DIY
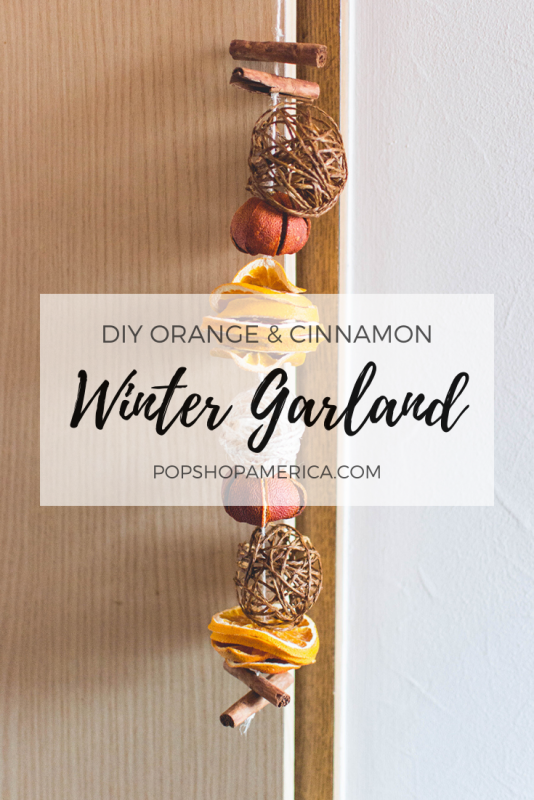
DIY Orange & Cinnamon Scented Winter Garland
Dec
This blog may contain affiliate links.
As the official first day of Winter is approaching and with the festive season being officially here already, I’m having a lot of fun while coming up with new cute and 100% natural ways to decorate my home for Christmas and Winter. That’s exactly how the idea of this DIY winter scented garland was born in a first place!
That day I spent the entire afternoon drying oranges and clementines in a food dryer and in my oven, making the house smell so nice and winter-y that I couldn’t help but want that scent to be bottled in garland form to hang somewhere in the house. I am seriously considering to create one for each room, because this little ornament not only looks so nice once hanged, but smells incredibly delicious too!
I’m also very tempted to create some to give as gifts for Christmas, or use them for wrapping my holiday gifts. I bet they’d make for such a nice versatile gift idea as well if you want to give it a go! Read on to learn how to make it!

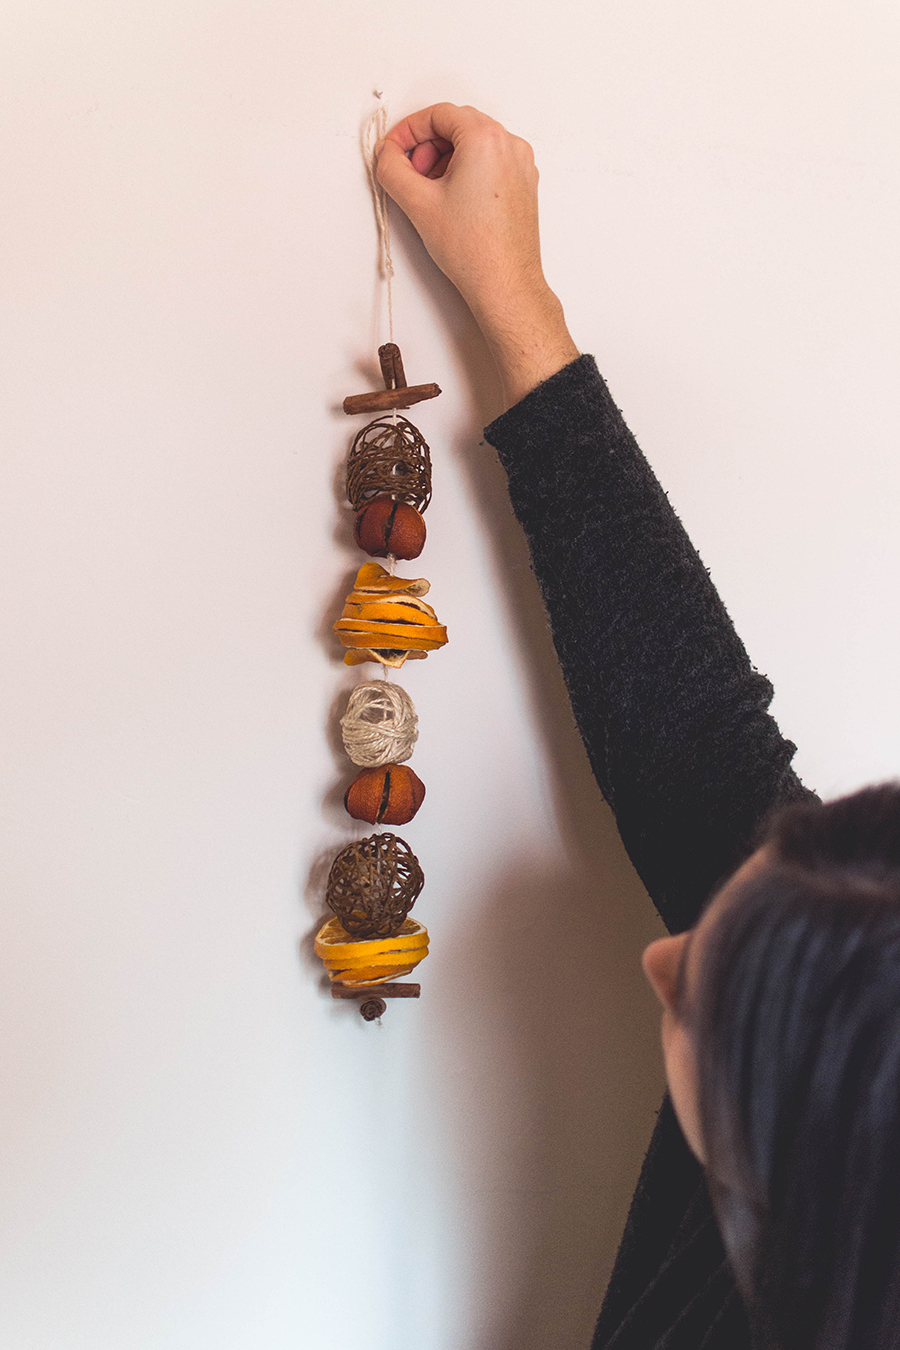
How to: DIY Winter Scented Garland
Materials:
– 3/4 balloons
– Vinyl/Decoupage glue + old brush
– Twine and paper twine
– Eucalyptus essential oil
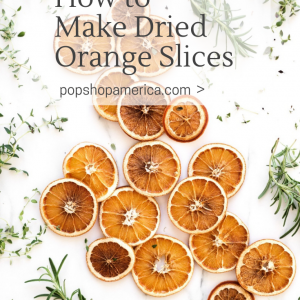
– Dried orange slices + clementines (read below how to make your own)
– 4 Cinnamon Sticks
– Thick thread and various sized needles
Method:

1. Create the twine spheres: in a glass mix the vinyl glue with water in a ratio of 1:1, add a couple of drops of Eucalyptus essential oil. Blow up 3/4 balloons until they are the size of a clementine or slightly bigger. Tie a ribbon or some twine to the base to make the balloons as round as possible.


2. Take your thick natural-looking paper twine and start wrapping it around your balloon covering the surface equally all over, making sure you can still see through it. Take an old brush and start wetting the paper twine with the glue mixture until it’s all covered with glue, the wetter the better.
3. Leave your balloons to dry for at least one hour until the twine has harden completely. Then pinch the balloons with your scissors to pop it and remove it from the sphere structure.

4. Dry your winter fruits: I’ve dried some orange slices in a food dryer at the higher temperature for 24h. Drying your fruits in a food dryer prevent them from turning brown, but you can still dry them in your oven at 80°C for a couple of hours. To make the dried clementines, just incise some (not too deep) cuts all around and then dry them in your oven for 3-4 hours.
5. Assemble your garland: take all your elements and assemble your garland on a surface to have a visual reference of how you should assemble it. Take a thick thread or twine of the length of the piled elements with the addition of 10cm. Make a secure knot at the bottom, then thread your needle and start assembling the garland!


6. Cinnamon sticks will be tricky to perforate: use a bigger needle to create a hole through them, so that you’ll be able to make the thread + needle go through it. Make a knot in between each element to make sure they’re secure and won’t move around.
7. When you’re done, create a last knot on top of the last element and make a slip knot with the end of the thread to create a loop to hang your garland.
8. Hang it wherever you like and enjoy!


Get More Lifestyle & Design Yumminess from Giada
Miel Cafe Blog | Miel Café Design | Twitter | Instagram | Bloglovin | Pinterest

Let’s Stay Friends!
Insta | Pinterest | Enews | TikTok