
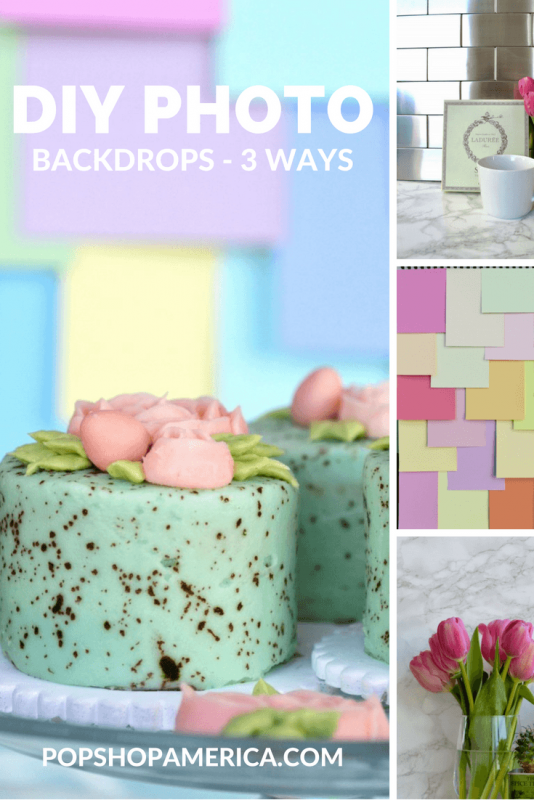
May
I’ll admit it – when I started out as a blogger, my photos were crap. They contained no props, had horrible lighting and weren’t composed very well.
Once I realized this, I took steps towards becoming a better photographer. One of the most beneficial things that I did was start to use a photo backdrop. This started out just being fabric draped over my pad of watercolour paper. It was ok, but I needed something better. My DIY instincts ended up taking over, and I came up with 3 of my own DIY photo backdrops to use for better blog photos.
I recommend making these backdrops on Masonite because it’s sturdier than cardboard, but still fairly lightweight.
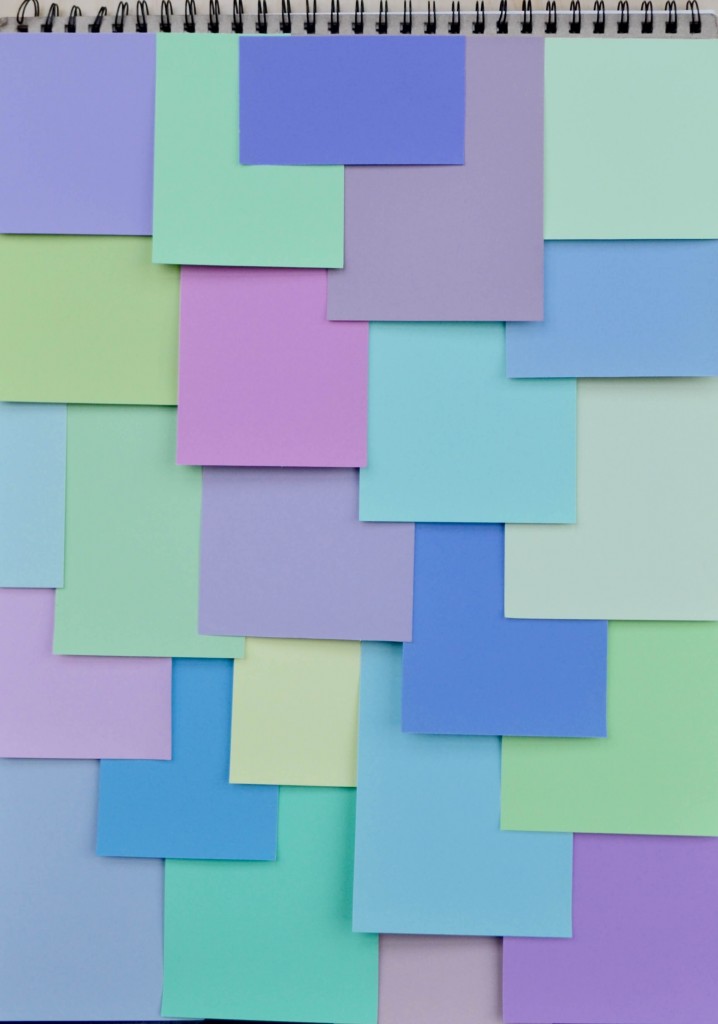
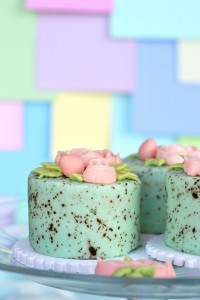 Colour Blocked Photo Backdrop DIY
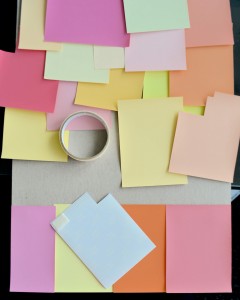
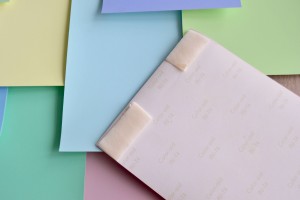
This photo backdrop is the first that I created and has yielded some pretty results with my food photography. It’s a great backdrop for when you want the background to be blurred, but still add some colour and interest. Also, I did mine in both cool and warm tones, but feel free to customize it for your type of blog photos. Here are some options to try:
- Different shades of one colour
- Shades of white
- Really saturated bright colours
- Jewel tones
- Neutral greys or beiges
- Try ripping the edges of the papers for some texture
- mix in some subtle patterns
- Cut out circles instead of squares for a more scalloped look
Keeping all that in mind, try not to be too heavy handed with your backdrops. Your want your subject to pop and the backdrop to simply enhance the photo!
Here’s how I did it:
Supplies
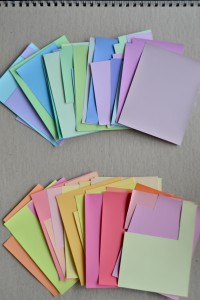
- approx 30 pieces coloured paper in a colour way of your choice measuring approx 4×6″ (double if you want to do 2 colour ways like I did)
- masking tape – or any other tape of your choosing
- an exacto knife
- a ruler
- a piece of masonite sized 16 x 20 ( I used the cardboard on the back of my watercolour paper, but in hind sight, I wish I would have used Masonite)
Method
- Buy or go through your collection of paper and divide the papers into two piles – cool colours (blues, greens, teals & purples) and warm colours (pinks, red, yellows and oranges)
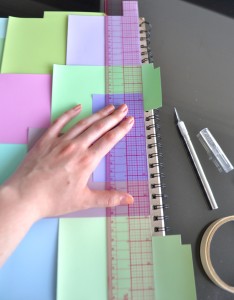
- Set aside one pile of colours. Take your Masonite and start to arrange the coloured papers beginning at the bottom.
- Work your way up to the top. Try to spread out the different tones so that you don’t get a big clump of one shade together. Mine were all slightly different tints, but if you bought paper and cut it to the 4×6″ size, you’ll have some duplicates.
- Once you reach the top, have a look at your layout and see if you like the positioning. Move around any pieces of paper that you feel are out of place.
- Once you are happy with the order, start by taping down the bottom row.
- Put all the papers up slightly except for the bottom row and tape them down in the order that you placed them
- Continue moving up the board like this, taping as you go
- Once you get to the top, you can trim off any excess that hangs over the top of your board.
- The end result might come out slightly different than your original plan, but it will still look great.
- Repeat for your second colour palette on the back or on a second pieces of Masonite.
It will only take you about an hour or so to put both boards together, and it’s also pretty fun to do.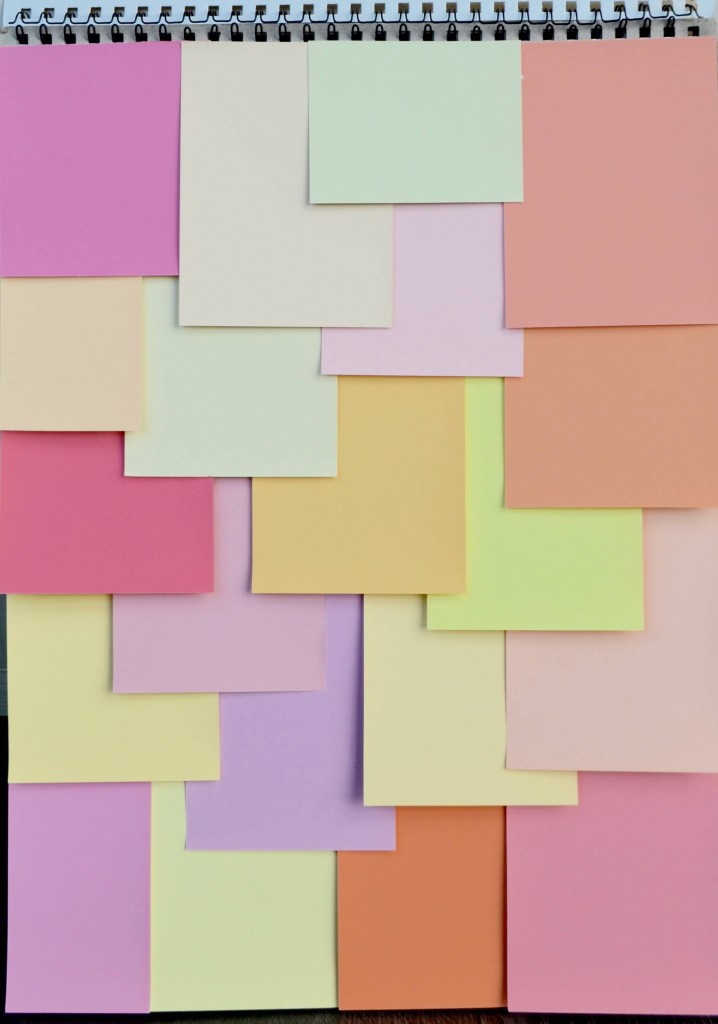
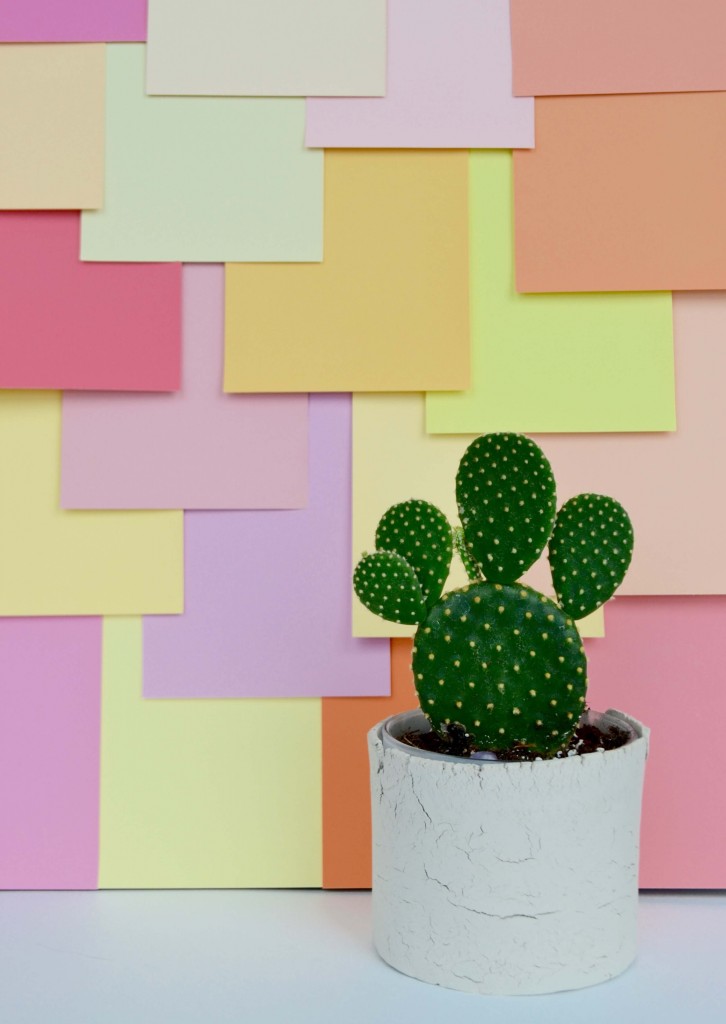
Here is an example of how you can use the backdrops:
Subway Tile Photo Backdrop DIY
The next backdrop that you create is going to be great for culinary / kitchen photos. It’s an easy way to create the subway tile back splash of your dreams on a budget. Ok, not exactly, but people will THINK you have the subway tile back splash of your dreams. Same thing right?
Lucky for me, my Dad does contracting for a living and his specialty is tile, so he had some extra tile that I was able to use. If you don’t happen to have a dad / boyfriend / friend who is a contractor, try going to your local habitat for humanity or a thrift store. I know they sometimes have tile and home furnishing things, so you might be able to pick some up. It might also be worth it to visit some tile stores and see if it’s possible to get some samples or get leftover or old stock at a good price. It never hurts to ask! My dad was able to give me some stainless steel subway tiles, and I couldn’t be happier with the result. Of course plain white would also look amazing and would give you some nice, bright, crisp photos. There are a number of different designs that can be done with subway tile, but I stuck with a simple offset version for my first try.
This one is probably a lot easier than you think, too. You really only need 5 things and half an hour to make this gorgeous backdrop. Full disclosure, the backdrop is fairly heavy when it’s done. It’s not impossible to move for photos, but you won’t be casually swinging it around either.
Supplies:
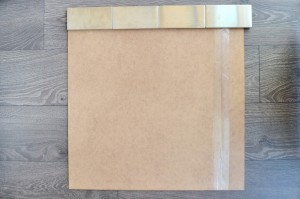
- about 30 pieces of subway tile (mine were 6 inches long by 2.5 inches wide)
- a piece of masonite about 20 x 20 (in order for me to get this size, I had cut 4 inches off of another piece and taped it to my 16 x 20 board. It’s held up no problem)
- a ruler
- a pen
- a mini hot glue gun & about 10-20 mini glue sticks
Method:
- Place your Masonite board on a flat surface. Start your glue gun heating up and make sure you have a spare piece of paper to put under the tip where the glue drips out
- Have your tile close at hand. Pick up your first piece and add a drop of glue to each corner and a strip along the length of the tile
- Place down on the top left corner of your Masonite and line the edges of the tile up with the edges of the board.
- Continue gluing your tiles down the row until you reach the end of the board. It’s ok if they hang off an inch or two – mine did.
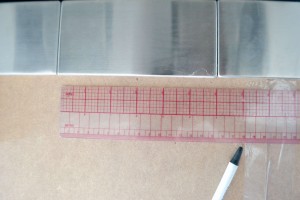
- Next, you’re going to want to take a ruler and find the center of the first tile that you placed. My tiles were 6 inches in length, so I made a mark on my Masonite at the 3 inch point. This is where you are going to start placing your next tile from. This will ensure that your tiles are offset and don’t line up underneath each other, which will look much better.
- Continue placing your tiles down the row until you reach the end. Make sure that the second row of tiles fits snugly against the first.
- Repeat steps 4-6 until you have covered your Masonite.
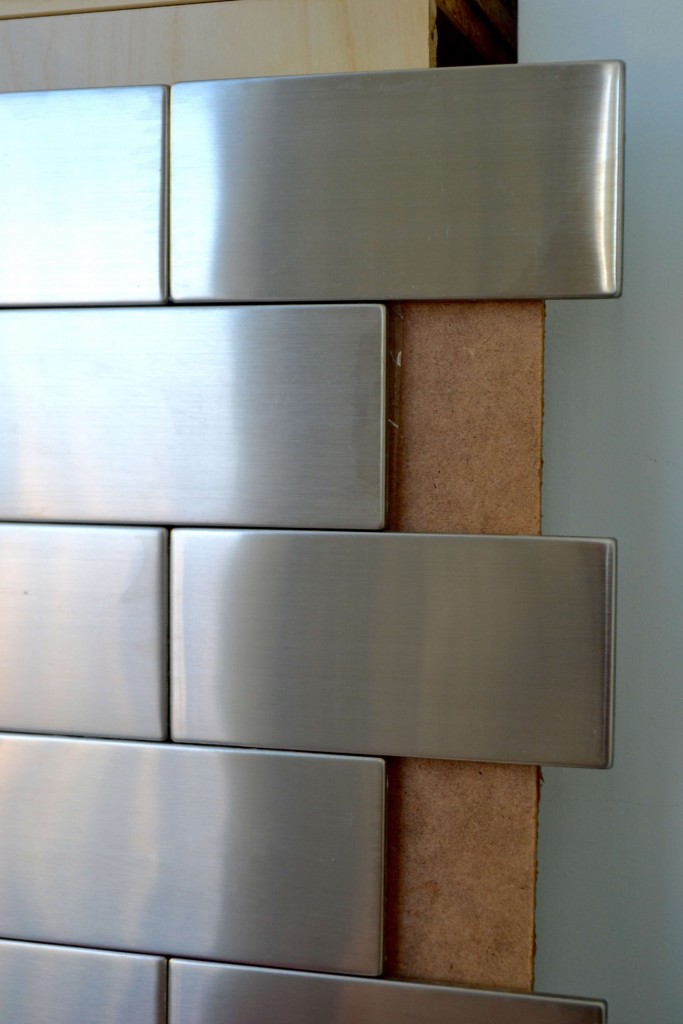
The edges certainly aren’t perfect, but I think the area of 20 x 20 should be enough space to take photos with that you don’t need to worry about anyone seeing the edges of your board. They’ll just assume that you have a beautiful subway tile back splash 🙂
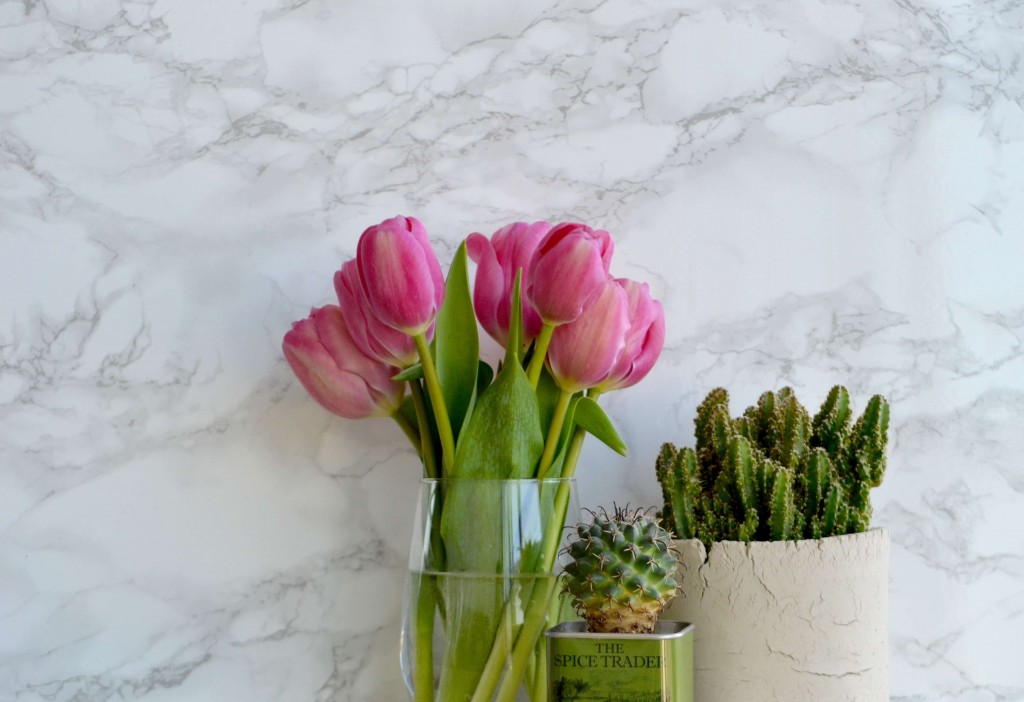
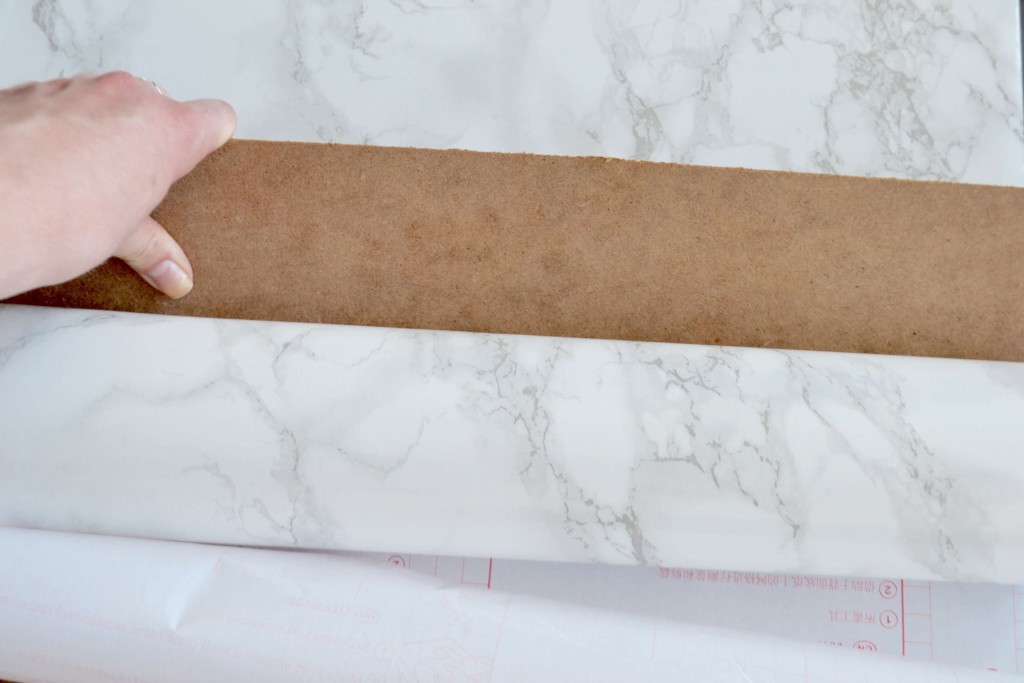
Marble Photo Backdrop DIY
This one is also very good for culinary photos, but I can see it being used a WHOLE lot more for Instagram. If you want that very crisp, clean, polished look for your photos and don’t already have a very expensive, perfectly lit marble counter top to take photos on, then this is for you. It’s also a very simple tutorial and uses the same Masonite boards from the previous 3 (Hint, buy 4 Masonite boards at once and save yourself the time!)
This tutorial is the fastest of all, and will probably only take you about 10 minutes!
 Supplies:
- a piece of Masonite 12 x 20 inches (I cut it down from the 16″ so that I could wrap my contact paper around the sides of the board. I used the extra 4 inches that I cut off for the tile backdrop!) Also, if your contact paper is about 1 inch bigger than your board, don’t worry about cutting it! I just wanted to be able to wrap the contact paper around the board.
- A roll of marble contact paper. I found mine online from De Serres for only $15 for an entire roll. It was 13″ in diameter.
- A ruler
- tape
 Method:
- Place your Masonite on a flat surface. Line up the top of your marble contact paper with the top of the board.
- Slowly start to peel the backing off of the contact paper starting at one corner and working your way across the width of the paper.
- Stick the paper down to the top of the board, leaving 1-2 inches of overhang
- Slowly roll the paper down the board, using your ruler (or a spare piece of Masonite like me) to press the paper down along the way. This will ensure that you don’t get any air bubbles.
- Once you get to the bottom, keep rolling your paper so that you have about 2 inches of overhang. Cut off excess.
- Wrap the paper snugly around the top, sides and bottom of your board. I secured mine with some masking tape for extra security.

Voila! You now have a faux marble photo backdrop for beautiful photos!I’ve already used these photo backdrops a number of times since I made them, and my photography is getting much better! The marble photo backdrop is definitely one of my favourite to use and is super easy to access when I want to take a quick snap. Each photo backdrop can also be customized so you can use these ideas to create backdrops that fit with the look of your blog photos.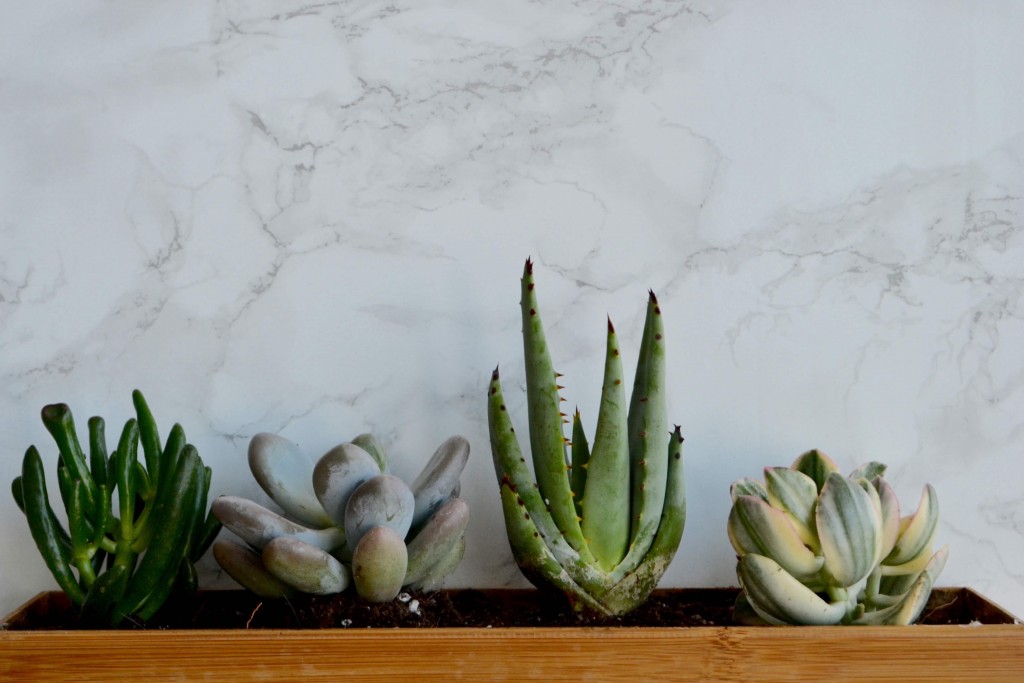
Do you use a photo backdrop when you take blog photos? What’s your go-to?
Happy crafting!
xo, tess.
Follow Tess Ciarloni at
Angean Blog | Facebook | Twitter | Pinterest

Let’s Stay Friends!
Insta | Pinterest | Enews | TikTok

These are great little ideas!! Love how simple they are. Now if only I had the lighting you have in your photos – they’re bright and clean looking!
Thank you so much Kelsey! I shoot indoors using natural light. The longer days have started to make it a lot easier to get good photos!
I’m totally in awe over how creative this is! I am definitely going to try the one with the sticky notes seeing as I have a brand new rainbow pack in my drawer. Thank you so much for sharing this.
Thank you so much Roselynn, that’s a great idea!
Brilliant ideas! Especially liked subway tiles method, idea can be developed 🙂
Thank you so much Klauss!
This is so creative! Would never have thought to make faux mini versions of the “real” thing:) Thanks for sharing!