Art, Craft in Style Subscription Instructions, DIY
Watercolour Mural DIY
Aug
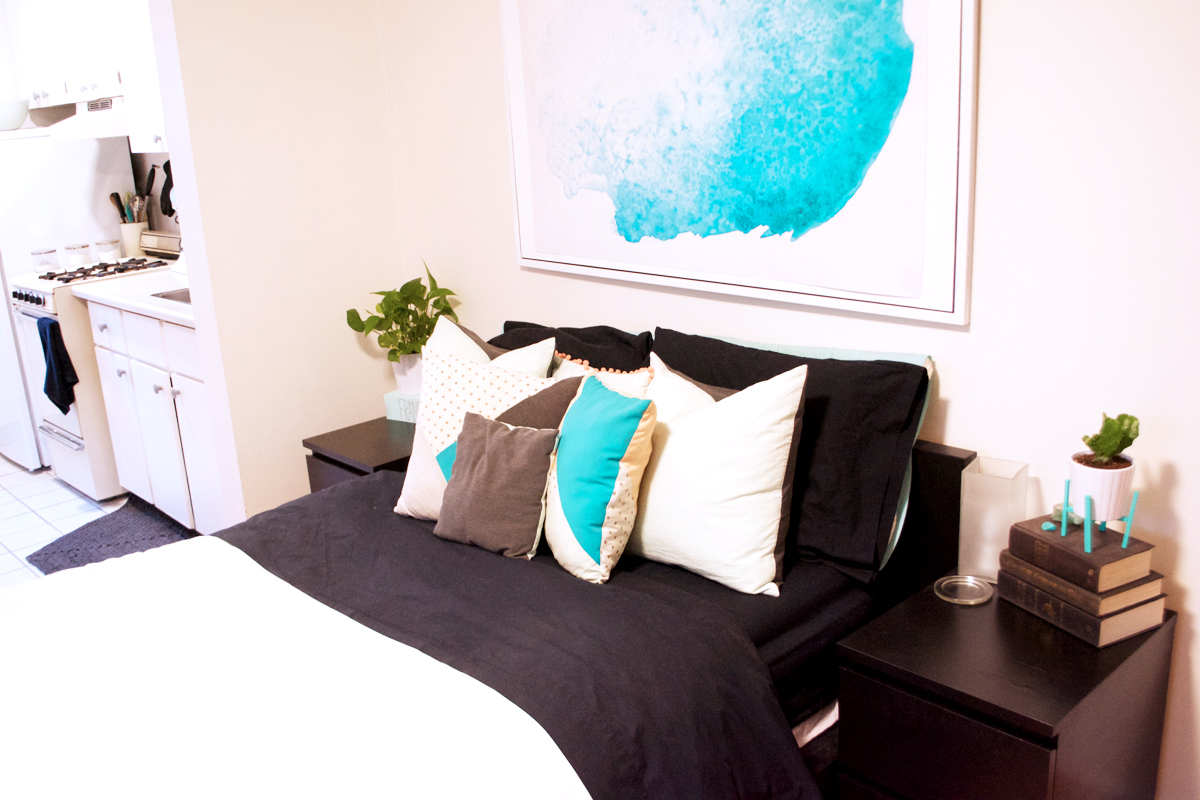
IMHO, the space over one’s bed is made for a huge display of art.
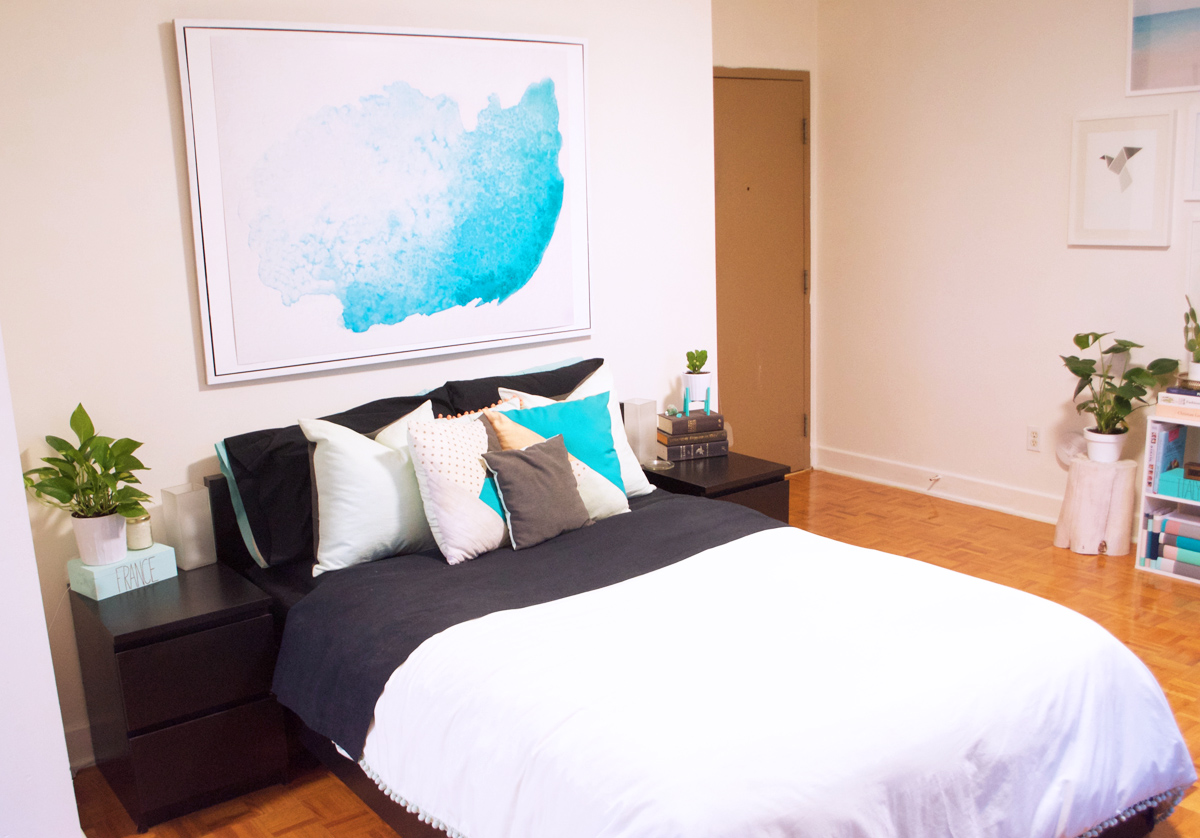
My bedroom has never quite felt complete without a large statement piece above the bed that kind of brings the whole room together.
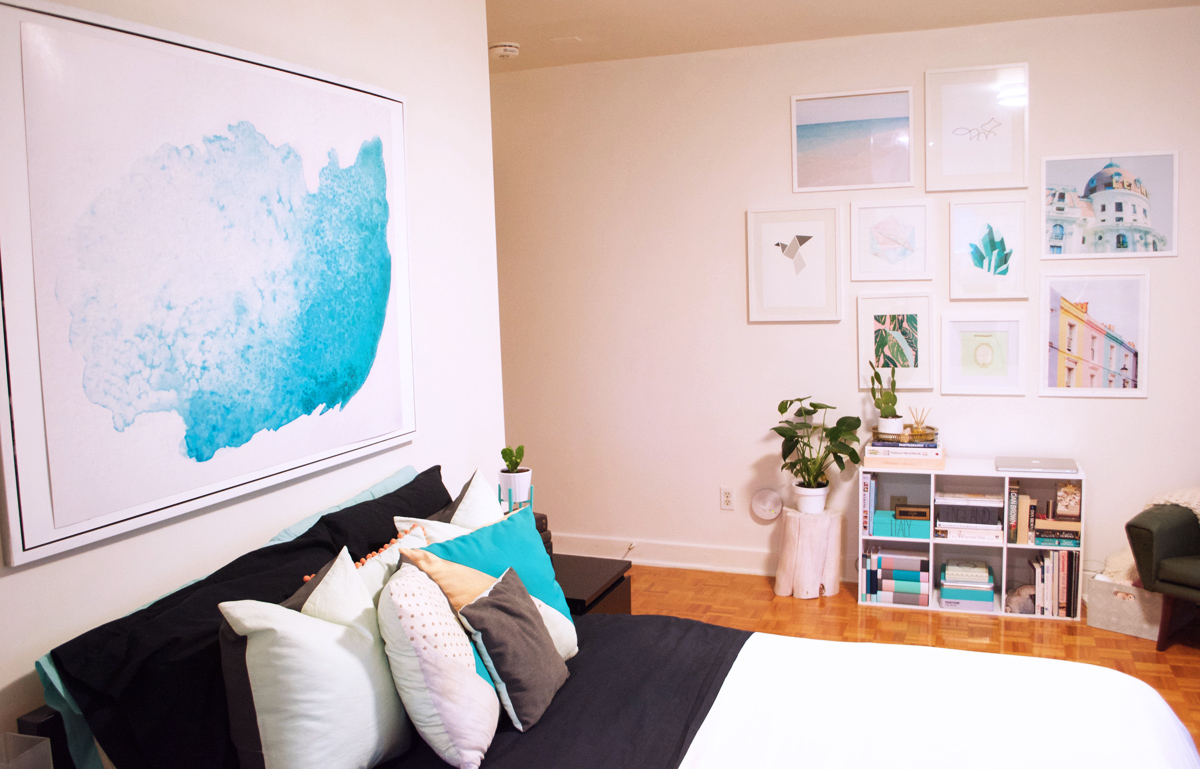
It doesn’t have to be a single piece of art – it could be a gallery wall, a triptych or even some kind of woven wall hanging, but whatever you choose, I like to pick something that helps to bring the whole room together.
Sourcing, affording and hanging said piece of art is the tricky part. However, with this Watercolour Mural DIY, making a huge piece of statement art for above your bed is fun, cost-effective and most importantly, gorgeous!
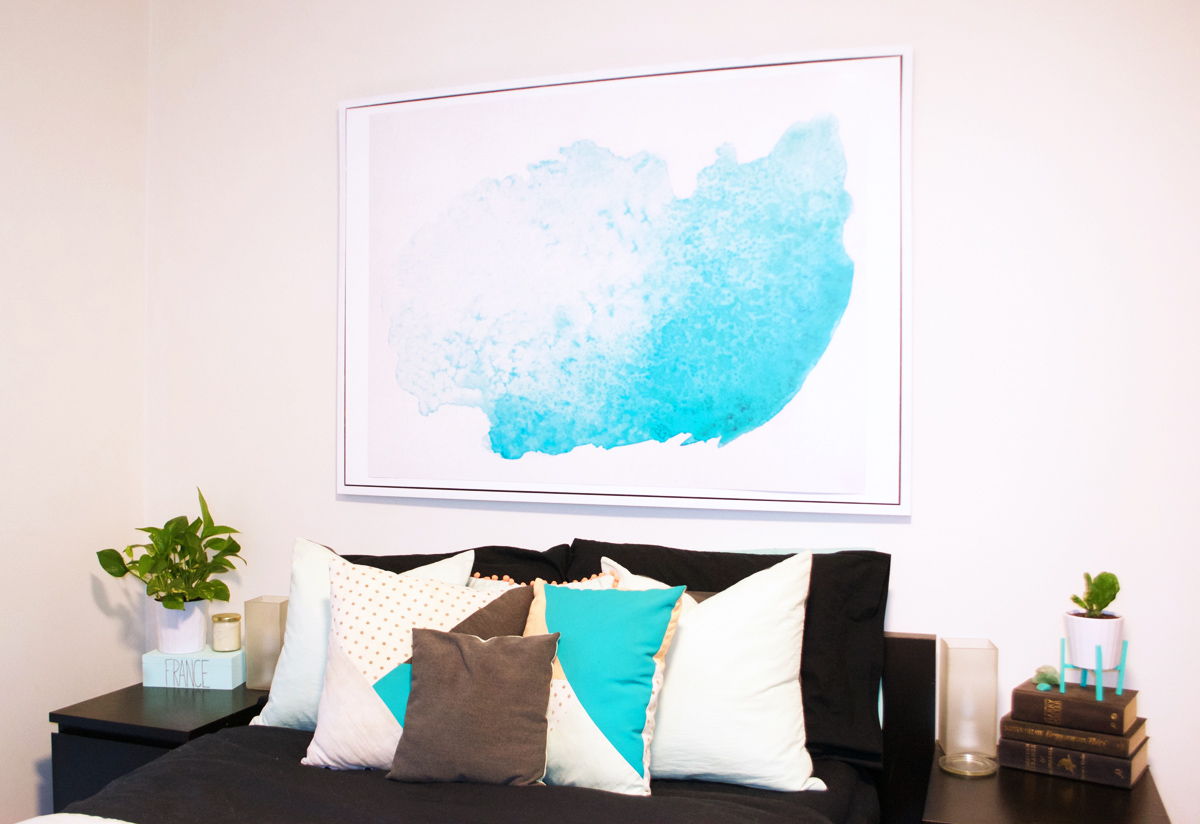
I first became obsessed with the idea of a watercolour mural for above my bed when I saw this infamous photo. How pretty and whimsical and effortless is that? I love it!
I knew then that I wanted to create one of my own, but didn’t want it to have a $500 price tag attached to it.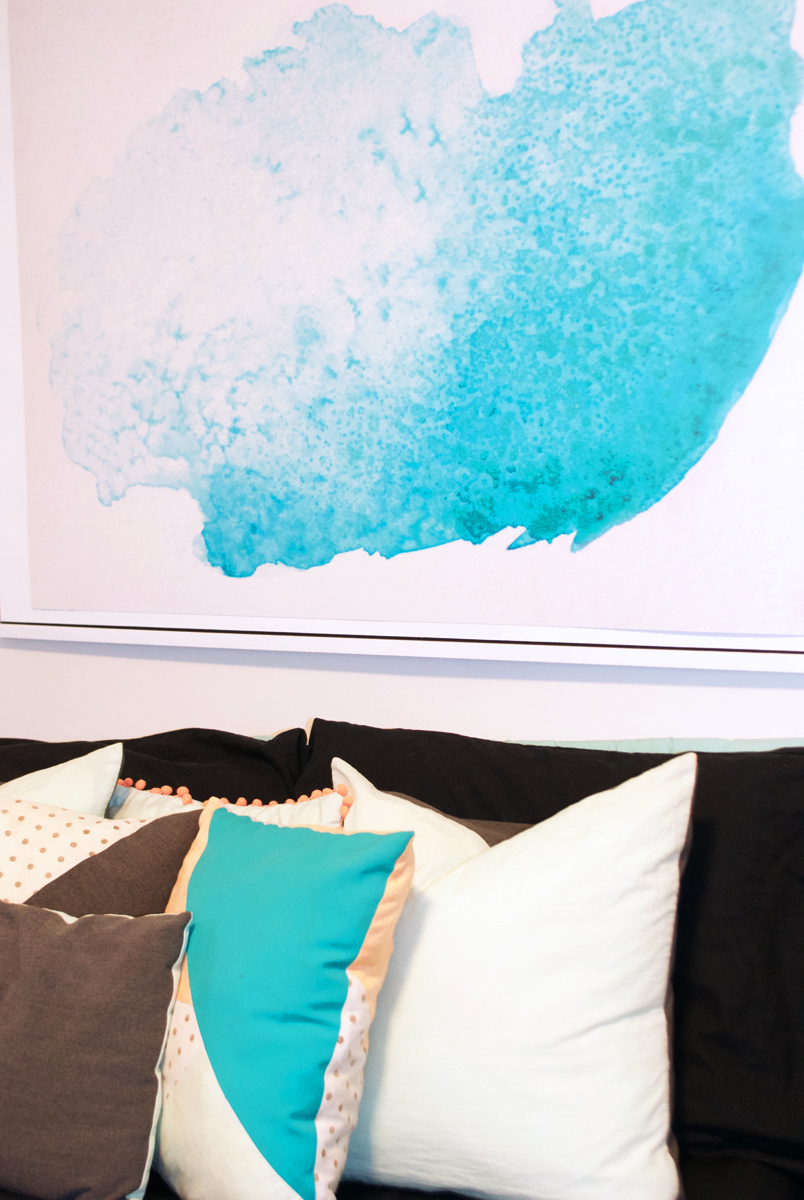
I’ve painted for most of my life, so I have some experience with watercolours. That being said, I think they’re a great medium for a beginner. It’s a ton of fun to just play around with the paint and see the different ways that you can use the paint to get different washes, textures and shapes. Once you get the hang of a few techniques, you’ll be well on your way to painting a mural of your own.
Supplies:
Grab a set of watercolours (even a more inexpensive set will work for this)
some watercolour paper (I like cold press)
and a brush
Then start practising a couple of techniques. Look up a bunch of different ones to try out, and then when you’ve played around a bit, sit down and start making something in the shape / colour that you want for your space. I ended up settling on a different design, but here’s an idea for another cool looking watercolour mural idea:
Some other things you might need for different techniques:
- a cup of clear water for rinsing
- salt
- a sponge
- a paper towel for blotting
- alcohol (works similar to salt)
- masking fluid
- a spray bottle
In order to create a watercolour mural similar to what I painted, here’s what I did:
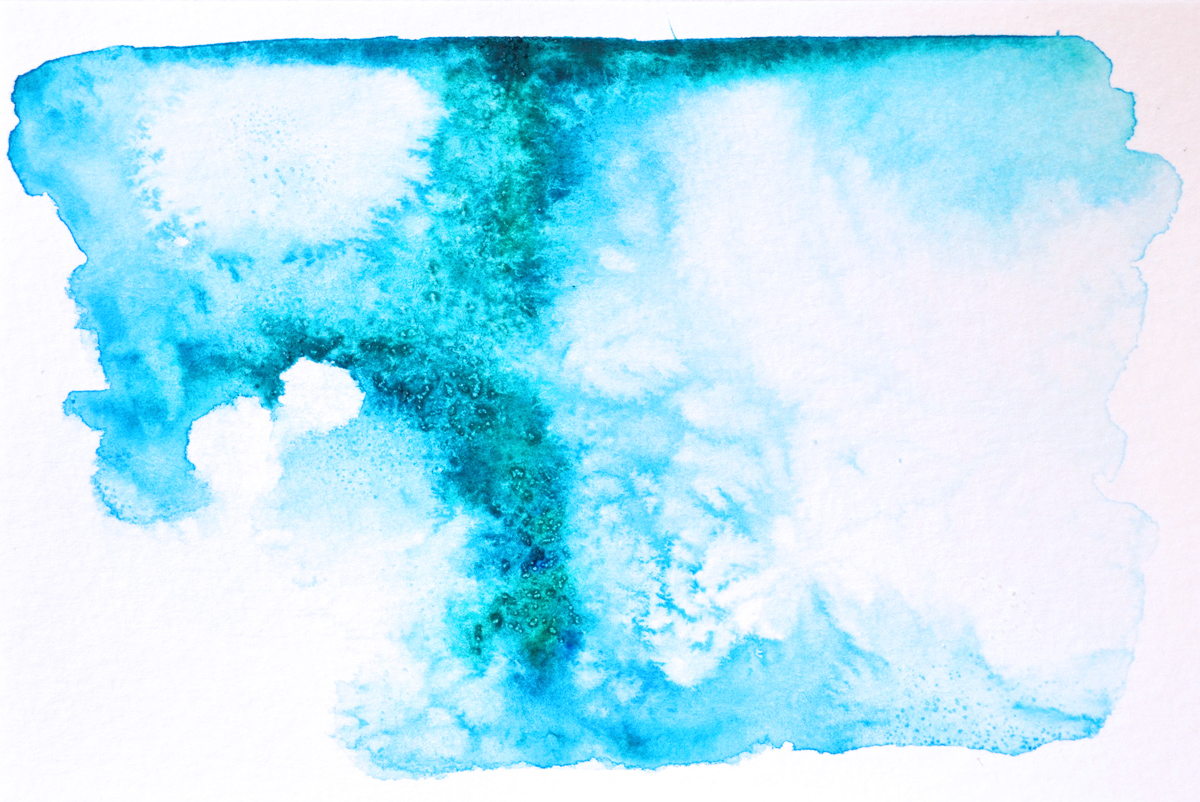
I used the wet on wet technique with some salt. I actually painted it on a fairly small piece of watercolour paper – 4 x 6 to be exact.
Take your brush and dip it in your water and draw an abstract shape with clear water. Then dip your brush in the colour of your choice and start to add some colour to the bottom right area of your shape. Depending on how bright you want the colour to be at this point, you can dilute it with some water.
Gradually mix the colour in with the water on the paper until you have a nice kind of ombre look. I added darker dabs of colour to the bottom right corner.
Also, don’t expect your painting to look like mine after just one wash – I did a couple of layers of colour to get it as dark as I wanted in the bottom right corner.
I then sprinkled salt on most of the painting to get that kind of grainy / crystal look. You want to do this in the more colour saturated areas, as it will be easier to see here. Also, make sure that your paper isn’t super saturated with water, as the salt won’t be able to absorb enough of the water to really make a difference. You want the paper to be damp, but not so damp that there is a pool of water that moves around if you were to tilt the paper.
Then just wait for it to dry and go back and touch up any areas that you want to change.
Once your piece is dry, press it under heavy books for at least a couple of days.
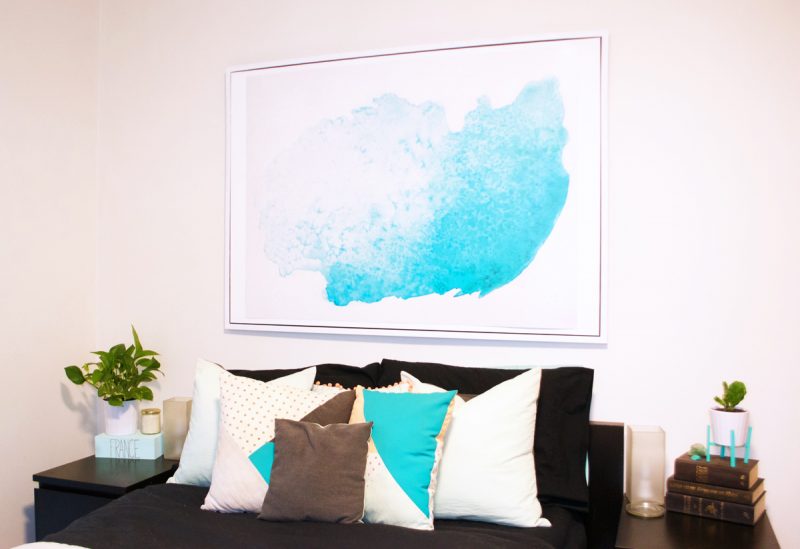
When it’s perfectly flat, I then took a photo and edited it. When you take the photo, try and make sure that you’re using the best possible light so that the white comes out really bright and crisp. Mine isn’t as crisp as I would like it to be, but it still works!
To get the photo to mural size, I used this website and ordered a custom display board in the 36 x 48 size. It only cost me about $40 CAD (including shipping), and I was rather impressed with the quality. But, be warned, when it’s shipped to you, the print isn’t rolled at all because it’s printed on a kind of thin cardboard material. So expect to pick up a shipment that is slightly bigger than the size you ordered!
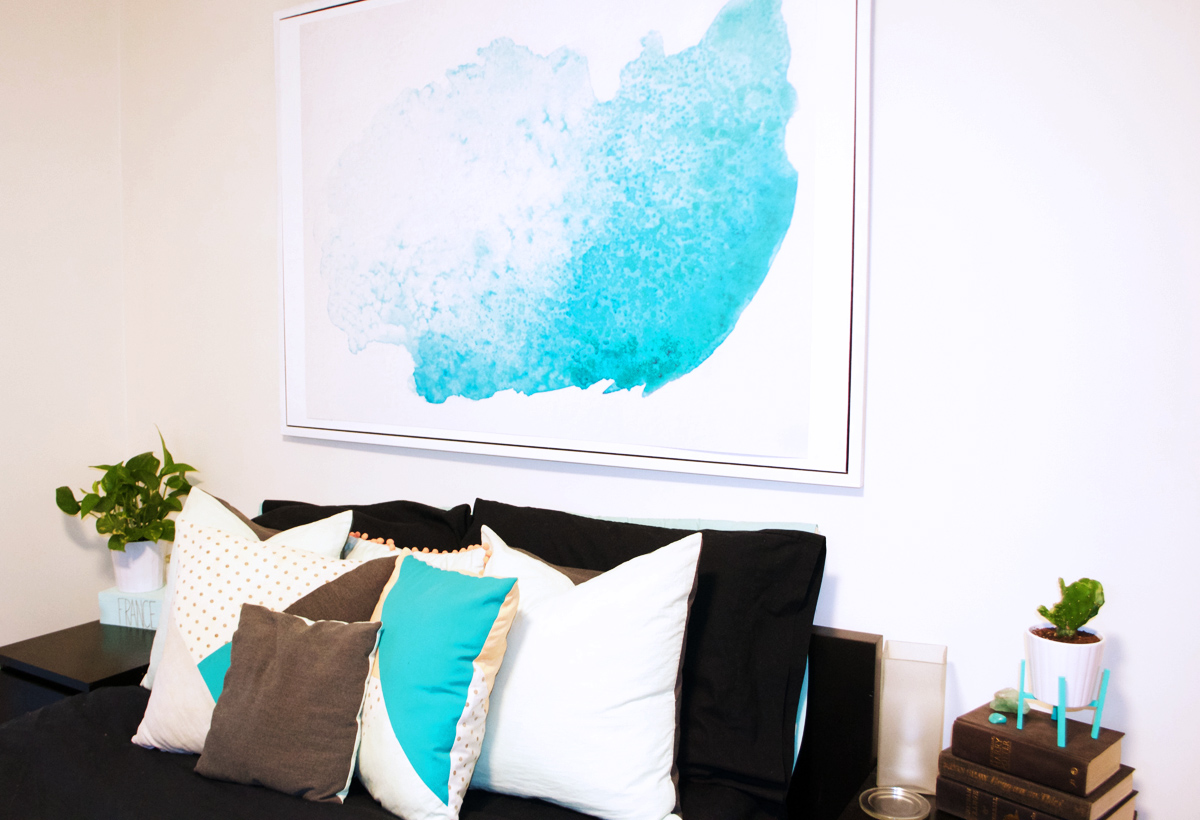
To finish your print, you can buy a frame for it (might be pricey), try making your own using this technique, or you can do what I did.
I got lucky and got this framed IKEA print for free and simply painted the entire thing white. I then glued the watercolour mural to the frame and am actually pretty happy with the results. If you’re not able to get a frame for free, try looking around at a garage sale or Valu Village. A more ornate frame would actually look pretty cool too if you painted it all a solid white and then stuck a more modern/abstract watercolour in there!
Whatever you choose to do, make sure that you have some fun with it! I think a lot of the time if you can create something yourself for your space, that’s what makes the piece so special. For me, that’s a large part of why I tend to love most of the apartments that I’ve lived in – because I’ve filled them with things I’ve made. It gives you such a sense of satisfaction to know that you put hard work into making something as opposed to just buying it.
Anyways, now that I’ve finally got my watercolour mural painted, printed and hung, the space above my bed looks much more polished. I think I can safely say that this apartment finally feels done!
I’d love to know what you think of this project! Would you make one for yourself?!
xo, tess.
Follow Me at
Angean Blog | Facebook | Twitter | Instagram | Pinterest