
Jan
If you know me, but at all, you know that my love for peonies runs deep.
They’re my absolute favourite flower, so I relish in the month of June when they’re ripe for the picking in my mom’s garden and I can bring a huge bunch back to my place in Toronto. I love putting them on the nightstand so that I can just lean over when I’m in bed and inhale their fresh floral scent.
I’ve even gone so far as to draw a temporary peony tattoo on my leg that I’ve seriously been considering getting for real. When done right, I think floral tattoos are gorgeous. You can find overwhelming evidence of this on my Pinterest board here.
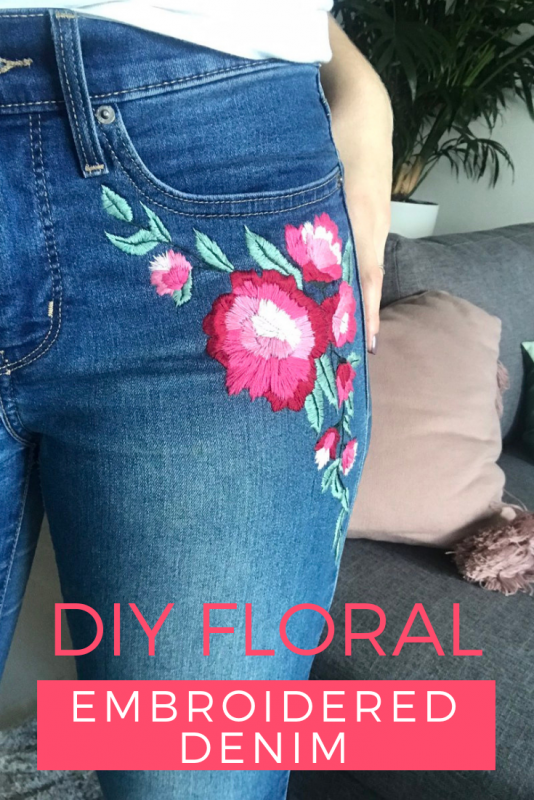
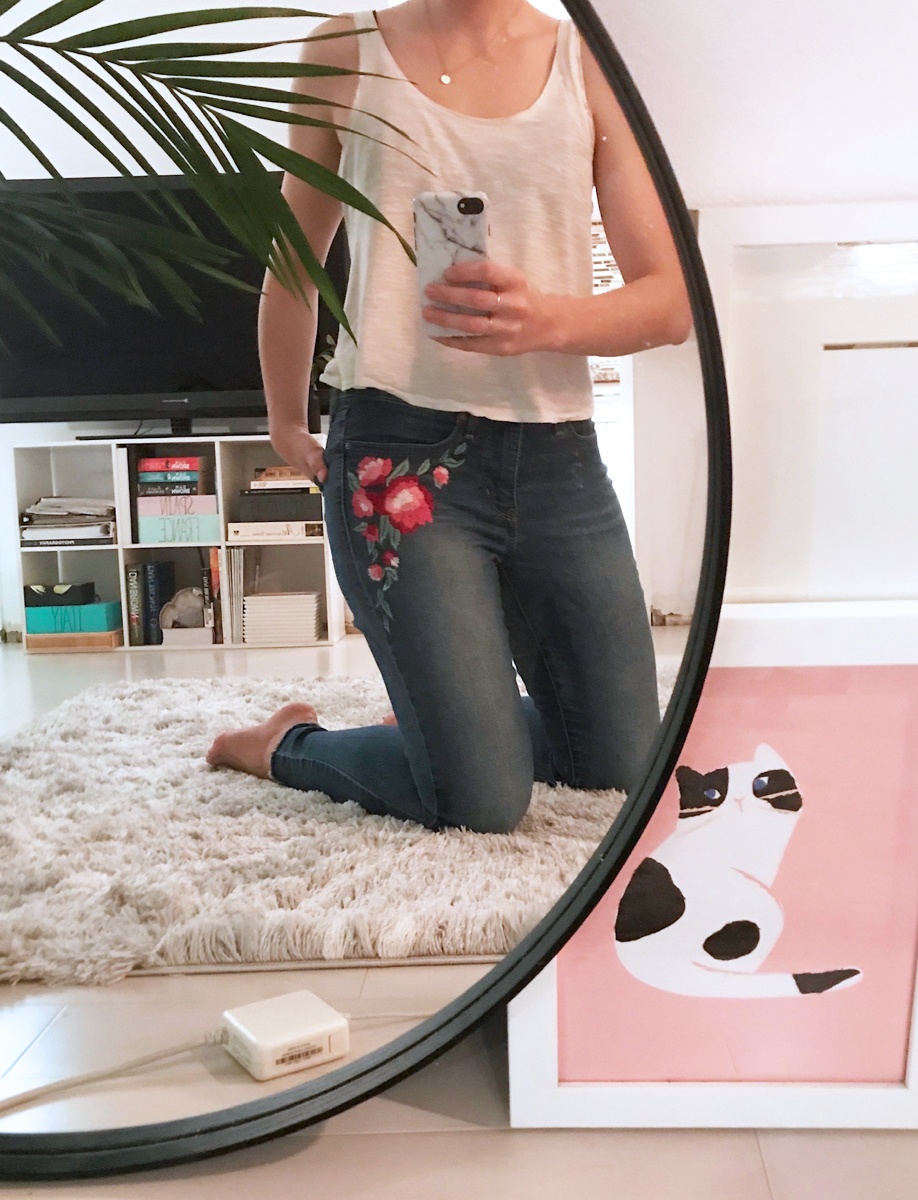
SO, naturally, when I decided that I wanted to try my hand at embroidering some denim, a peony was an obvious choice for me.
Like any project that I do, my inspiration came mainly from Pinterest, and I spent a good amount of time on there searching for different peony images that I liked. I think it’s important to search for images of the flower as well as embroidered versions of it just to get a sense of how the flower actually looks vs. how it can look in thread.
Roses are a very popular choice, so you’ll see a lot of rose designs, but I think that sweet peas or ranunculus would be lovely as well.
This is also a great project for a beginner because I just used a very simple straight stitch and kept things pretty basic and open to interpretation. There isn’t a set pattern that I followed, and I don’t use any fancy stitches. I think this is a great project to start now so that your floral embroidered denim would be ready for spring!
So, I’d say use this post as inspiration to create your own floral embroidered denim, or follow along below for my loose tutorial!
DIY Floral Embroidered Denim
Supplies:
Medium Weight Denim (like jeans) for the Embroidery
A Pen (black or a lighter blue depending on the colour of your denim)
Inspiration Images (or use mine)
About 6 Colours of embroidery floss (4 for the flowers, 2 Greens for the leaves)
A Small/Medium Sized Sewing Needle
Scissors
An Embroidery Hoop
Instructions:
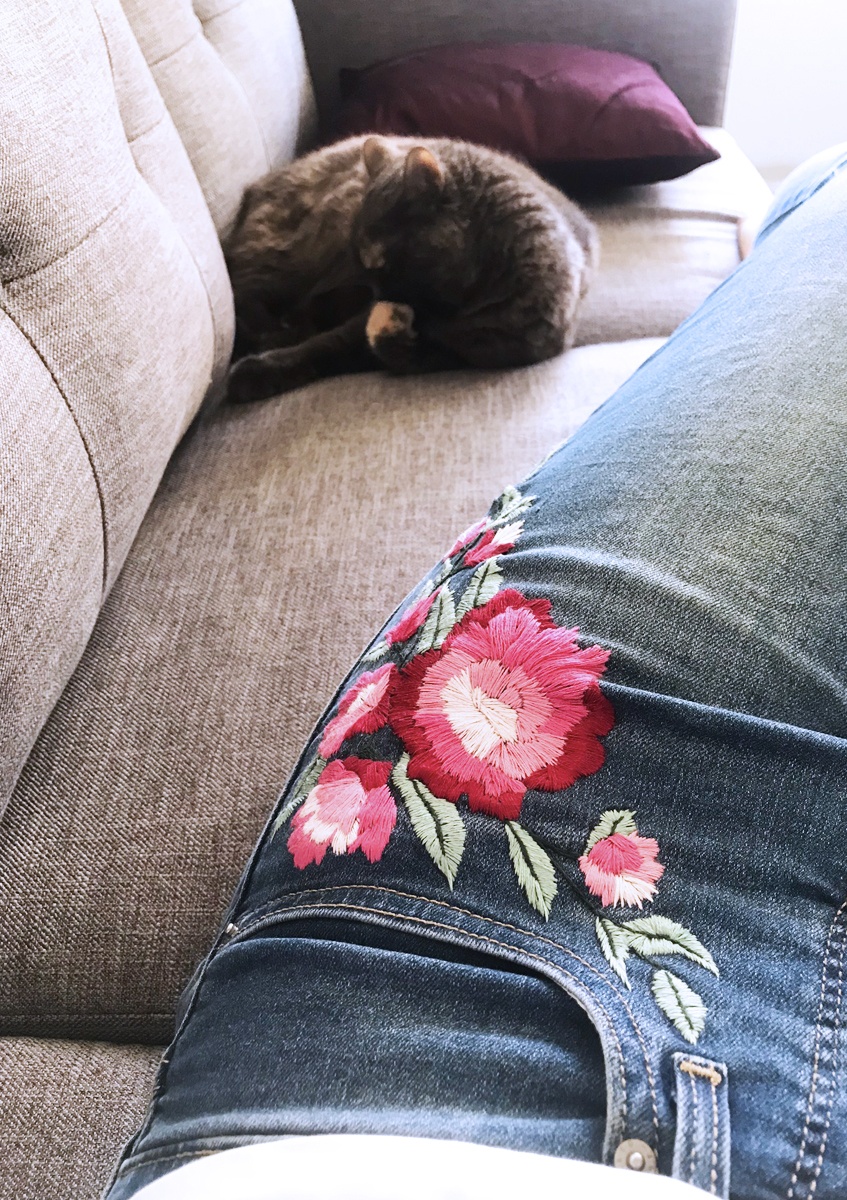
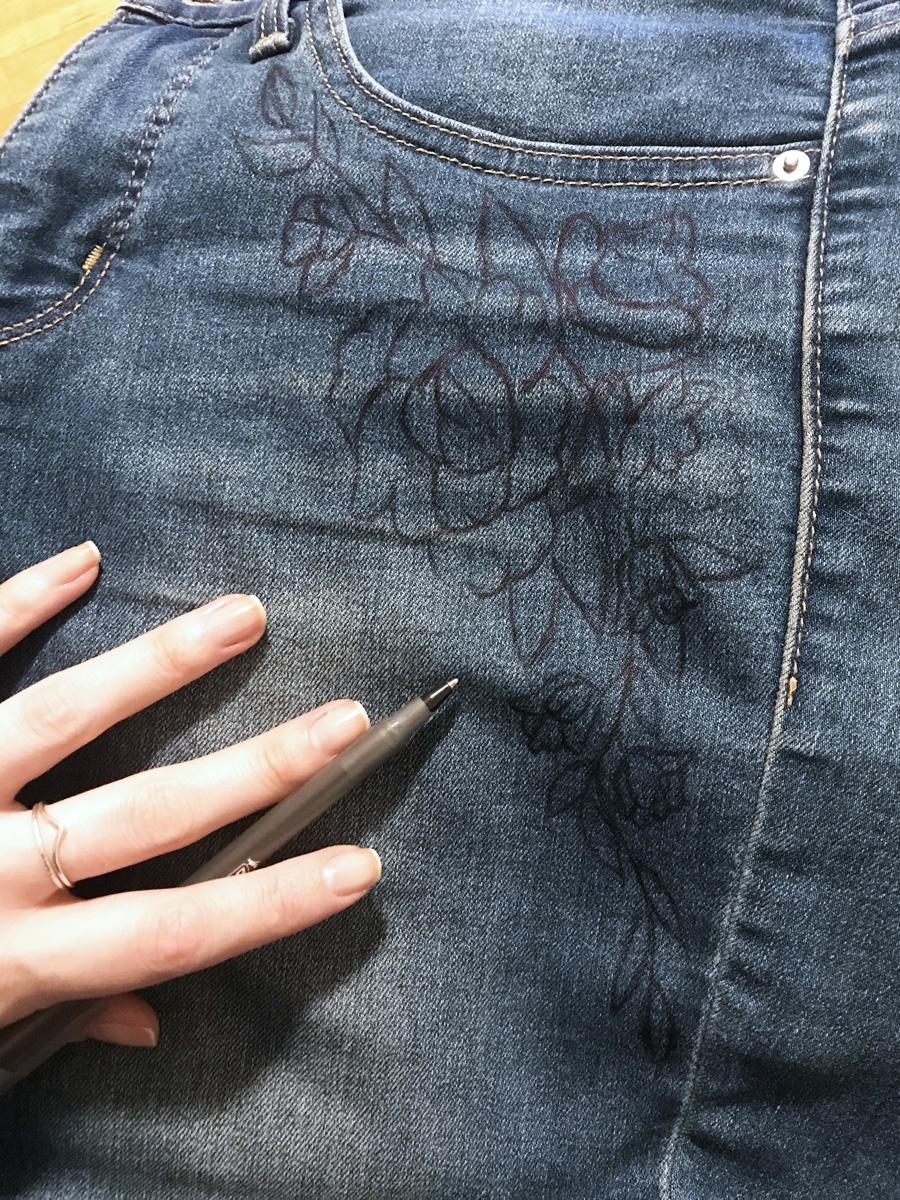
1. Start by drawing your chosen design onto your denim. I did this using a pen and didn’t have any problem with the pen showing after my embroidery was finished. However, if you’re embroidering lighter coloured denim, I would use a pen that’s just a shade or two darker than your denim i.e don’t use a black pen on white denim. I also recommend a medium weight denim for this tutorial because the embroidery does end up being a fairly thick, large patch and might not hang right on a lighter weight fabric. Also, make sure you’re embroidering in a spot that’s going to be easy to work on. Near the waistband is going to be best. I chose near the top left pocket. If you have a smaller embroidery hoop, near the ankle of the jeans would be cute as well. Any spot on the front or back of a jacket would be pretty easy, just the arms would get tricky.
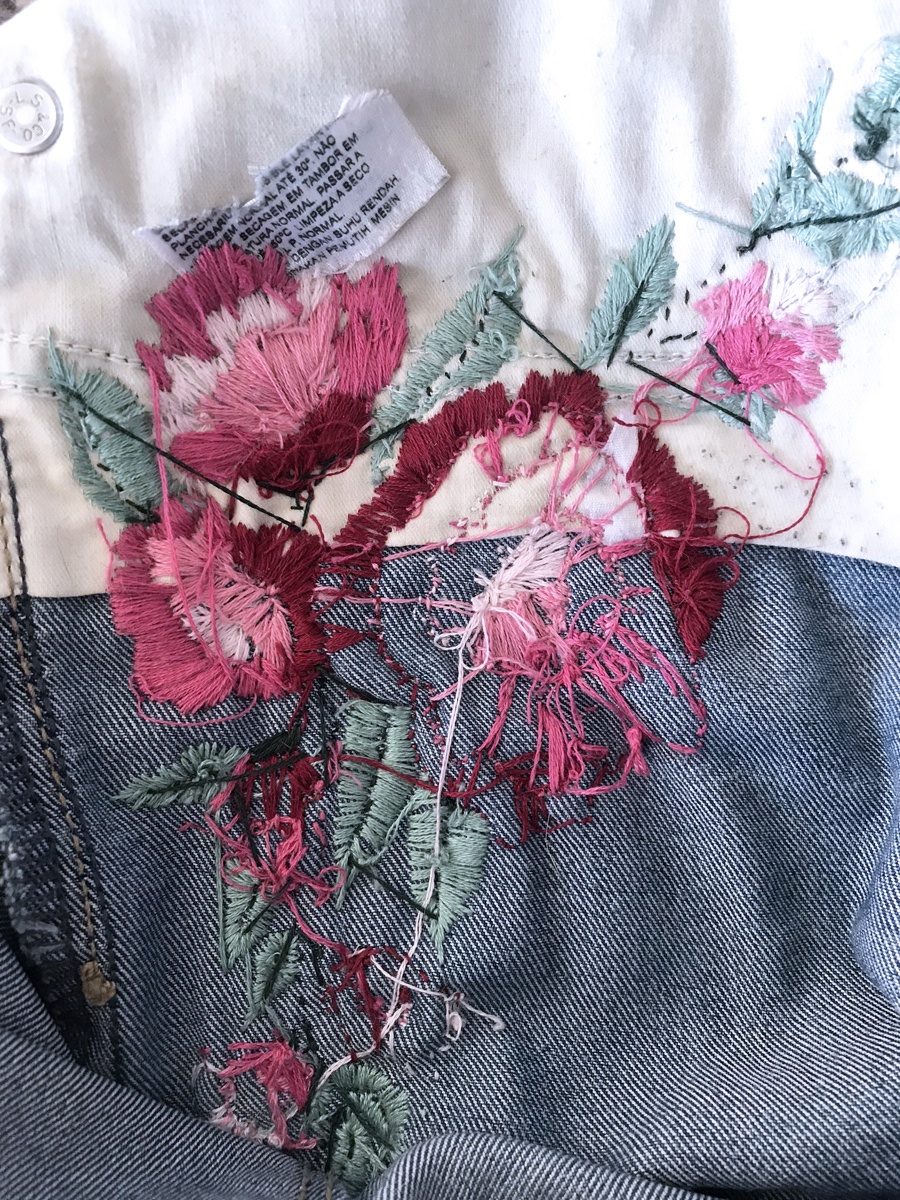
2. You generally want to start with what’s in the background first and move your way to the foreground, so I started with the main base colour of the leaves. Embroidery floss comes with 6 strands of string strung together, so you’re going to want to only use one strand each time you thread your needle. You’ll be threading the needle and tying the ends together in a knot so the single piece of thread will be doubled. Each time I threaded my needle, I’d have a length of about 1m just so that it wasn’t so long that it was getting tangled. Every time you finish off a strand, just make sure that you tie a double knot in the back of your work and then rethread!
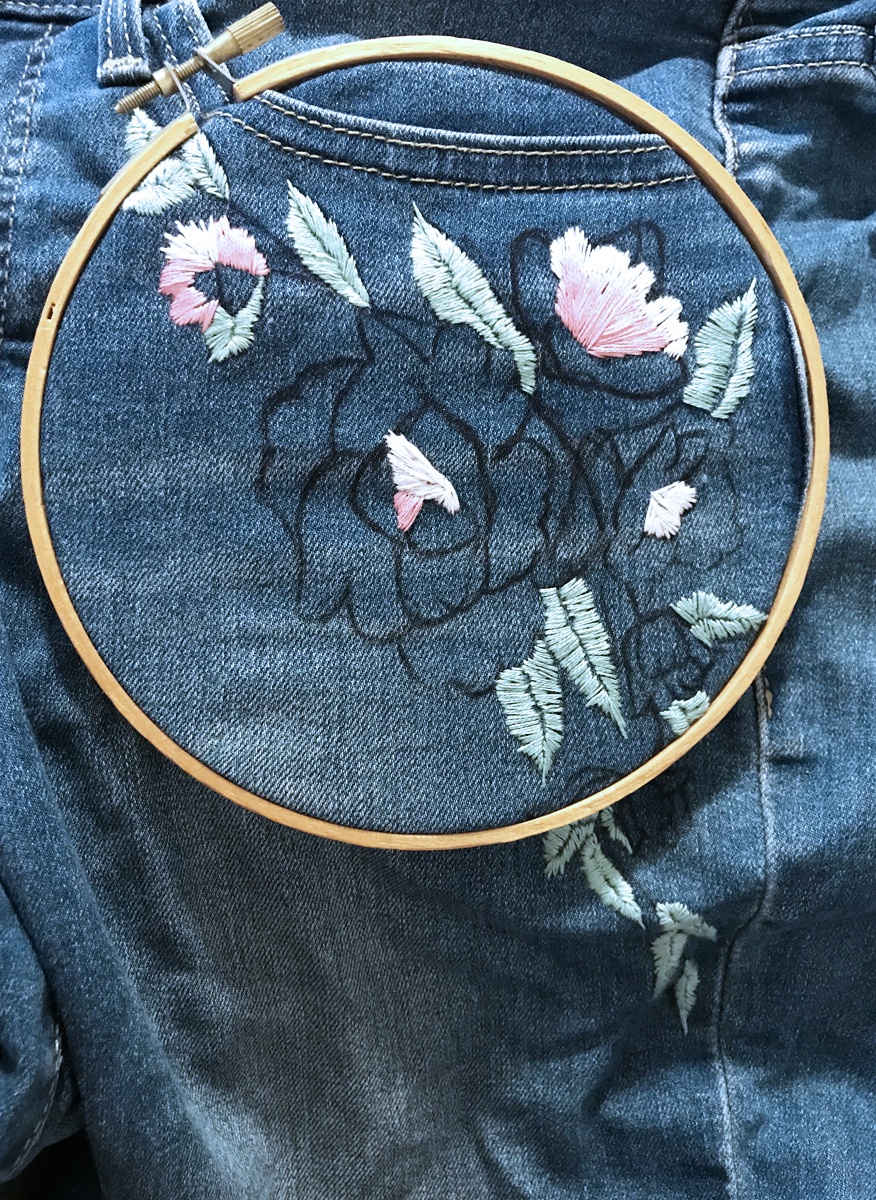
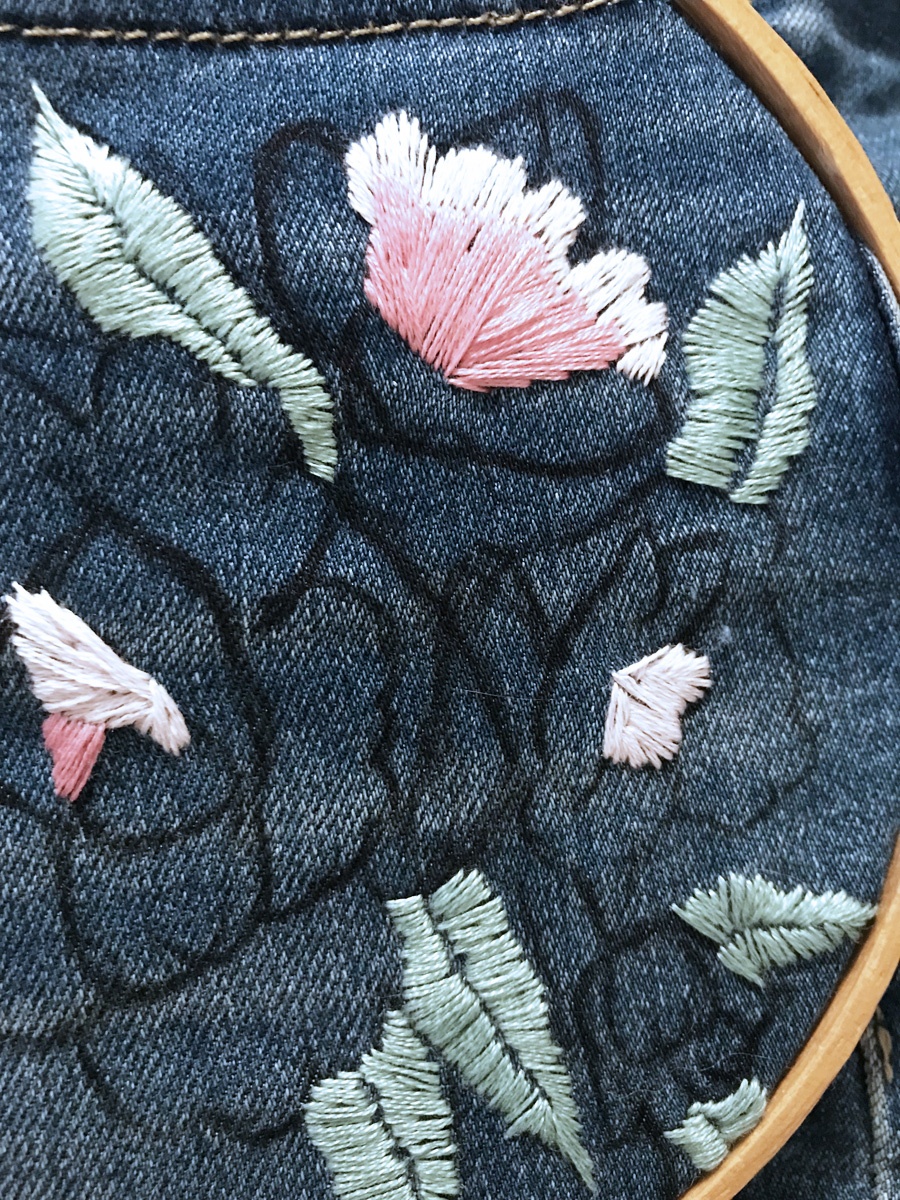
3. Once your needle is threaded, set it aside. I started near the top of my design and placed my embroidery hoop over the leaves, tightening it so that the fabric was taught. After that, I just started by embroidering straight lines in what I thought was a leaf shape, leaving a small gap in the centre that would be the vein of the leaf. When I started, the back of my work looked very similar to the front and I realized that this was wasting a lot of thread. So, instead of placing my needle on the opposite side to go back up to the front of my work, I placed it 1mm over from the stitch I just did so that all you see on the back are tiny stitches and it helped save a lot of thread and made my work less bulky. You can see the difference here:
4. Keep removing and re-placing your embroidery hoop over each section of your design until you’ve finished all the leaves.
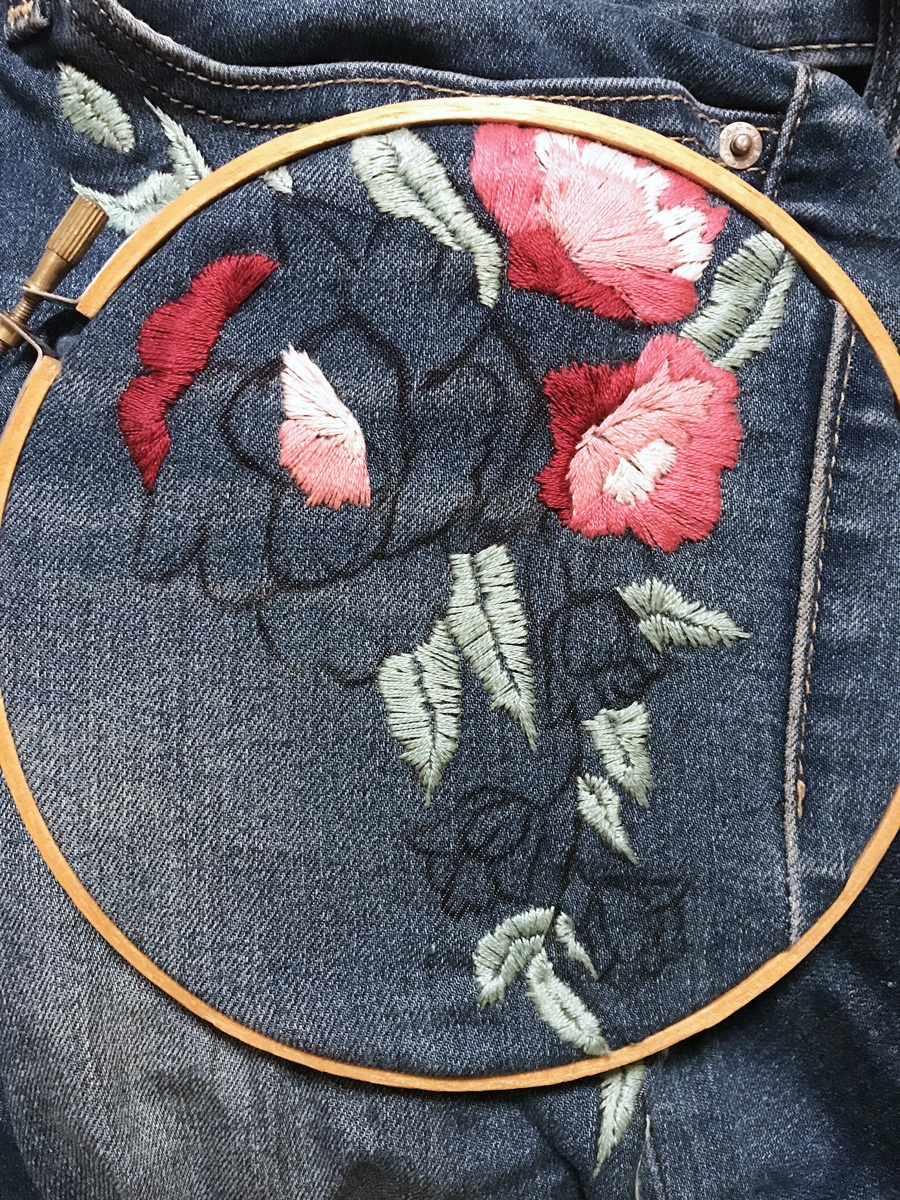
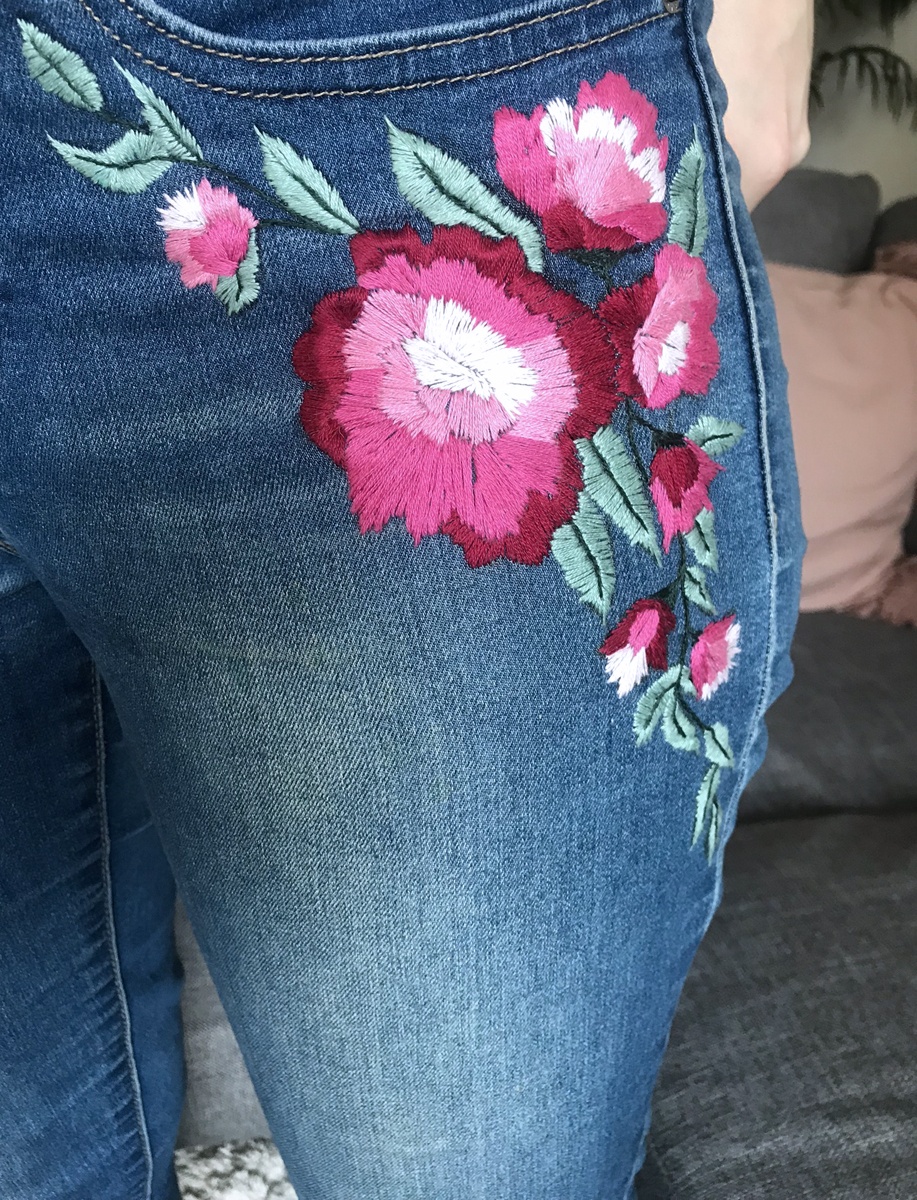
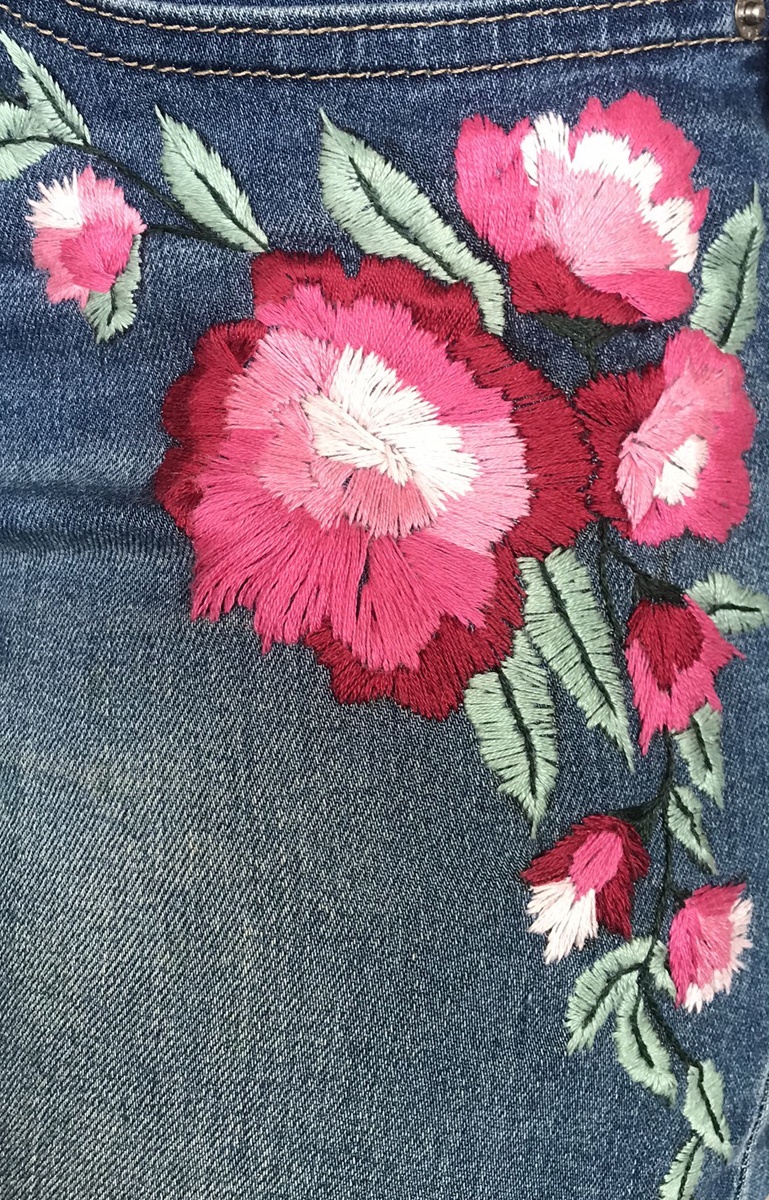
5. Once the leaves are done, it’s time to move onto the more fun part a.k.a the flowers! I started with the smaller buds that I had made and moved my way onto the bigger flowers. For the small buds, I didn’t necessarily use all 4 colours of embroidery floss, so the best advice I can give is to work from the back of the flower forwards. I didn’t necessarily always do this, as evidenced below, but I think if you plan on overlapping your threads more, it’ll look better if you work that way. Learn from my mistakes haha.
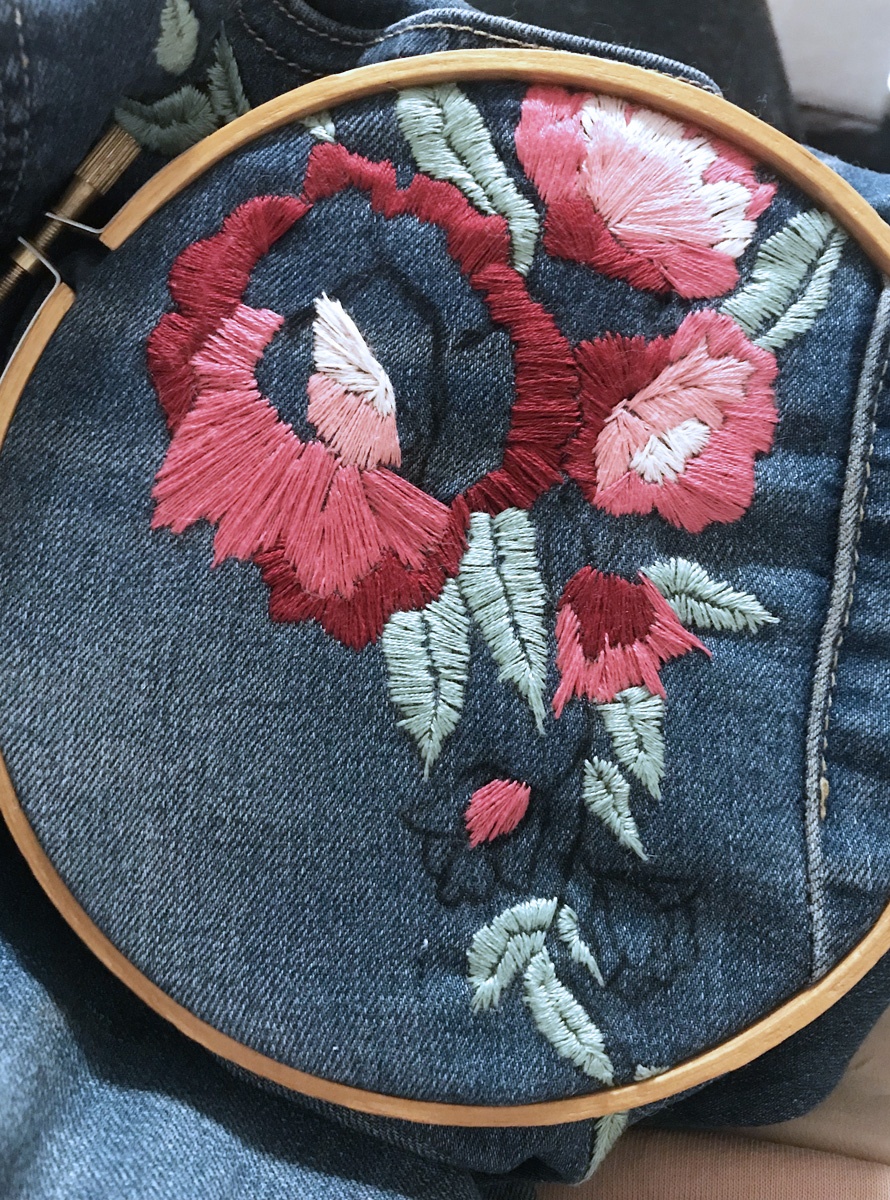
6. I did do the bigger flower mostly properly and worked from the outside in and was able to overlap the threads a bit better so that none of the denim showed through and I love how it came out! It was really gratifying to see that big flower come together.
7. Once all the flowers were done, all I had to do was take my darker green and add a bit of detail to the leaves and vines. The space that I left in the middle for the vein of the leaf is where I placed my darker green colour.
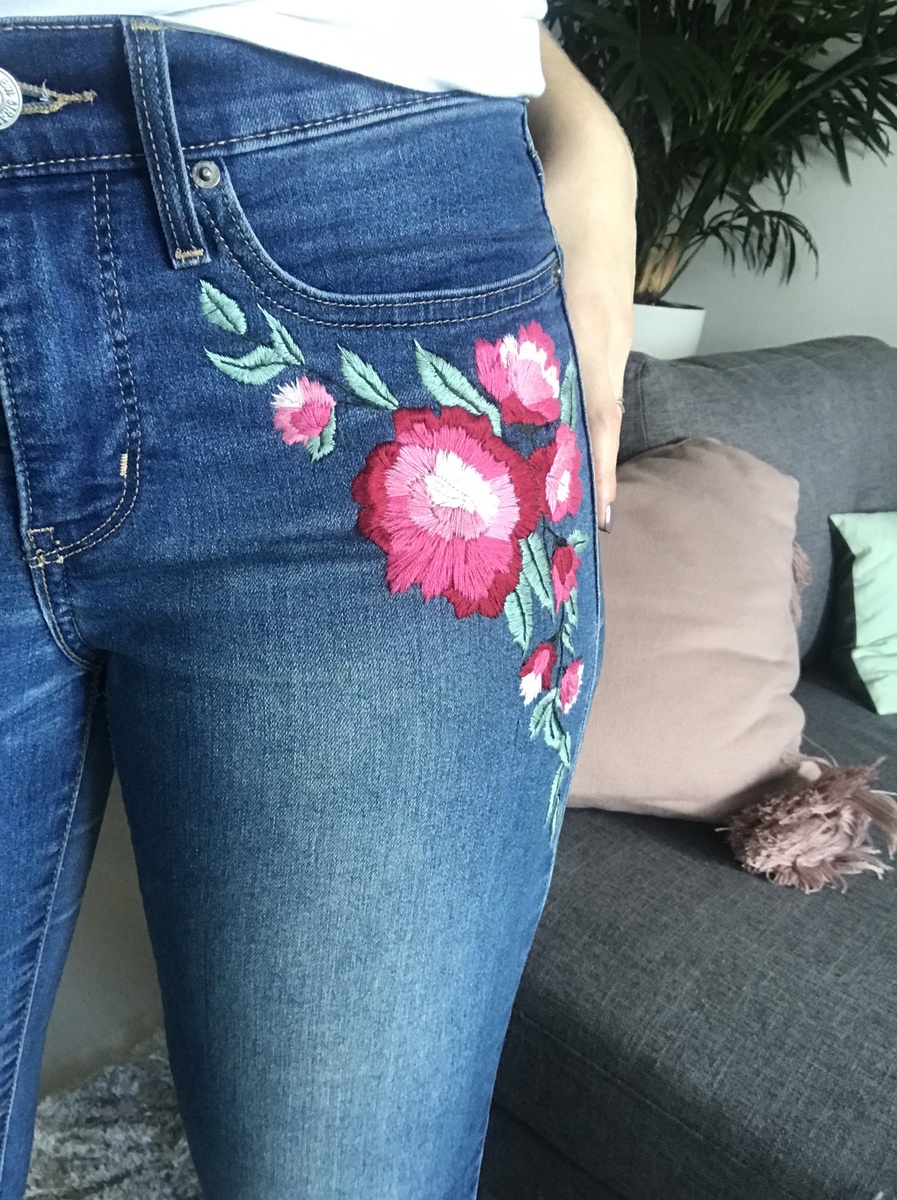
When that final detail was finished, my jeans were done!
I finished these in early December, so not exactly the season for floral denim. But, I can’t wait to wear them come spring time with a flowy white tee and some cute nude sandals or flats!
This definitely sparked my interest in embroidery and I can’t wait to try embroidering a couple of my other items of clothing. I’m thinking maybe some text on a shirt or jacket?
I’d love to know what you think of this project!
xo, Tess.
Follow Me at
Angean Blog | Facebook | Twitter | Instagram | Pinterest


I love the way your design turned out!
Thank you so much, Beth!