
DIY
DIY Metallic Wire Dream Sign
May
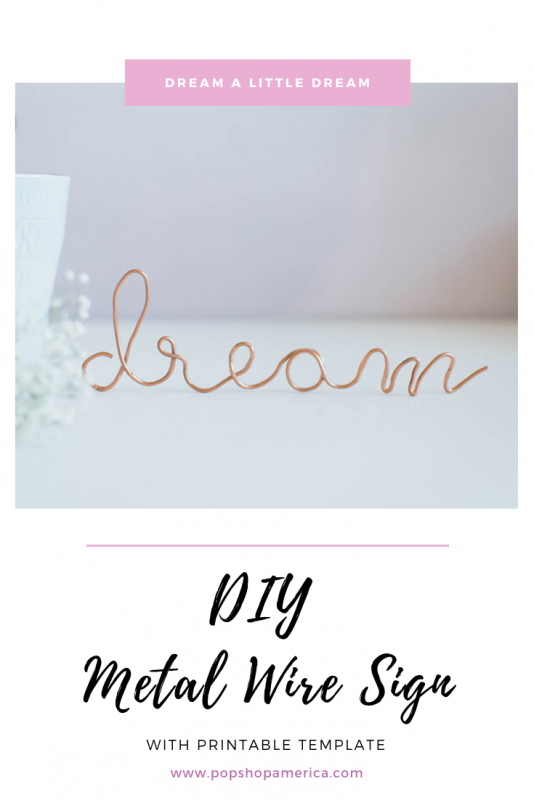
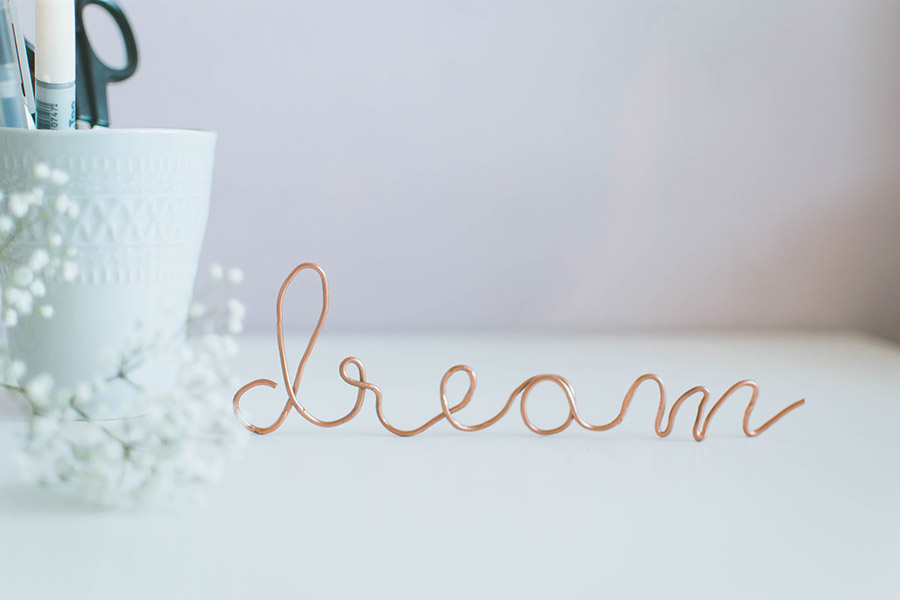
Wire signs are being very popular lately, Instagram and Pinterest are so overpopulated by them and they do indeed look very pretty. Especially if they display words or concepts that are close to our hearts and mean something to us. I wanted to give this little DIY project a go for a while, making my own mini DIY metallic wire sign with the word “dream” to always have at my desk to motivate myself and remind me to keep dreaming big.
If I have to be honest I thought it would have been so much more difficult to do it myself, but actually, with the help of jewelry pliers and a stencil as a reference, it’s so easy to do! Add the fact you can basically write anything you like and in the style you prefer, and you’ll get why I couldn’t wait to share this DIY project! Here you go…

DIY Metallic Wire Dream Sign
Materials:
– 12 Gauge Copper Wire (I used aluminum wire and then painted it rose gold)
– Printed stencil (click here to print my “dream” stencil)*
– Jewelry Pliers
– Metallic spray paint if you want a different colour
* You can even create your own stencil selecting the font you prefer (dafont.com is jam-packed with free and cute fonts to pick from!) and writing any words you like!
If you end up deciding to print my “dream” stencil (free download here), just make sure to print it on A4 paper to get the same size as mine.
Method:
1. Firstly create a stencil or print mine here on A4 paper. You’ll use this stencil as a reference to build your wire sign.
2. Take your copper or aluminum wire and, with the help of jewelry pliers and your hands, start molding the wire following the shapes of the printed letters. Don’t worry if they don’t look exactly the same, no one will ever know! Jewelry pliers can be extremely handy for creating small circular shapes or angles in the letters.


3. Keep going until you reach the end of the word, and then cut the excess wire off.
4. To make the sign stand by its own, make sure the bottom part of the letters create a support. For example I made sure the middle stroke of the “M” sits a bit more to the front, while the tail of the “R” sits a bit more on the back. This why they create balance and the sign stands by its own!
5. Lastly, if you used aluminum wire like I did and want your sign to be in a different colour, use metallic spray paint all over. I used rose gold paint and let it dry for 1-2 hours on both sides.


Now enjoy your completely customized DIY metallic wire sign! You can use it to decorate any shelf or room, or even place it at your workspace as I did. Have fun and let me know if you give this project a go!
Get More Lifestyle & Design Yumminess from Giada
Miel Cafe Blog | Miel Café Design | Twitter | Instagram | Bloglovin | Pinterest
Let’s Stay Friends!
Insta | Pinterest | Enews | TikTok


This is so cute! 😀 Gonna have to make it for my future place!!