Craft in Style Subscription Instructions, DIY
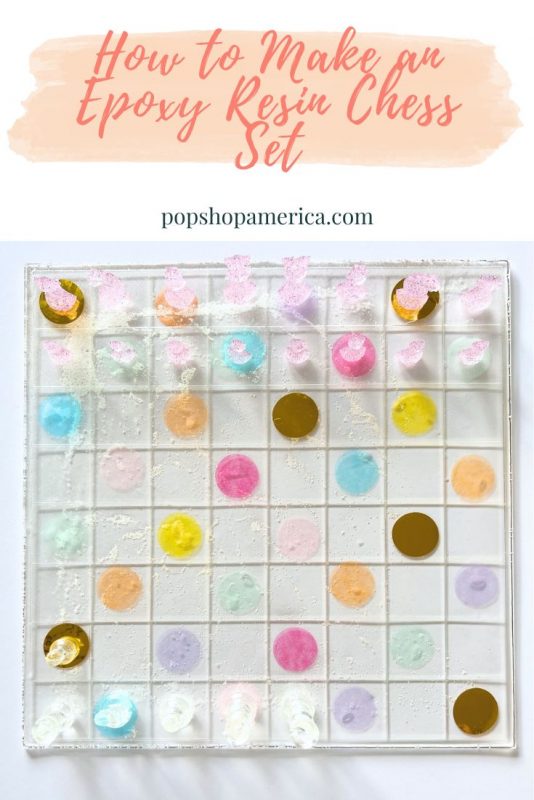
DIY Resin Chess Board & Chess Set
Sep
This blog is the tutorial for the August Craft in Style Subscription Box. You can find previous box tutorials, more about this box, and other Craft in Style Boxes here.
Shall we play a game?
This epoxy resin chess set is such fun way show your love of chess. Plus you can style it in so many different ways. Color your resin with confetti, glitter, mica powder, alcohol inks, or even add pressed flowers!
Plus glitter, mica powder, and alcohol inks come in every color of the rainbow. So you make so many different choices about how you want your Resin Chess set to look!
Additionally, there are lots of different crafts you can make with resin. Once you try your first resin project, you may just fall in love with making bracelets, earrings, coasters, cutting boards and more.
So let’s get started!
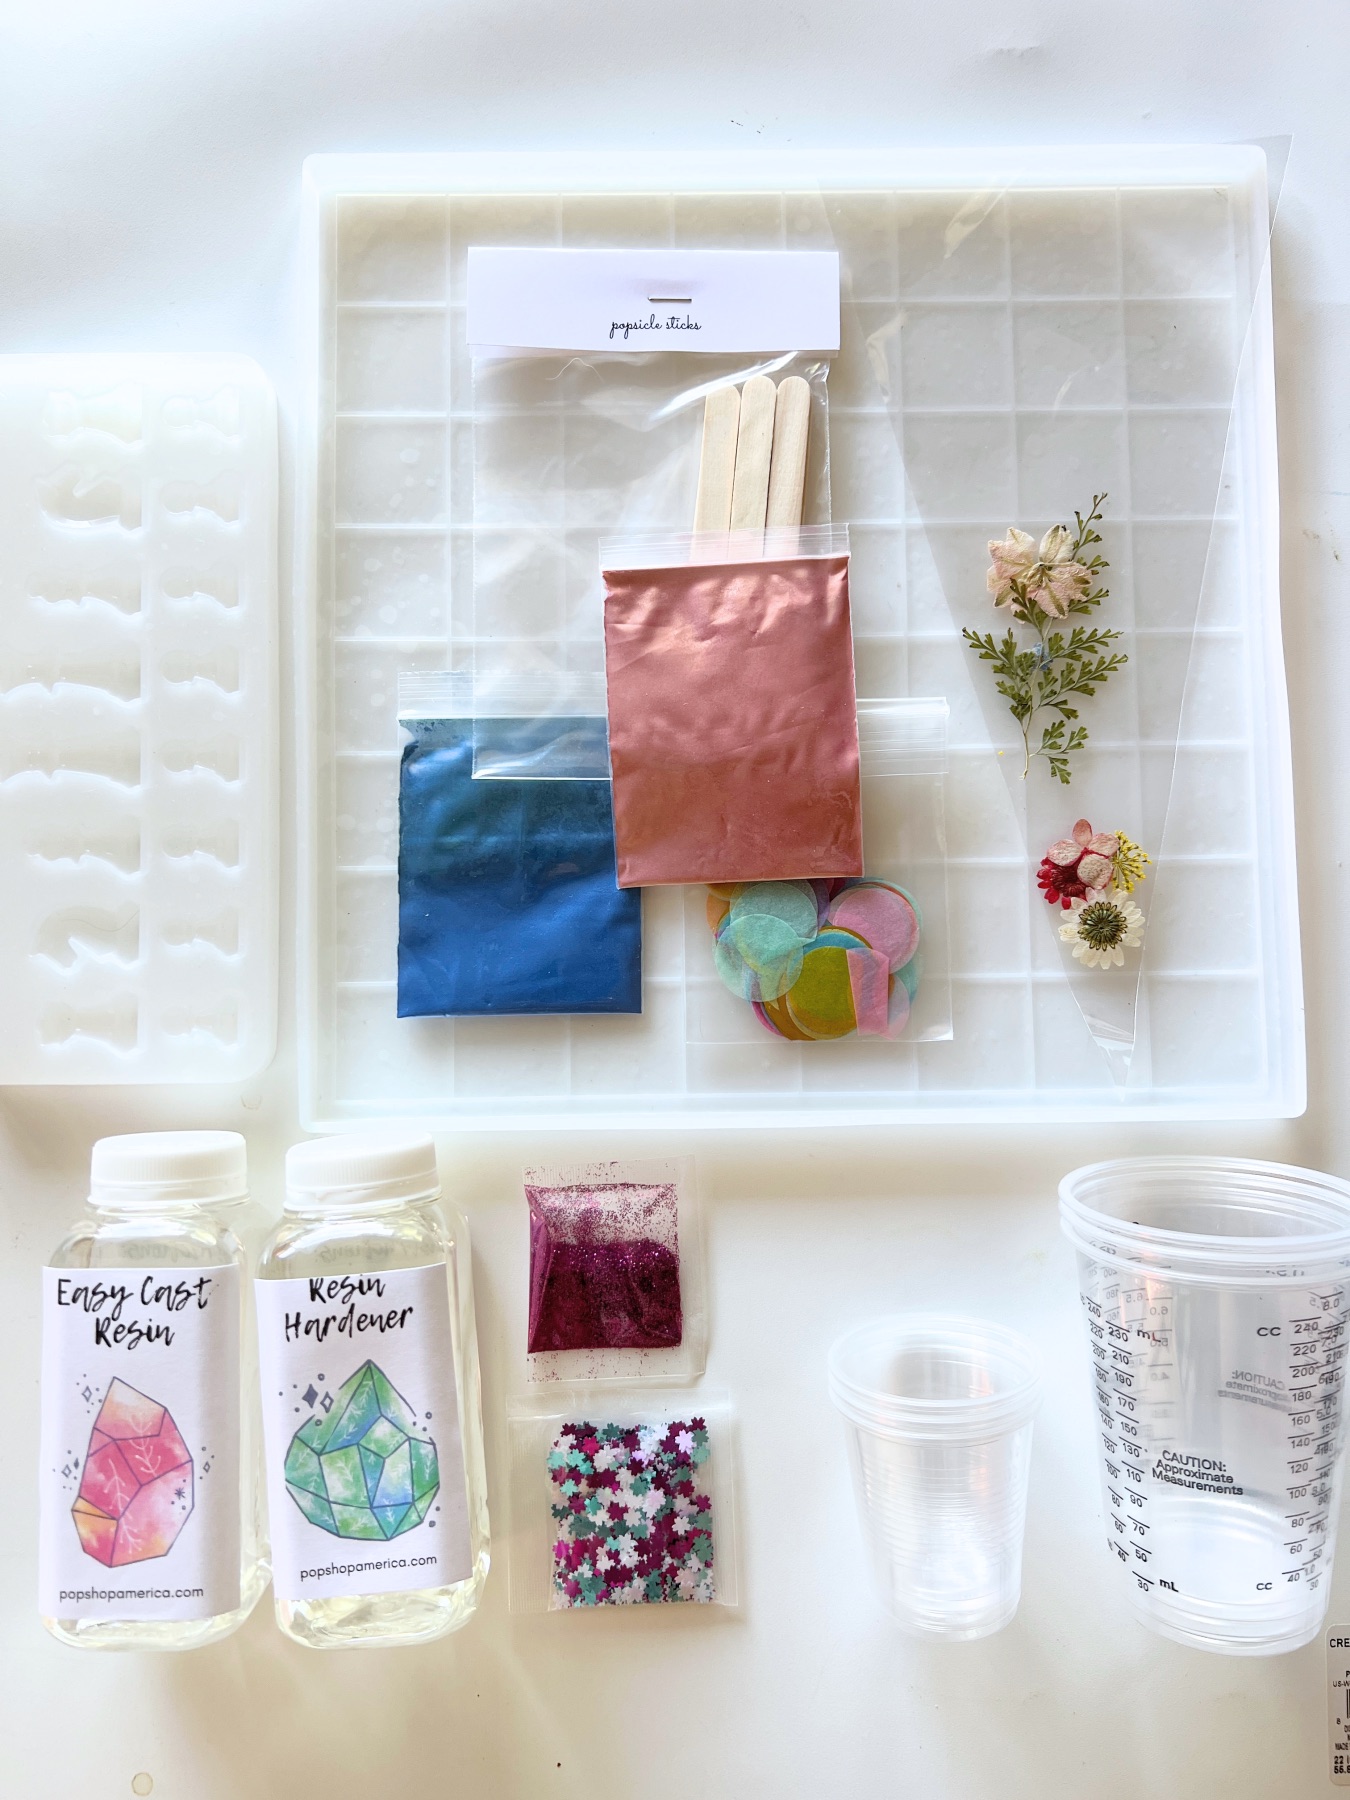
Supplies to Make a DIY Resin Chess Board & Chess Set
This DIY Resin Chess Board & Chess Set Making Kit
-or-
A Resin Chess Mold
8 ounces Resin
8 ounces Resin Hardener (or 16 ounces total)
Measuring Cups (disposable are best)
Popsicle Sticks
A Heat Gun, Hair Dryer or Torch Lighter (to get rid of bubbles)
And:
Confetti, Glitter, Mica Powder Colorant, Alcohol Inks, Metal Foil (or other items to color half of your resin)
I’ve used lots of different brands of resin and liked many different ones for different reasons. So feel free to try a few. The only harm is that some may need perfect accuracy to set. Others do not.
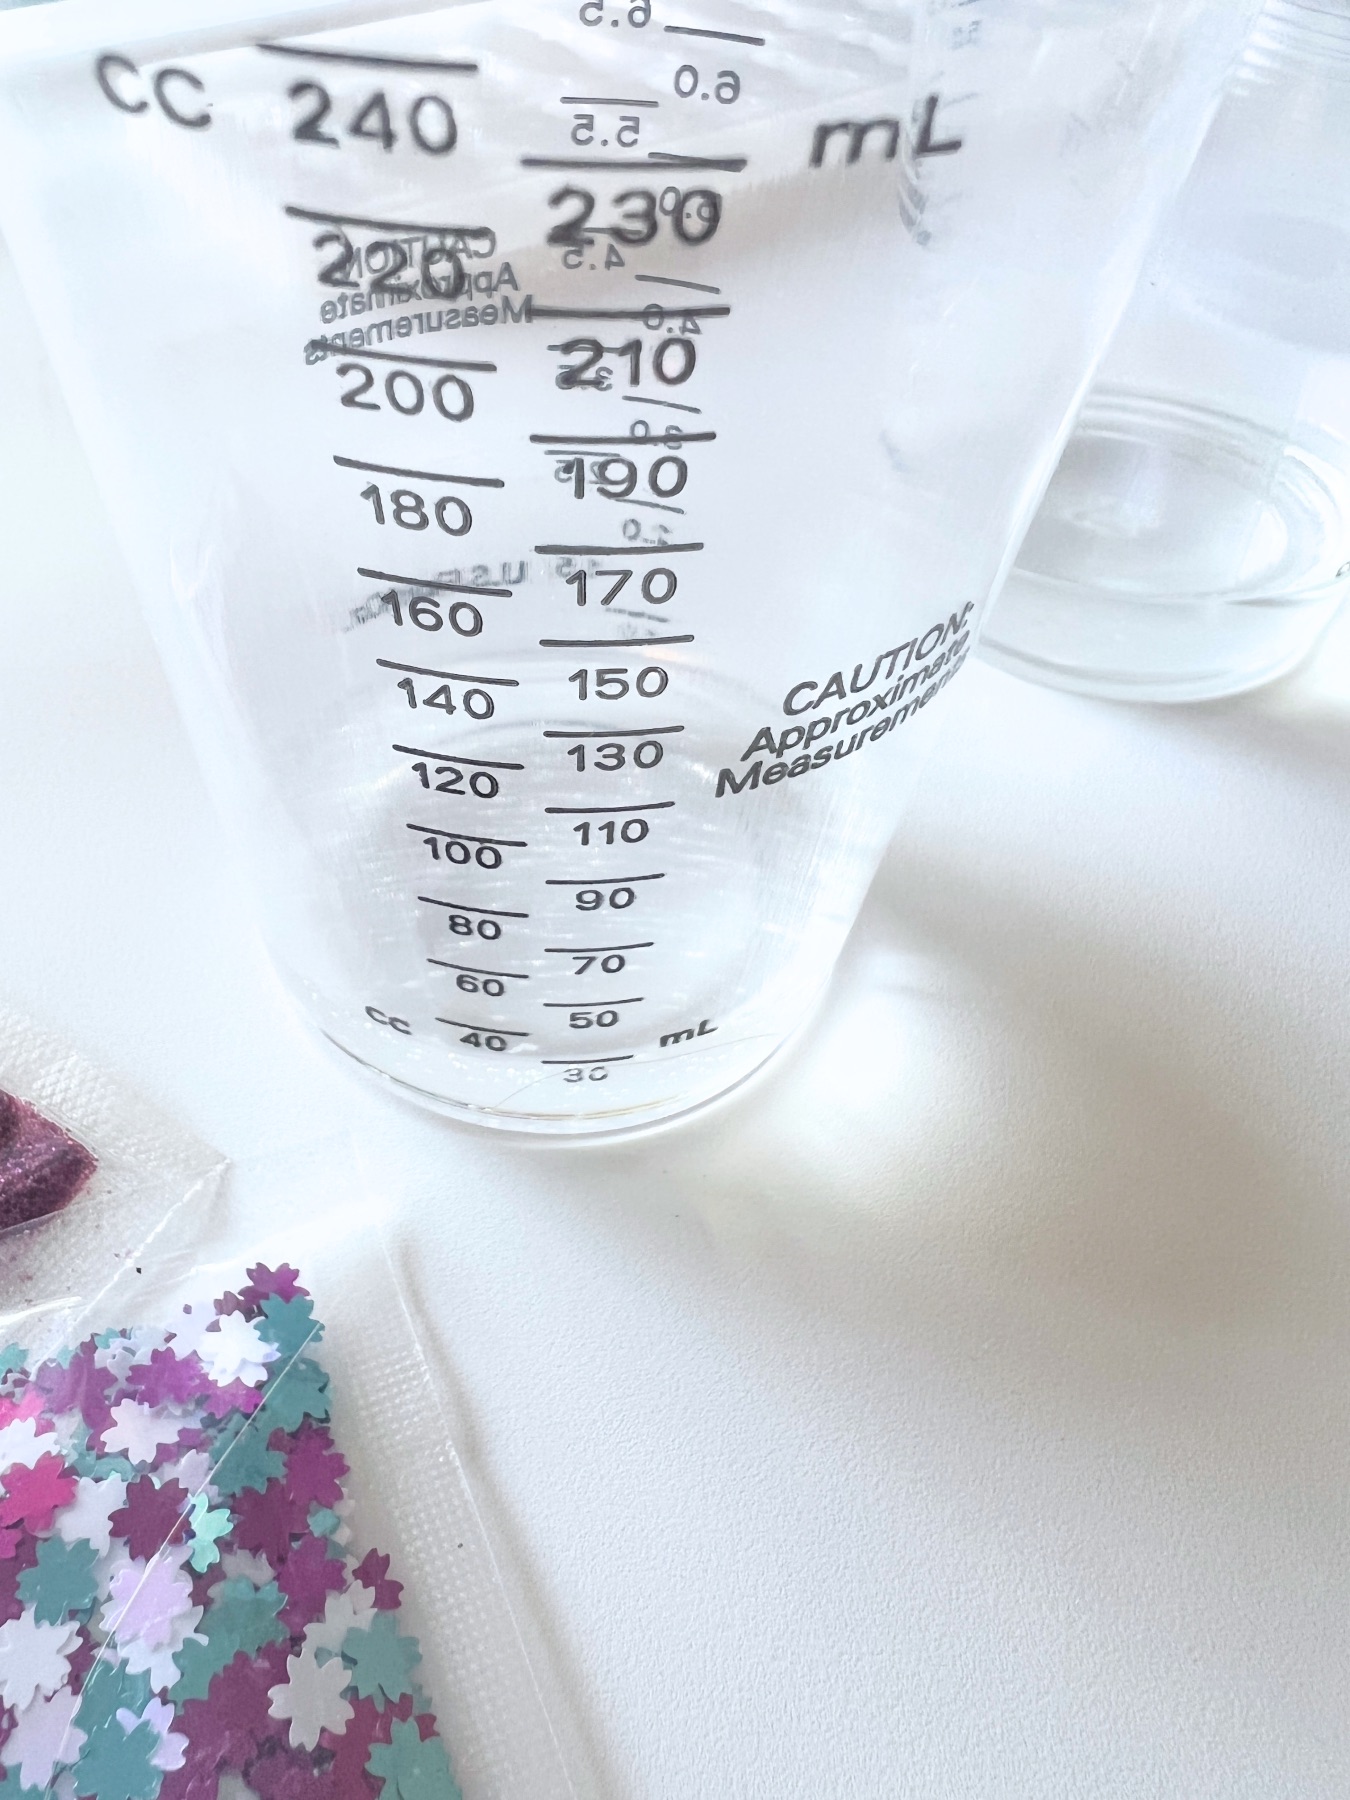
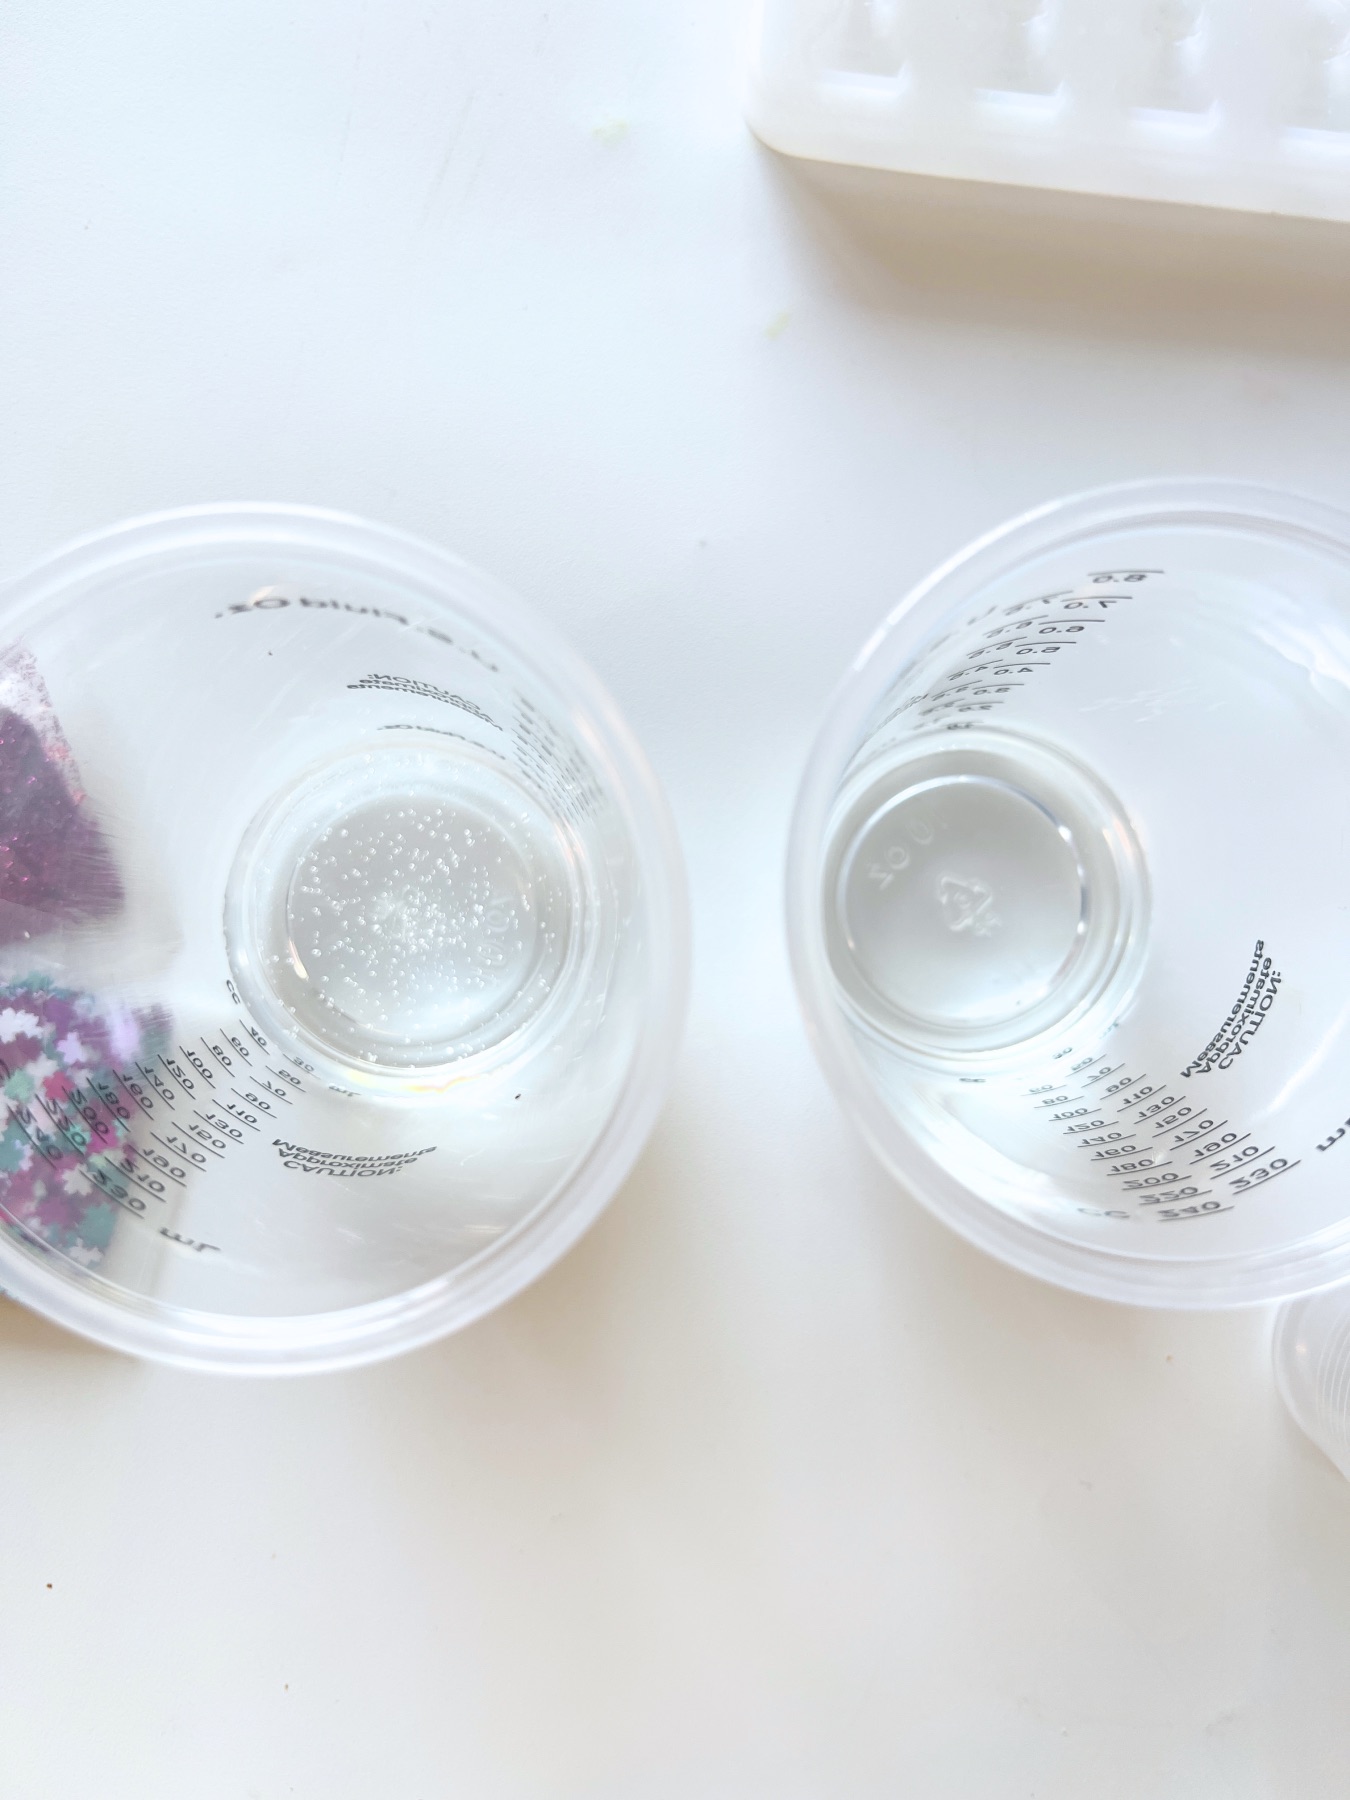
Start by Labeling Your Measuring Cups
Resin always has to be first poured separately before you can combine it into one cup. So start by labeling 2 measuring cups. One for your resin and the other for your hardener.
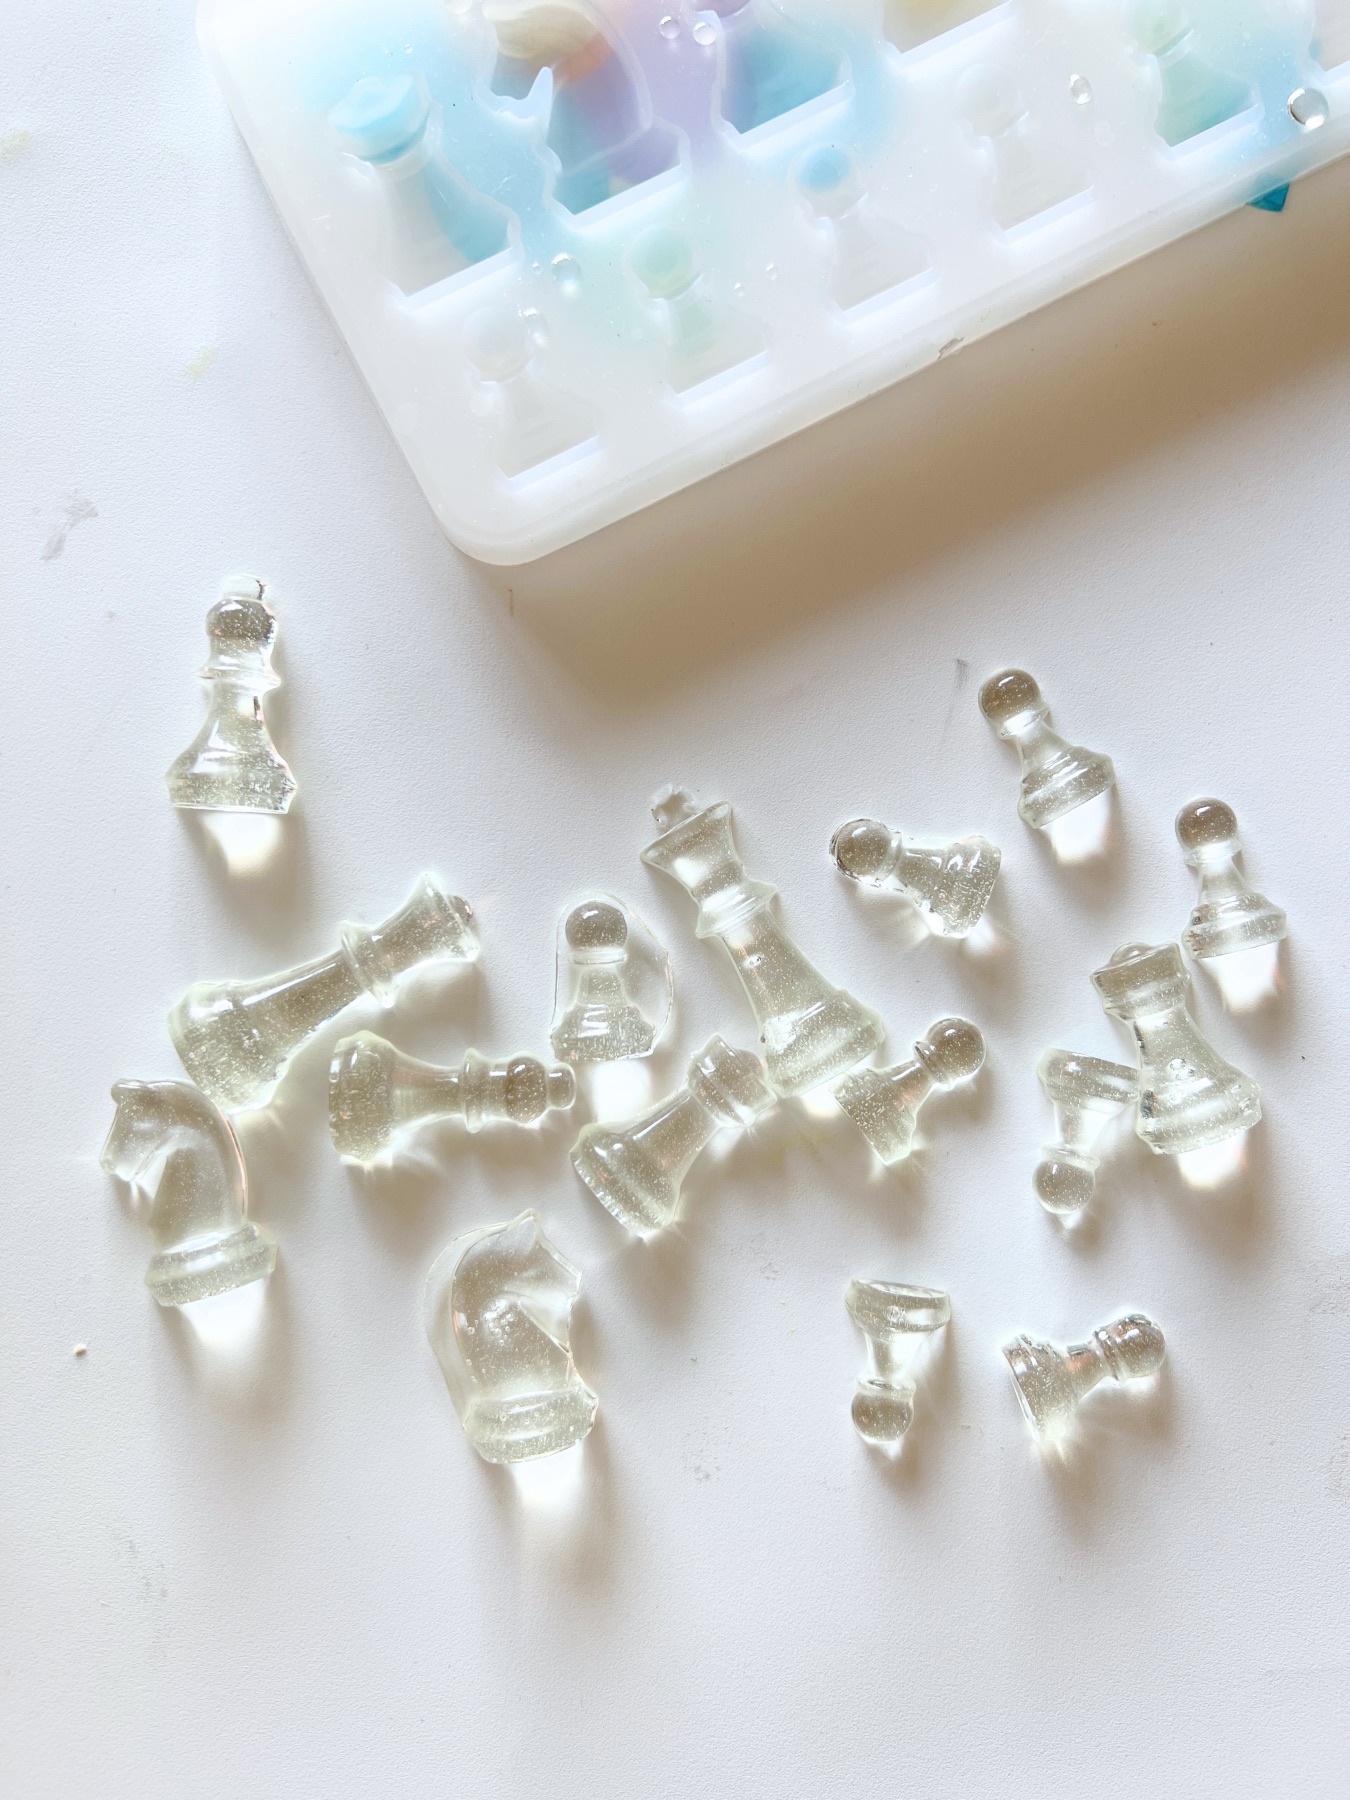
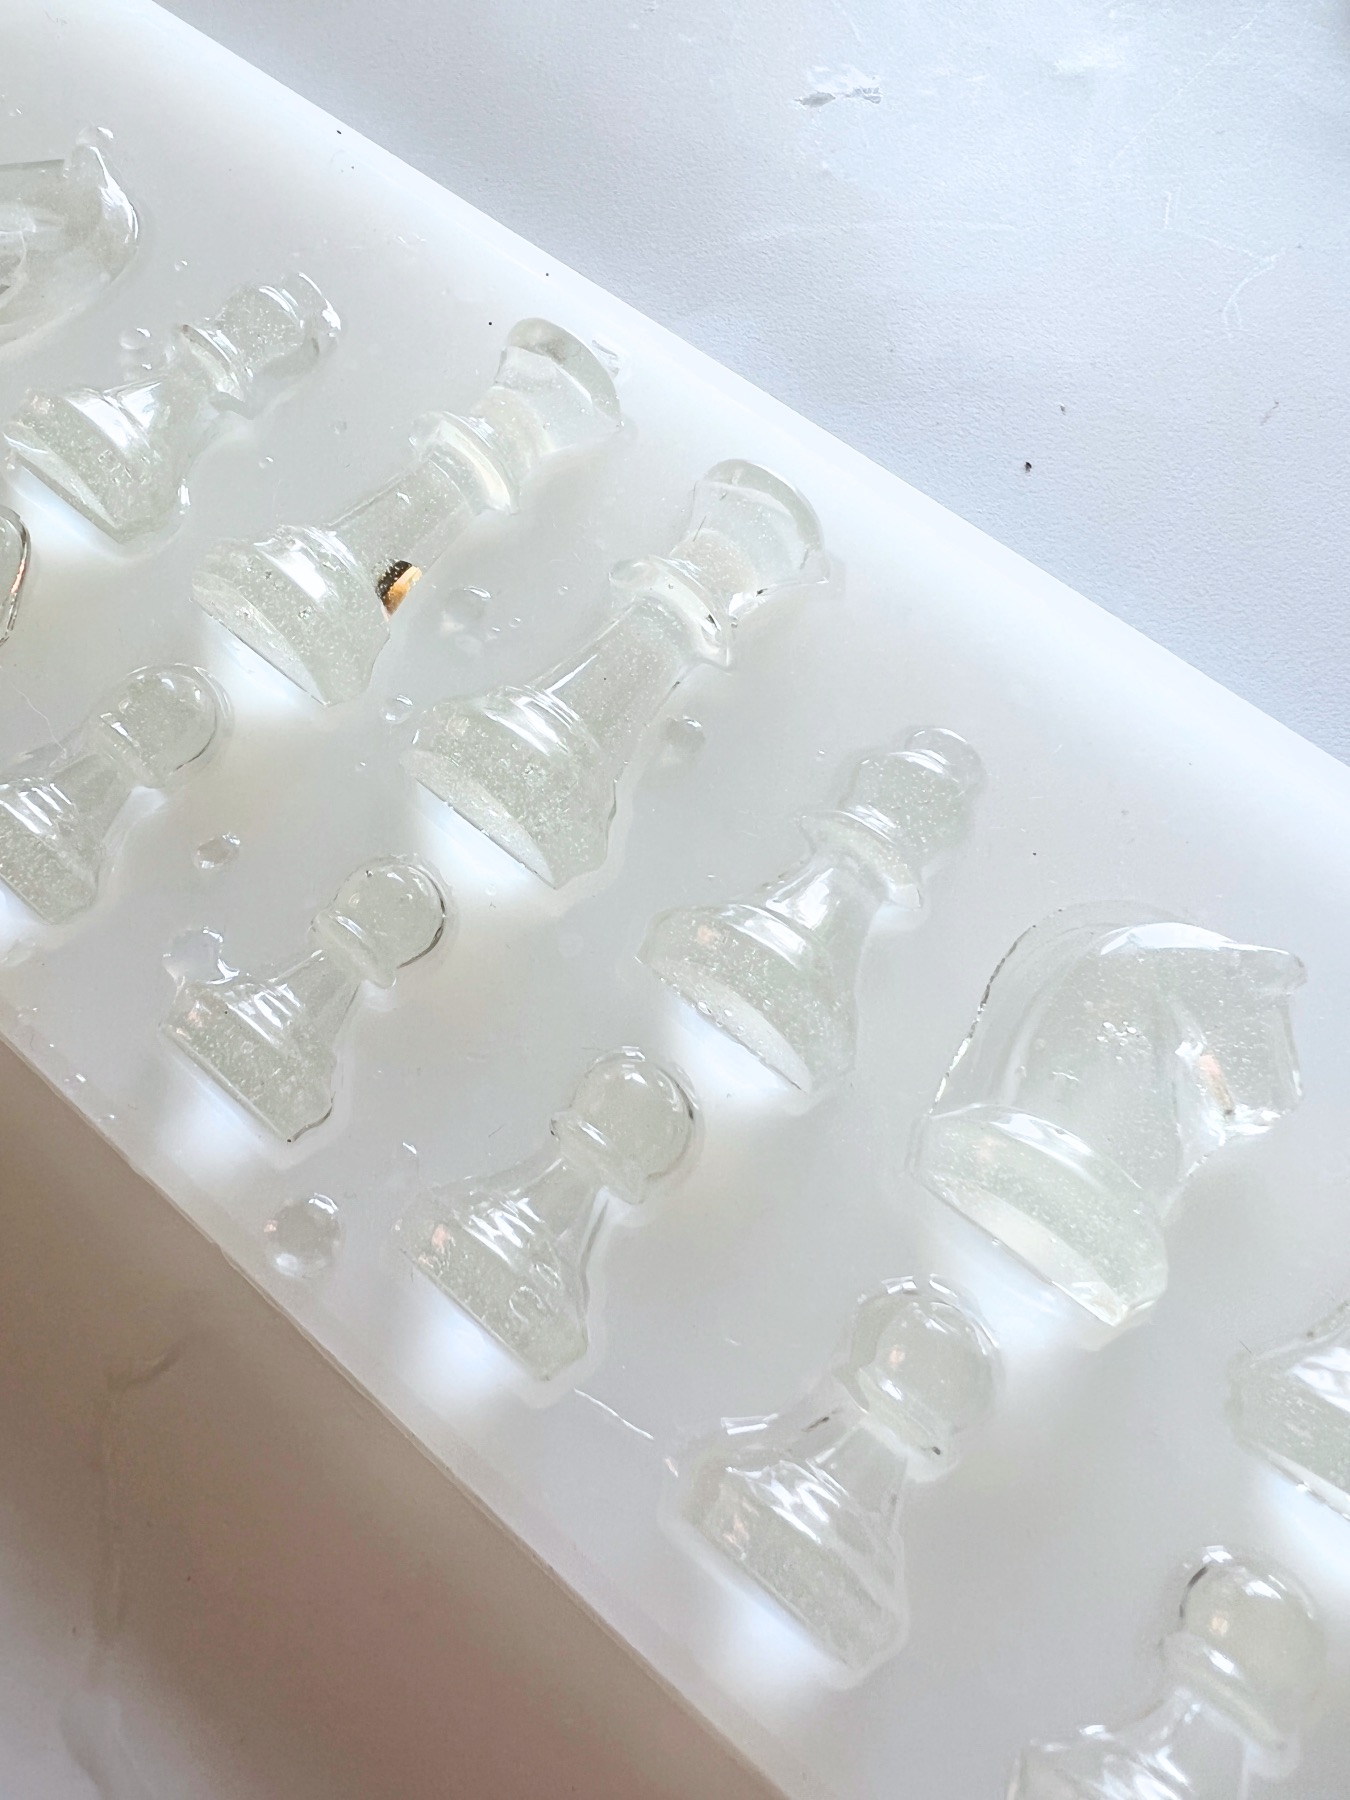
Make Your Chess Pieces First
It’s best to make your chess pieces first because the chess board can have a lot of variation in thickness. It would be really easy to use a ton of resin and end up with less than what you need for your chess pieces.
Plus since your chess piece mold is so small, it’s the best way to test colors and to make sure you are mixing correctly so that it sets correctly.
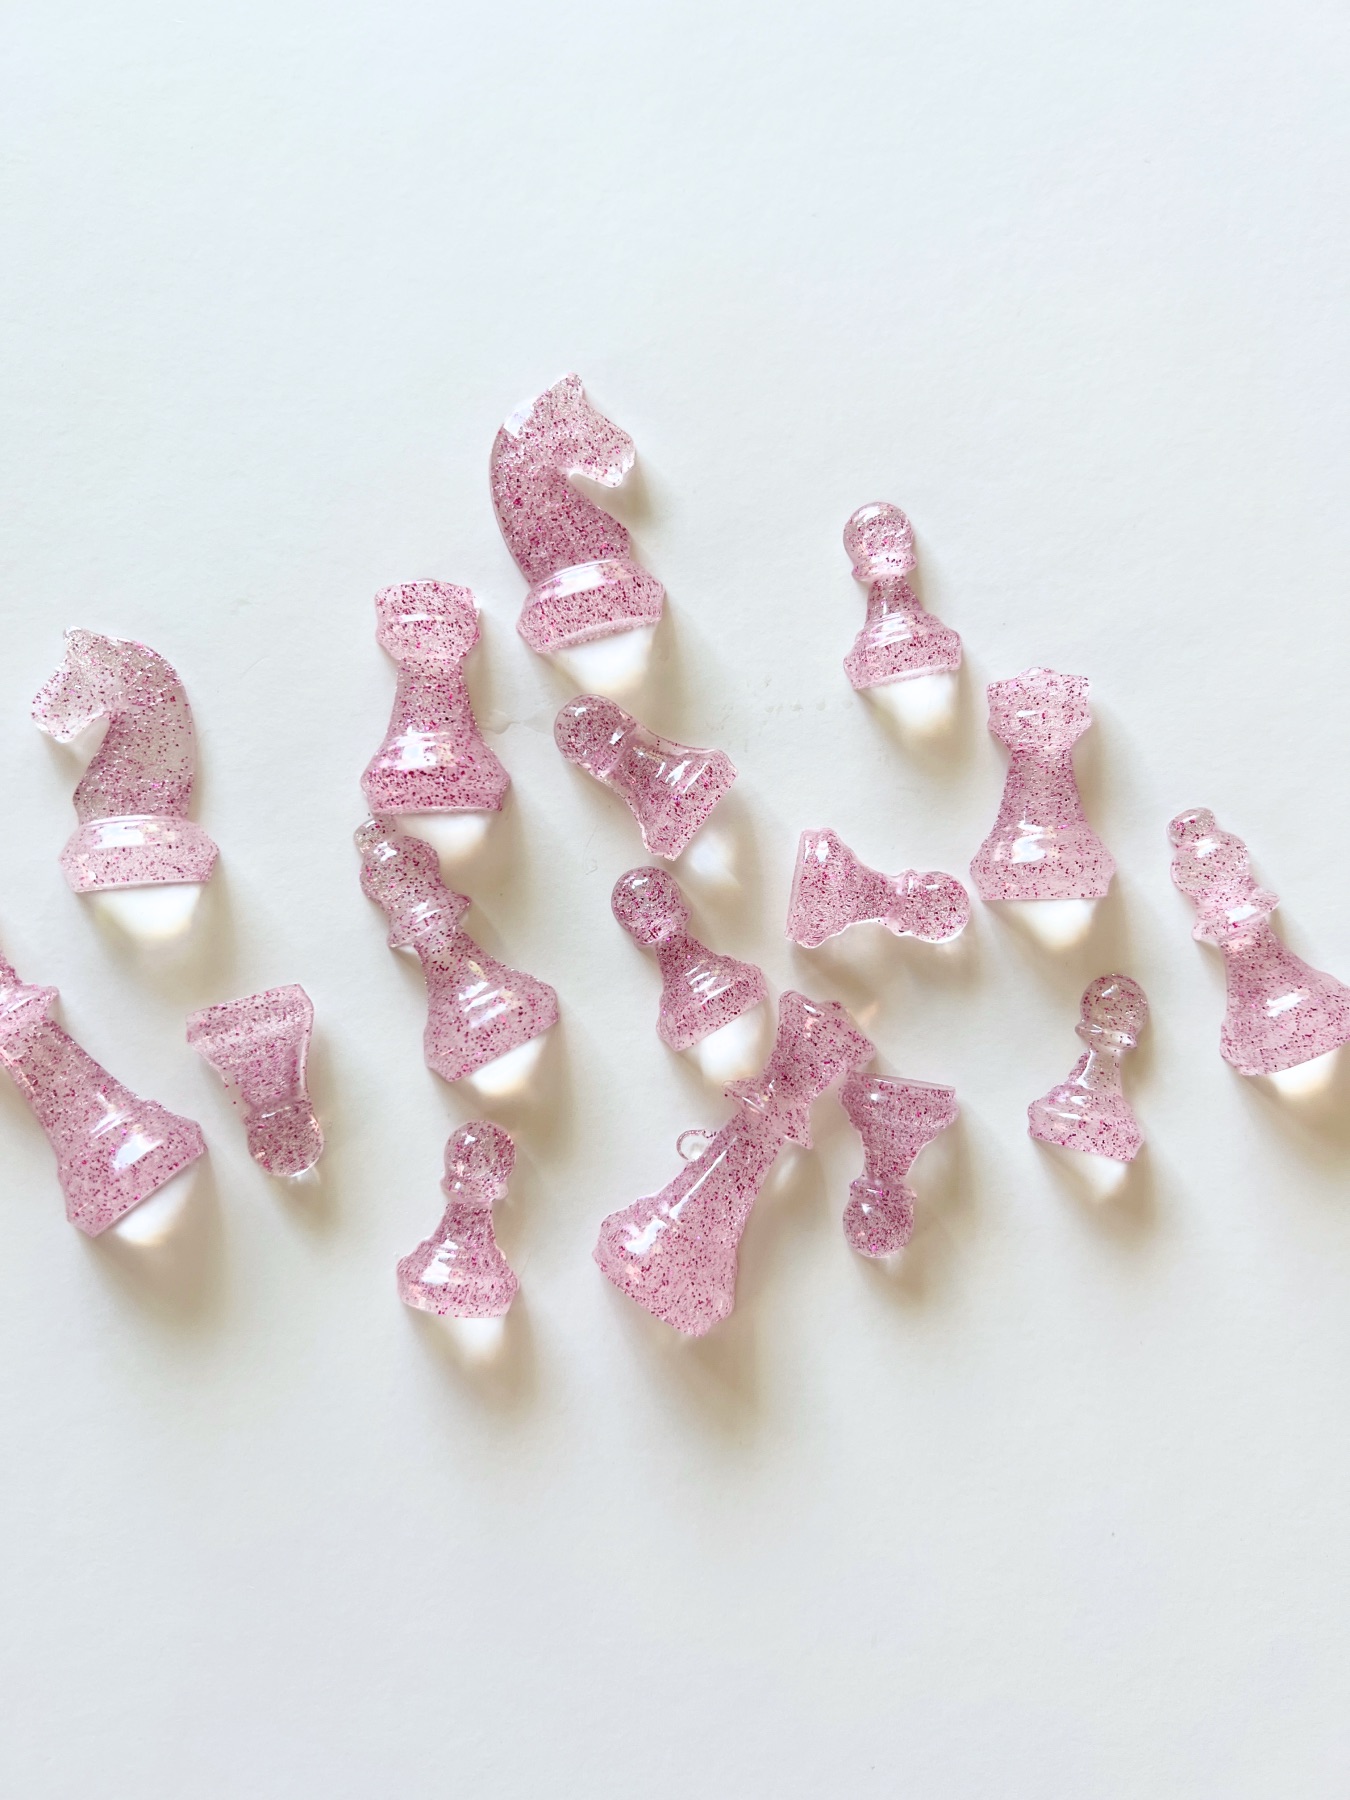
For a game of chess, you will need 1 set of light colored pieces and another set of dark colored pieces. I recommend making the light color first, but you don’t have to follow this exactly! Just do what inspires you.
How to Mix Your Resin
When you are ready to mix and pour resin into your chess mold, first read the instructions on your bottle. Most epoxy resins mix at a 50/50 ratio. But some brands are different. If yours is like mine, you will need around 15 mL of resin and 15 mL of hardener.
If you are using a different brand, just be sure to use about 30 mL total for the chess piece mold.
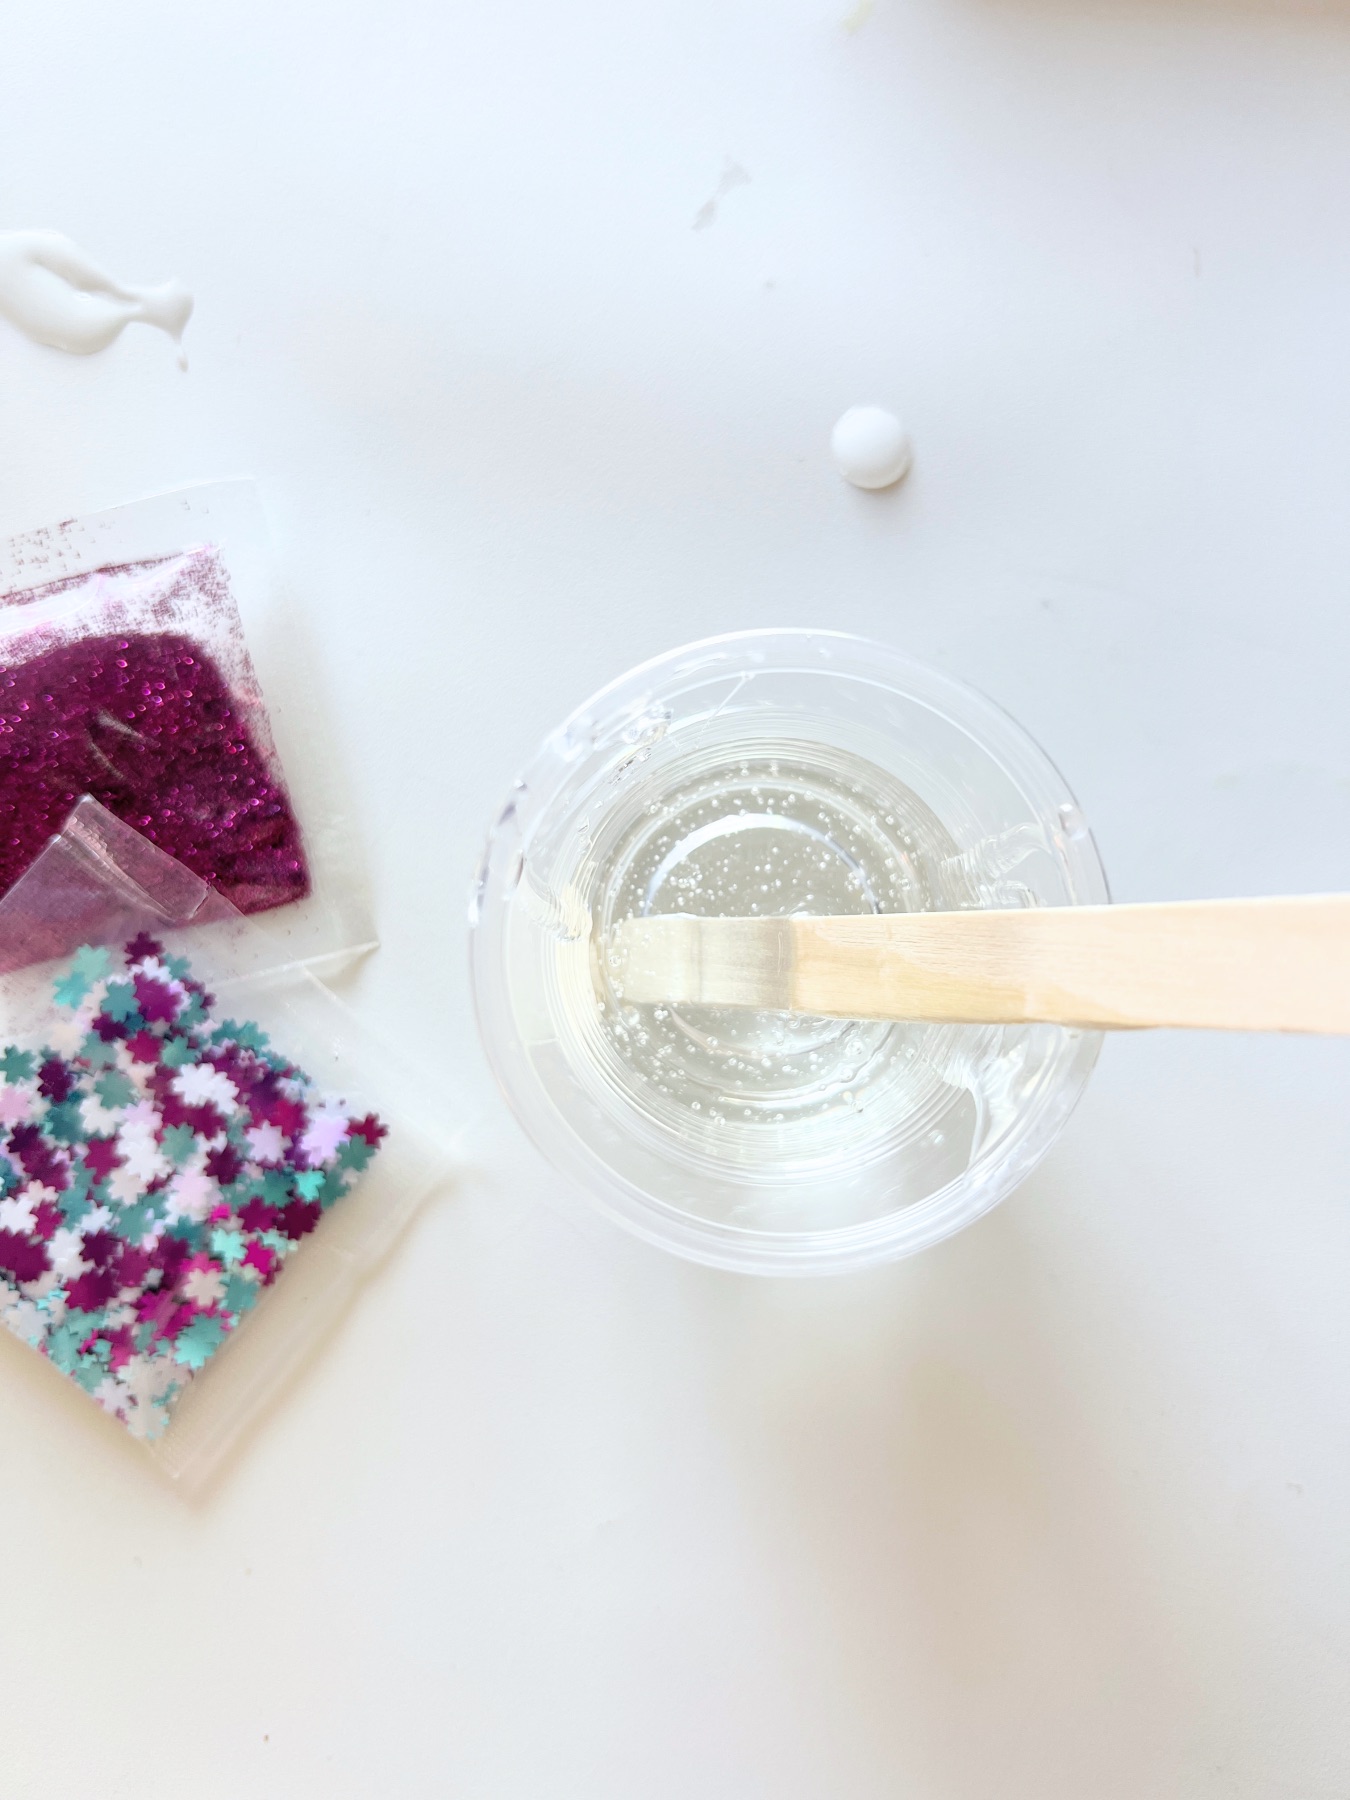
Pour the resin and the hardener into separate cups. Then pour the equal amounts into 1 cup and stir thoroughly and completely for at least 3 minutes. Be sure to scrape the sides of the cup and the bottom of the cup as you stir.
Place your mold on a perfectly flat surface. Once it’s been 3 full minutes, slowly and gently pour the resin into the mold. Try to pour so that it does not bubble over the top of the mold. Instead leave just a touch of room inside the mold so that the back sides of your chess pieces will be perfectly flat. Be mindful to get resin inside the cross on top of the King.
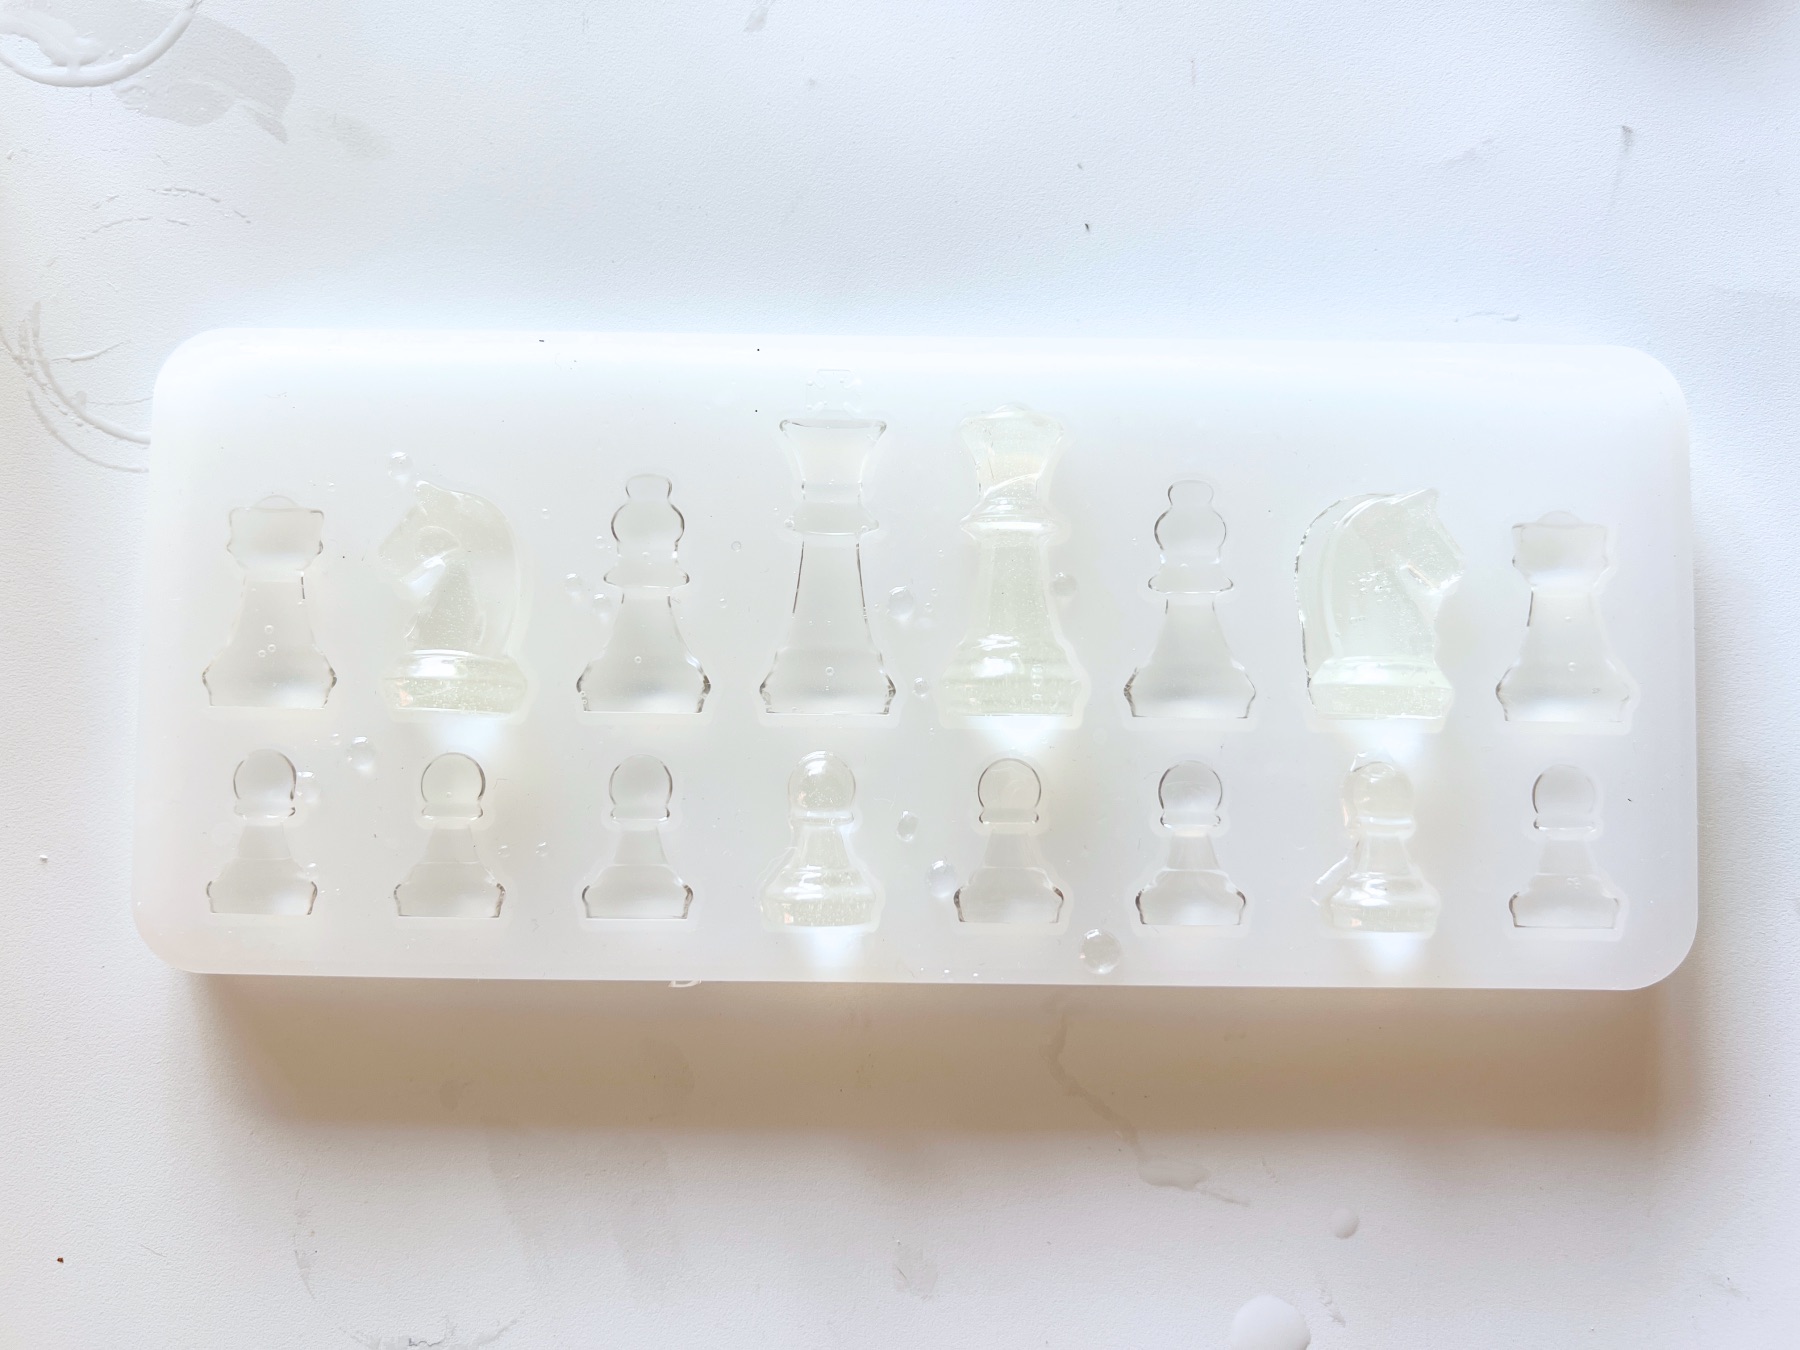
Let Your Chess Pieces Set for 24 Hours
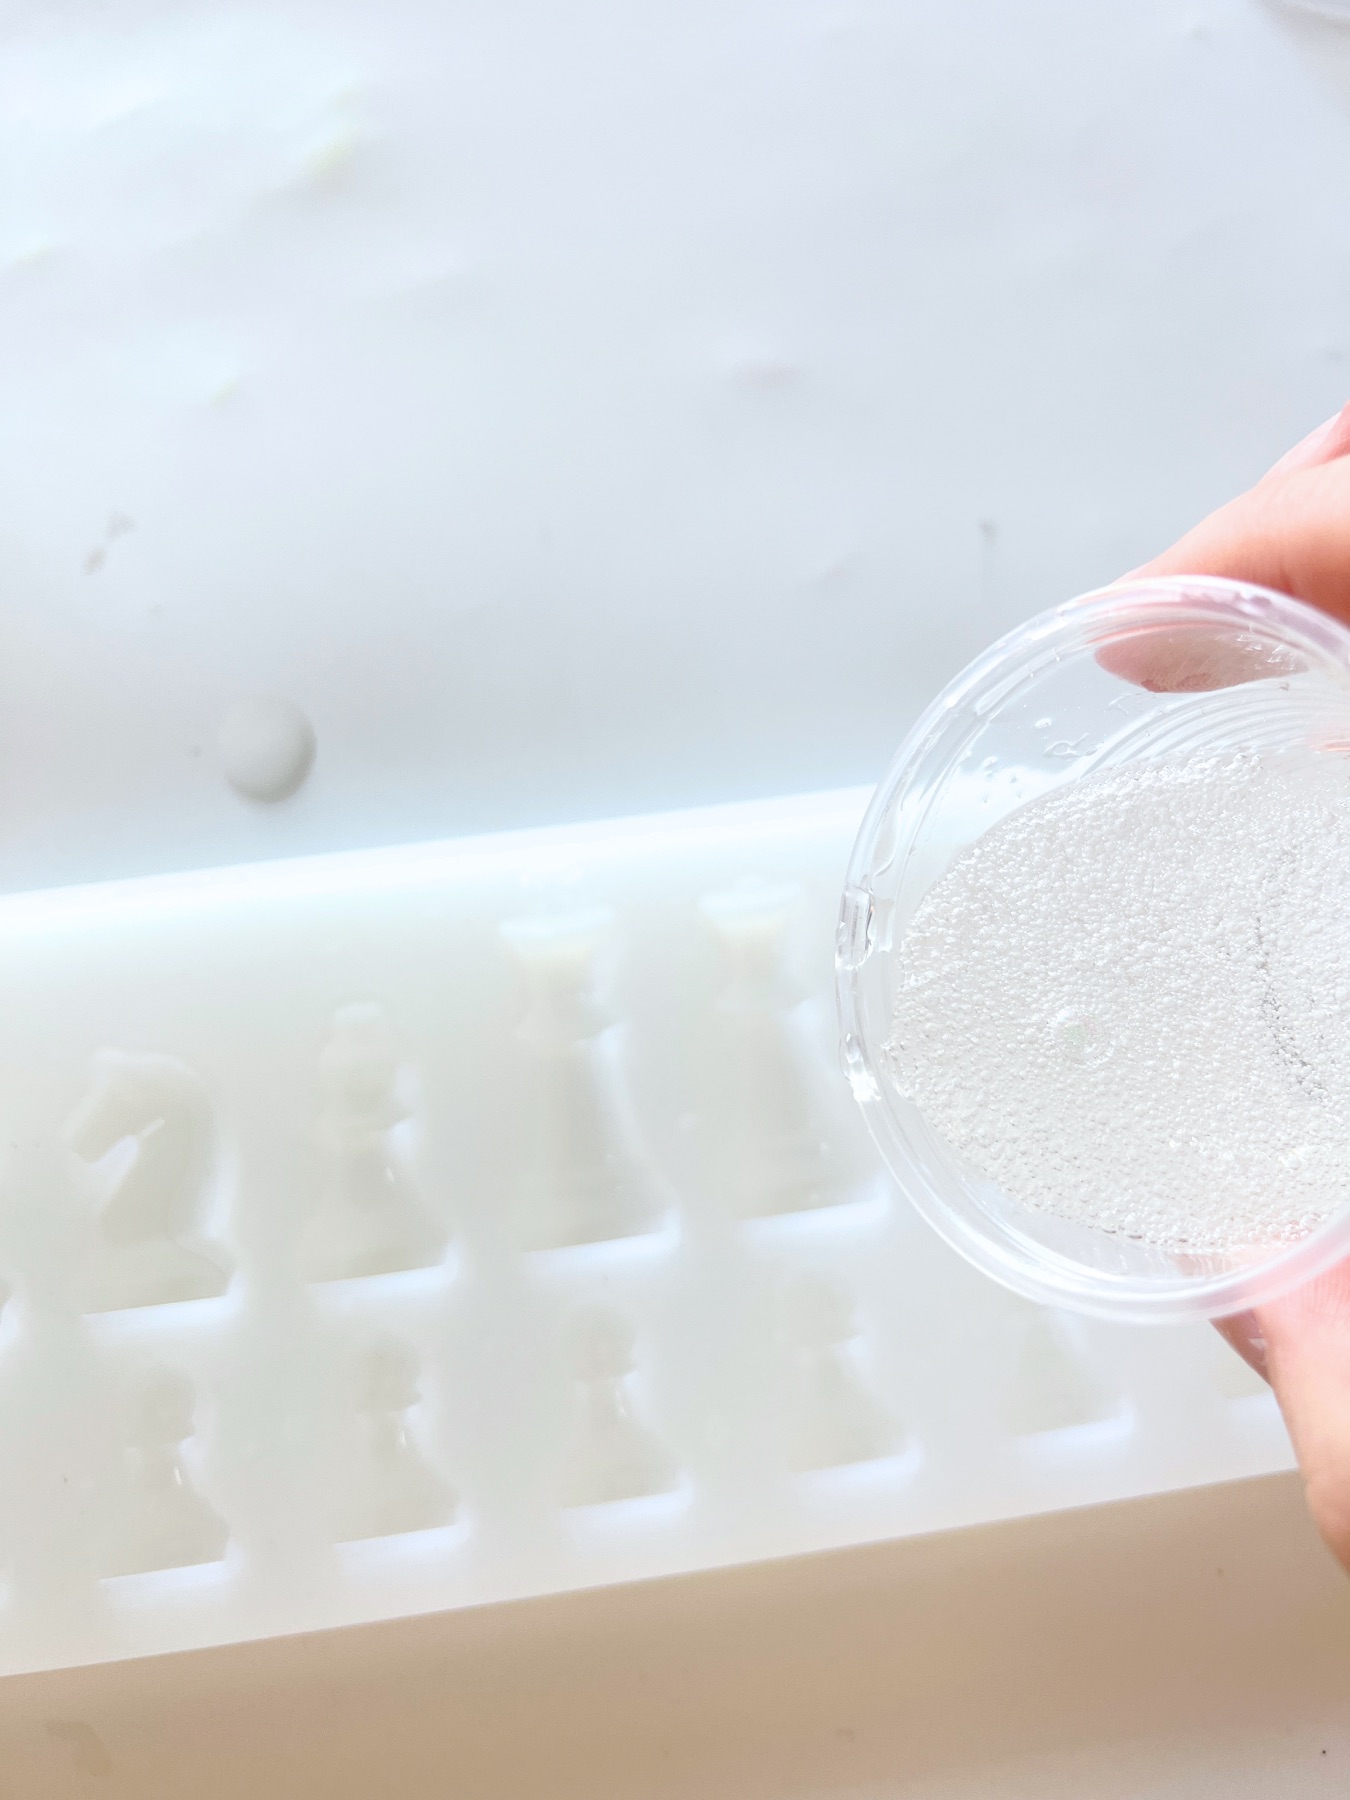
Once your mold is filled, leave it on a flat surface away from any debris or movement and let it set for 24 hours. If you see bubbles that you want removed, grab your heat gun, blow dryer or torch lighter and gently heat the surface until you see the bubbles escape.
It takes a long time for resin to set, so once your chess piece mold is filled, you are finished for the day.Casting resin can be done in short bursts, but it will take multiple days to complete any project.
Once it’s been 24 hours, remove your chess pieces from the mold and test them to make sure they are nice and firm and not too soft or moveable. If they are soft, it means the resin was not mixed properly. Either it was not stirred long enough or there was not a perfect 50/50 of resin and hardener.
But luckily, we can try again to do better!
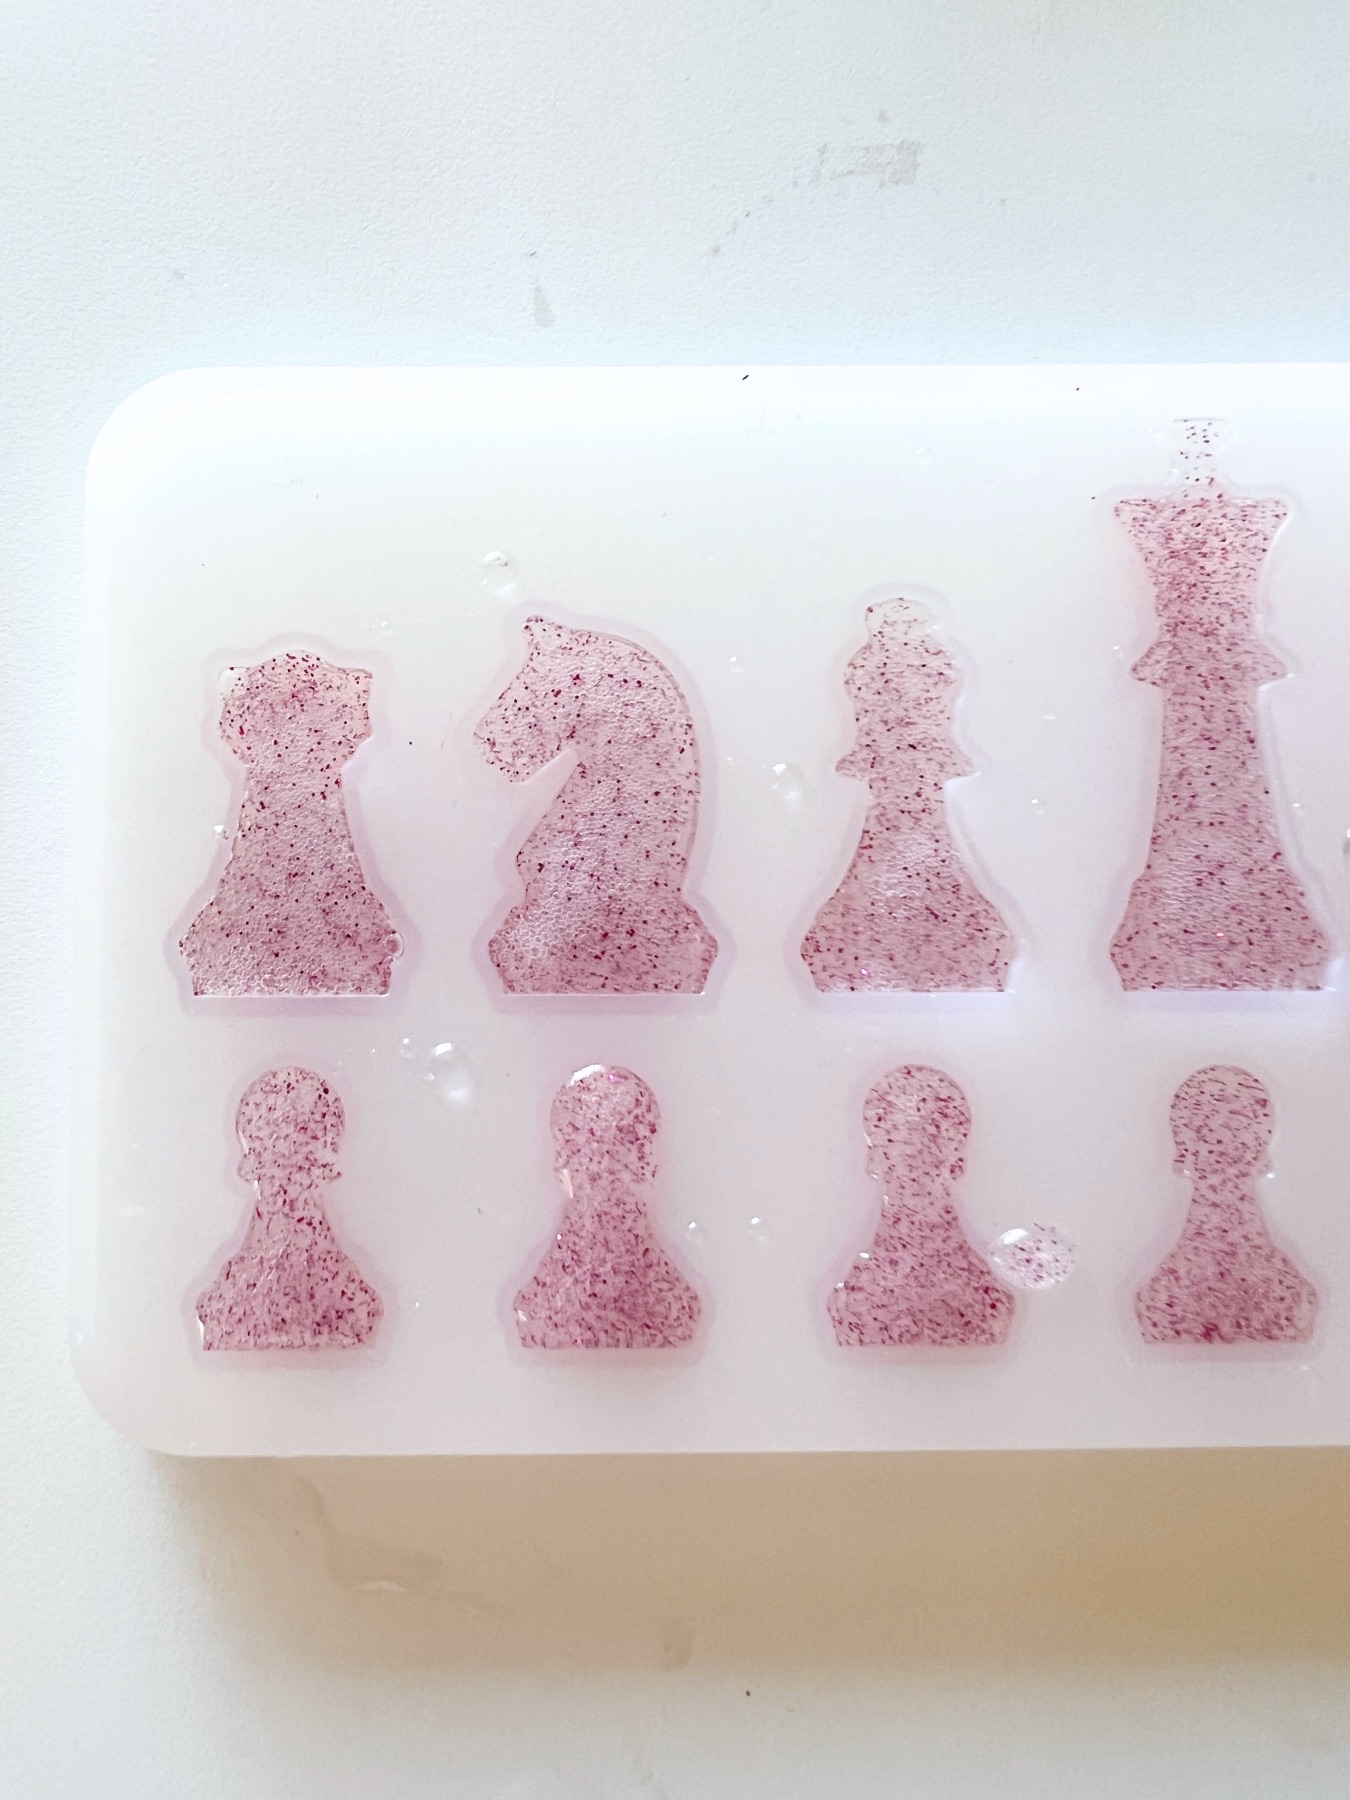
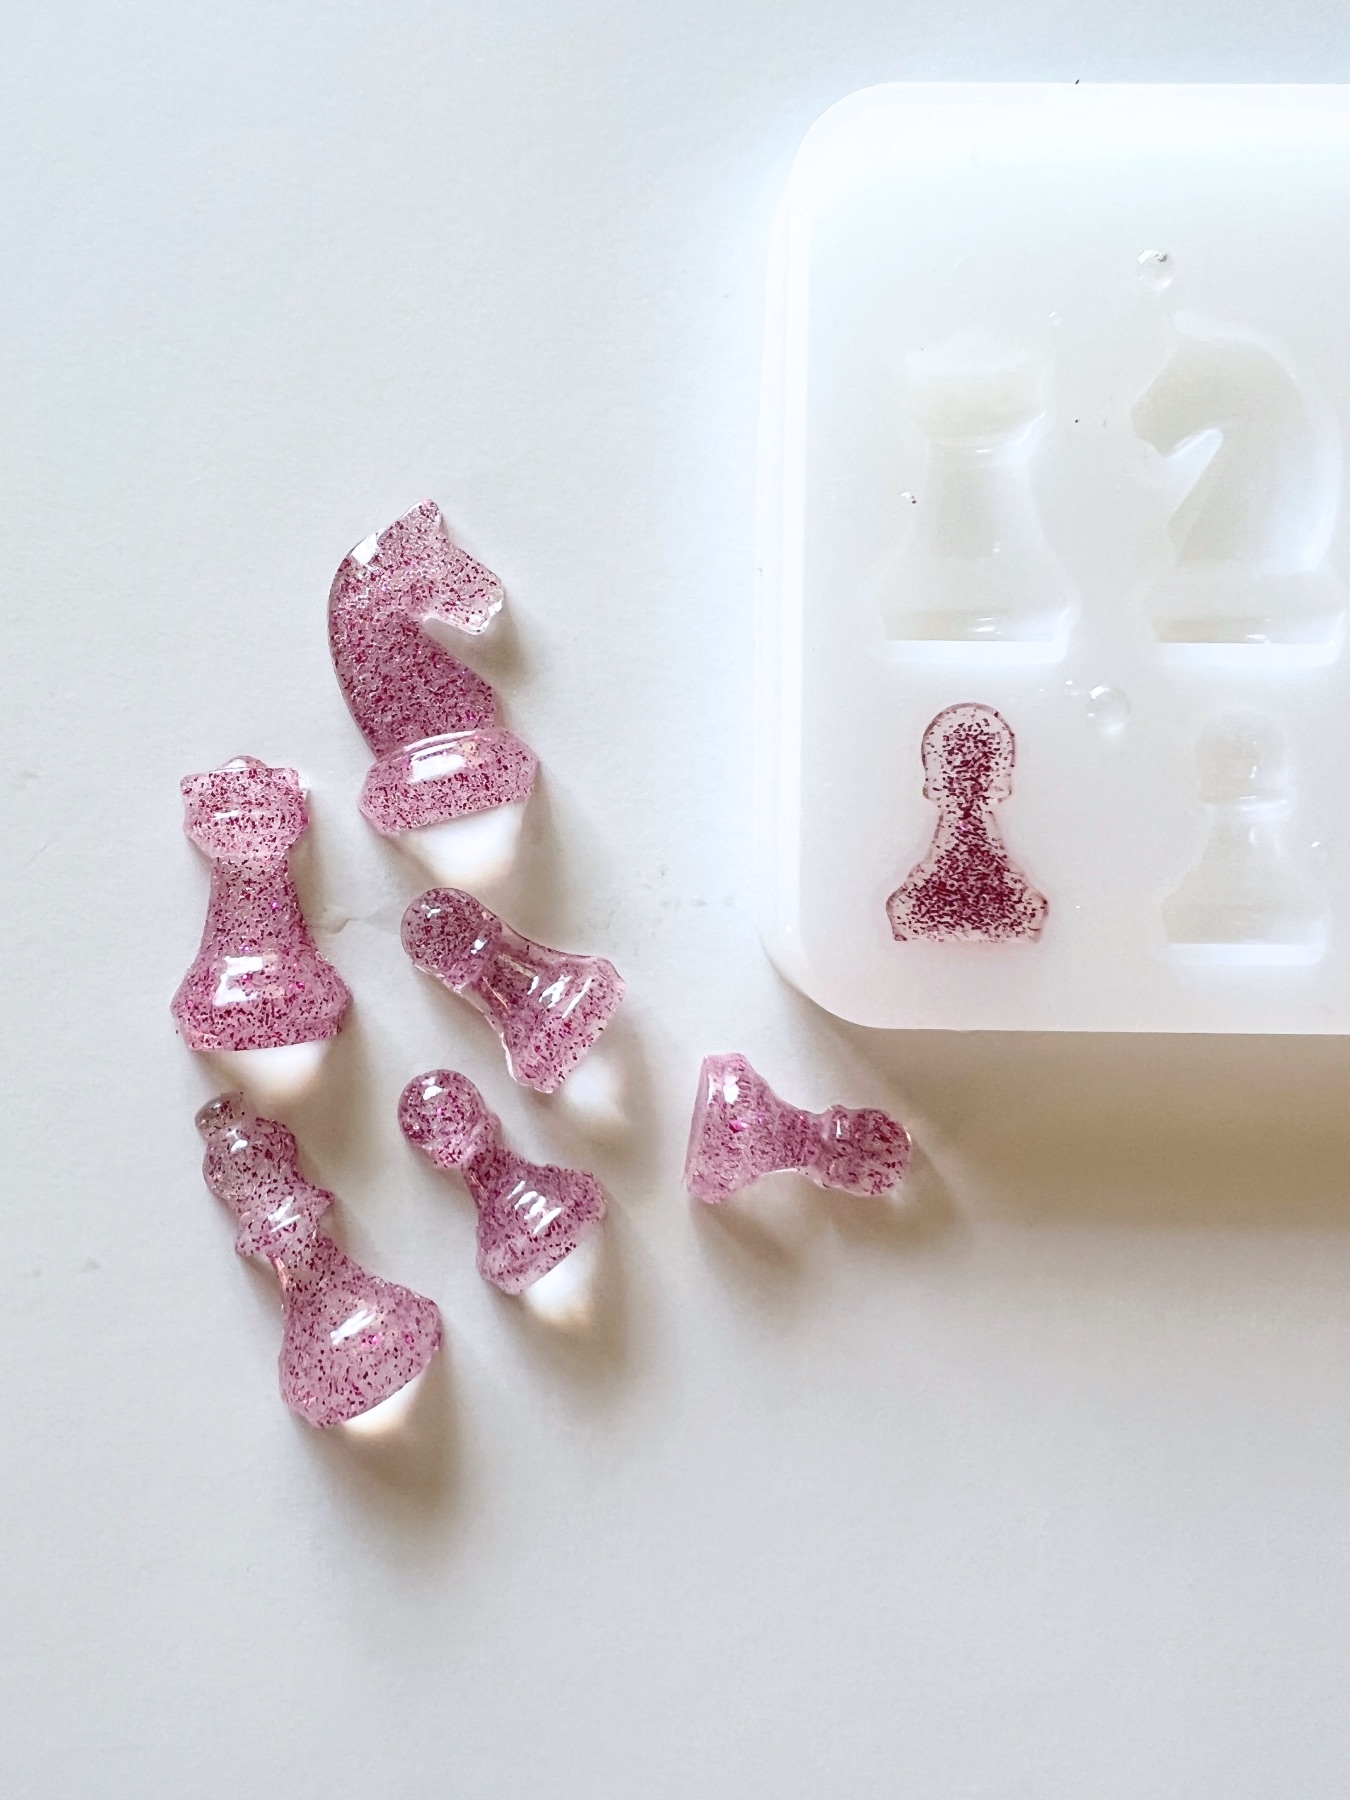
How to Make 3D Chess Pieces
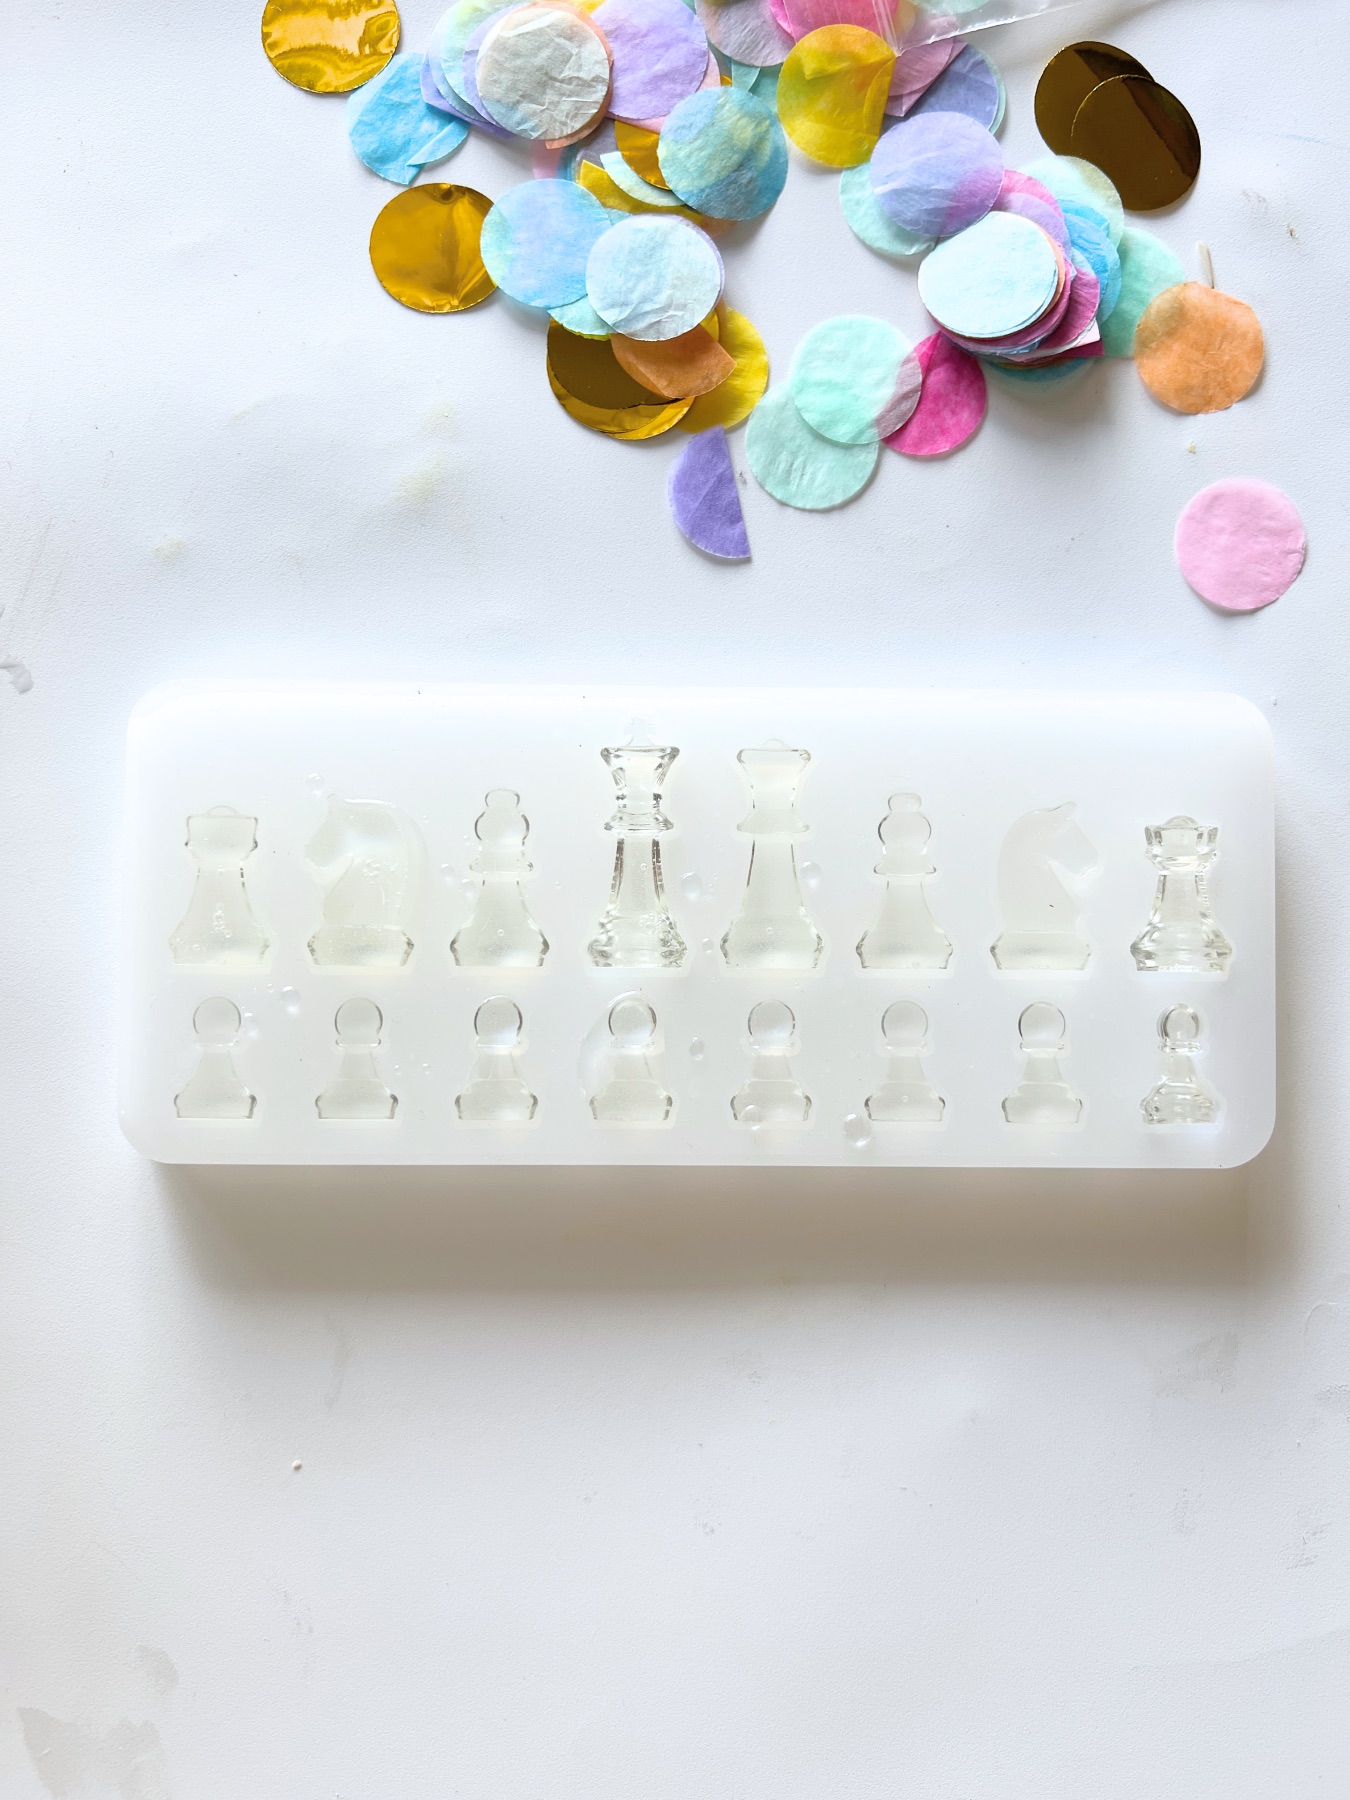
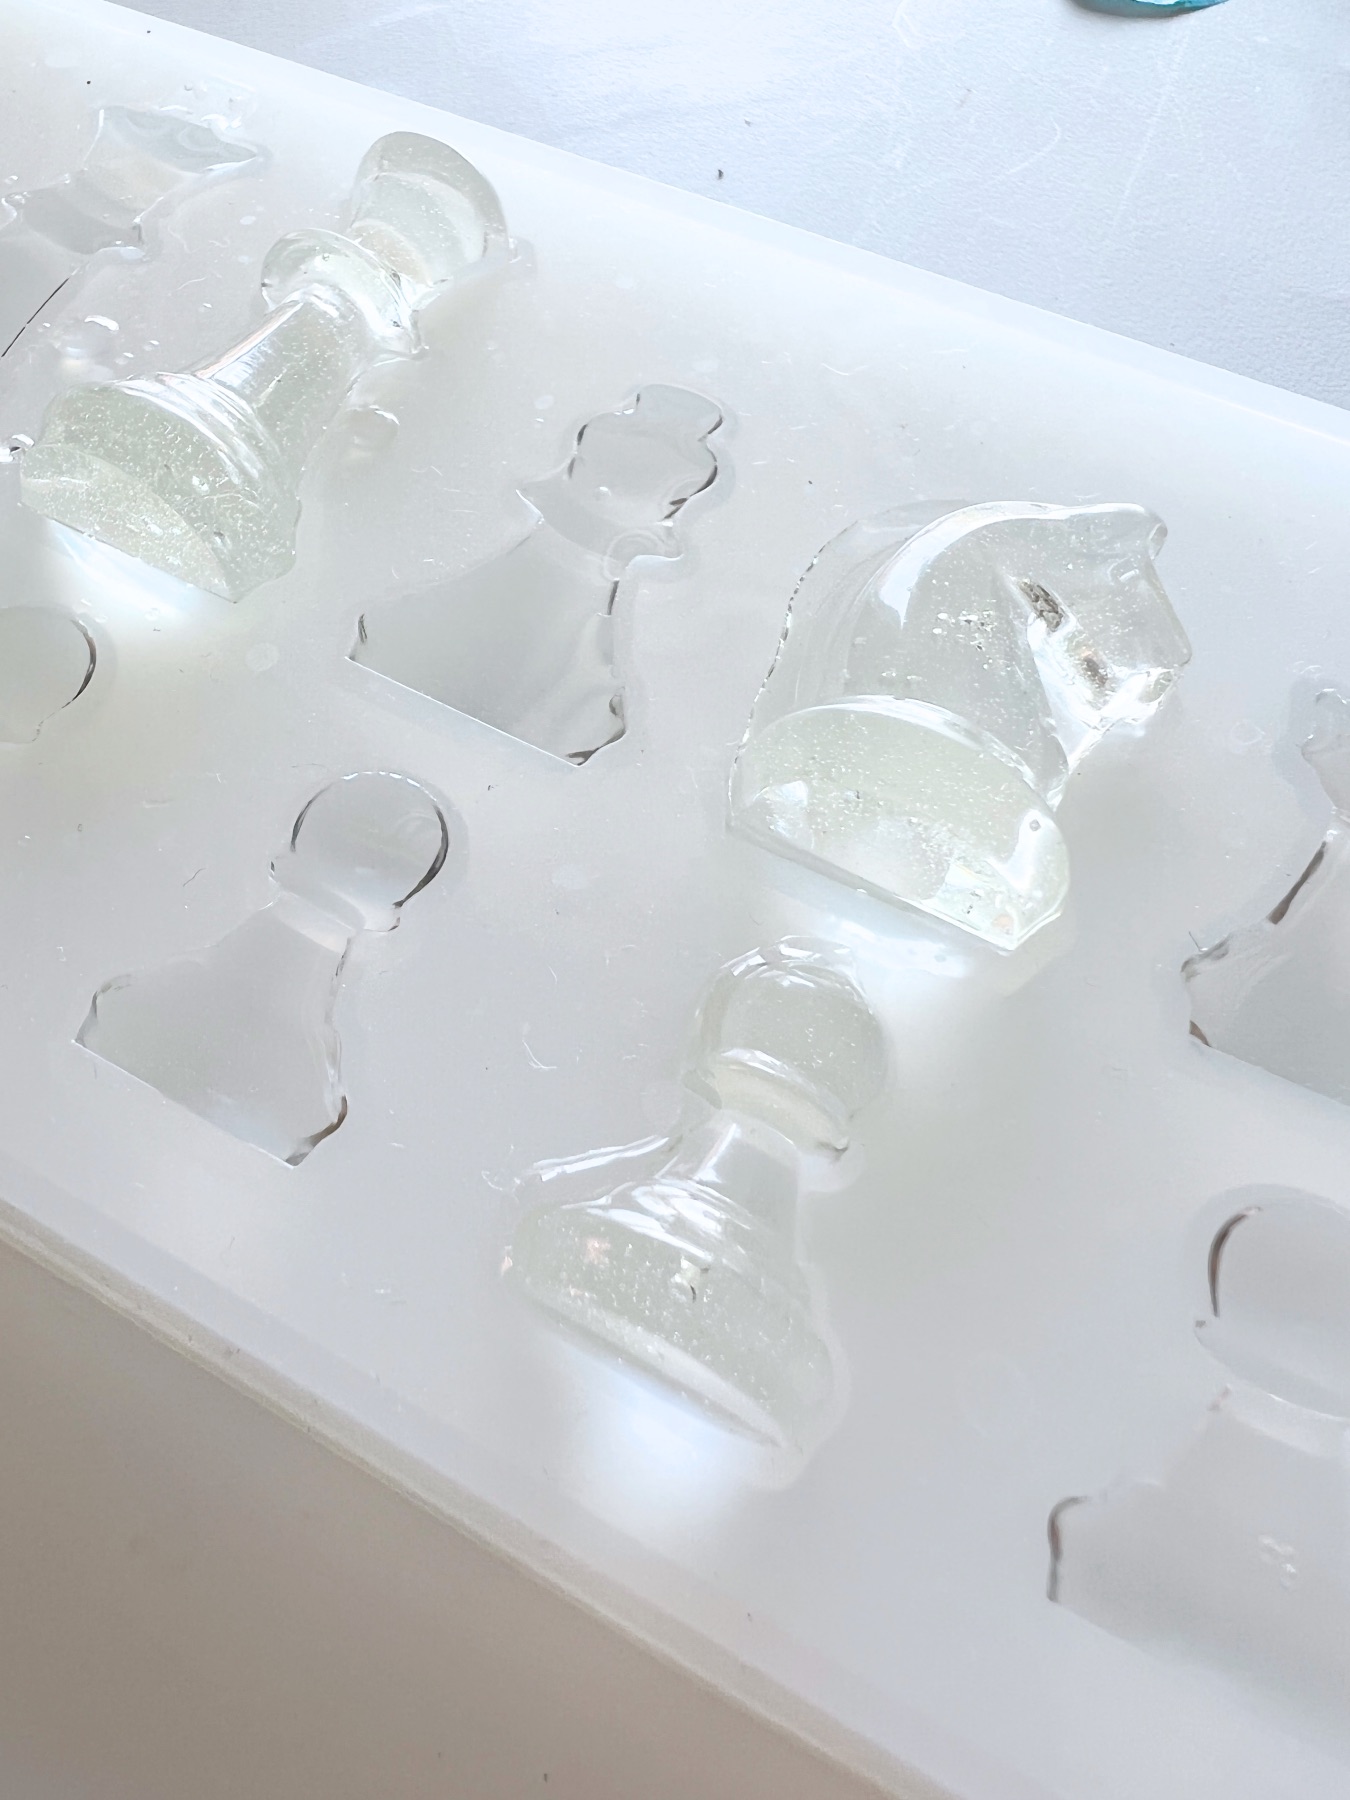
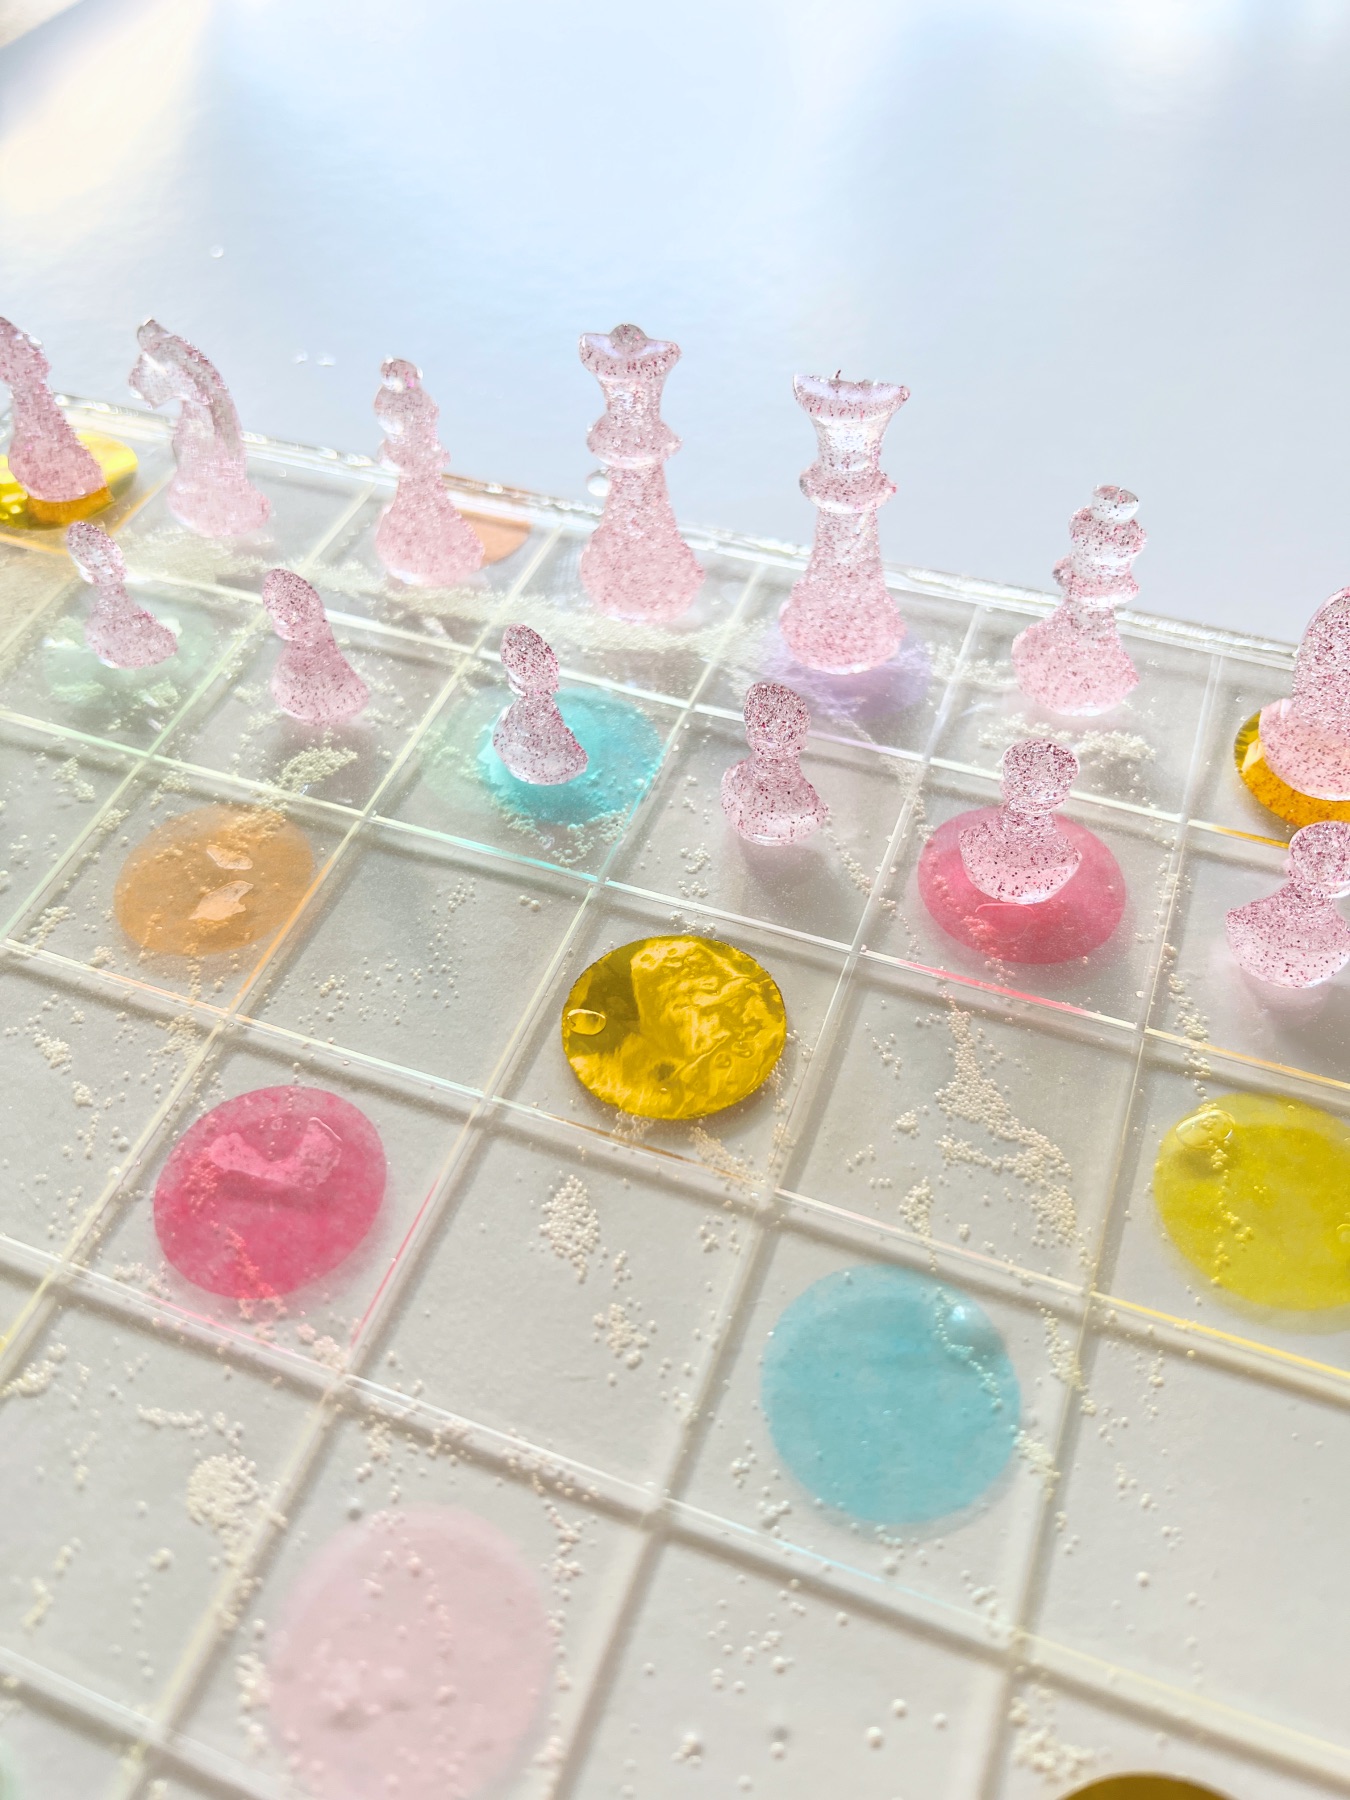
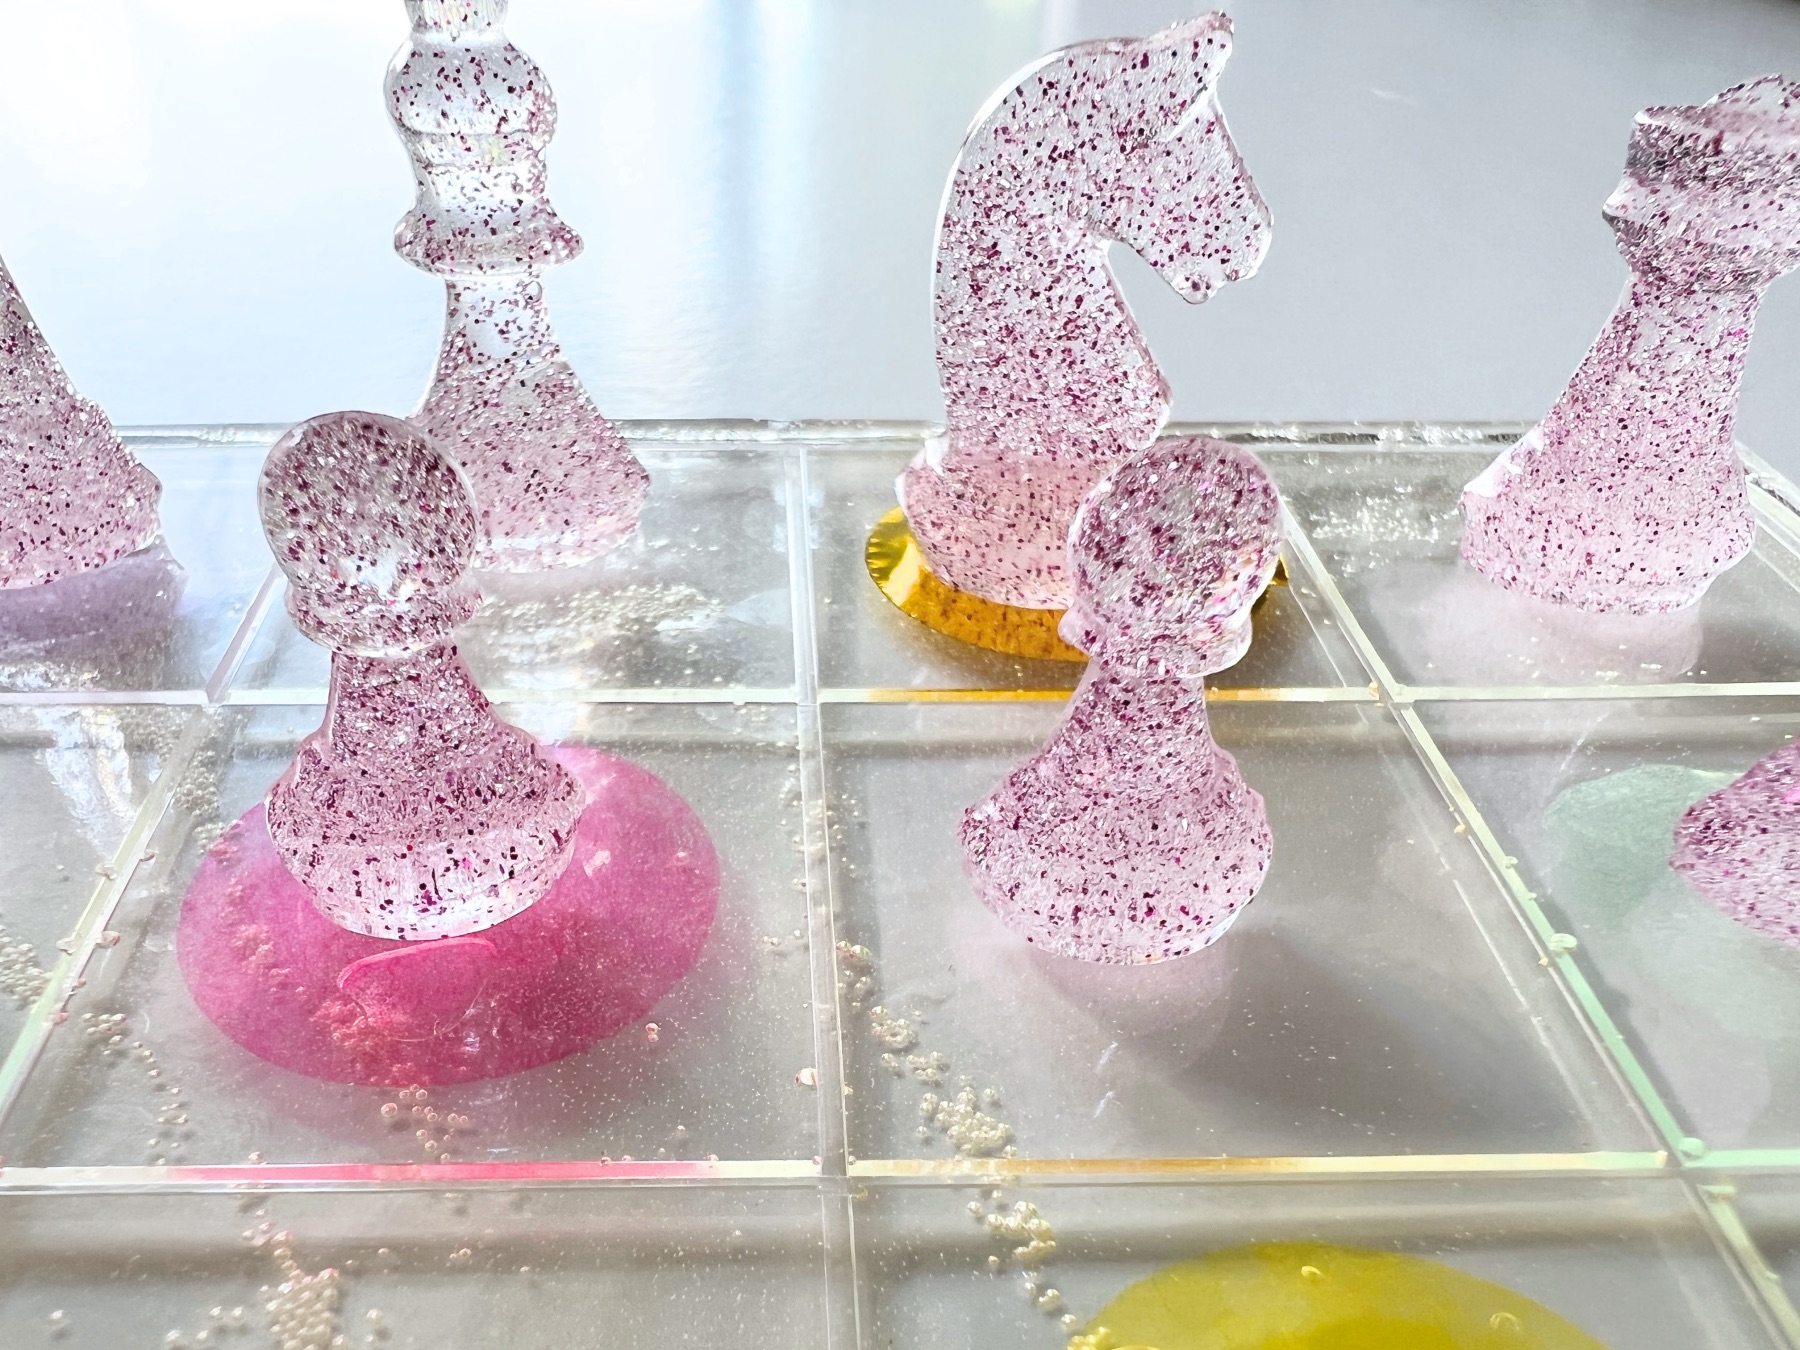
For your chess pieces, the fast way is to make 1 mold full of each color – light and dark. These pieces will have a flat backside but will stand up perfectly and be just fine to use. You can, however, make 3 dimensional pieces. All you have to do is fill the chess mold with the same color twice. Then place your dry pieces on top of your wet pieces in the mold so they hold together.
So, mix another 30mL total of resin + hardener using the same color as your first batch. Stir it completely and thoroughly for 3 minutes scraping the sides. Pour your resin into the mold again, being mindful to not overfill.
Once your mold is filled, gently place the finished pieces on top of the liquid resin. Be mindful that the direction of your horse for your knight is consistent between the liquid and finished piece.
Be careful that the edges of the pieces line up perfectly. If the weight of the chess piece on top is causing resin to pool out of the mold, use a paper towel to soak it up as best you can. If necessary, you can use a nail file or sandpaper to fix any edges later. Now allow the pieces to set again for another 24 hours. And remove the pieces from the mold.
Make a 2nd Color Set of Chess Pieces
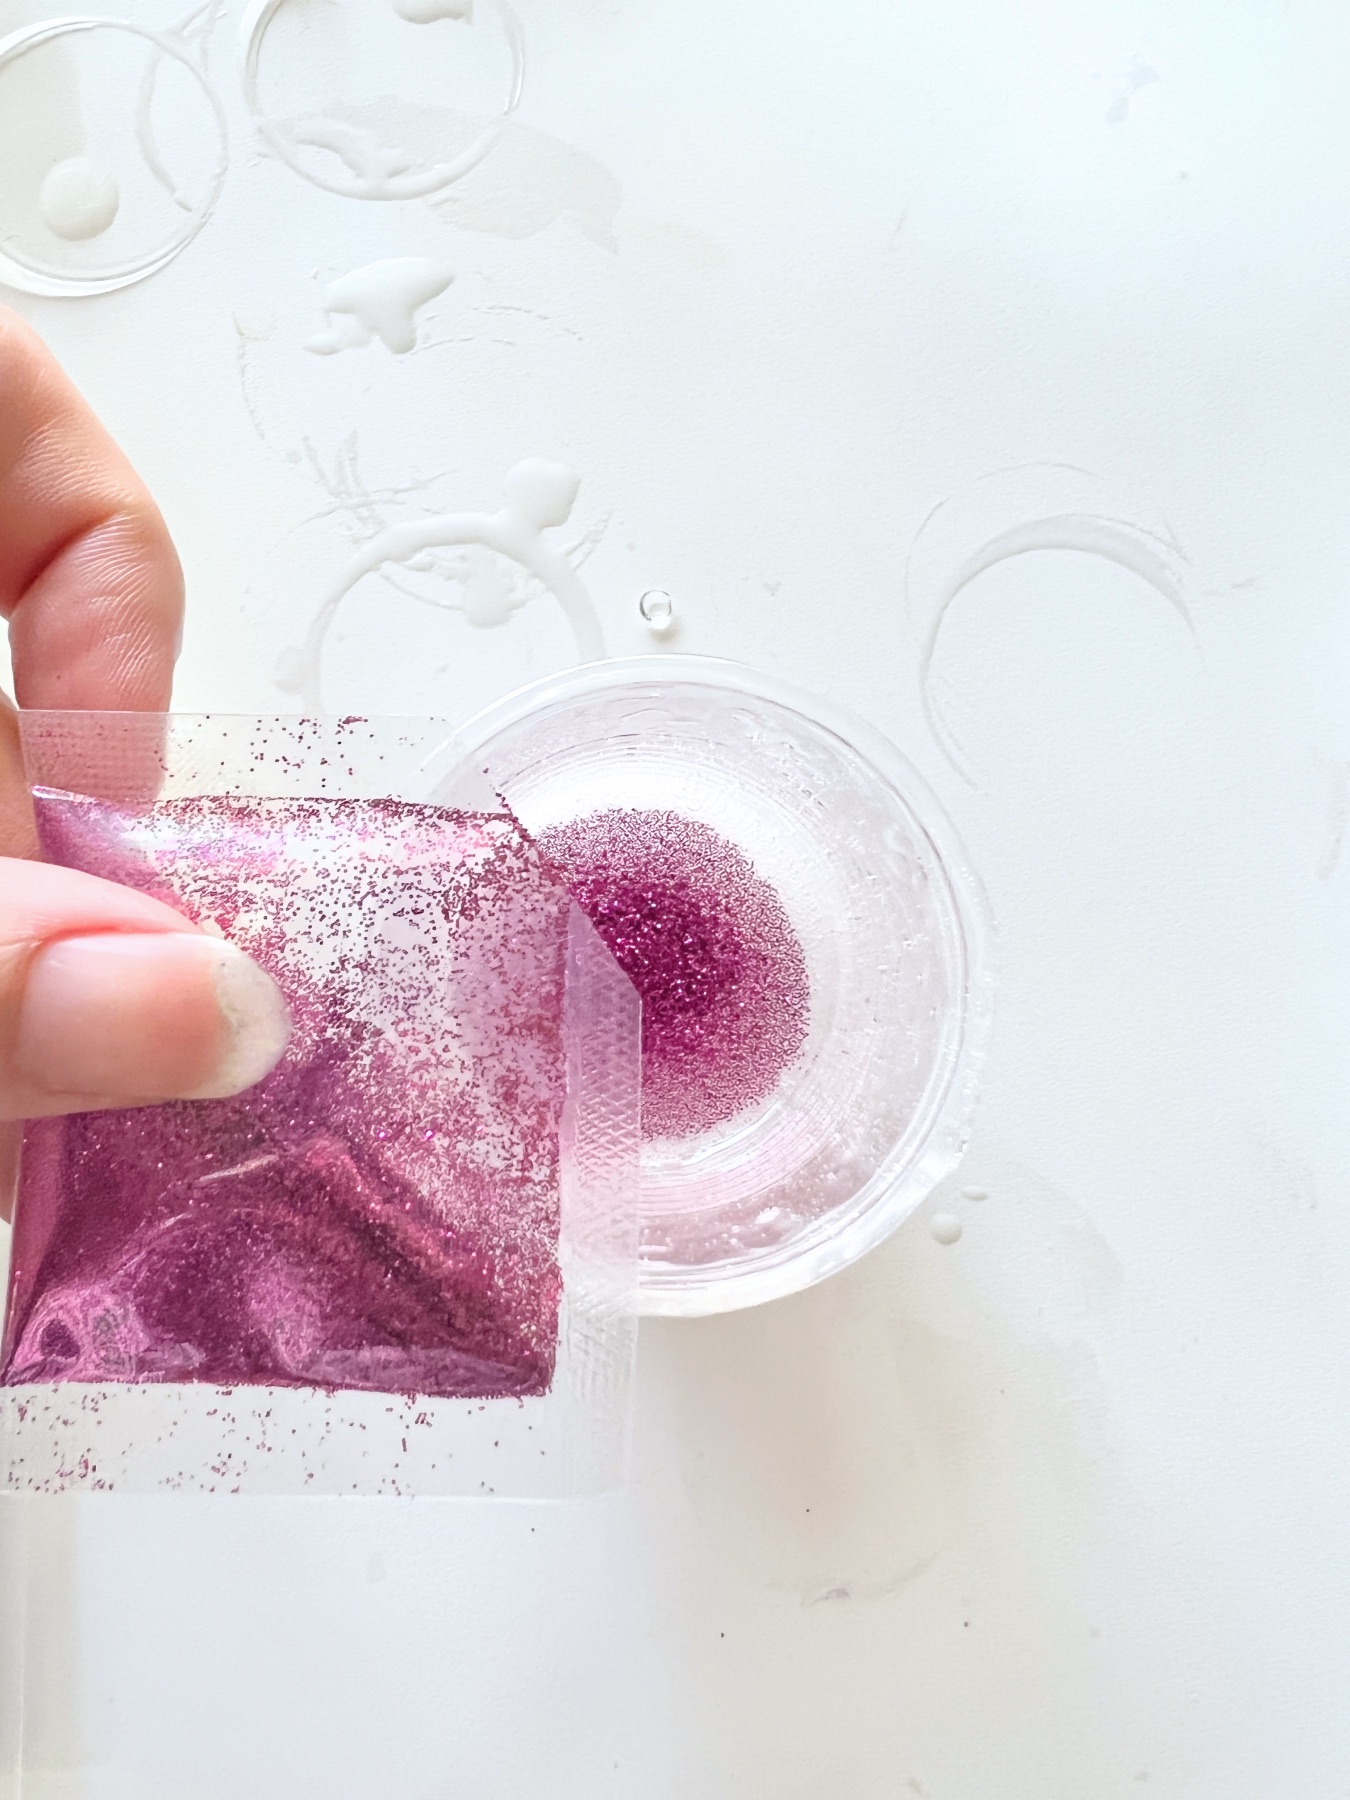
My favorite way to make a 2nd color set of chess pieces is to use glitter. It just looks so fabulous inside resin. But you could use all sorts of things – metal foil flakes, mica powder colorant or alcohol inks.
How to Color Resin
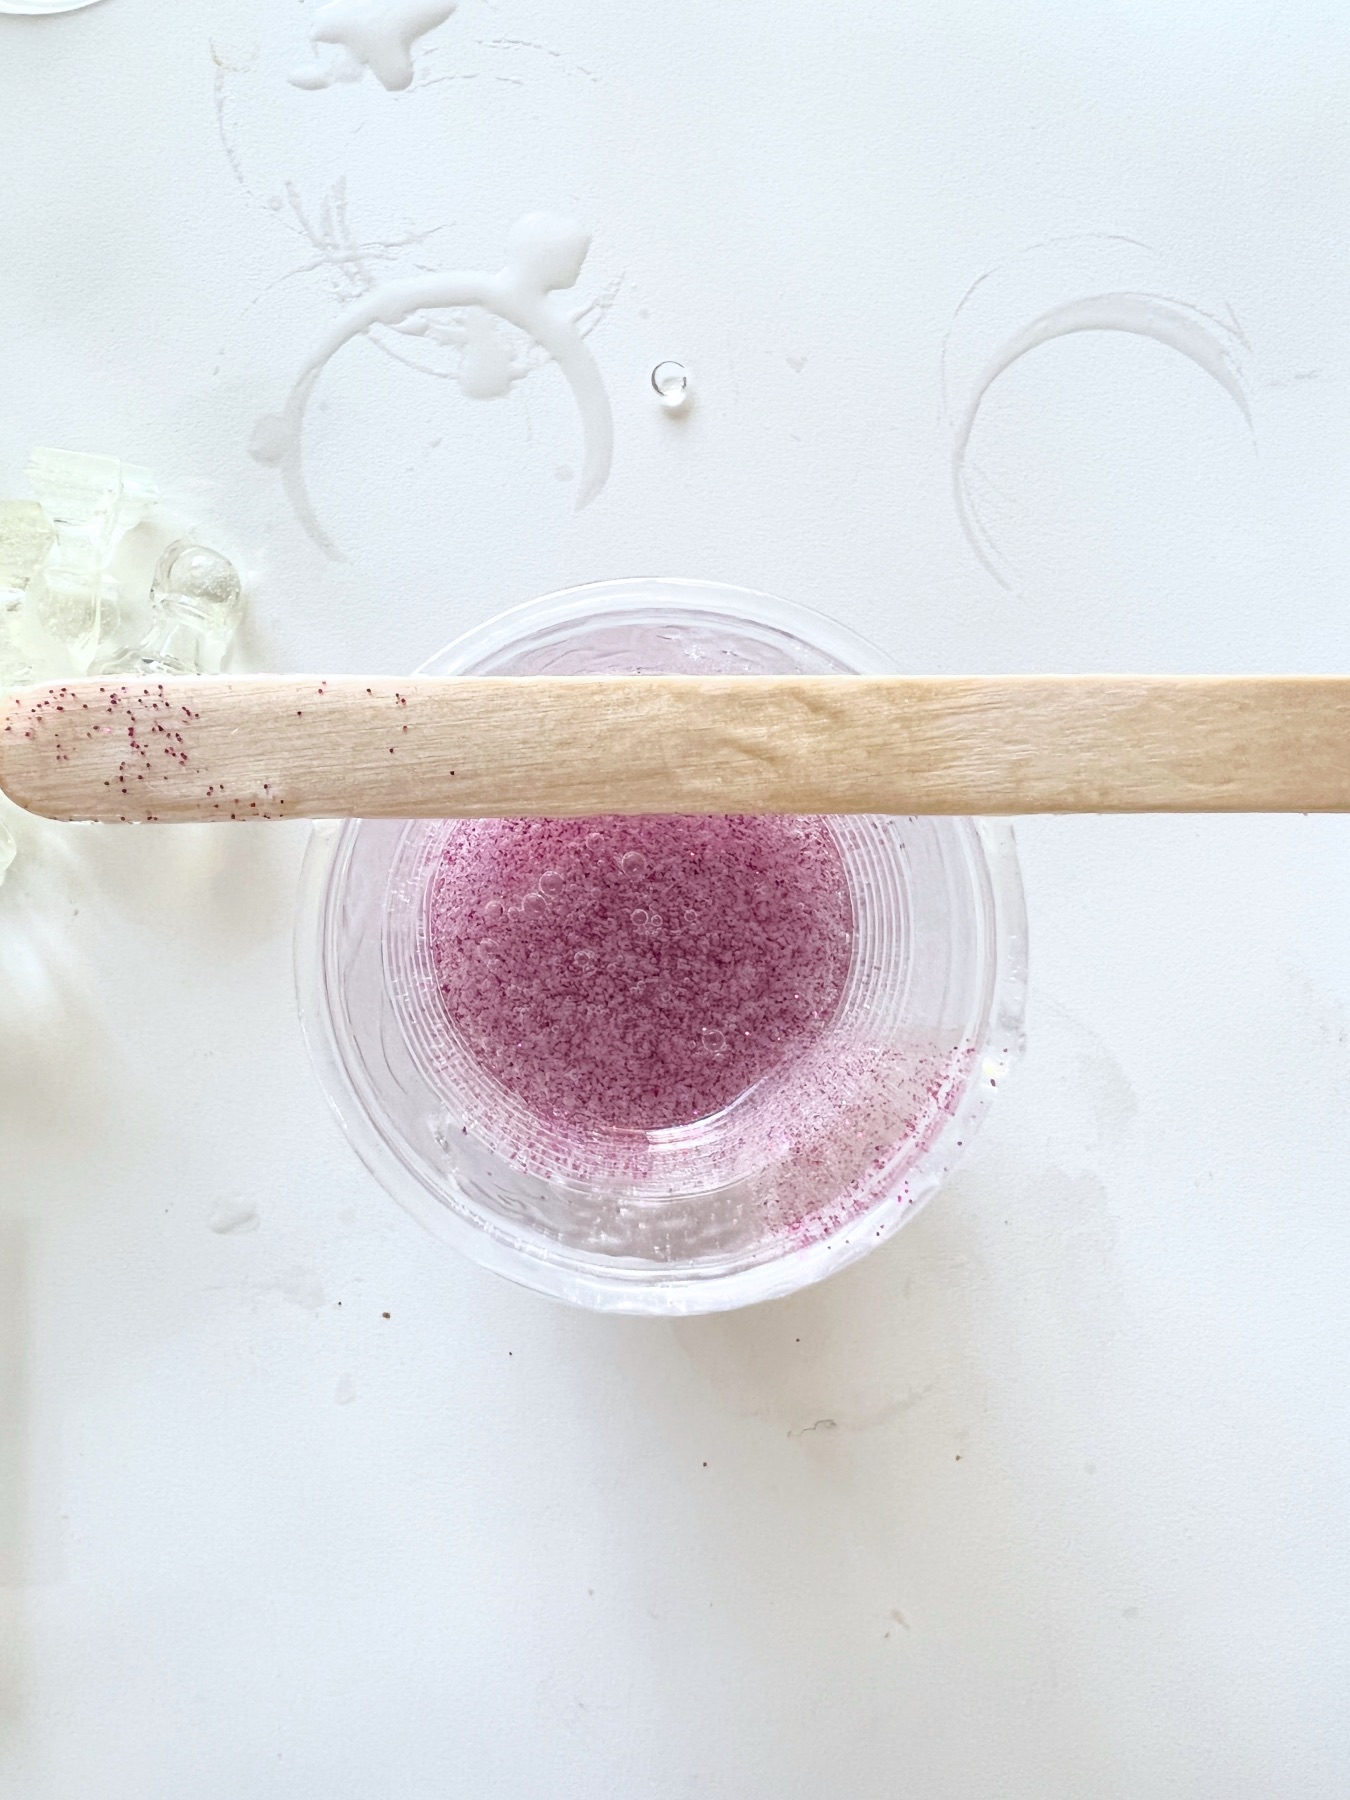
To make colored resins, pour your resin and hardener into your separate cups to measure them. Then pour them into 1 cup together. Once the resin and hardener are added to the same cup, add the colorant and begin to stir for 3 minutes.
There’s no set amount to how much colorant you use – you can add glitter, mica, or ink until your desired color is reached. So as you blend in your color, you are welcome to add more until you get the color you are looking for. You can even add multiple colors or add mica and glitter! Get creative.
Pour the Resin
Then pour the resin into the mold again. If you are making both sets of chess pieces 3 dimensional, you will make 4 molds of chess pieces total. This will span across 4 days.
If you want to make the most gorgeous set of chess pieces, this is the best way. If you want to make the fastest chess set, so you can try out resin and get to playing chess, skip making your pieces 3 dimensional, because that alone will save you 2 days time!
How to Make the Chess Board
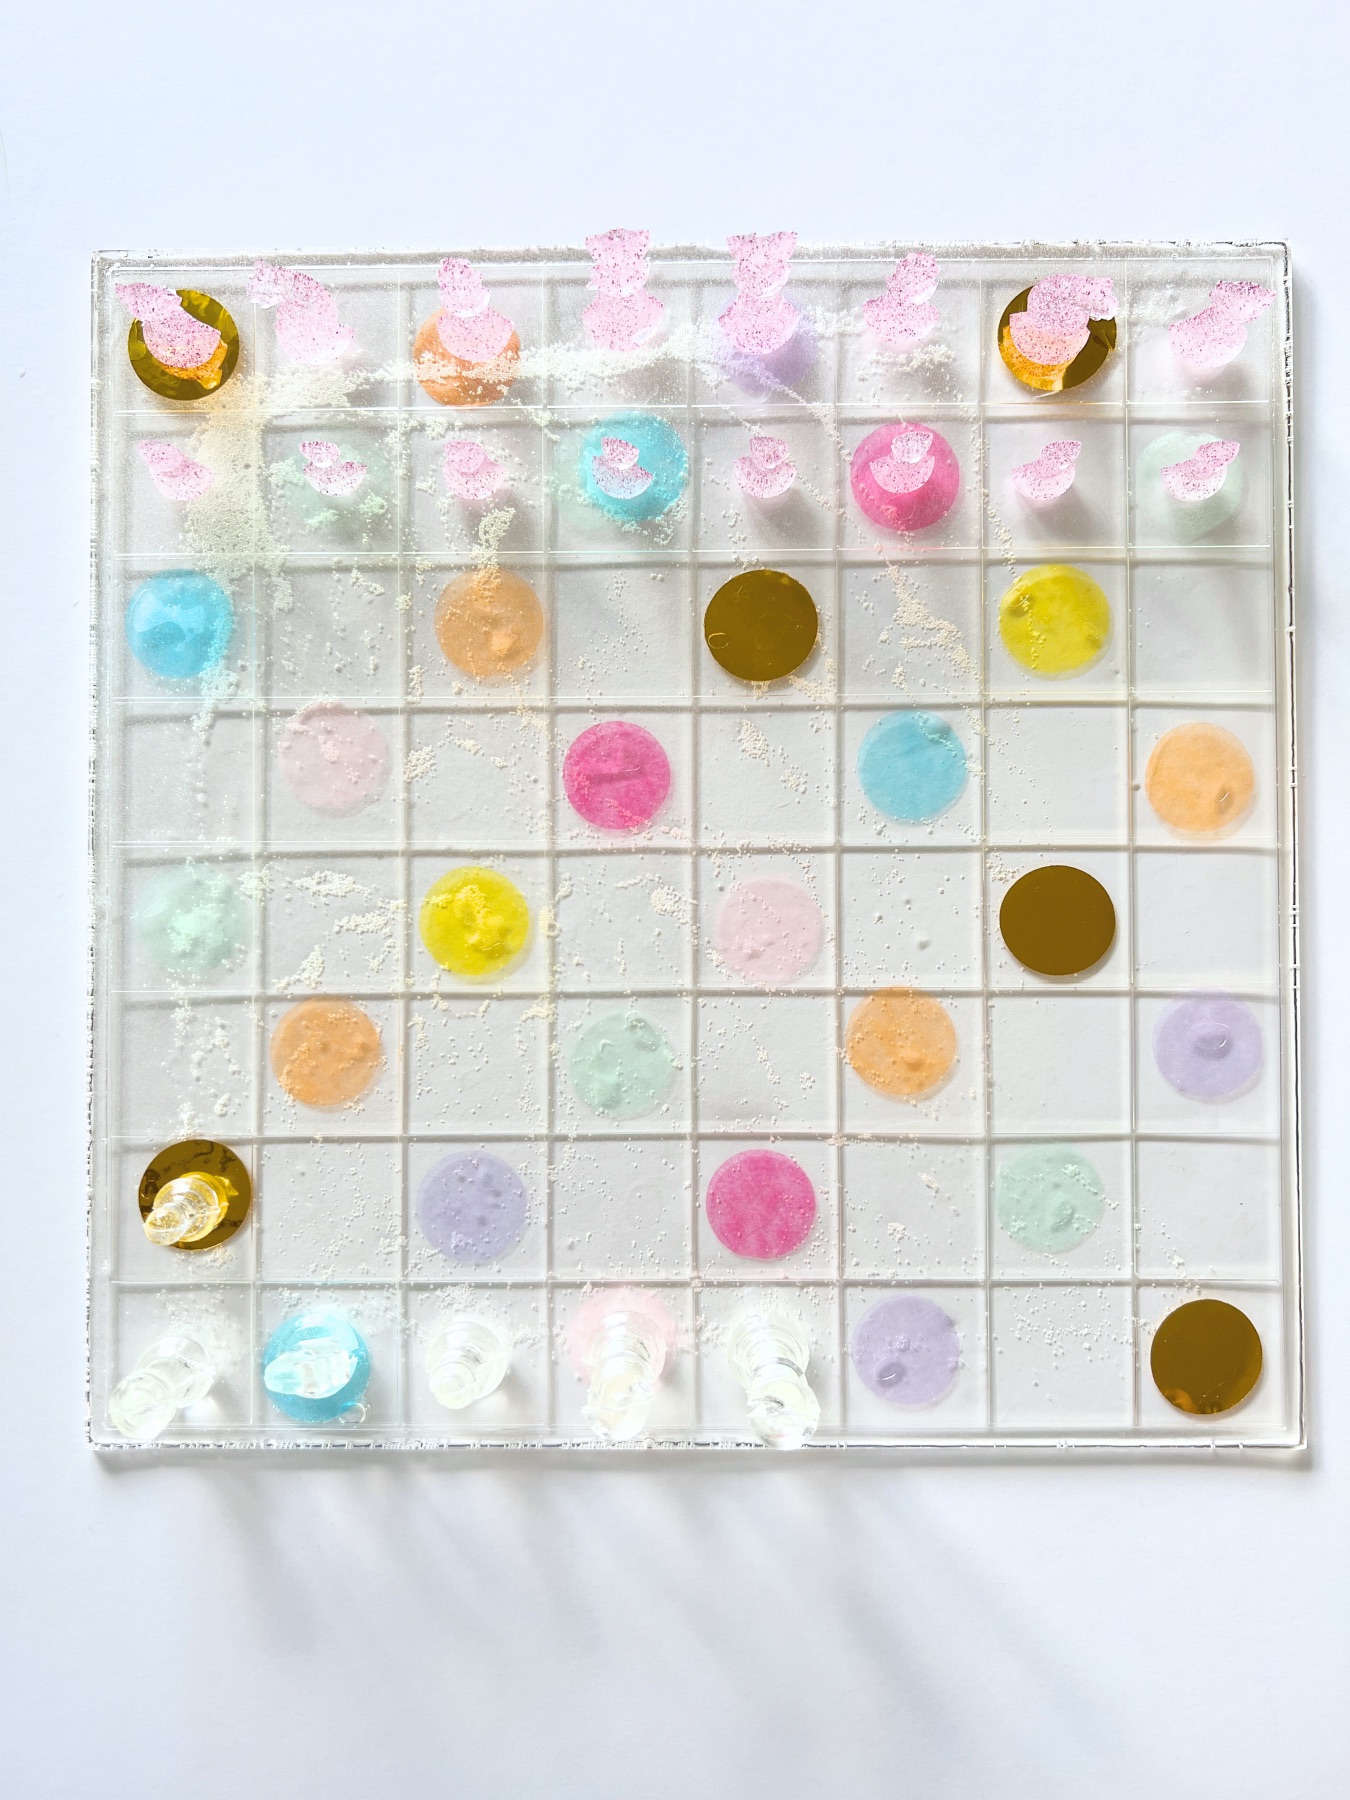
Once your chess pieces are done, it’s time to make your chess board. Remember, you will need a diagonal pattern of dark colors. The rest of your chess board can be light colors. The amount of resin you will use can vary, so feel free to use the remainder of your resin bottles.
The Easiest Way to Make a Chess Board
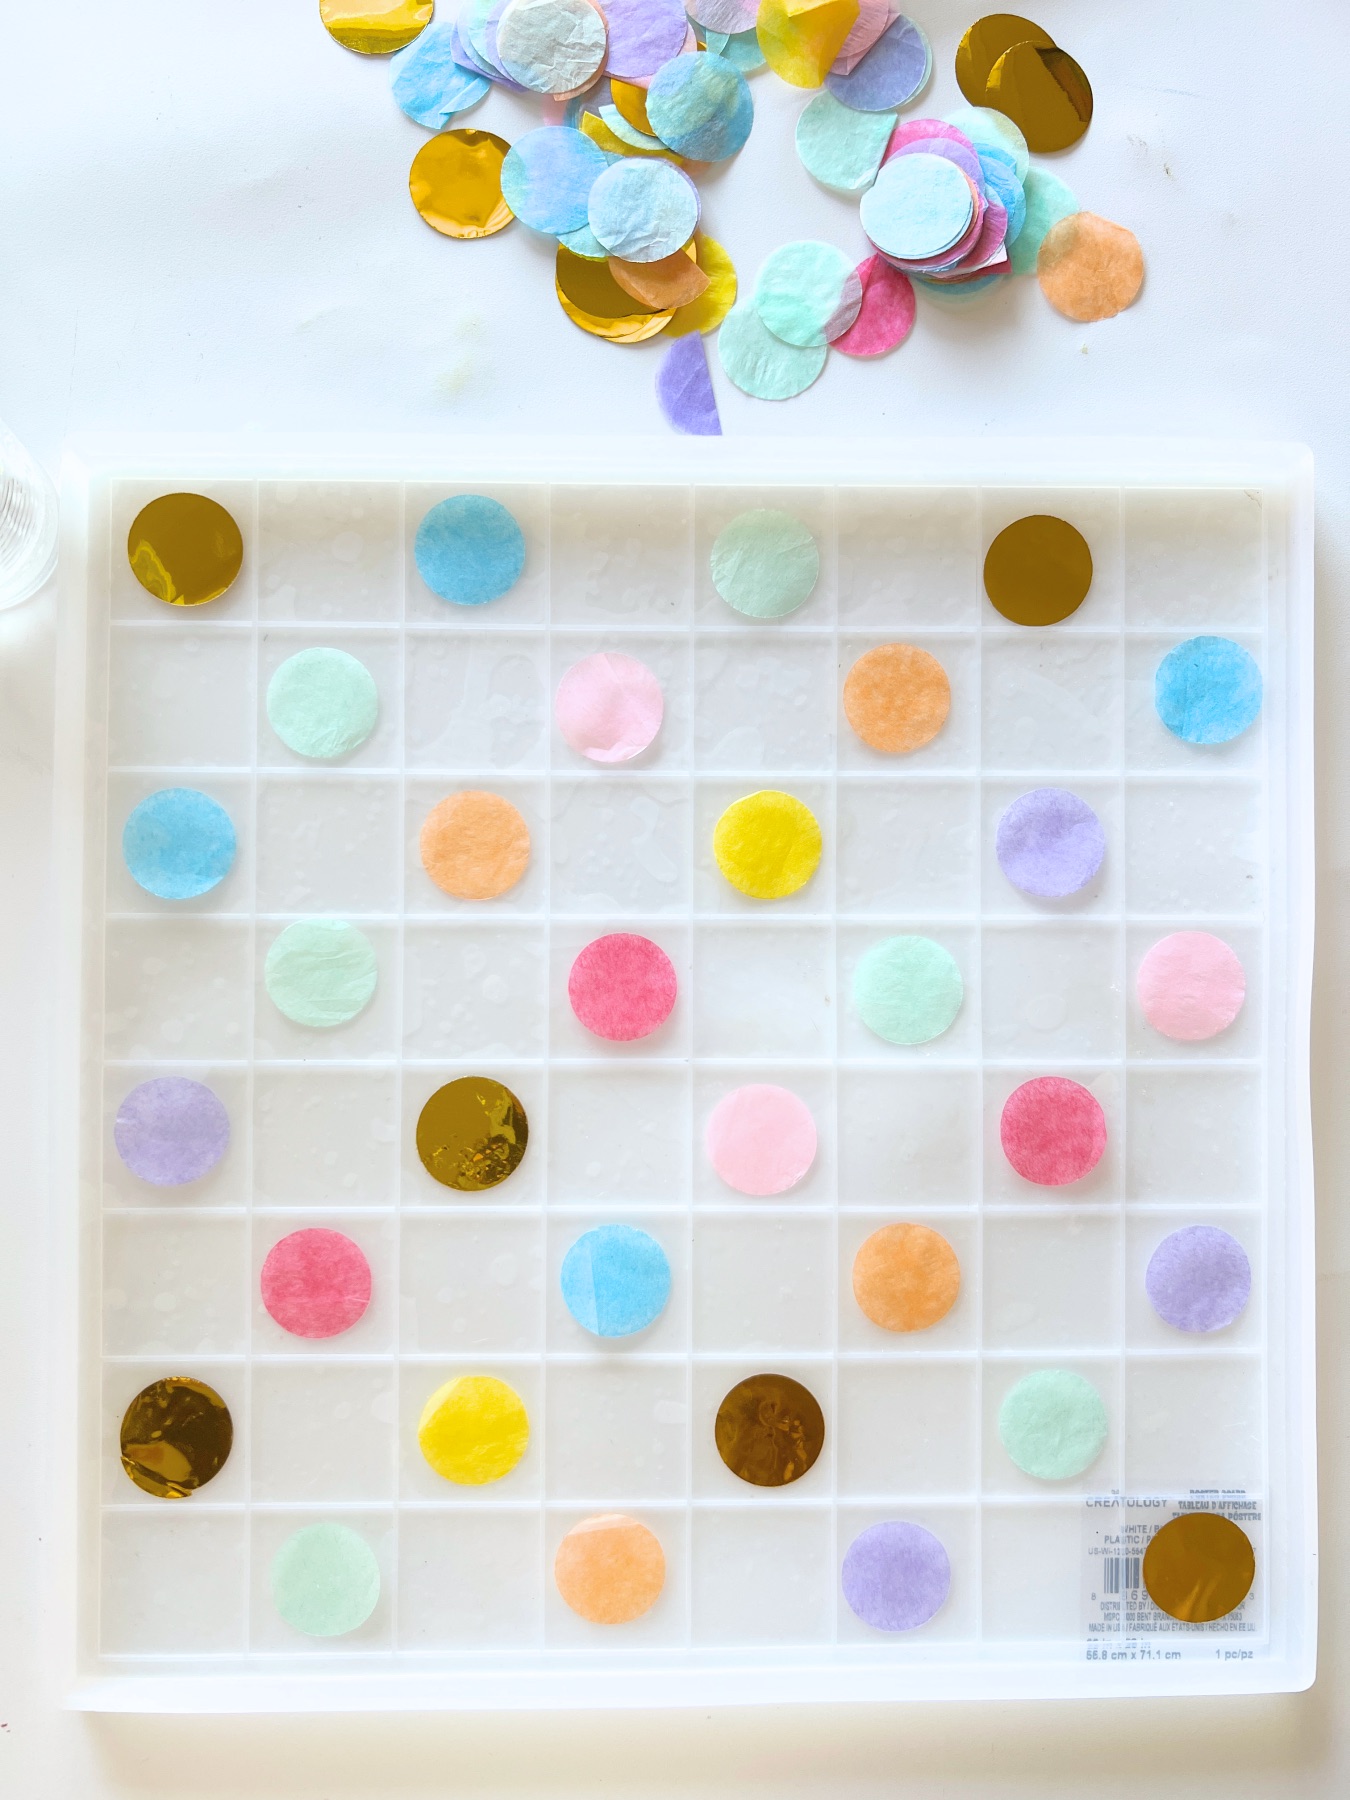
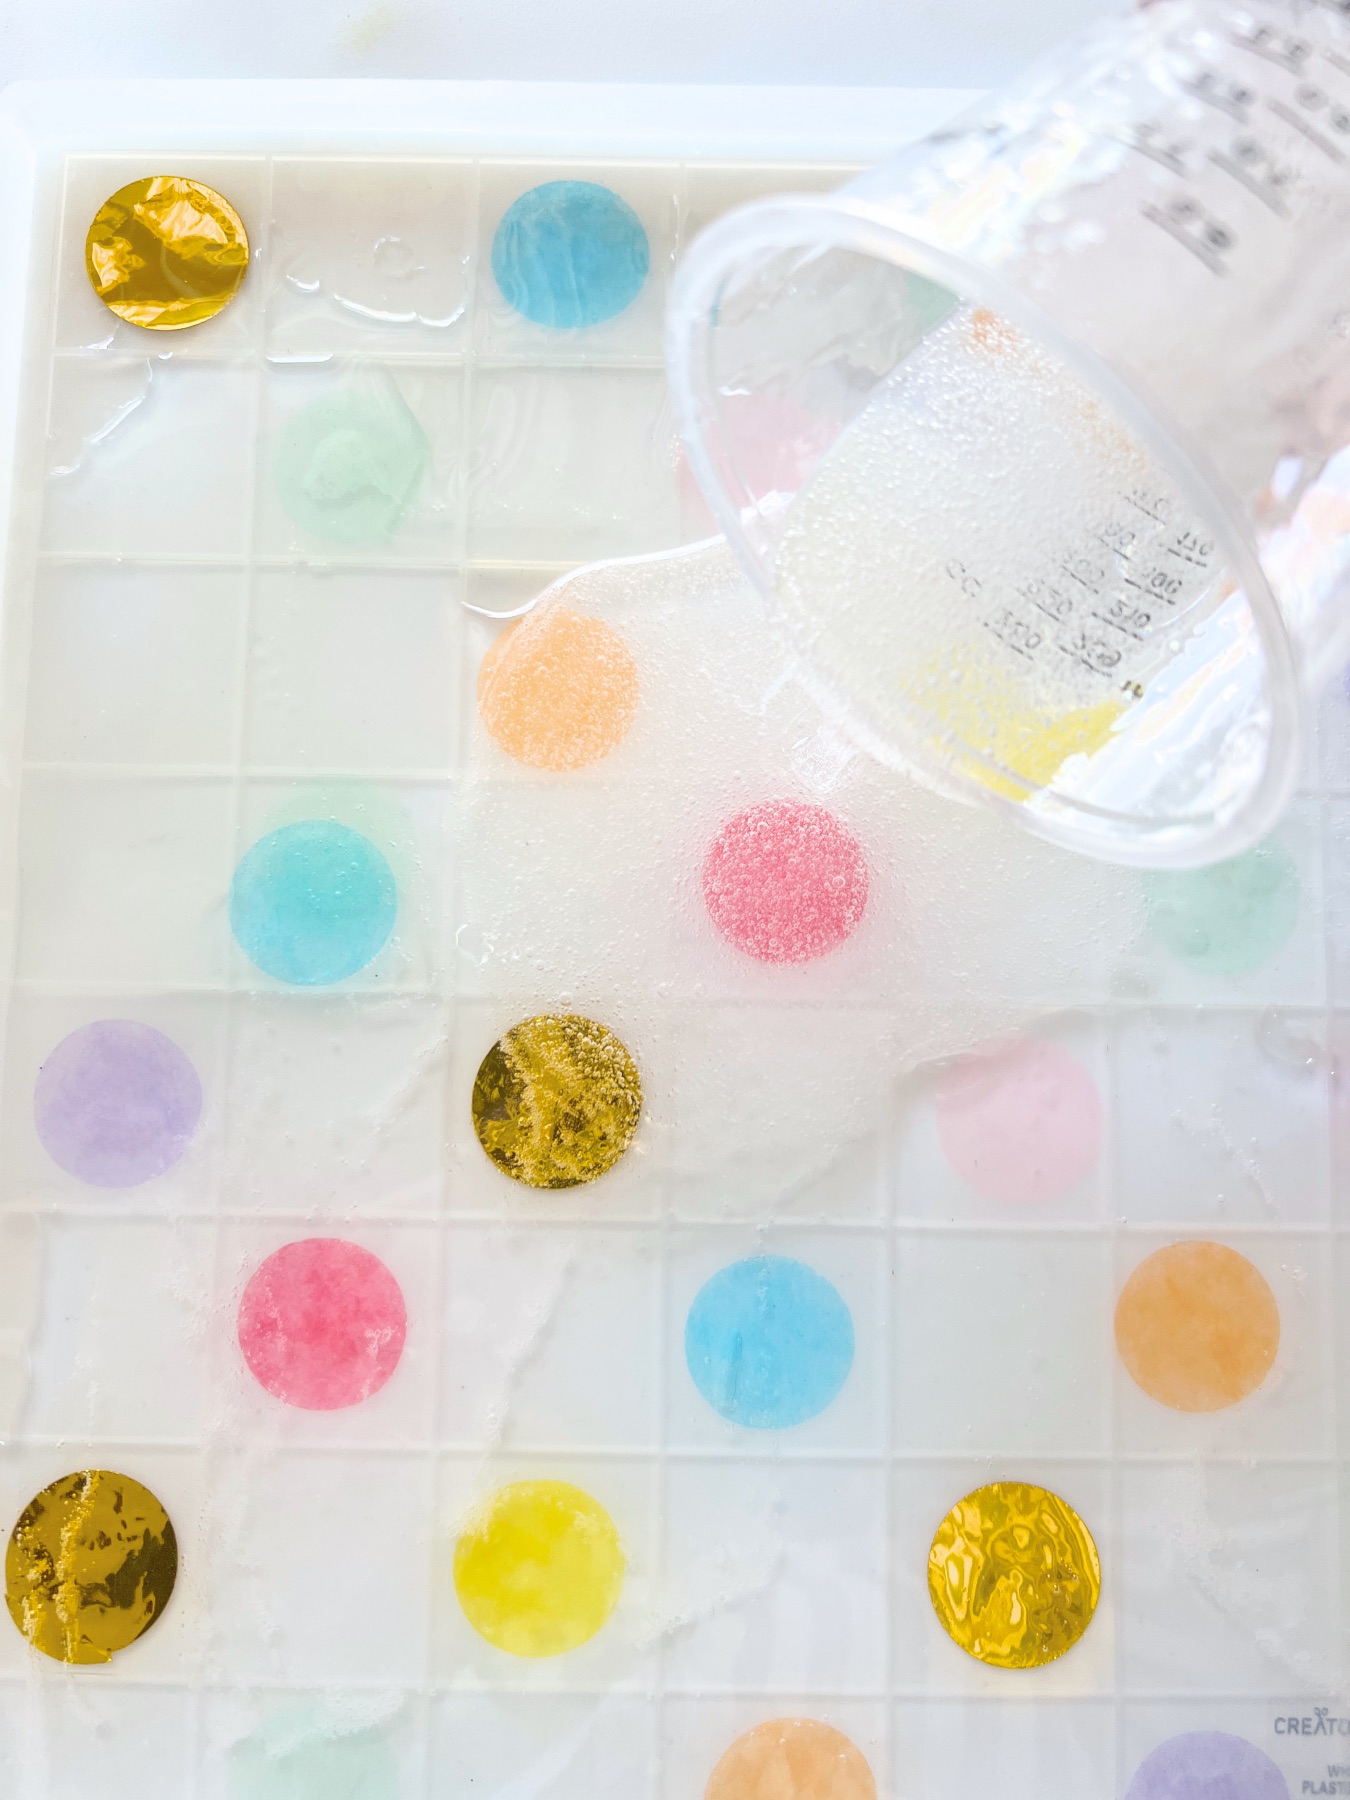
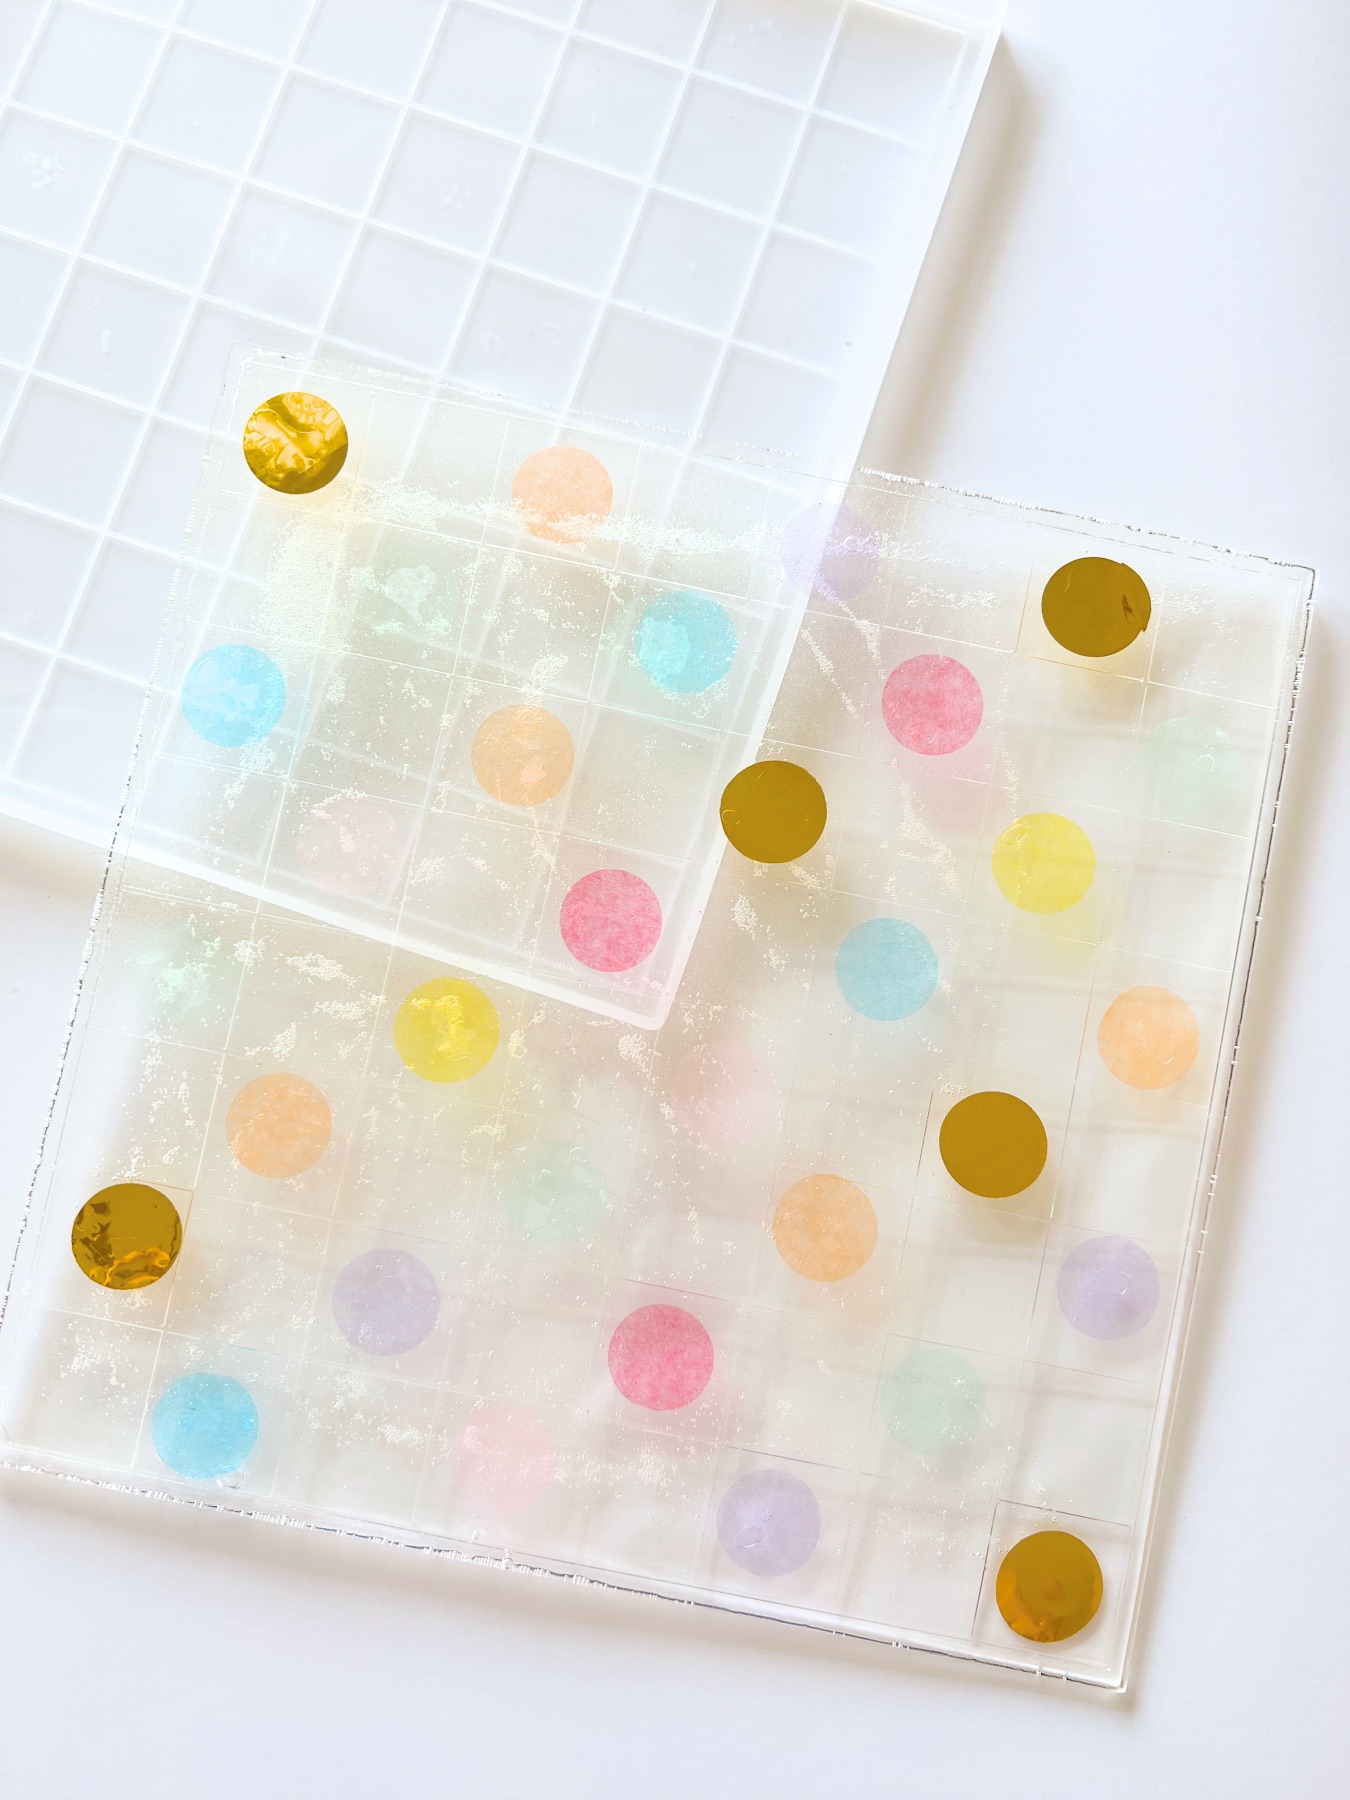
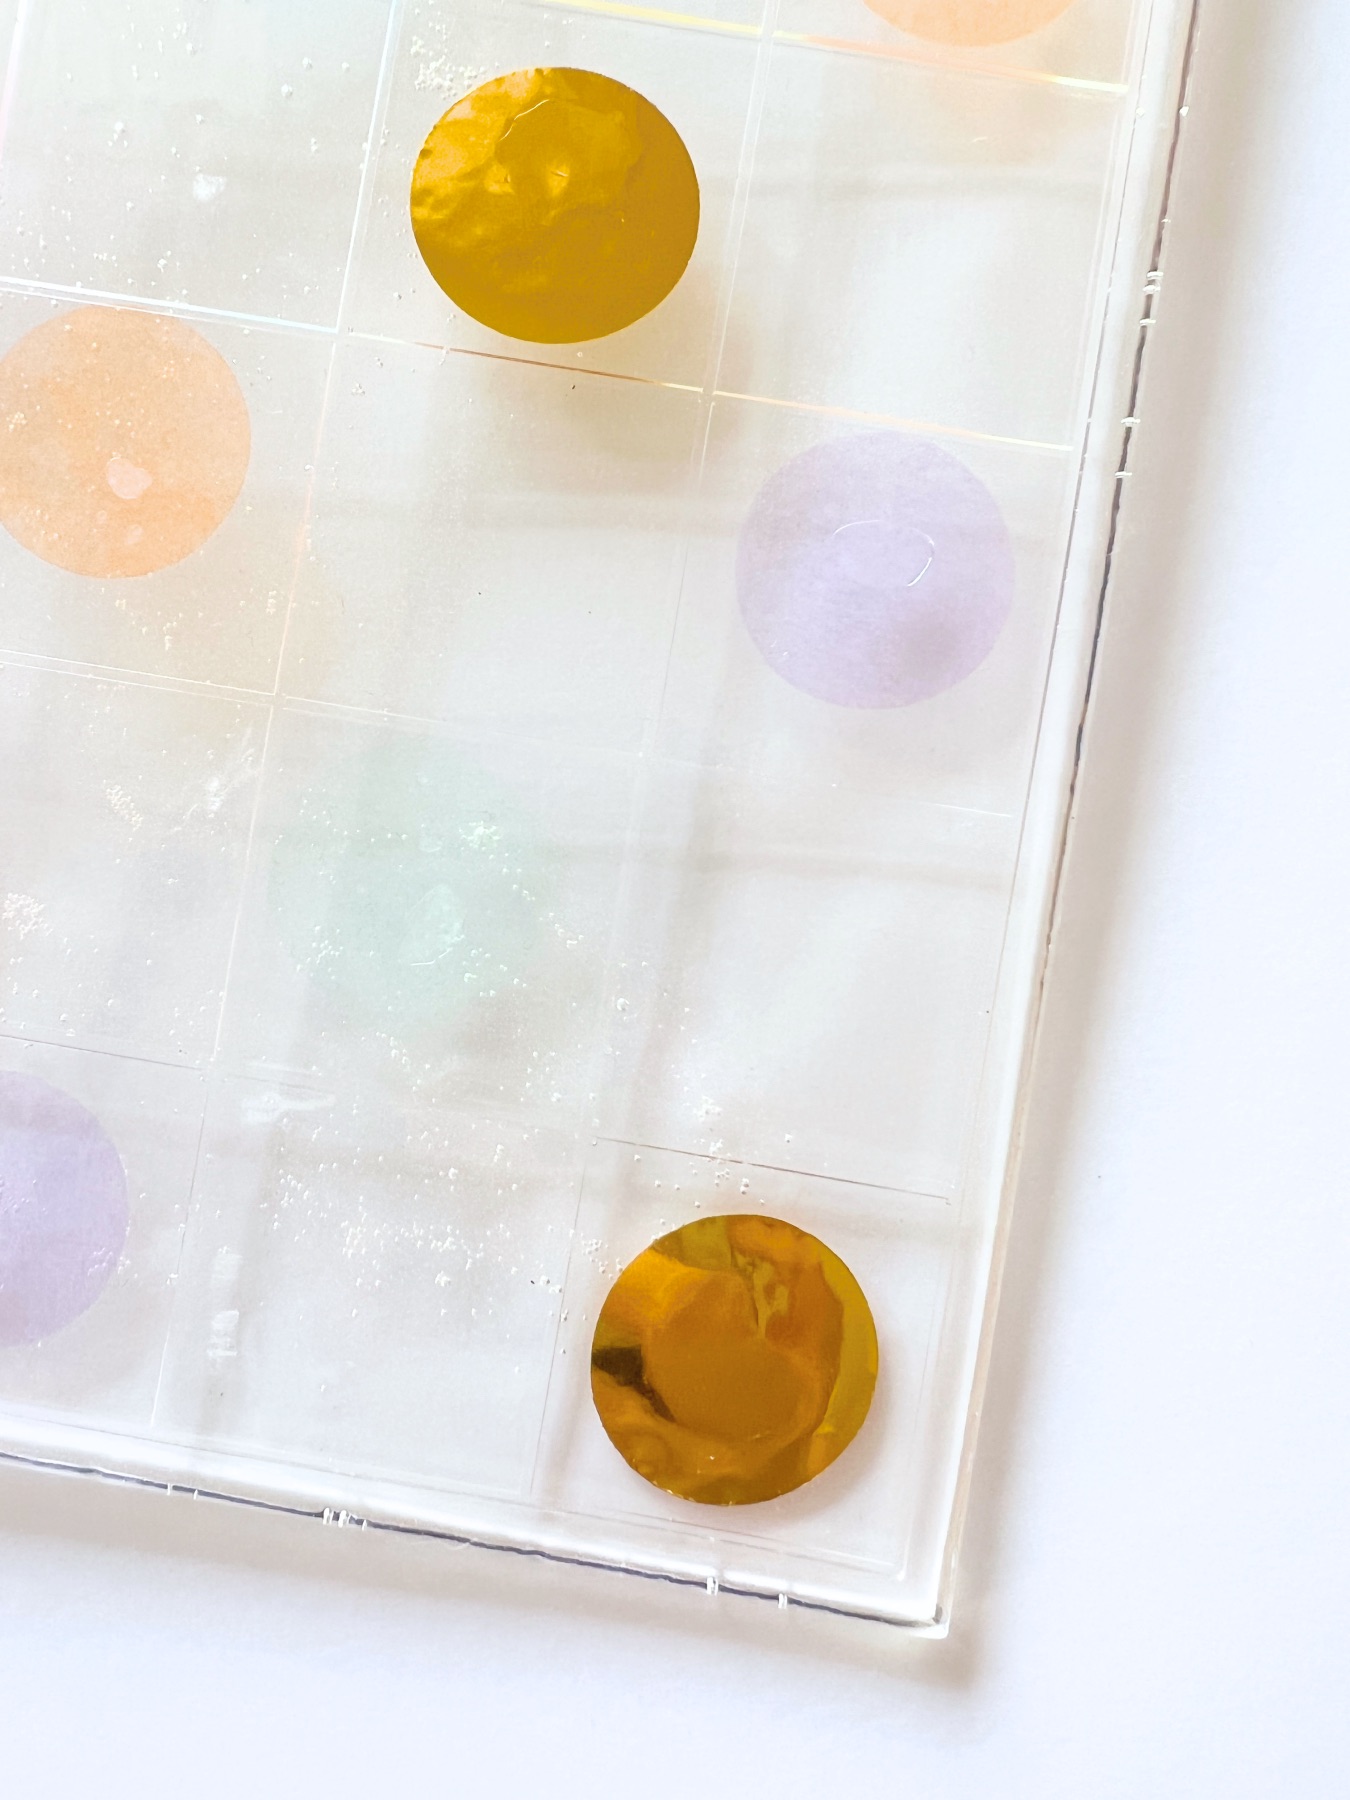
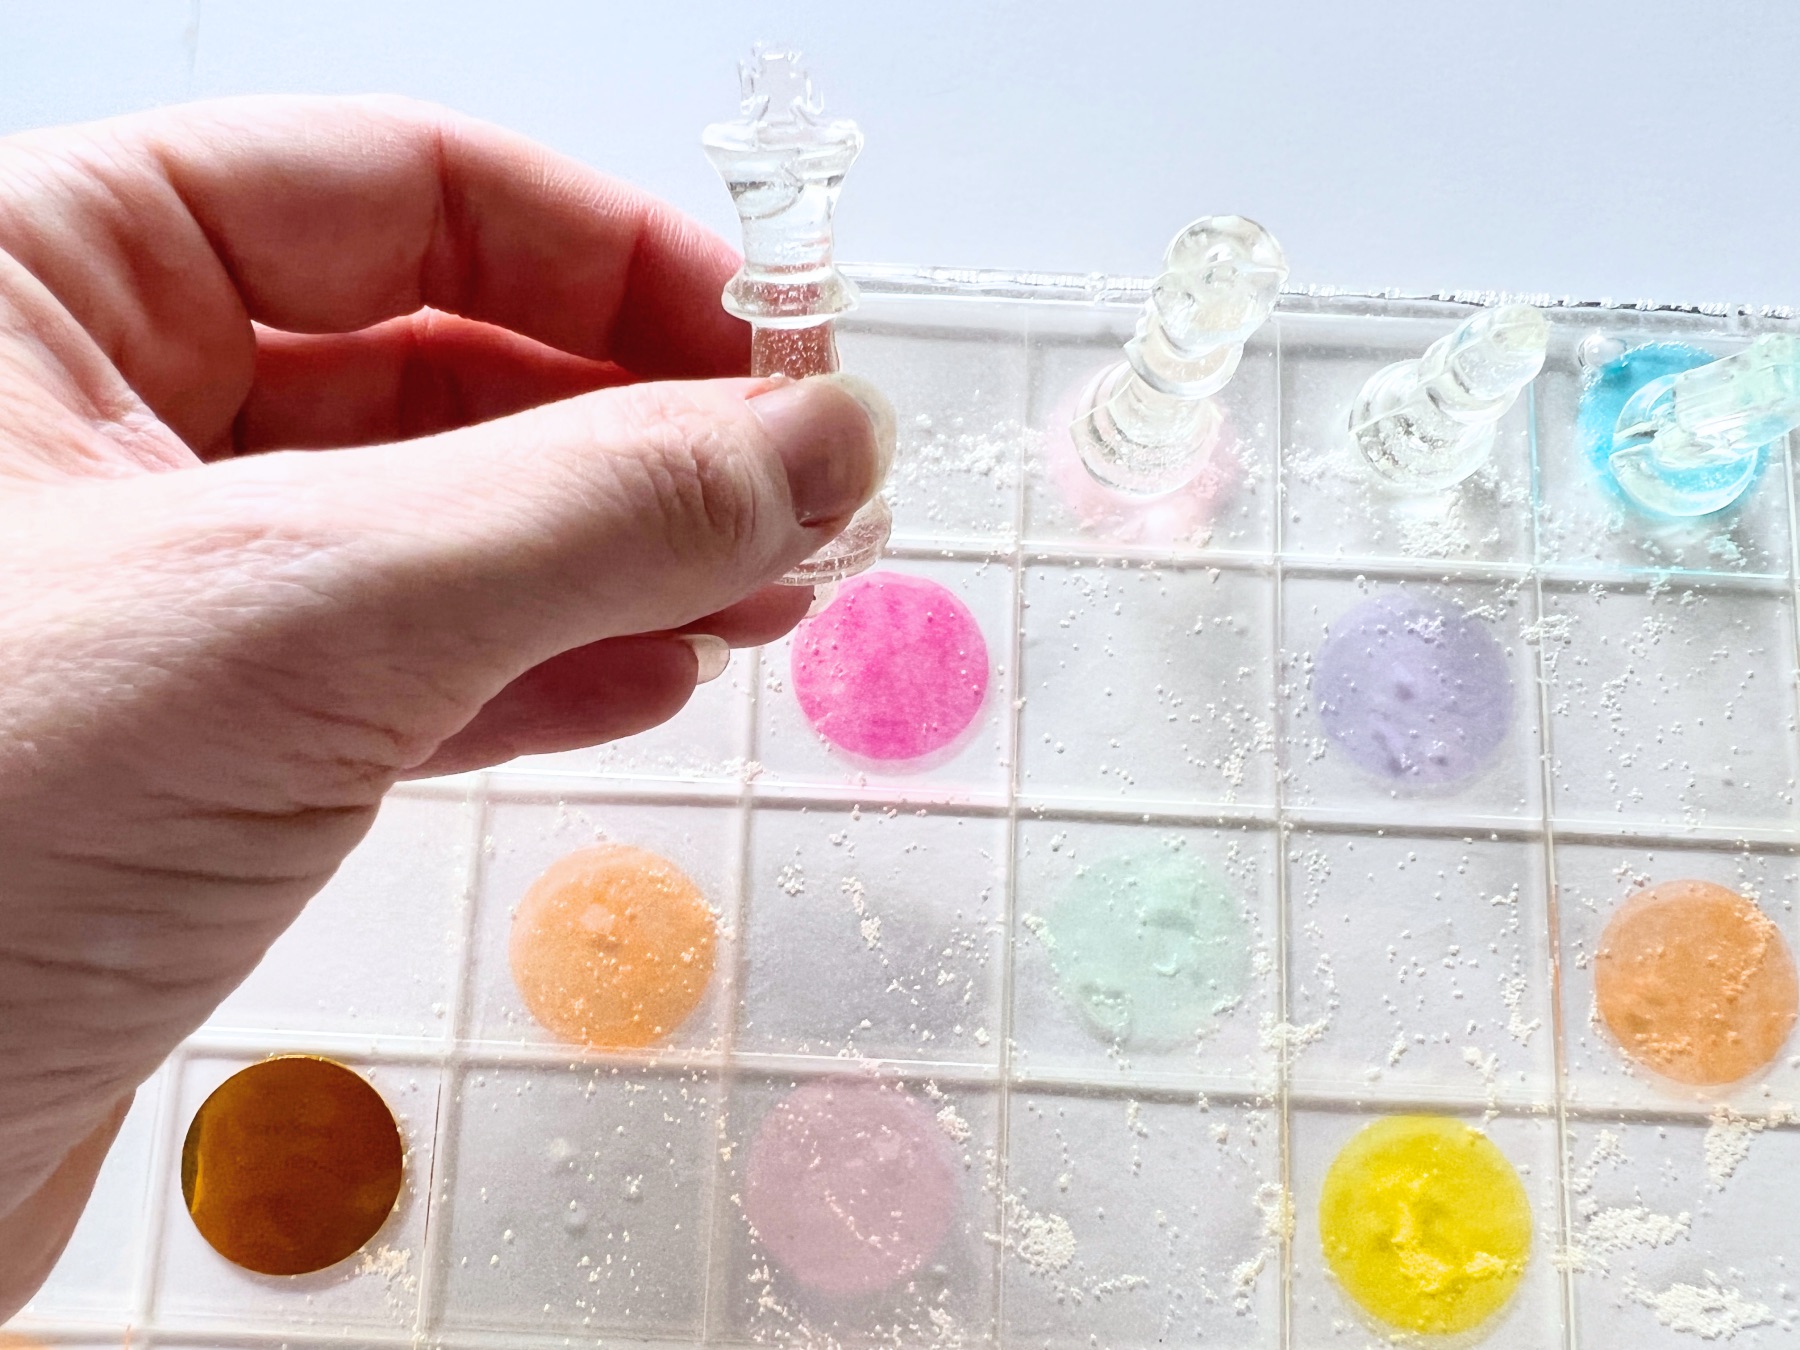
I made my resin chess board with confetti to mark the “black” spaces on the chess board. If you mark the spaces with pressed flowers, confetti or metal foil, you can pour the entire board all in 1 pour. It’s faster than the method below and it’s also really cute!
For this method, mix equal parts resin and hardener – whatever you have left. Again mix the 2 supplies together for 3 minutes, scraping the sides and the bottom of the cup. Then pour into the chess board mold. You may need a popsicle stick to smooth the resin flat from edge to edge.
Make sure to get your heat gun or blow dryer ready, because you will definitely have bubbles! I’ll tell you more about that below.
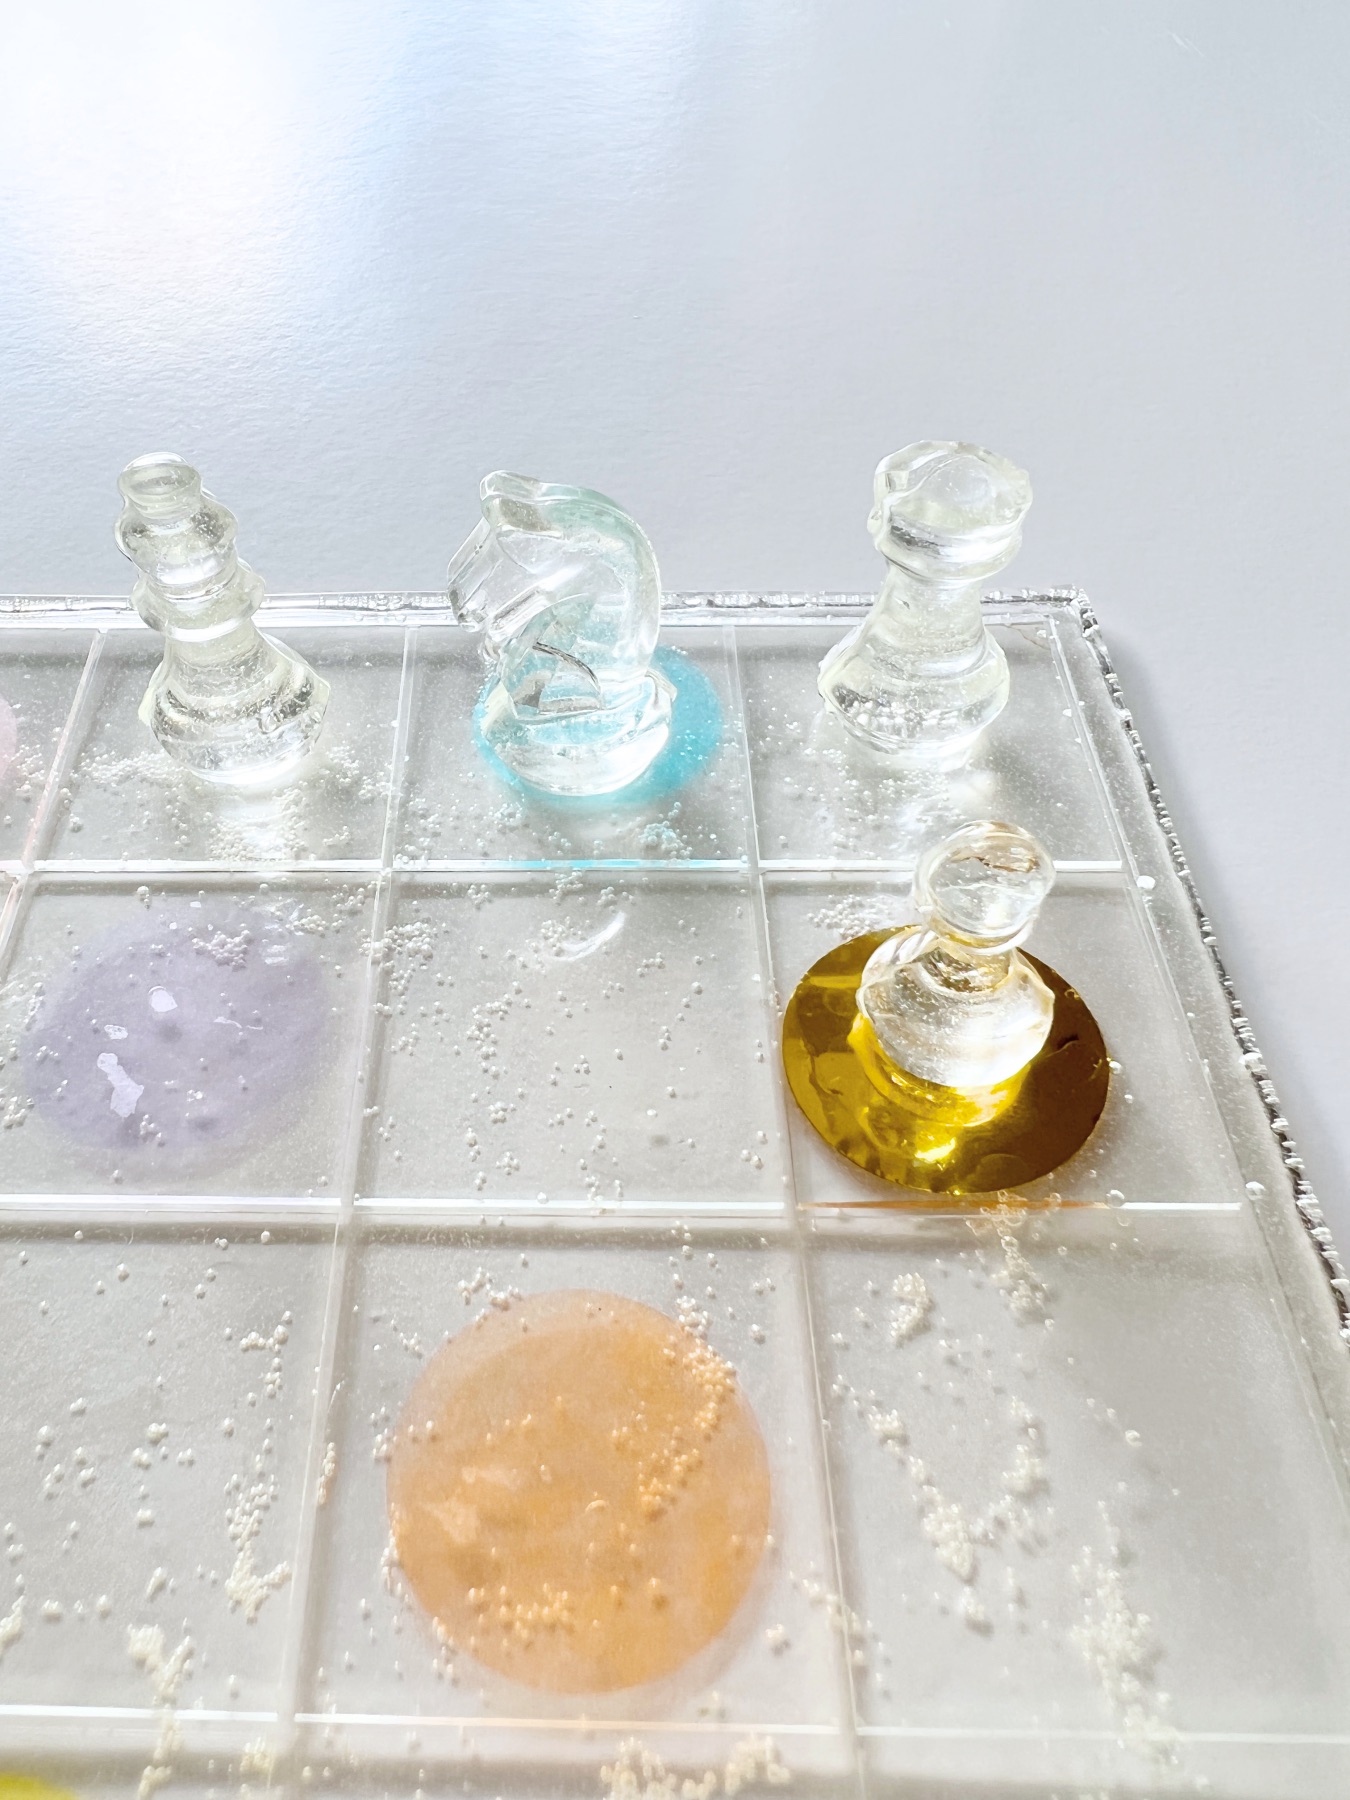
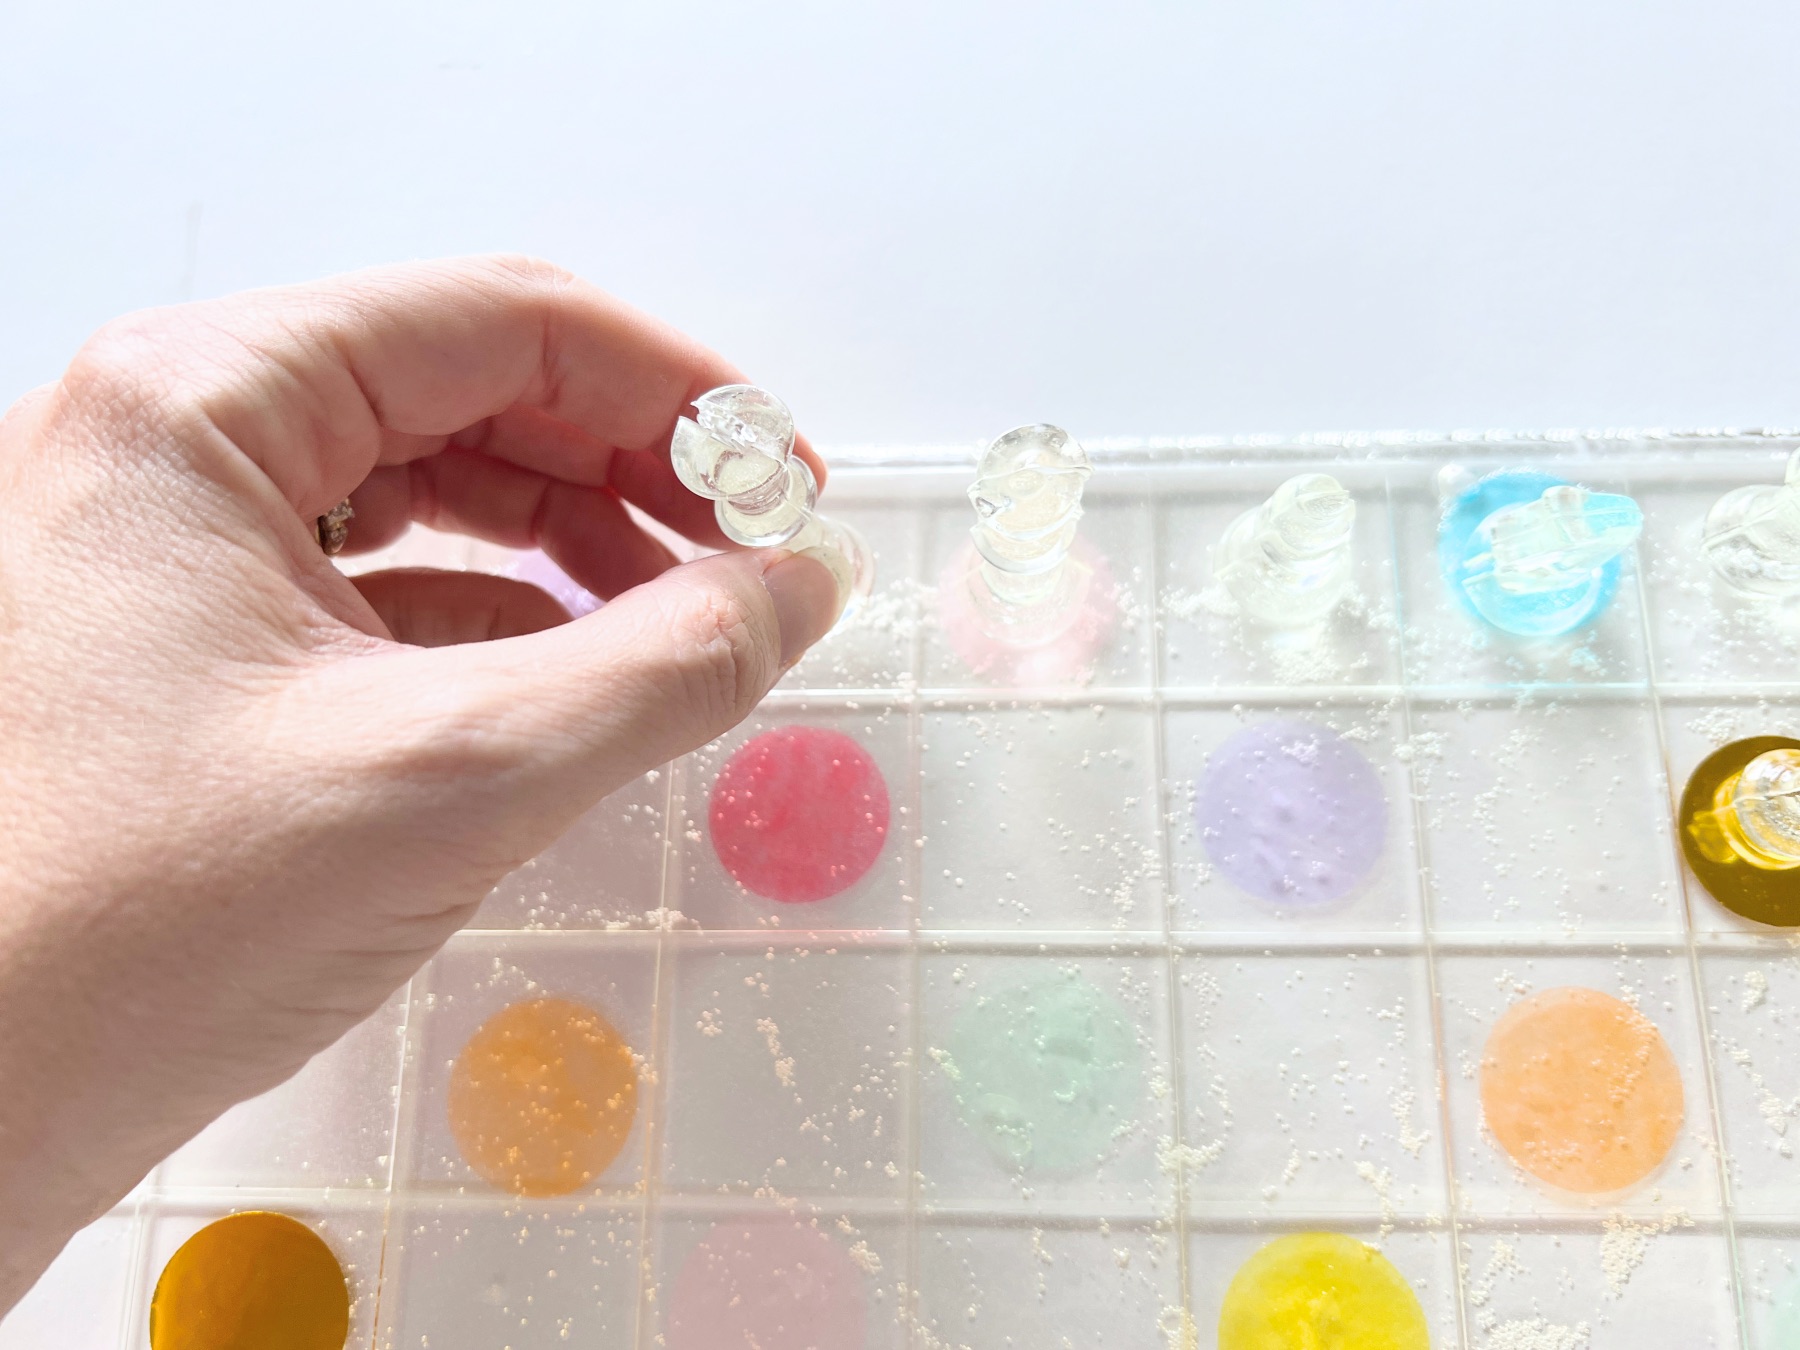
How to Make a Chess Board with Mica or Glitter Squares
If you want to make a chess board with mica or glitter colored squares like this, mix your darker colored portion first. It’s hard to say how much you will need so start small and just know that you will likely need to mix a few batches.
Fill in the board in a diagonal pattern leaving half of your squares empty. Follow this pattern here. Let the resin set for 24 hours before filling in the remainder of the board. You may need to use a popsicle stick to smooth the resin flat across the entire board.
How to Remove Bubbles from Resin
Now check out my board in these photos. I hate it, but sometimes you have to show people how to do something incorrectly so they will see why you should do it better!
This is what your chess board will look like if you don’t remove the bubbles!
To remove bubbles, most people prefer using a torch lighter. But you can also use a blow dryer on high heat or a heat gun. A torch lighter is best, a heat gun is better and a blow dryer is okay.
Place your heat source close to the surface of the liquid resin while it’s in the mold and heat the surface until you see the bubbles escape.
Continue this process across the entire surface. This step is the most important to achieve a gorgeous, professional result, so take your time!
Once your chess pieces are finished the only thing left is to let your chess board set. Then your DIY Resin Chess Board & Chess Set is finished!
This DIY Resin Chess Board & Chess Set would make a great gift and is so much fun!
If you are just getting started playing chess there is a wealth of information with tips and tricks to improve your chess game. My favorite way to get started is to go on Youtube and watch some chess playing tutorials like these.
If you want to make this resin chess set for yourself, be sure to shop the complete diy kit here! It has everything you need to make a resin chess board and chess set and it’s so much fun. And read below for other craft ideas that may spark your creativity!
Happy crafting!
Let’s Be Friends!
Insta | Pinterest | Enews | TikTok