May
Do you have any clothing that you know could be perfect if you could just change one little thing?
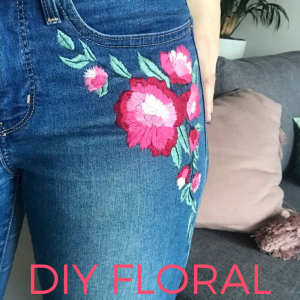
Maybe shorten a strap or take in a pant leg or let something out just a touch? How about just a touch of embroidery on the leg like this here.
And you know that if it fit just a little better, it wouldn’t sit at the back of your closet, neglected for years until you finally come to terms with the fact that it will never fit right, so you just get frustrated with it and donate it?
Me too.
I’ve always known how to sew, but I used to primarily try to sew new clothes for myself. Lately, it’s less about sewing new things and more about trying to alter the clothing that I already have so it fits perfectly and I actually want to wear it regularly.
I’m sure a lot of you probably come across a lot of the same problems, so I wanted to start a little sewing series about how to alter various items of clothing. One of the biggest items for me is taking in pants, followed by small alterations to shirts, fixing rips and tears (or making rips and tears!), taking clothing in, or even making things a bit bigger (how did I accidentally buy a small thong instead of medium?!)
By changing just these small details about my shirts, pants, dresses, or in some cases underwear, I’ve been able to get way more use out of my wardrobe and have been able to spend less time and money searching for the perfect fit. Now, I just make the perfect fit!
Starting off today with hemming and taking in jeans. I used to absolutely hate wearing jeans before they started putting any stretch in them. I’ve got a small waist and a large butt, so it’s always been a bit of a challenge.
Even though it’s easier these days, there are still small things I sometimes need to fix. I’ve had to take in the waistband of some of my jeans and have also had to take in and hem a lot of the pant legs. Here’s how:
Hem & Take in the leg of Jeans
I’ve stuck with skinny jeans for about 8 years now and I think that’s the most flattering fit for me. However, retailers don’t always make them as skinny as I like, or in the length I need. In order to fix this, I’ve taken in the legs of many pairs of jeans and have also had to hem some of them.
Taking in the leg: Before you go about taking in the actual leg of your jeans, you have to decide how you want the hem to be finished. There is a lazy way to do this and a way that will make your denim look more finished. For darker jeans or jeans that have matching stitching, I would just sew right over the hem. I don’t think you can really tell, so for me, it’s not worth the hassle. For a lighter denim, or a medium denim that has that brown stitching, I would recommend unstitching the hem of the jeans so that you can sew in a straight line right down to the bottom and then redo the hem so that the hem looks cleaner. So, once you decide on your hem treatment, it’s time to take in the leg.
- To take in the leg of your jeans, try them on inside out. One seam of the jeans will probably be sewed down with an edge stitch on the outside and the other won’t. We want to take in the side that hasn’t been stitched down!
- Using pins, mark down the length of your jeans the amount that you want to take them in. You will probably have a small triangle shape if you’re making a straight leg jean into something more skinny. You want to make sure that it’s a fairly elongated triangle though so that the new seam that you’re making blends in with the current one. It’s also VERY important that when your pinning the jeans close to your ankle, make sure you don’t make the opening too narrow or it won’t fit over your foot when you try to put them on. I learned that the hard way, so hopefully you won’t have to.
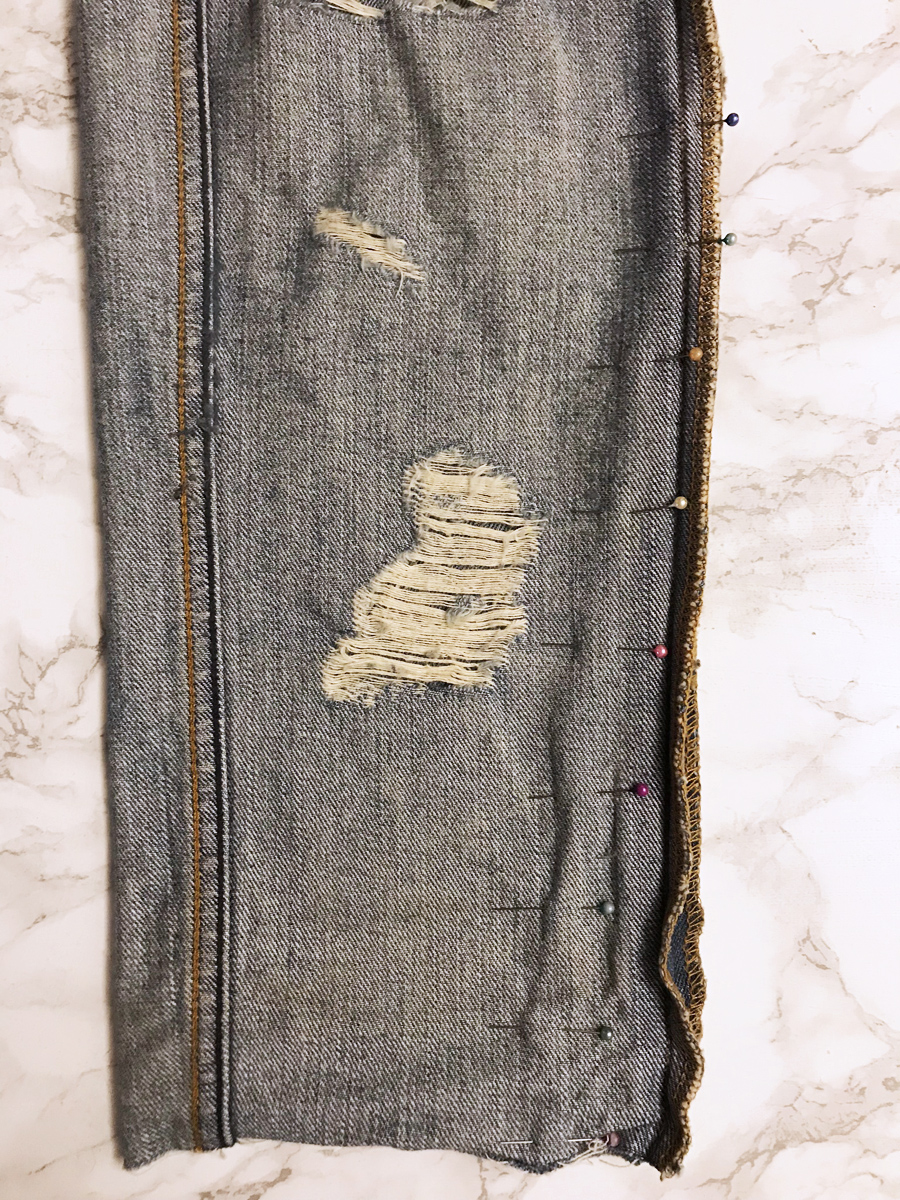
- Take the jeans off and starting from the hem, sew up the length of the jeans until you’ve reached the last pin, making sure to taper your triangle so that it blends in with the current seam. Also, make sure to backtack when you start and finish sewing.
- Turn your jeans right side out, try them on and evaluate the fit. I’m always a bit conservative when taking in the legs because I don’t want them to be too tight.
- If you’re satisfied with the fit, cut off the excess material and voila! You’ve got a pair of jeans that will fit you much better and be a lot more flattering.
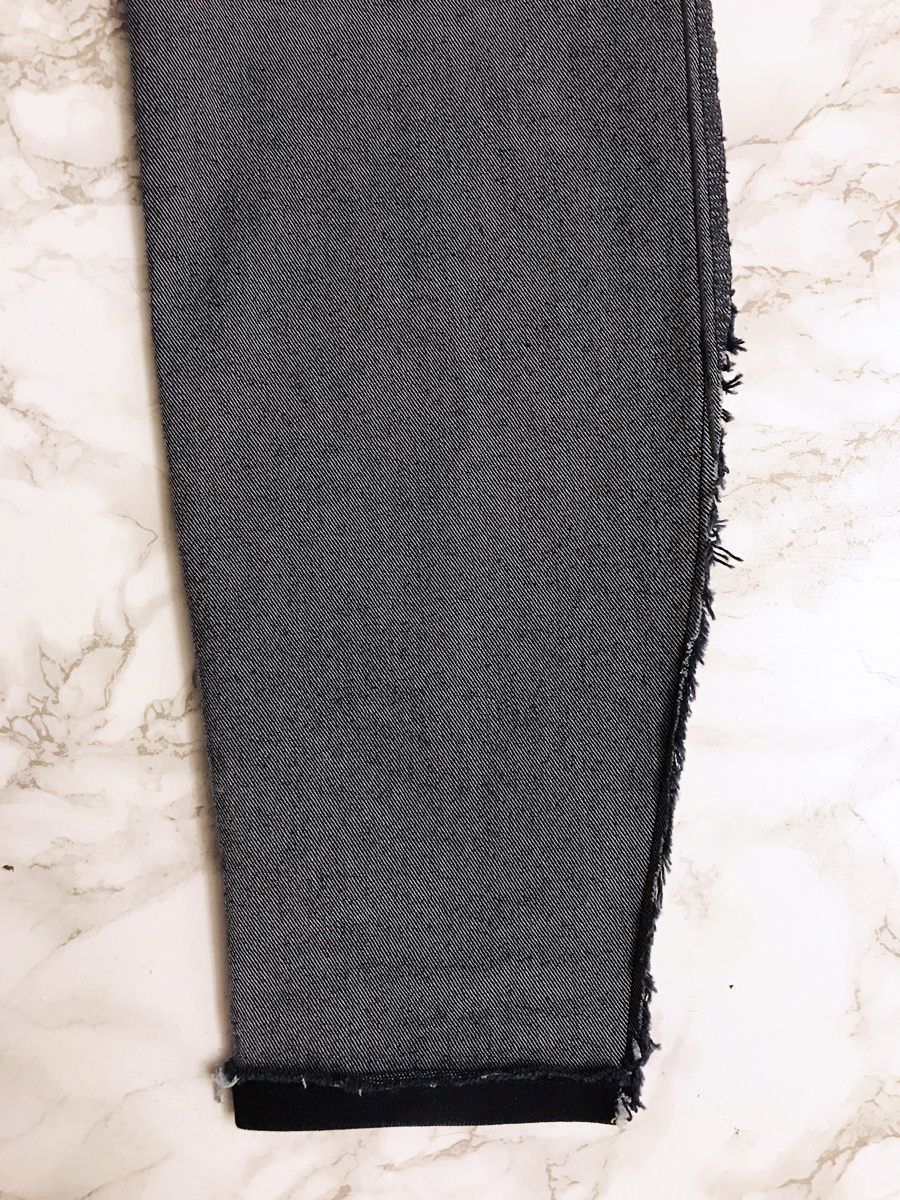
A much narrower leg after taking in the jeans.
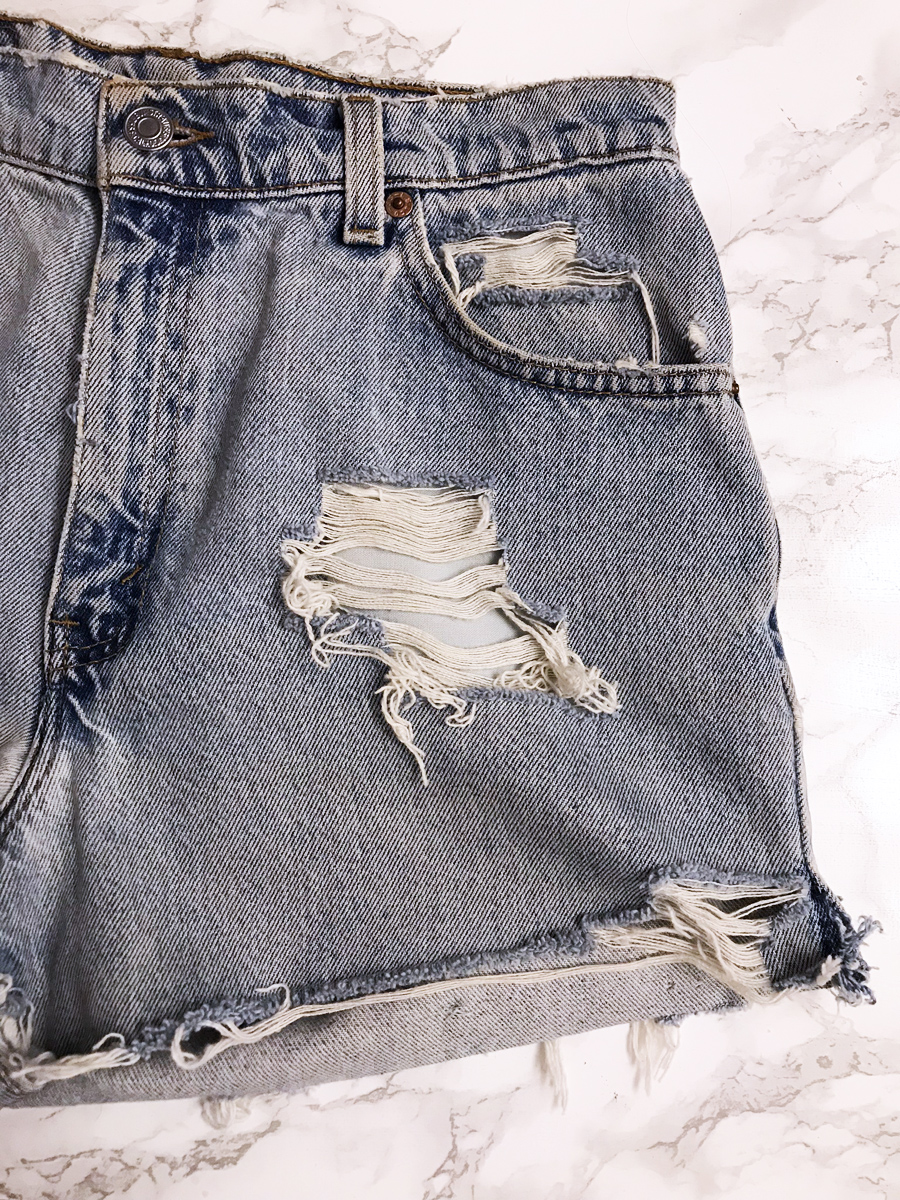
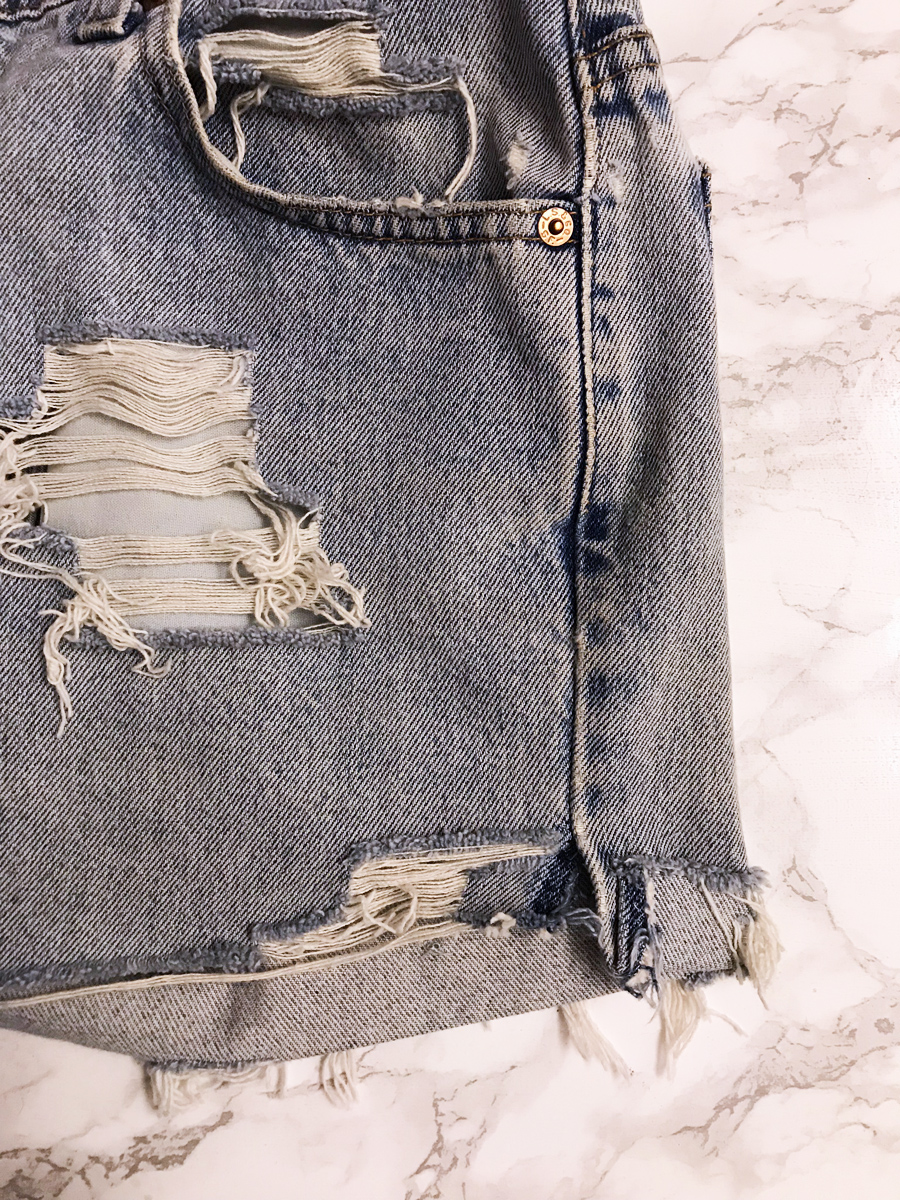
Hemming: To hem your jeans, simply try them on, mark where you want the jeans to hit and then measure 1/2 down from that line and cut there. Turn the jeans inside out, fold them up the extra 1/2″ that you measured and then using embroidery thread in a colour that matches the existing stitching, sew a hem about 1/4-3/8″ away from the bottom of the pants. An even faster way to hem your jeans is to leave the bottom cut to give the jeans a more distressed look. The frayed edges will be hanging down. I love to do this with a lighter wash denim, but have also done it with a black pair that I cut holes in the knees of.
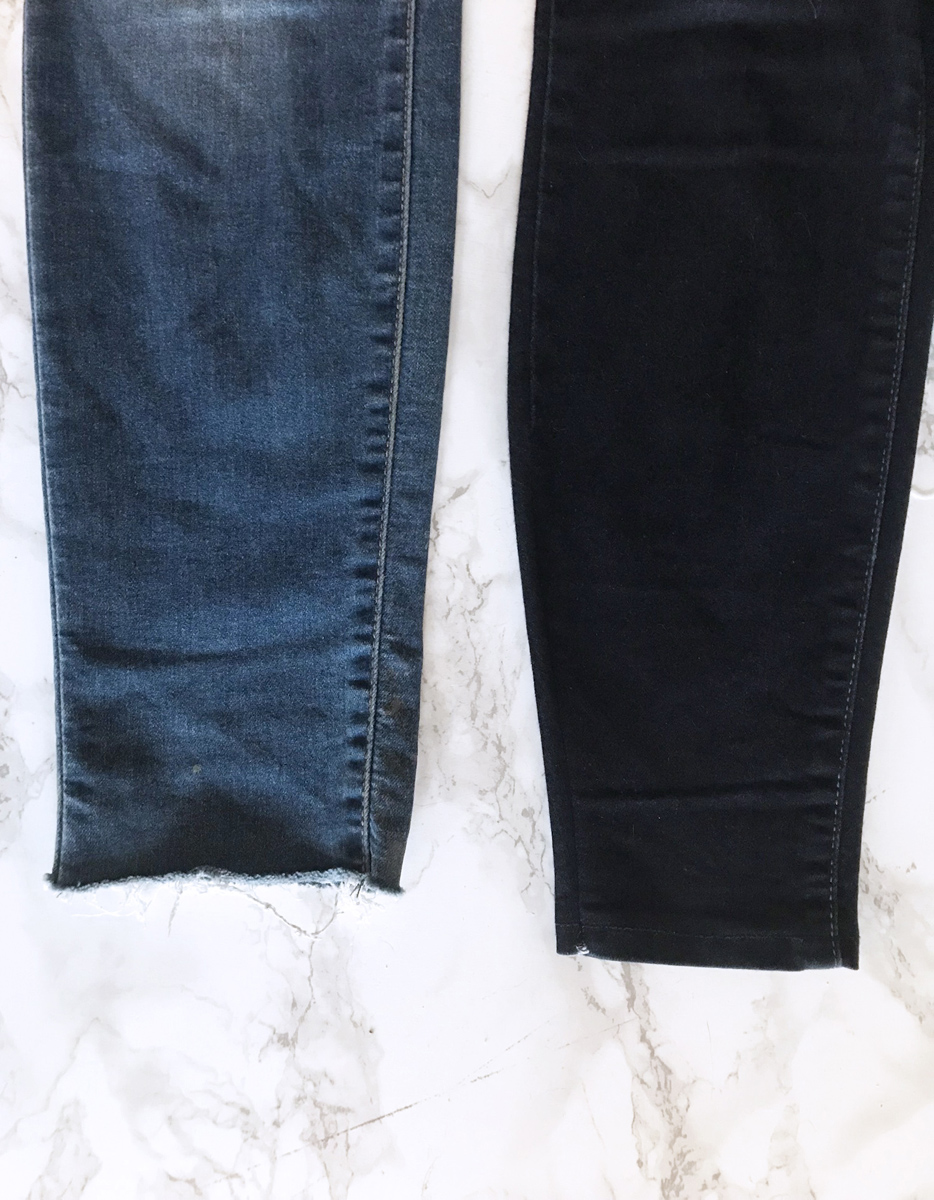
The first pair of jeans in the below photo is a pair that I just hemmed by cutting off the excess length and left it as a raw hem. It’s actually these jeans that I embroidered so I feel like the raw hem goes with the laid back, looser more summery style of the jeans. The pair on the right is a pair that I took in the leg of and finished the hem. You can see how the ankle is a lot skinnier than the lighter blue pair.
Hemming jeans like this can apply to shorts too! I love to hem my shorts to make them look a lot more distressed. I even made the front of the shorts a bit shorter than the back to a) make sure that they cover my butt and b) create a bit more visual interest with an uneven hem.
Taking in the Waist: Taking in the waist of your jeans is similar to hemming in that there is a fancy proper way to do it, and then there is the quick easy way that I choose to do it that seems to work fairly well still. While it won’t look as aesthetically pleasing as the fancy route, this is a quick fix that I’ve done to a couple pairs of jeans that I wear longer shirts with. You can tell that they’ve been taken in, so I use this method sparingly, but it does help the jeans to fix better super quickly. Here’s how:
- Turn your jeans inside out and try them on
- Note how much your jeans need to be taken in with pins. I make two darts on either side of the back centre belt loop
- Take the jeans off and sew each dart making sure to try and not make too blunt of a triangle. Back tack at the beginning and end so that they stay in place. You really only want to sew until you get to the horizontal line across the back that most jeans have. Don’t sew over this or your dark won’t sit right. You’ll also want to try to make the darts even on each side of the belt loop.
- That’s it! It doesn’t look super professional, but if you always plan on wearing a top over the jeans, then no one will ever see!
That’s it for part 1 of my quick clothing fixes series. If you have anymore questions about altering denim or any kind of clothing feel free to ask!
Coming up soon I’ll be chatting about altering the straps on tops and bras to help them fit better.
– tess.

Let’s Stay Friends!
Insta | Pinterest | Enews | TikTok