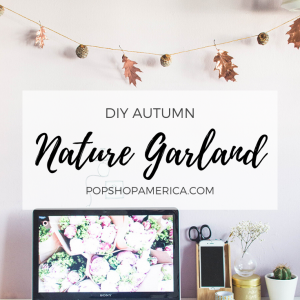
DIY
How to Make a Easy Fall Flower Wreath
Oct
Wreaths are a fun, easy way to decorate for any holiday or season. At Christmas time, I throw a wreath on the door, hang a few lighted ones in the window, and it just dresses up the whole house.
I even have a red, white and blue wreath to hang for patriotic holidays!
But my favorite wreaths are my fall ones – I can’t get enough of the reds, yellows, and oranges. They’re just gorgeous and they brighten up any space!
In fact, I’m looking around my house and I currently have five fall wreaths as decor – 2 on doors, 2 on the wall and one on top of a desk. How many wreaths is too many??
Recently, I grabbed some gorgeous artificial flowers from Michael’s and knew I wanted to turn them into a wreath. Would you believe me if I told you this is basically a 5 minute (mayyyybe 10) DIY project? I have an almost 3 year old; crafts gotta be quick around these parts! So, let’s get started!
Supplies for Simple DIY Floral Wreath
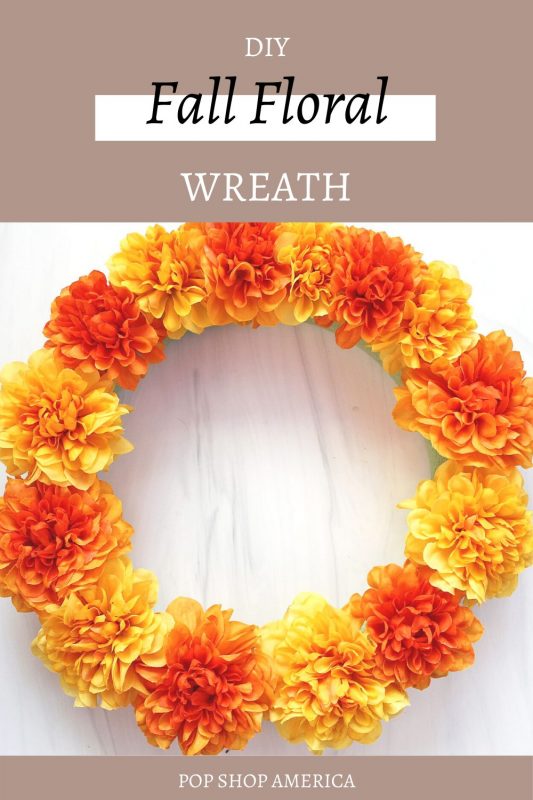
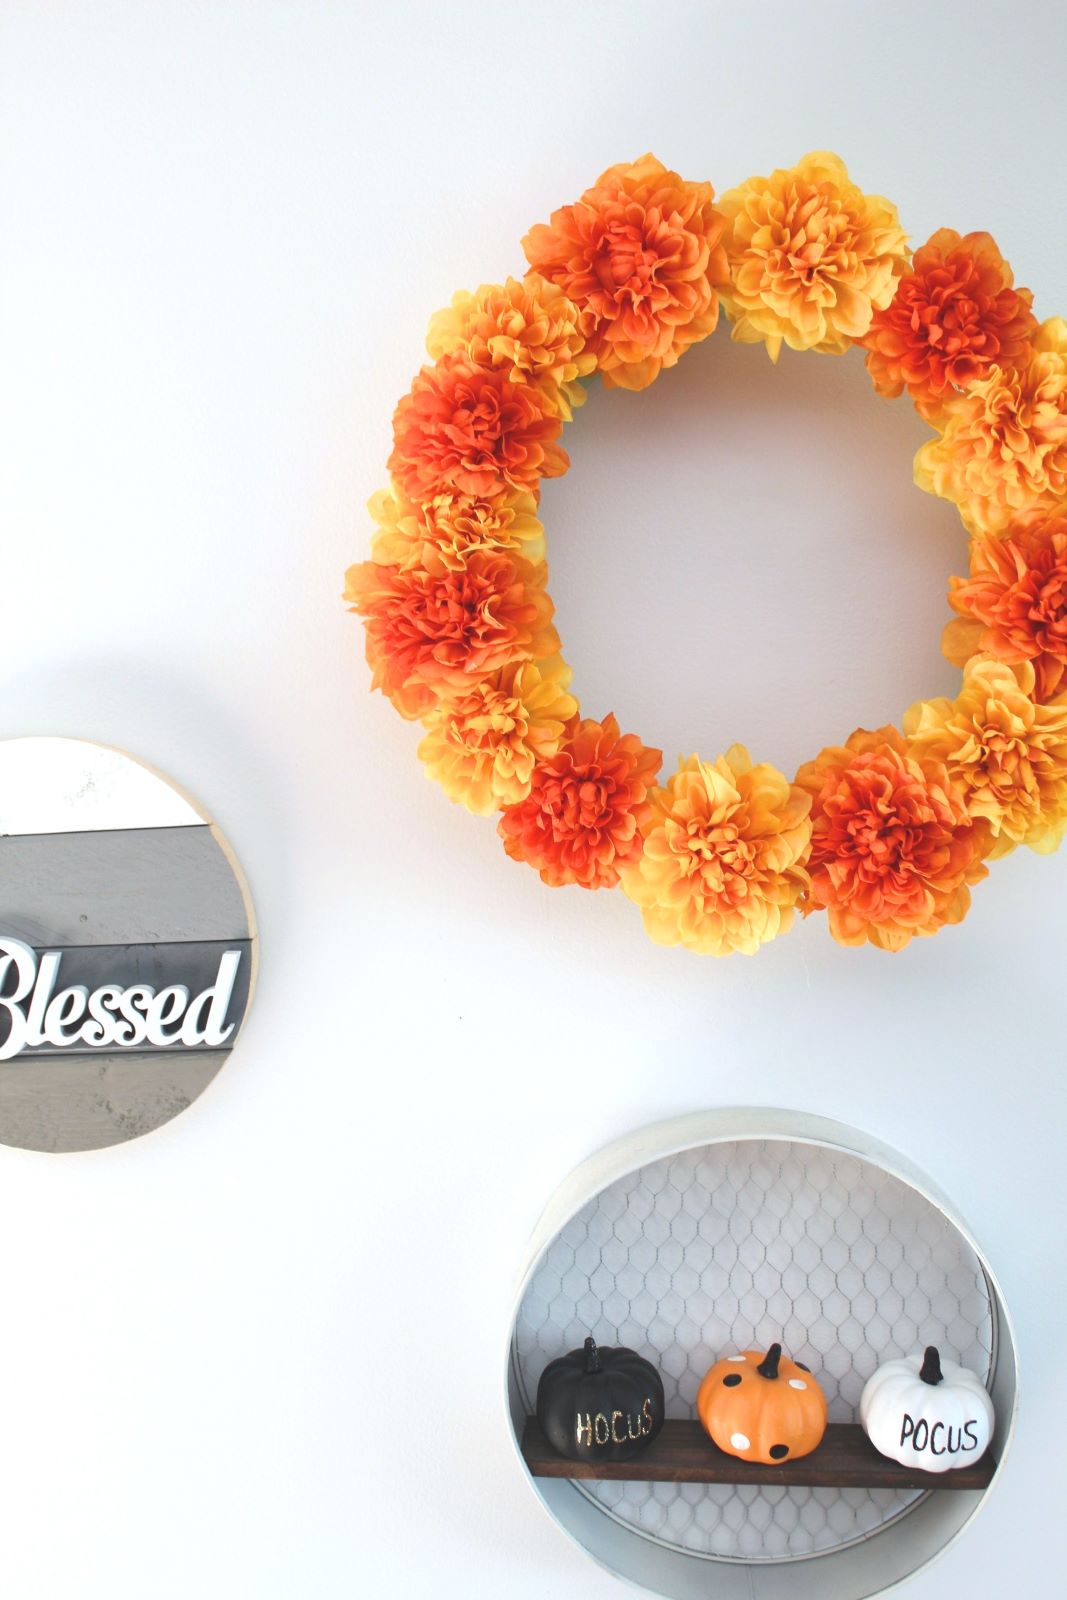
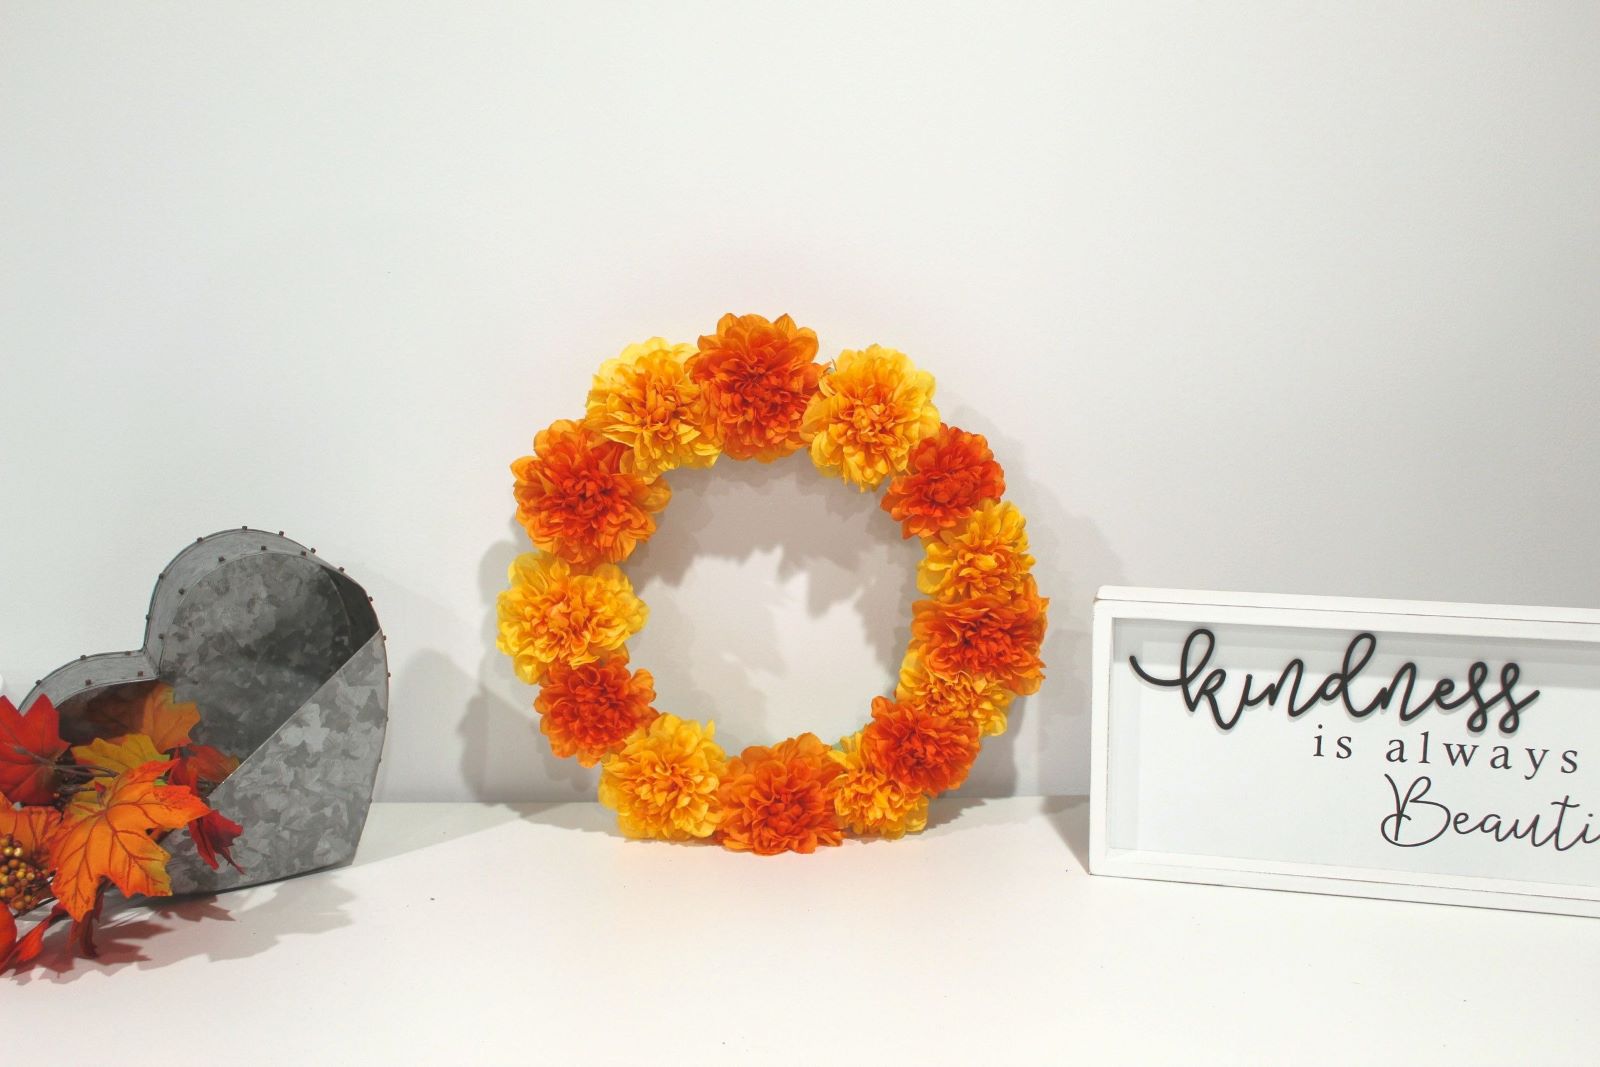
The best thing about this wreath is that it only requires THREE supplies: a foam wreath form, large artificial flowers and wire cutters.
I used a 14″ floral foam wreath ring, but the size is completely up to you!
You can choose whatever floral bushes you want, but make sure the flowers are fairly large if you don’t want to have to do multiple rows. I bought two large floral bushes from Michael’s and the just covered my wreath ring. I think I’m going to buy another couple of them so can cover the inner and outer parts of the ring that show just a bit from certain angles.
Let’s Craft!
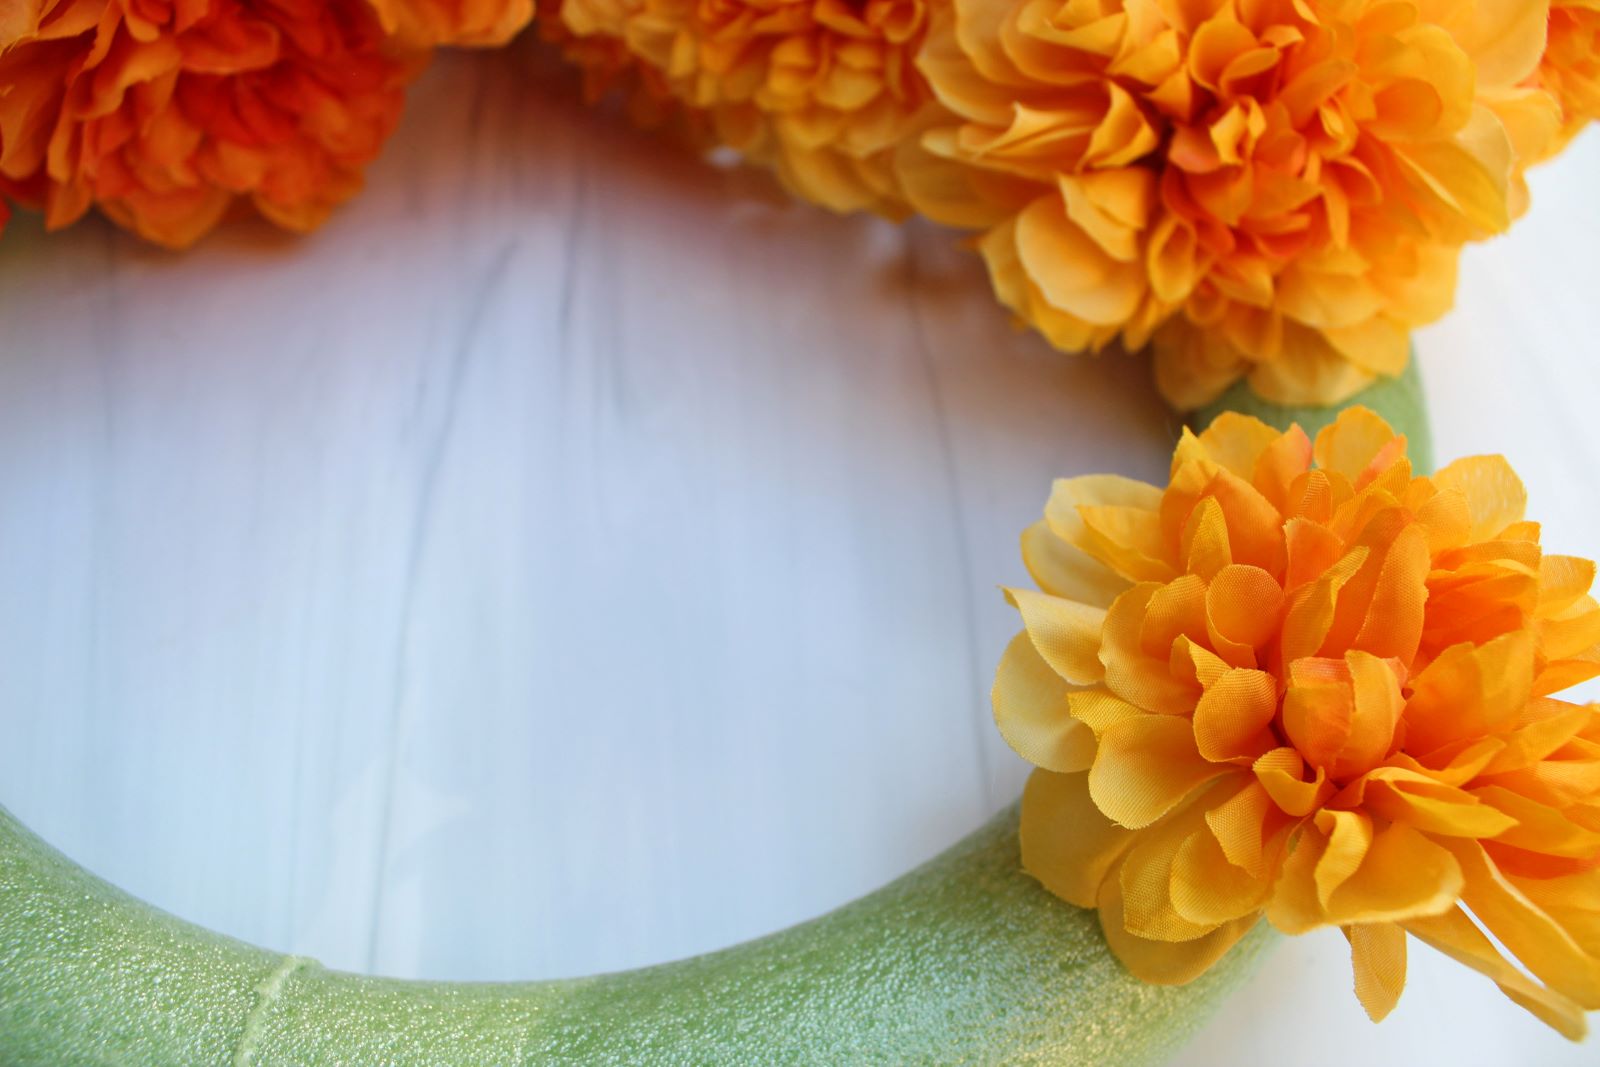
Start by using your wire cutters to cut all of the flowers off the stem. Leave about a 2 inch stem on them for stabbing into the foam ring. You can discard the stems. If you want, save the leaves to add details to your wreath.
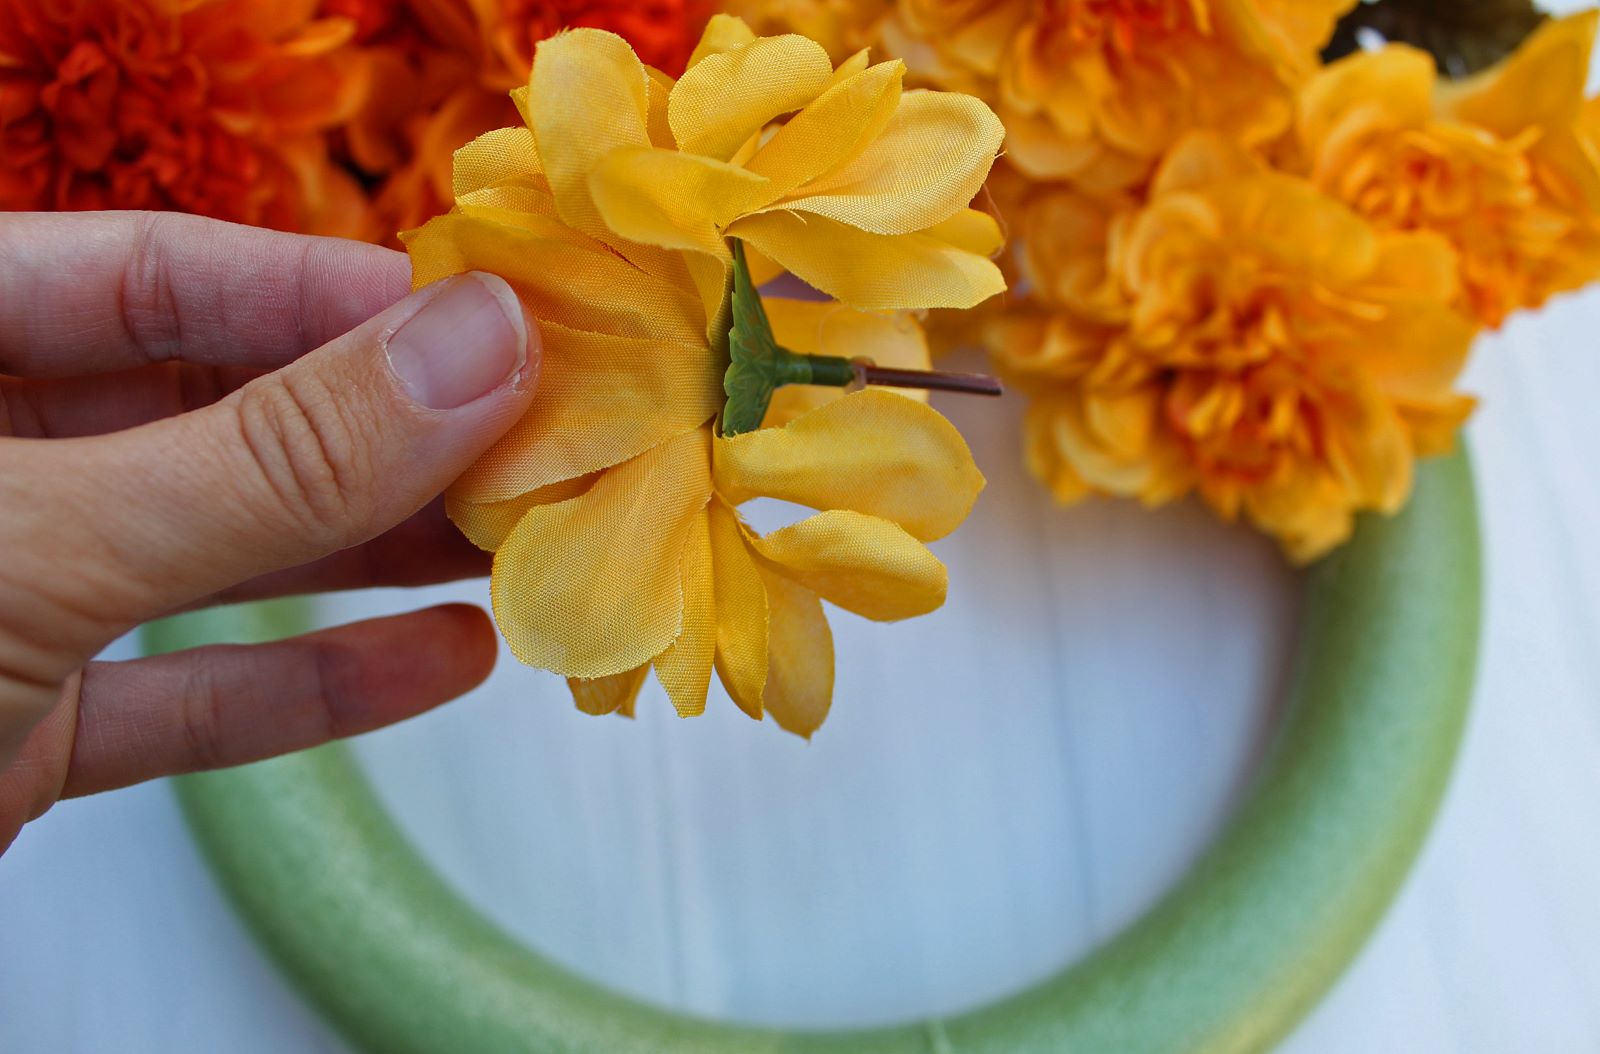
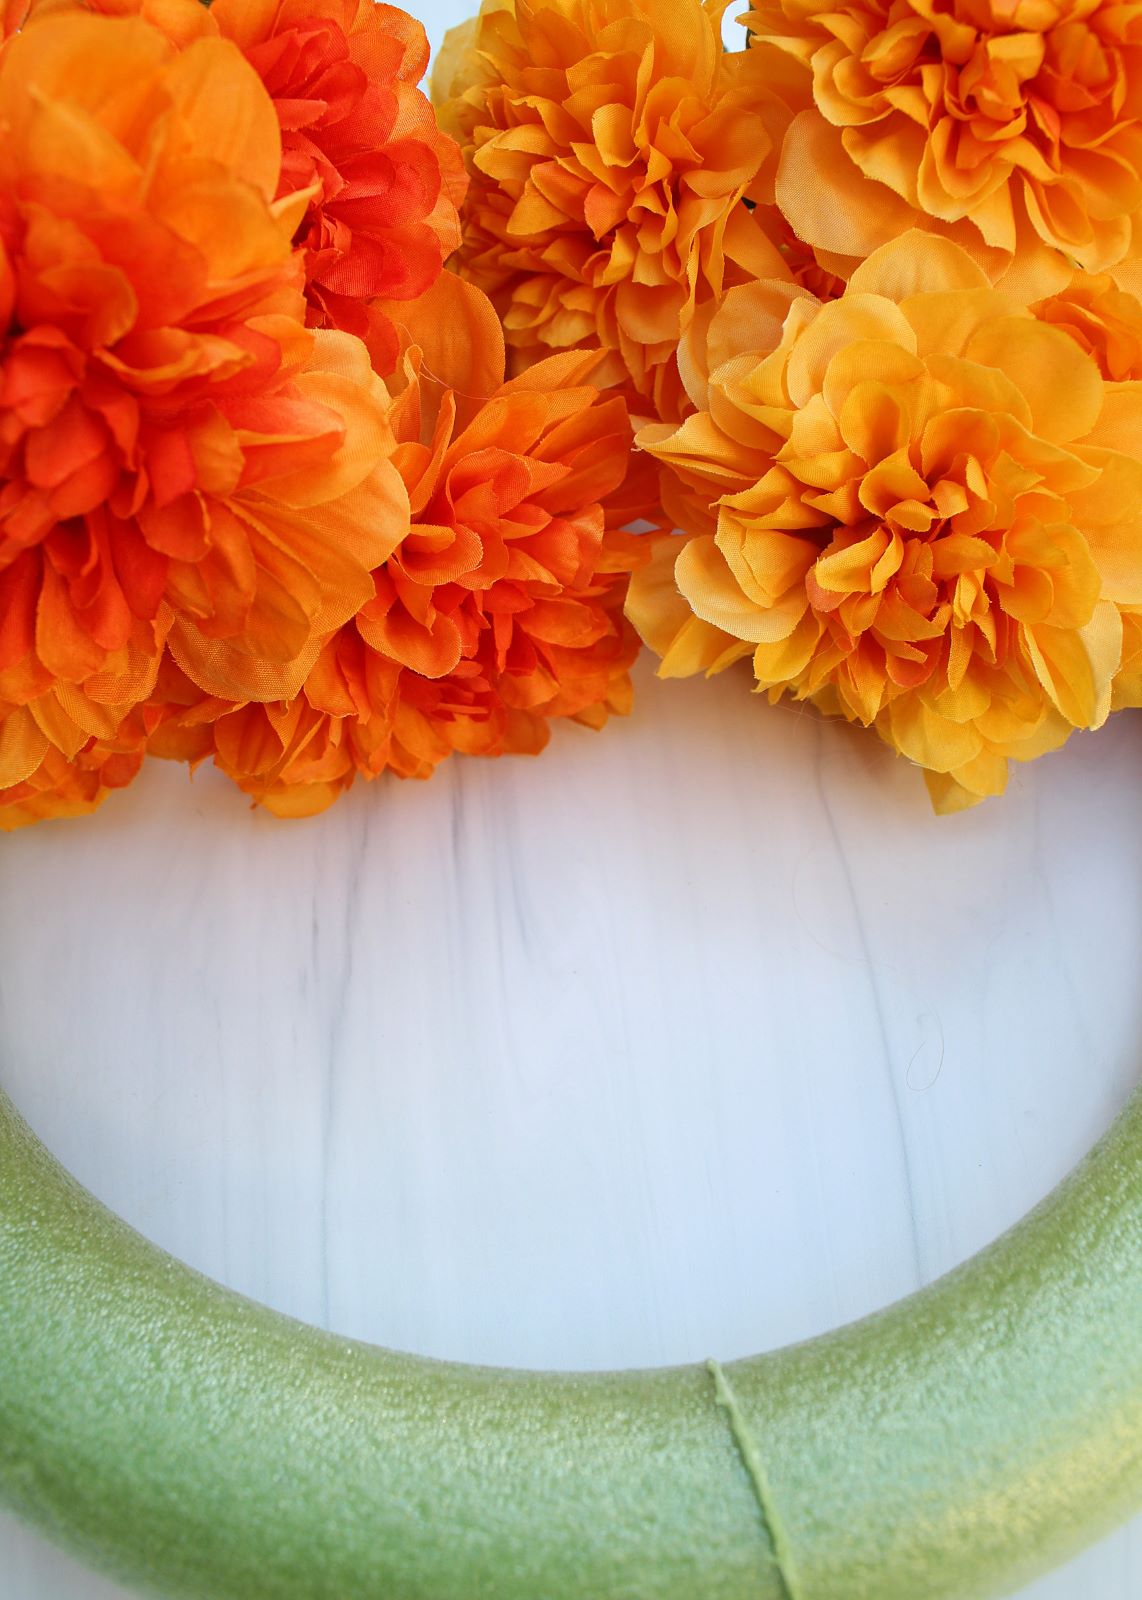
Once all your blooms are cut, take one flower and stick it into the foam floral ring, right center and front. Then continue stabbing the flowers all around the ring. Keep them close together; you want to make sure you can’t see green (or white) foam ring through the flower petals.
If you get close to the end and realize the flowers aren’t quite close enough together, it’s easy to pull them out and stick them in closer together. I’m definitely speaking from experience here.
And, friends, that’s it! If you want to keep it simple, you are completely done. You can stick a nail in the wall and hang the diy floral wreath directly on that, or stick it on a wreath hanger on the door.
But if you want to dress it up a little more, I’ve got some more ideas for you below.
How to Dress Up Your DIY Floral Wreath
Like I mentioned above, you could save the leaves from your floral stems and hot glue them onto the wreath to add some nice accents.
You could also grab some cute seasonal stems – I had some white velvet pumpkins I was going to put on here, but they ended up in my son’s fall sensory tray. Oops! To add seasonal stems – like pumpkins for fall, cute candy canes for Christmas, snowballs or pinecones for winter – just cut them off with a 2 inch stem and stick them in, the same way you did the flowers.
A cute DIY wire ribbon bow would be perfect on this too. All of my ribbon was too short, but as soon as I can get my hands on some, I’m adding one.
You could also just loop ribbon around the top of your wreath to make a wreath hanger as well.
And if you want to get even more creative, you could wrap your floral wreath form in cute ribbon – like I did with the patriotic wreath – and then poke the flower stems into it. That gives your wreath a beautiful background for the flowers to sit against.
How to Store Your Seasonal Wreaths
I store mine in our storage room in the basement. My husband hammered nails all around the wall and the wreaths hang on those. It makes it easy to keep them all protected and make sure they don’t get smashed, without spending a lot of money on wreath storage containers or bags. To keep them from getting dusty, you can buy wreath bags to cover them or you can just use a garbage bag. You’re just storing it – it doesn’t have to be pretty!
Let’s Be Friends!
Insta | Pinterest | Enews | TikTok