DIY
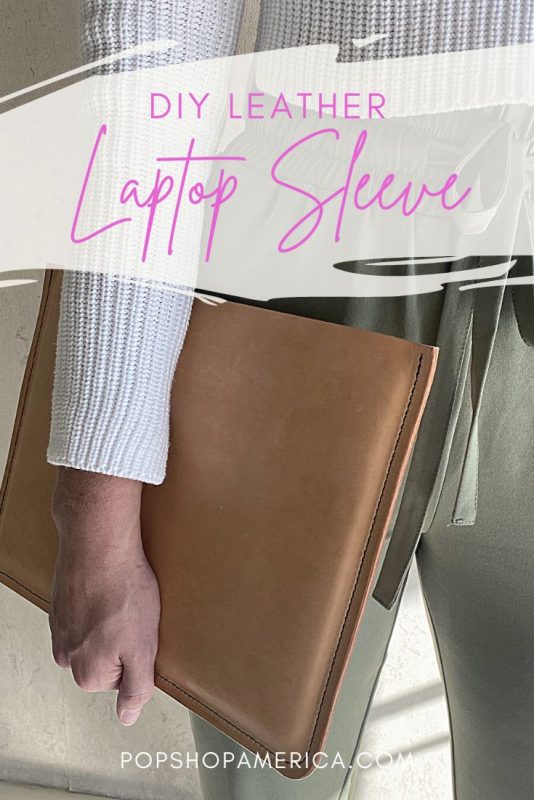
How to Make a Gorgeous Leather Laptop Sleeve
May
After about 13 years of owning a memory foam purple laptop sleeve, it was time for me to make a new one.
I didn’t want to buy just any laptop sleeve and had started to lean towards getting a new leather one. However, the idea for a new one in leather really started to take shape after I started dating my partner, S. He’s very into leatherworking and has beautifully made quite a few wallets and other items. I floated the idea to him of making a leather laptop sleeve and he was VERY into it.
Before I continue, I want to preface this post by saying that if you don’t support the leather industry, if you’re vegan, or if you just don’t like it, you could make this laptop case with faux leather as well. A lot of fabric stores often have faux leather. I’ve even found some at the dollar store! However, it won’t have the same longevity as a leather case, and it will be harder to find the proper weight of material to make a laptop case.
Sourcing Leather – Stores
When we initially started talking about this project, I looked online to try to find leather, but I’d discourage you from doing that. Try to see if there is a local store that you can visit. Going to a store means that you can actually go and see what they have and feel the leather.
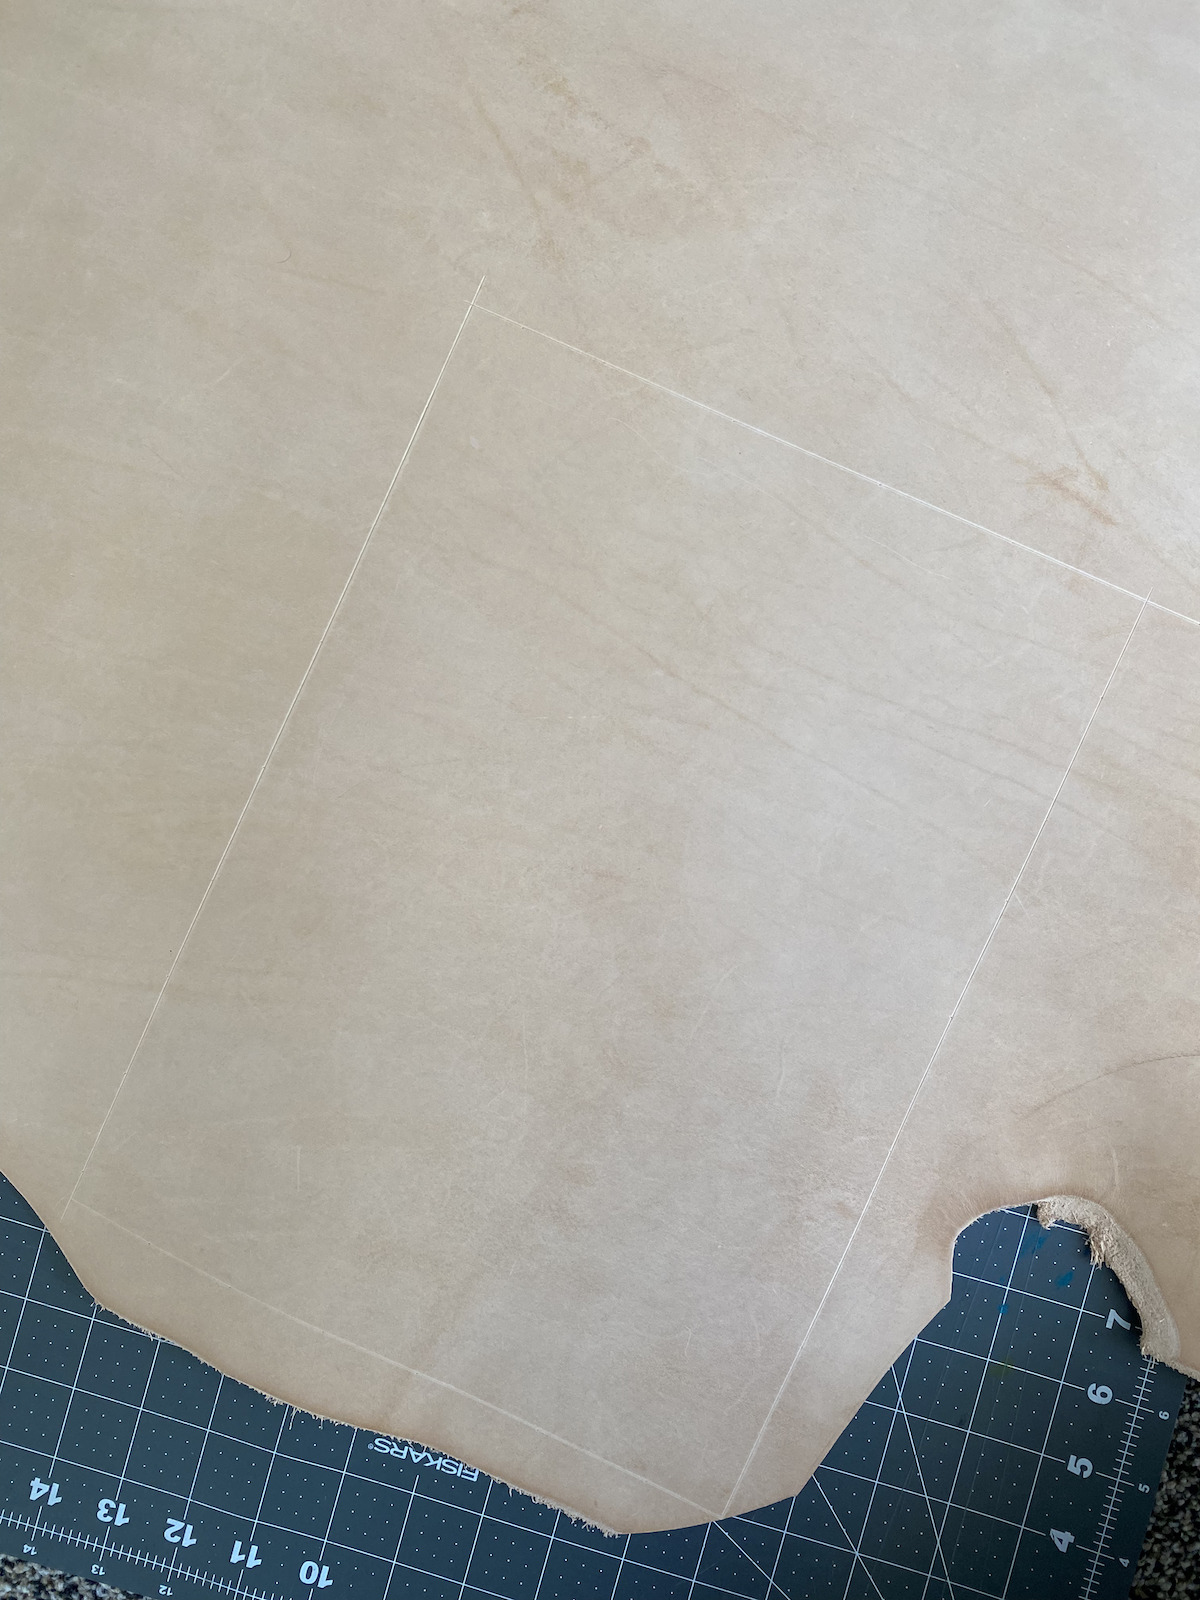
I’m glad that we went to a couple of stores in person because there were so many beautiful things! I initially went in thinking that I wanted a caramel-coloured leather for my laptop sleeve. However, when we arrived there were so many different options that I had a very hard time picking! As we looked around, S brought me to the vegetable tan leather hides which are basically like raw leather. They haven’t been treated or aged in any way, so they’re a very light colour. It was a departure from the caramel that I wanted, BUT over time, they would age to that beautiful rich caramel colour. Peep the eventual colour in the mousepad below!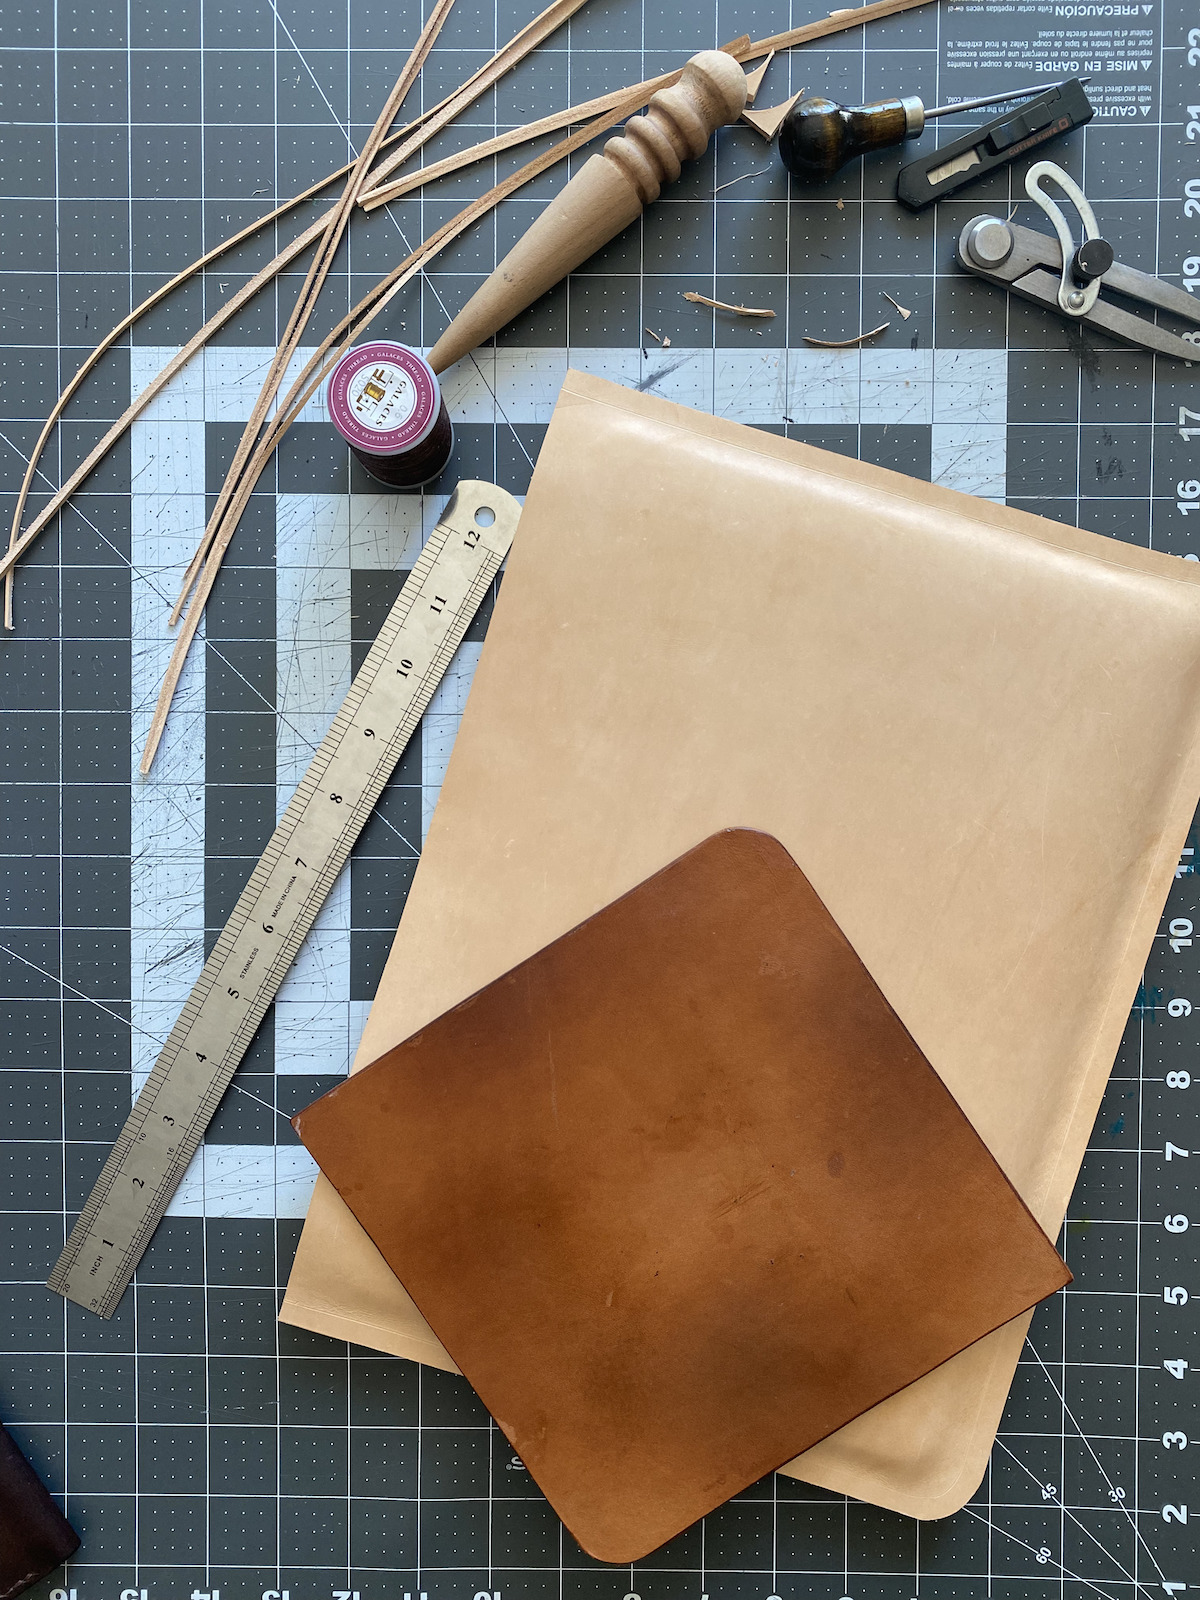
So, I ended up going with the veg tan leather for my laptop sleeve. It would just require a little bit of patience to get to the colour that I wanted. Plus, it would be fun to see it age along the way. There were a few reasons that I went with this type of leather, so let me break them down.
Sourcing Leather – Weight & Quality
- Price – Veg tan leather hasn’t been treated or dyed in any way, so it’s less expensive than the caramel colour I initially wanted. The veg tan leather that we were looking at was priced for the half hide and mine came in around $65. For the size that it was, I could have gotten about 3 laptop cases out of it, so I felt like it was a really great price!
- Weight – as S told me, weight is VERY important when you’re making leather goods. When you’re looking at buying leather, each piece will have a weight associated with it. It’s often listed in ounces, so make sure to look out for that. There were a few caramel pieces of leather that I liked, but they weren’t heavy enough to be able to make a laptop case. The veg tan leather that I ended up purchasing was between 4-6oz. The weight is given as a range because this leather was once a living animal, so it won’t be perfectly uniform. There will be some areas that are thicker or thinner than others. So make sure to look out for this when you’re cutting your pieces!
- Quality – when buying a piece of leather, make sure to turn it over and inspect it for any weak areas where it’s very thin or any scratches. Again, this material comes from a living animal, so know that there will likely be some flaws in your leather. The more you’re willing to pay for a piece, the less flawed it will be. It’s just helpful to keep this in mind when cutting your pieces.
Tools
Making your own leather items is a bit more of a niche project than a lot of the DIY’s I’ve done. If you’re starting from scratch and want to get into leather working, there will be a number of tools that you’ll have to buy upfront. So, take that into consideration before beginning your project. One of the main reasons why I wanted to undertake this project was because S had all the tools, so all I had to buy was the leather. 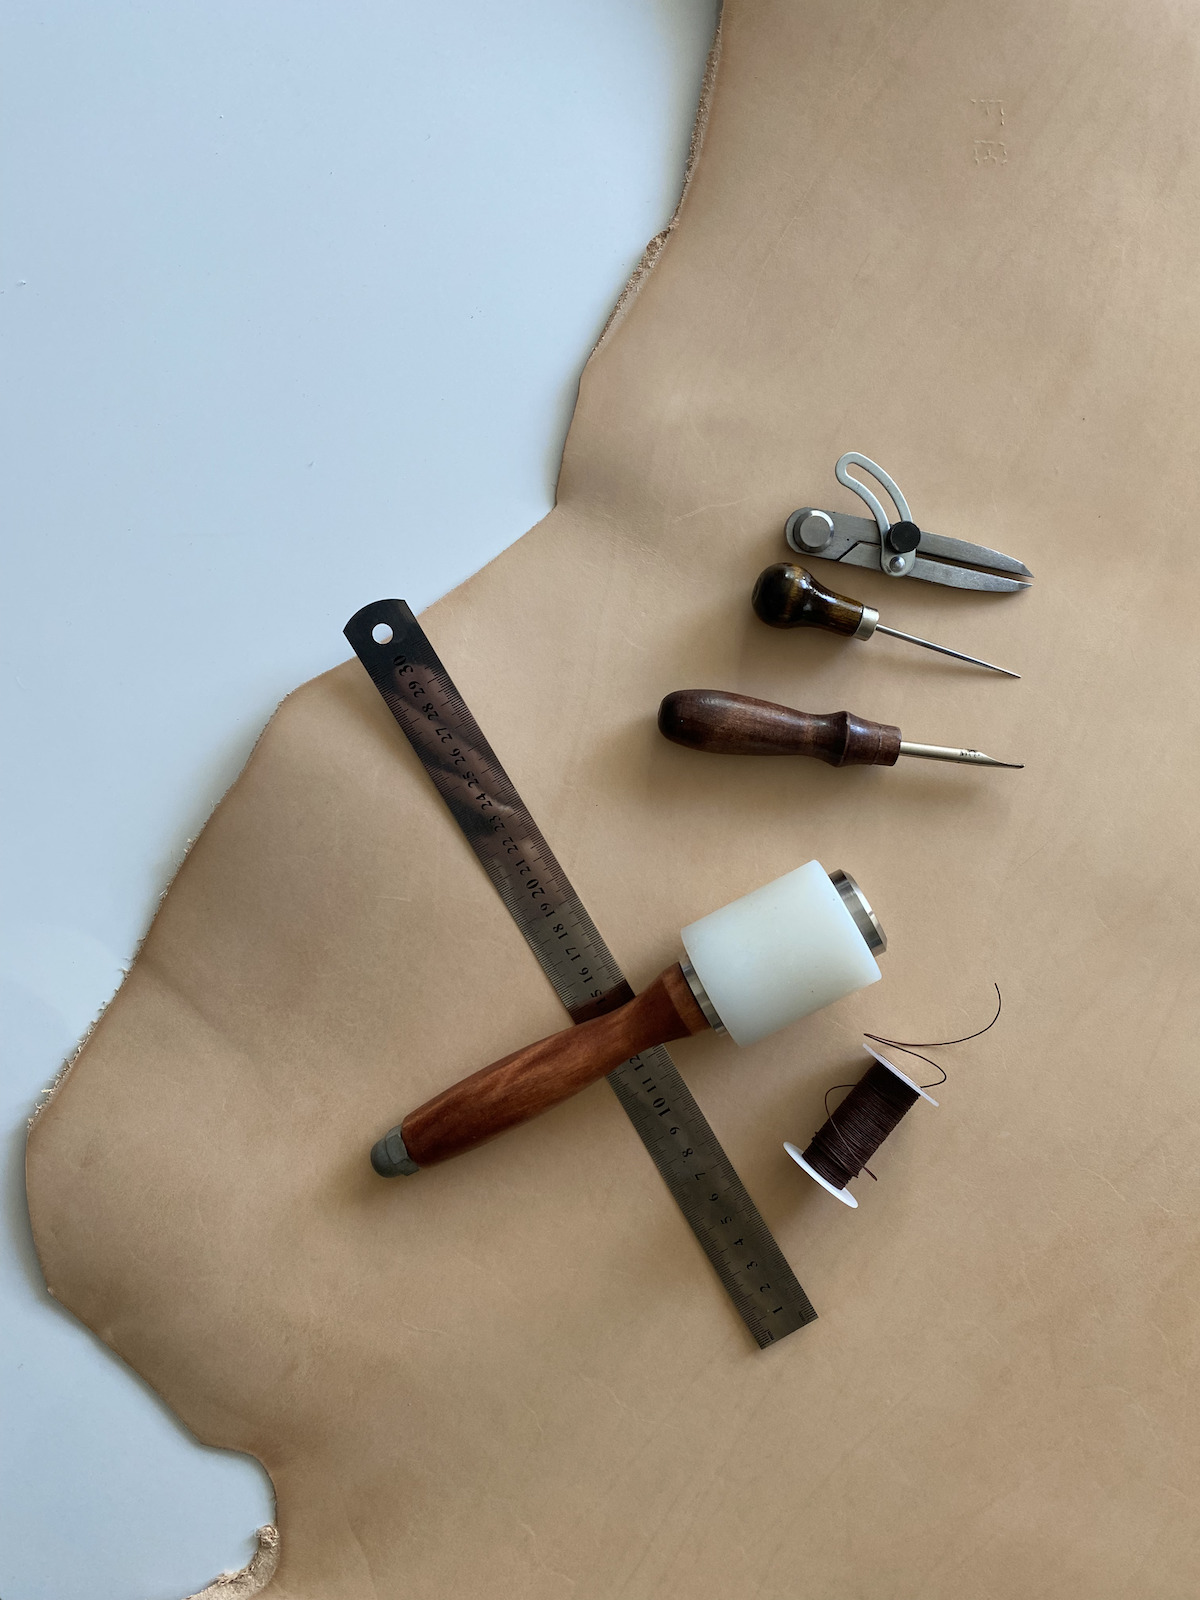
How to Make a Leather Laptop Sleeve
The sleeve I made is for a 2020 13″ Macbook pro, so if your laptop is slightly different in shape or thickness, feel free to leave a comment and ask how you can adjust this tutorial for your laptop!
Tools
- Leather – I used a 4-6oz piece of veg tan leather that will age to a deep cognac colour. I bought half a hide and only used about 1/4 of it for this project.
- Ruler
- an awl – this will be used to open the holes for your stitches
- a wing divider edge creaser – you’ll use this tool to make your stitch line
- a cutting mat
- an X-Acto knife
- a two-prong leather punch and a five-prong leather punch
- a rubber mallet
- a thick plastic cutting board
- two leather sewing needles
- leather adhesive
- waxed thread in the colour of your choice
- burnishing liquid
- burnishing tool (also called a leather edge slicker)
- a lighter
- rubber gloves – optional, but helpful for pulling the needles through your holes
Cutting
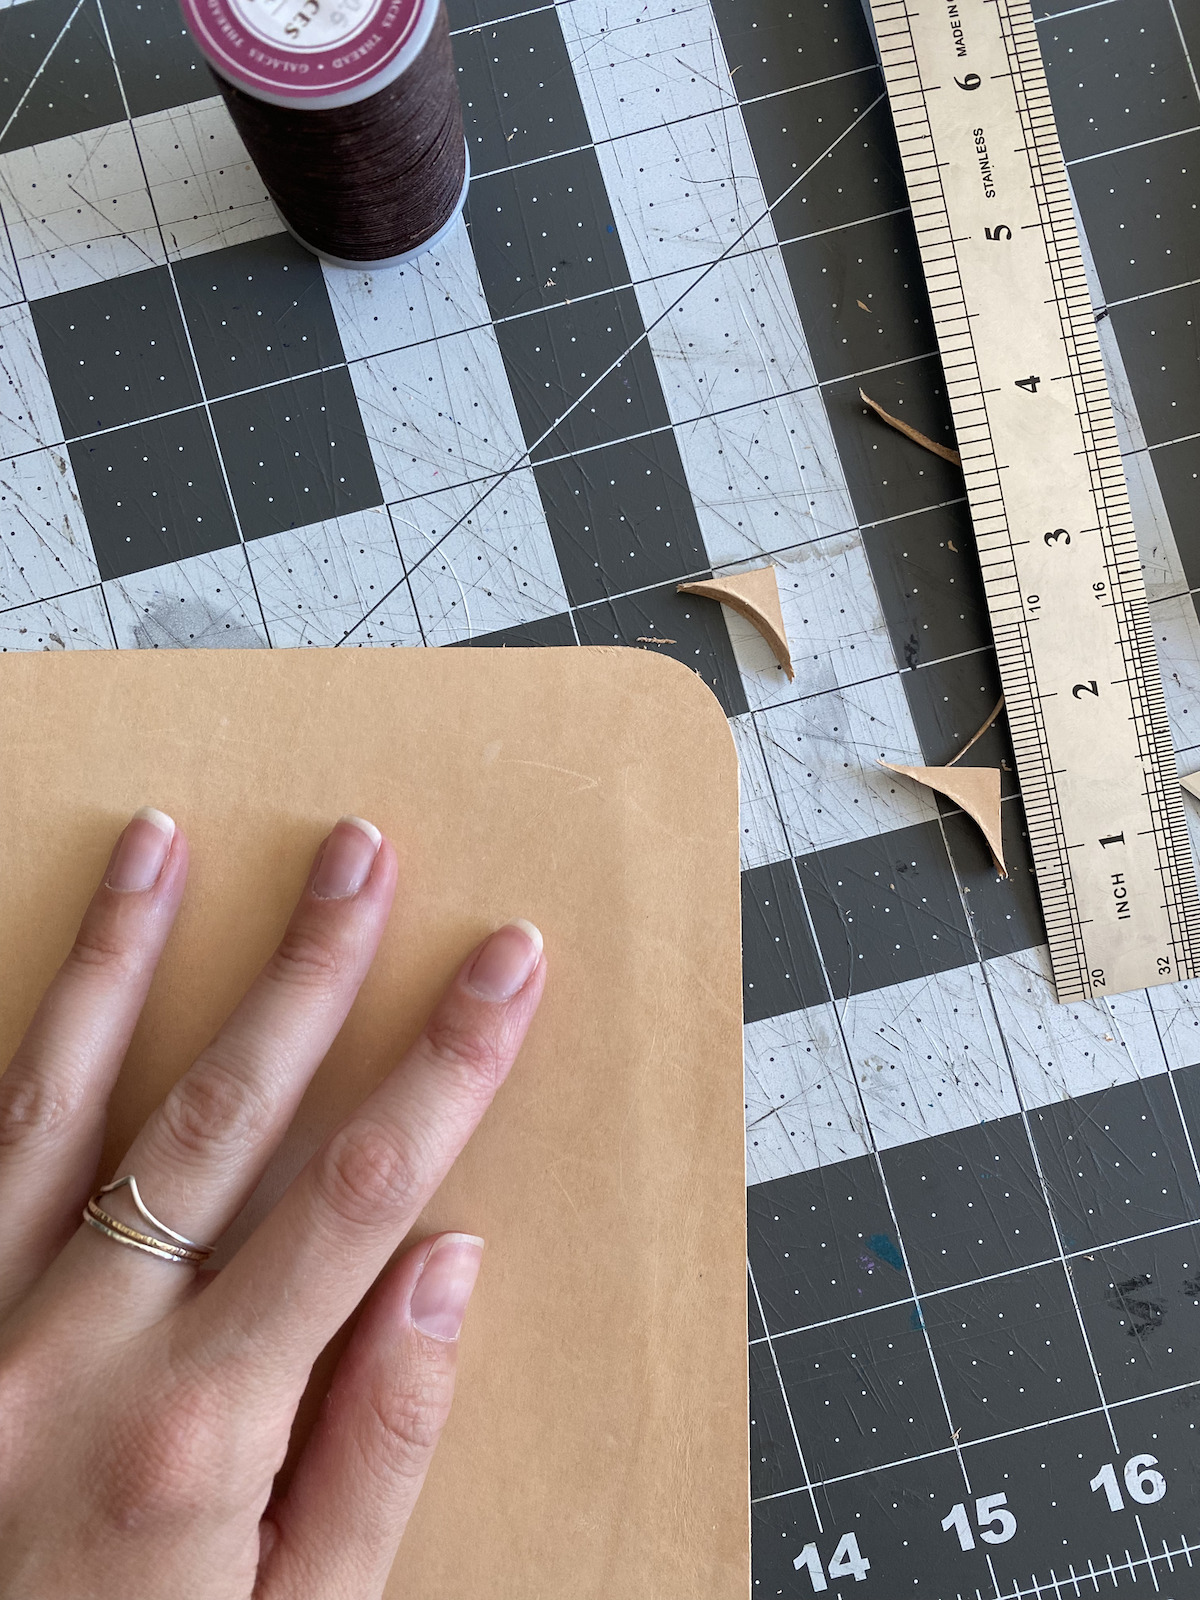
- Start by laying out your piece of leather on a flat surface and position your laptop on the leather. Starting at one corner of your laptop, use a ruler to measure 3/4″ out from your laptop and make a mark using an awl. Do this around the entire perimeter of your laptop.
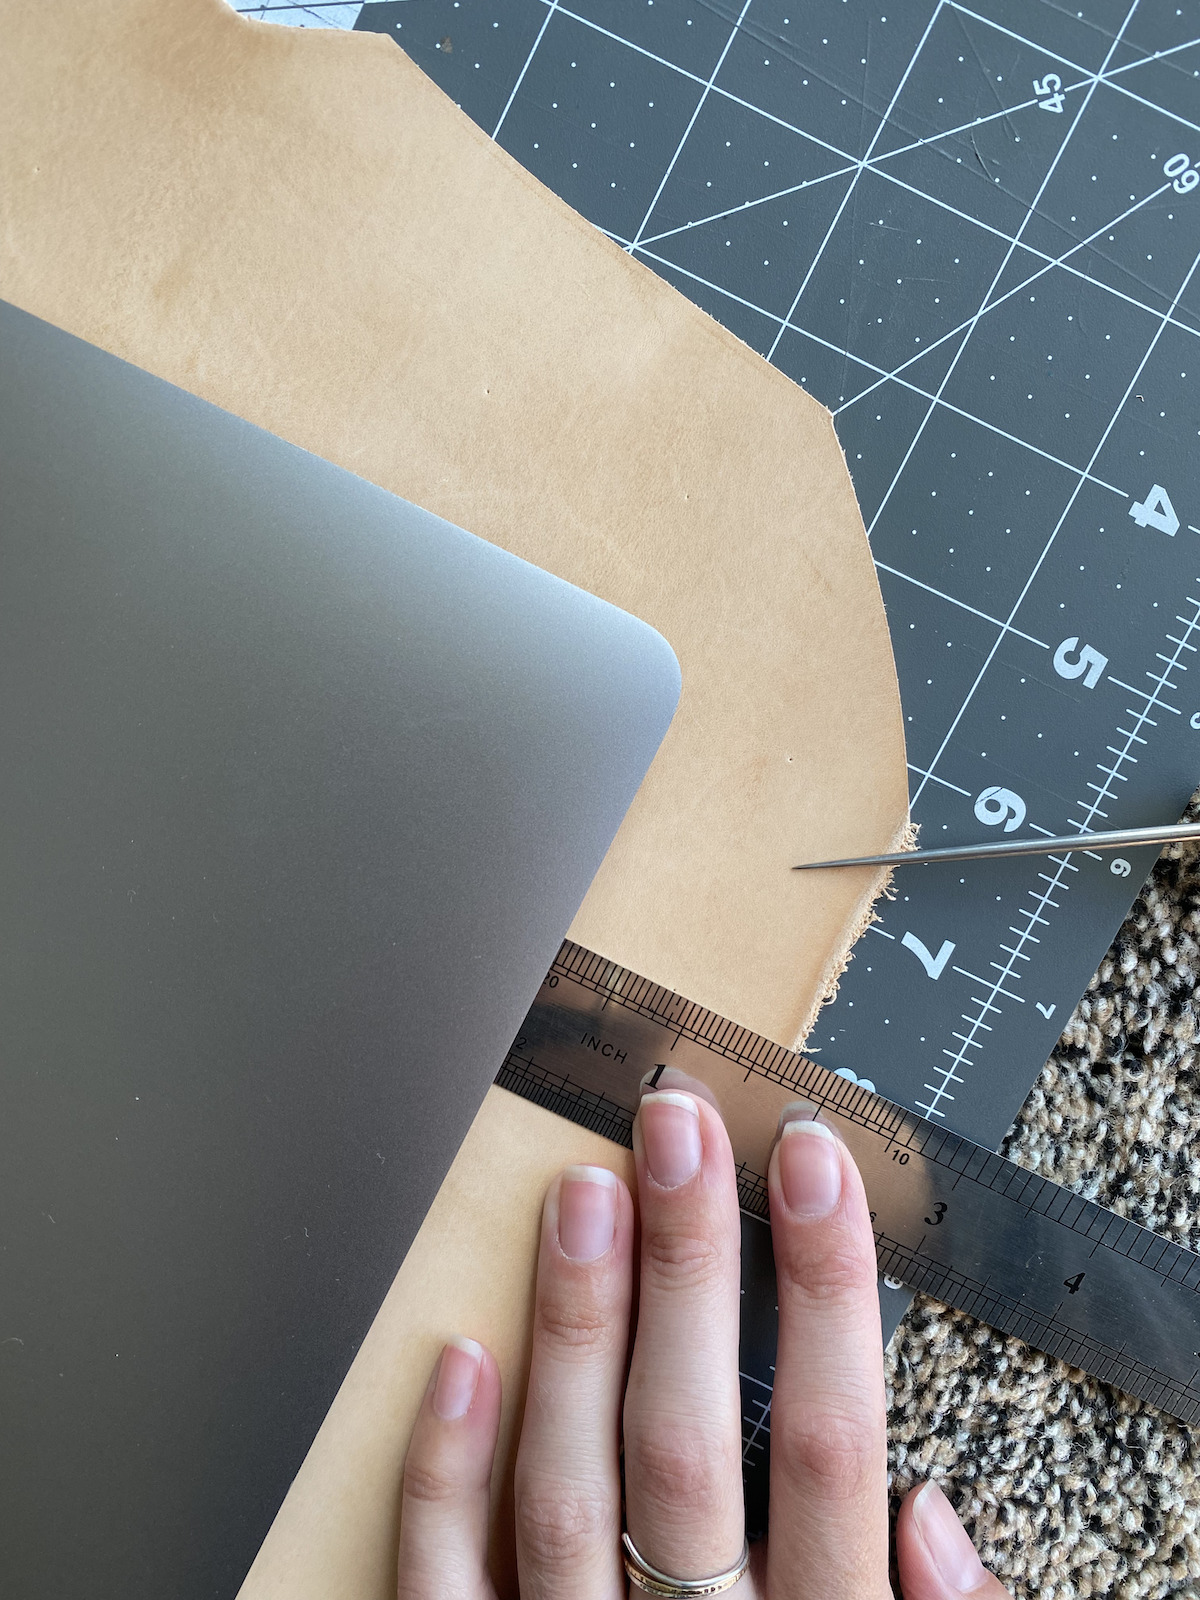
- Next, use your ruler to connect the dots and draw a line with the awl. Once you’re done, you should have a rectangle.
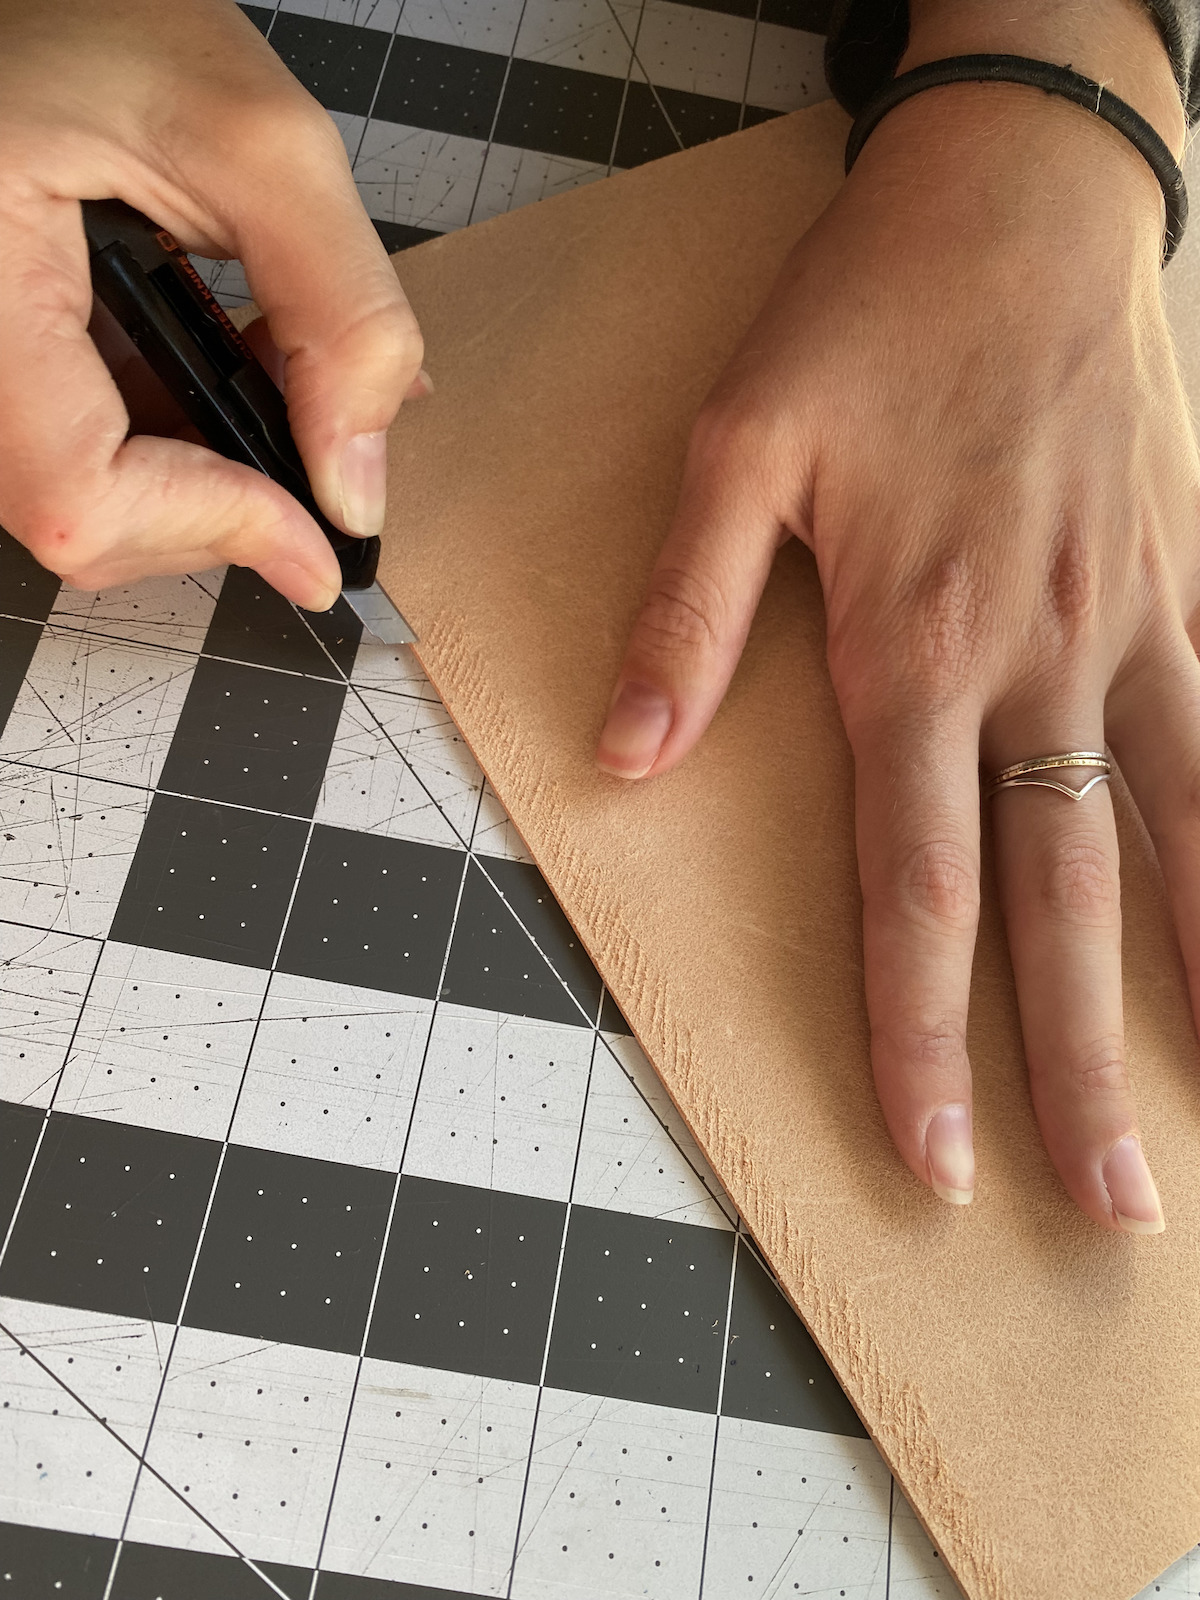
- Take your ruler and X-Acto knife and cut out your rectangle. Use this rectangle to trace a second rectangle. Cut that out as well.
Assembling
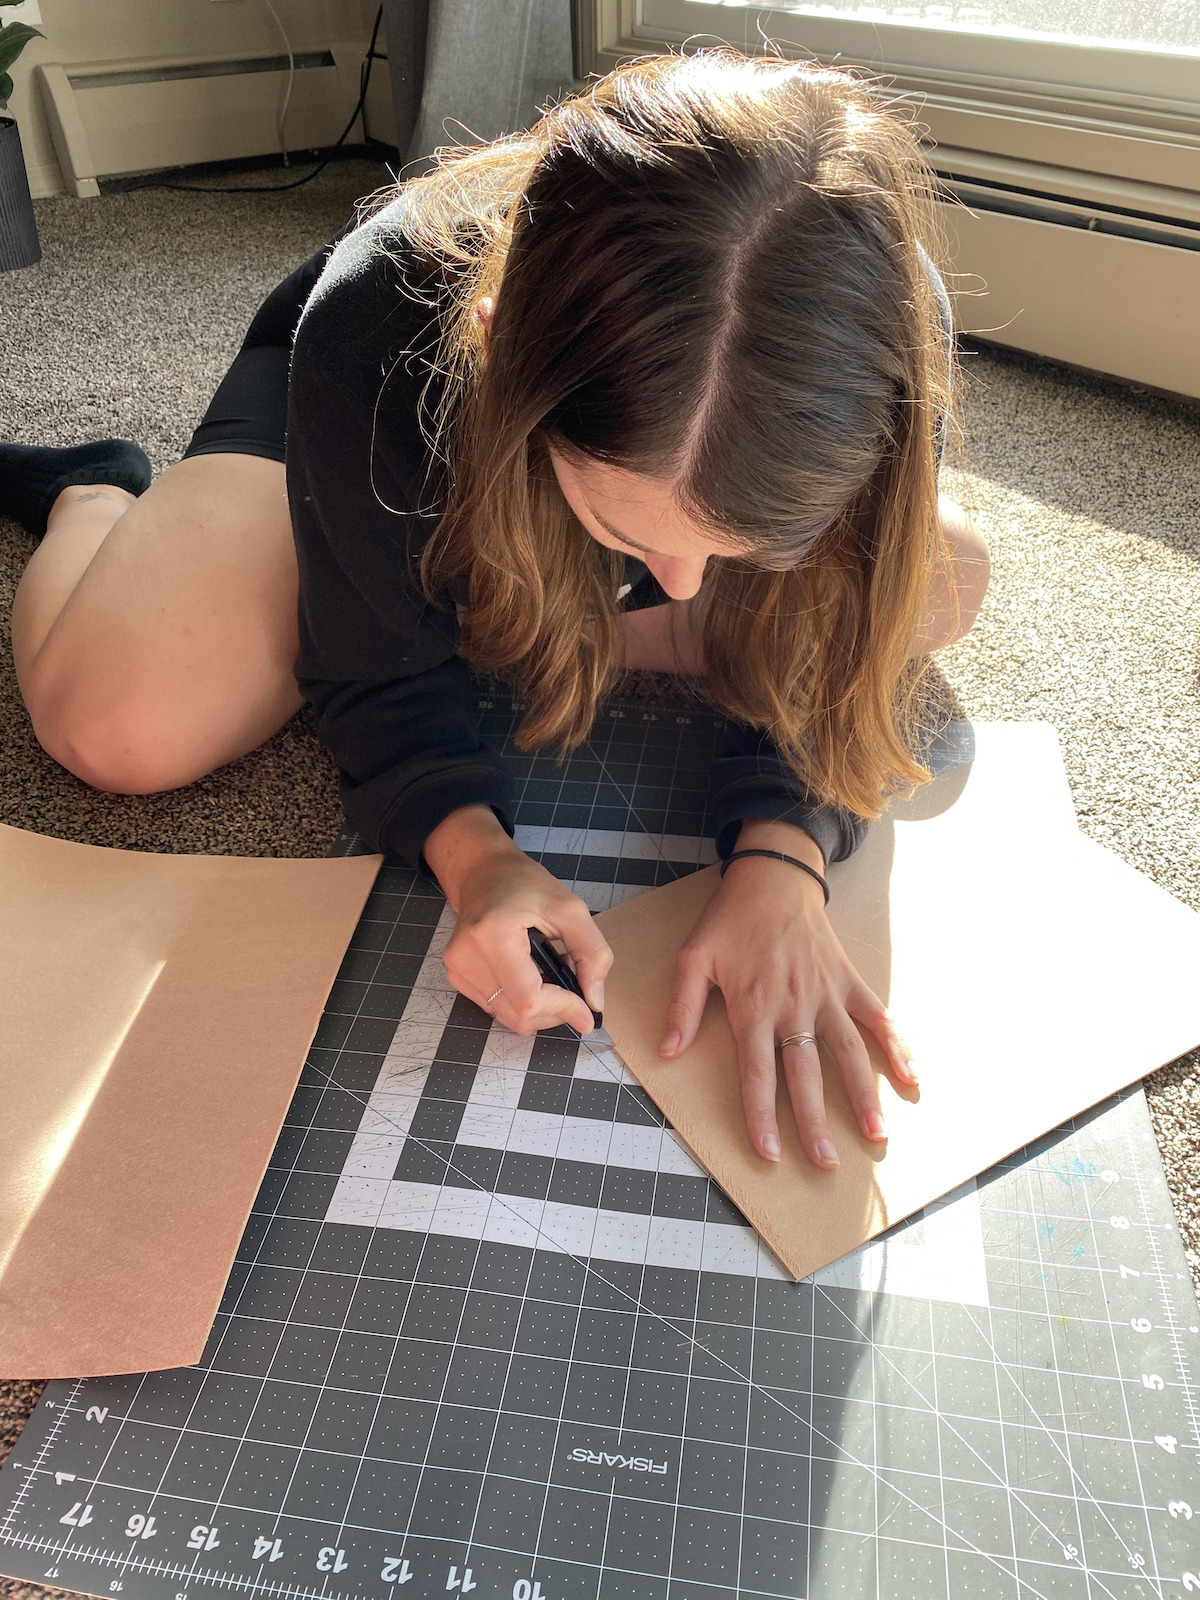
- Working on the back side of one of your pieces of leather, take your X-Acto knife and make small scratches about 3/8″ wide along two of the short sides and one of the long sides of your leather. We’ll be leaving the top of the laptop case open, so we don’t need to make the cuts on the top. What you’re trying to do is texturize the leather so that the two pieces will adhere better when you glue them together. Repeat on the second piece of leather.
- Now that your edges have been roughed up, it’s time to glue the two pieces together. Take one piece of leather and run a thin line of glue all along the roughed-up edges. Take your second piece of leather and lay it on top of the first so that the roughed-up edges are aligned. Use your hands to apply pressure to the glued edge so that it adheres well.
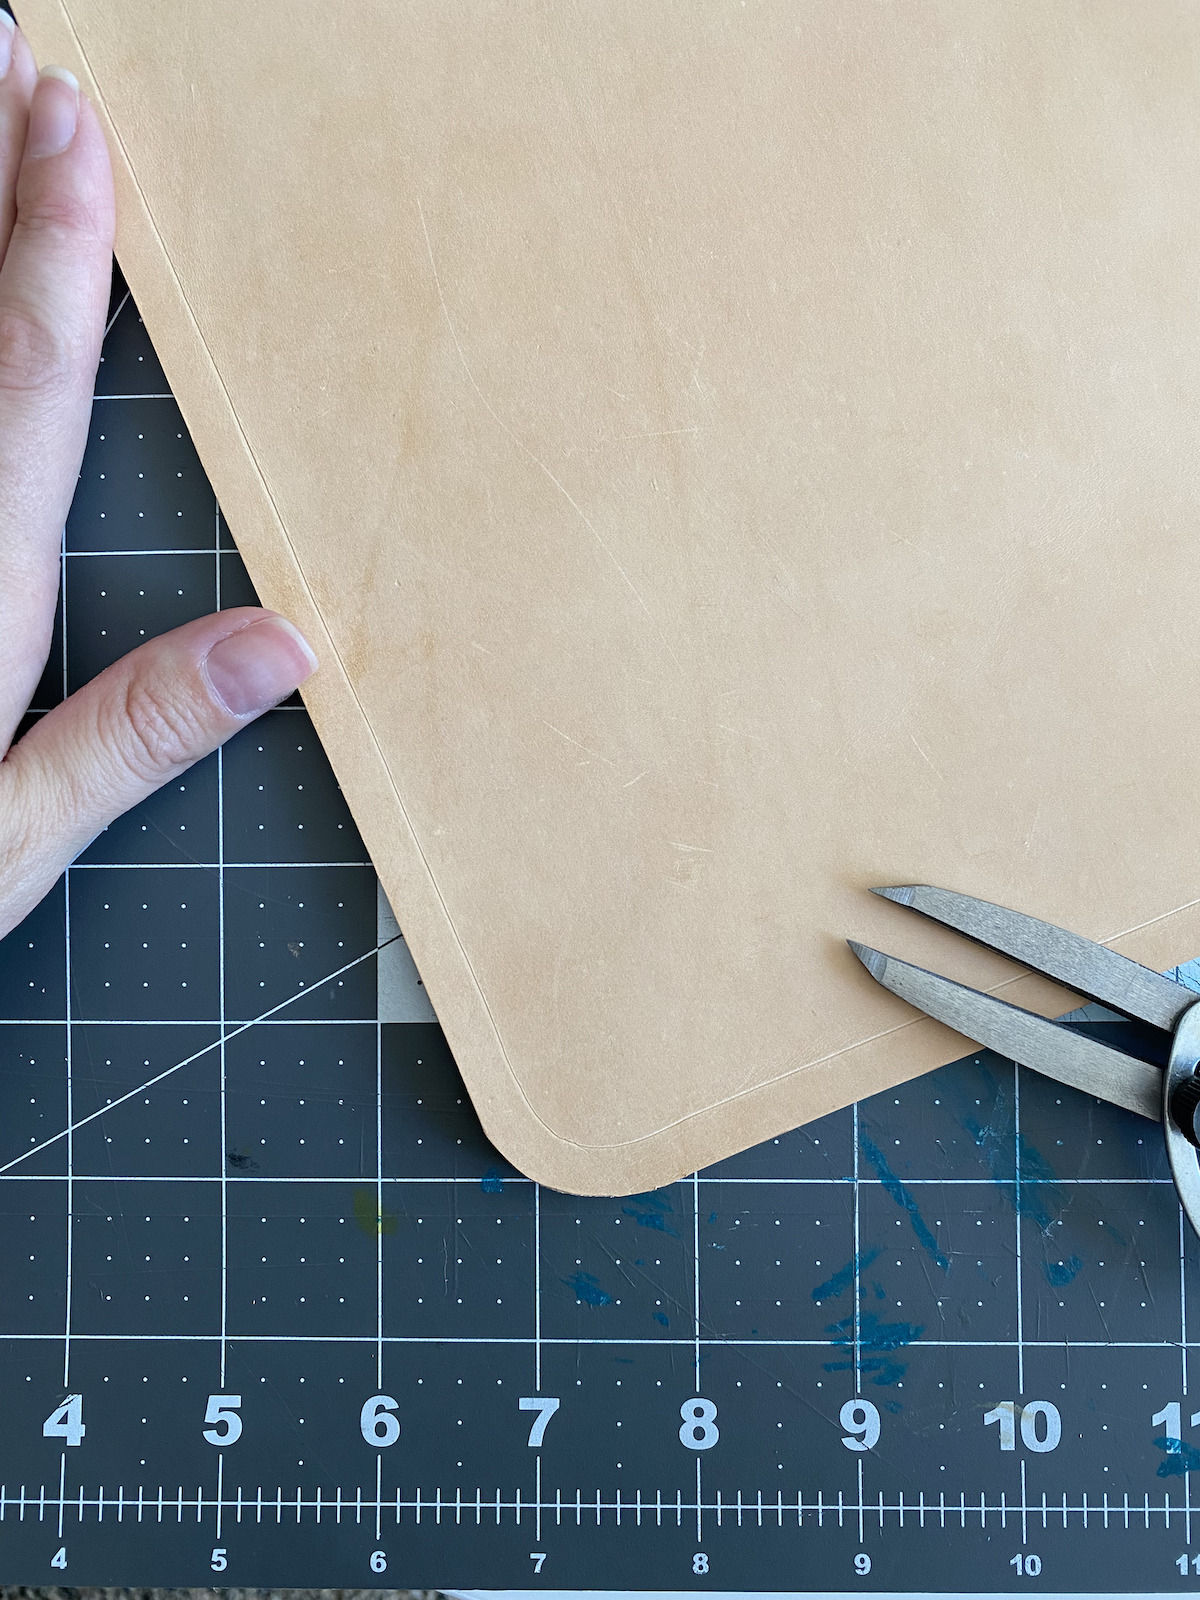
- Take a look at your laptop case and notice if any of the edges didn’t adhere perfectly straight. If the two pieces of leather aren’t aligned, trim the edges very slightly so that the two pieces are flush.
- Next, we’re going to round off the corners of our laptop case. To do this, I just took the spool of thread and placed it along each of the bottom two corners. I then used the awl to trace the curved line. When I was happy with the curve, I used the X-Acto knife to cut it into a curve.
Punching the Holes
- Now, it’s time to prep for making your stitches. When you’re making your stitch line, you want to ensure that you’re not stitching too close to the edge because this can weaken the leather. Try to give yourself at least 1/4″ of seam allowance for something like a laptop case. Mine is just over 1/4″ and I think it’s a great width. So, to make your stitch line, take your wing divider edge creaser, set it to 1/4″. Then, line up one of the arms with the side of your laptop case, placing the other arm on the leather. Making sure to keep contact with the edge the entire way around your case, apply pressure and drag the wing divider edge creaser around all 3 glued edges of your laptop case.
- Next, take your five-prong punch, mallet and plastic cutting board. Lay the laptop sleeve on the cutting board. Starting at the top left edge, line up your prongs with your edge line and use the mallet to tap the top of the prong to make holes. You want the holes to just go through the two pieces of leather. To make your next set of holes, place one of the prongs in your last hole and continue down one side of your laptop case.
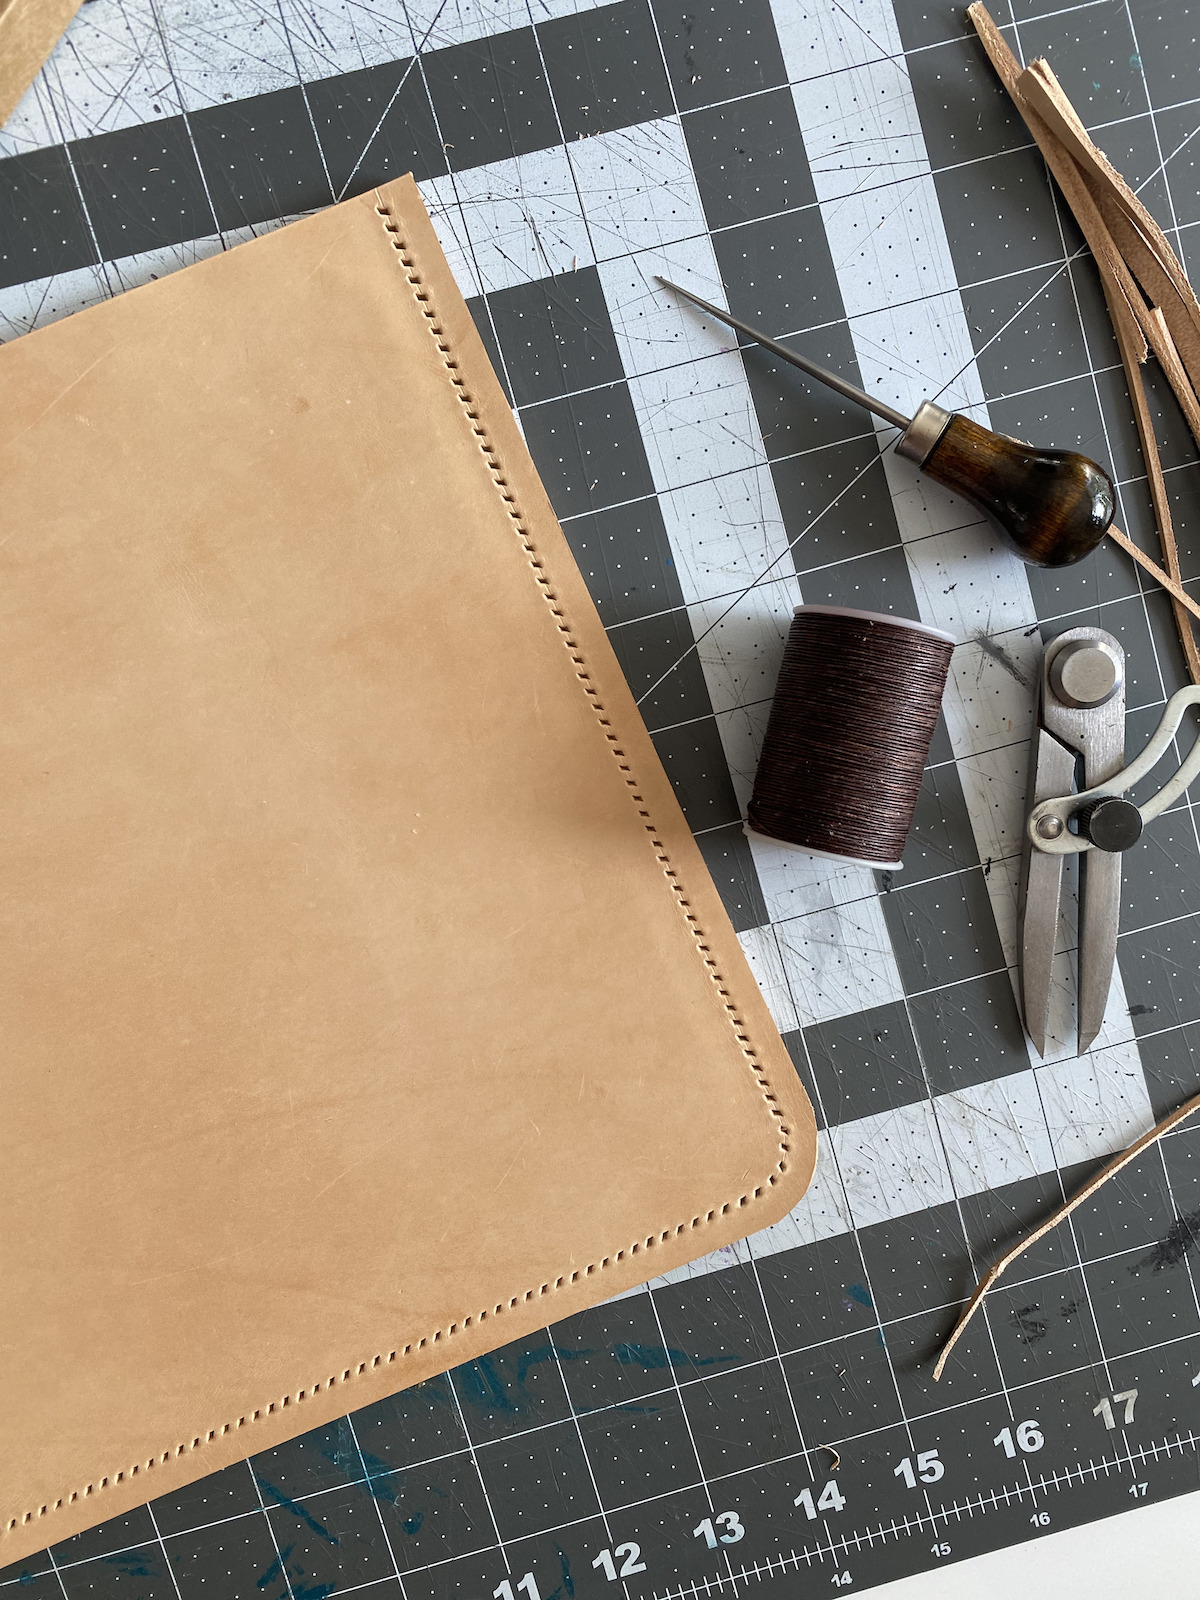
- When you get to the curved corners, switch to your two-prong punch and then continue with the five-prong for the straight lines.
- After all your holes are punched, use your awl to open up the holes slightly to make it easier to stitch.
Stitching
- Measure the length of all 3 sides of your laptop case and then multiply that by 4. This is how much thread you’ll need.
- I finished my laptop with a saddle stitch, so thread both ends of your thread with a needle.
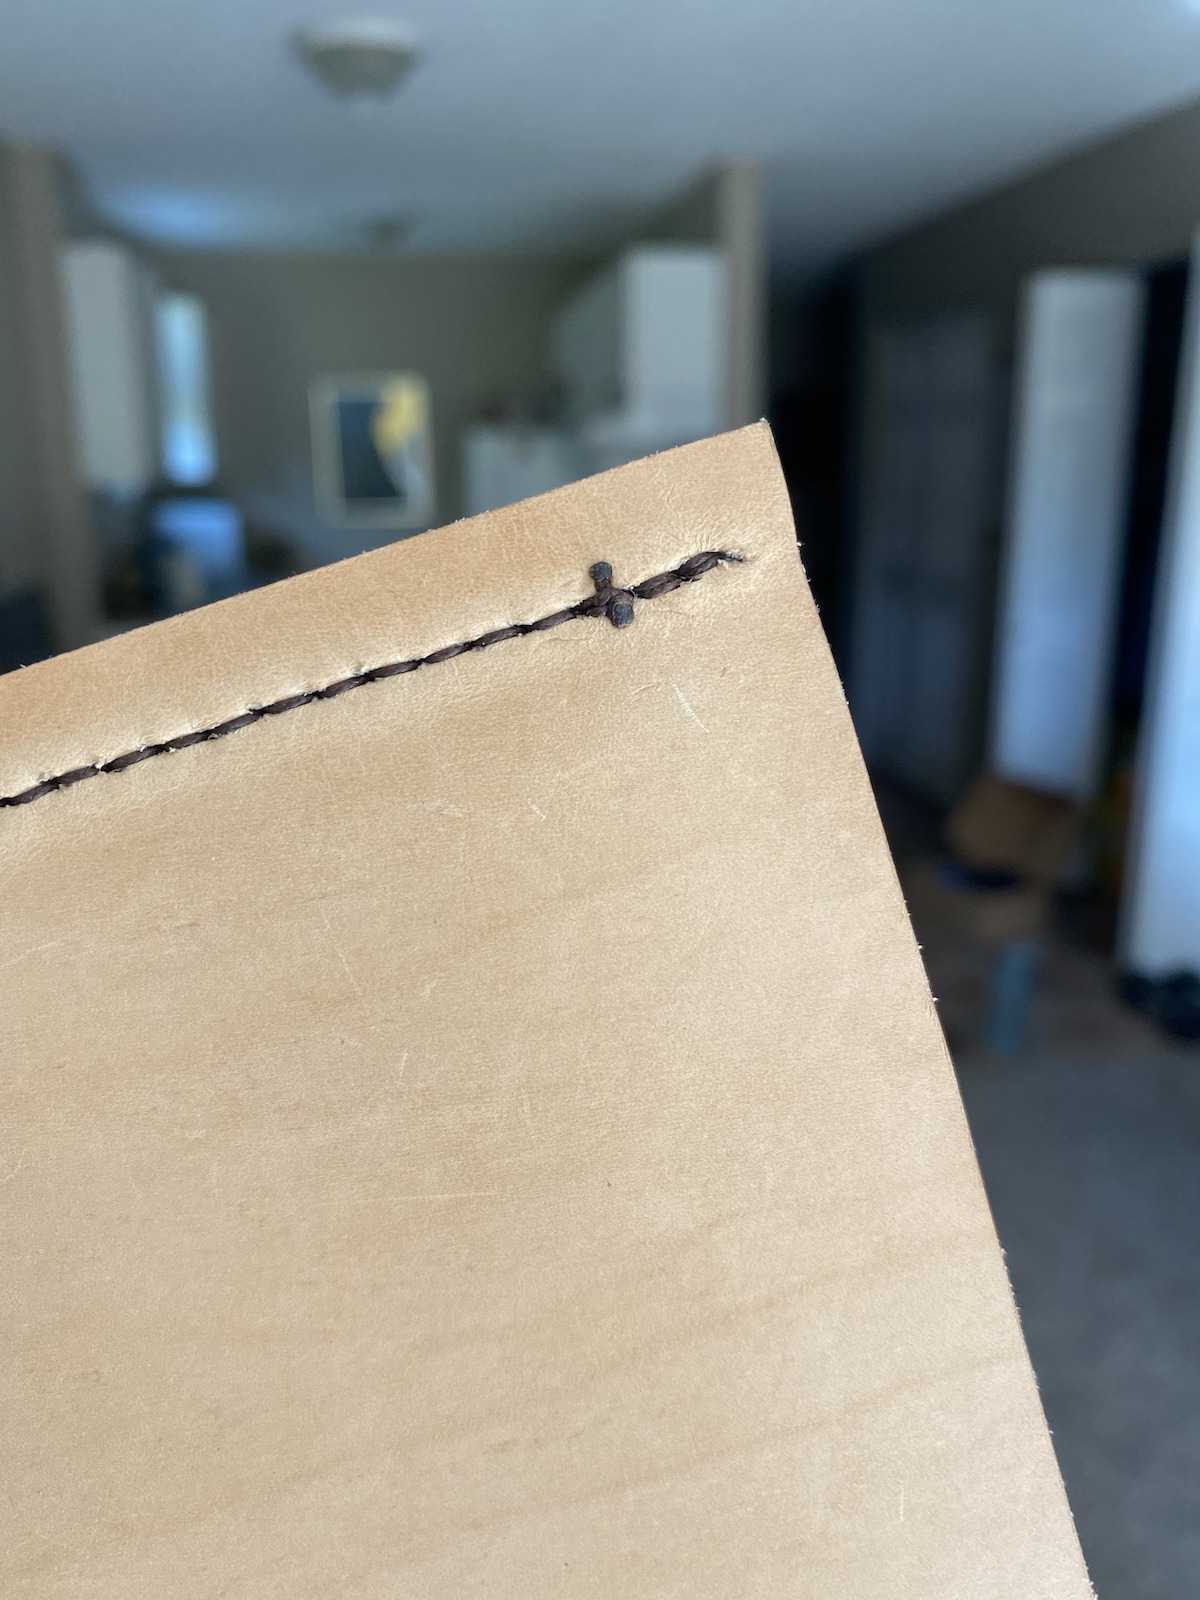
- Starting from the third hole down, thread one of your needles through the hole and then pull the threads so there is an equal amount on each side.
- We’re going to backstitch a little by stitching into the two holes above the third hole and will then come back down and complete the saddle stitch around the entire perimeter of the laptop case.
- To learn how to properly saddle stitch your laptop case, watch this video.
- Once you’ve gotten to the end of your laptop case, backstitch another 2-3 stitches and then cut your threads short – only about 1/8″. Use a lighter to burn the ends (being careful not to burn your leather) and then blow out the flame. Take the flat end of one of your prongs and use that to flatten the threads and seal them in place.

Finishing
- The last step in finishing your laptop case is to use the burnishing liquid and burnishing tool to finish the edge of your laptop case.
- Working about 2″ at a time, brush a small amount of burnishing liquid onto the seam of your laptop case. Rapidly rub the burnishing tool over that area. Repeat until you’ve worked your way around the entire edge of your laptop case
- If you’d like, you can do a second round of burnishing and your laptop case will be ready to go!
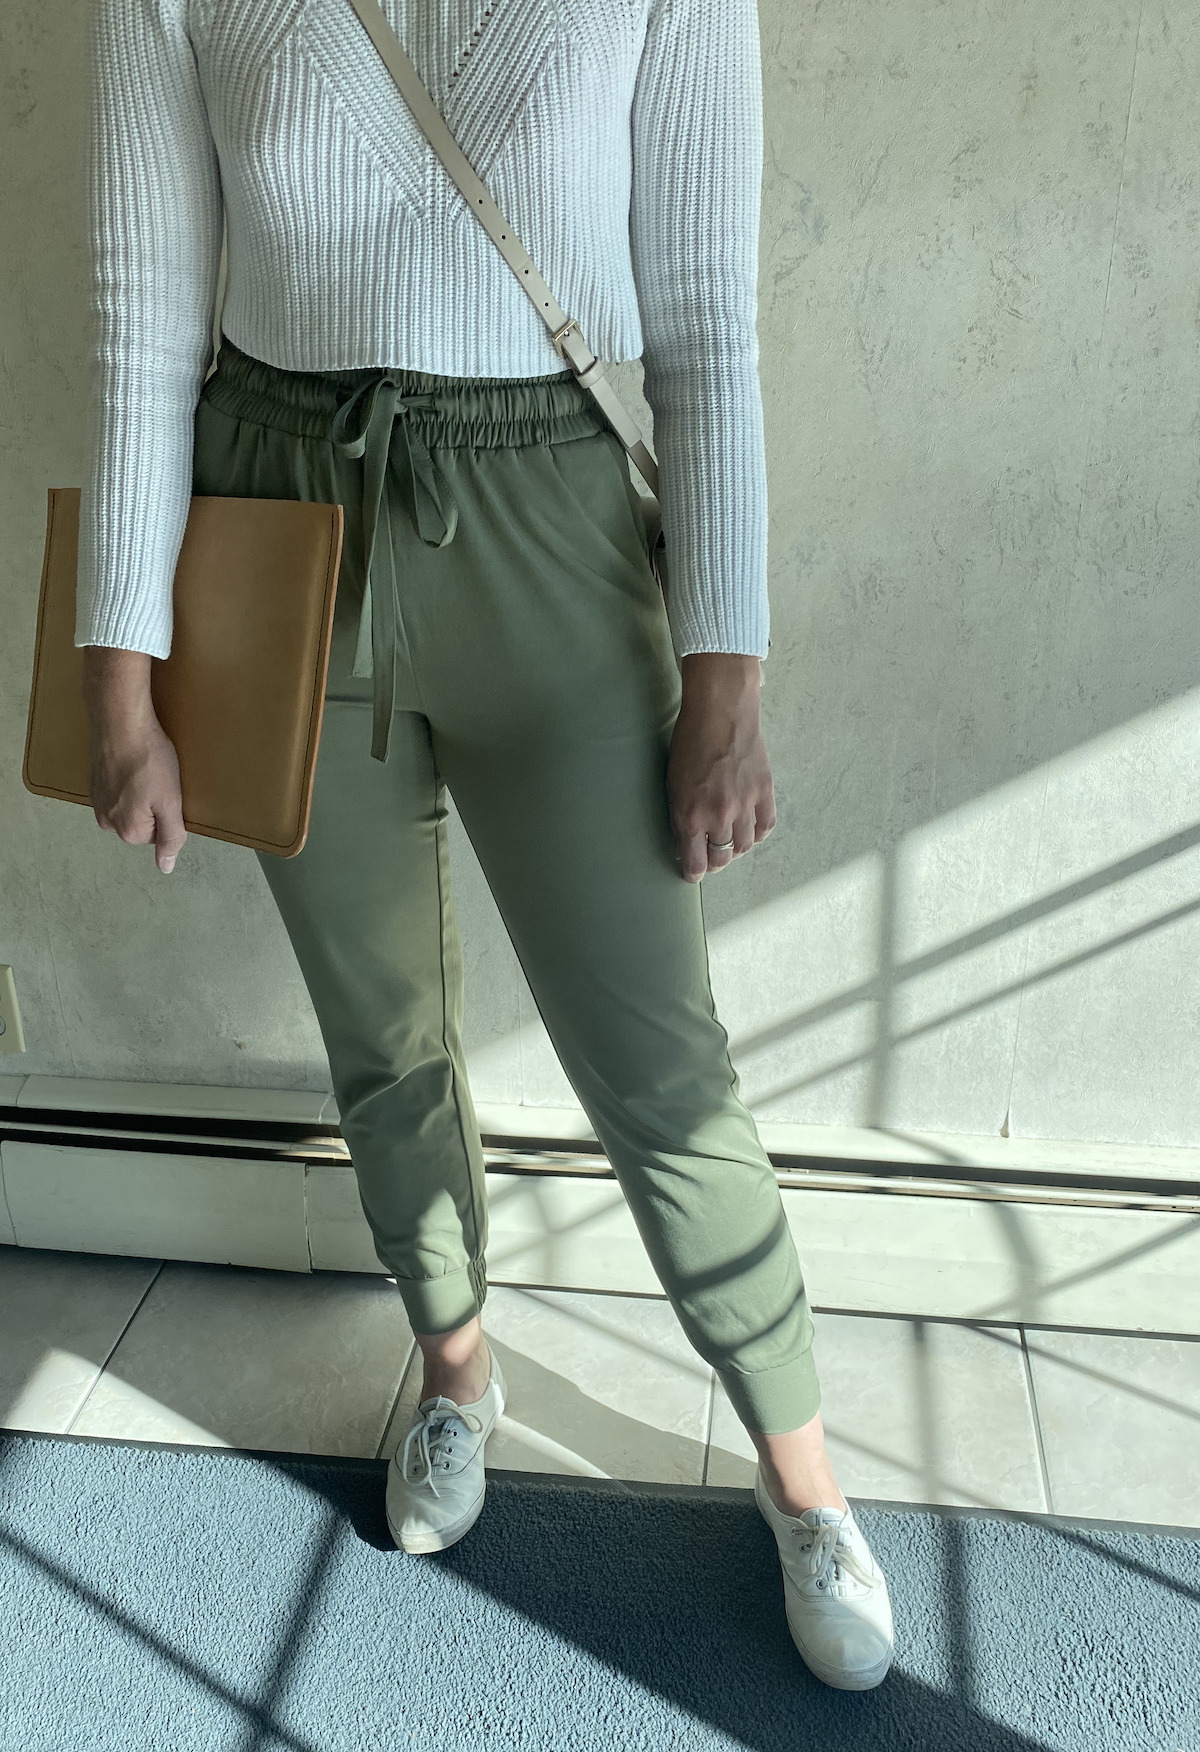
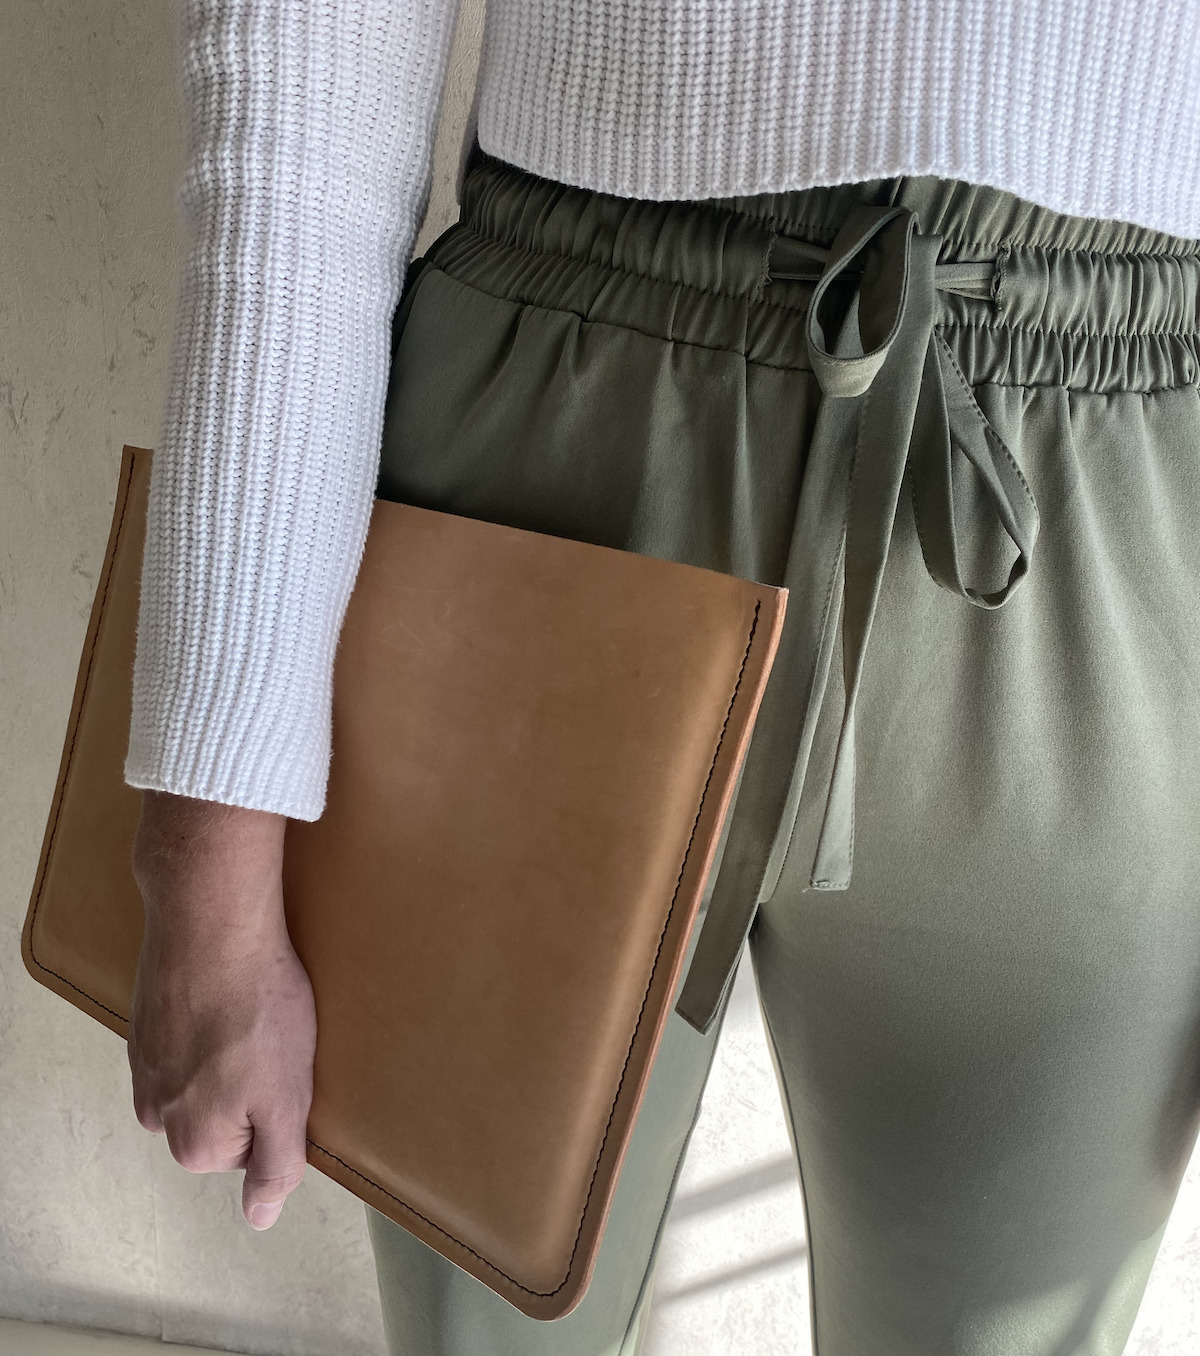
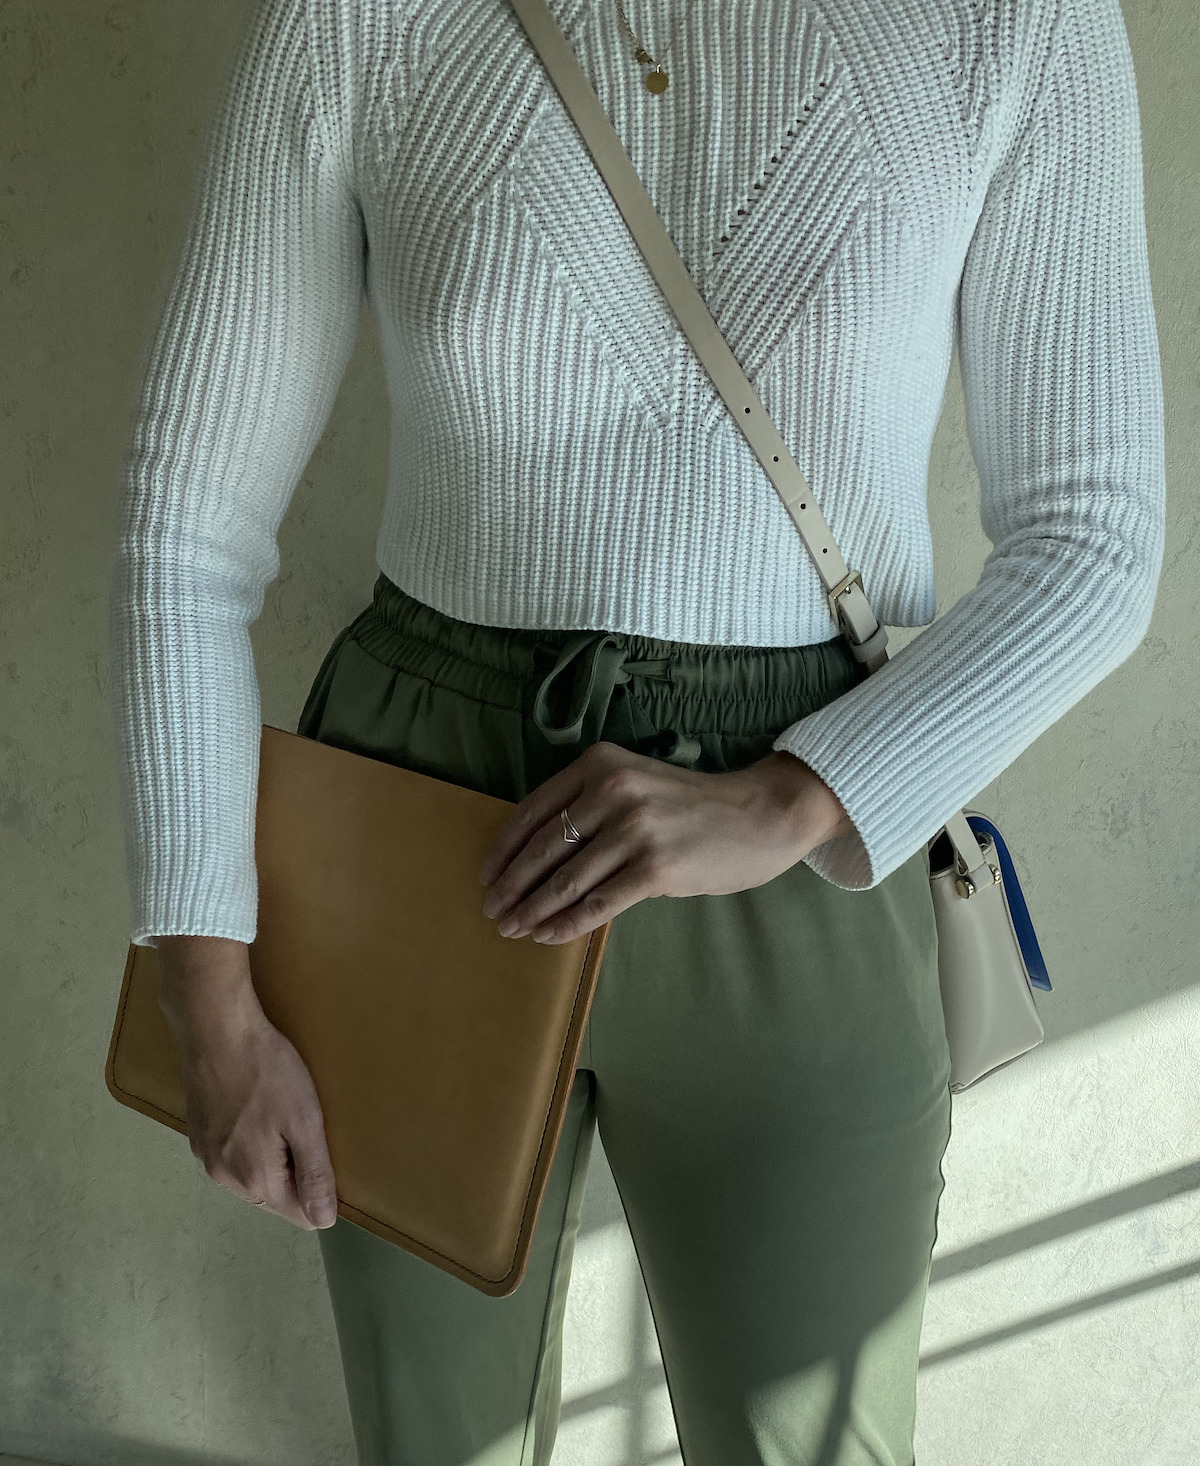
I’m so thrilled with how my laptop case came out and I can’t wait to use it for years to come. It’s exciting to be able to watch the leather change colour as it ages. I can’t wait until it’s the perfect rich cognac colour of my dreams!
This project has definitely started an obsession with making leather goods, so I can’t wait to share more with you! If you’re feeling the same way after finishing this project, take a look at this leather accessories kit!
I’d love to know what you think of this laptop case!
- Tess
Let’s Stay Friends!
Insta | Pinterest | Enews | TikTok