

Sep
There is nothing I love more than a quick and easy DIY that you can complete in an afternoon. Now, imagine that the DIY you’re doing is going to yield a cute sleeveless shirt at the end. How amazing is that?! With my simple sleeveless shirt tutorial you’ll be able to quickly whip up an adorable shirt. It’s perfect on it’s own, or can be layered under other pieces to transition seamlessly into fall! All it takes is about 1/2 a meter of fabric, matching thread, and an afternoon. Let’s get sewing!
First, let’s talk fabric. I have a ton of scrap fabric from past projects, so I was able to pick one and create this sleeveless shirt tutorial right away. I chose a silk fabric, but actually used the reverse side so that it looked more like a crepe and didn’t have the sheen of silk. You can pick a dressier fabric like I did, or for a more casual look, consider a cotton or a blended fabric. Also, if you don’t have matching thread at home, make sure you pick some up while you’re fabric shopping!
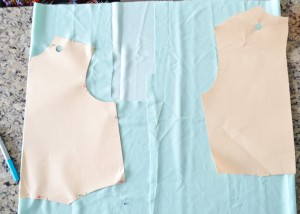
Next, we’ll discuss the pattern pieces for this shirt. I have pattern pieces from when I went to school for fashion, so I’m able to use those. It’s definitely a good idea to take some bristol board and cut out your own basic shirt pattern pieces because then you’ll have them forever. The first image below is the two pattern pieces I use. They can be used time and time again! You can even use this sleeveless shirt tutorial as practice for making other garments with those same pieces. You’ll need a shirt front and a shirt back. You can also base this off of a sleeveless shirt that you already have, if you don’t have the pattern pieces.
Simple Sleeveless Shirt Tutorial
Materials:
1/2 meter of fabric (should be light – medium light weight and drape fairly well)
matching thread
Equipment:
a serger (optional, but highly recommended – I use a Janome serger)
a sewing machine (I have a basic Brother sewing machine, but it’s lasted me for over 10 years and I’ve never had a problem with it. I love it!)
fabric scissors
shirt front and shirt back pattern pieces (or a sleeveless shirt in a similar style)
a ruler – I swear by this one
pins
an iron
a pen
Pattern Prep:
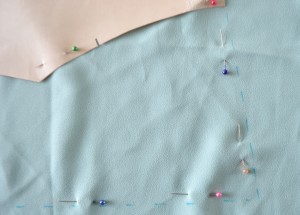
- First, lay your fabric out in a single layer. Then, fold both sides of your fabric in towards the middle so that you have two folded edges.
- Place each of your pattern pieces on one of the folded edges of your fabric and make sure that they are parallel with the selvage (the finished edge of the fabric)
- Pin your pattern pieces down using pins
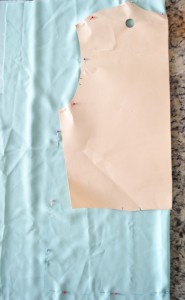
- I wanted my shirt to be longer and wider than my pattern pieces. For the shirt front, I took my ruler and continued the line of the side seam 4 inches longer than the pattern piece. This made the shirt front about 4 inches longer. For the shirt back, I wanted it to be wider, so I drew a straight line from the bottom of the arm hole to my new longer hem. I also extended the shirt back about 6 inches from the bottom of the pattern piece. I purposely made my shirt back longer than the front.
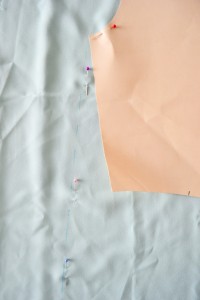
- Next, cut our your pattern pieces. After I cut my pattern pieces, I trimmed the neck and sleeves like so:
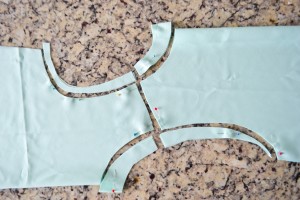
- If you have a serger, now is the time to serge your pattern pieces. I highly recommend doing this as it makes for a much nicer finished product. It also prevents all those frayed threads from escaping or hanging down from your garment. This is what your pattern pieces should look like when cut:
Garment Construction:
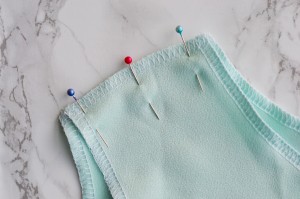
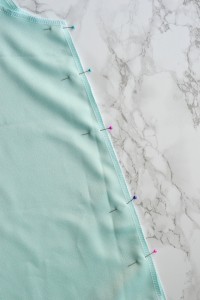
- First, pin both of the shoulders with right sides together. Sew with 3/8″ seam allowance, remembering to back tack at the beginning and end.
- Try the shirt on over your head and see how the neckline and sleeves feel. If they are too tight, cut the sleeves or neck down a little further about 1/4″ or so.
- If all fits well, move on to sewing both side seams. Make sure that right sides are together. To finish the bottom of the shirt the same way I did, stop sewing the side seams about 1-2 inches away from the bottom.
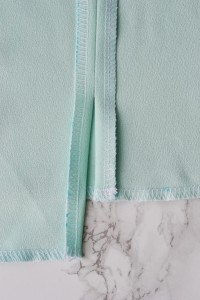
- Try the shirt on again and adjust the fit as needed. If you’re happy with the fit, go ahead and press those side seams and shoulder seams open. When pressing the side seams, press all the way down to the bottom like so:
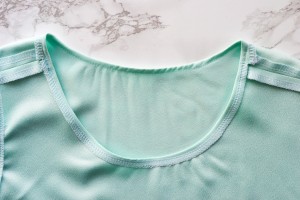
- Next, we’re going to sew the neckline and the sleeve openings. All I did was fold the serging back and sew the fabric in place. It looked a little funny at first because I had to stretch the fabric, but after giving it a good pressing it lays flat and looks nice. You could also cut facing for the neck and sleeves and finish the shirt that way.
- To finish the side seam, start on one side and sew down the pressed fabric. Once you reach the part where the two pieces are sewn together, just go across the seam and then back down the other side. It should look something like this:
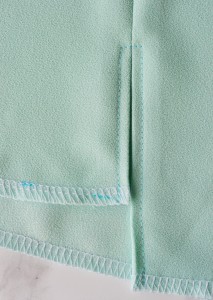
- Lastly, we’re going to do the hem. I hemmed mine the same way that I did the neck and the sleeve holes. I just folded my serging up and sewed in place.
- Press all seams again and wear!
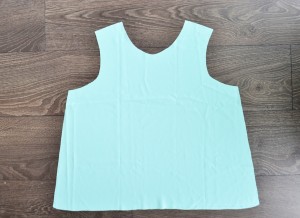
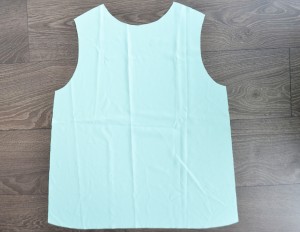
Finished Shirt:


After only about and hour of sewing, I had a finished shirt that I was able to wear for work! It’s simple, classic and works with so many different outfits! Also, because the shirt is so quick to make, it’s a great project for a beginner sewer. It’s also great if you only have a short amount of time to make something – it comes together so quick! I was so impressed by the finished product that I already have some ideas for other shirts that I’m going to make. I’m thinking a long sleeved red shirt for the next project!
What do you think of this simple sleeveless shirt tutorial? Will you be making one for yourself?
Let me know!
xo, tess.
Follow Tess Ciarloni at
Angean Blog | Facebook | Twitter | Instagram | Pinterest
And here’s More T-Shirt DIY’s!

This tutorial looks so easy to follow! Thanks!
Wow, I like this post. You presented well the “how-tos” of making this nice sleeveless blouse. I am excited to try this.
Thanks so much Jho! I’d love to know how it goes when you try making it 🙂
What serger settings did you use for your slik? 3 thread, 4 thread, cover stitch, overlock, etc? Thank you!
Hi Rebecca,
I used a serger to finish the edges which I believe is also called an overlock machine. It uses 4 threads! Hope that helps!
Tess