DIY
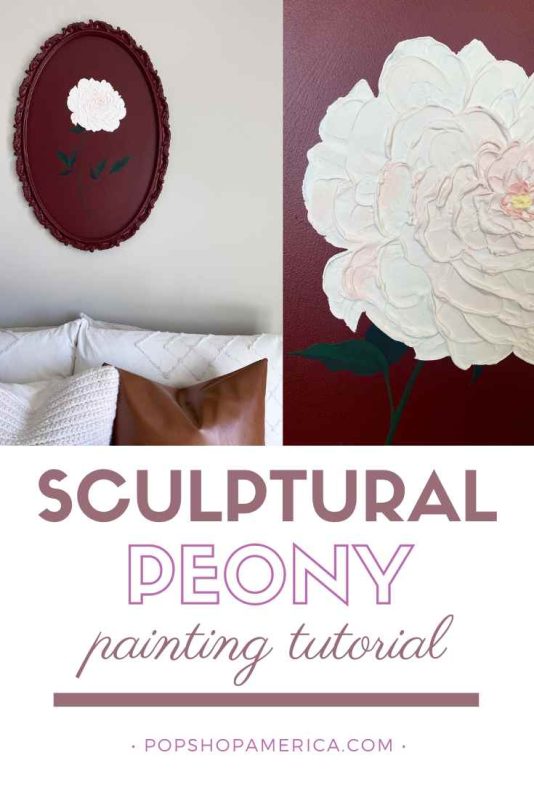
Textured Peony Painting Tutorial in a Vintage Frame
Apr
Every few years I feel the need to redo my bedroom.
This year, I did something pretty radical (for me anyway). I got rid of 4 whole throw pillows. For someone who used to take pride in having about 18 throw pillows on her bed, this was quite the change. I’d been sitting at about 8 throw pillows for the last 10 years. So, finally getting rid of some for a more minimal look actually felt great.
I redid some of the pillows with a cognac-colored faux leather fabric, so it definitely feels more mature. A lot of the white and pink of my last apartment had to go, and I’m leaning towards deeper, richer shades. I wanted to have more of a mix in this apartment, and I think it’s slowly starting to get there.
Having a big piece of art above my bed has always been a favorite of mine, so I decided to switch that up too. In fact, that’s what this entire post is about!
I saw this beautiful piece of art on Instagram and wanted to try to recreate something similar for myself.
Now that it’s done, I’m here to help you create one of your own! I just have a couple of notes on paint and materials before we get started.
Materials
The Frame
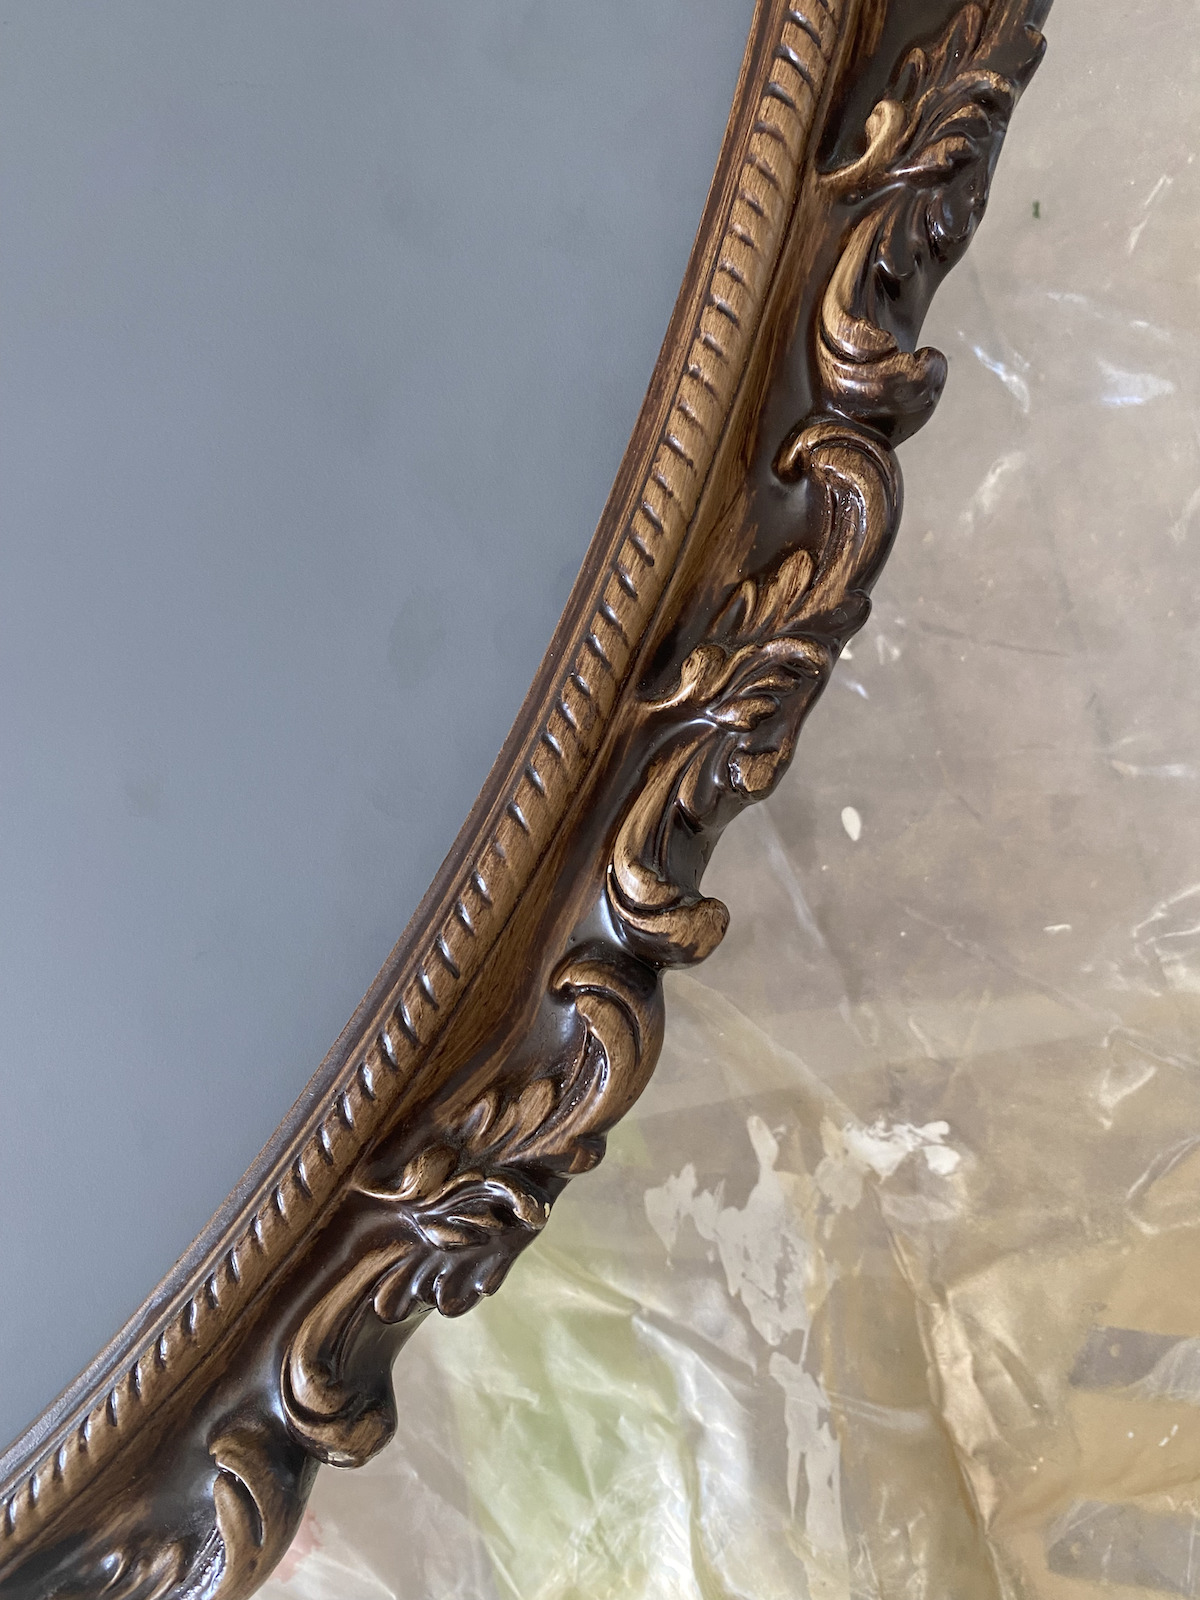
I spent a long time looking for the right kind of ornate frame for this project. This is not a step that you want to rush! Take your time and go to some vintage or antique stores and see what they have. Facebook marketplace is also a great option and that is where I ended up finding my frame. To make this type of art pop, you’re going to want a frame that’s more ornate. You’ll most likely find frames that are wood and will have to paint them. How ornate the frame is is totally up to you, but I found that this was a go-big or go-home kind of project. So, I went pretty ornate with mine. Painting it the solid color helps to modernize the frame, so it doesn’t end up looking gaudy at the end, even if it is super ornate.
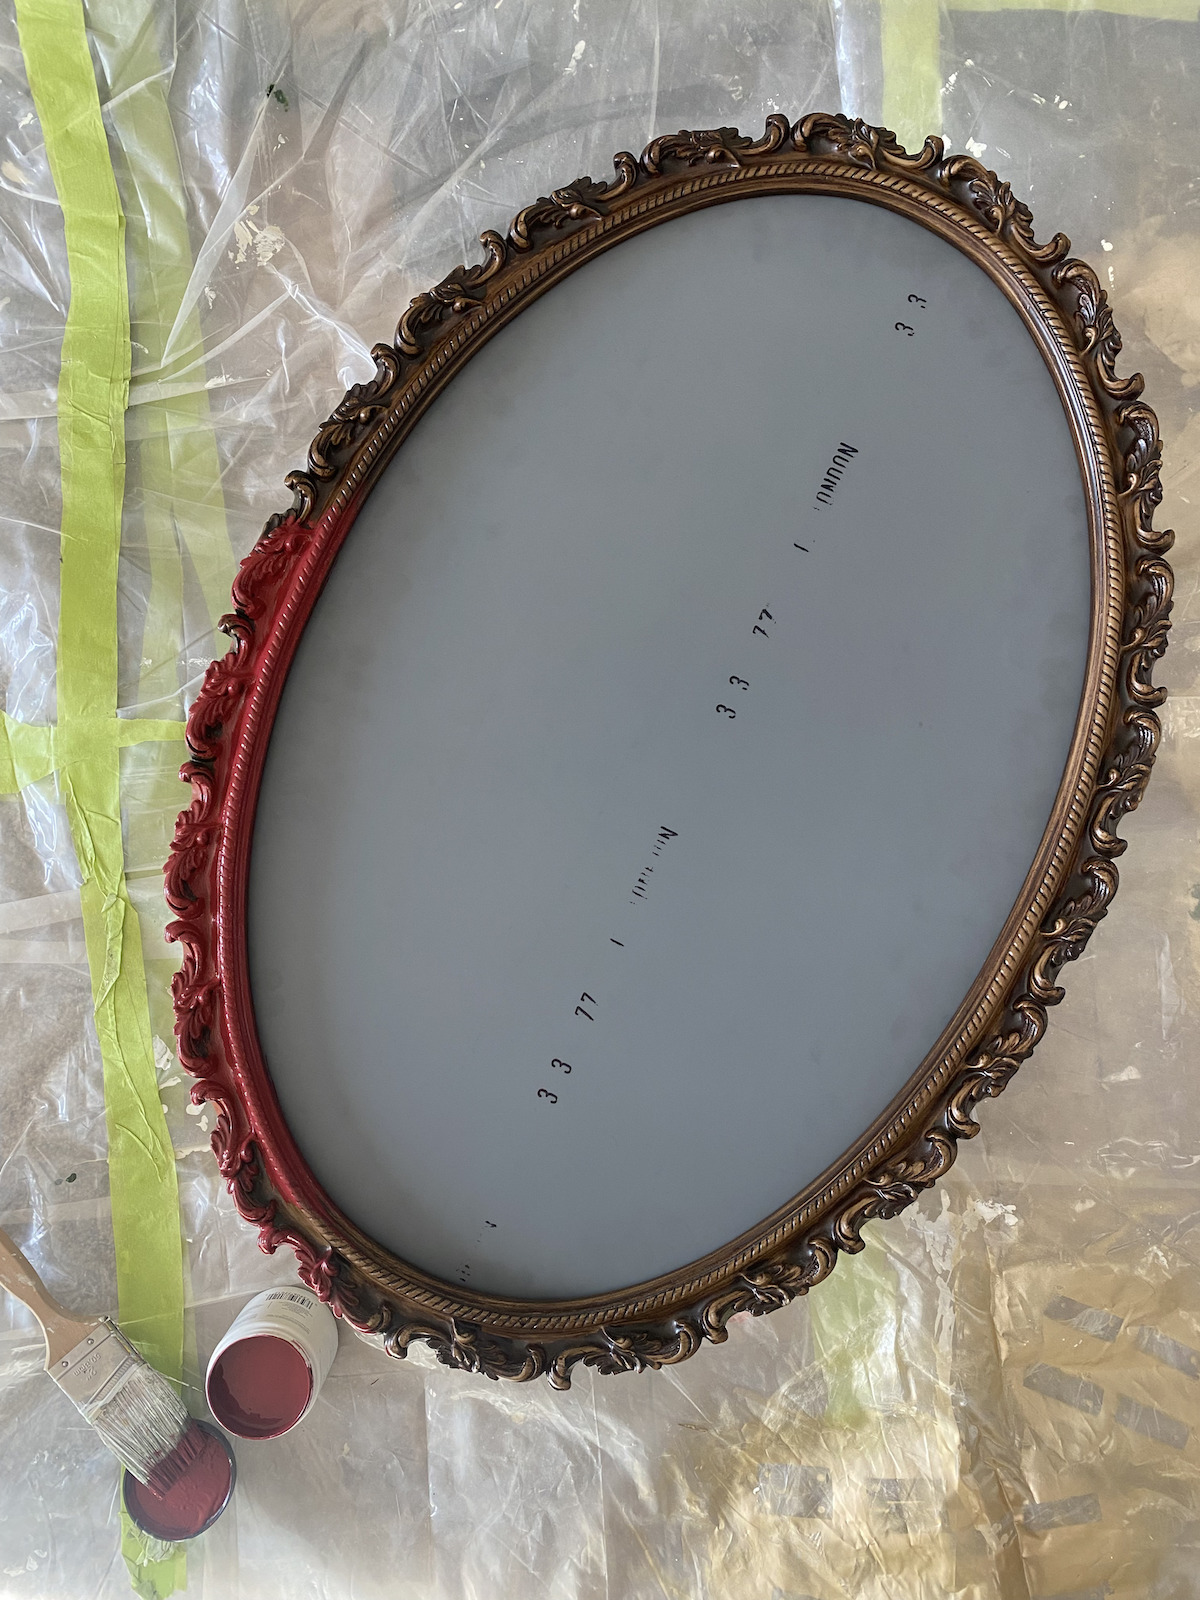
I didn’t end up finding a frame, but rather a mirror, so that is an option as well! If your frame comes with a piece of glass over the art, you’re going to want to remove the glass so that you’re painting on cardboard or an MDF board. If your frame doesn’t come with any backing, I’d recommend buying a piece of MDF and having it cut to size.
The Paint
If I were to do this project again, I would recommend priming the frame first. I didn’t do this for mine and found that the color wasn’t quite what I thought it would be. Priming will help you avoid this! However, you’ll want to avoid doing too many coats of paint on your frame. Too many coats can start to make the details less defined, especially if they’re very small or subtle.
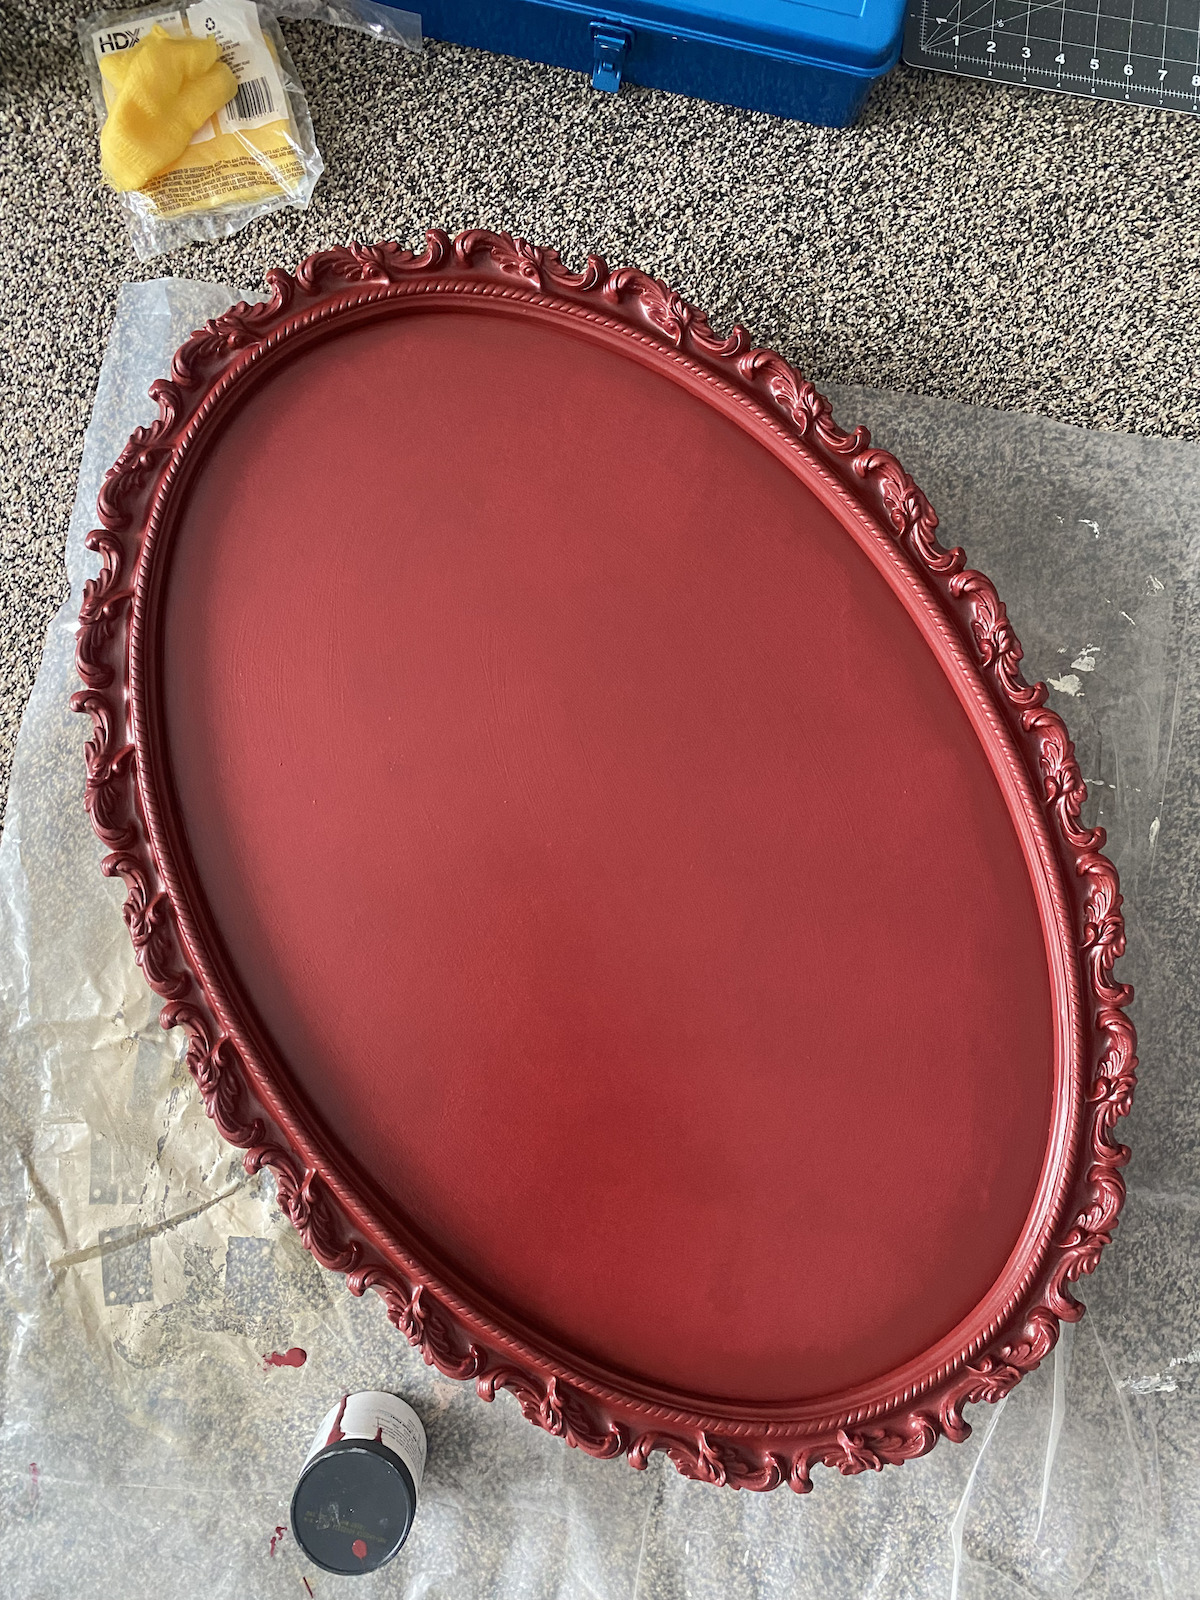
For the paint, I went with my long-time favorite, Benjamin Moore. This is a great option because you can order a sample pot of paint (which is all you’ll need for this project) and it’s only $8! I went with the color Classic Burgundy. This color looked perfect online and in the sample, but for some reason when I painted it on my mirror, it came out with orange undertones. I ended up adding a bit of blue and black to it to make it more of a true, deep crimson.
For the paint to make the peony, I mixed acrylic paint with drywall compound. I did this so that the paint would be really thick and could be applied with a palette knife. By applying it with a palette knife, I was able to create a lot of texture in the peony and make it seem more life-like.
Drywall Paint
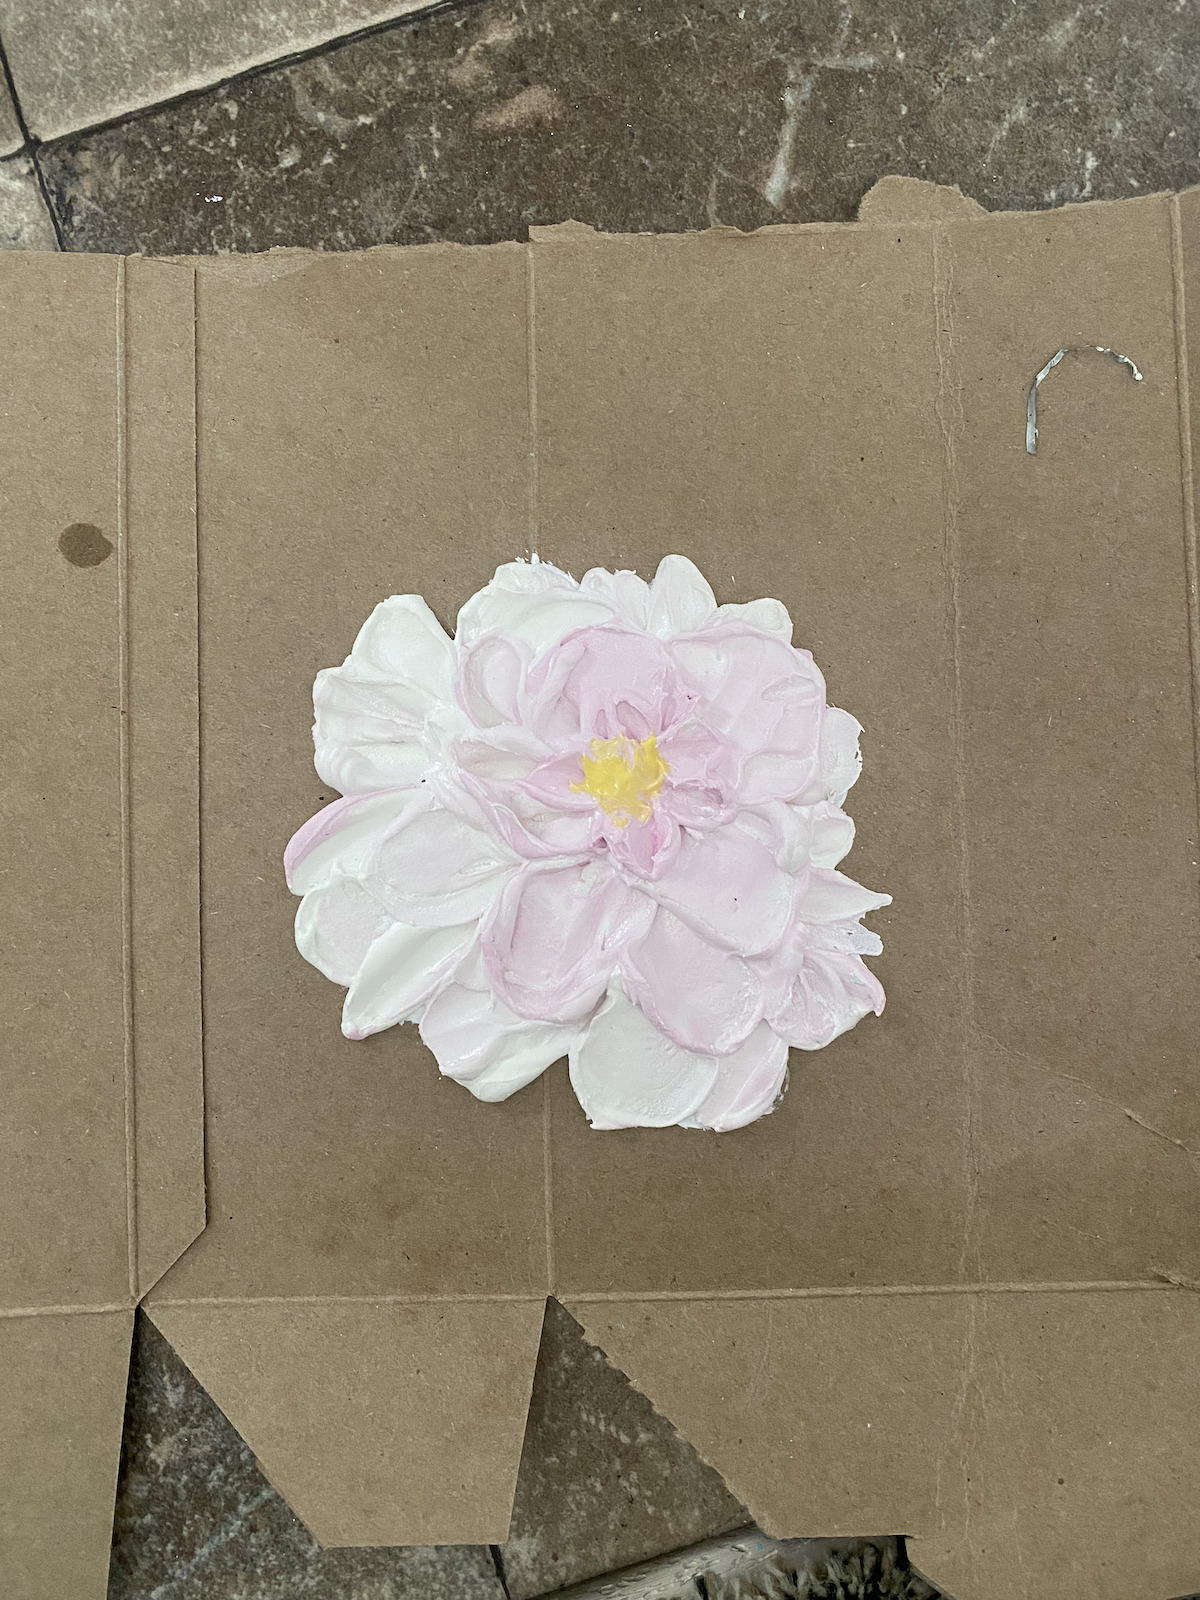
I’m calling this drywall paint because it’s a mixture of drywall compound and paint, so that makes sense to me! This was my first time trying to paint with drywall paint and a palette knife, so I did a test peony first. I highly recommend doing that as it will help you get a feel for the technique before you jump into your actual painting. I actually found it very helpful to watch some tutorials on Youtube for how to use this type of paint. What was actually the most helpful was a cake-decorating video! She uses a palette knife to paint buttercream flowers on the cake, which is very similar to what I wanted to do. The way she describes picking up and using the buttercream is very similar to how we’ll be using it for this flower! You can watch the video here.
DIY Ornate Frame with Textured Peony Painting
Materials:
- an ornate-style frame with no glass
- primer (optional)
- paint for the frame. I used Benjamin Moore
- tack cloth
- a mini roller & tray
- a small paintbrush
- a drop cloth
- 3-4 soup cans all the same height (you’ll use these to place your frame on top of so that you can paint the edges easily)
- drywall compound
- acrylic paint in white, yellow, green, black and coral colors
- a palette knife
Frame Instructions:
- Start by using the tack cloth and running it all over the surface of your frame to remove any dust or particles
- Then, lay down a drop cloth and place 4 soup cans on top of the cloth. Balance your mirror on the soup cans with one in each corner so that it’s stable. This will make it easier to paint the edges of your frame.
- If you’d like to prime your frame, now is the time to apply 1-2 coats of primer.
- Next, using your small paintbrush, paint the ornate portion of the frame, making sure to get into all the nooks and crannies
- Paint the middle portion of the frame (where the picture would go) using your roller
- Allow the frame to dry before repeating steps 4 and 5
- At this point, you’ll want to assess if you need a third coat of paint. I needed one for mine.
- Once your last coat is dry, we’re ready to start making the peony!
Peony Painting Prep:
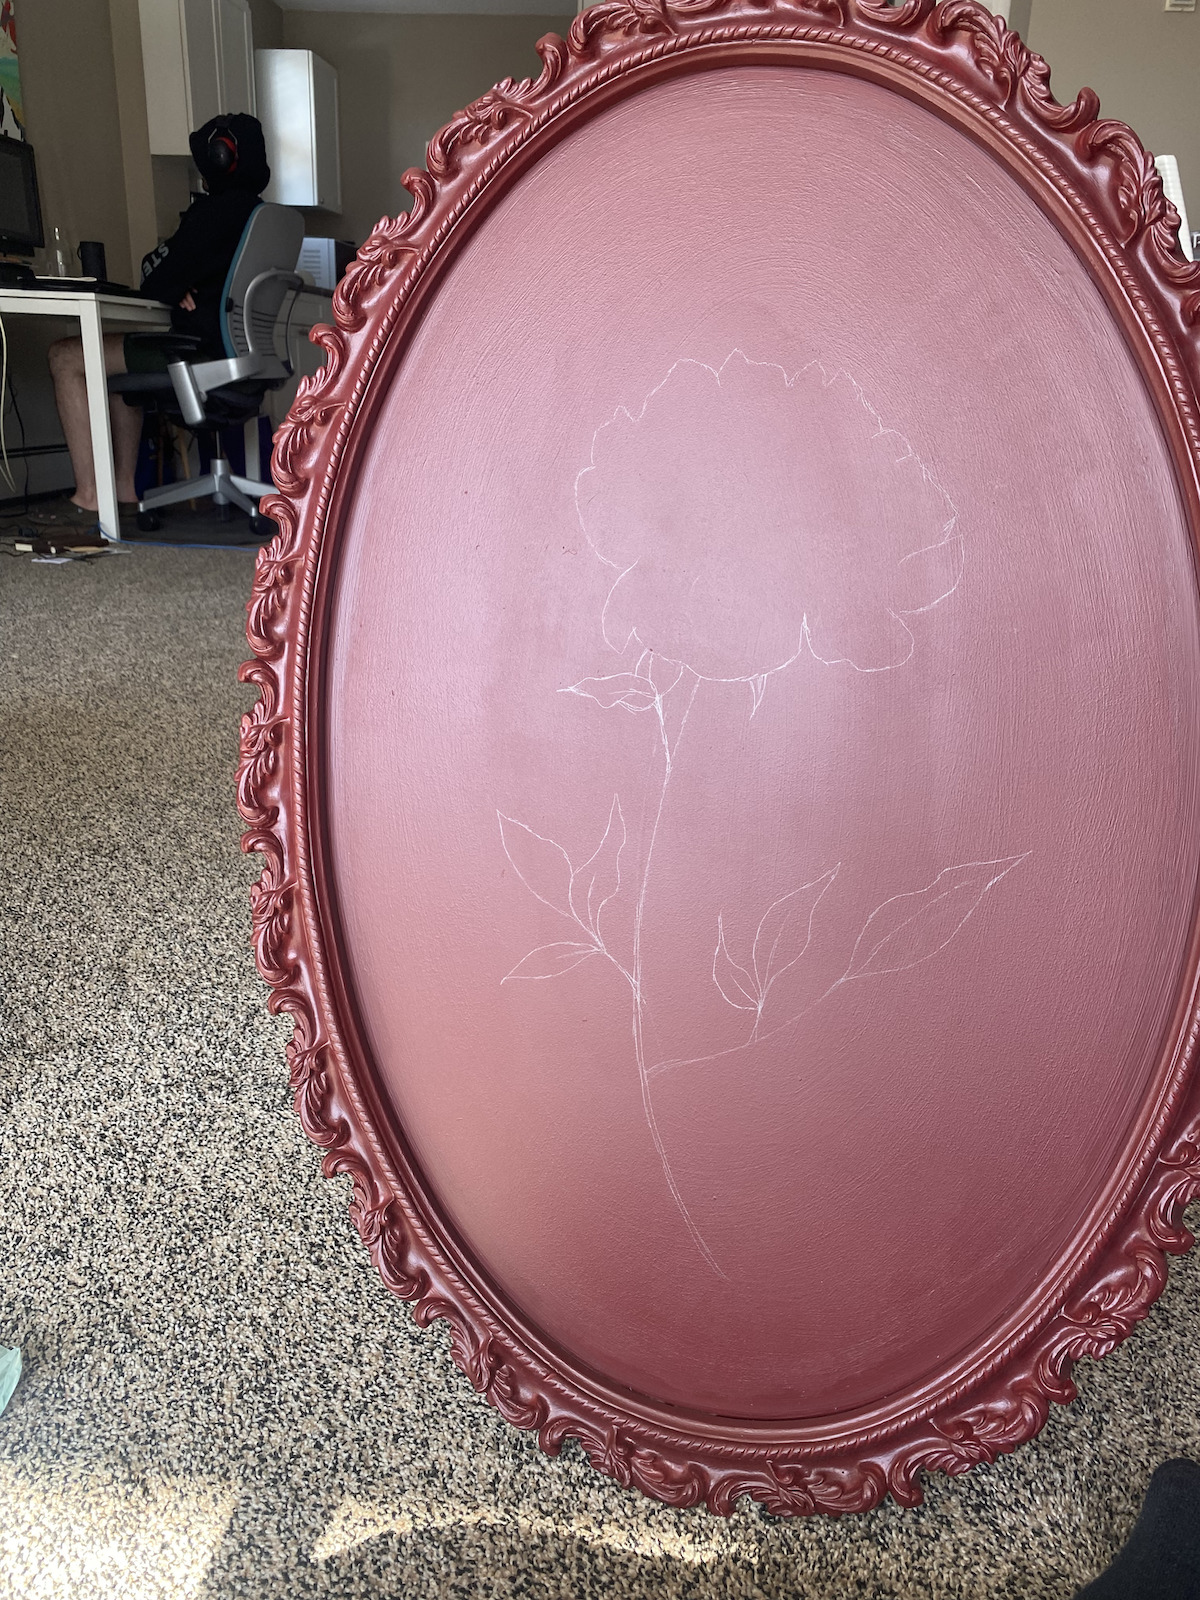
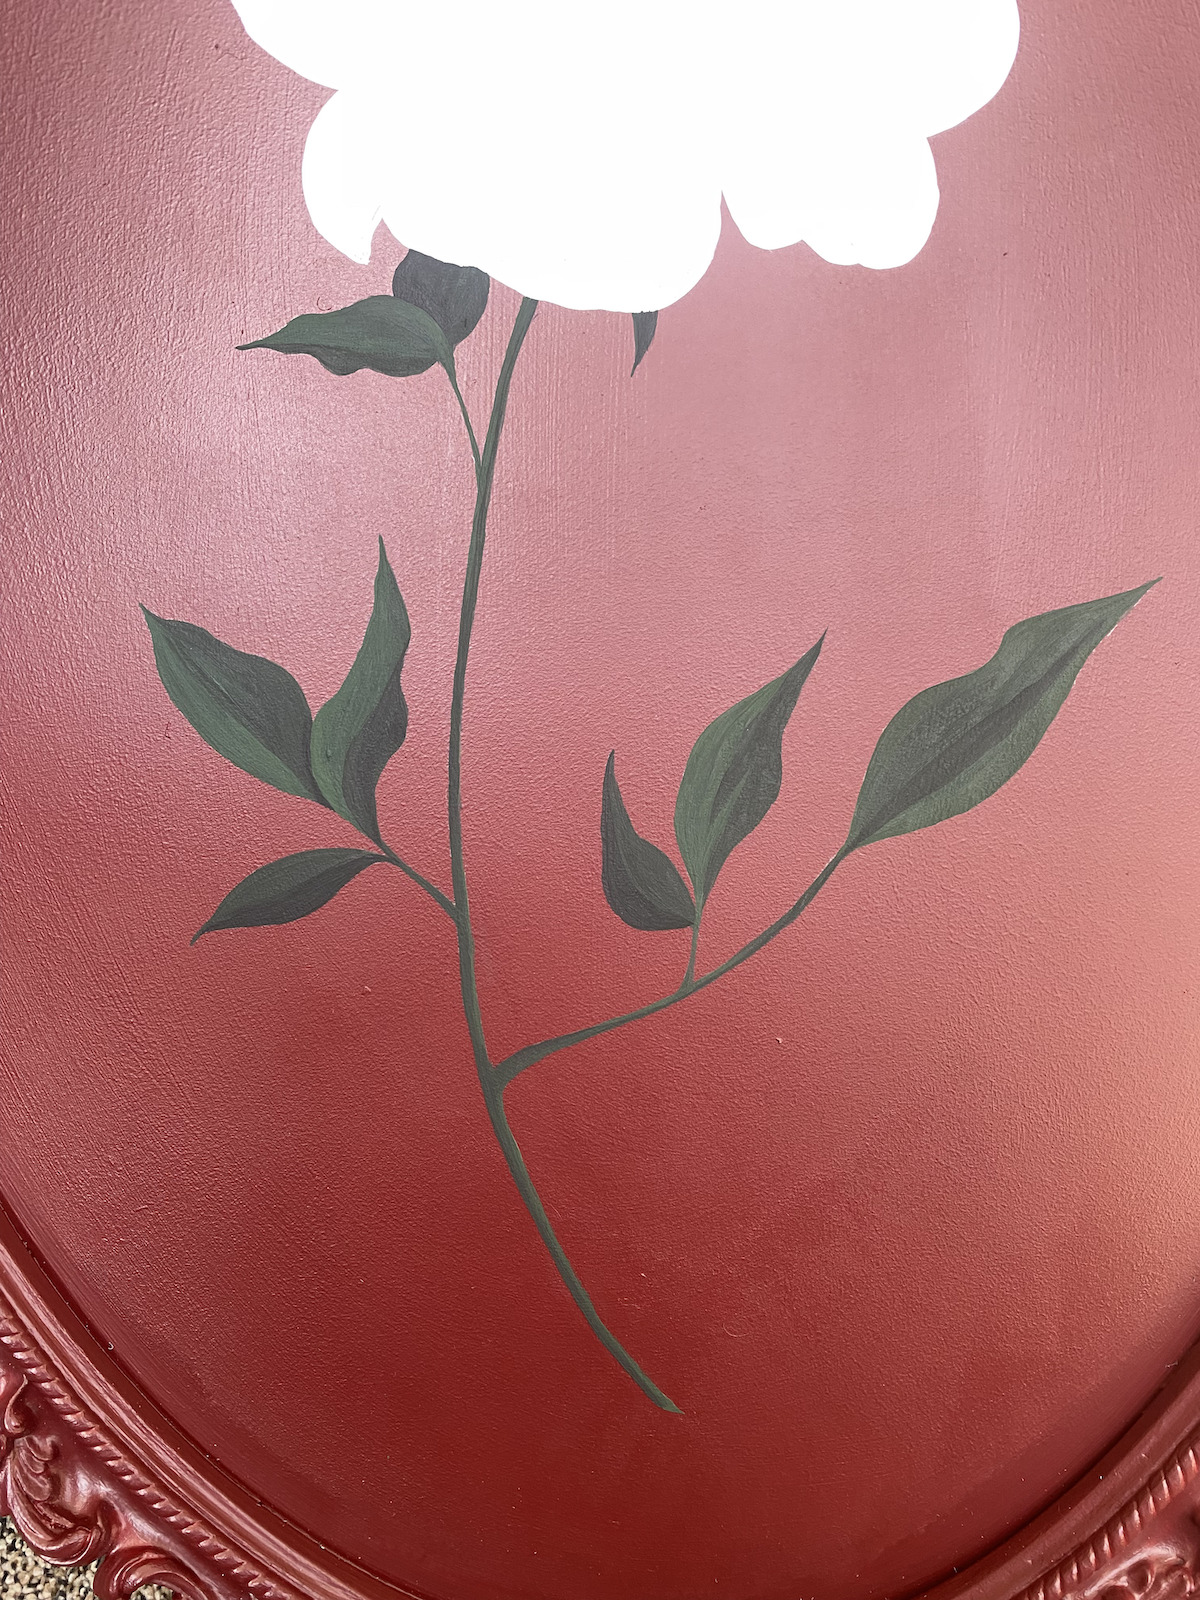
- Start by taking a pencil and sketching out a rough outline of your flower. I tried to get mine roughly in the middle, but it’s ok if it’s not perfect. This is how mine looked. I was also able to erase any mistakes I made, so it’s really important to start with pencil first!
- Next, I did a base layer of the leaves, mixing about 3-4 shades of green paint. I used a small angled brush to paint the leaves.
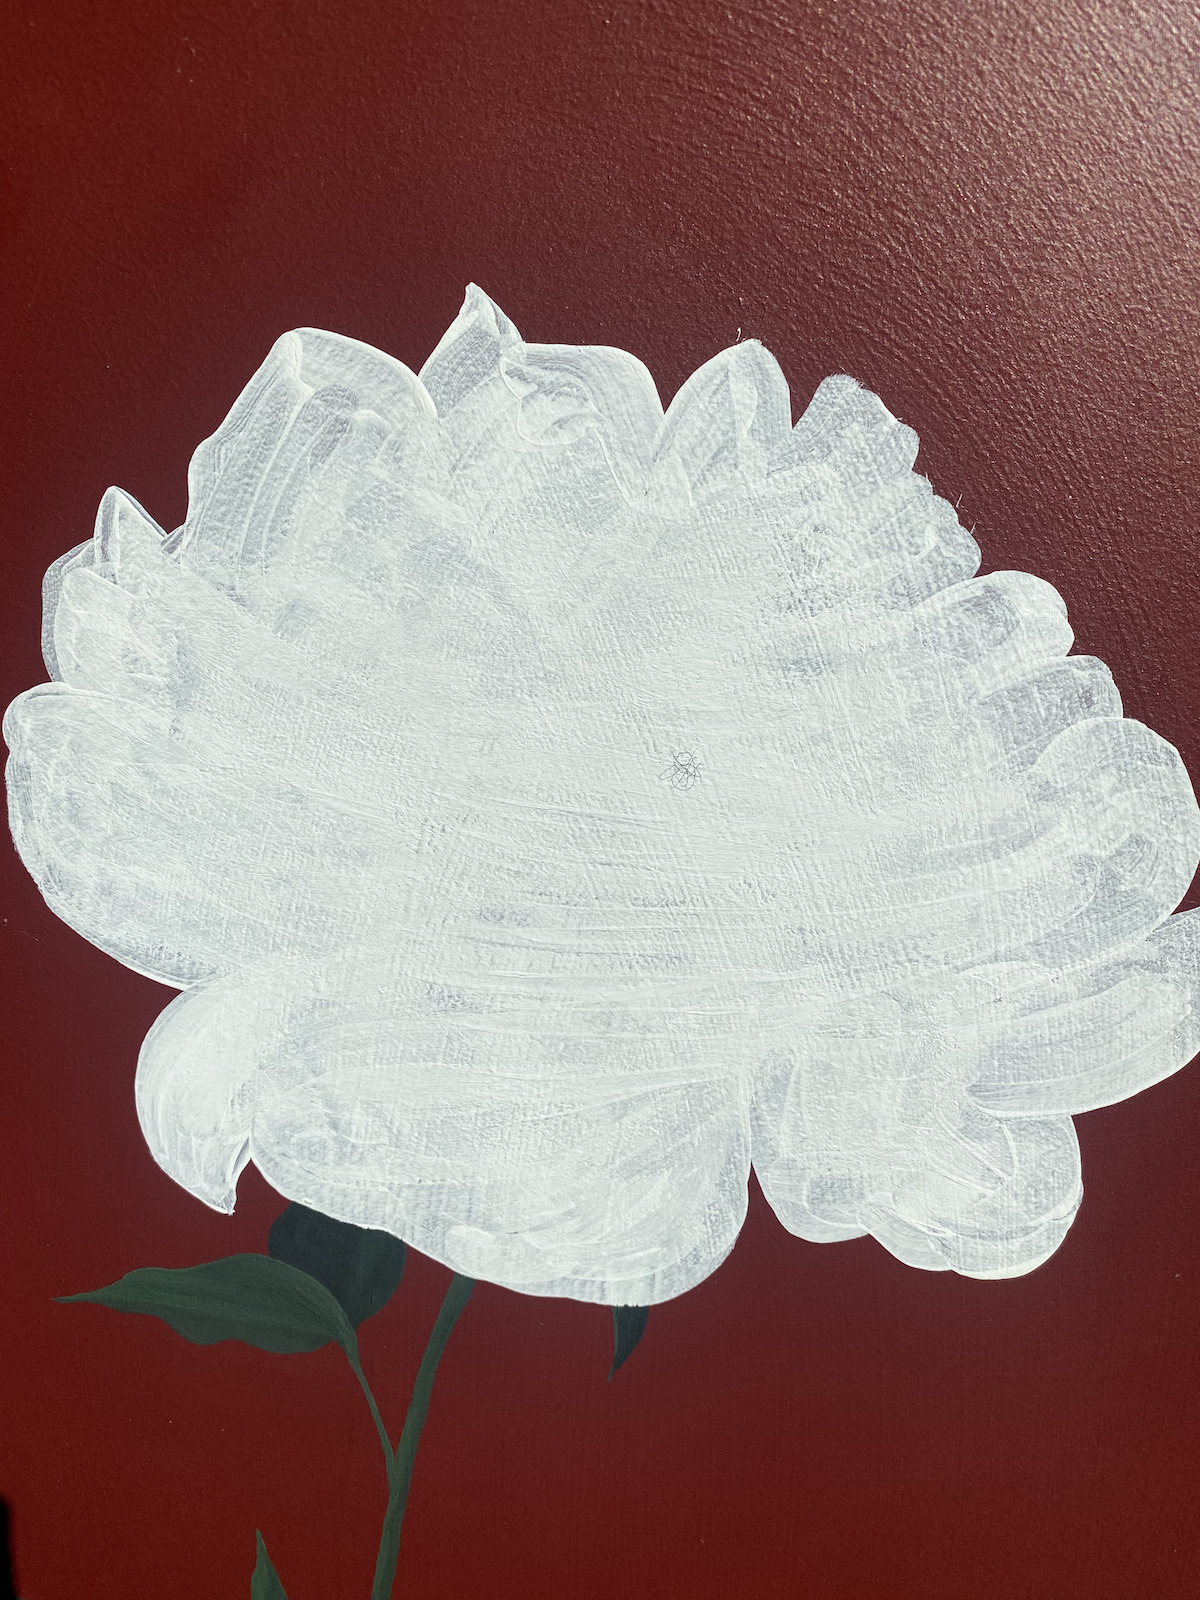
- Then I did the plain white base layer for the flower. I did the base layer so that I could see the shape easier when applying the drywall paint. I also wanted to make sure that you wouldn’t be able to see the red paint under the flower.
- After I had the base of my flower, I went back and did a second coat on the leaves.
- Now is the fun part. It’s time to mix the drywall compound into your paint to get that amazingly textured look.
- I started by mixing a big glob of drywall compound with white paint to make the white base of the petals.
- Then, make 3 smaller blobs of drywall compound and mix a small amount of coral pink paint into one, a tiny bit into the second and just the slightest dab of paint into the other. You want to create 3 different shades of pink that are similar so that they’ll blend nicely.
- Lastly, you’re going to mark where you want the centre of your flower to be. This doesn’t have to be the dead centre. In fact, it would look more visually pleasing if it wasn’t. I marked the centre of the flower closer to the top right of my flower.
Peony Painting Instructions:
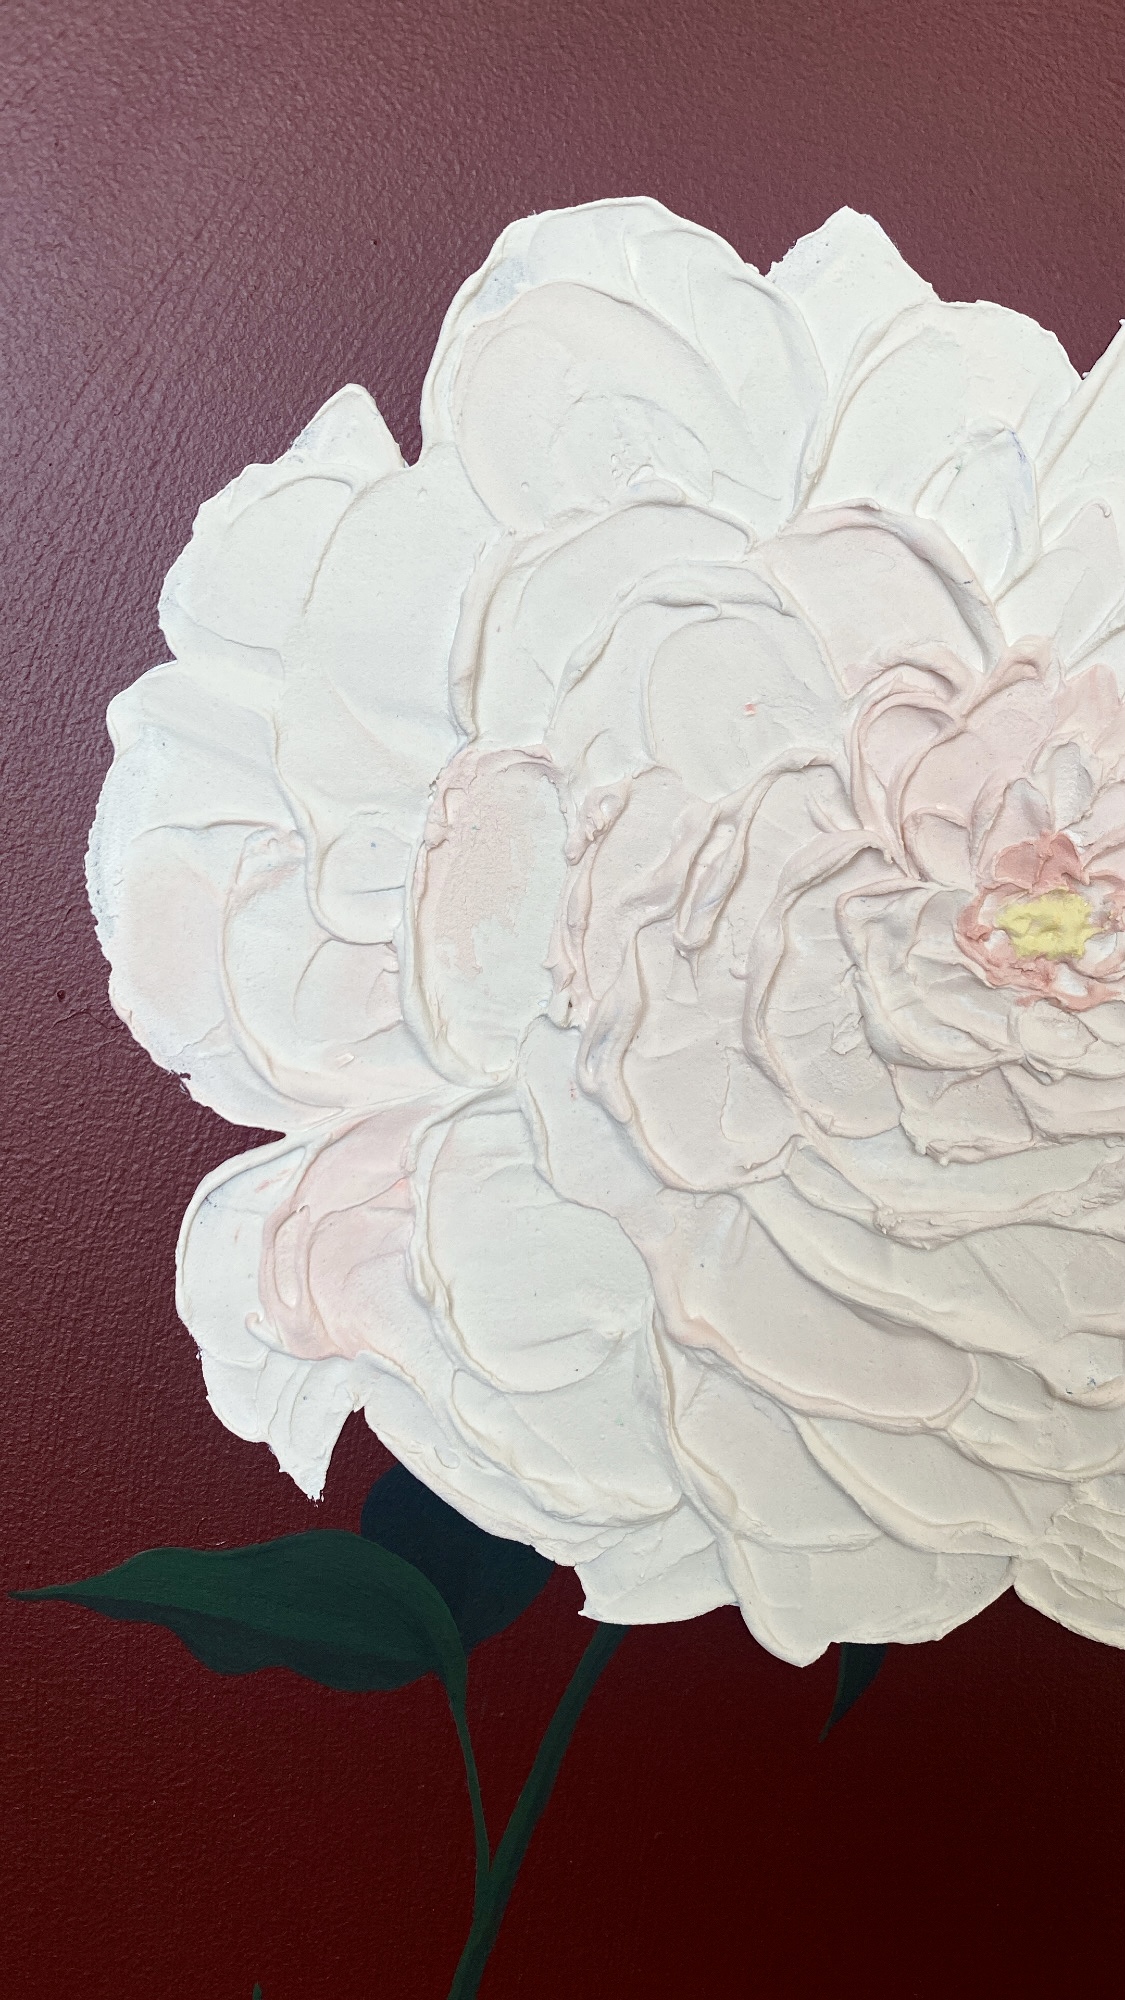
- Now that all your paint is mixed, you’re ready to go with the palette knife! Starting at the edge of the white petals, you’re going to load some drywall paint onto your palette knife and gently drag it along the petal. You want to try to create a “lip” of built-up drywall paint on the edge of the “petal”
- Work your way around the outside of the flower, mixing in small amounts of your palest pink colour as you go.
- I tried to kind of form the petals in organic shaped arcs to get that build-up of paint on the outside of the petal.
- From there, you’re just going to keep laying in the petals in thin layers until you reach the centre mark of your flower.
- As you get closer to the centre, you’re going to want to overlap the drywall paint more and make the petals smaller. You’re also going to want to start blending in more pink until you get to the centre of the flower.
- When you near the centre of the flower, you’re going to want to use just the tip of your palette knife to create small petals.
- Before you paint over the centre, you’re going to mix a small amount of yellow drywall paint and apply that to the centre mark of your flower.
- Allow your painting to fully dry for at least 24 hours. Test it at the 24-hour mark to make sure it’s not still wet. At this point, you can actually use very fine sandpaper to sand or blend any bits that you don’t like.
- Then, you’re ready to hang wherever you like!
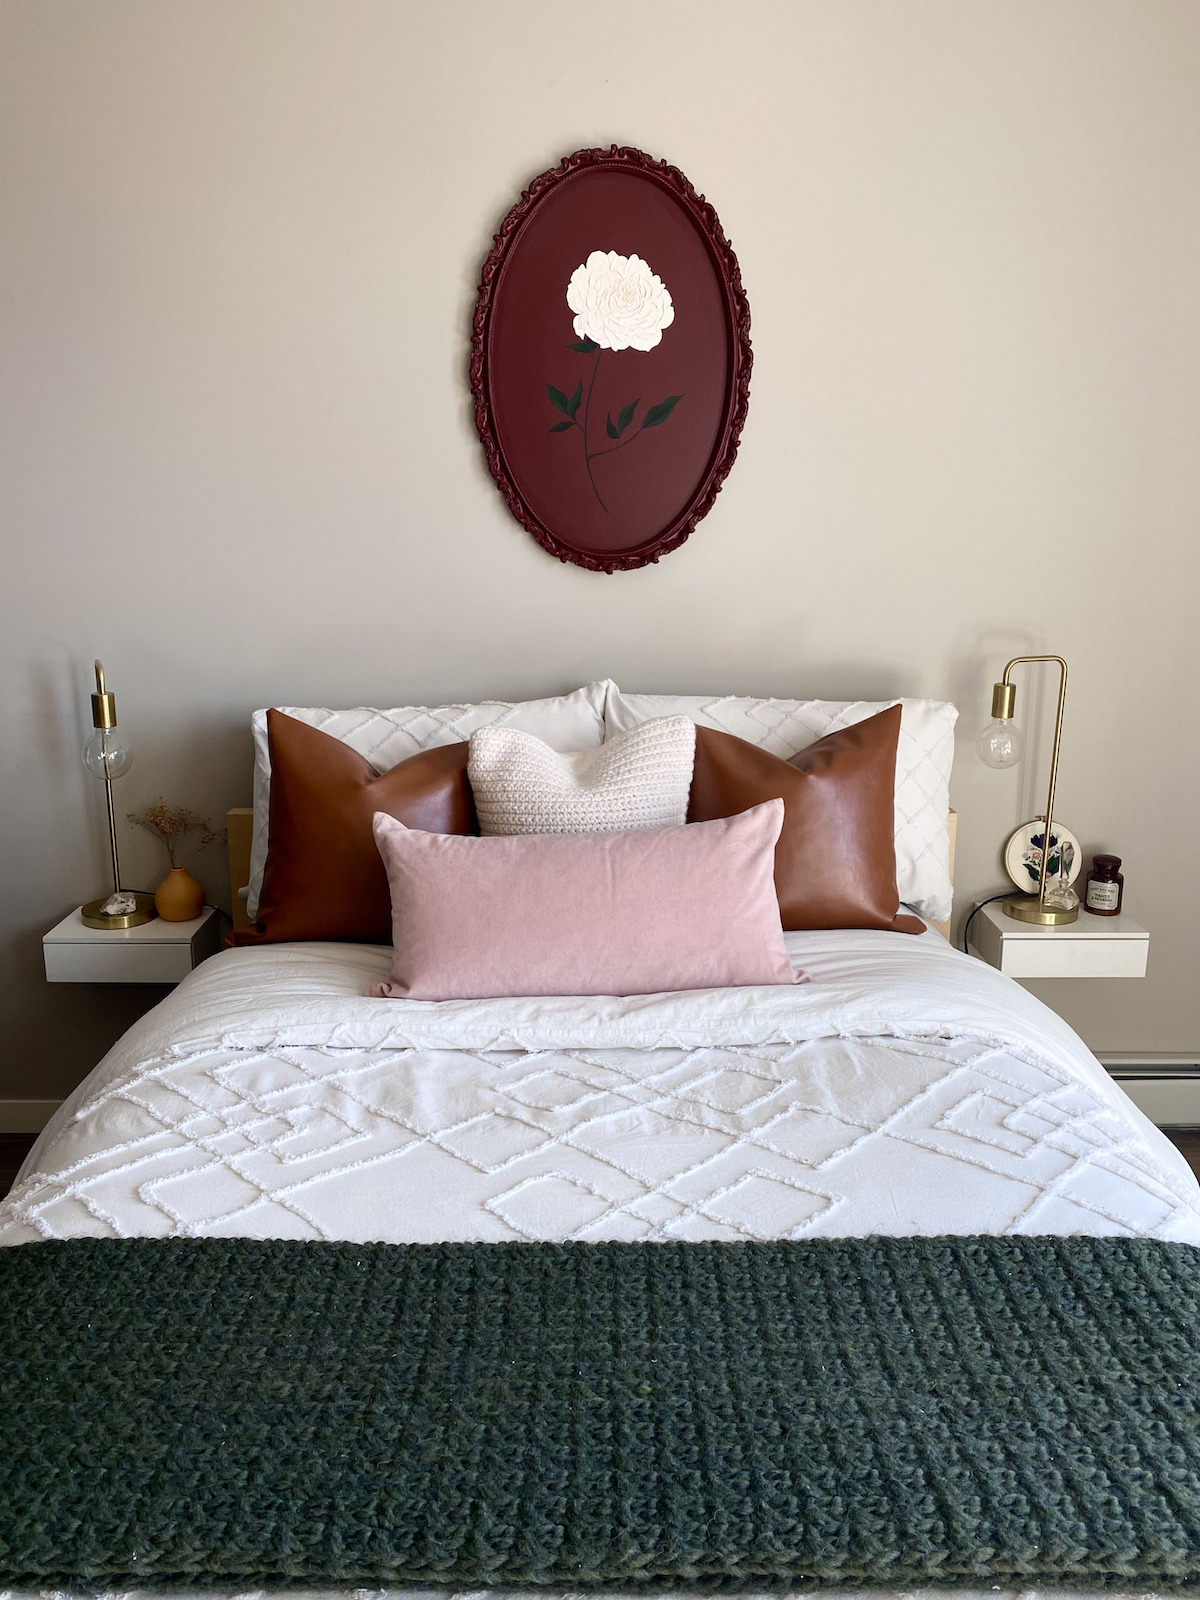
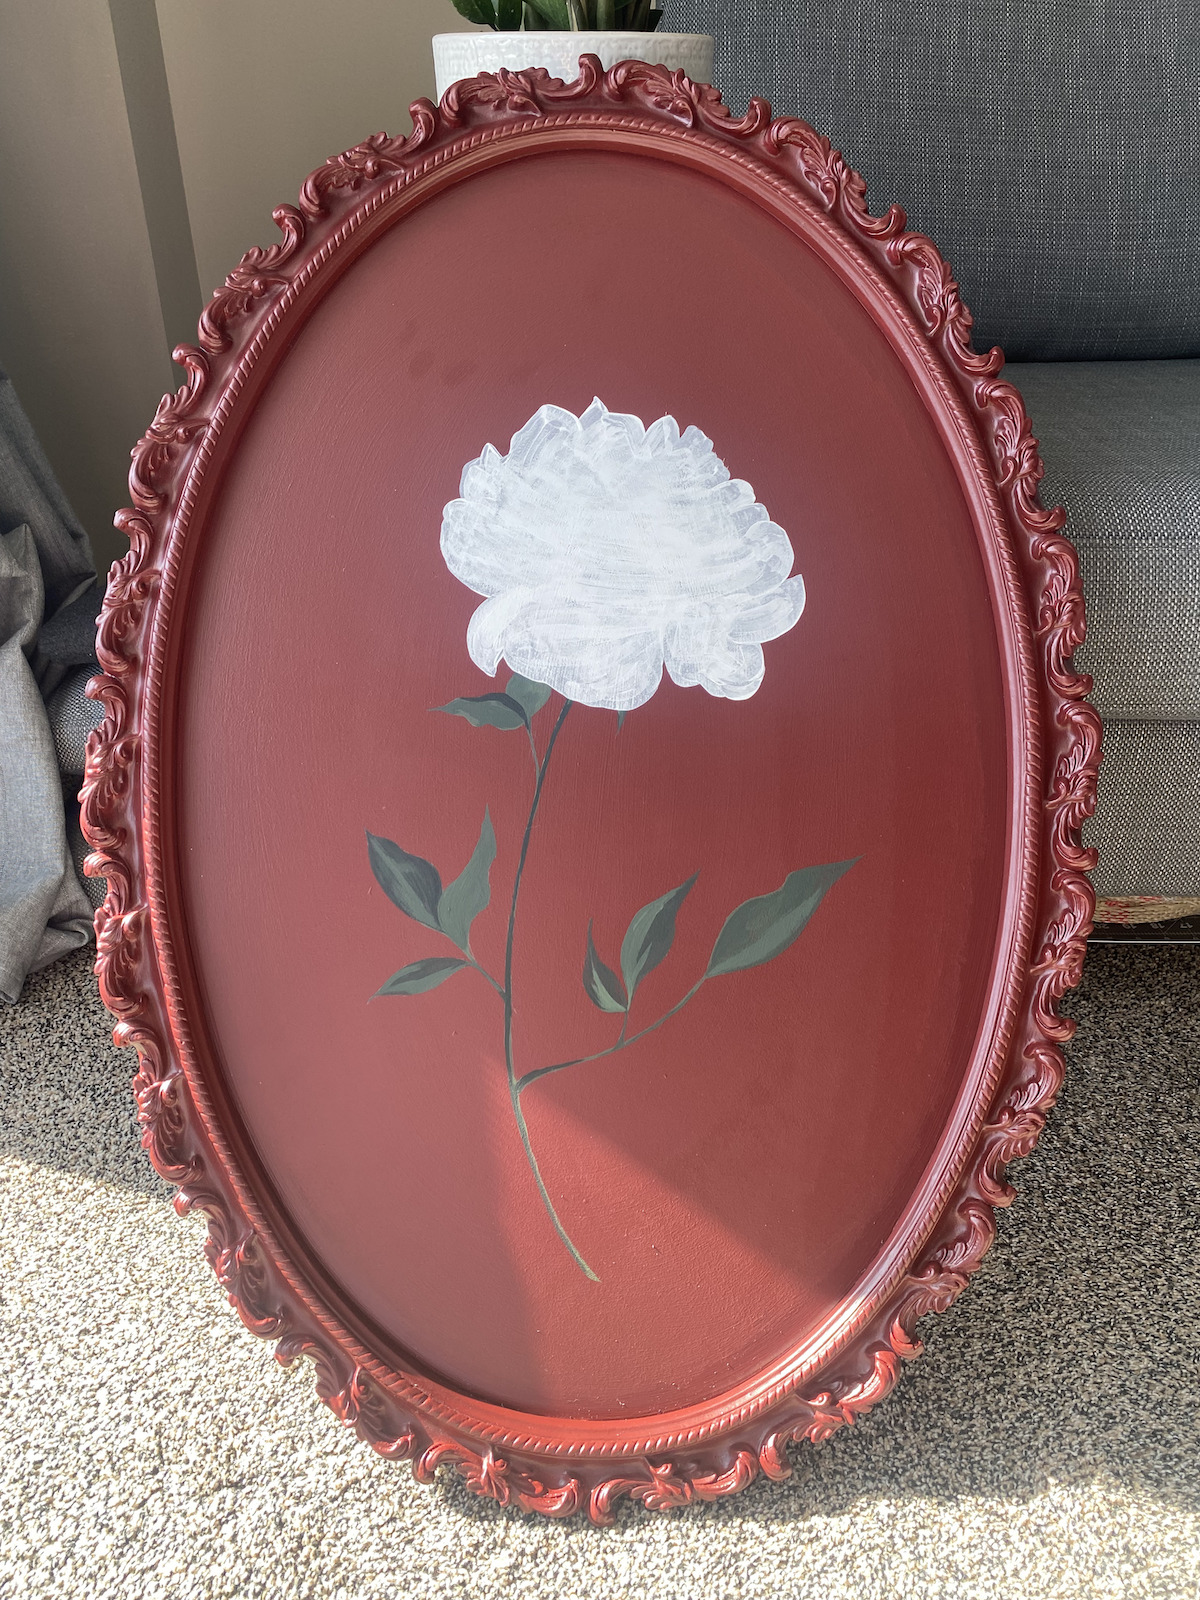
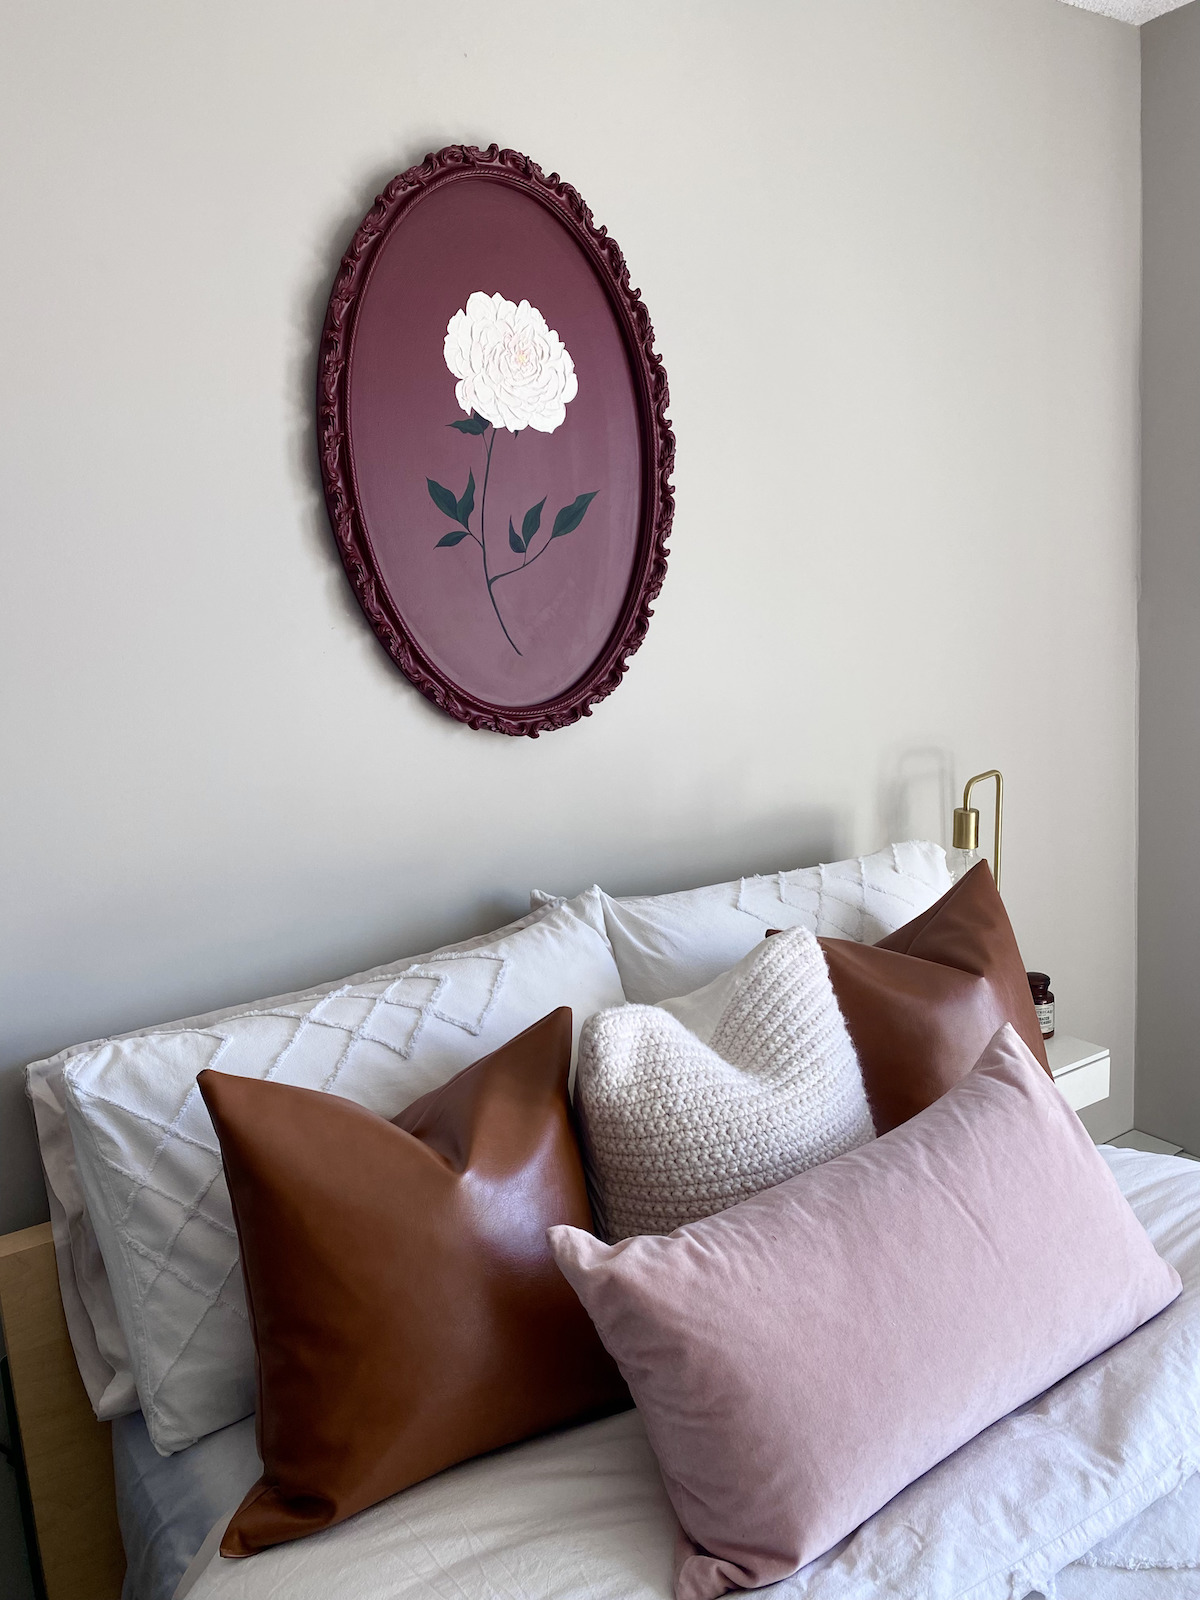
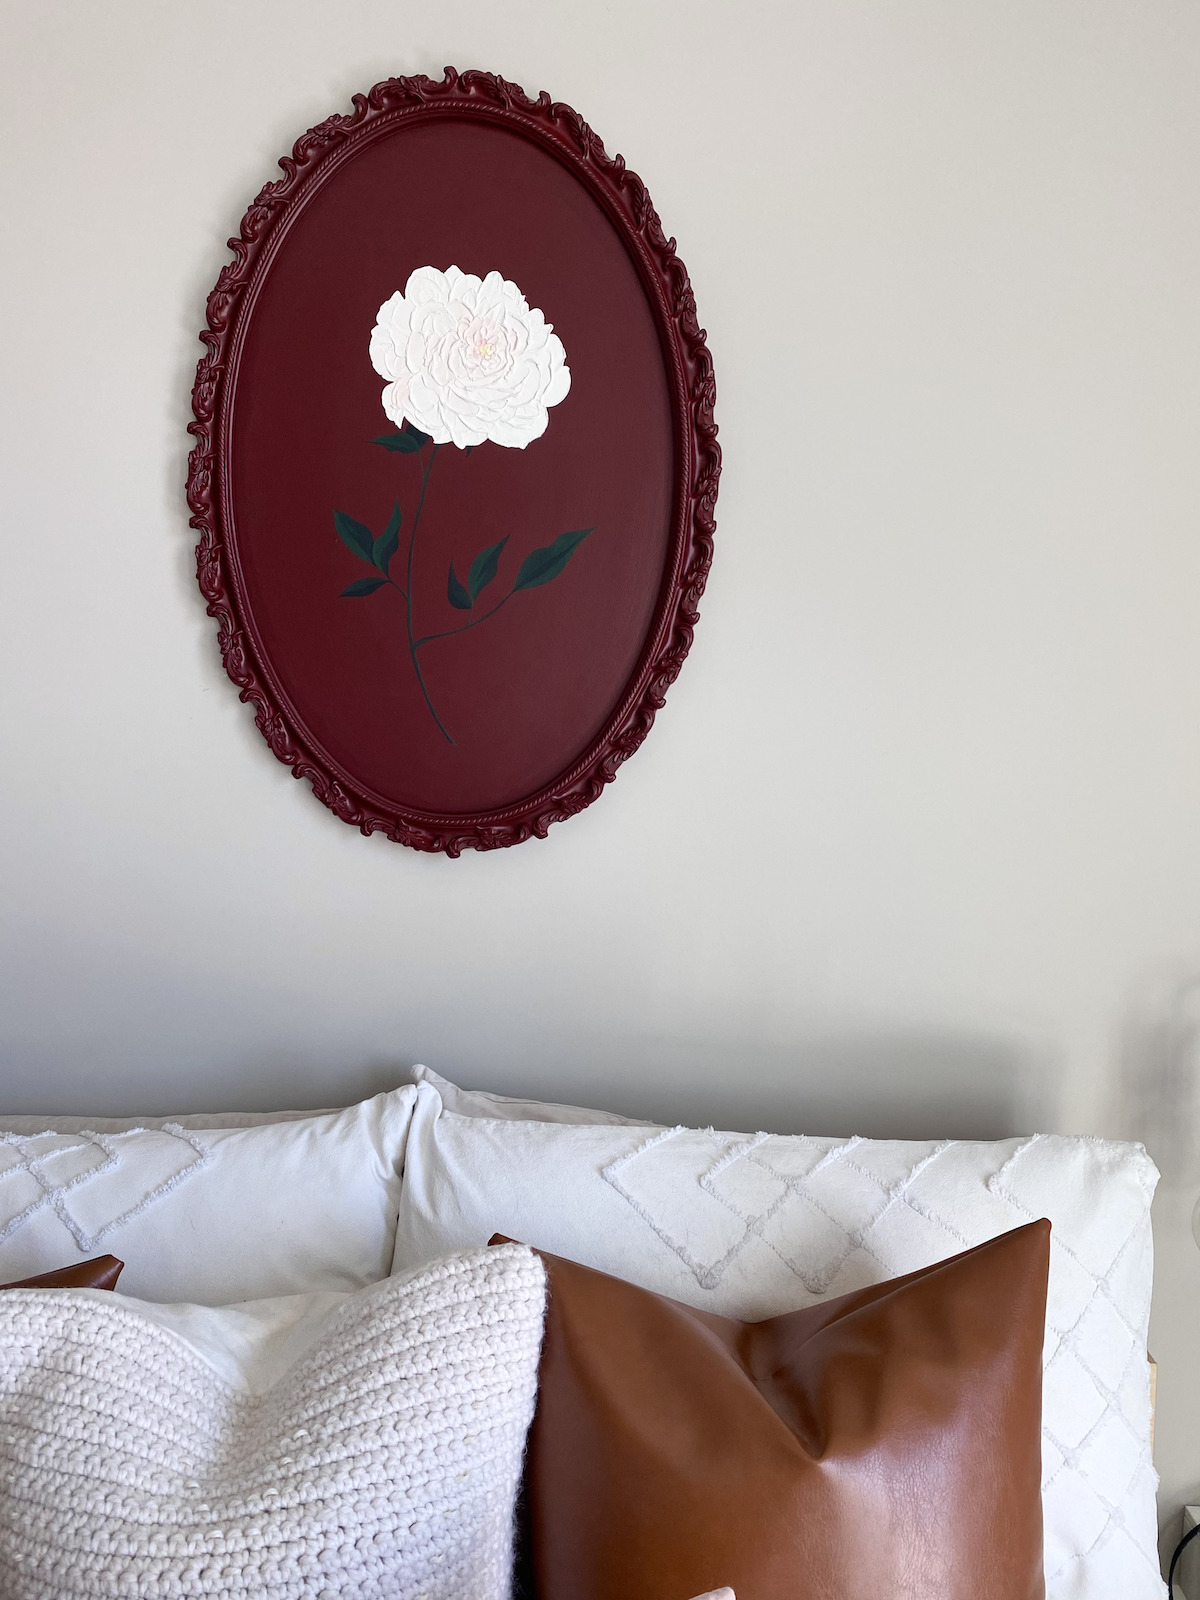
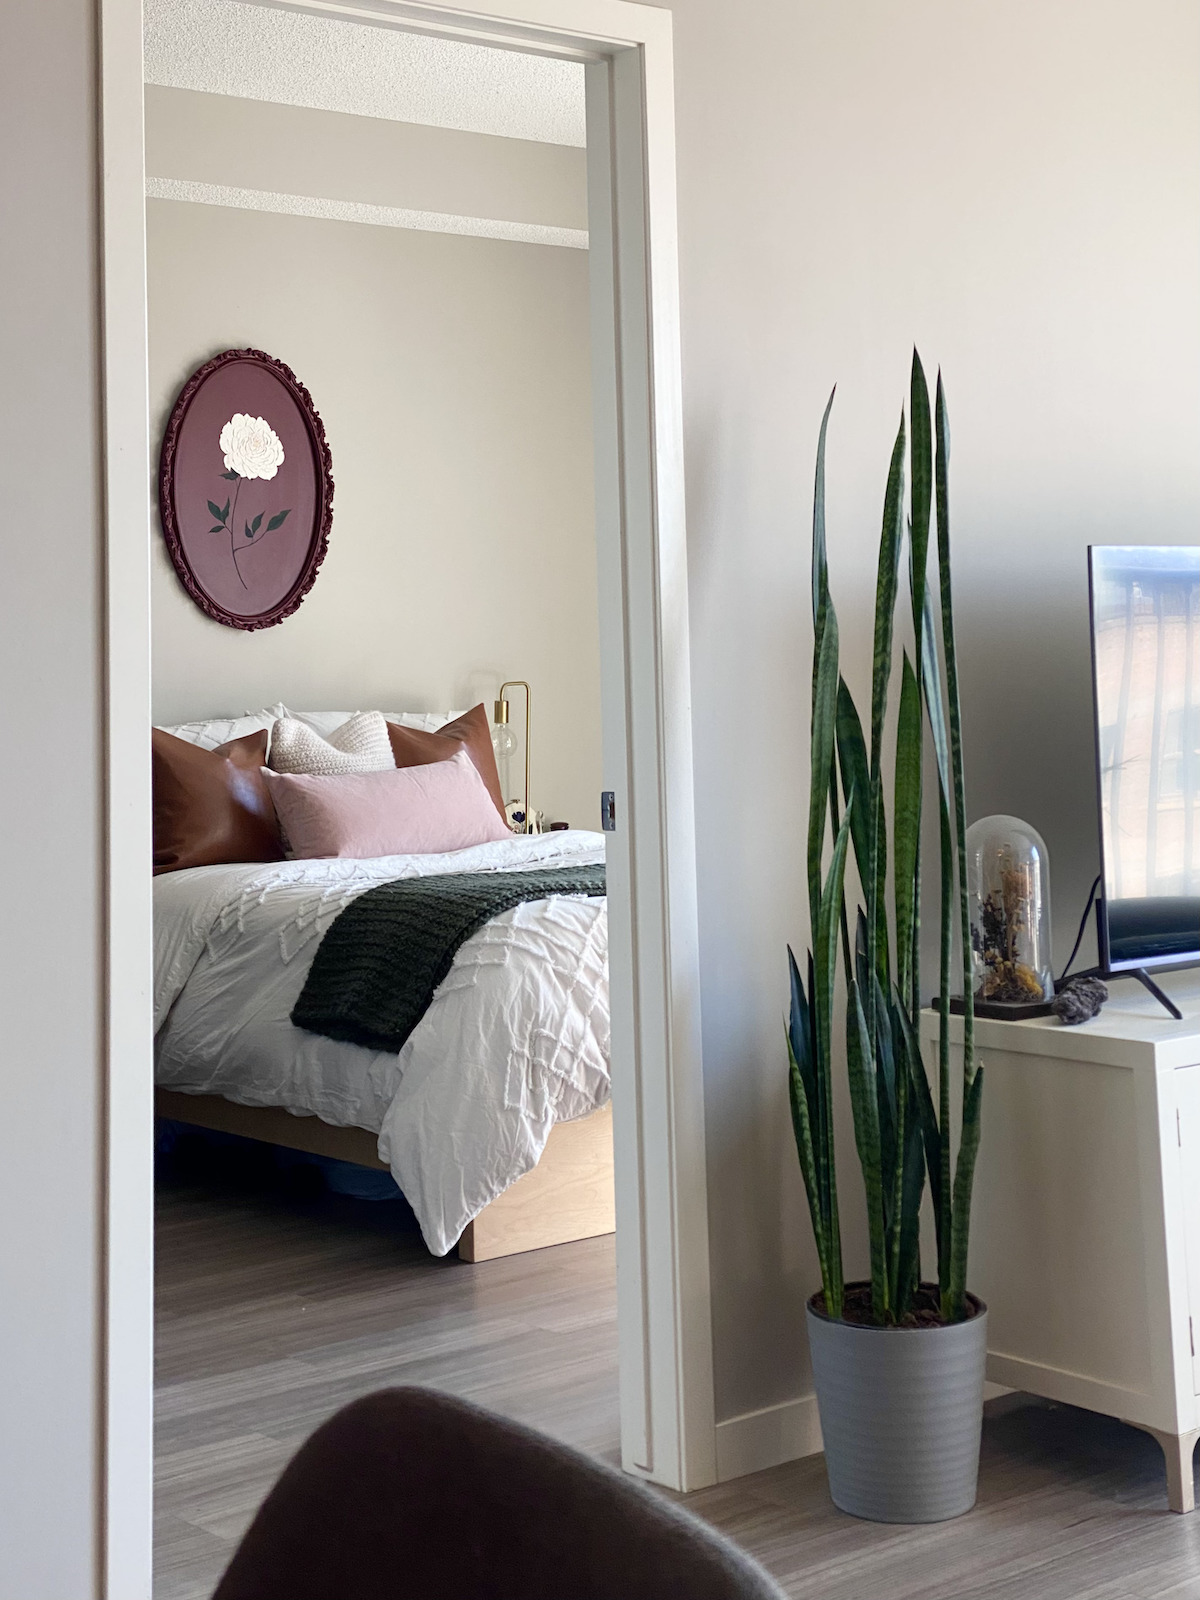
The End Result
I hung mine over my bed as part of my bedroom refresh and I absolutely love the result. I think it’s so pretty and it came out even better than I could have imagined which is just the best feeling when you’re doing a DIY. This was a very scary project for me as I’ve never worked with drywall paint before, but I’m super happy with how it came out!
If you’re looking for more inspirational painting tutorials, give this one a try! It’s super fun on a black canvas.
Let’s Stay Friends!
Insta | Pinterest | Enews | TikTok