
Apr
I have never wanted summer so badly in my entire life! And I know I say that every year, but this year I REALLY mean it.
I’m from Toronto, so we’re currently experiencing what feels like the longest winter in all of recorded history.
As I type this, it’s STILL snowing. It’s mid April, so that’s just not ok.
I should have at least been able to start wearing my fall jackets again with some cute tights and maybe been able to consider a sneaker instead of boots, but NO.
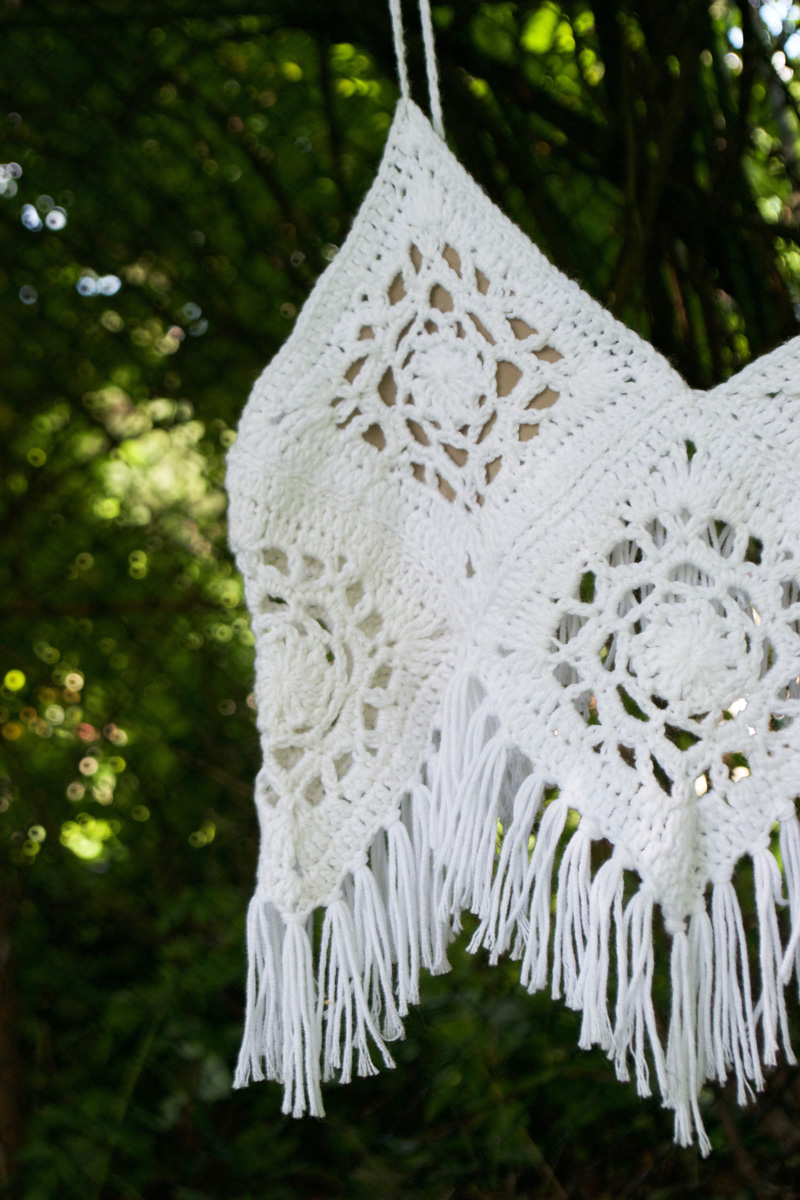
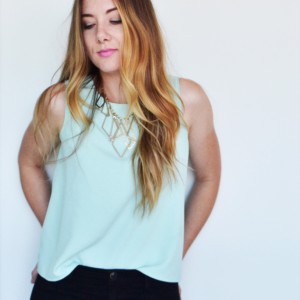
There is still a cringe-worthy amount of snow on the ground, and it feels like I’m no closer to wearing crop tops than I was in January. I was planning on wearing this very crochet crop top to a concert I’m going to on the weekend, but with snow still on the ground, it just doesn’t feel right.
So, for all of those who are in warmer climates, I envy you. You could follow my tutorial and make this adorable crop top that I’m sharing and you can start wearing it RIGHT NOW.
Ok, maybe not right now, because it’ll take you a bit of time to make it, but you get it.
If you’re one of those lucky people and you want to make a fun, easy crochet top with all the perfect boho vibes, look no further!
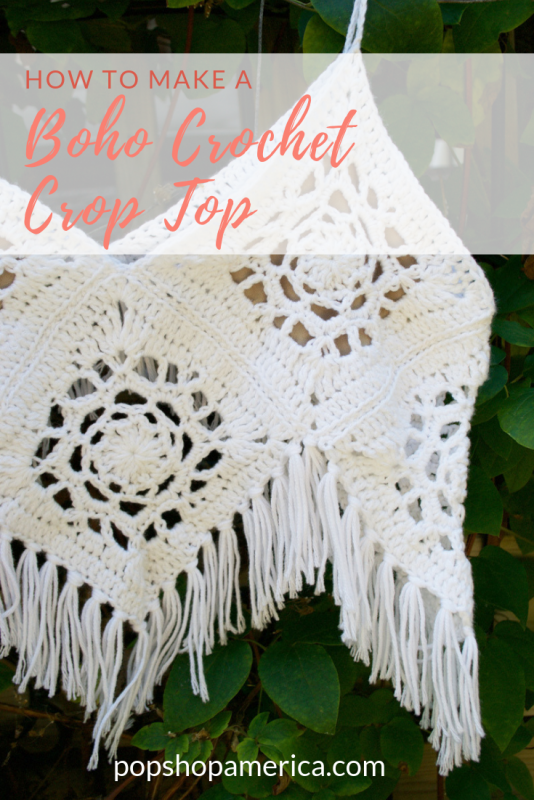
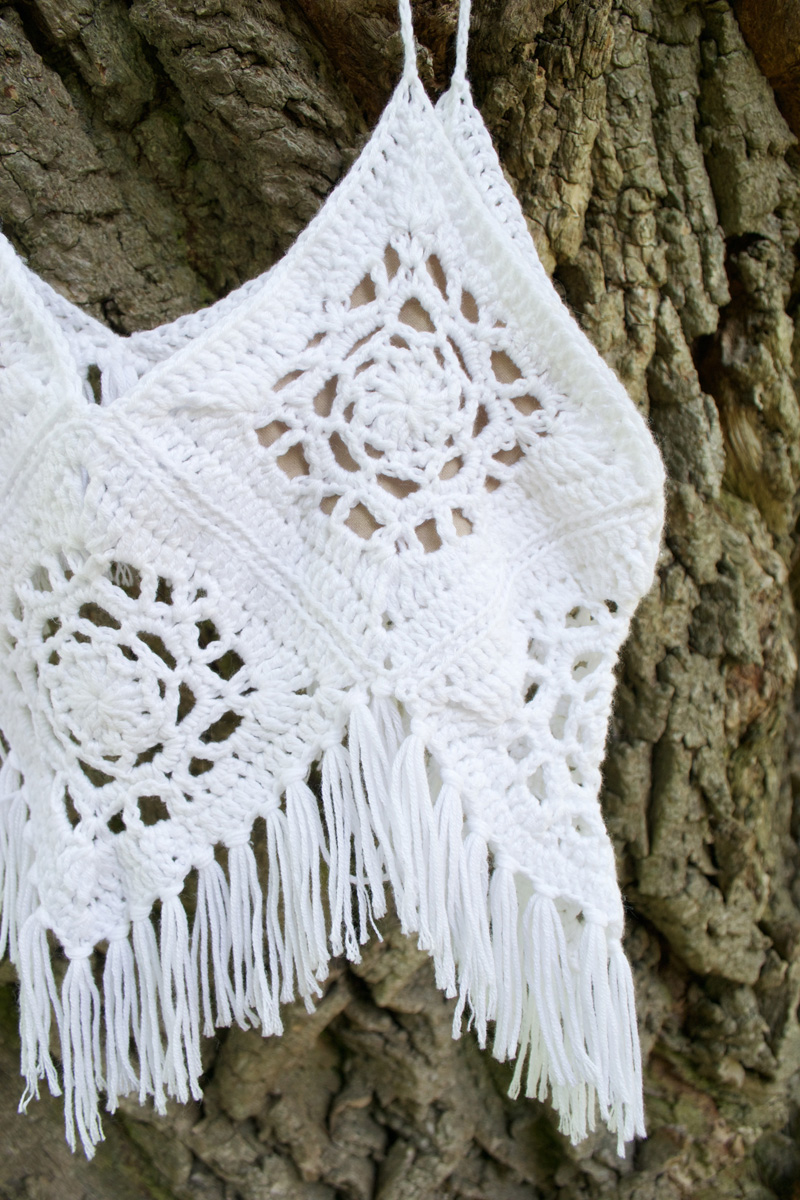
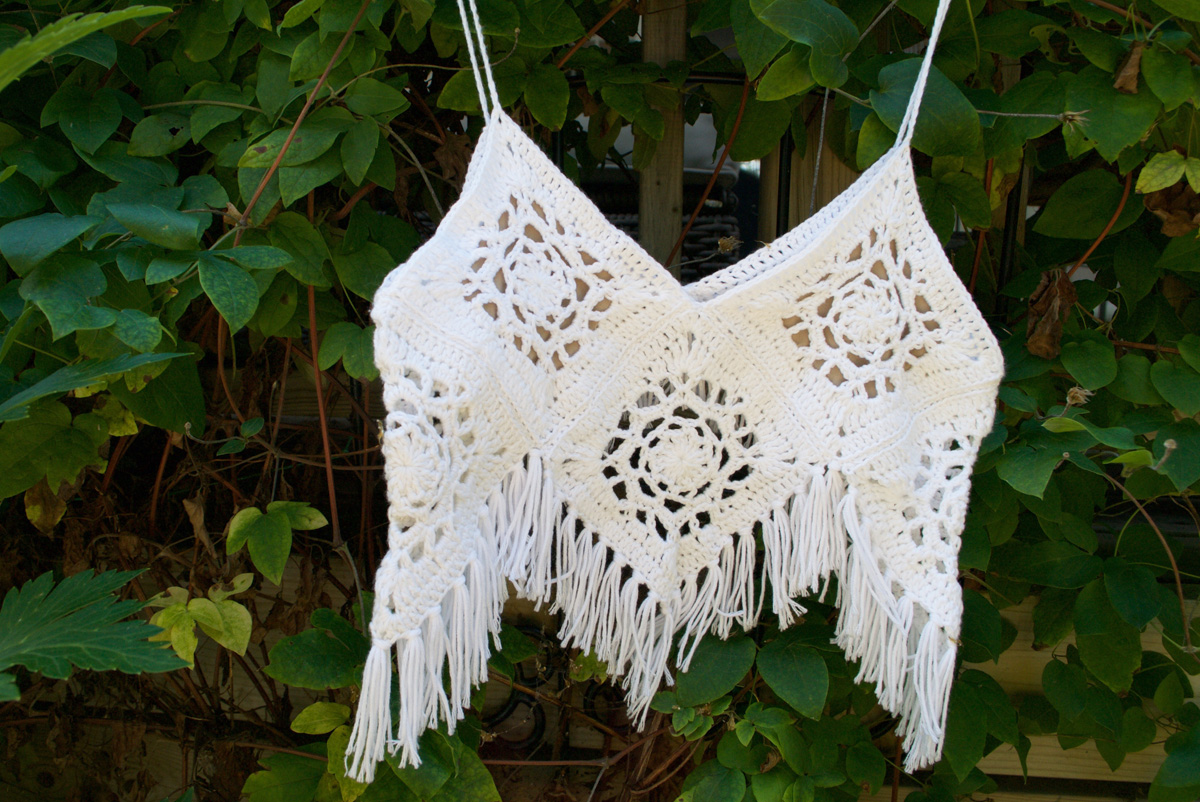
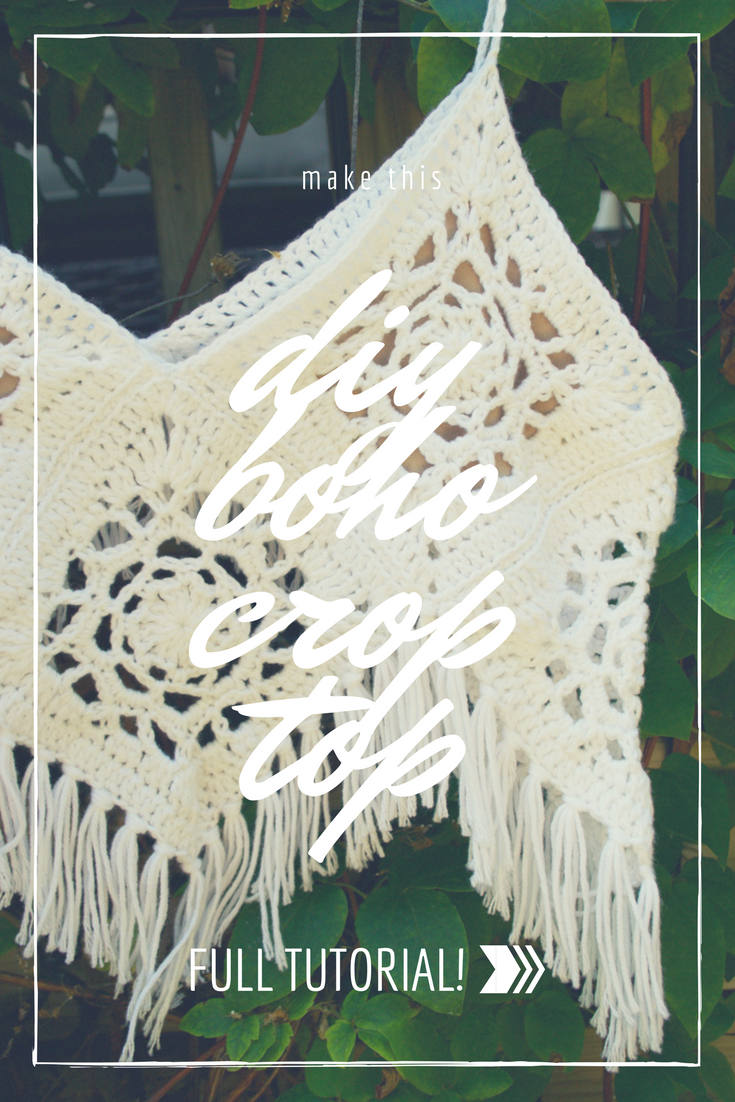
The Basics: Boho Crochet Crop Top DIY
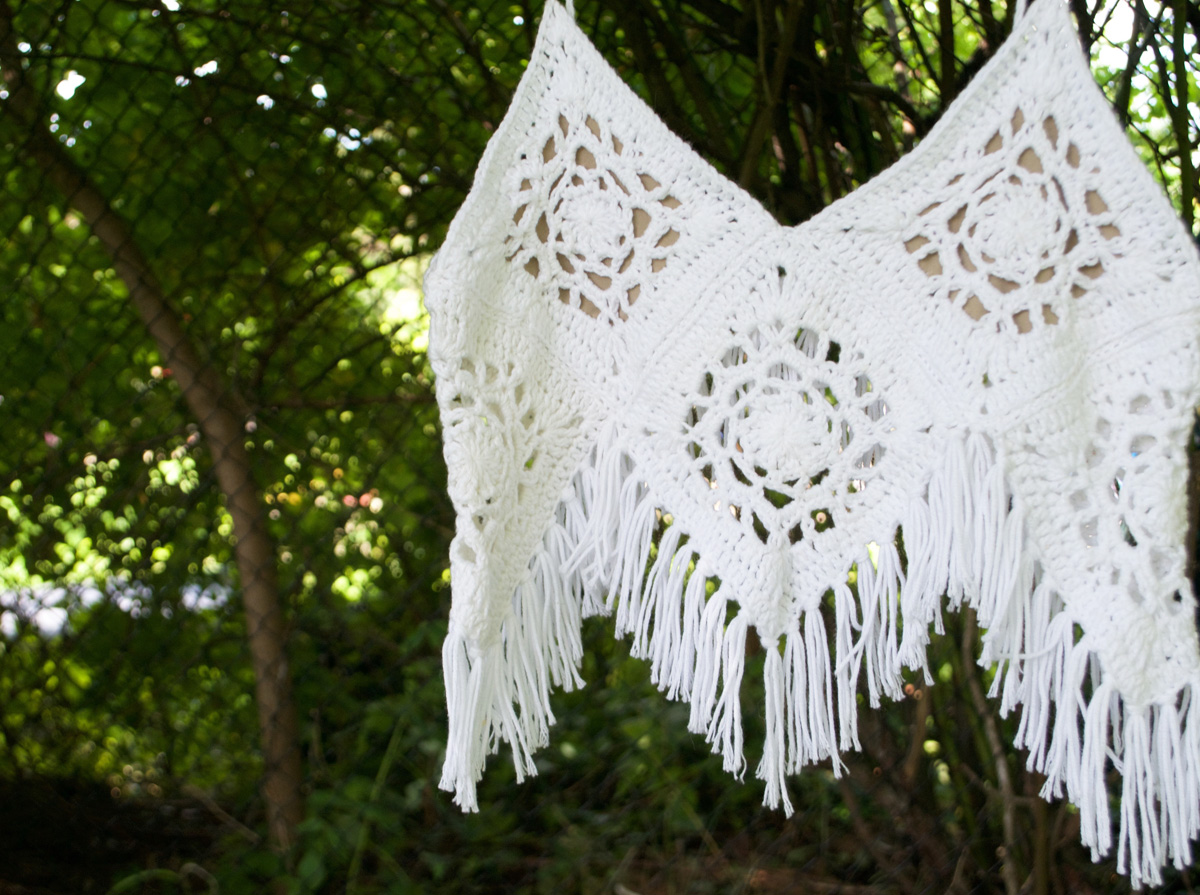
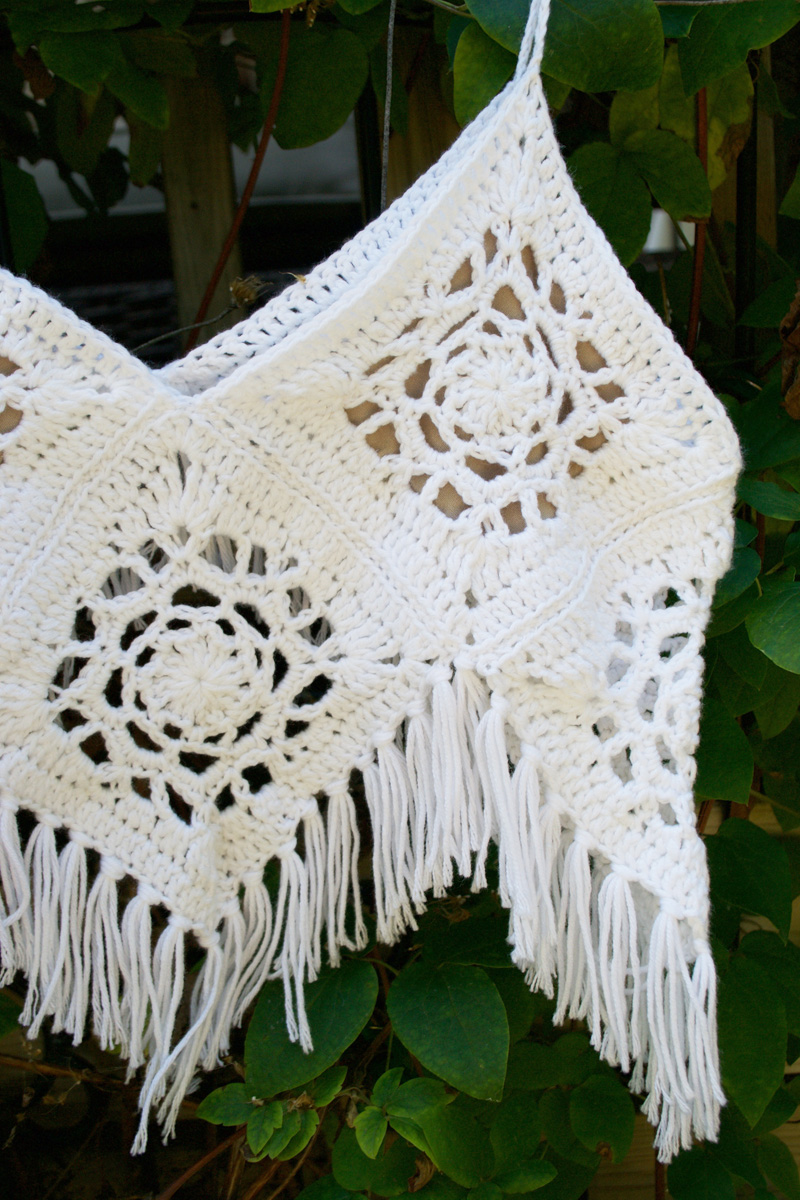
This top is made by crocheting 7 granny squares and then attaching them together, adding some fringe and some straps and voila! If you were really determined, I bet you could make this in a day. In the tutorial I explain how to sew lining into the top, but I only did that so that I wouldn’t have to wear a bra. If you plan on wearing a bra under this top, you can skip the lining.
The instructions that I give below are to make a top that will be approximately a size small. Basically, you want one of the granny squares to be able to cover one side of your chest. If you need the granny squares to be bigger, you’ve got a couple options:
- add a few more rows to your square until the square is big enough. This can be any type of stitch that you want, be it double, single or triple crochets. If you end up doing this and you want to add a bit of fun to your square, try doing a row around of single crochets and then for your next row, double crochet, chain one and then skip a stich and place your next double crochet. This will create a bit of a gap and will add a bit of fun to an otherwise standard row of double crochet
- You can also use a size 4 yarn and a larger hook (I would try a 3.5) to increase the size of the square, but keep the same pattern that we’re using.
- Use the pattern that I reference and complete up to 14 rounds. You really only need to get to 10 to make it into a square though.
- Use a different granny square pattern! As long as you make sure that they are still squares and that they fit over one side of your chest, feel free to use a different square pattern and then finish your top with the rest of this tutorial
I went with a white colour for my top because I was planning on wearing it with high waisted jeans, or desroyed jean shorts and nothing beats a classic denim blue with a white top. But, feel free to make this top in any colour(s) you choose!
How To: Boho Crochet Crop Top DIY
Materials:
- 100g (approx) of lightweight cotton yarn – mine is a size 3
- a size 2.5 crochet hook (could maybe get away with a 2.25 or a 2.75)
- scissors
- lining fabric to match your skin tone in a jersey or something with some stretch
- thread that’s the same colour as your yarn
- a needle
Pattern:
-
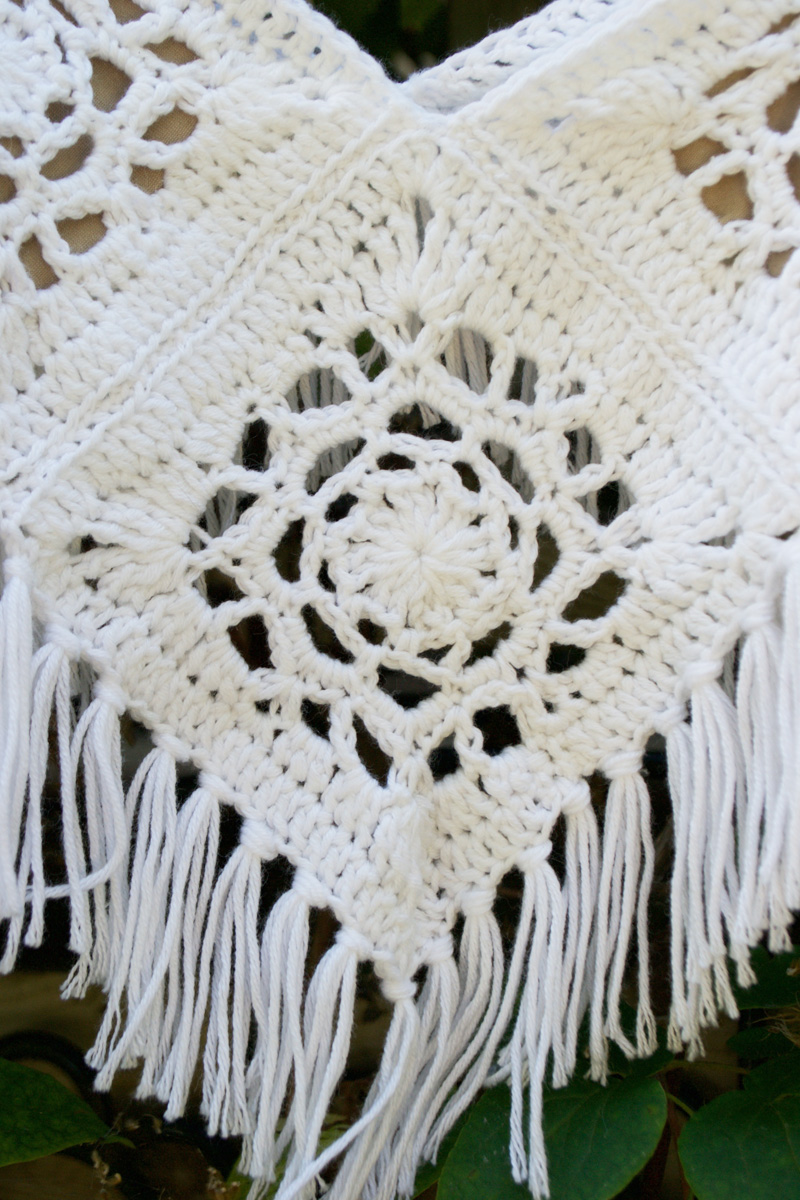
- We’re going to start by crocheting the granny squares. You’re going to complete this process 7 times for each of the squares that you will be making.
- To start your granny squares, you are going to be completing Rows 1-5 from this pattern. I’d write it all out here, but the photos are incredibly helpful!
- Once you’ve finished row 5, you’re going to move on and complete rows 9 and 10 of the same pattern.
- When you’ve completed row 10, you’re done your first granny square! Now set that aside and make 6 more.
- Once you have all 7 granny squares done, trim any loose ends or weave them back into your work.
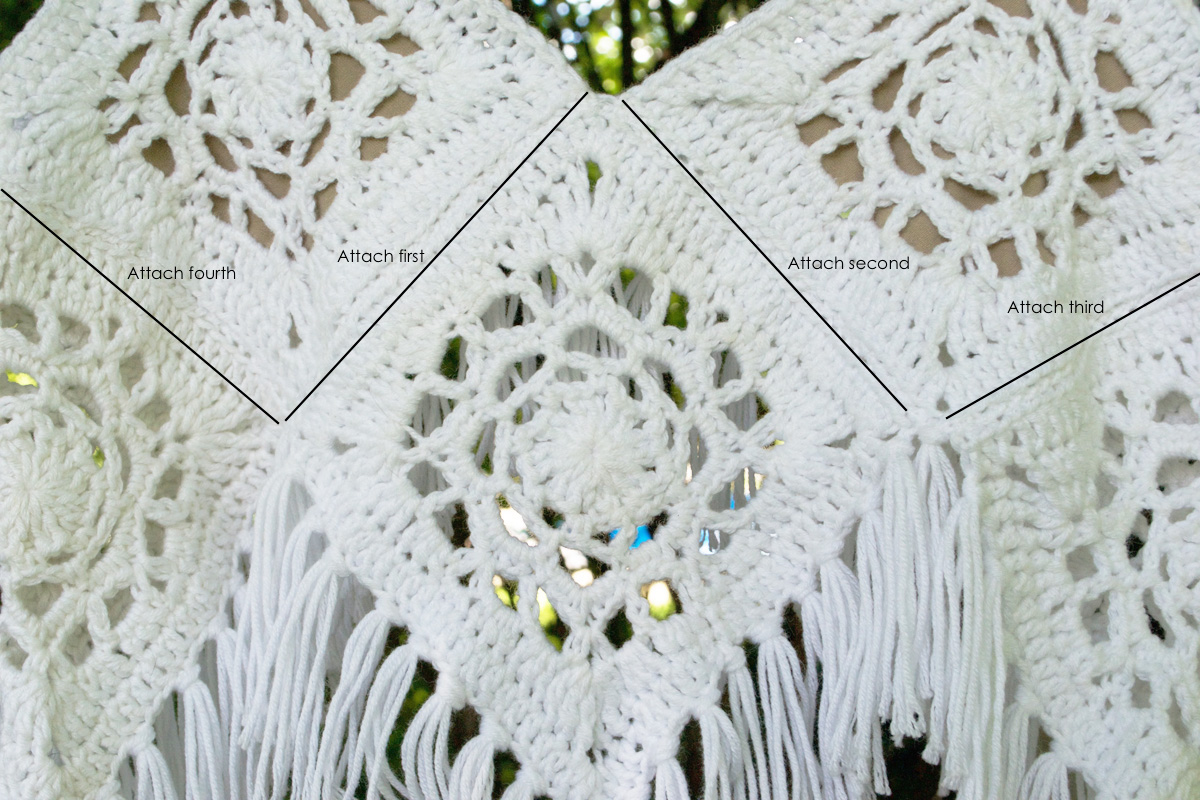
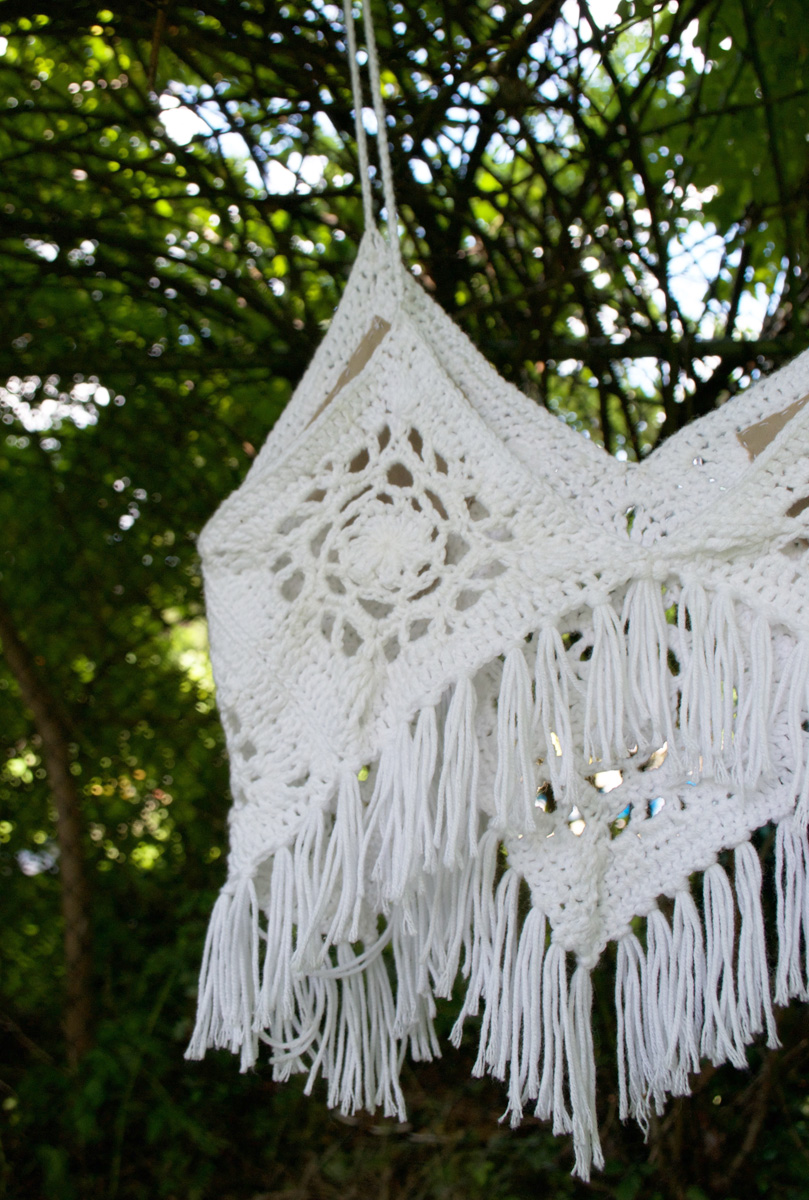
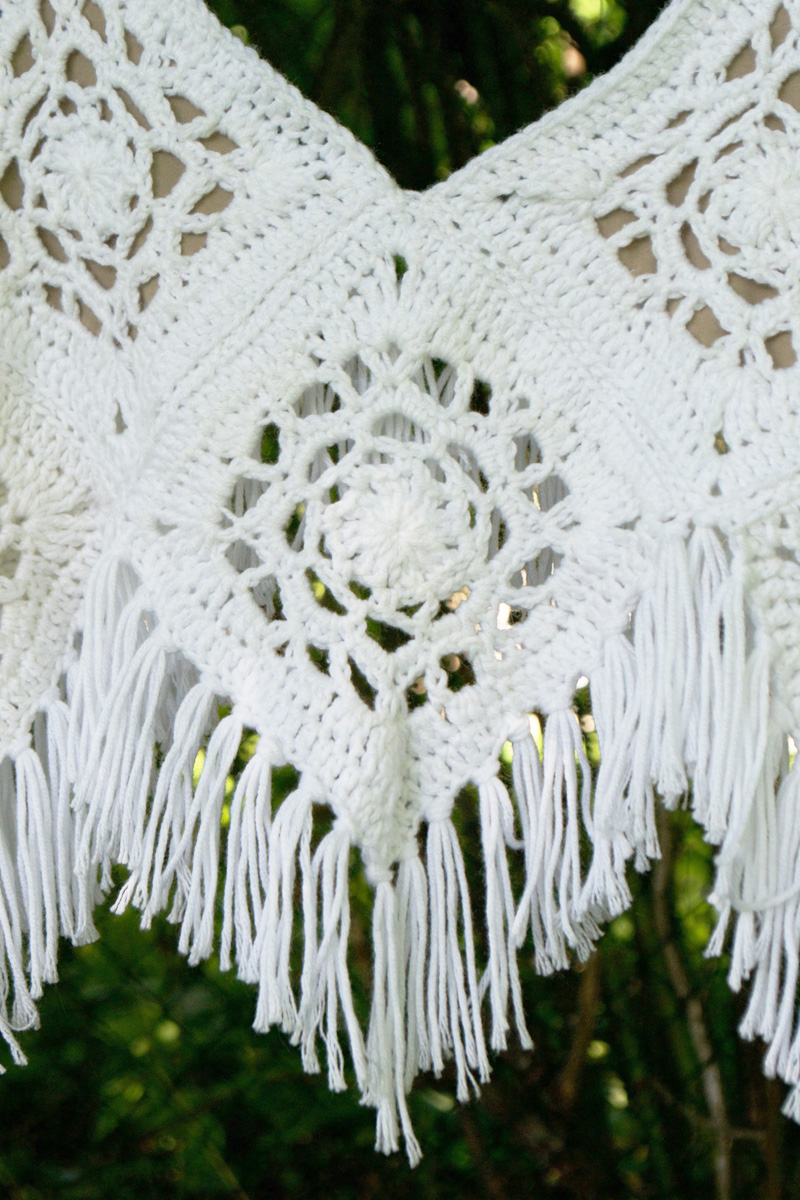
- Now, it’s time to attach the squares together. I do this using my crochet hook and some more of the same yarn that I made the granny squares with. So start by laying out your 3 best squares in a V shape with right sides up. This will make the front of your top. Attach them together where the sides meet, like so:
-
- Tuck in any loose ends from attaching those squares and then cut off any excess.
- Next, you’re going to attach a square on either side of the V, making sure to tuck in and trim any loose ends (see above photo).
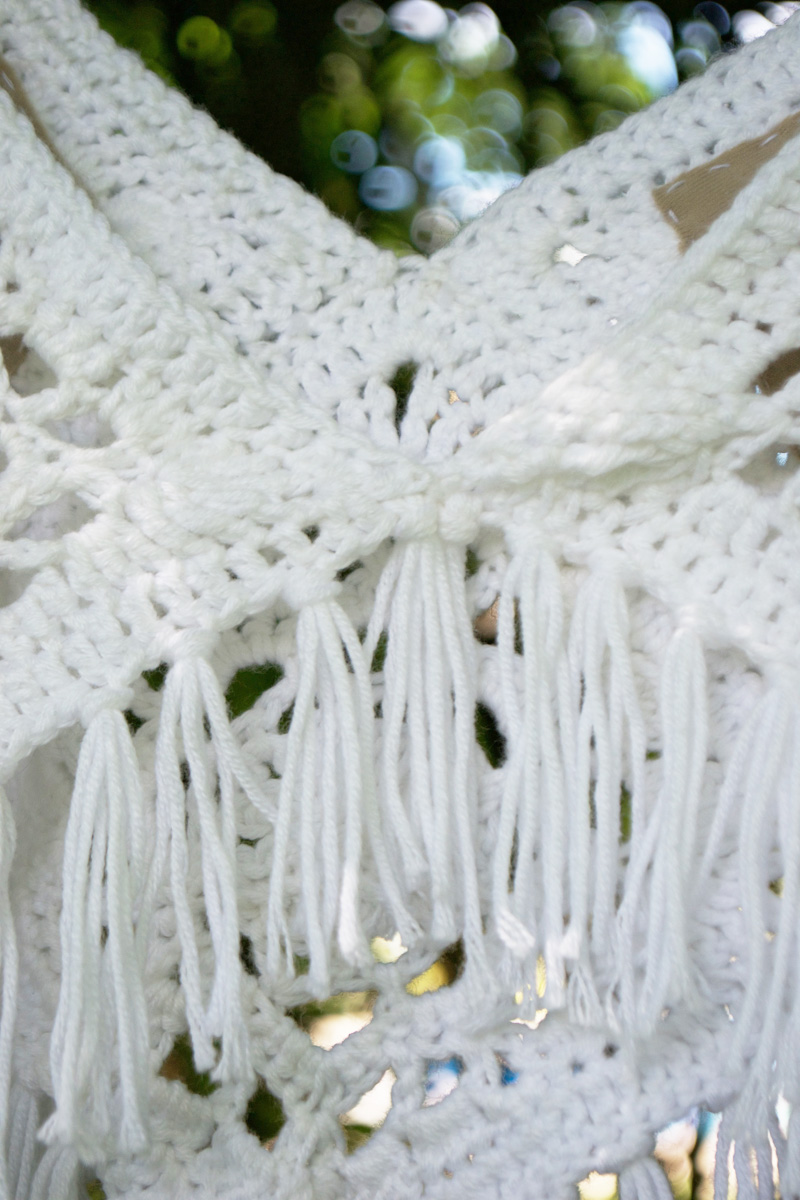
- Lastly, you’re going to attach the 2 back squares. The back of the top should look the same as the front, except it won’t have the centre square.
- Now, take a small bit of yarn and secure the back together. Tuck in and trim loose ends.
- Now, we’re going to make the straps. Connect your yarn to the top right hand corner of the top.
- Chain approximately 45-55 chains. Without securing to the other side, try your top on and see where the top is sitting. Add or subtract any chains until your top sits comfortably on your body. Once you have the desired chain length attach to the top chain on the back granny square. Tuck in and trim loose ends. Repeat on the other side.
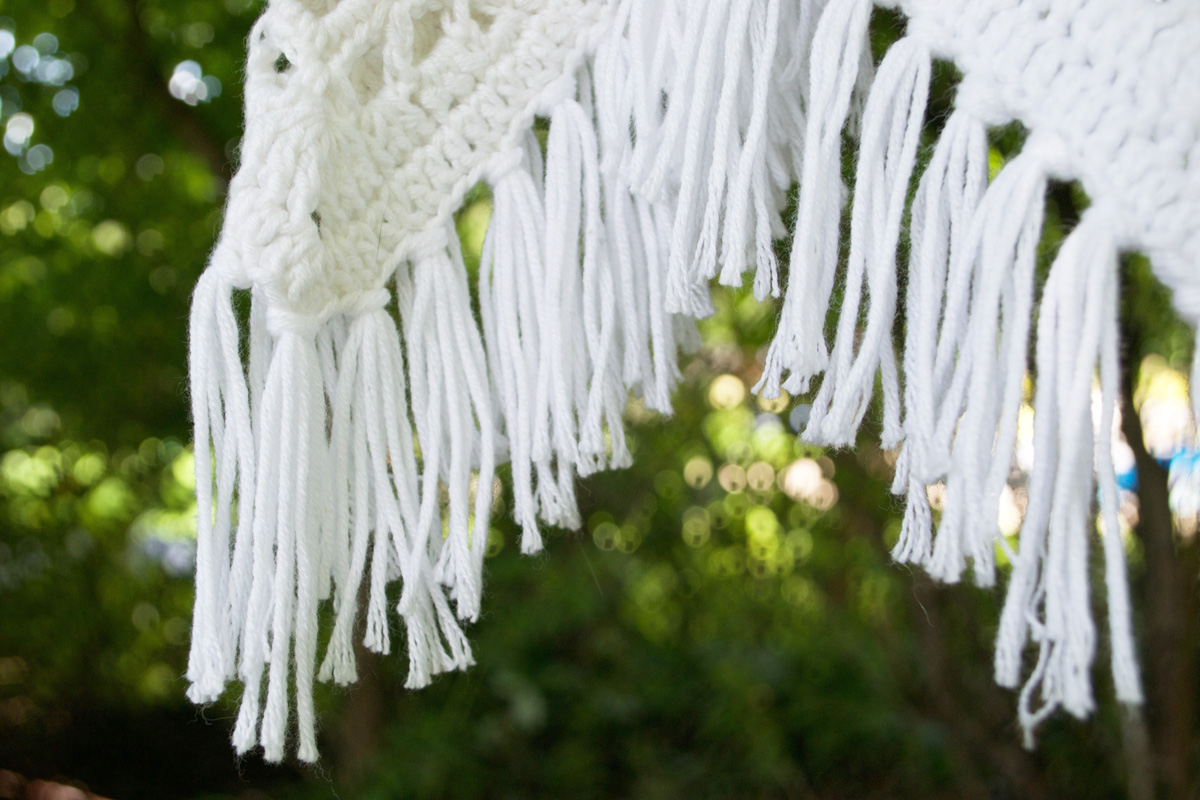
- Now it’s time for the fringe! I placed fringe approximately every 3 chains and did 3 pieces of yarn in each fringe. You can do more or less depending on how much fringe you want your top to have. To make the fringe, I cut a bunch of yarn that was about 4″ in length. Again, if you want your fringe longer or shorter, that’s up to you, just make sure to cut all the yarn approximately the same size.
- To attach the fringe, take 3 pieces of yarn, wrap them around your crochet hook and insert into a chain from the top down. Bring the yarn through the loop that you’ve just created. They should look like this:
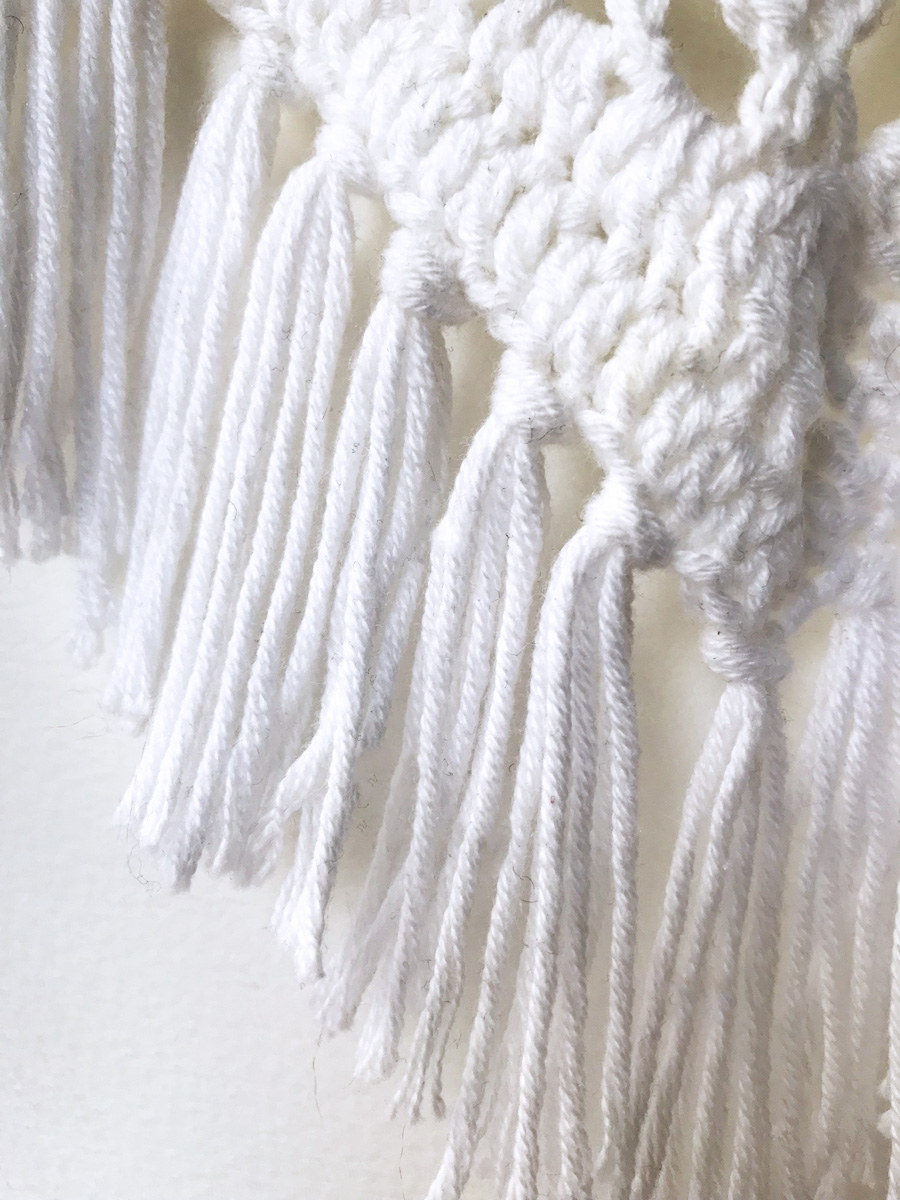
- Work all the way around your top, spacing the fringe evenly until you have the desired amount of fringe. Make sure that you’re placing a piece of fringe on the point of every triangle and not off to the side. Trim any pieces that are too long.
- At this point, you can add the lining if you plan on wearing the top sans-bra. If you don’t need lining, then congrats – you’re done! But if you do, then just cut out a piece of your lining fabric that’s about a 3-5″ square depending on how big you made your squares, how open the pattern is and how much coverage you want. Then, simply take your fabric and sew it into place on the wrong side of the top using small, even stitches.

All that’s left to do now is throw that top on with some denim and hit the beach!
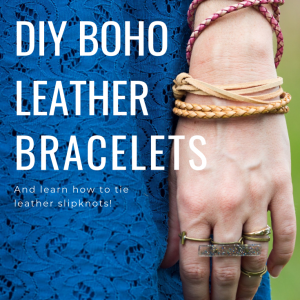
Or in my case, wait a few more months for this snow to clear up and then hit the beach EVERY DAMN DAY in this adorable top. This would pair so perfectly with these DIY Boho Leather Bracelets or this DIY Leather Lariat Necklace.
I’d love to see the results of anyone who decides to try making this top! Post them in the comments below!
xo, Tess.
Follow Me at
Angean Blog | Facebook | Twitter | Instagram | Pinterest


Hi! Great pattern, which I have enjoyed making. I have my 7 squares ready to sew, but should I block them first? Did you block yours? Thanks in advance for your advice!
Hi Debbie, thanks so much!
I didn’t exactly block them, I just used pins to pin them down to a cushion to make them slightly more square and stretch them a little bit. I only left them for about 1 day. I found that when I sewed them together, they were square enough. I did also find that the shirt stretched a little bit after I wore it once or twice.
Hope that helps!
Debbie! Send us photos when yours is done!! Can’t wait to see how it turns out. 🙂
I will! 😀
Just finished the top — you can see my pix on my Ravelry page and SOON on my blog! Changed a few details but the recipient LOVES it!
oops forgot to put that I am DeeDeeQ5724 on Ravelry!
AND wrong blog url, now it’s fixed 🙂
Thanks so much for sharing Debbie! The top looks amazing 🙂
Is this top for adults ? If so.how would I make in a child size ? So cute. Thank you
Hi Jodi! Yes, I made this top to fit me and I’m an xs/s adult size. When I measured for this top, one granny square hit the middle of my chest to approx my side, meaning that I needed 4 squares to wrap all the way around my body. So, I would start with a granny square (you may have to choose one with fewer rounds) and measure on the child to see if 1 square fits 1/4 of the way around their torso. Hope that helps!
Hi! I don’t really understand how you do transition from round 5 into round 9, as in round 8th you finish with 24 chain spaces and at the end of round 5 you only have 15. Can you please help me out? Otherwise in unmakeable.
Thanks
I wish there was a way to print this out