DIY
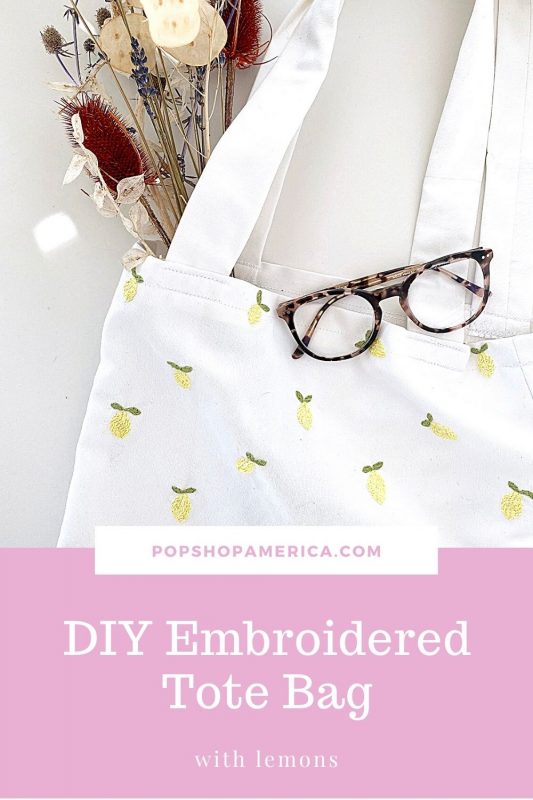
DIY Embroidered & Hand Sewn Tote Bag with Lemons
May
Every few months or so, I feel the need to purge all of my belongings and get rid of things that I no longer use.
I also tend to get rid of clothes that just aren’t working for me anymore or that no longer fit my style. It feels like it’s easier to do with clothes, but recently I started trying to streamline all of my household items, too.
My latest area that I’ve decided to tackle is my random assortment of reusable grocery bags. Lately, my tote collection is just some ugly random bags that I got for free and a lot of bags from the company that I work for. It’s not a particularly pretty collection, nor do any of the bags match. So, when I got some vintage fabric that was my Nonnie’s, I decided it would be perfect for some new tote bags.
Inspiration Struck
While I was cutting out some patterns last weekend, I was trying my best to use all the fabric that I had. I had a decent amount leftover and I knew that I wanted to clean out my stash of reusable bags, so the idea to make some tote bags was born. I was hit with a burst of inspiration when I realized that these bags would be the perfect opportunity to practice some embroidery. I’ve been working on a small cross-stitch that I got for Christmas and wanted to keep experimenting with different designs. So, I just figured out a very cute way to replace my old ugly grocery bags while practicing a new skill and making the bags pretty.
I wanted to keep all of my bags within a fruit/floral theme, so I searched Pinterest for a lot of embroidery inspiration. You can see all of the options that I’ve pinned here which will hopefully inspire you, too! If you’re new to embroidery or cross-stitch, these kits are a super cute way to try it out!
Notes on Supplies – Fabric
These bags are super easy to make and should come together in about an hour, not including the embroidery. When buying fabric, I’d recommend a medium to heavyweight cotton or canvas fabric in any colour of your choice. Darker colours won’t get dirty as fast, but white is the first fabric that I cut out. You’re going to want to buy some fusible interfacing for the straps of the bag, but aside from that, there aren’t any fancy supplies to buy.
Notes on Supplies – Tools
The embroidery that you do will be completely up to you, but I’ll walk you through the embroidery that I did. One of the best things I’ve invested in is an erasable marker. I used this to roughly draw out my designs on the lighter fabric and it really helped me to keep things centred and even. For the darker fabrics, I would use dressmaker’s chalk. I also love using a rotary cutter and mat to cut out my fabric, but if you have scissors then that works, too!
Anyways, here’s my tutorial for a super cute lemon embroidered tote bag!
DIY Lemon Embroidered Tote Bag
Supplies:
- 1/2 yard medium-heavyweight cotton or canvas fabric in white
- 1/4 yard fusible interfacing (you won’t use this much, but often can’t buy a smaller amount)
- white thread
- an iron & ironing board
- embroidery floss in pale yellow and a yellow-green. I used an entire skein of yellow and only about 1/6 of the green.
- a tapestry needle
- erasable marker
- 6″ embroidery hoop
Prep:
- First, you’re going to want to cut out your fabric. We need 3 pieces for the bag. For the straps, cut 2 pieces of fabric and interfacing that measure 4″ x 24″. For the main portion of the bag, cut one piece that measures 14″ x 30″.
- Fuse your interfacing to the wrong side of the strap pieces and set them aside.
- At this point, I highly recommend serging the edges of your bag piece so that they don’t fray while you’re embroidering. A zig-zag stitch on the edges works as well.
- Now, take your fabric for the bag and fold it in half so that it measures 14″ x 15″. One side will be the front of your tote and the other will be the back. Mark where the halfway point is.
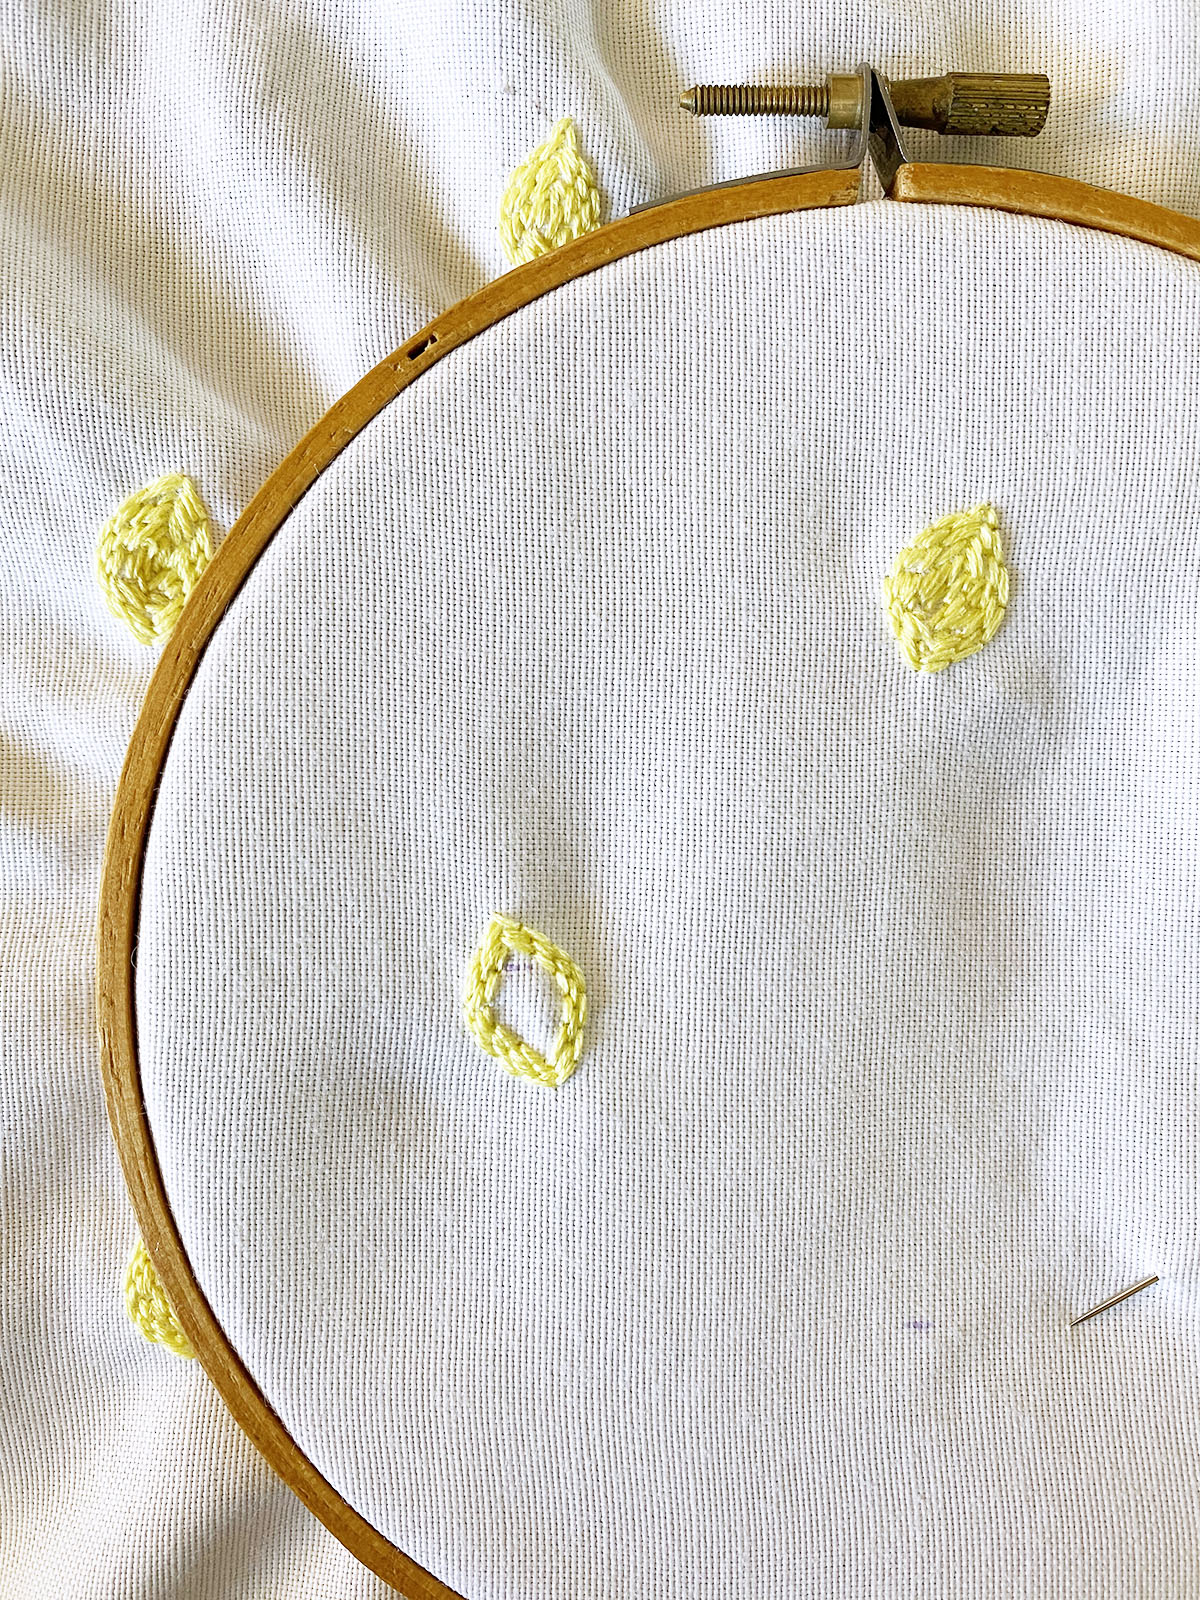
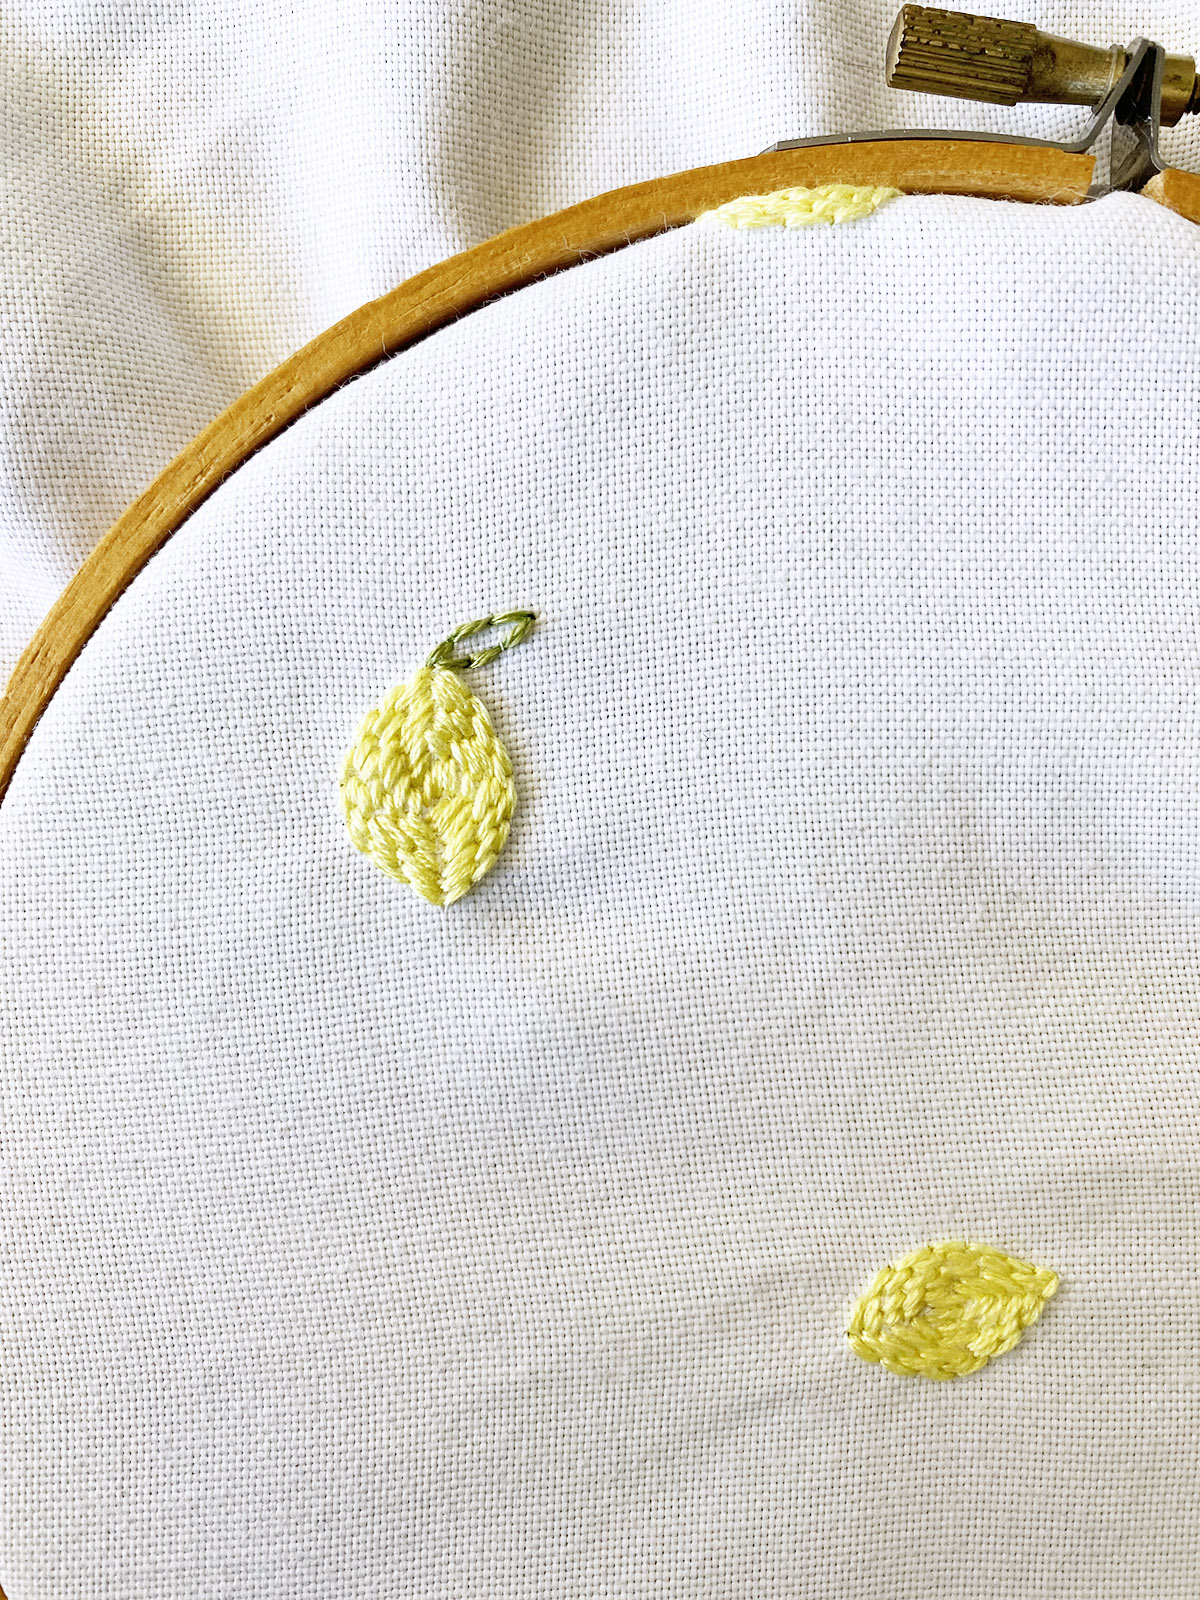
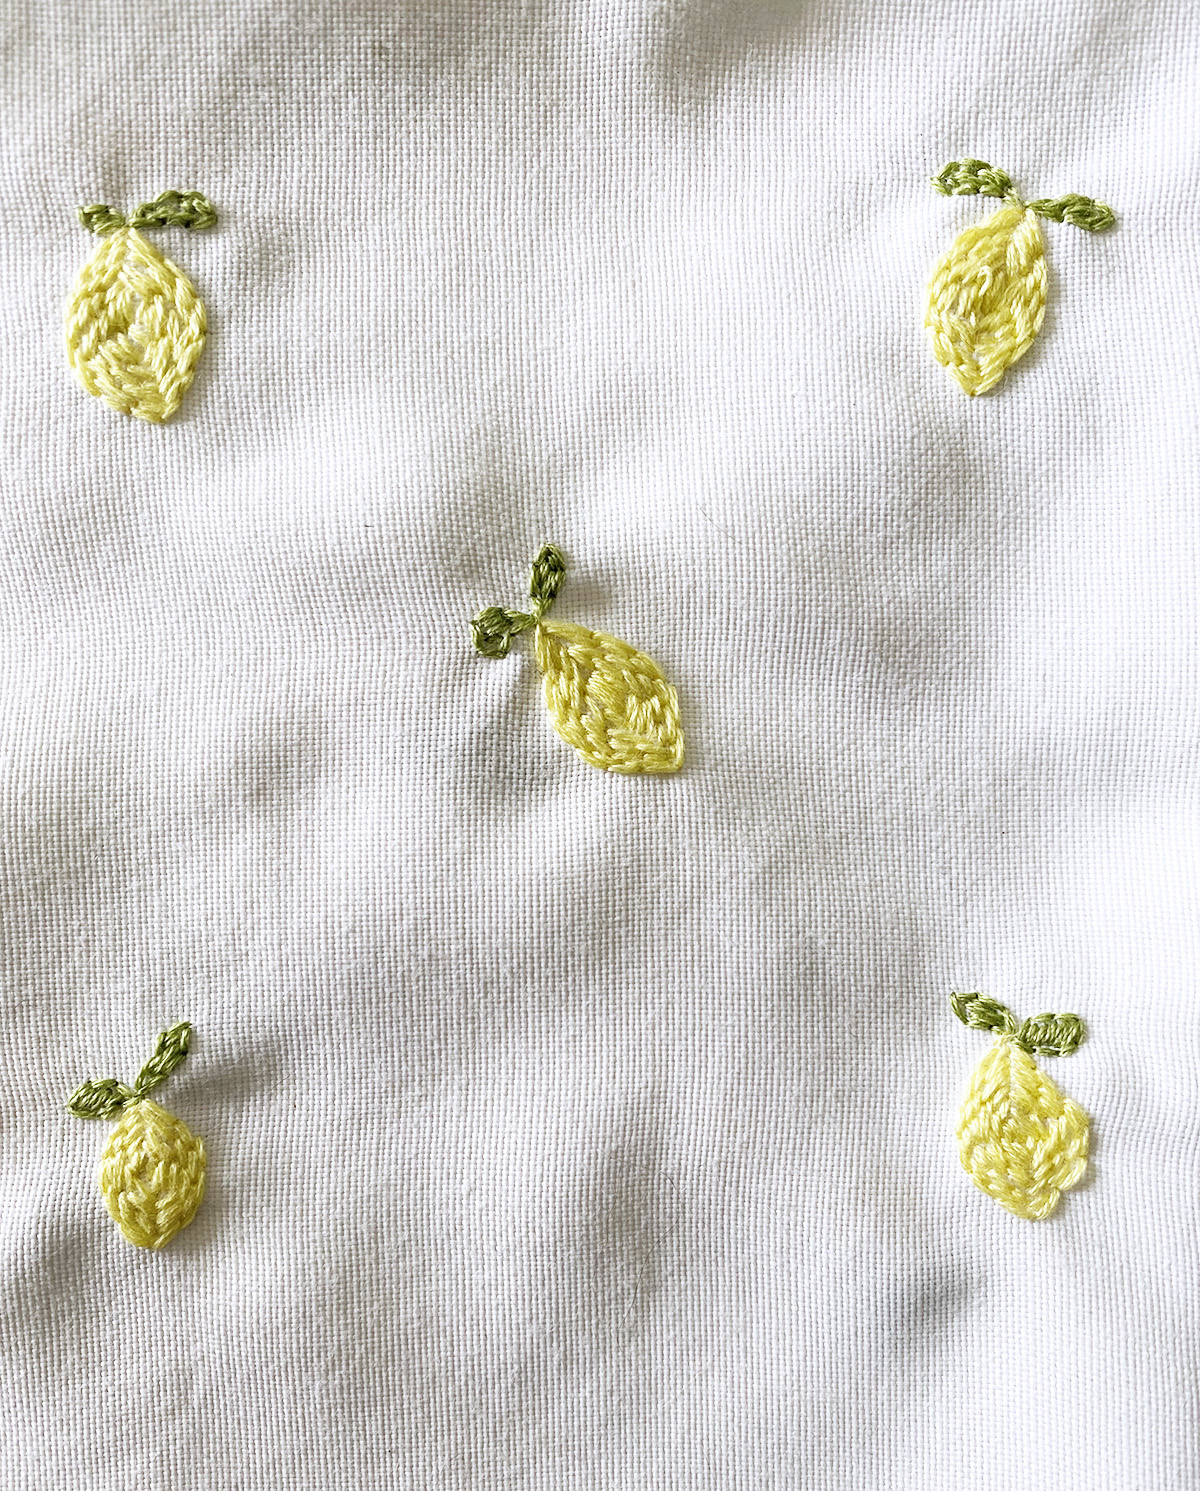
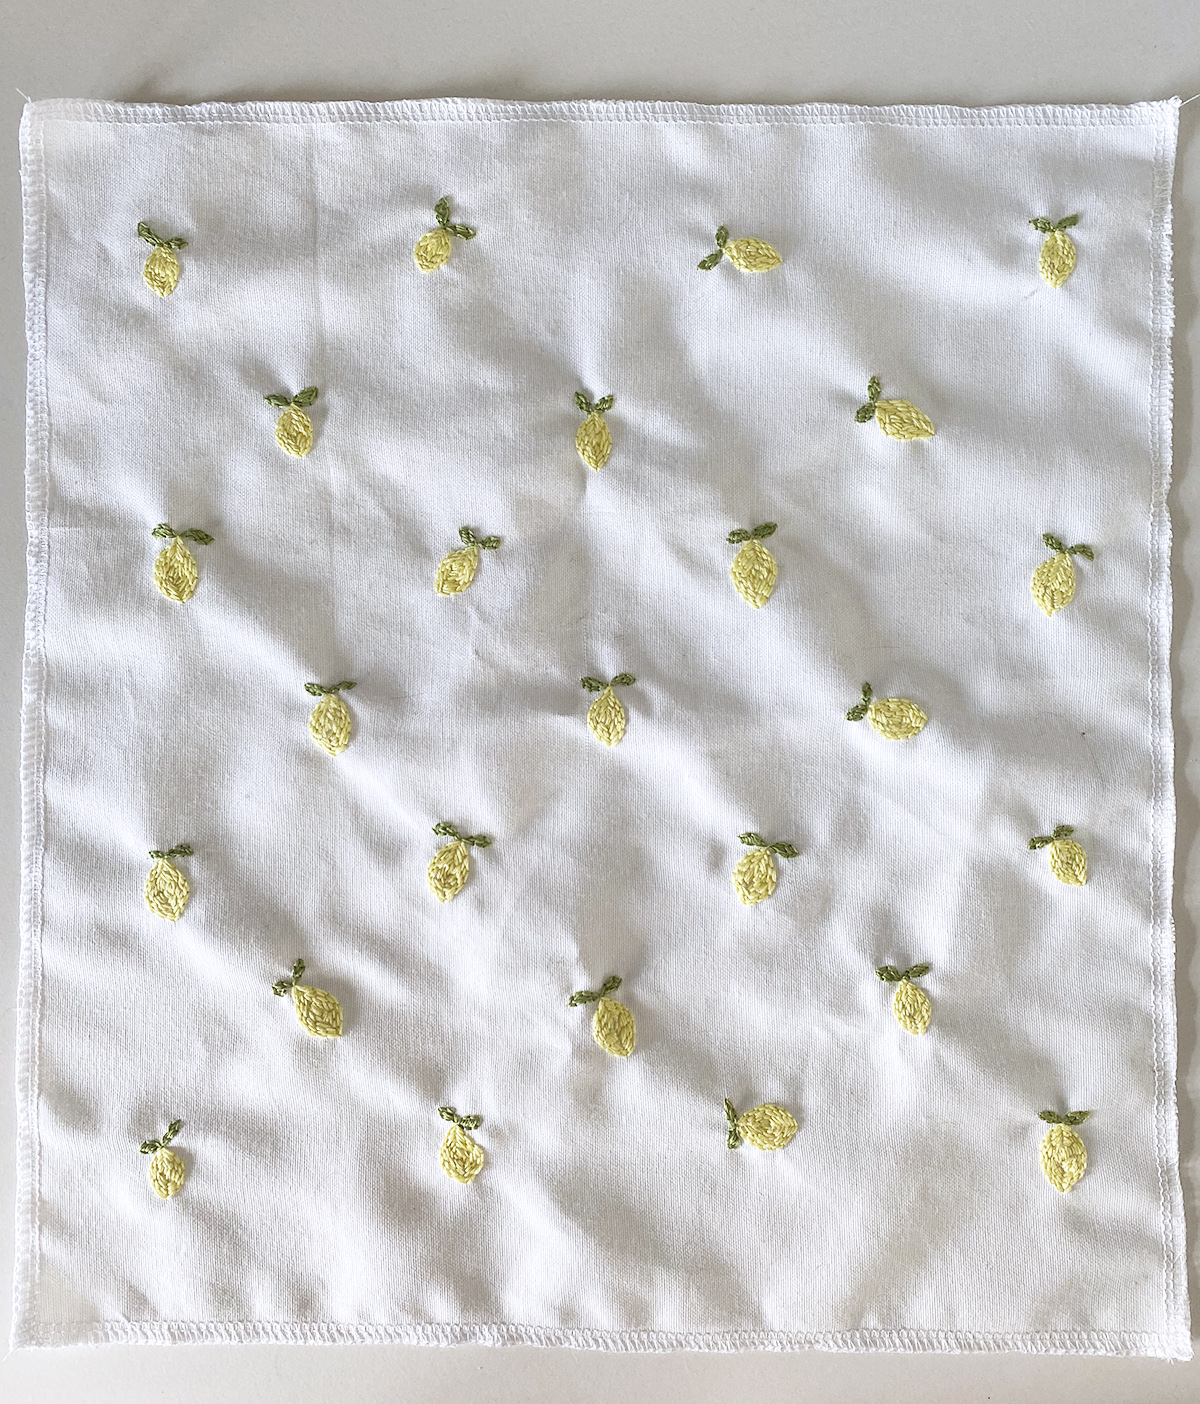
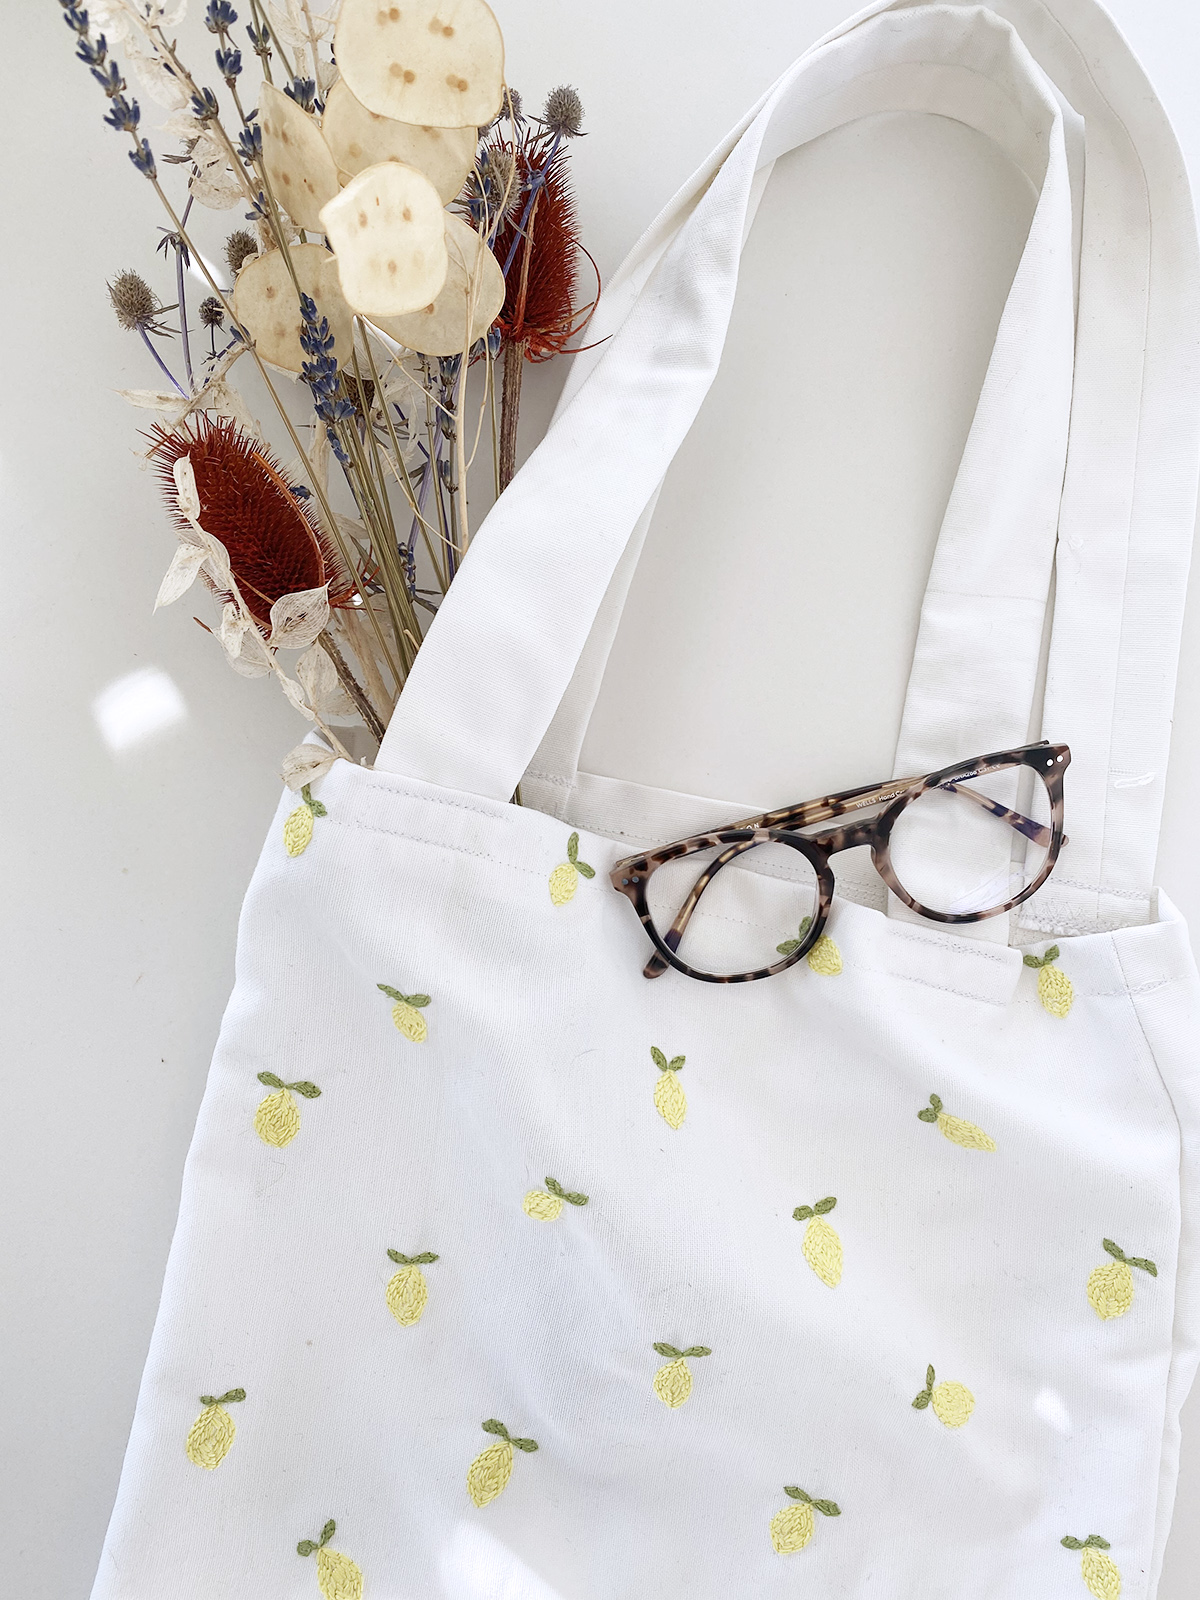
- Lay the fabric out on a flat surface and work with only the front half start to make small dots on the fabric where you want your lemons to go. I used my erasable marker and did an offset pattern that was 4 lemons across and 4 down. To ensure that the pattern alternate, start the top row with 4 lemons and then the second row with three. You place each lemon in between a lemon from the row above. I got 25 lemons on my tote bag in total. I figured the size of each lemon would be about a nickel, plus the stem.
Embroidery:
- When you’re embroidering your lemons, don’t feel like you need to be super careful about the placement or size. Mine are all generally the same size, but they’re slightly different shapes with slightly different placements around the dots that I made.
- Once you have your dots ready, sandwich your fabric in between your embroidery hoop and you’re ready to start stitching! I split each strand of yellow floss in 2 so that I was working with 3 strands at a time. Thread your tapestry needle with 2″ of thread and then twist the needle so the thread stays in place.
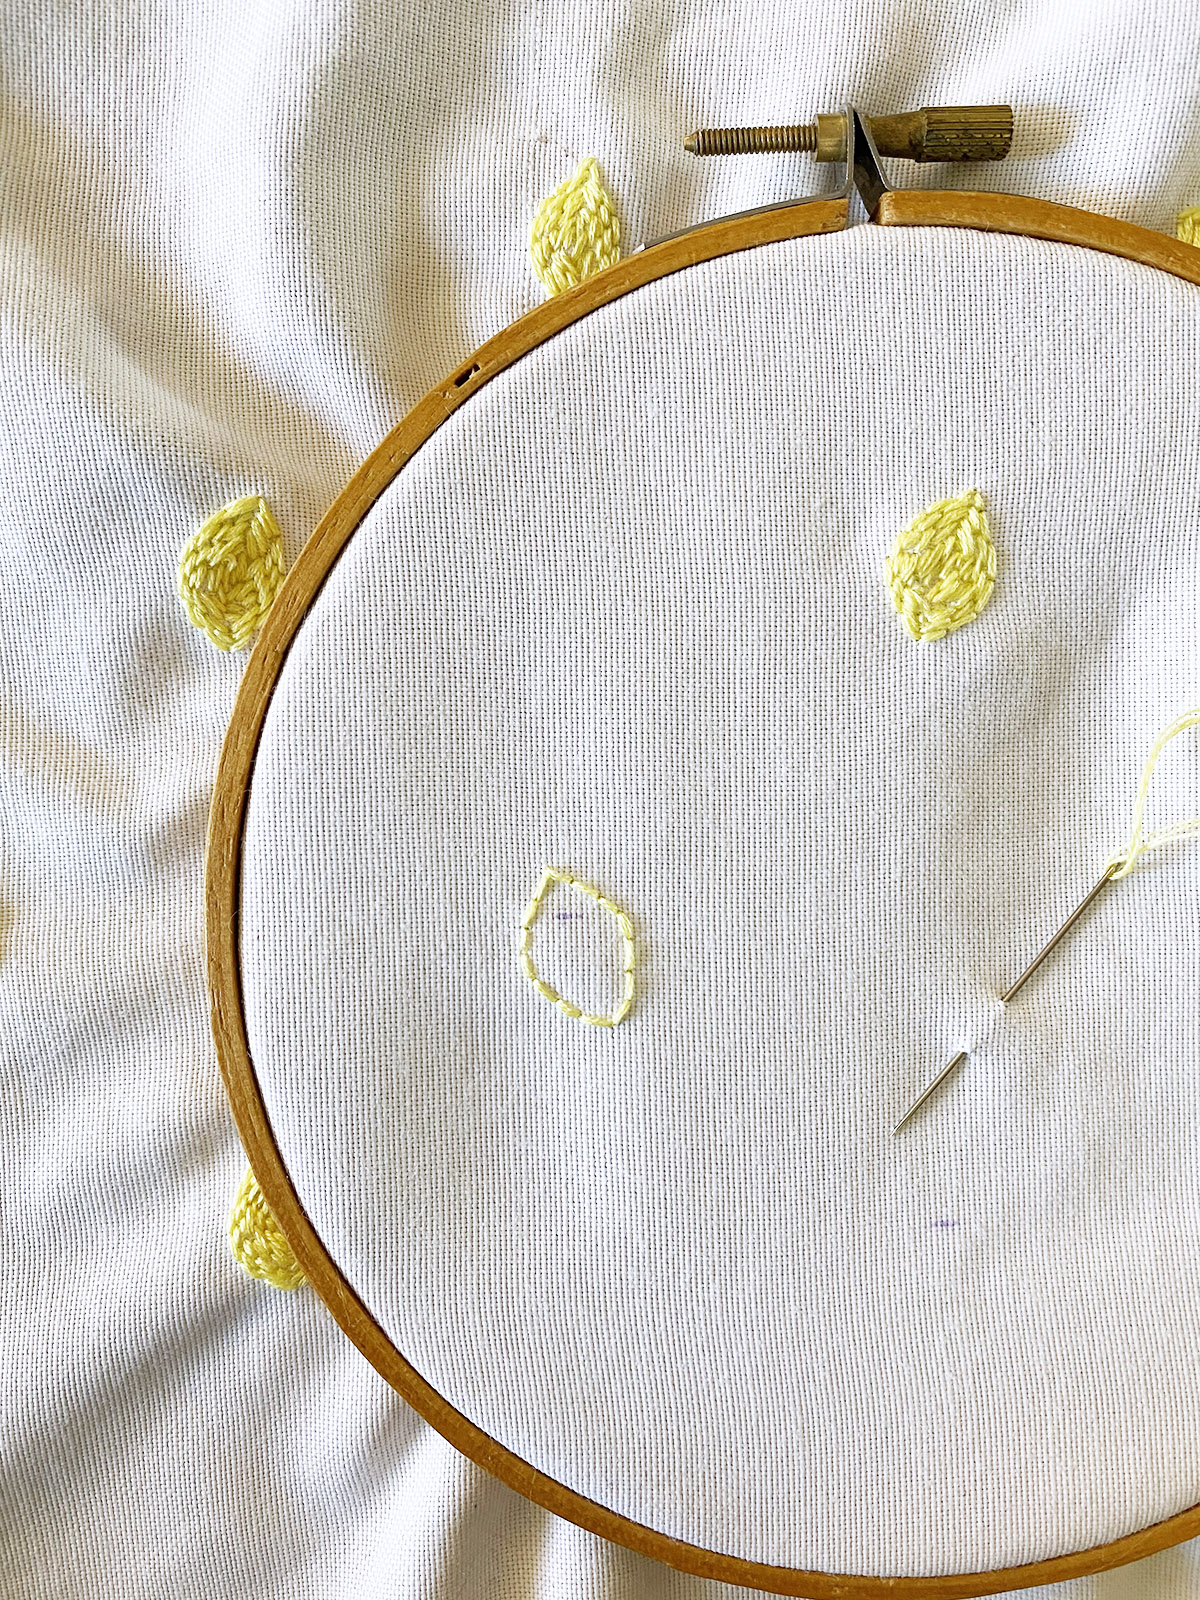
- Start stitching your lemon by doing the border first using a backstitch. We’re not going to tie a knot in the back of our work. Instead, leave a tail of about 1.5″ on the back and it will get stitched over multiple times. So start by making the border of your lemon.
- Then once you have the border, keep working in rounds until you get to the centre of your lemon. At this point, I would separate the strands to tie them in a knot. Cut off the excess.
- To do the leaves on the lemons use the same method using your green thread. Border first and then fill it in so that the leaves are solid.
- Once you have all your lemons done, it’s time to quickly sew the bag!
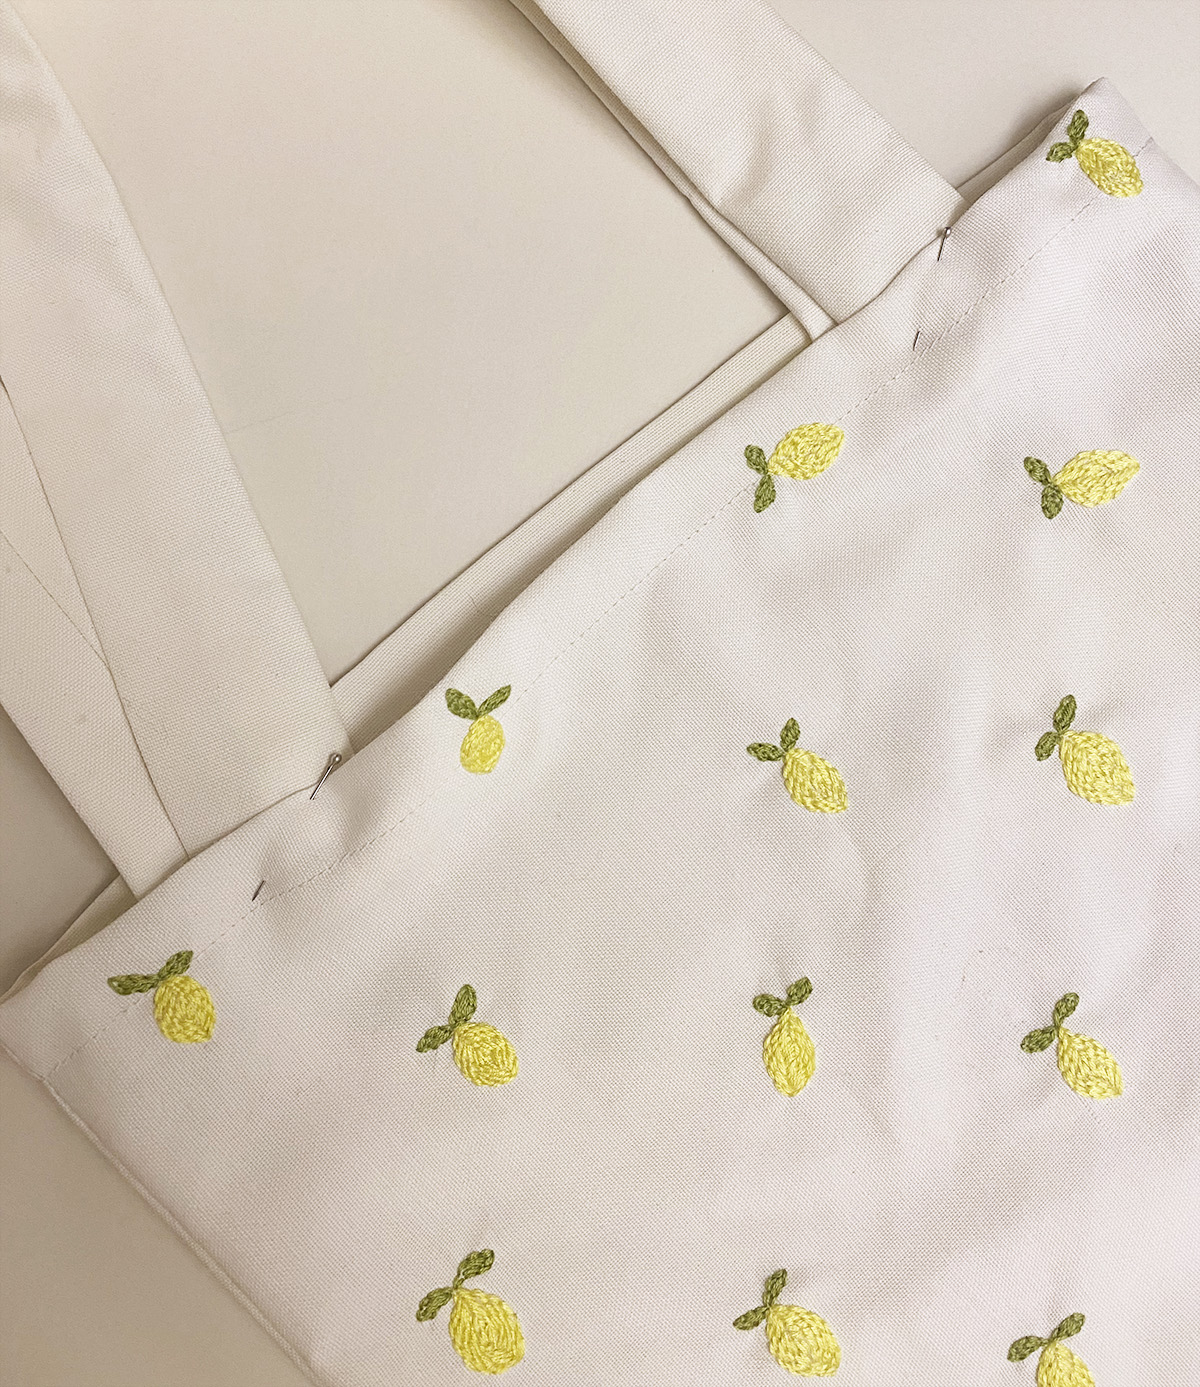
Sewing the Bag:
- For the main part of the bag fold your fabric in half with right sides together and sew along each side seam using a 1/4″ seam allowance. Remember to back-tack at the beginning and end of your seam.
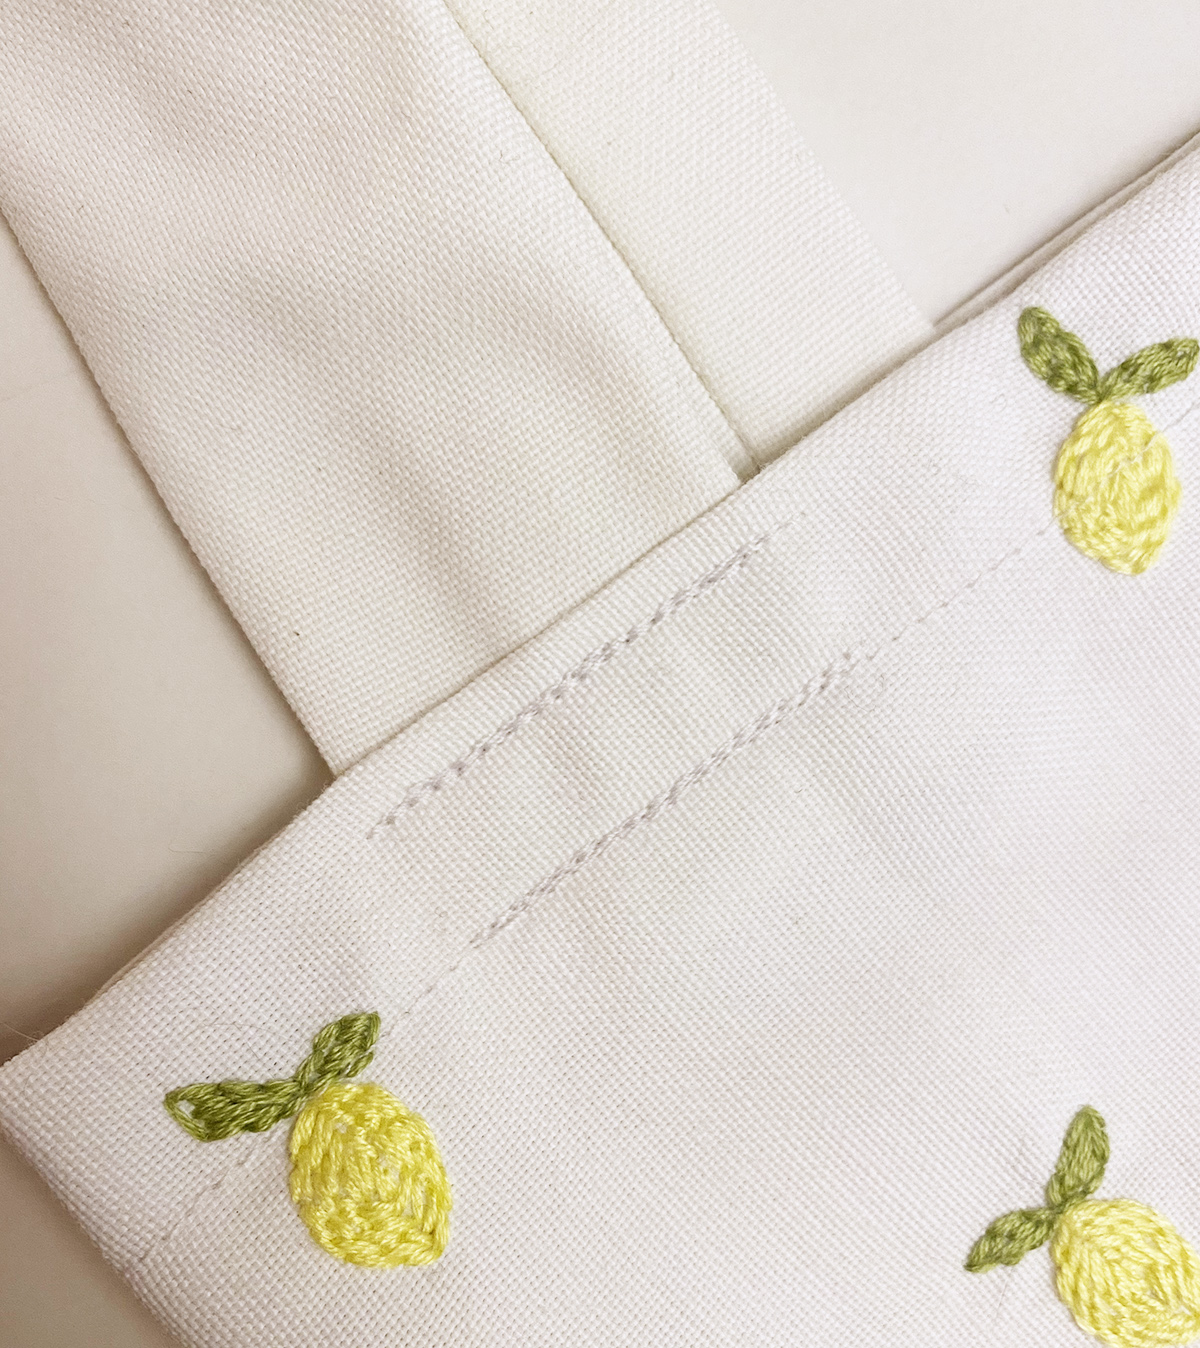
- To finish the top of the bag, fold the top of the bag down 1″ and press the seam.
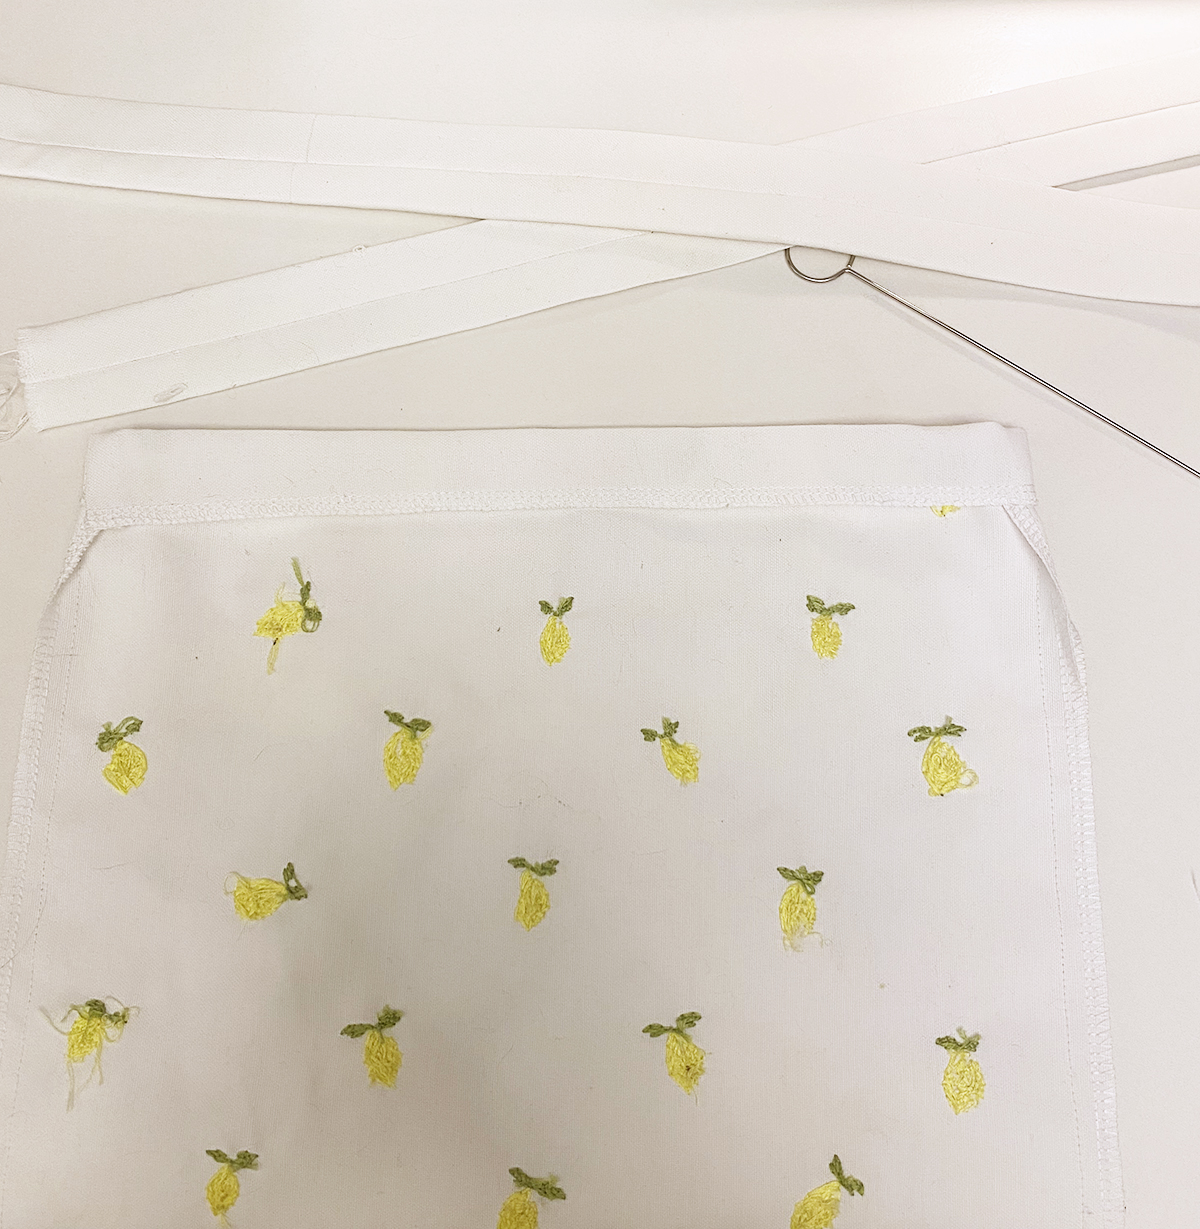
- Sew the top of the bag down 3/4″ away from the top of the bag.
- Now turn the bag right side out and press the front with the embroidery as well as the top seam.
Sewing the Straps & Finishing:
- Using a straight stitch, fold one of your straps lengthwise with right sides together. Sew along the length of the strap using a 1/4″ seam allowance. Repeat for the second strap.
- Turn your straps inside out and press so that the seam is centred on the underside of the strap. At this point, you can finish the ends of the straps using a zig-zag stitch or a serger if you have one.

- To add the straps, place one end of the strap beneath one layer of the bag ensuring the strap seam is on the underside of the strap. It should be about 1.5″ away from the side seam and extend about 1″ below the top of the bag.
- Sew across the strap about 1/4″ down from the top of the bag back tacking over the seam about 4 times.
- Working with the same strap, sew the strap down again sewing over the hemline that you made for the top of the bag. Back tack this about 4 times as well.
- Repeat this for the remaining 3 straps and your bag will be finished!
The Finished Bag
I’m super happy with how this came out and it’s even cuter than I imagined! I can’t wait to use these bags for grocery shopping or for carting around food in the summer to take to picnics in the park!
Flowers or different fruits/veggies would also be a super cute alternative for this bag. I think next I’m going to do strawberries and then maybe an assortment of veggies would be really cute too.
I’d love to know what you think and if you’d make one for yourself! They’d also make a really cute gift!
- Tess

Let’s Stay Friends!
Insta | Pinterest | Enews | TikTok