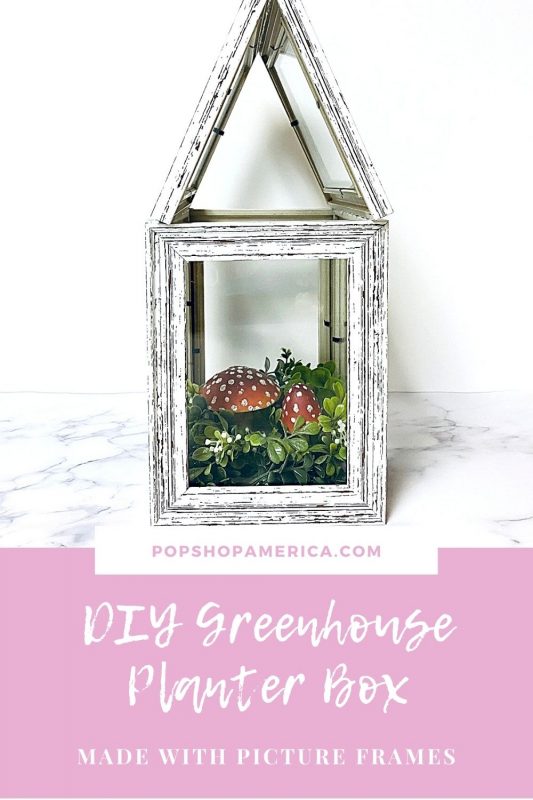
DIY
DIY Picture Frame Greenhouse Terrarium
Feb
You know I love a good transformation. Nothing’s more exciting than using supplies to create something completely different than how the supplies started out. This DIY Greenhouse Terrarium is made with picture frames!
It’s inexpensive to make and it’s the perfect decoration for tabletops, entryways, or other cool spaces. It takes these supplies from ordinary to extraordinary. So let’s make it!
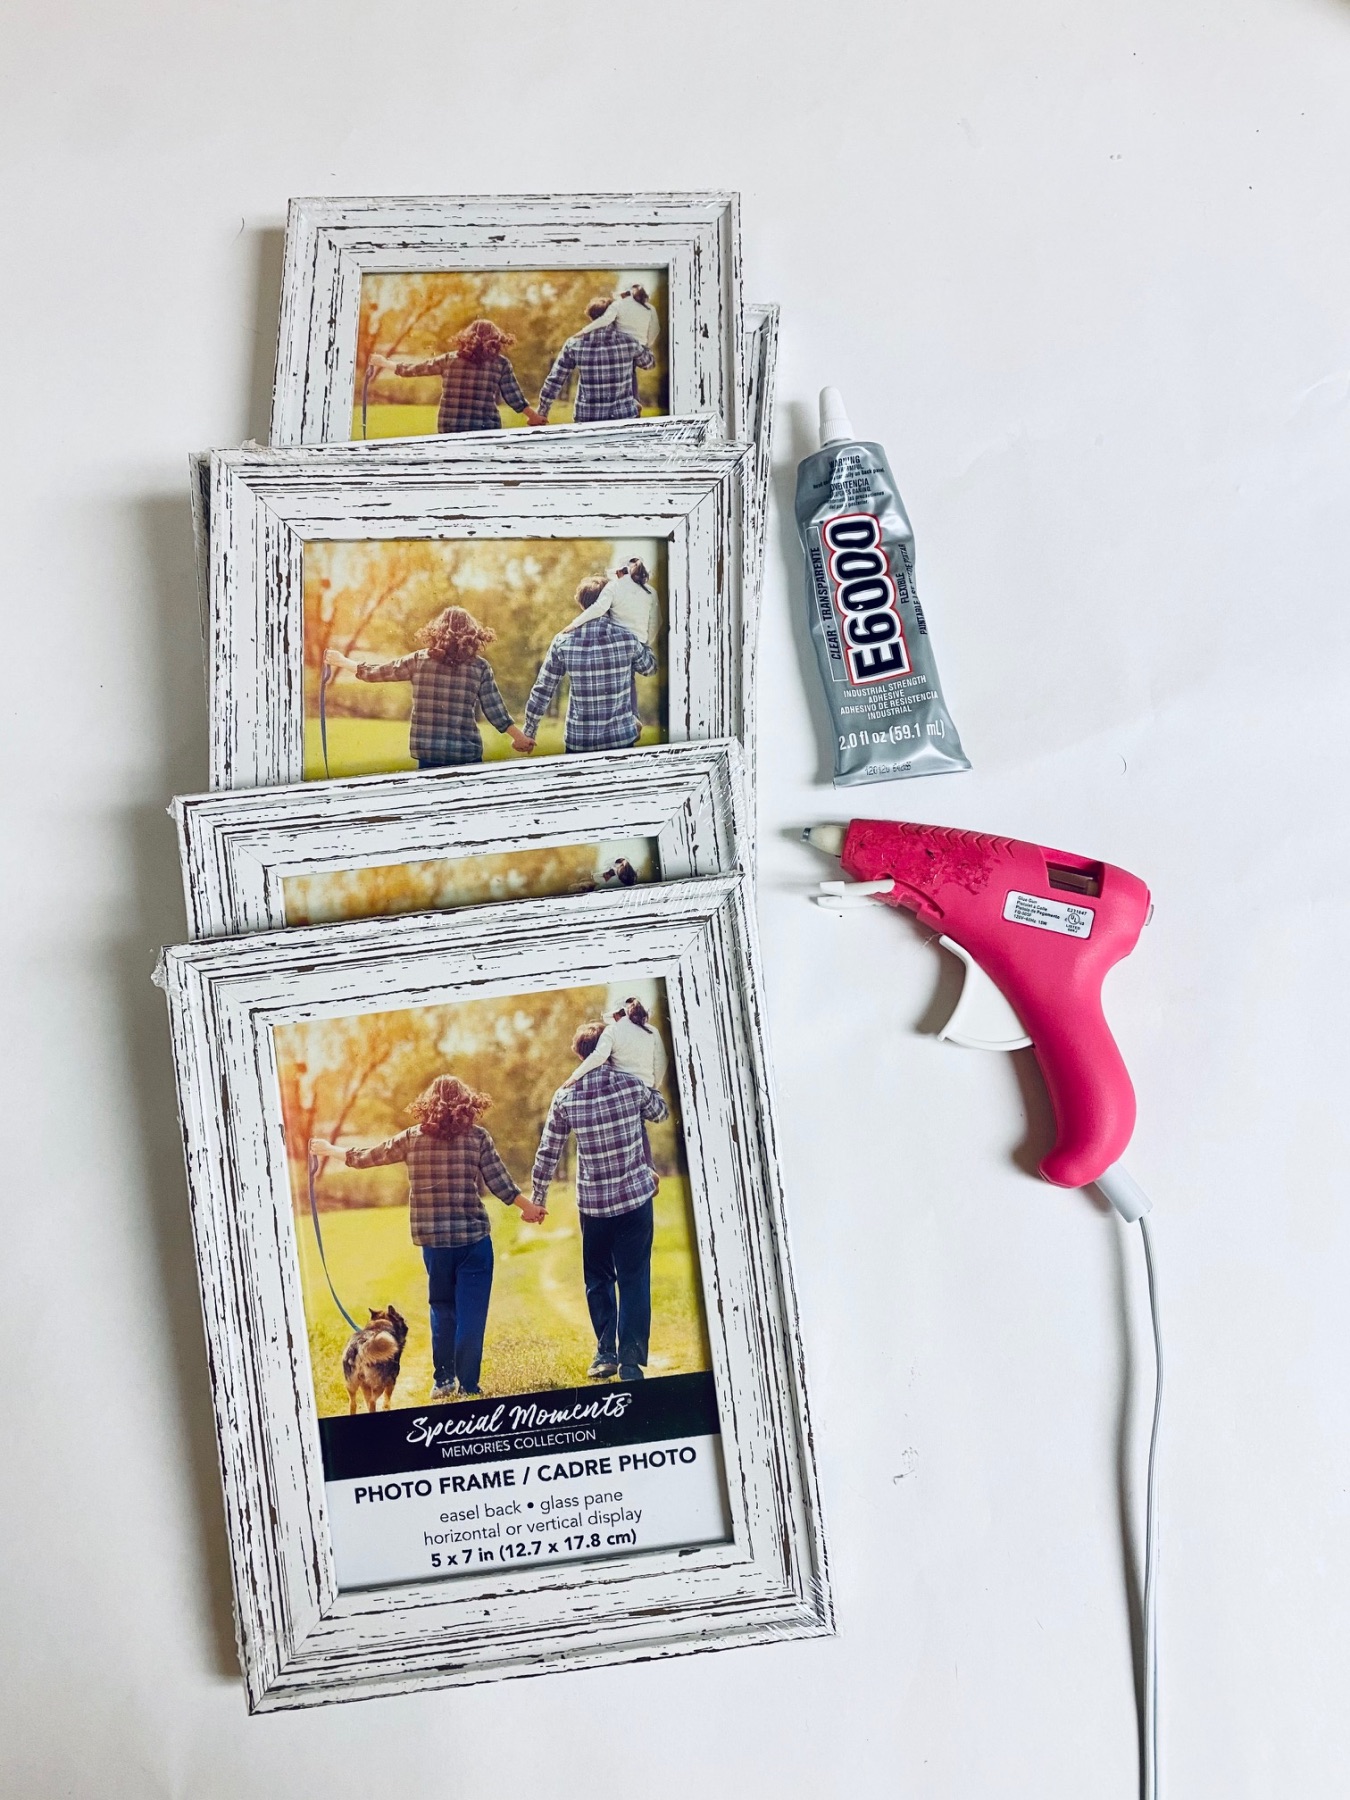
Supplies to Make a DIY Picture Frame Greenhouse Terrarium
6 5×7 inch Picture Frames
E6000
Hot Glue Gun + Glue Stick
An Array of Live or Faux Plants
The supplies are simple. You don’t need many things to complete this project. What you do need are the 6 picture frames, a quick holding glue in addition to a glue that offers a strong permanent hold.
Because you are working with 90° angles for the walls and a roof that’s holding in place at a 45° angle, you need more than 1 glue to hold these pieces together.
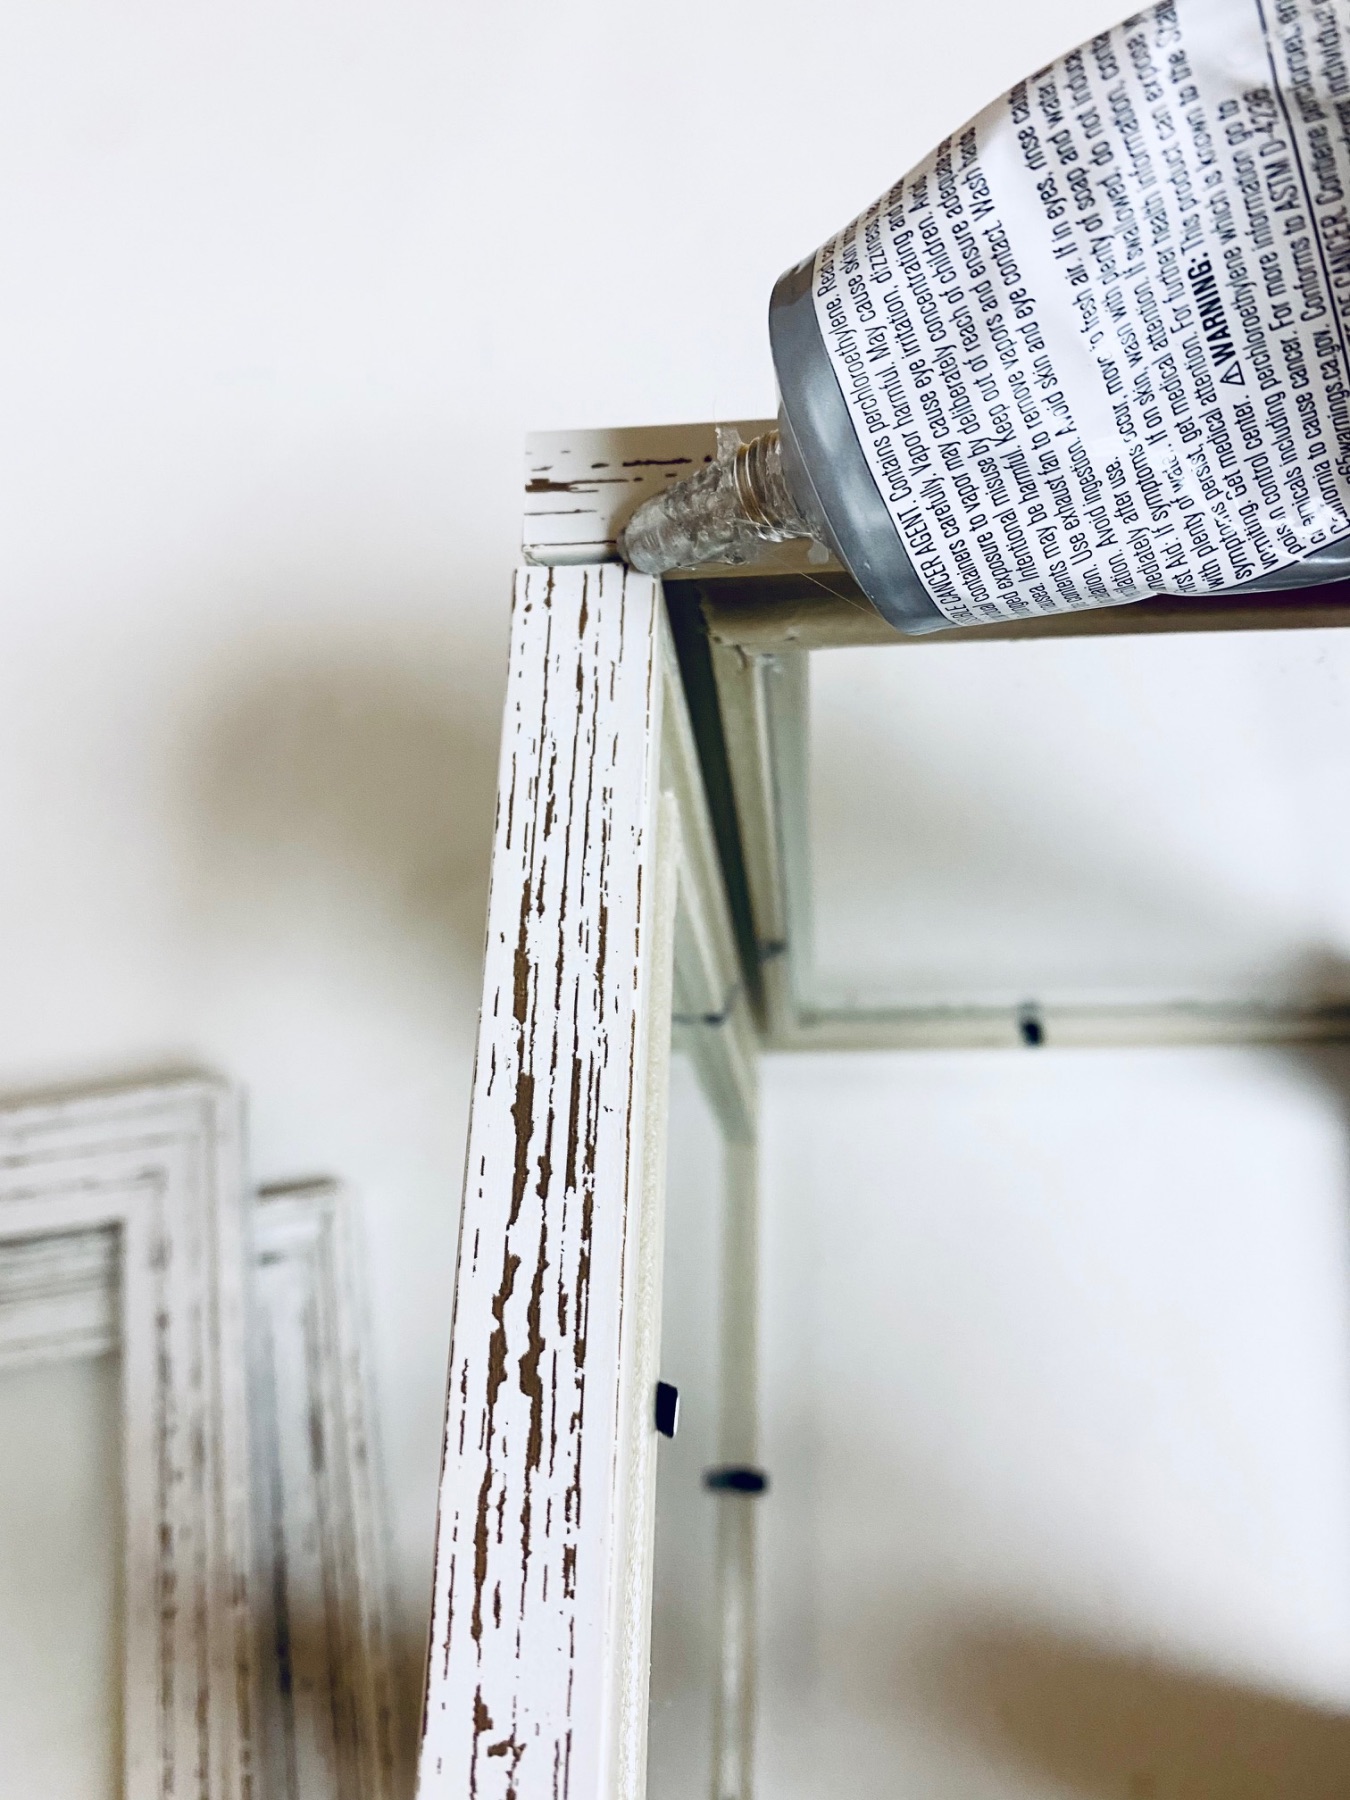
Everything You Need to Know about E6000 Glue
E6000 is a resin that you don’t have to mix yourself. Instead it comes pre-mixed. It offers a permanent hold that is stretchy and thus can have a little give without breaking. Here’s what you need to know:
1. A dot does a lot. You don’t need to use much. You can make dotted lines or thin stripes of glue.
2. Anytime you use E6000, be sure to scrape all the glue off the tip and put the lid back on immediately. If you don’t, you will glue the lid to the bottle making it impossible to use.
3. Although E6000 is perfect for long permanent holds, it doesn’t set immediately. You will need to hold your pieces in place for up to a few minutes. Hot glue can serve as a great temporary glue to assist with this.
Everything You Need to Know about Hot Glue
Hot glue dries almost immediately, making it a perfect pair for E6000.
1. Hot glue guns are one of the most common ways to injure yourself while crafting. Be extremely careful and don’t touch any of the metal or let the liquid glue touch your skin.
2. Hot glue dries almost immediately, so have the pieces that you are gluing together ready to go.
3. Hot glue can be used plentifully, but try your best to glue strategically so that it won’t show in the finished piece. Hot glue although clear can be visible and unsightly.
4. Hot glue can be stringy. Once your glue completely dries, after 24 hours, you can gently peel the strings away.
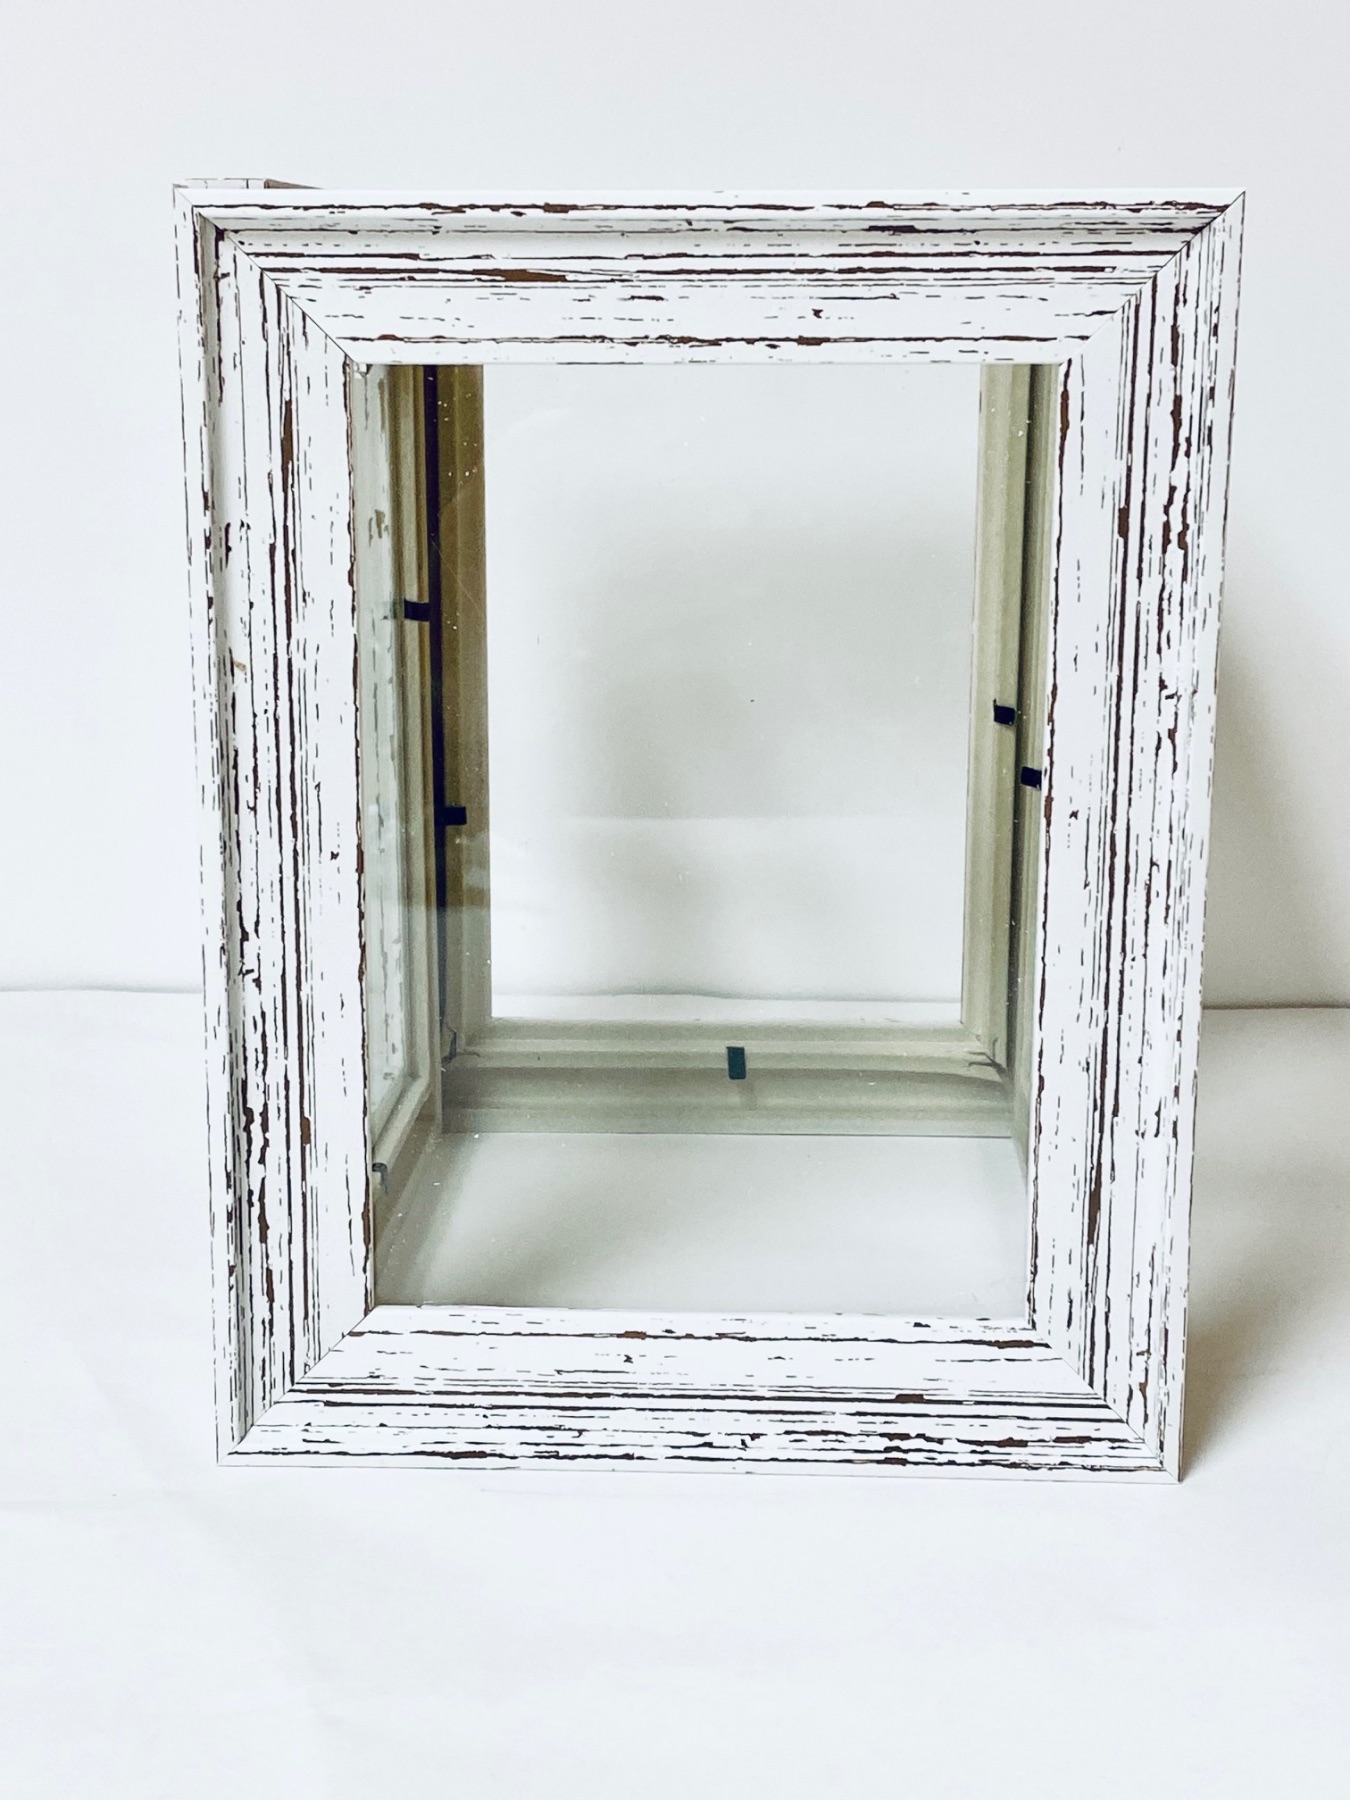
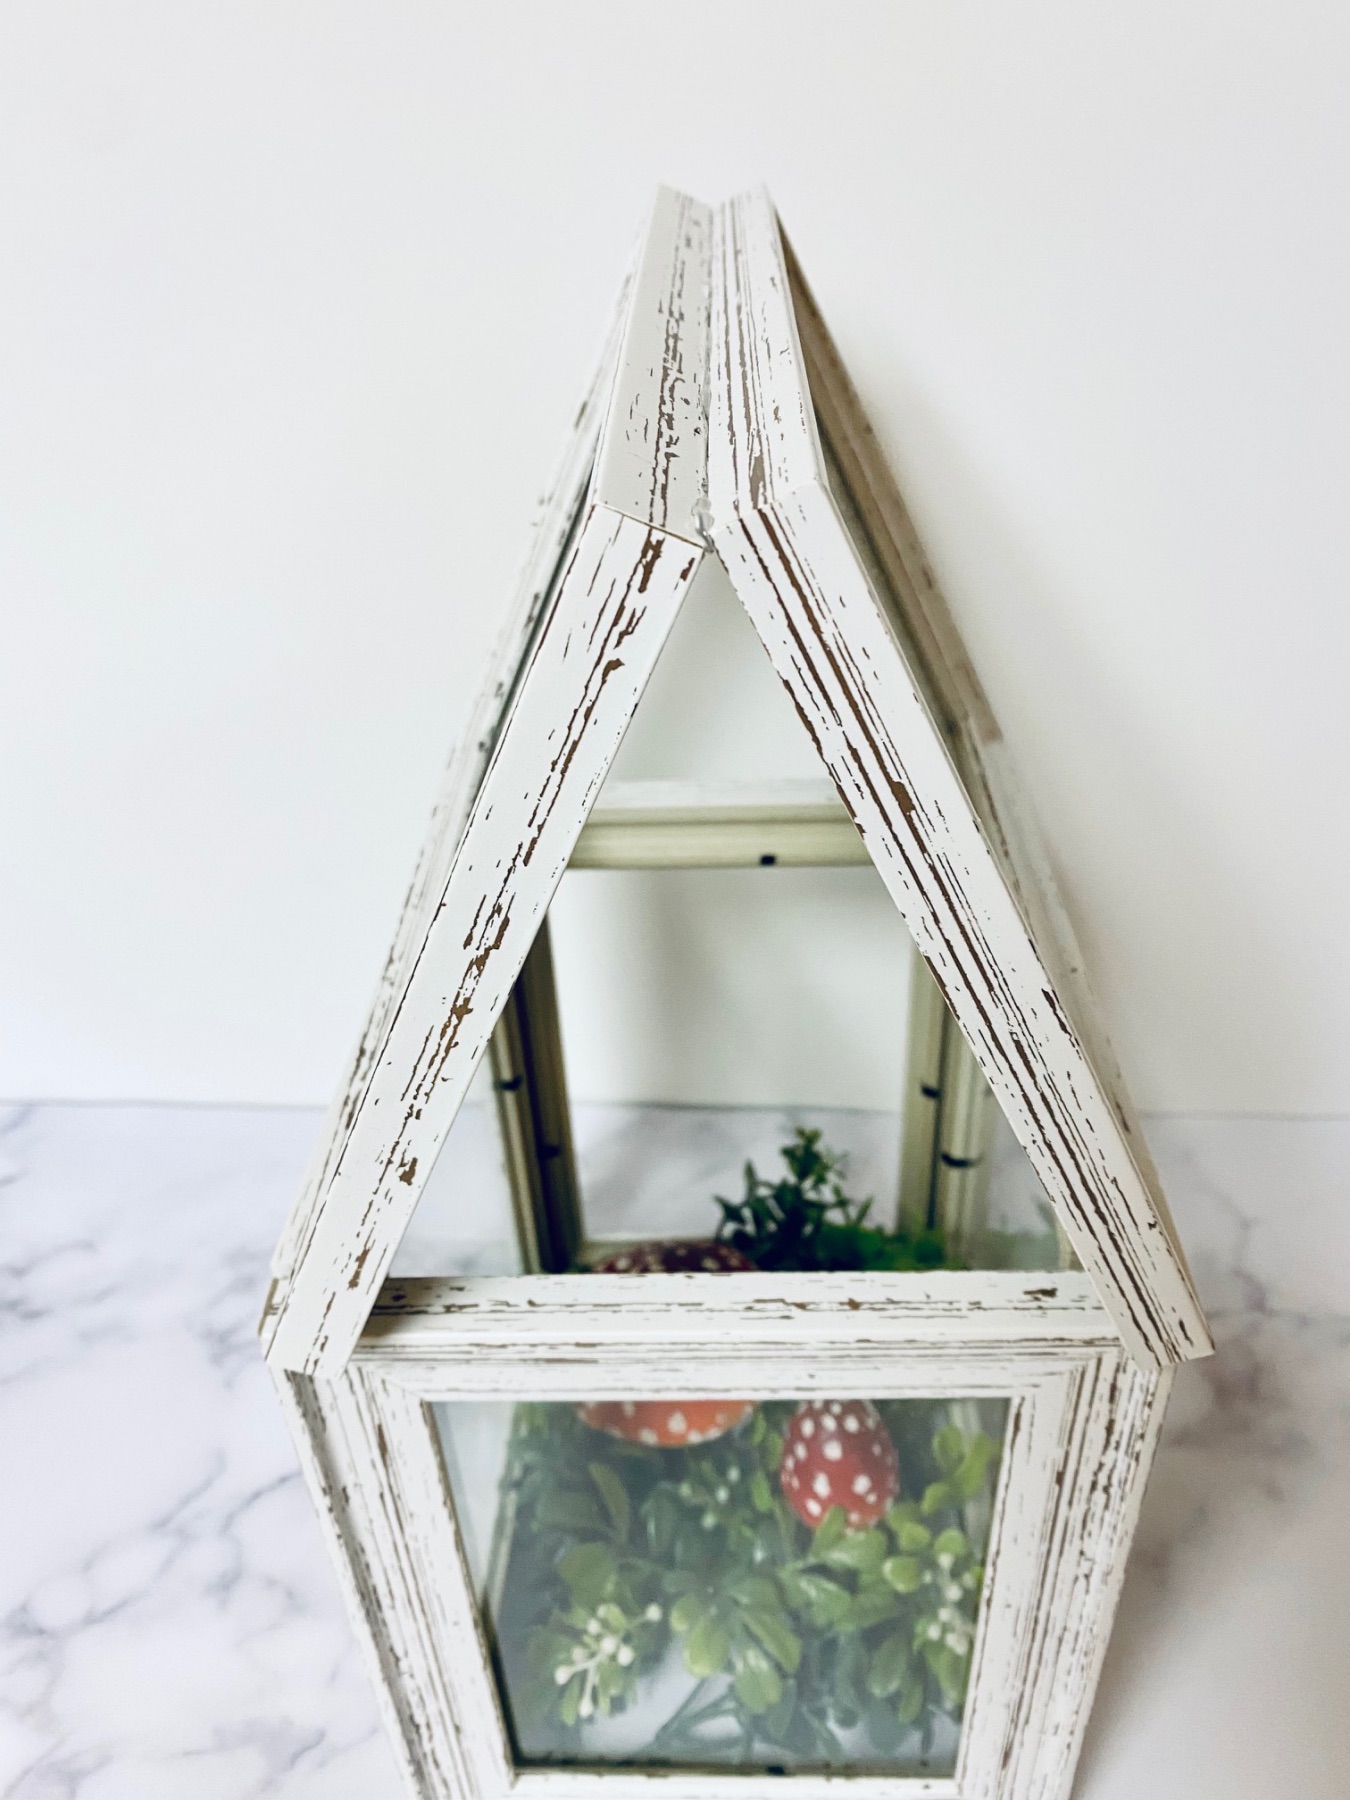
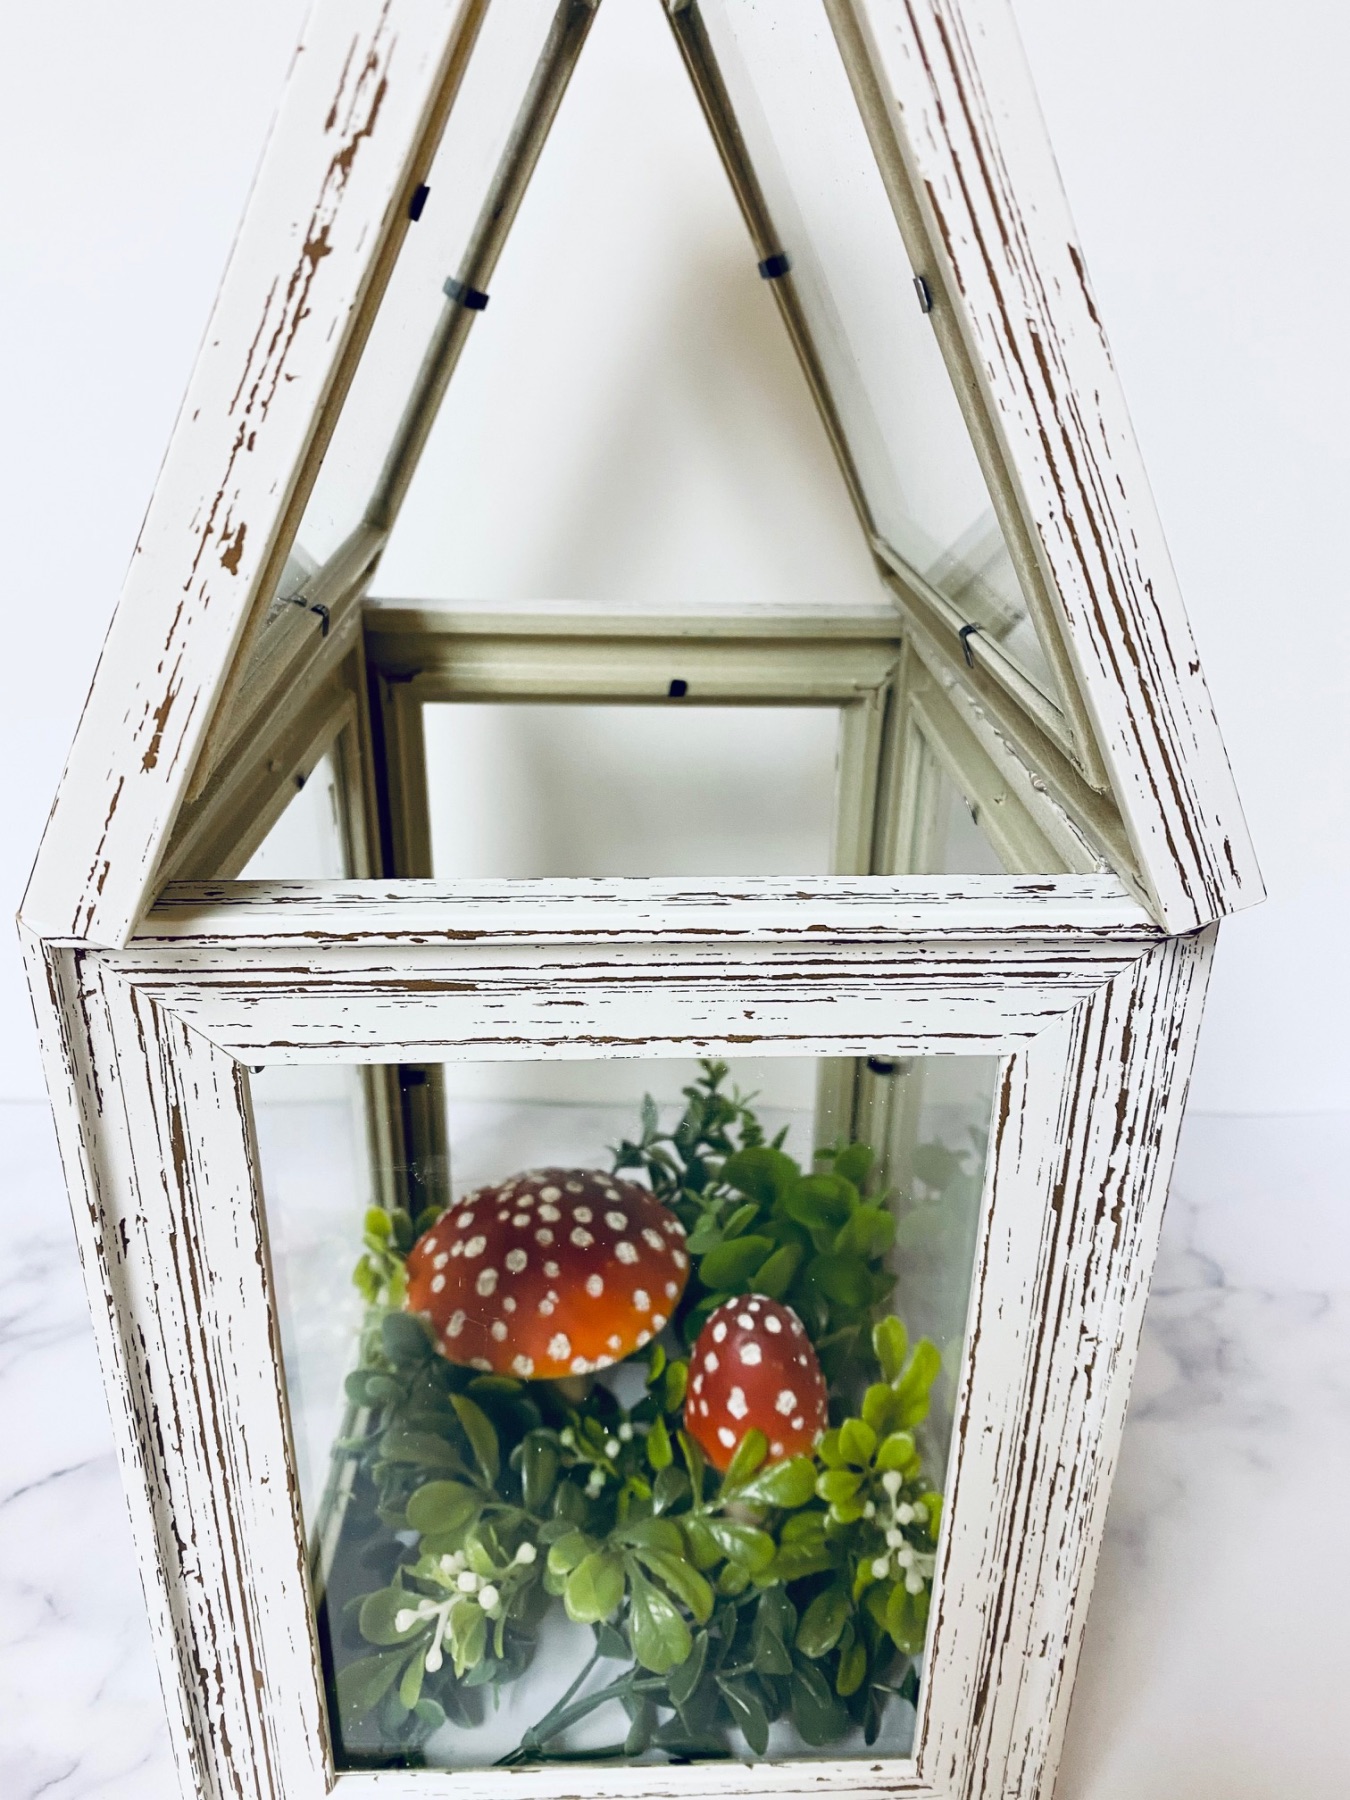
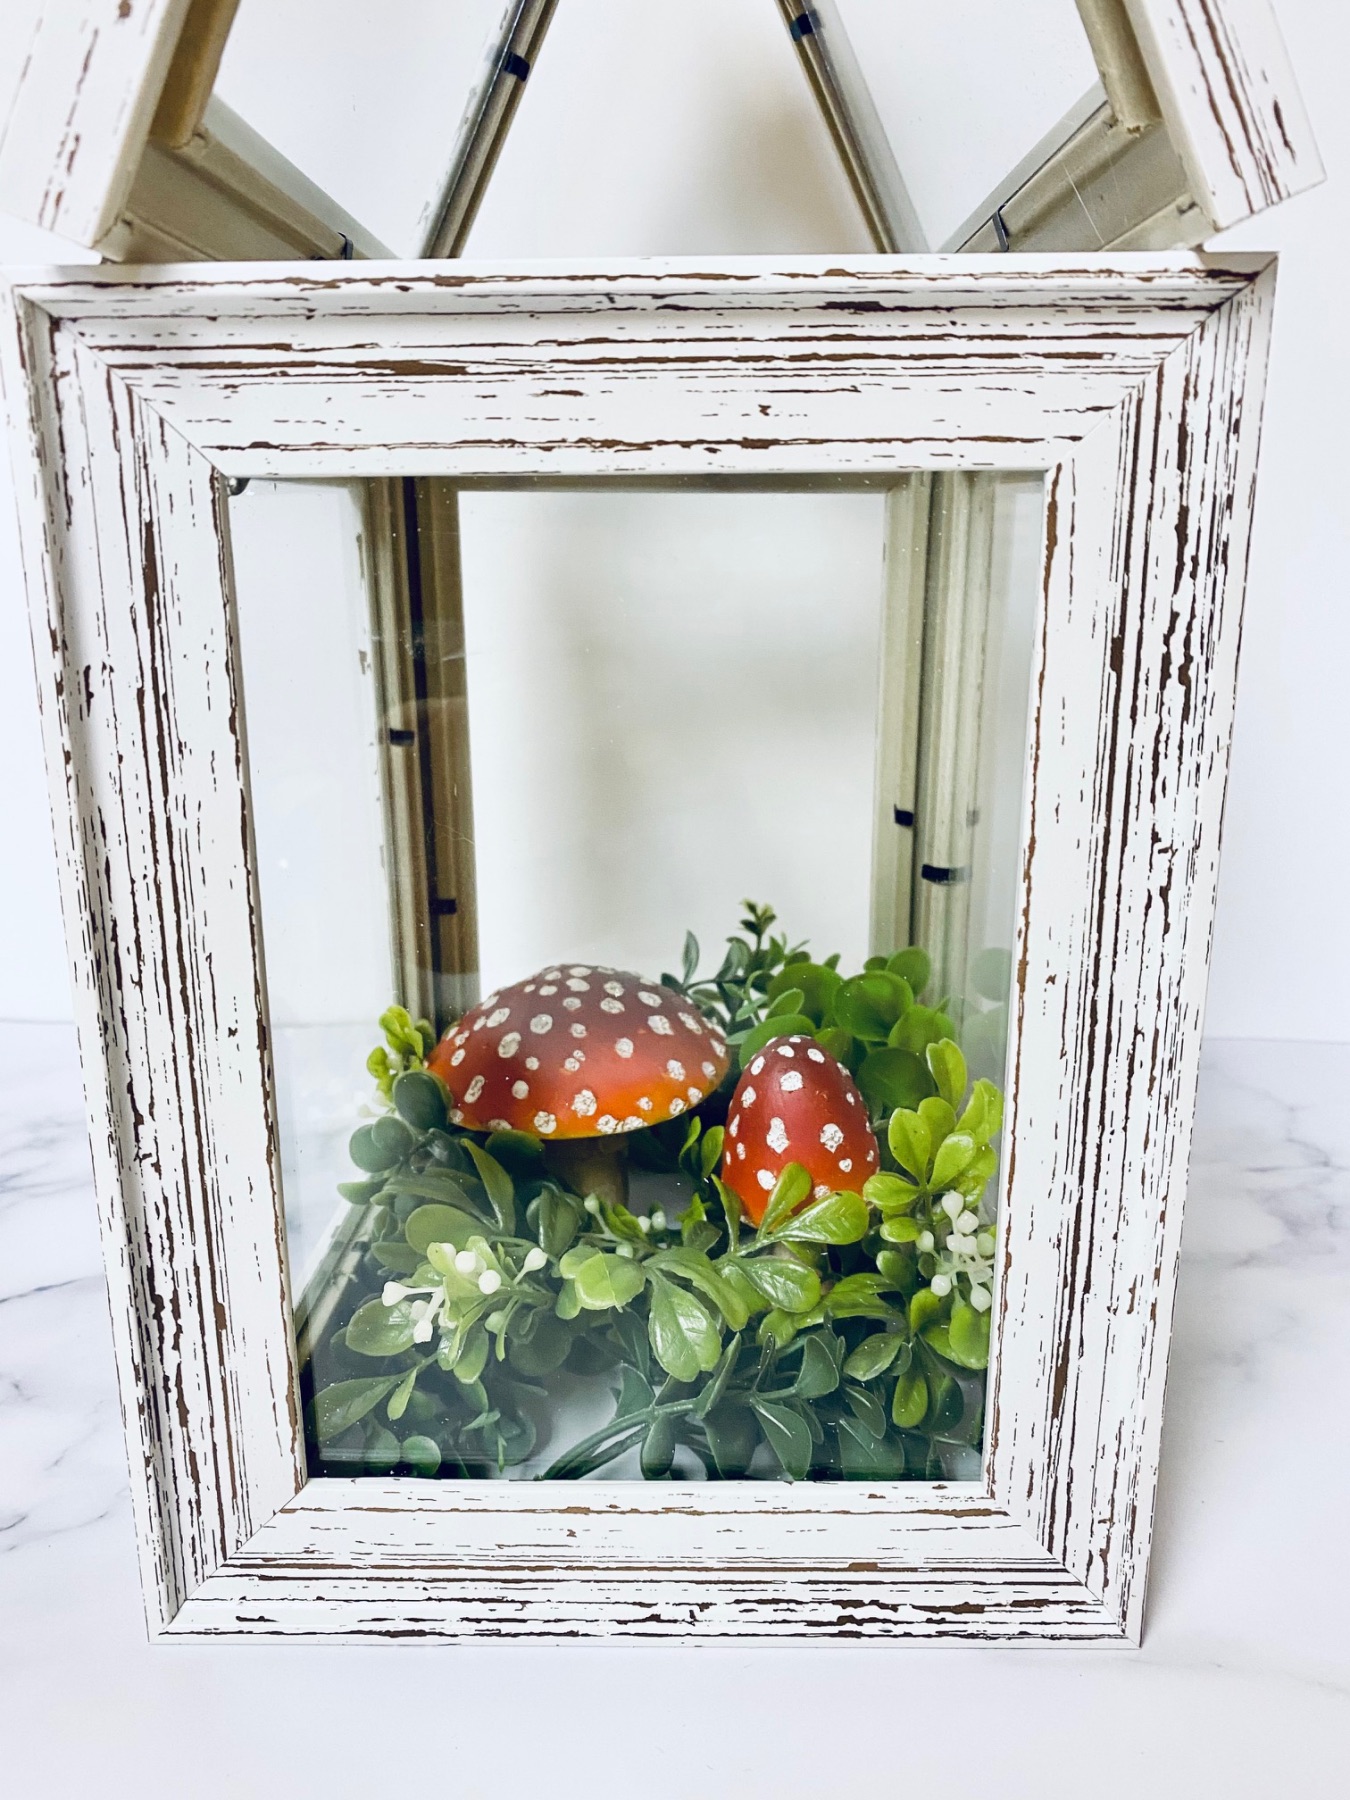
How to Attach the Sides of the Greenhouse
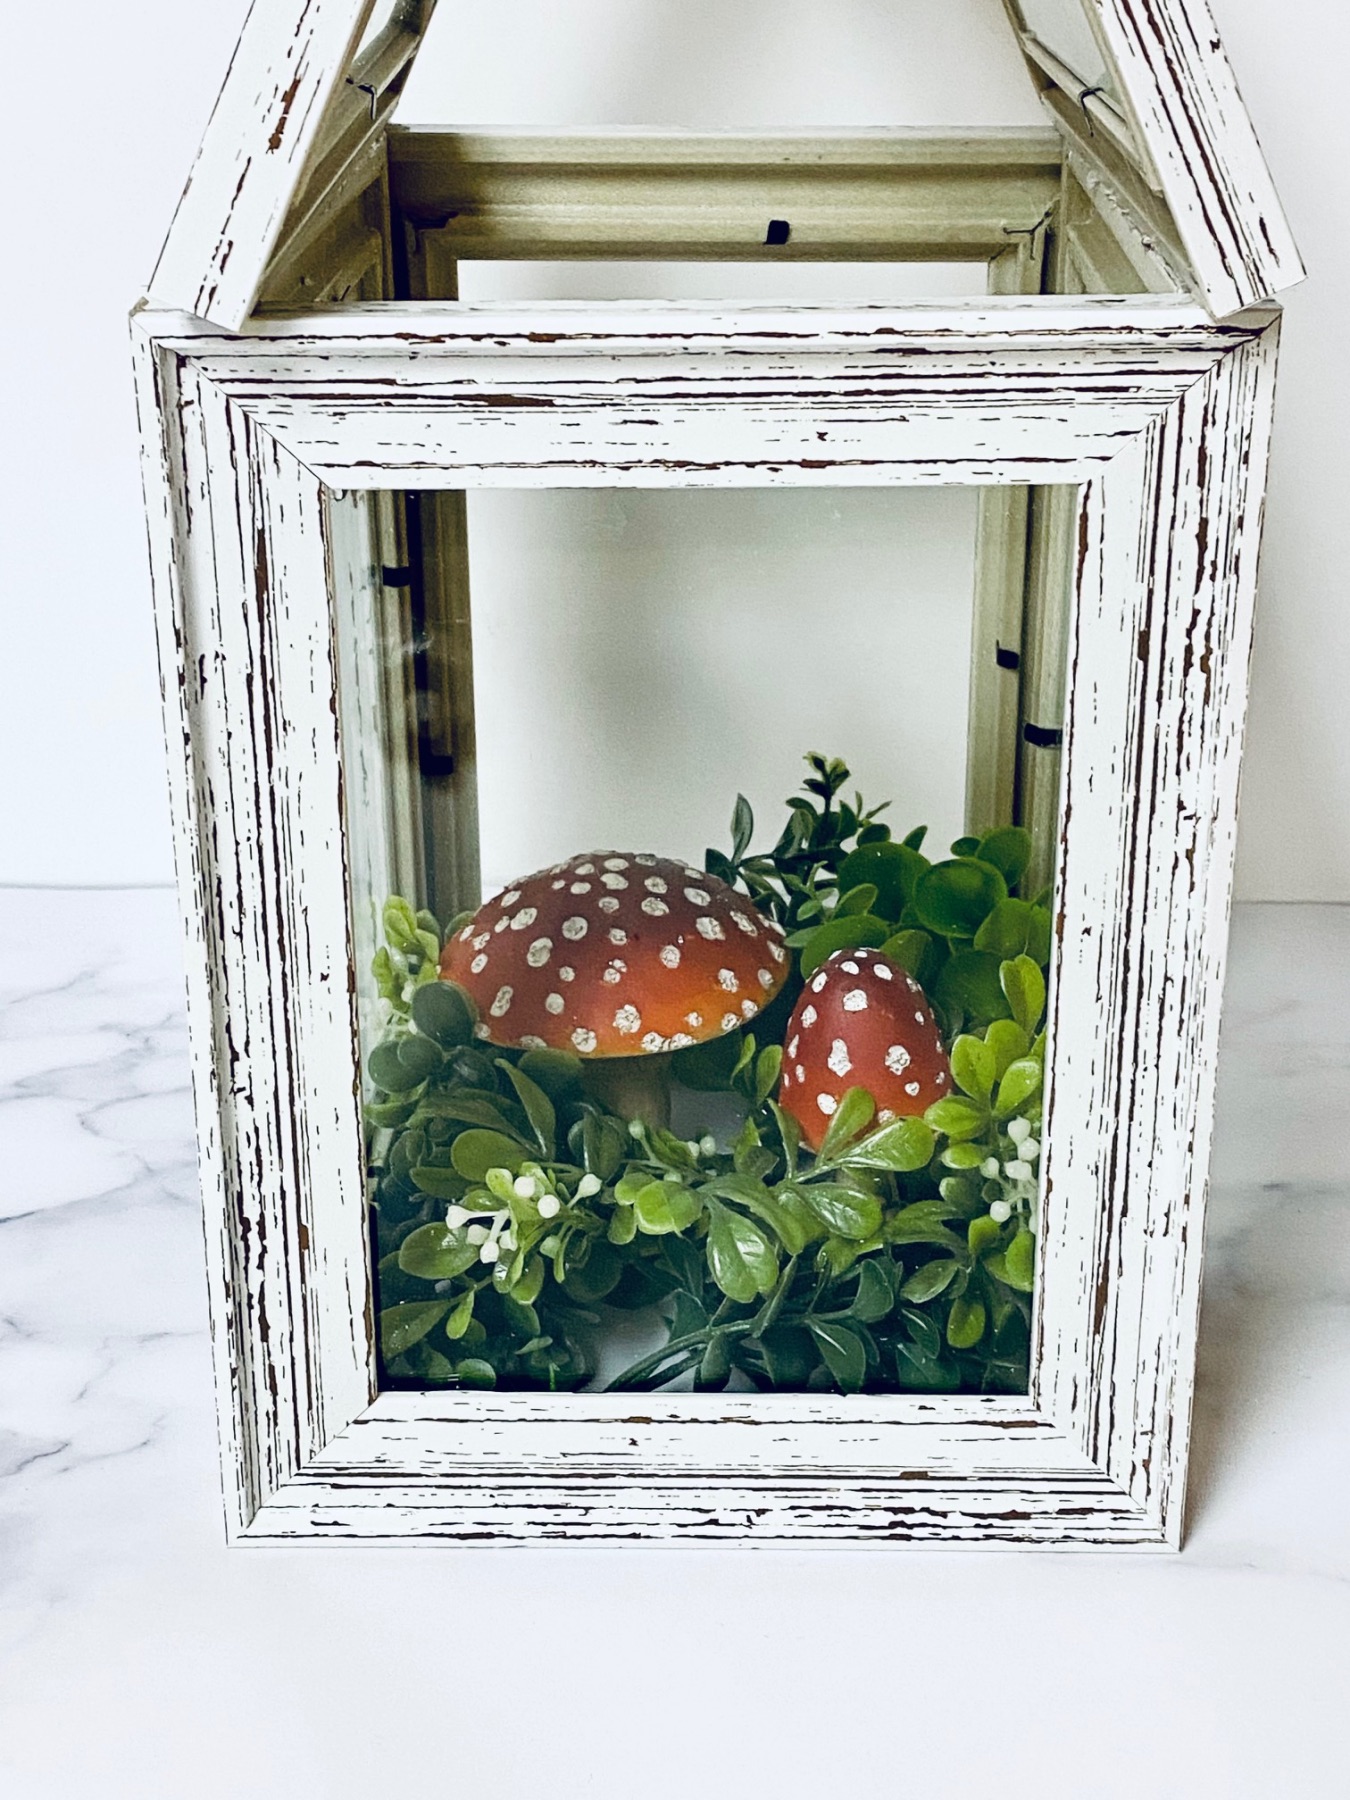
First, start by removing all of the paper inserts from inside your frames. Then decide if you want to keep your glass or remove the glass completely. I kept mine, because I think it’s so cute that way!
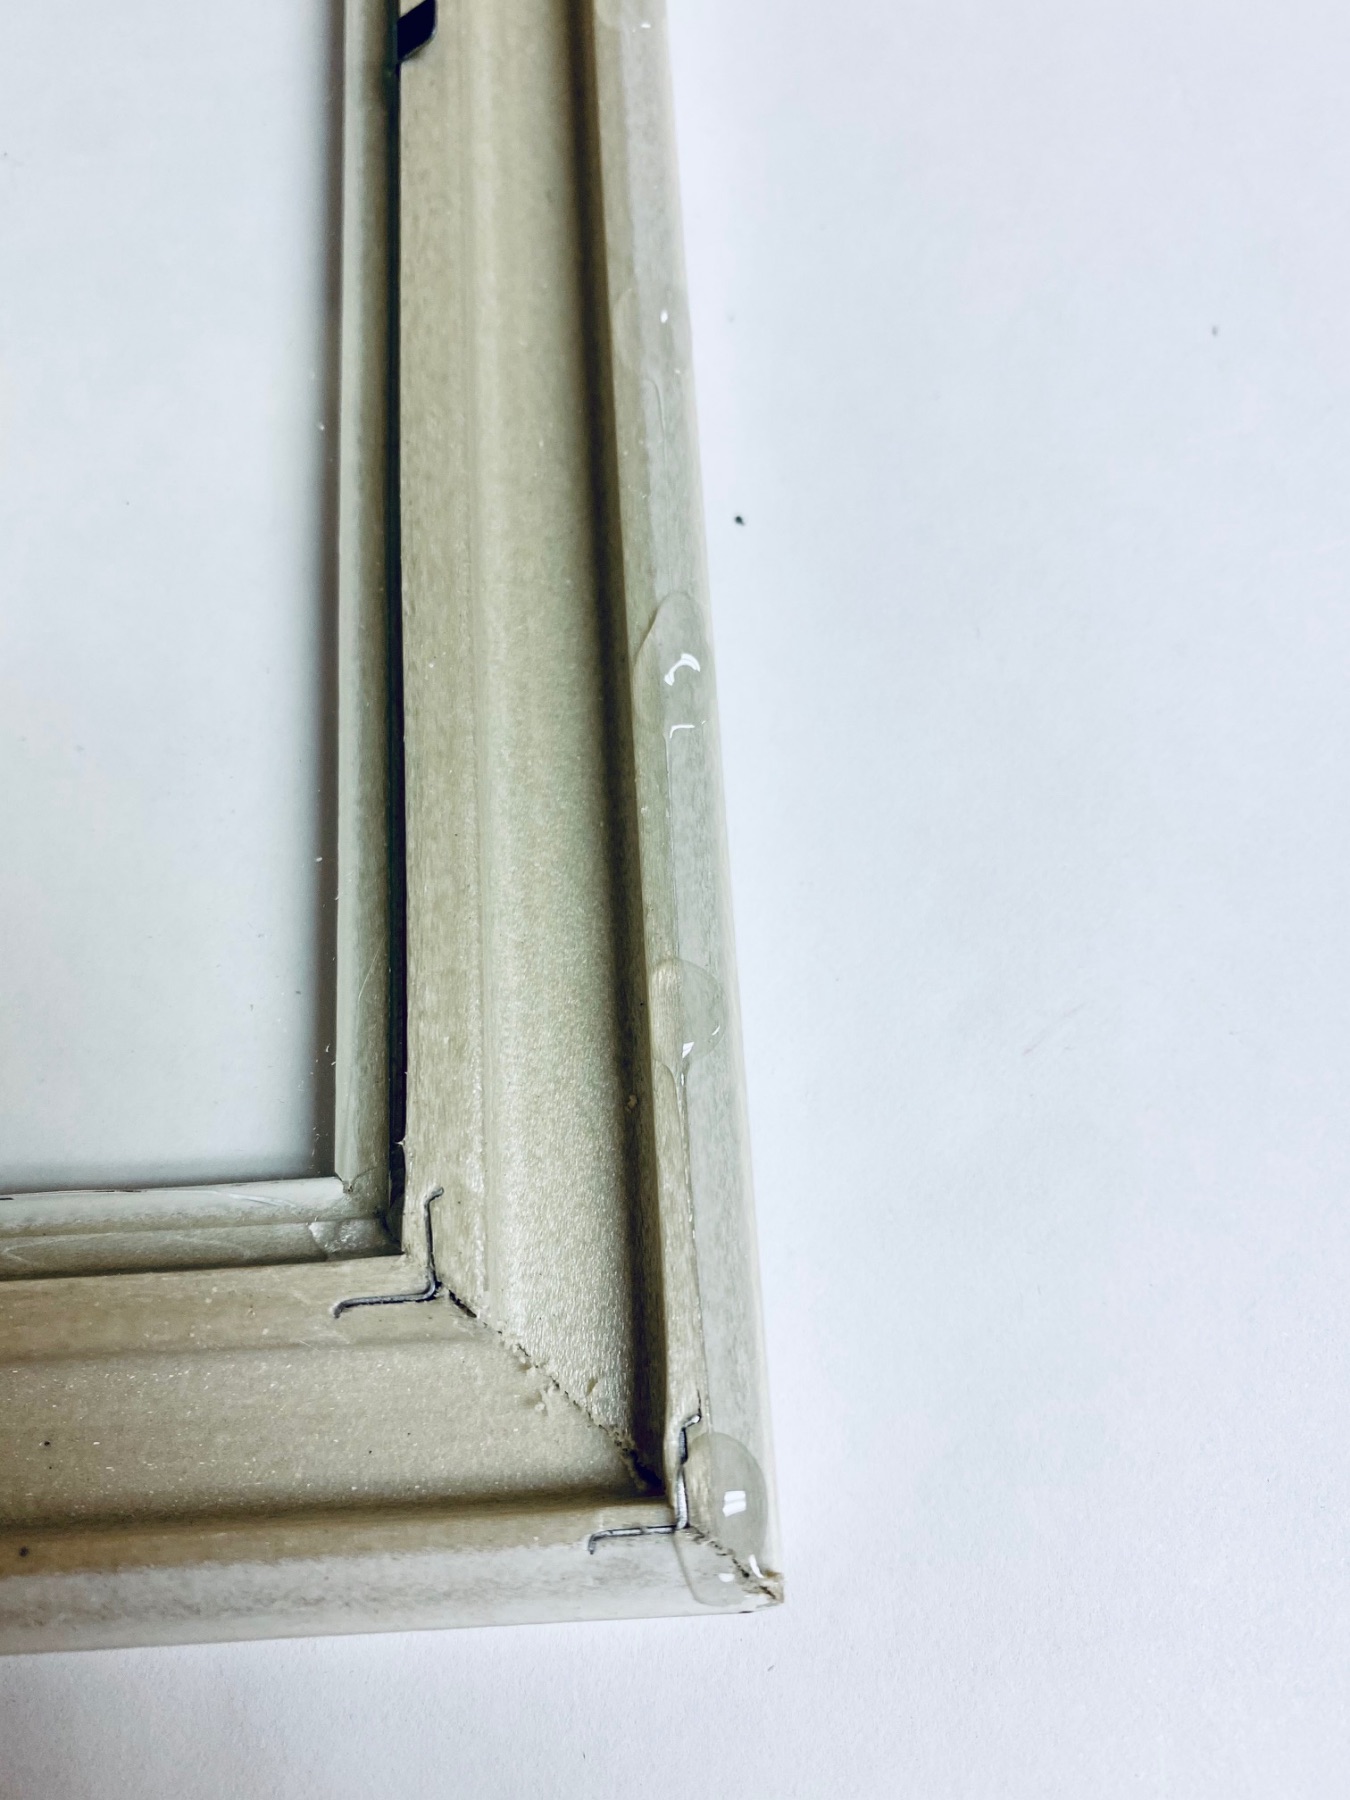
If you want to keep your glass, you will need to glue it into place. Start by adding a dot of hot glue into each corner of the frame, right where the glass sits. Press the glass to hold it into place.
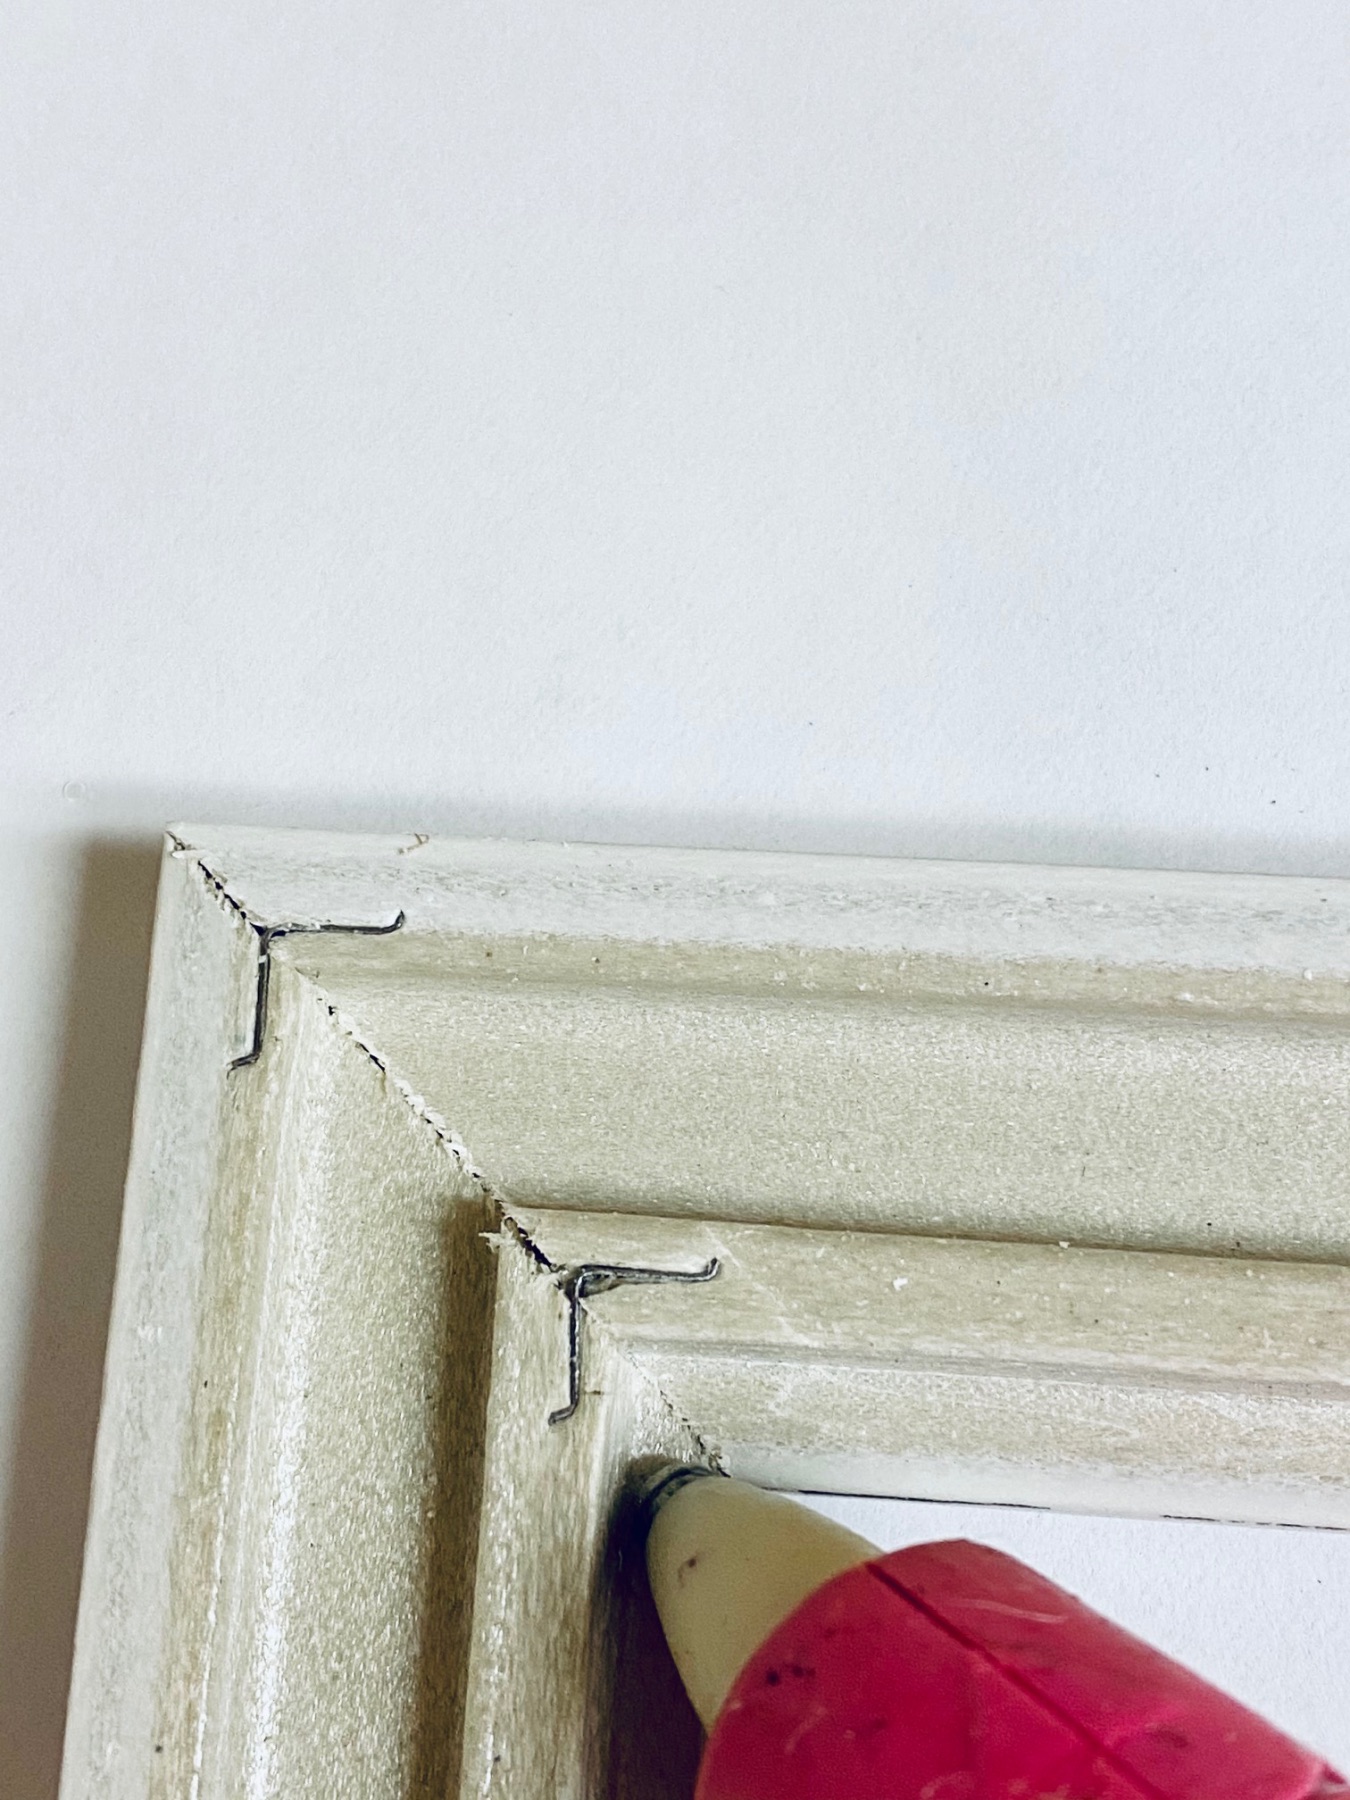
Most frames have little metal pieces that hold everything in place. If you have those, you can remove them entirely or you can fold them into place to help hold the glass.
Next, to make the walls, start with any 2 frames to create a corner. Decide if you want your greenhouse to be tall, like mine or if you want it to be longer and shorter. This will determine the way that you will orient your frames when you glue them together.
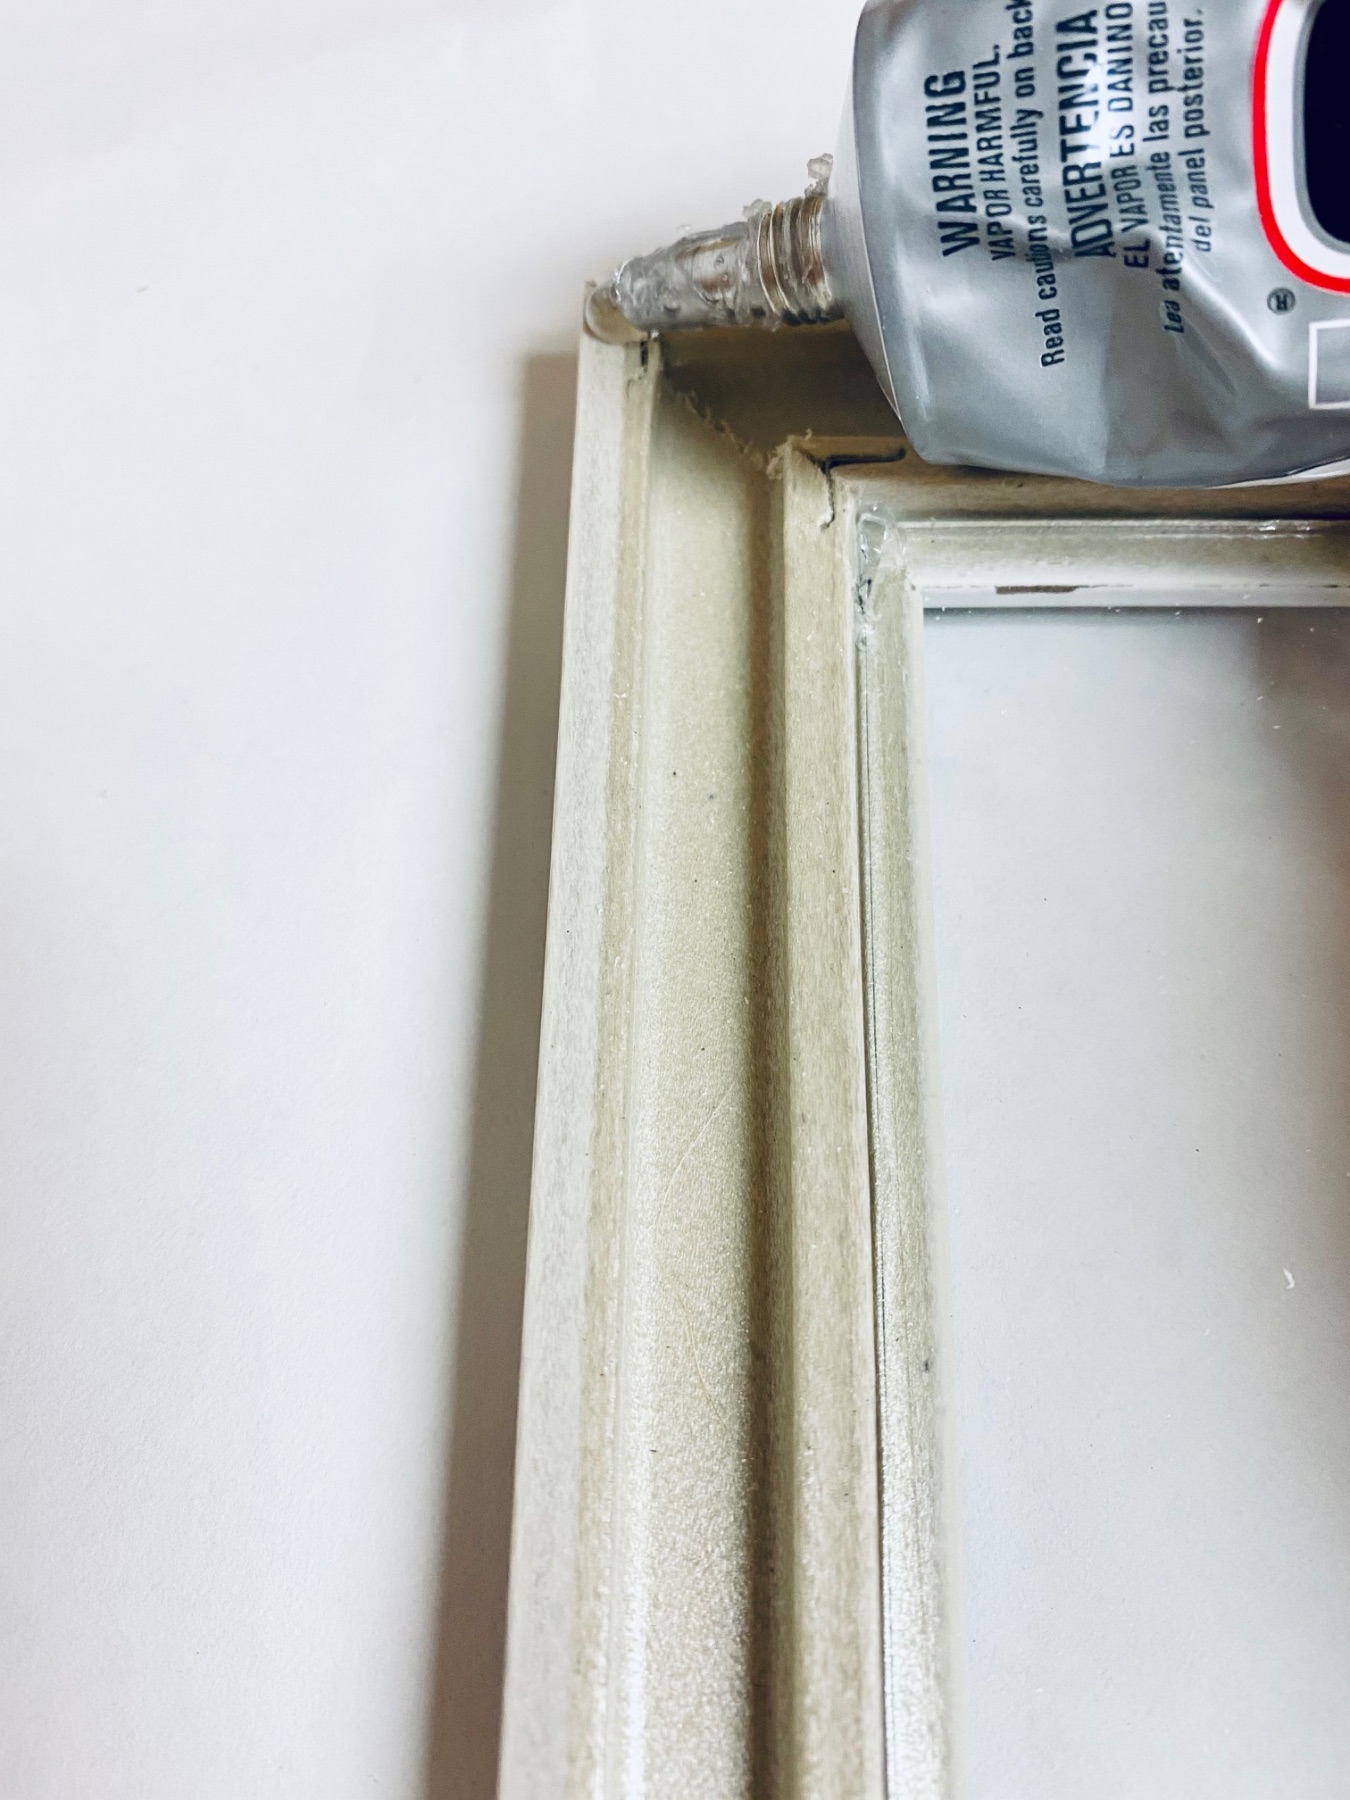
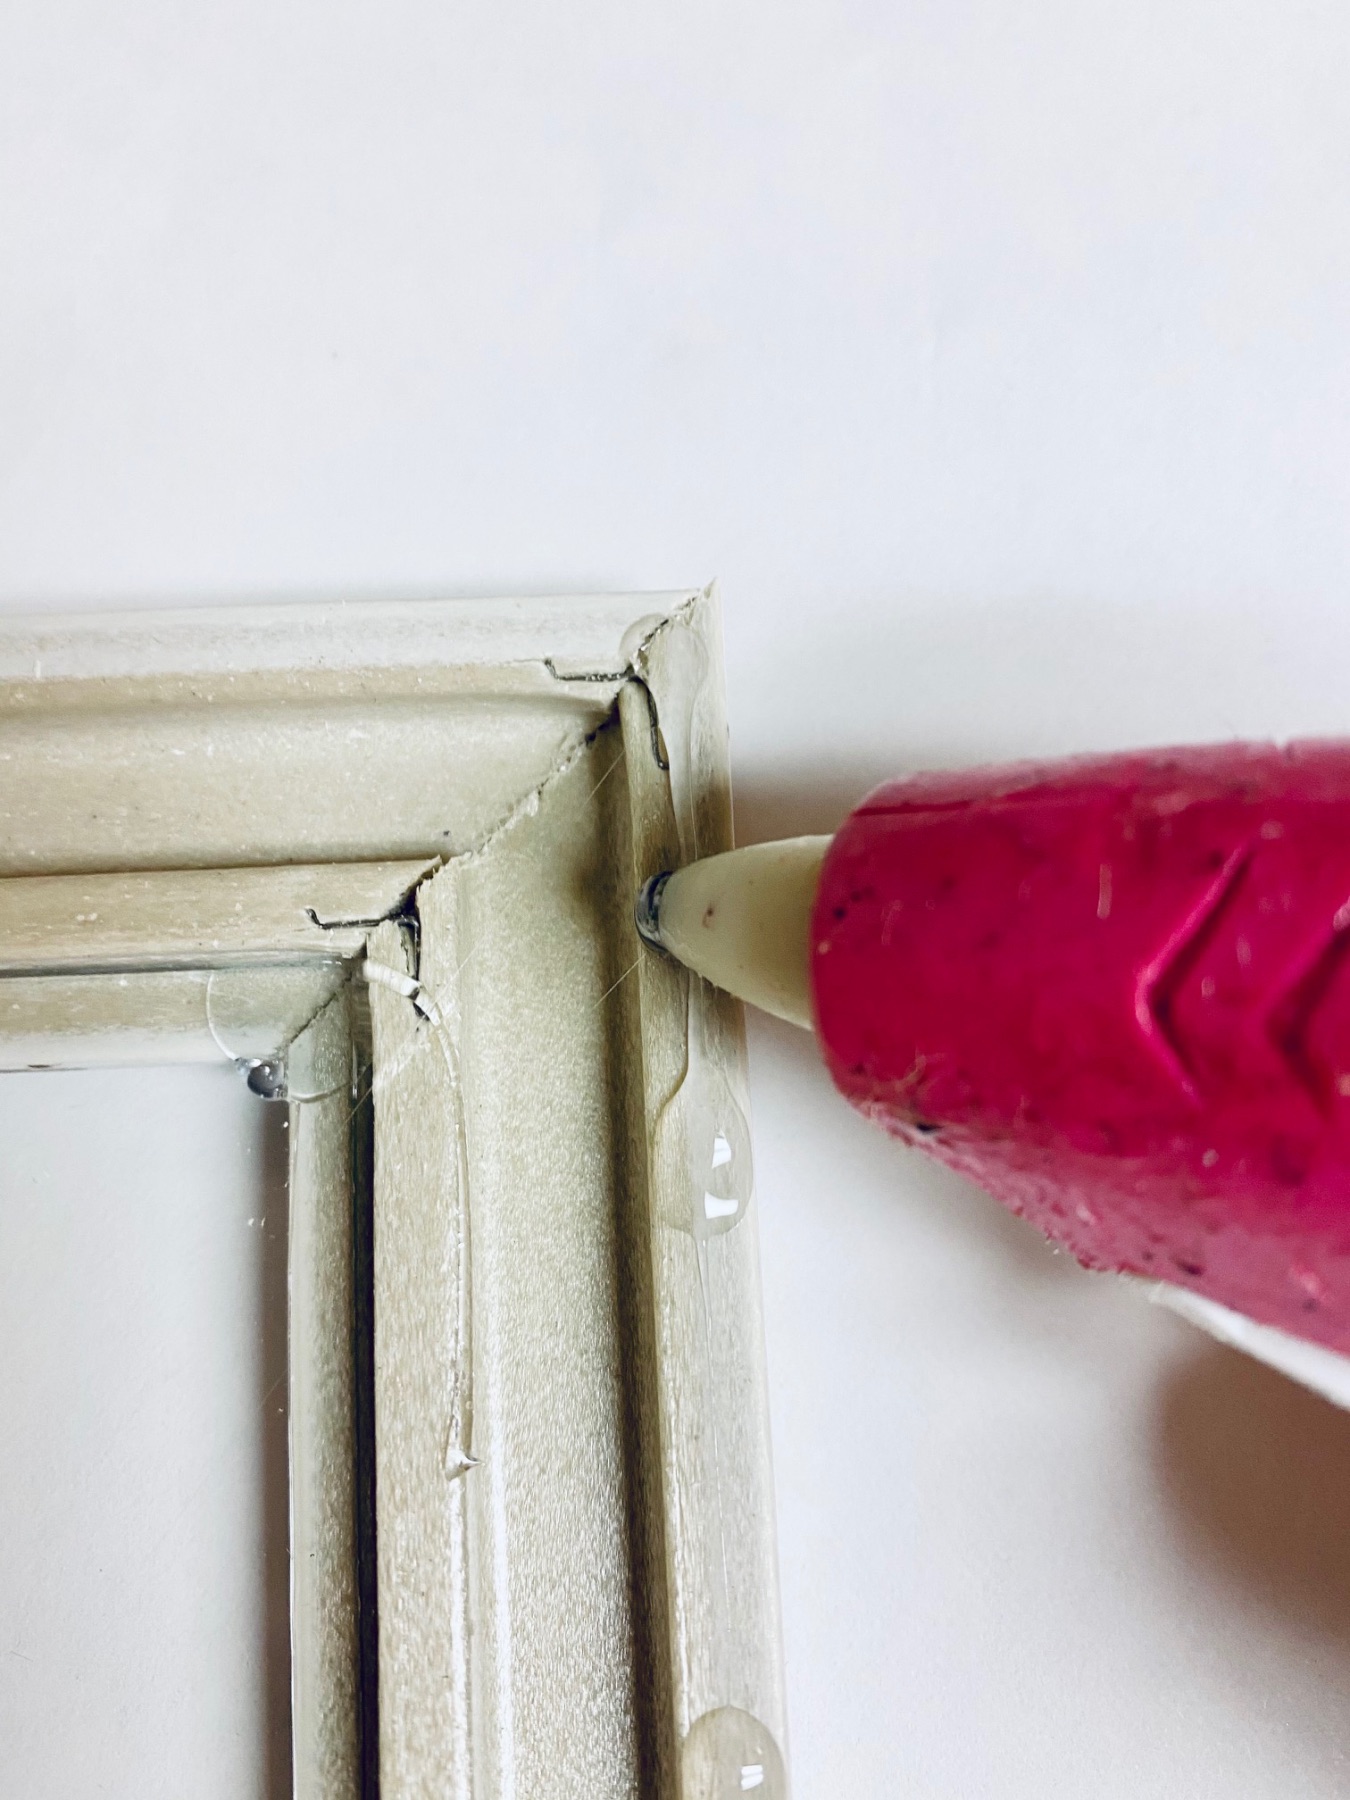
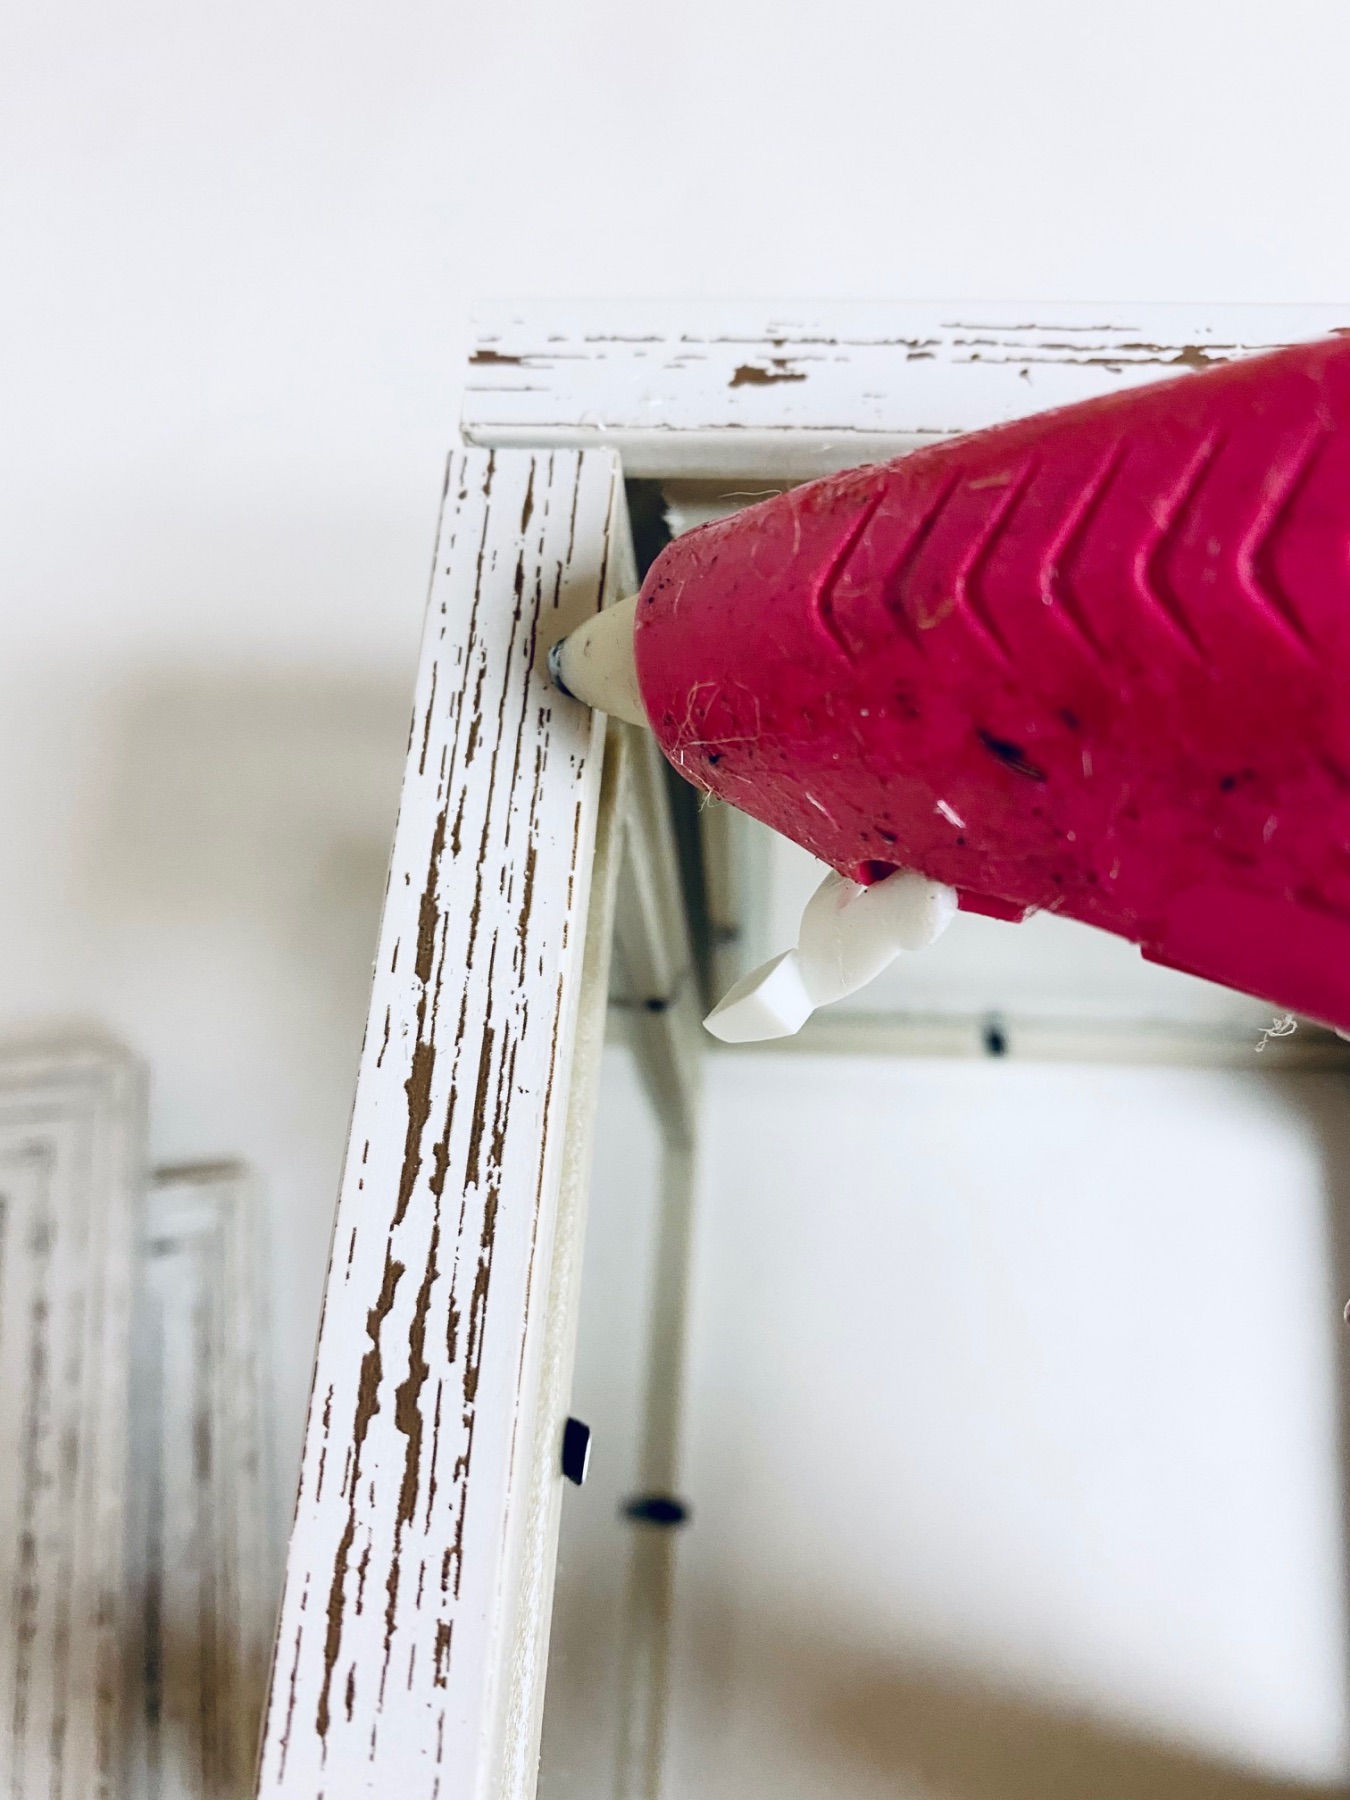
Next, along the exterior border of the frames, where the corners will overlap, add a small amount of E6000 and then afterwards add a strip of hot glue. Add the glue to both pieces that you are attaching.
As soon as you add the hot glue, attach to 2 frames together quickly since hot glue dries fast. Make sure the pieces are lined up perfectly, since the glue is permanent.
Hold them in place for a few minutes or until they hold on their own. Continue to attach the 4 sides, adding 1 side at a time, and adding glue to both frames. Then let it set overnight before attaching the roof.
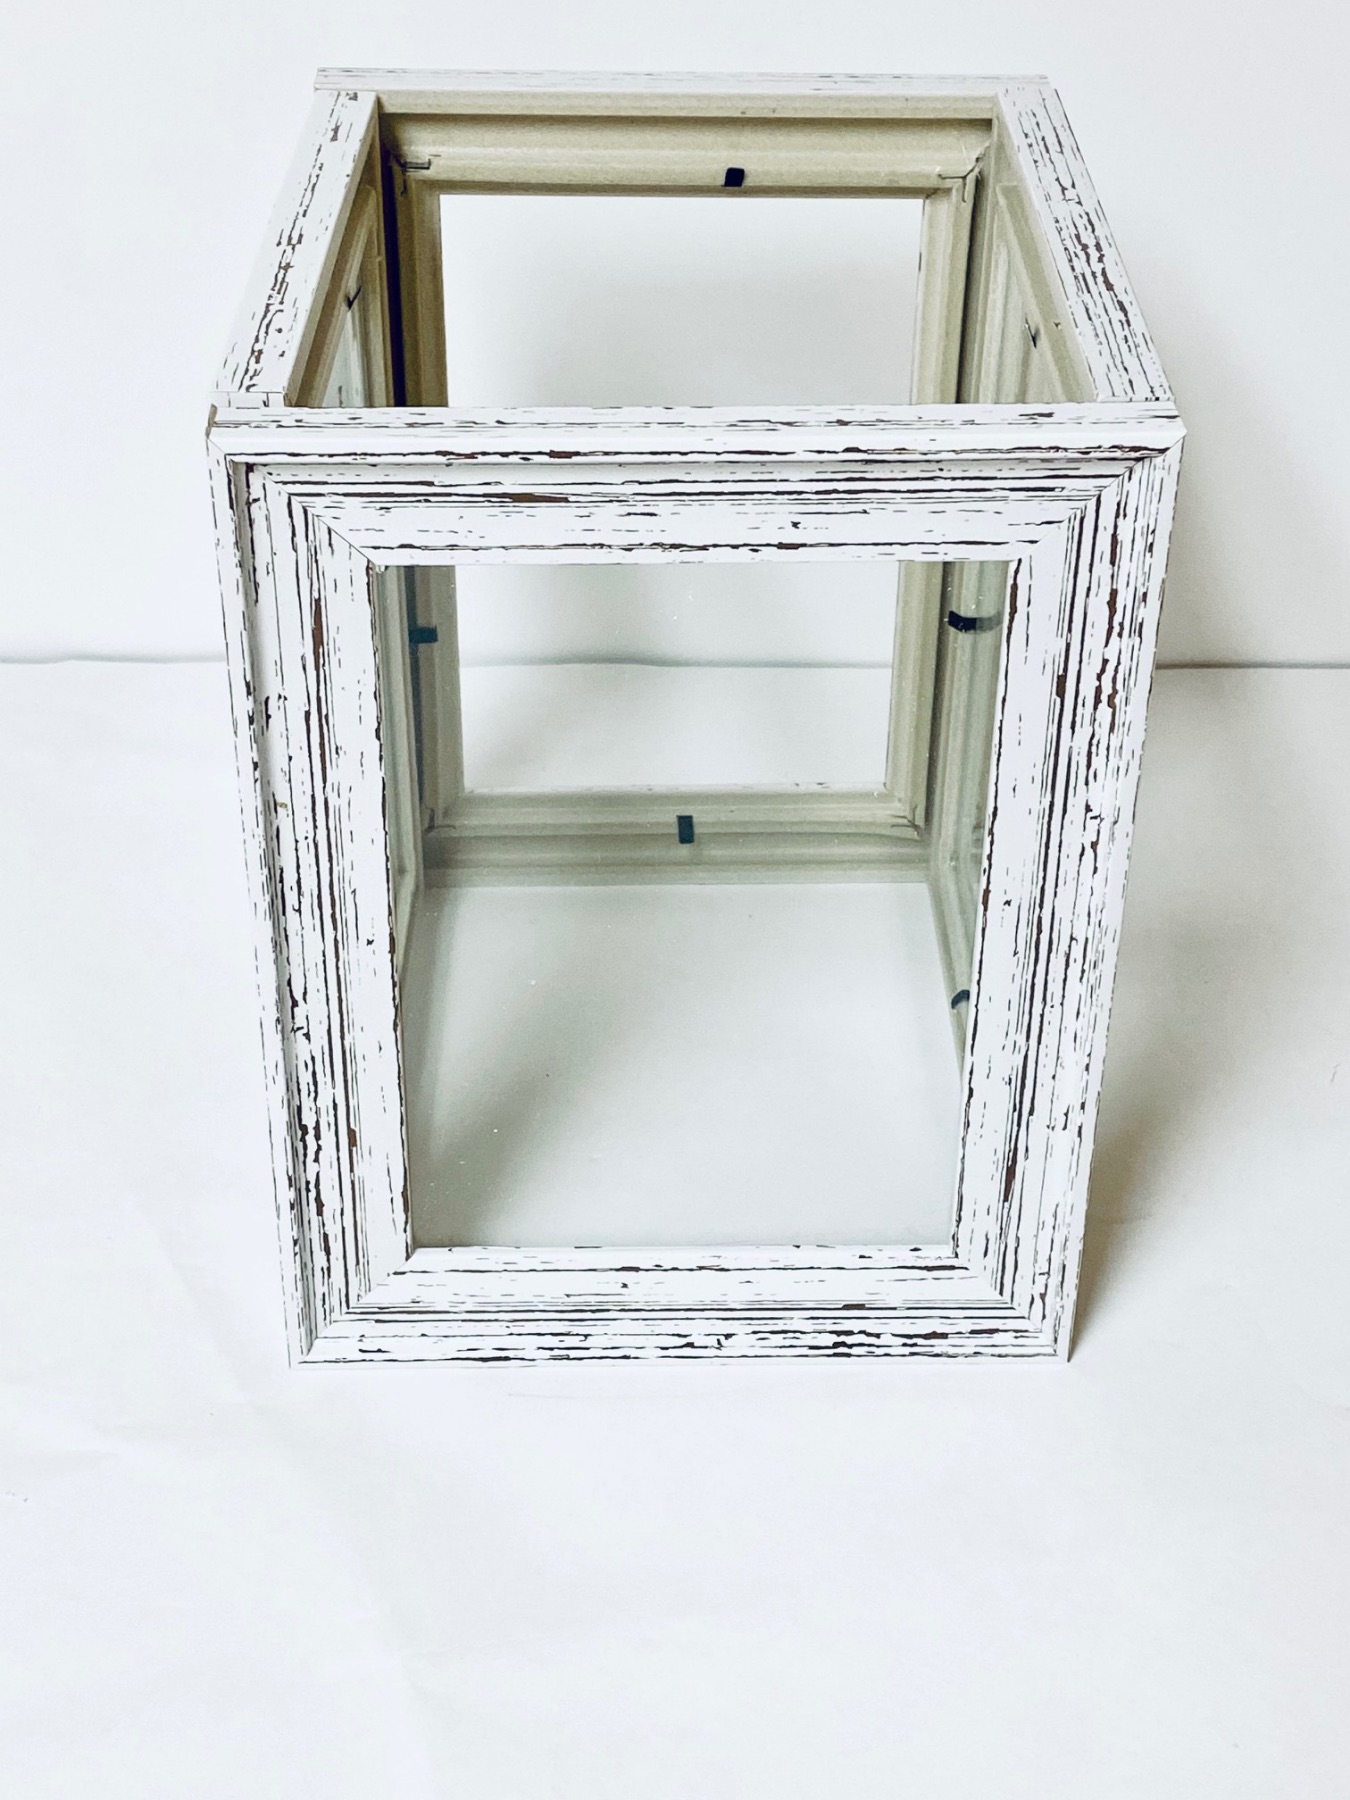
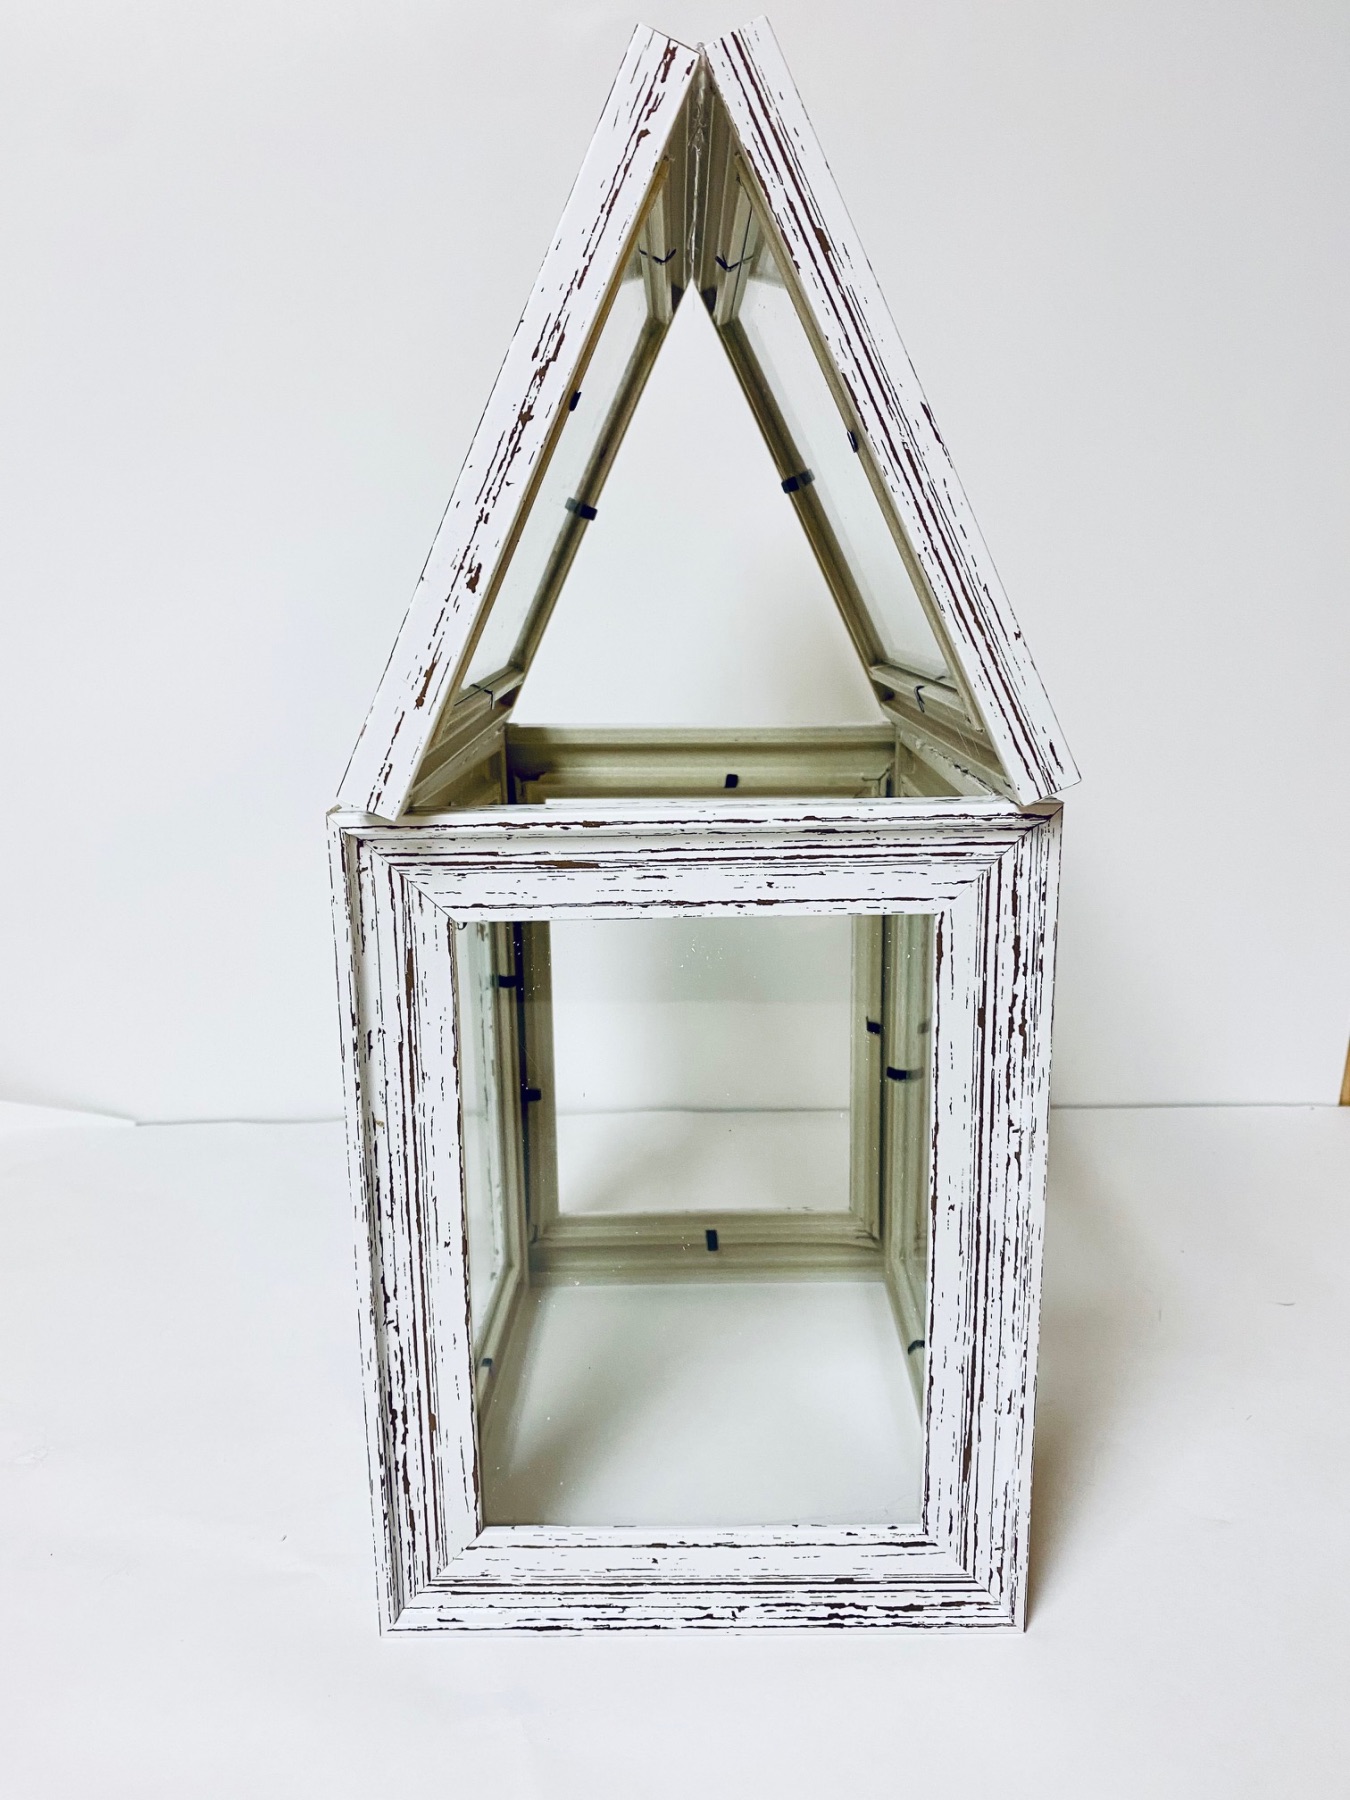
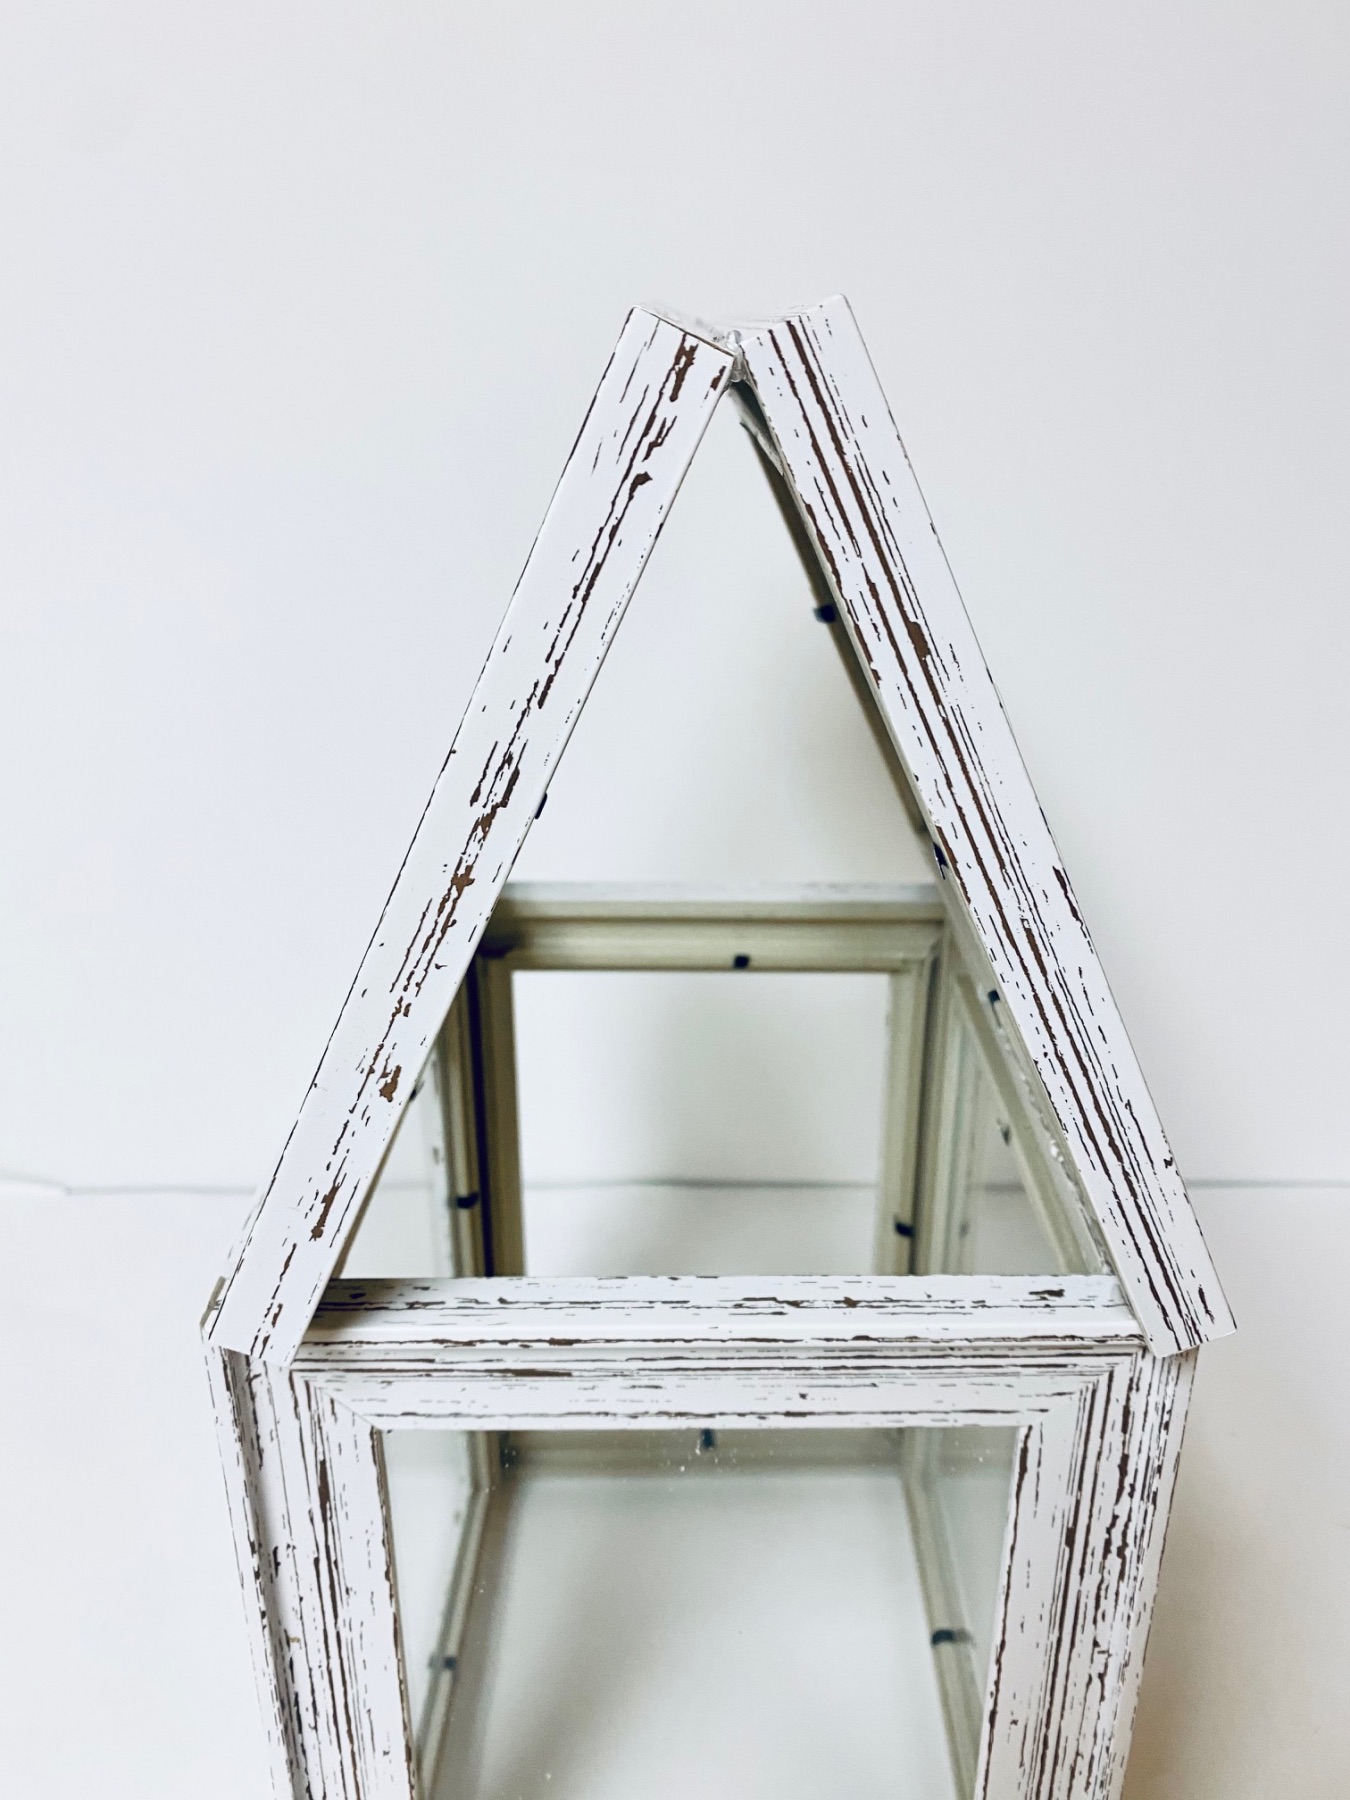
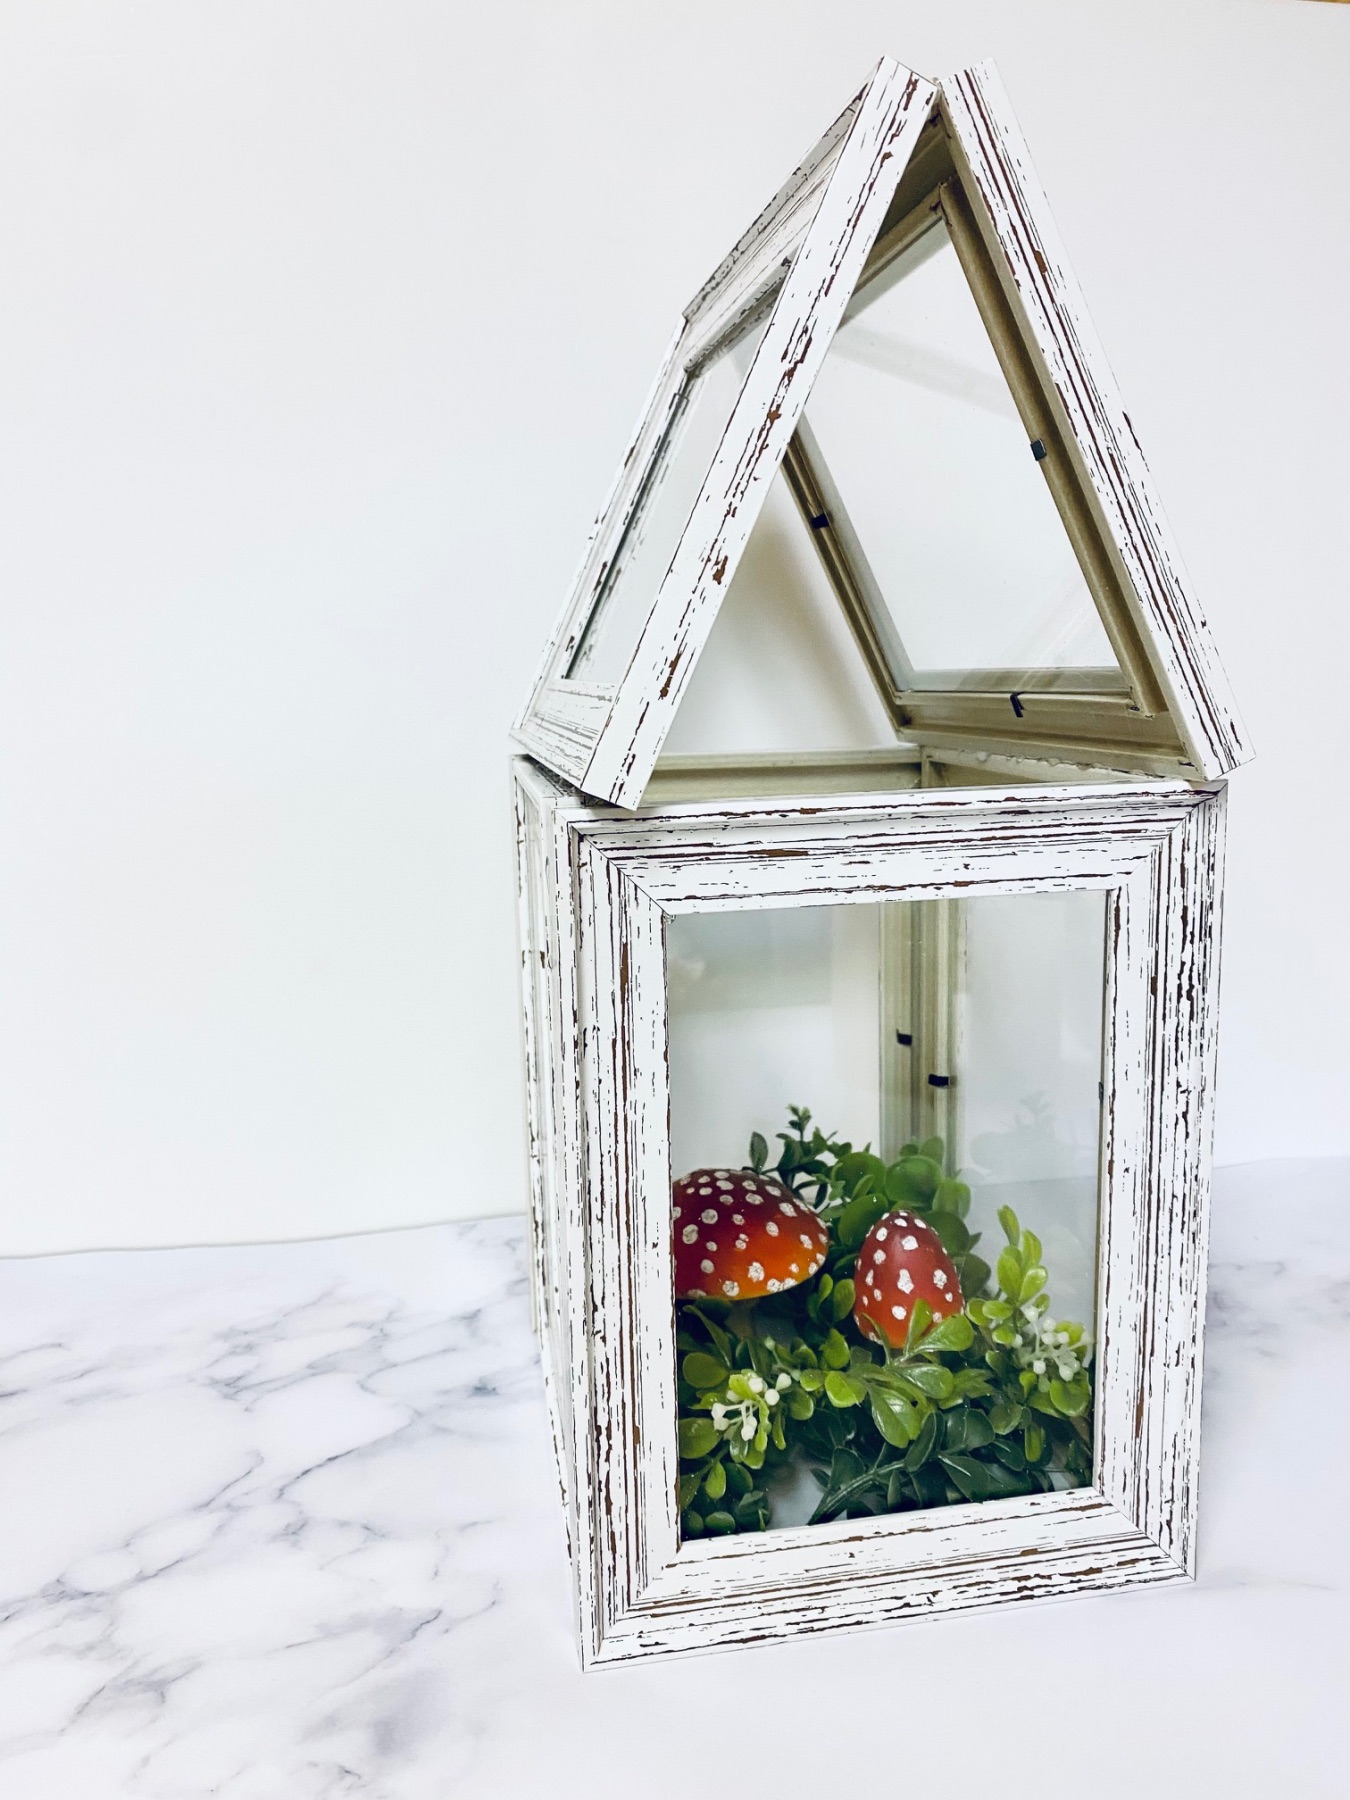
How to Attach the Top of the Greenhouse
To attach the roof, use the same glue technique that you used for your walls. But this time you will need to have glue ready on 2 frames (4 sides total) at once. If you want your roof to hang over the edges of the walls, you could reorient your frames long ways.
This will give you a shorter roof that hangs over the walls. For me, I made my roof tall like a steeple. It is the same width as the side walls.
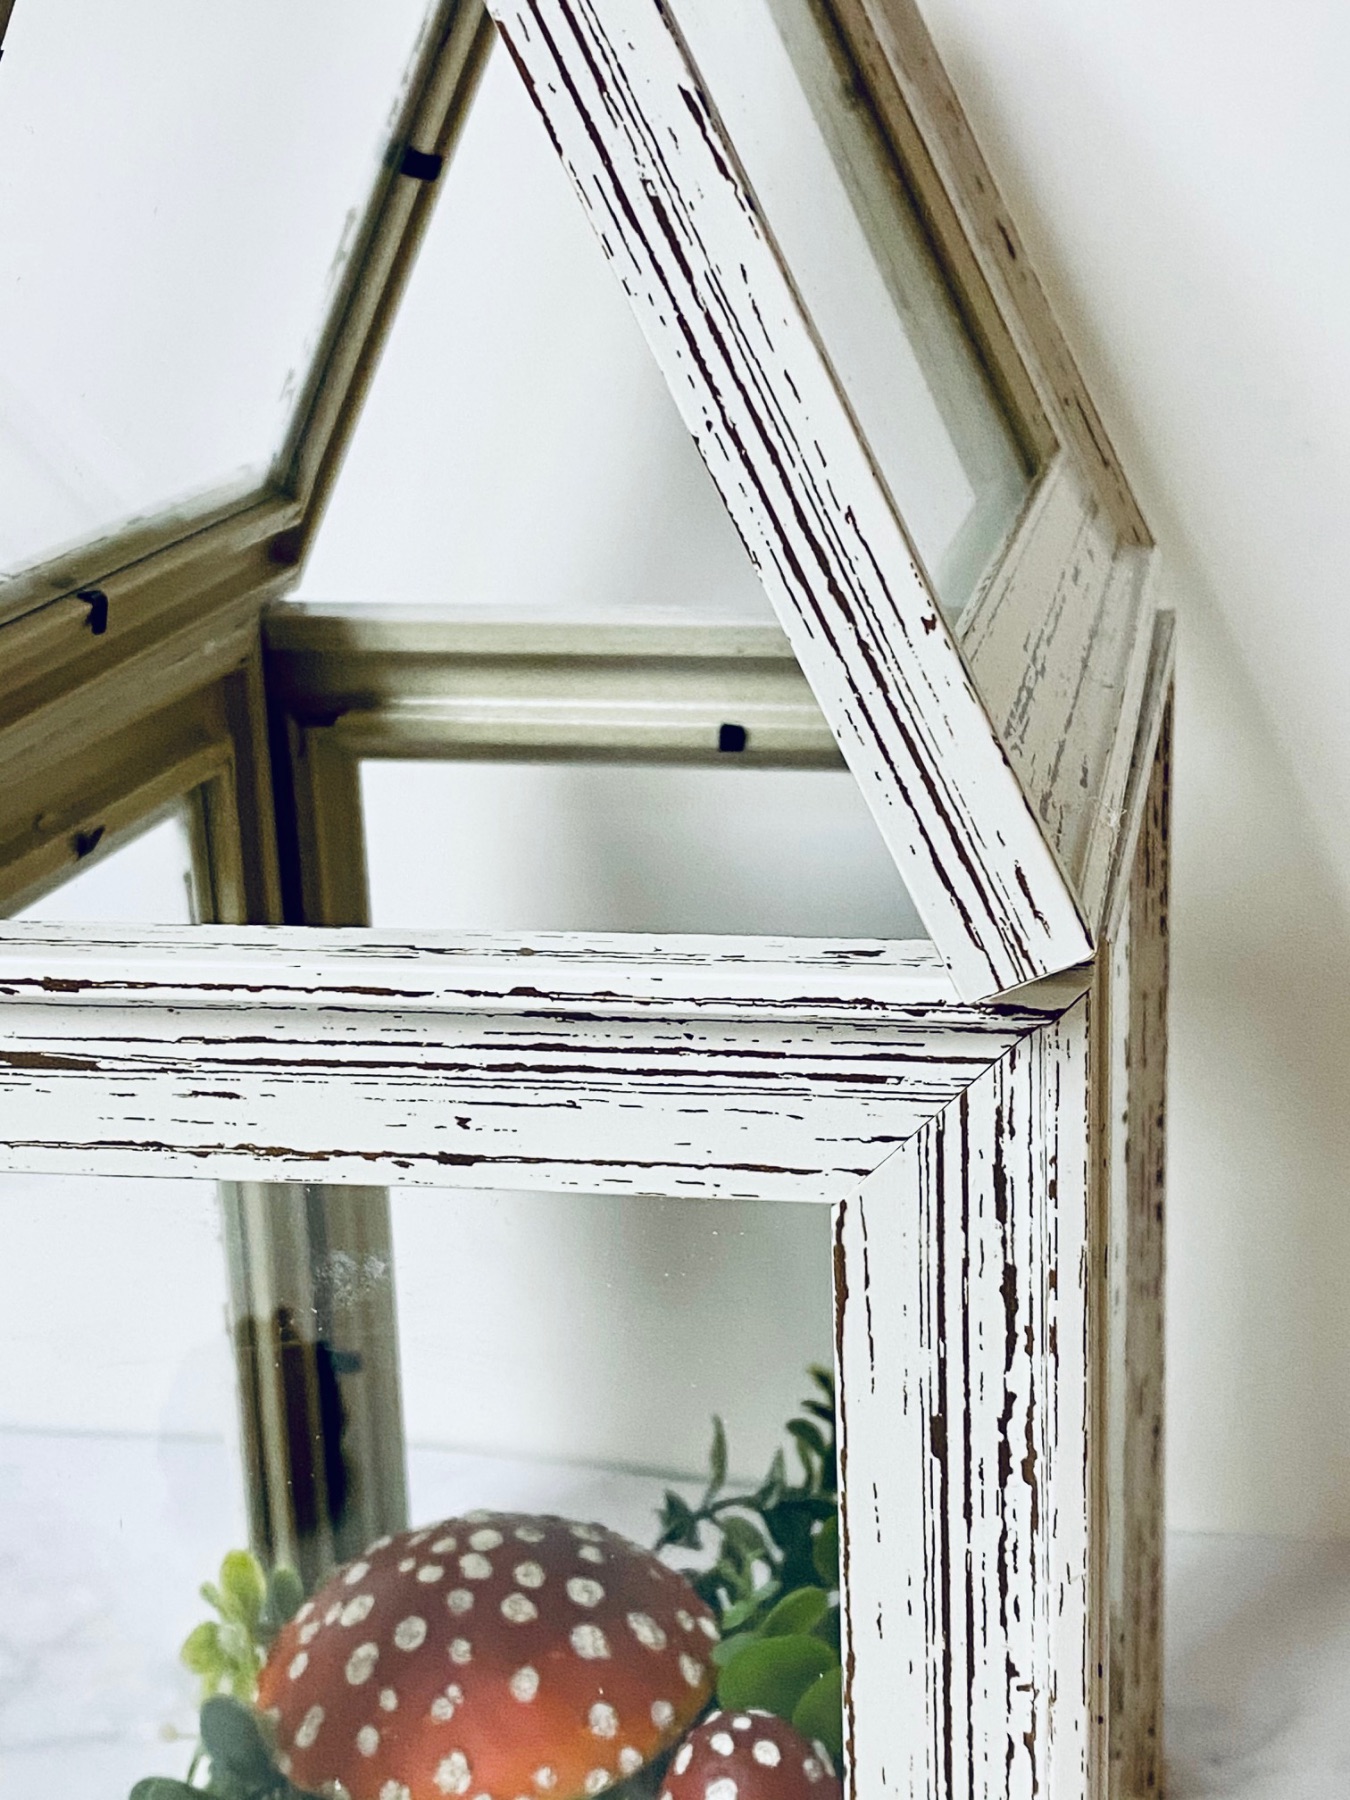
To orient your roof like mine, add the E6000 and hot glue to the shorter sides of the frame (the 5 inch sides) on both pieces to make 4 sides total. Hold the roof pieces in place for a few minutes until they hold together on their own.
Let your glue completely set overnight before adding any plants or moving it to a new location.
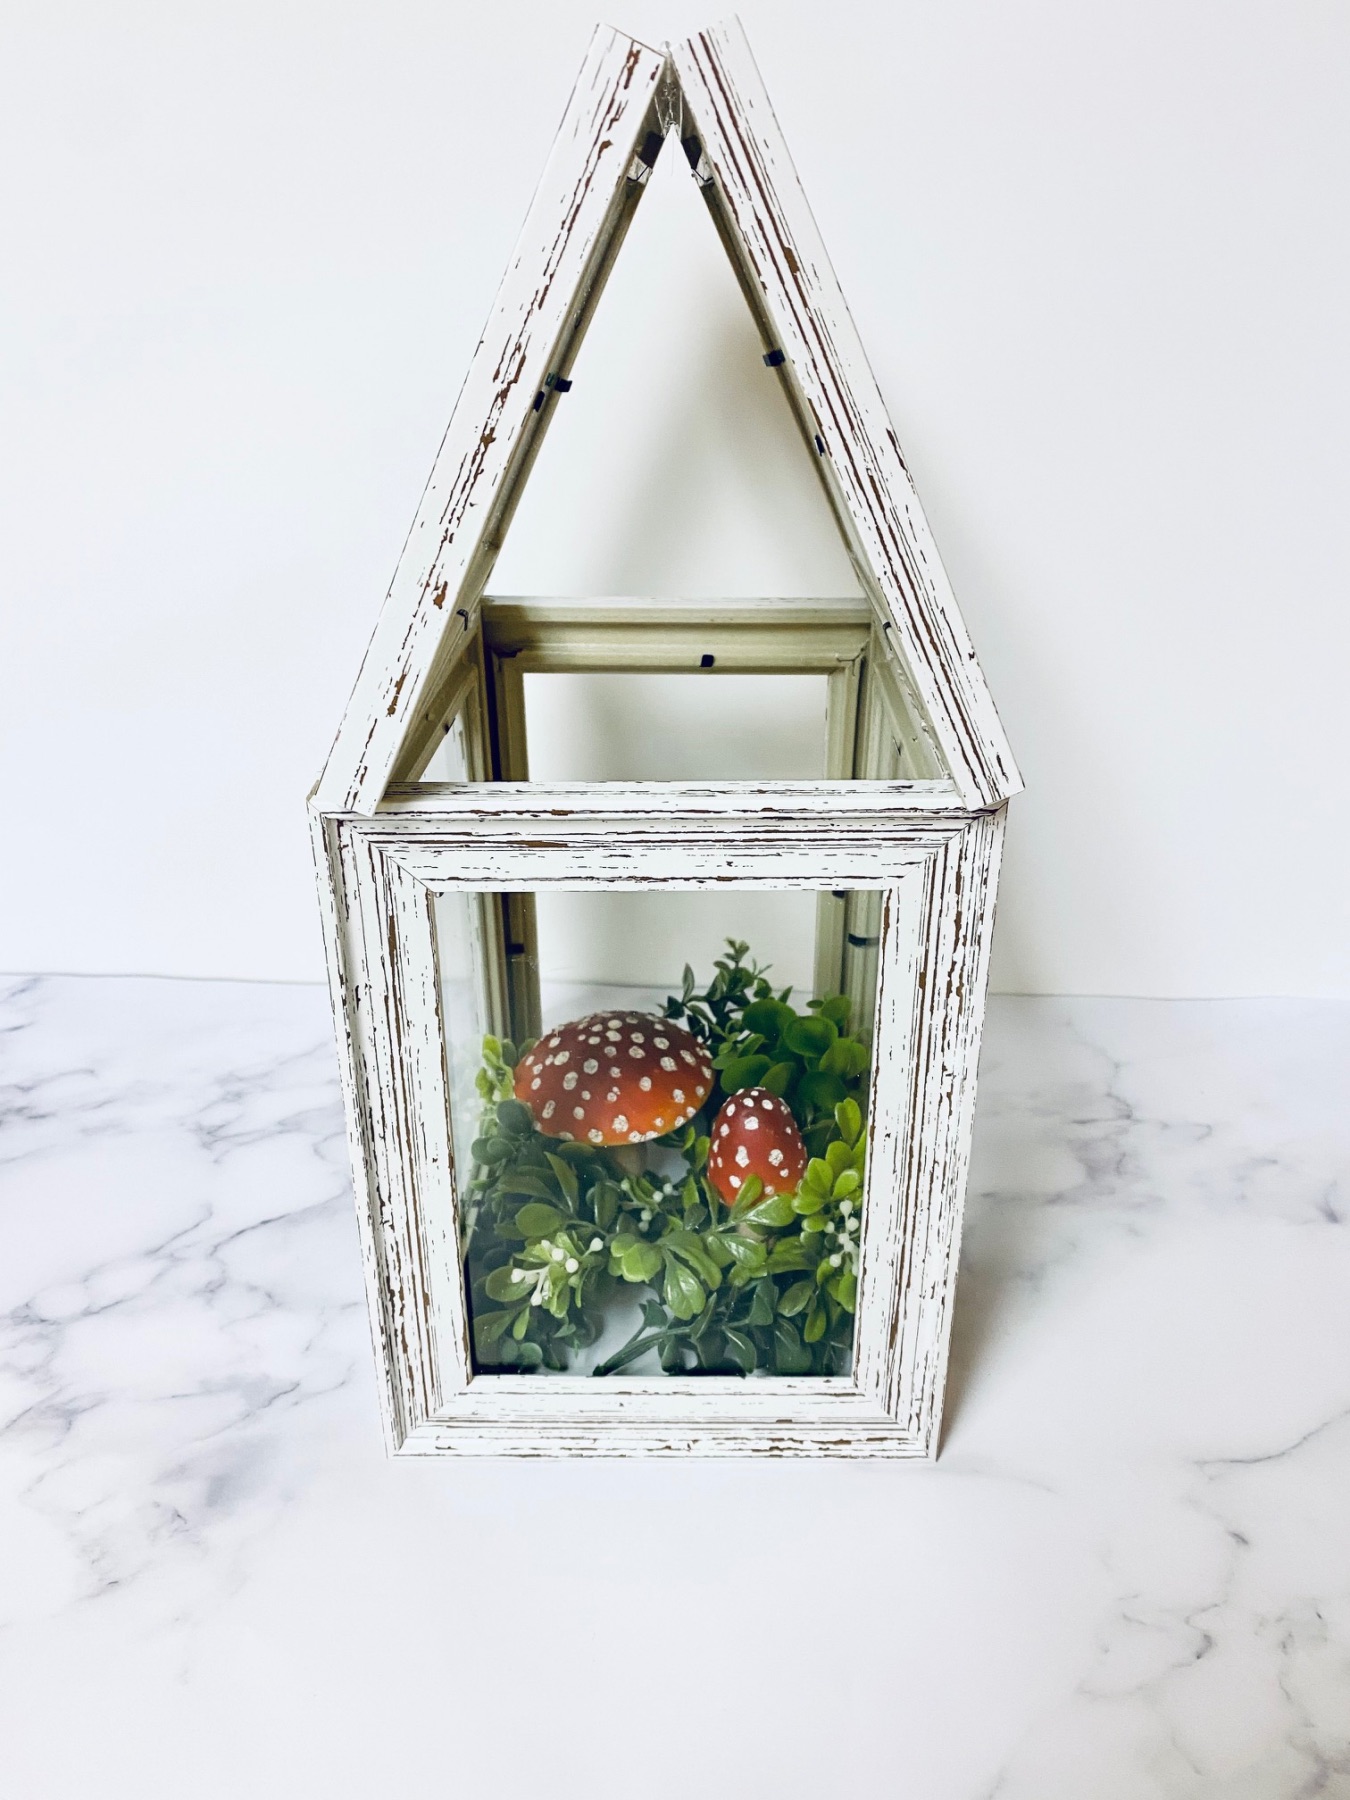
How to Decorate Your Greenhouse
Once your walls and roof is firmly in place and the glue is completely set for 24 hours, it’s time to have some fun!
Now remember, if you want to use live plants, they will need to be in a container since you don’t have a bottom to your DIY Picture Frame Greenhouse Terrarium.
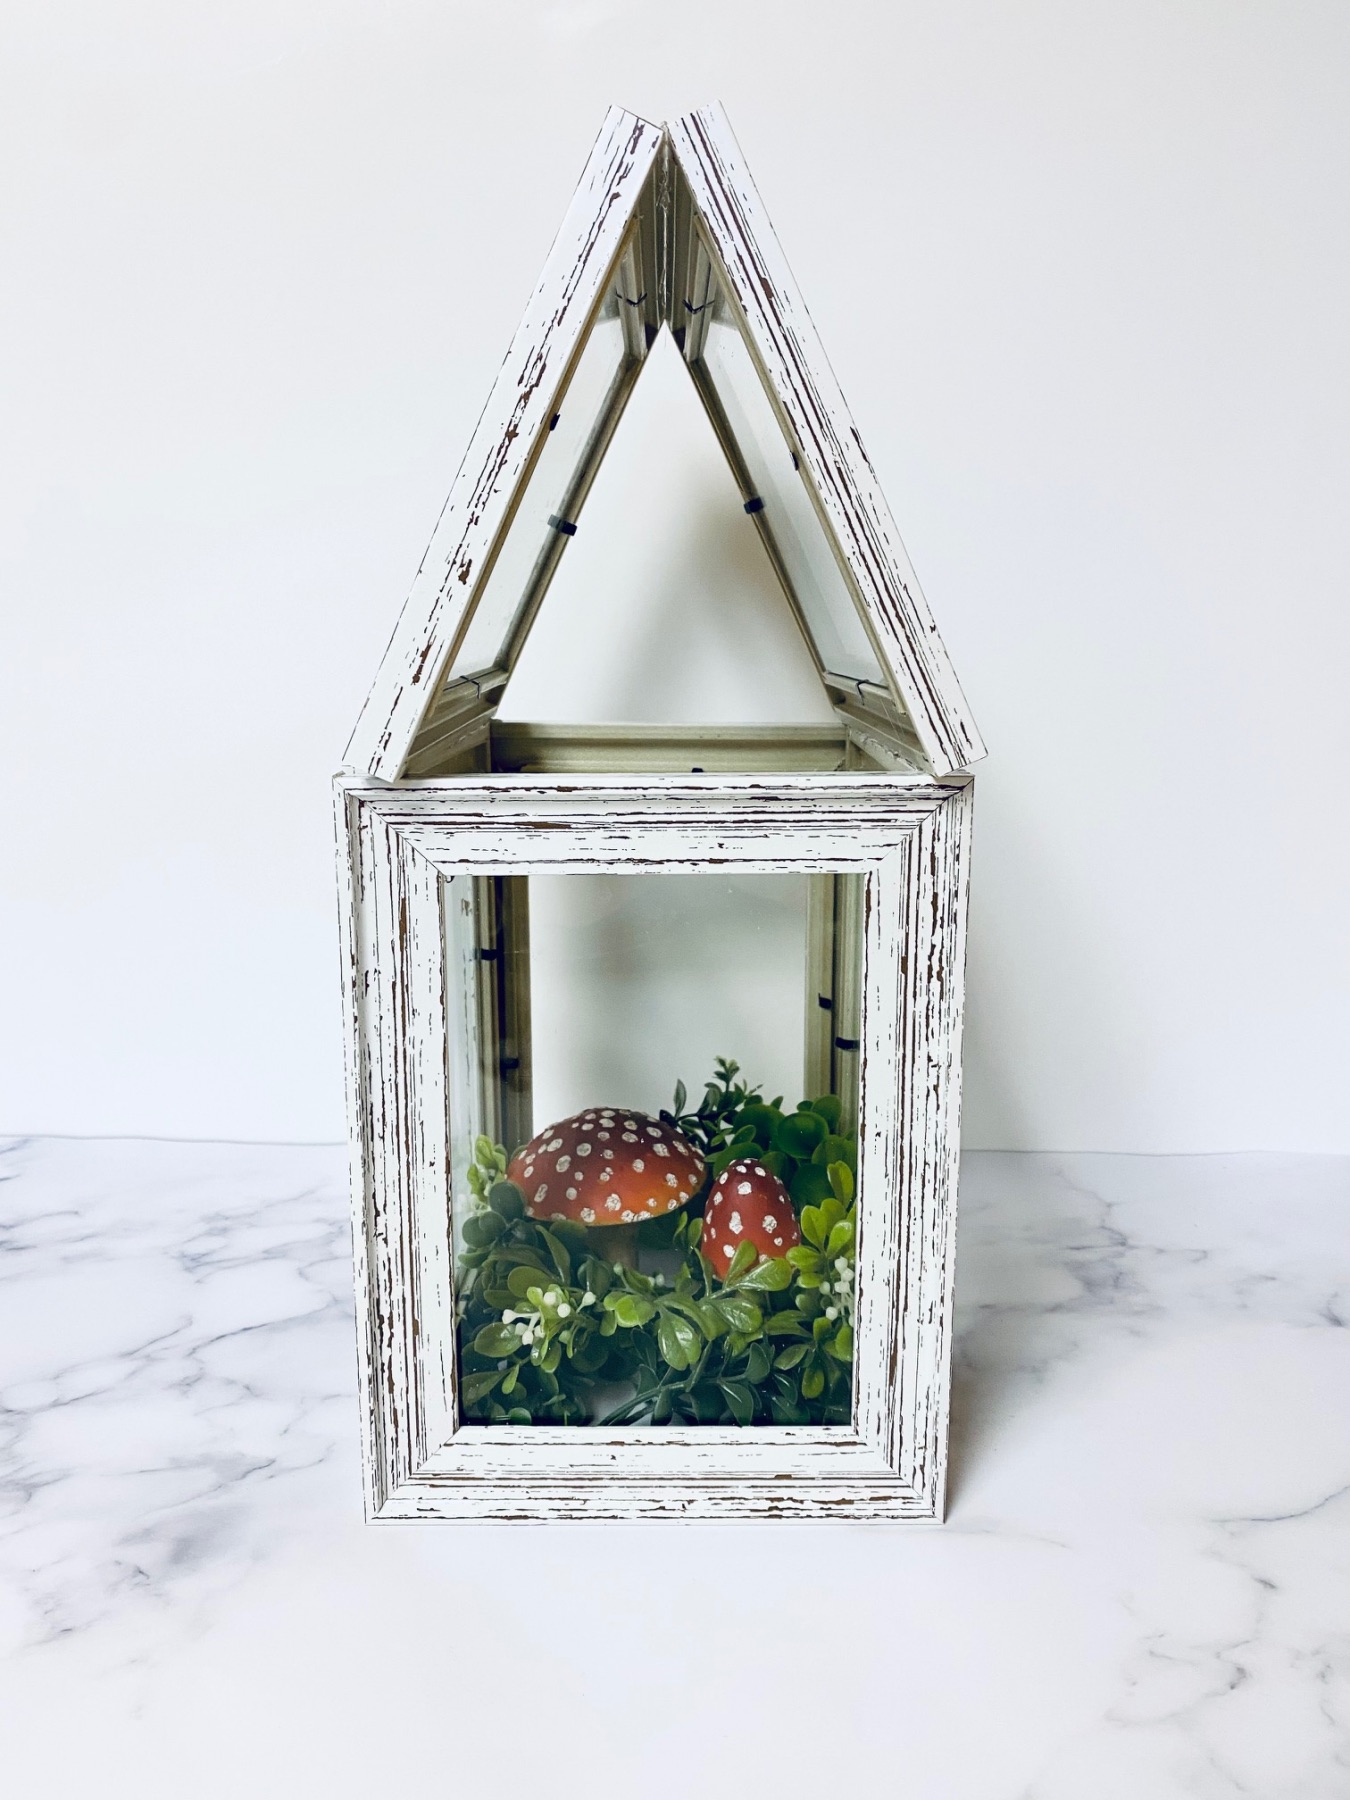
For live plants, use plants that thrive indoors that are planted inside a planter. Spider plants, succulents, or orchids are all great choices.
Instead of using live plants, faux plants are a great option. Your DIY Picture Frame Greenhouse Terrarium could even contain fairy garden accessories, mini animal toys, and all kinds of cute things beyond the greenery.
Whatever you choose, the more full and green you make it, the cuter it will look! Then place your DIY Picture Frame Greenhouse Terrarium on a tabletop as a display or use it for a dinner party.
Show us what you made! If you made this project, post photos in the comments below or tag us on social so we can see the color of frames you used…How you styled it…what plants you added… Since this project can be so versatile, everyone is likely to be different!
Let’s Stay Friends!
Insta | Pinterest | Enews | TikTok