
DIY
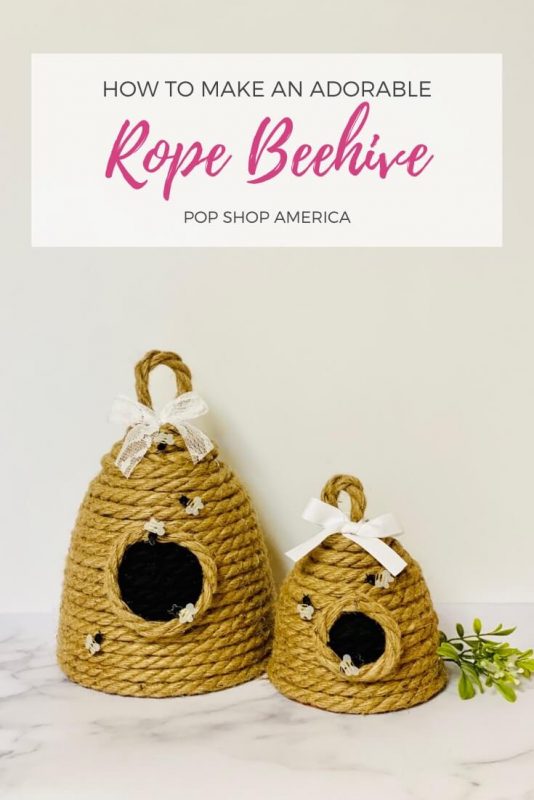
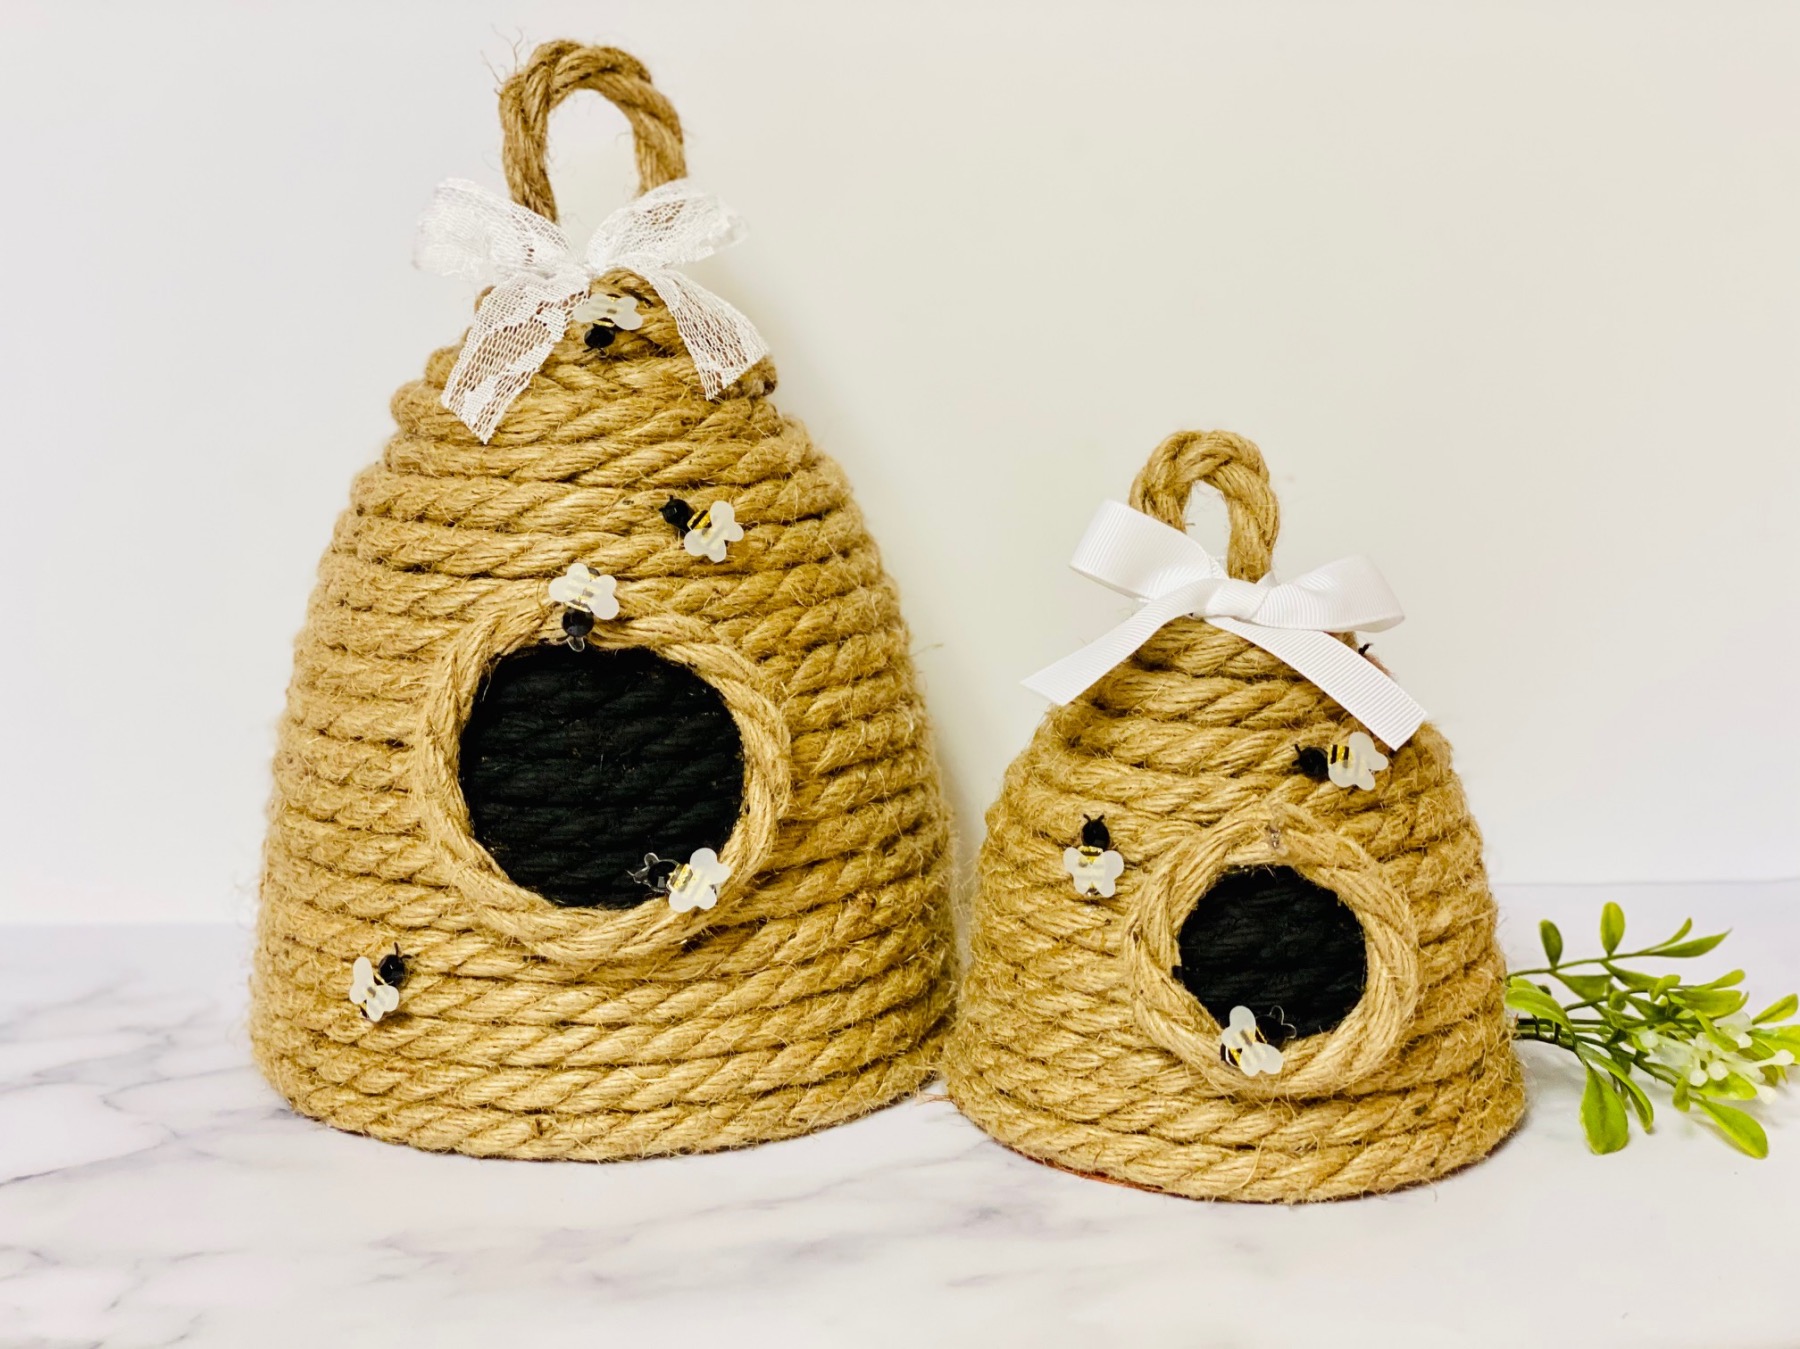
DIY Rope Beehive Decoration
Apr
What’s the buzz about this spring? How about this très adorable DIY Rope Beehive Decoration? It can transform any space into the perfect spring setting because it is so much fun. It will fit perfectly with all your spring party essentials. And would look so cute on a dining table or in an entry way.
Best of all, this Rope Beehive is also easy to make. So let’s get started!

Supplies to Make a DIY Rope Beehive Decoration
Medium Size Flower Pot
Small Flower Pot (Or a 2nd Flower Pot at a different size)
40 ft. Nautical Jute Rope
Paint Brush
Black Chalkboard Paint
Bee Stickers or Scrapbooking Die Cuts
Cream or Lace Ribbon
Plus you will need:
Scissors
Hot Glue Gun
Hot Glue Sticks
Note about Supplies: Depending on the size of your pots, you could need more or less rope than what I used. It’s always nice to have extra, so you don’t have to worry about running out. Jute rope can have a lot of variation in thicknesses and flexibility. Be sure to use a soft and thick jute rope.
How to Find the Perfect Shaped Planter
It’s not just jute that requires a certain attention to detail. You will also want to pick the perfect shaped planter for this project.
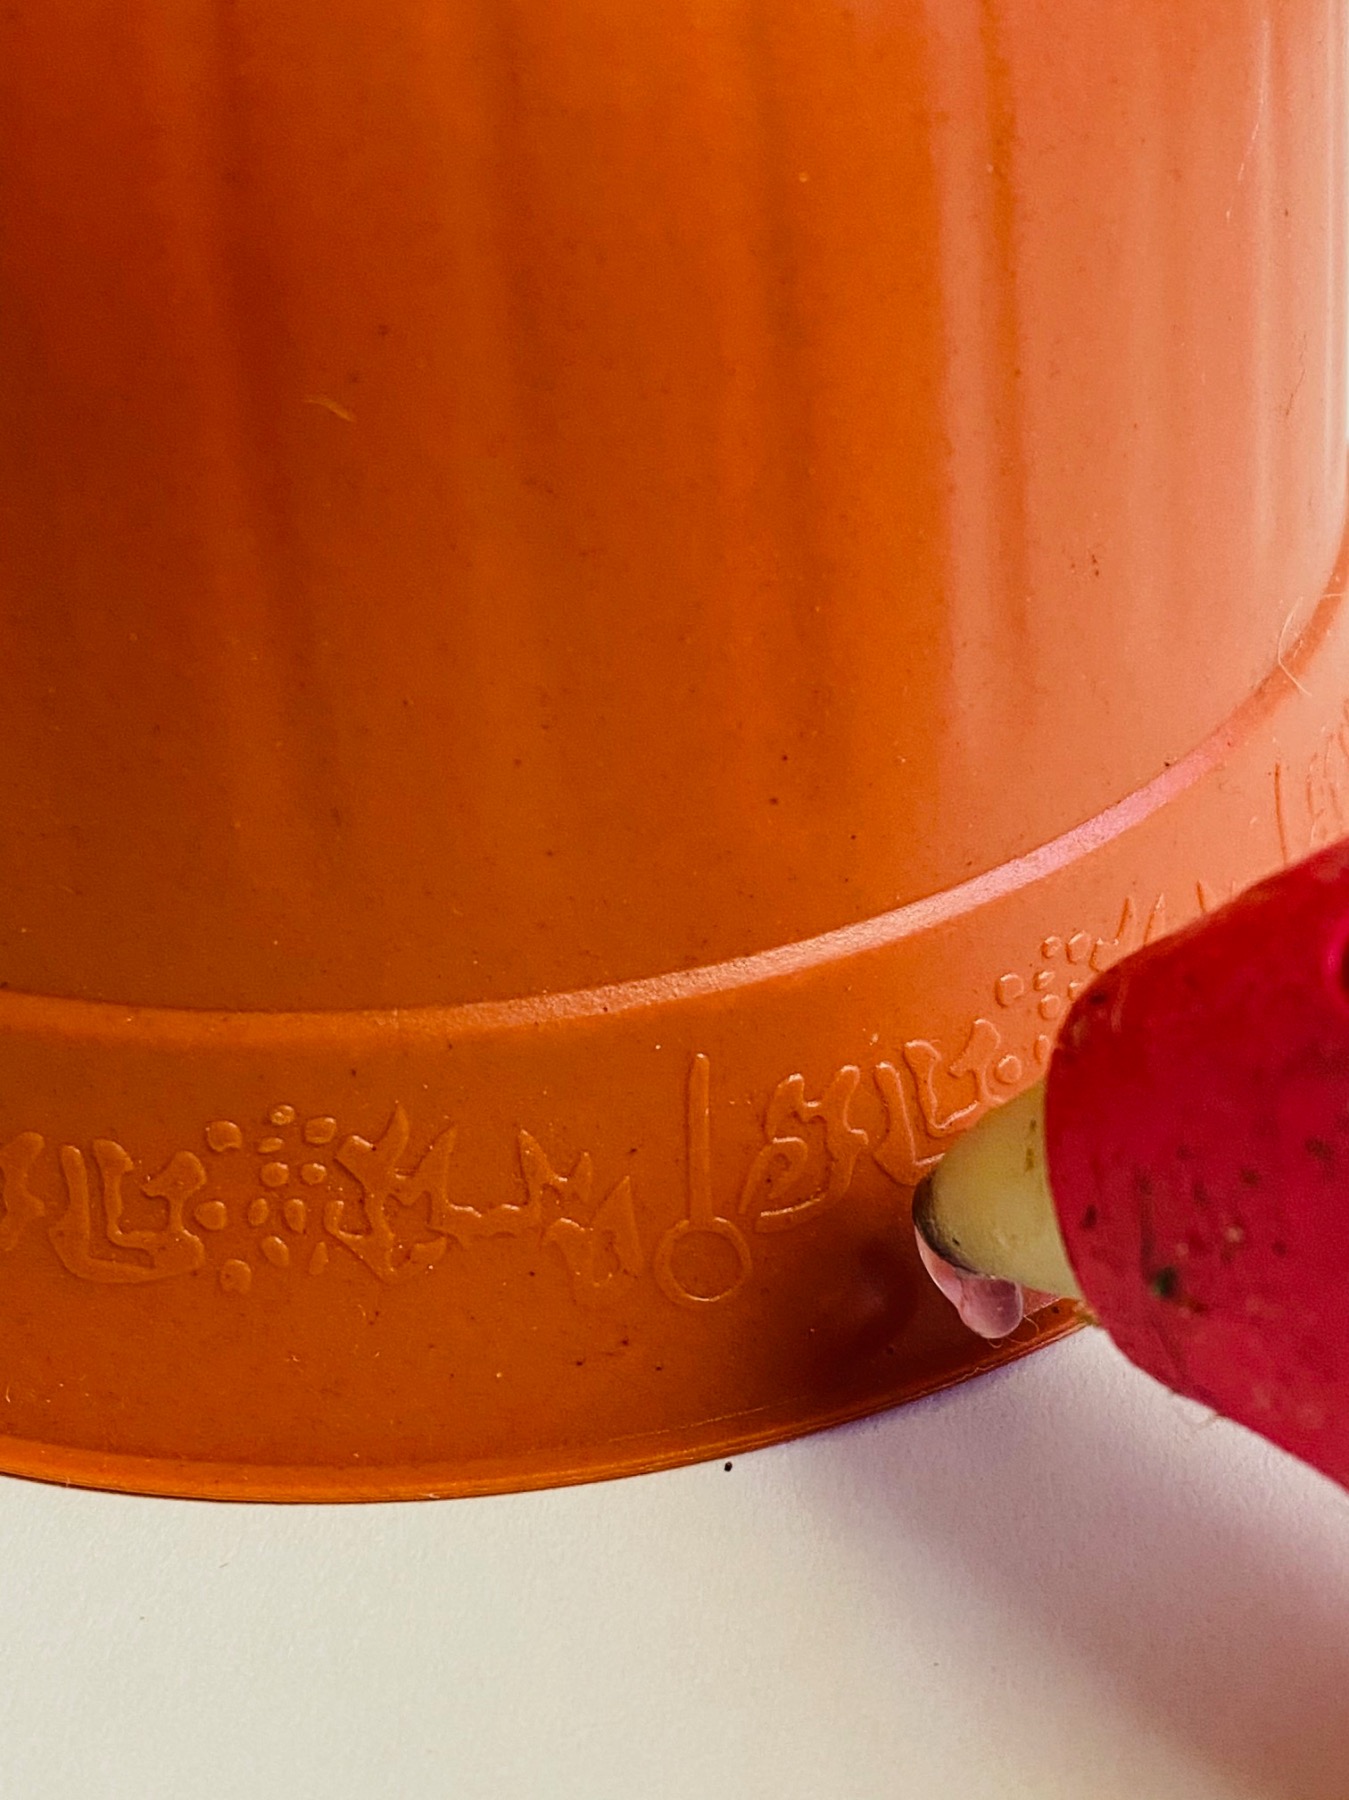
Use a planter that is wider at the opening than at the base. This planter should gently taper from its slim base to its wide opening without any geometric edges or angles. The slope should be smooth, almost like an oval. You will not want a planter with a saucer either.
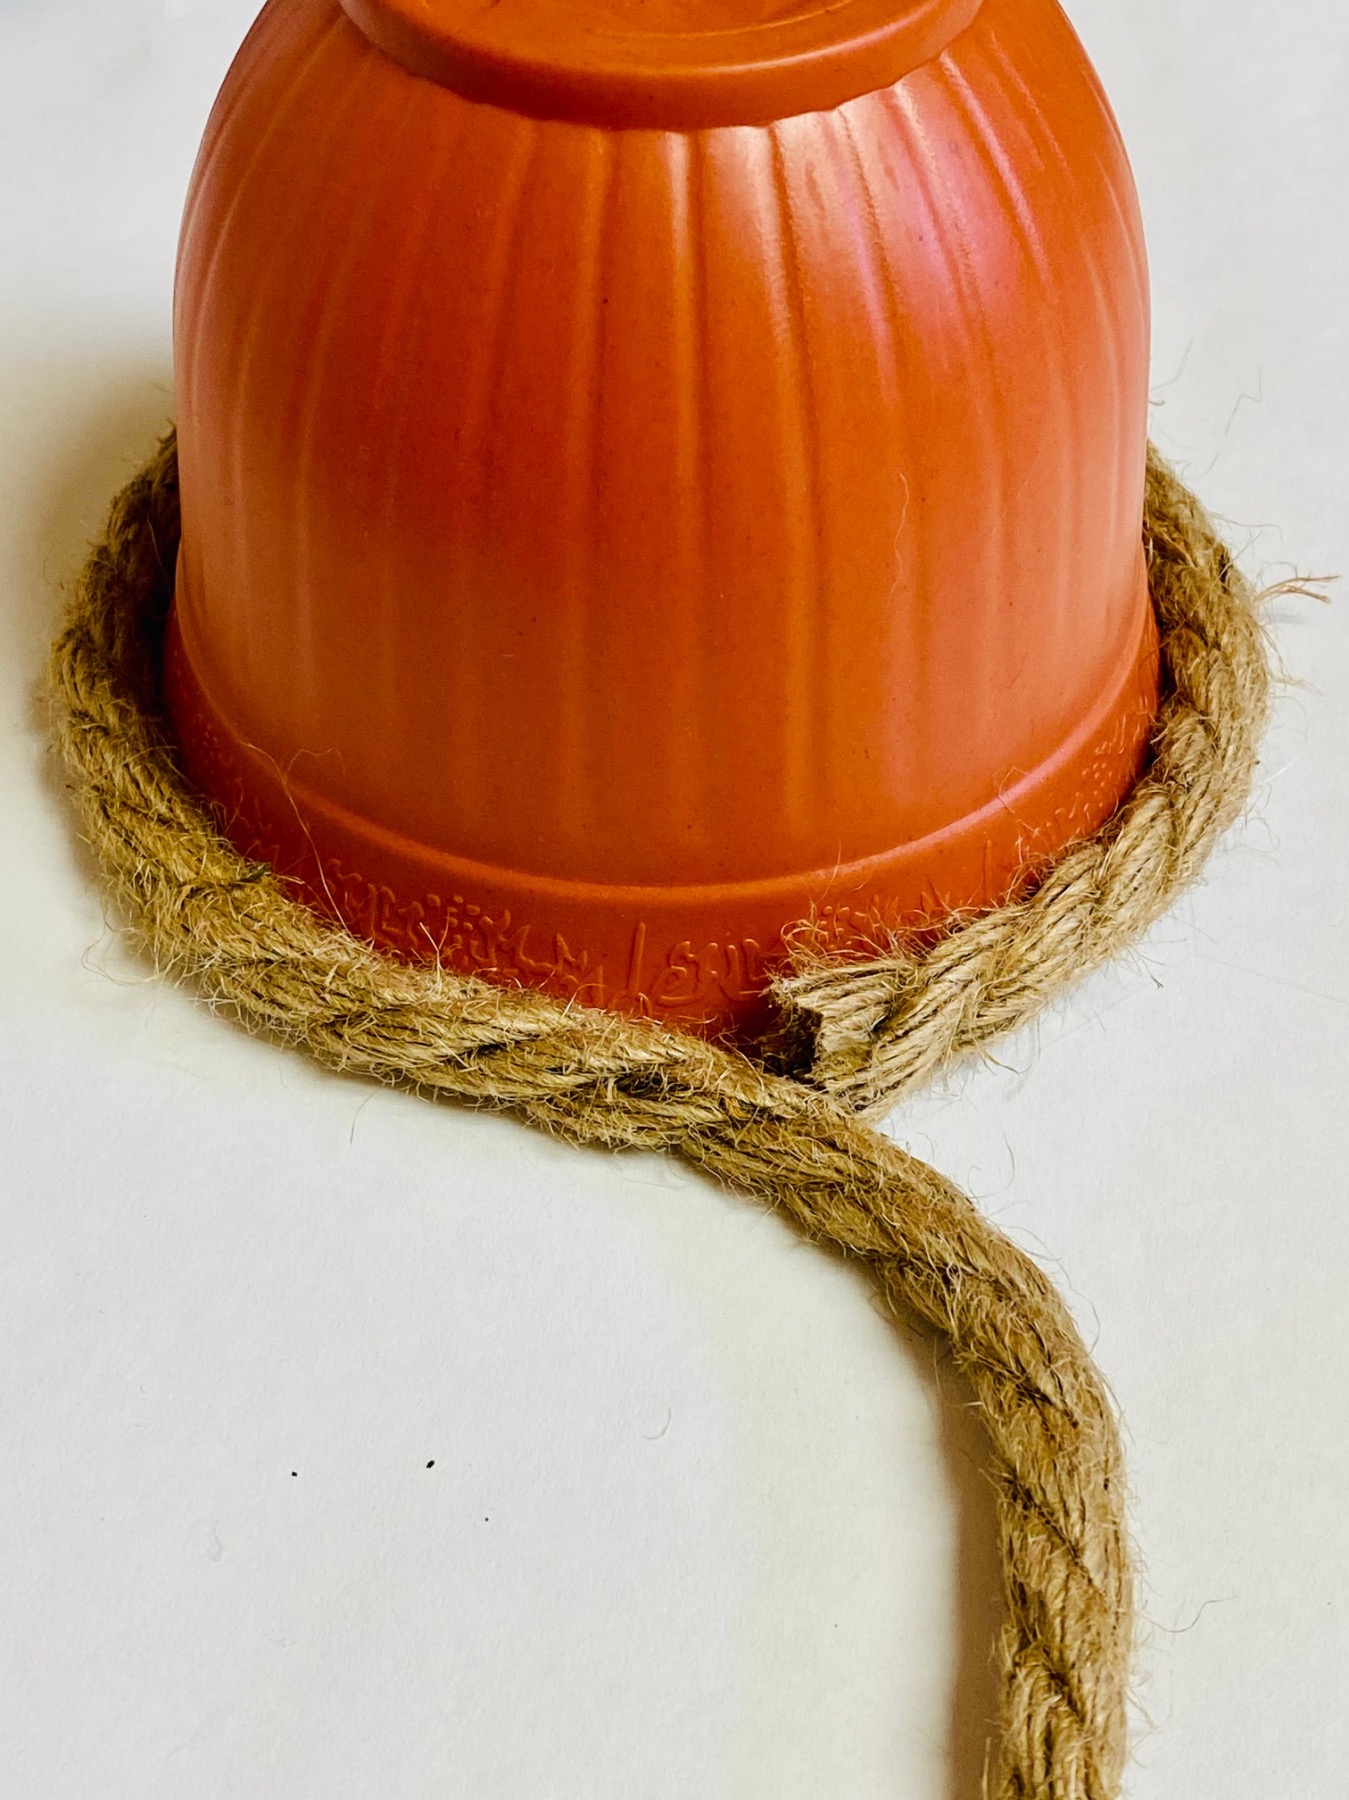
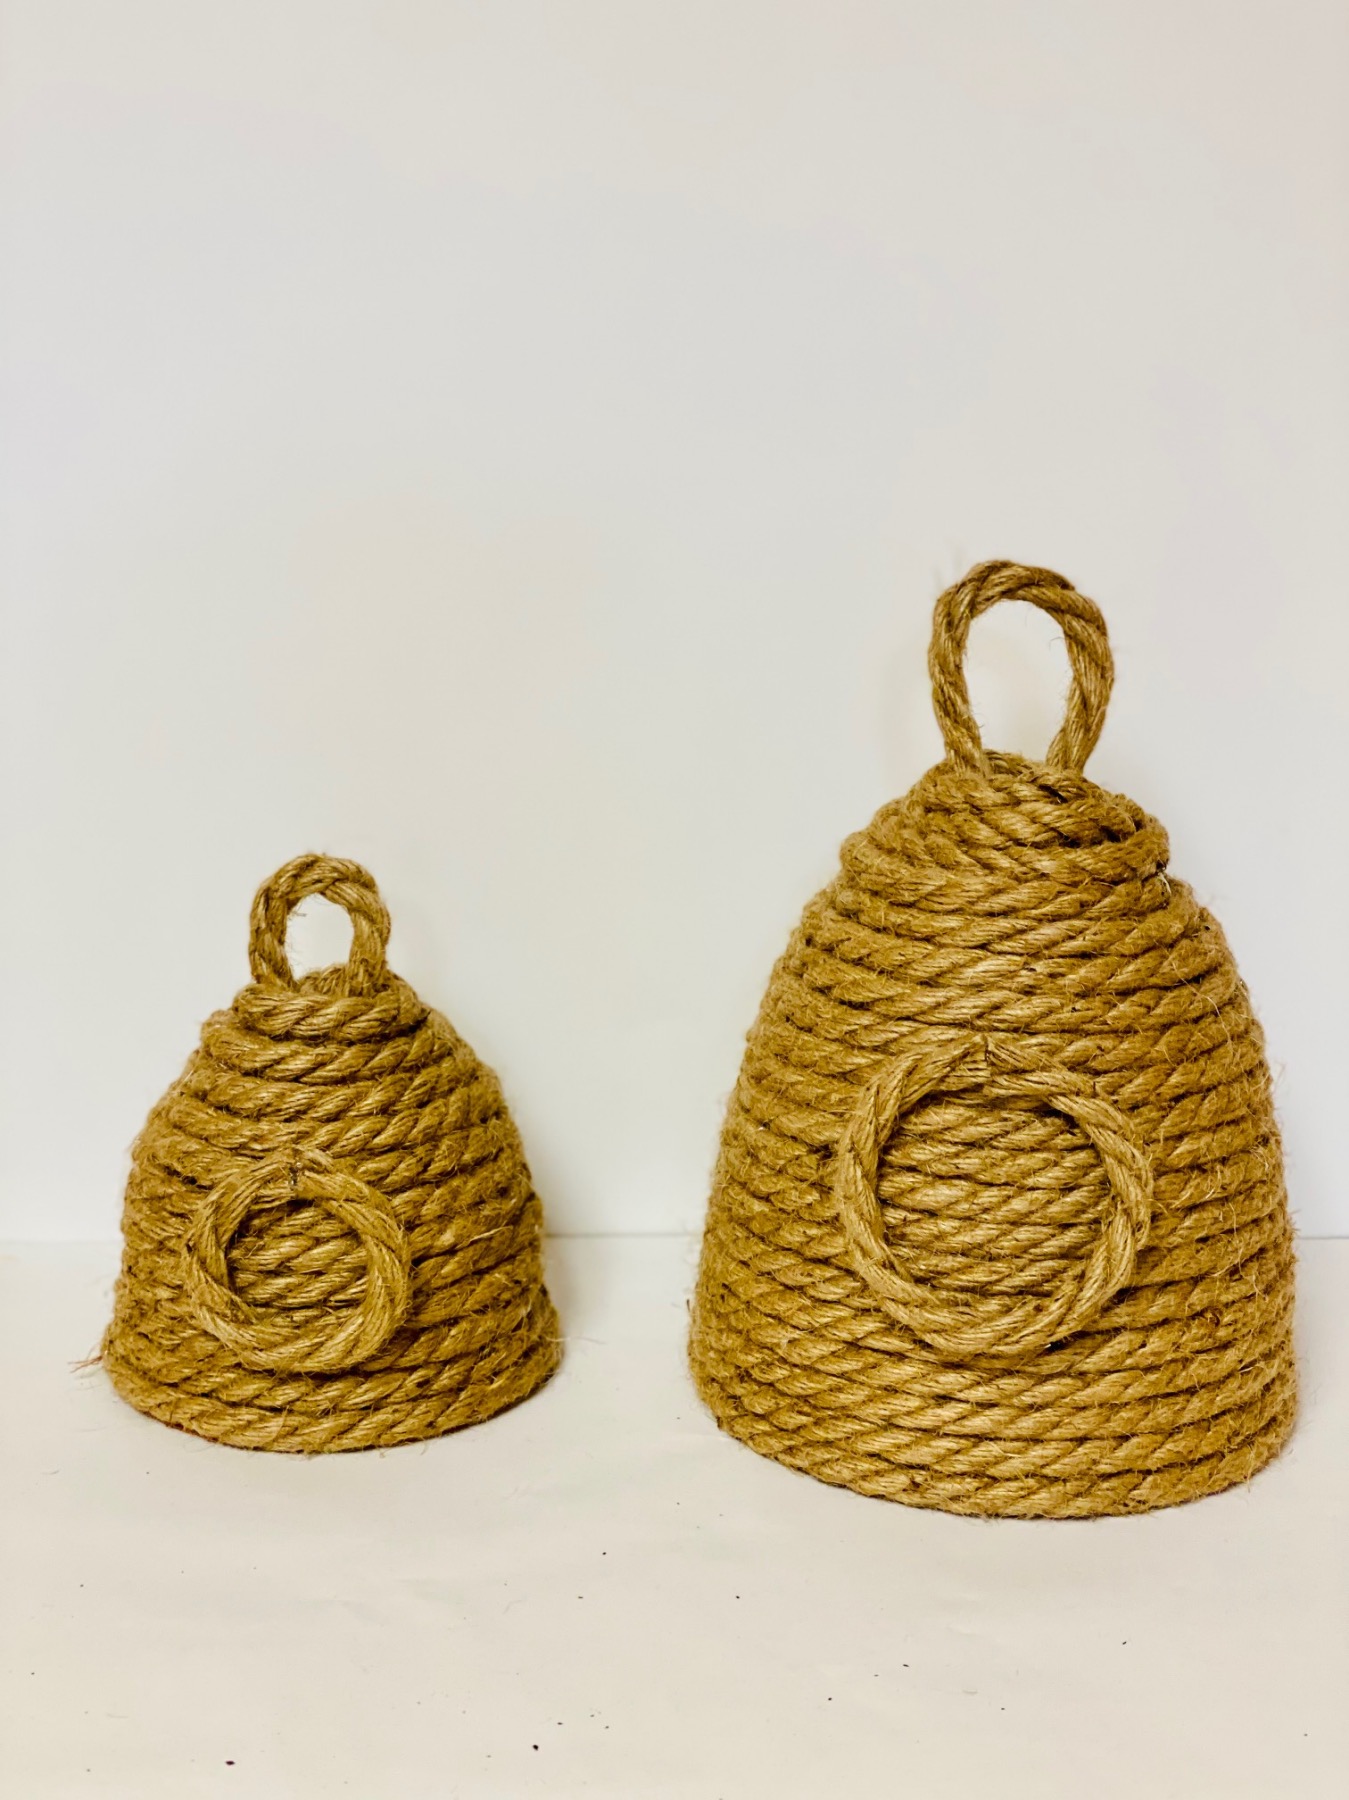
Begin Attaching the Rope from the Bottom
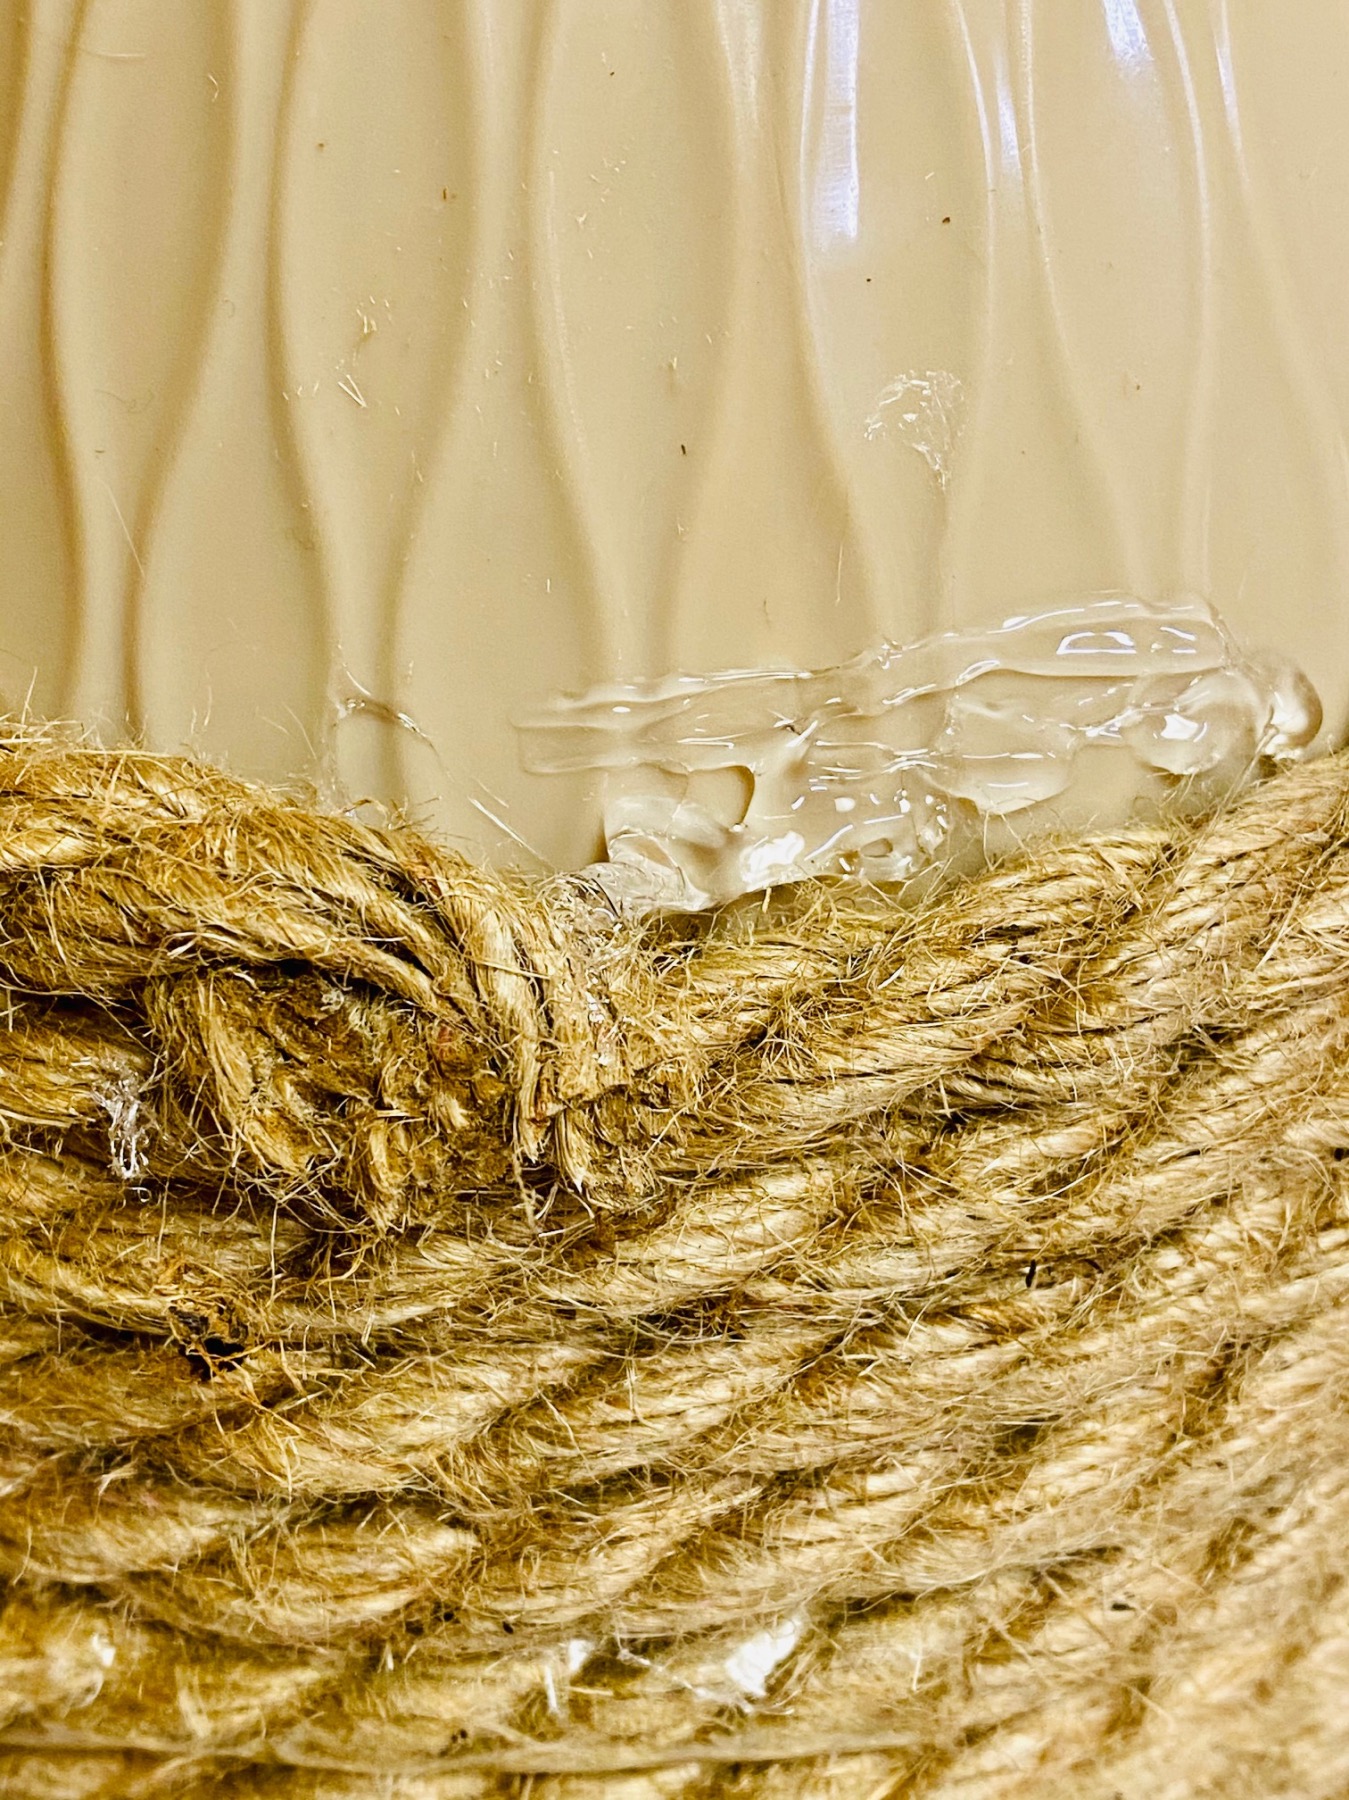
Get your glue gun ready! And flip your planter upside down. The widest part of the planter will become the bottom of the beehive and the slimmest part of the planter will become the top.
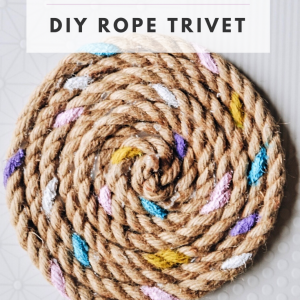
Start by making small dots or stripes of hot glue around the widest part of the planter (the bottom). And attach the jute rope in sections. We talk a lot about how to glue rope with hot glue in this DIY Rope Trivet Tutorial and here are the basics.
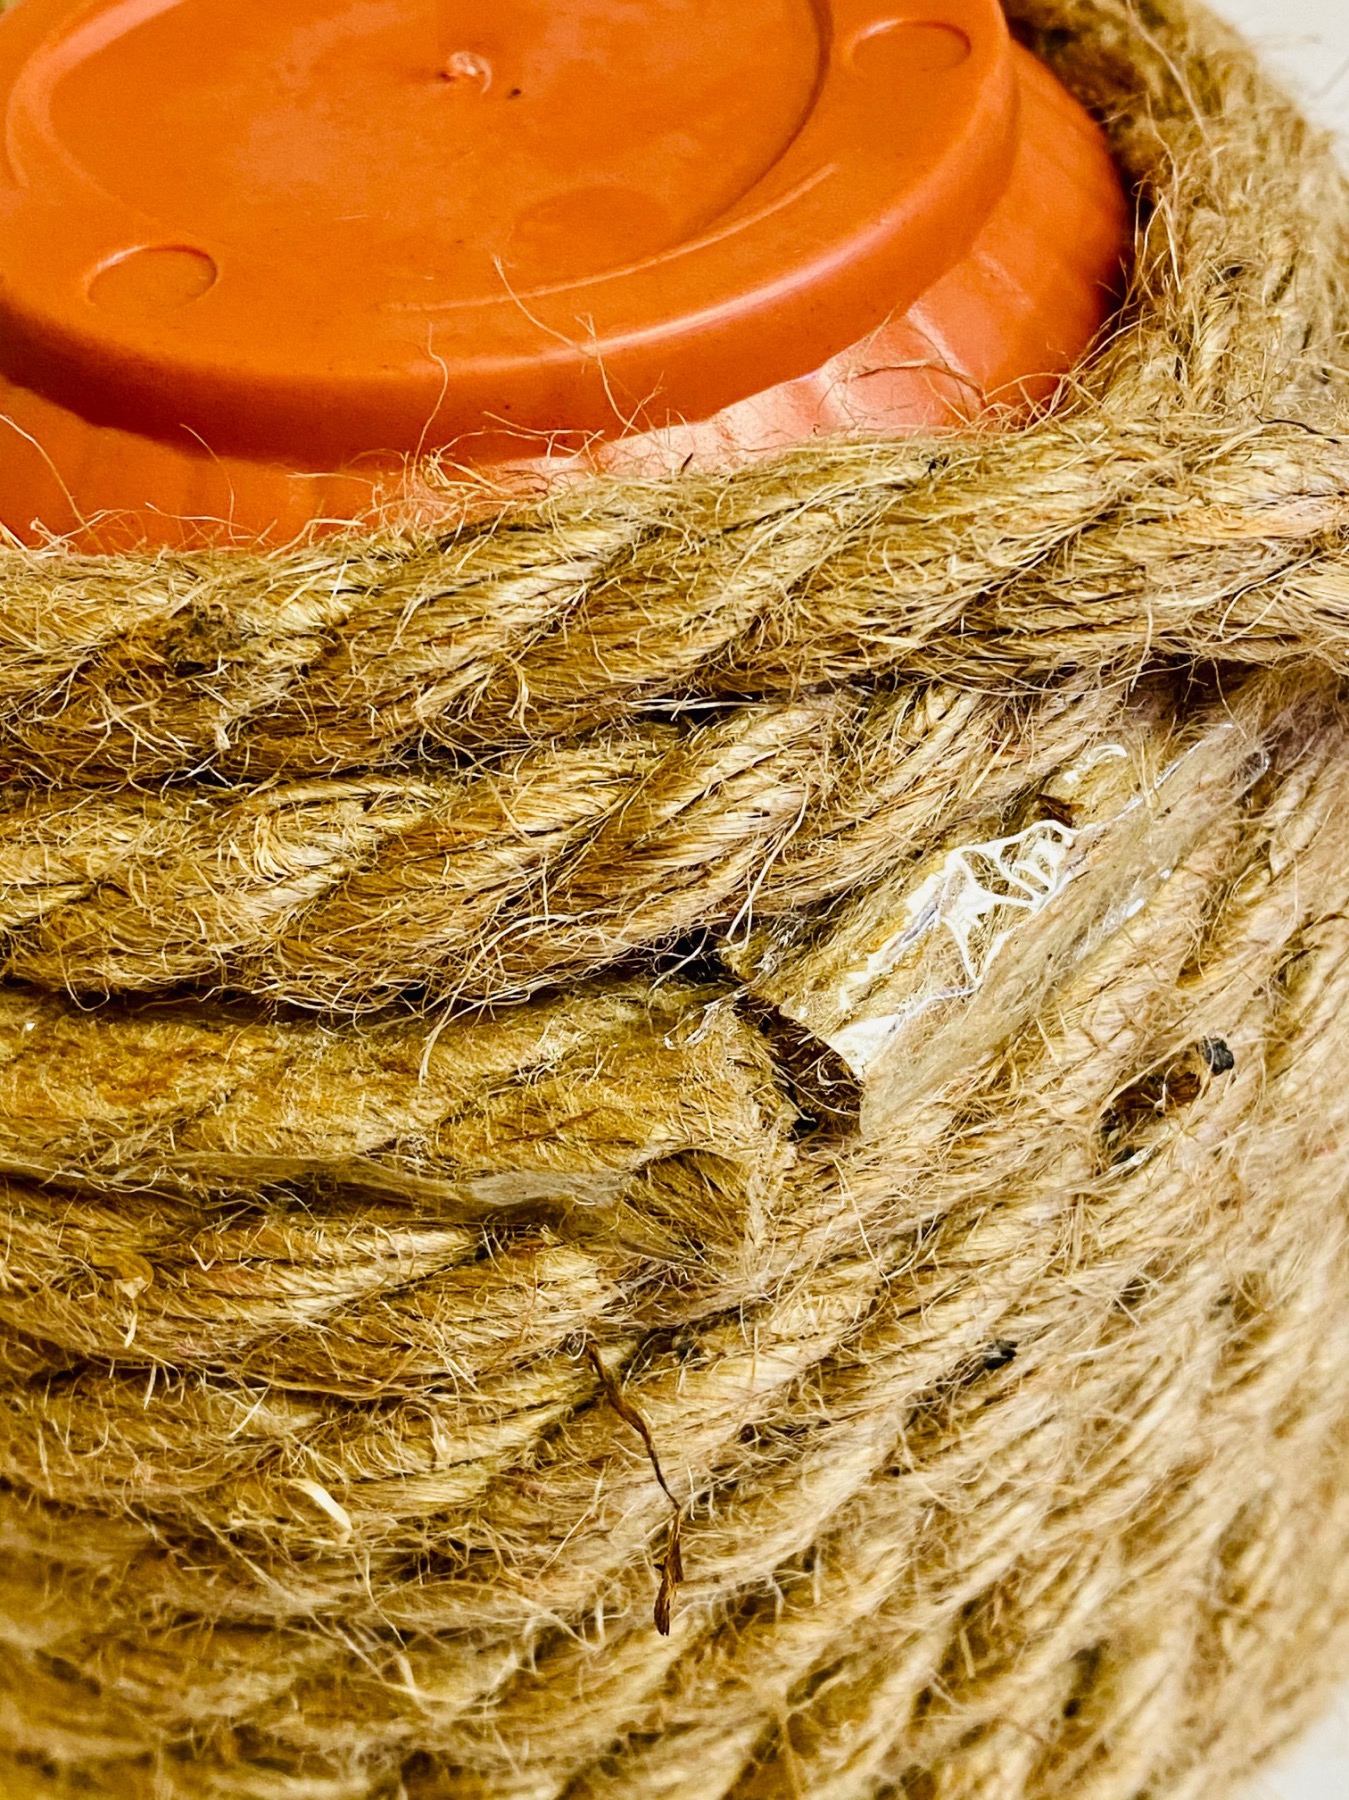
Glue your rope to your planter in sections of around 6 inches. This will give you more control with your rope. And it will make it easier to attach stylishly.
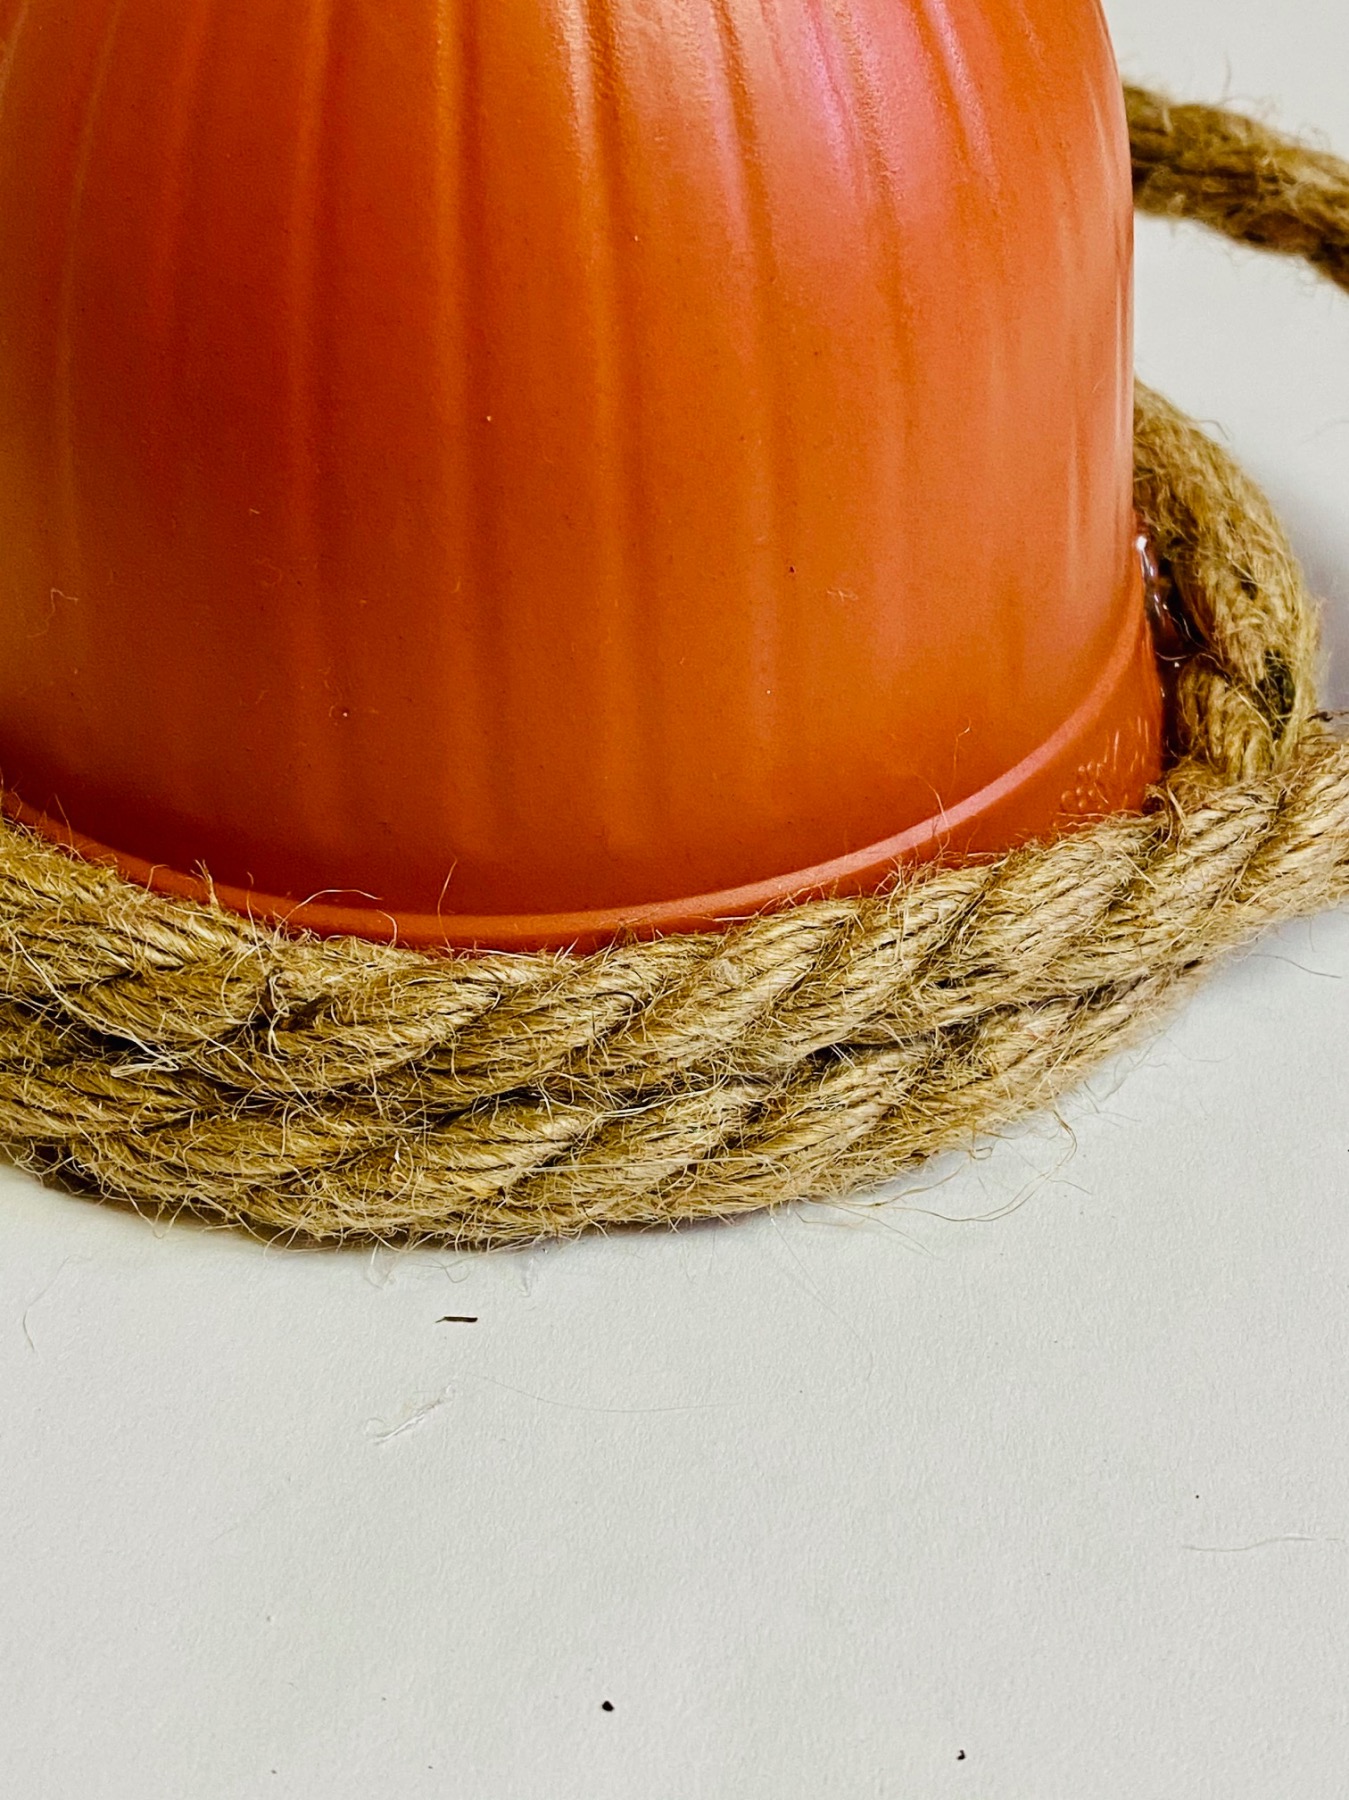
Place the glue on the planter so the glue will not show. Use the planter itself and the back of rope and additionally add the glue sparingly. As you glue your strips of rope, hold the sections in place for a few seconds to ensure they are fully attached to the planter.
Use rope straight from your source without cutting it into sections. Where your rope sections begin and end is the hardest part to make pretty. It often looks messy and is challenging to control.
As your wind your rope off the source and onto your planter, your rope may need to be untwisted as it’s unwound.
Be cautious when adding the next ream of jute to ensure that they line up perfectly. Once you glue the end of the 2nd length of rope, you can trim the ends so they fit together. Clean them up to help them to look seamless.
Once you reach the top of the planter, set your jute to the side. Finish the body of the beehive after the next step. But you can use the same length of jute rope.
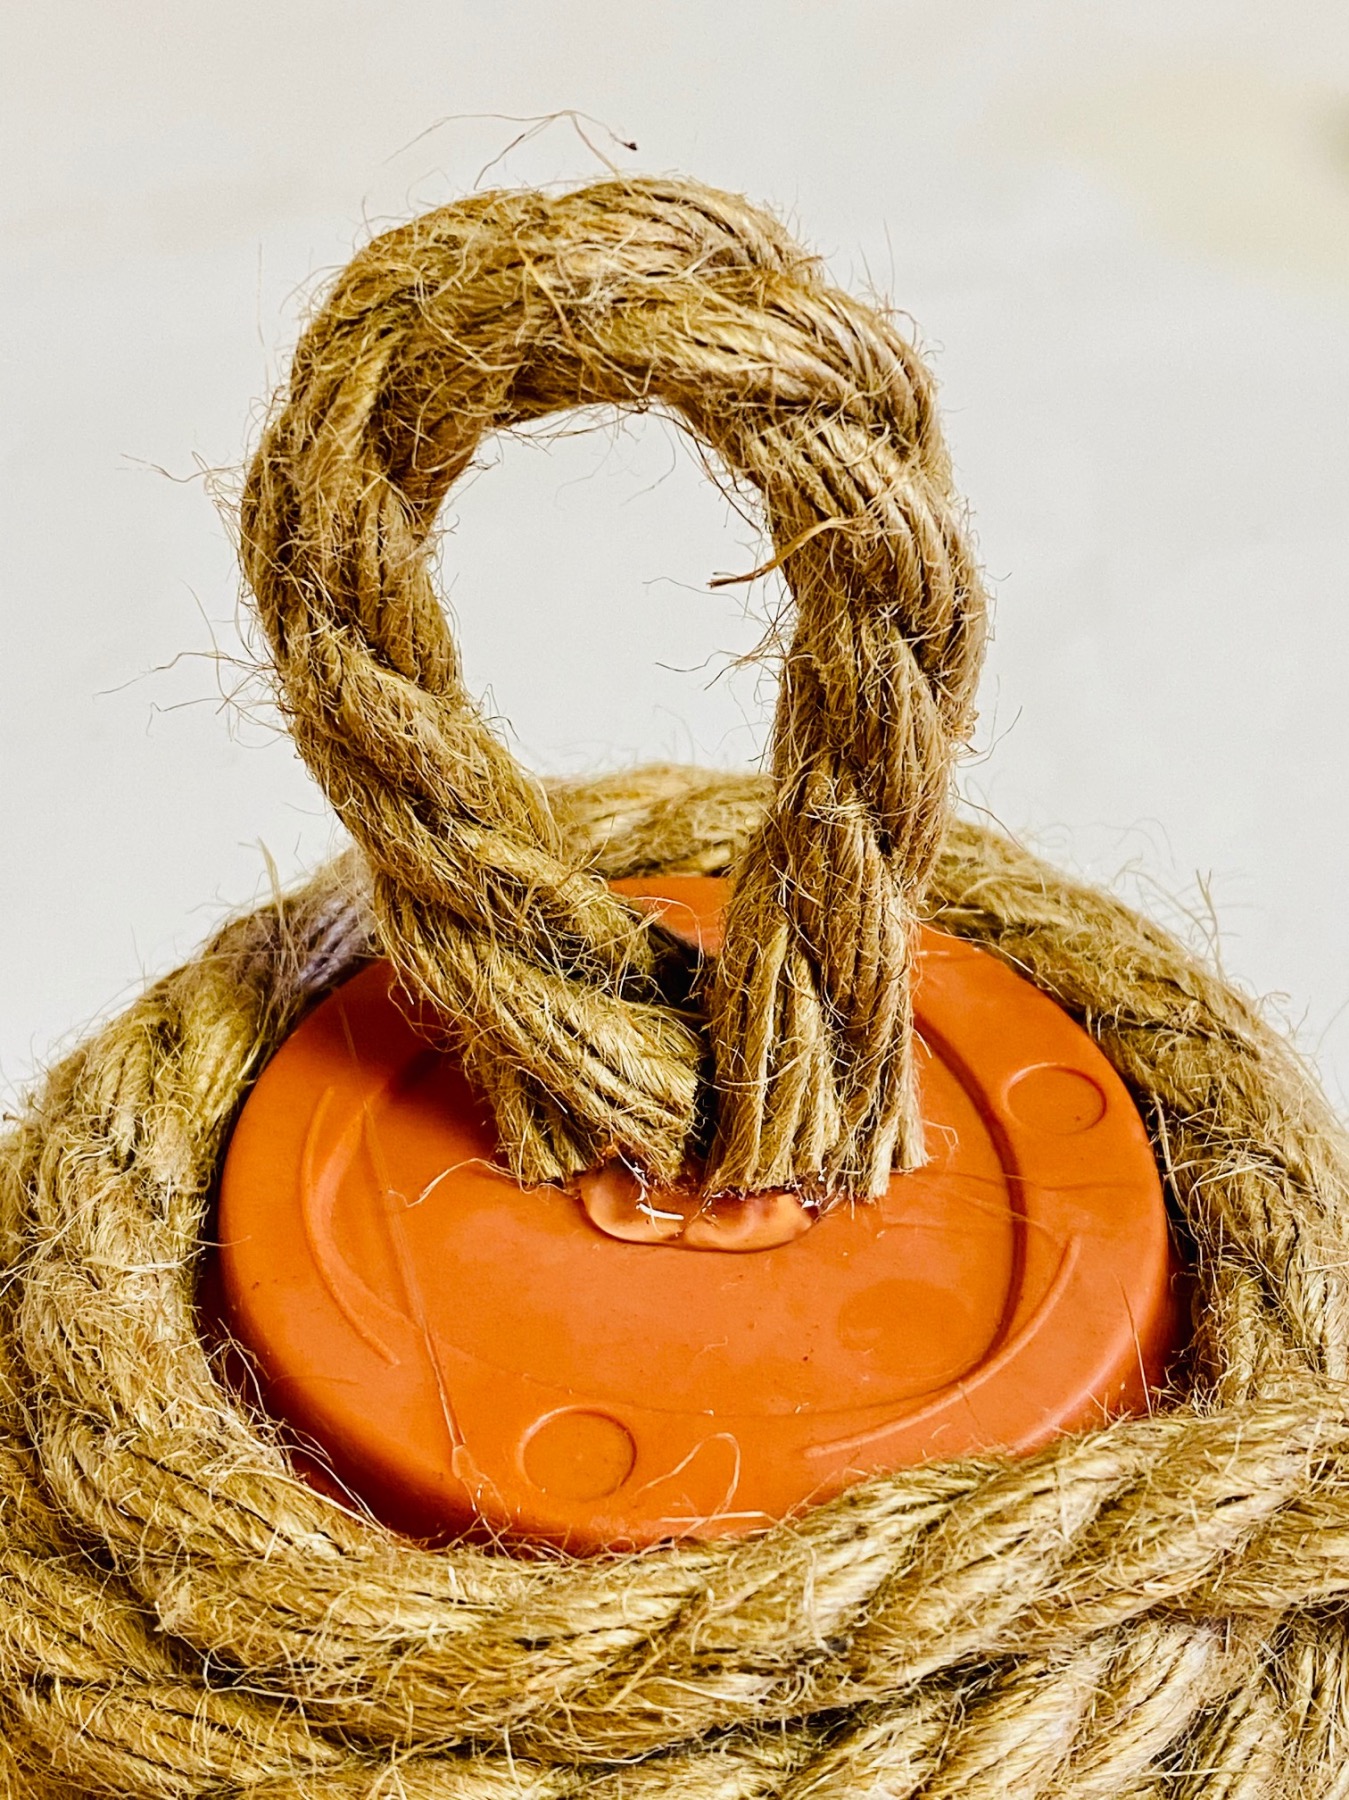
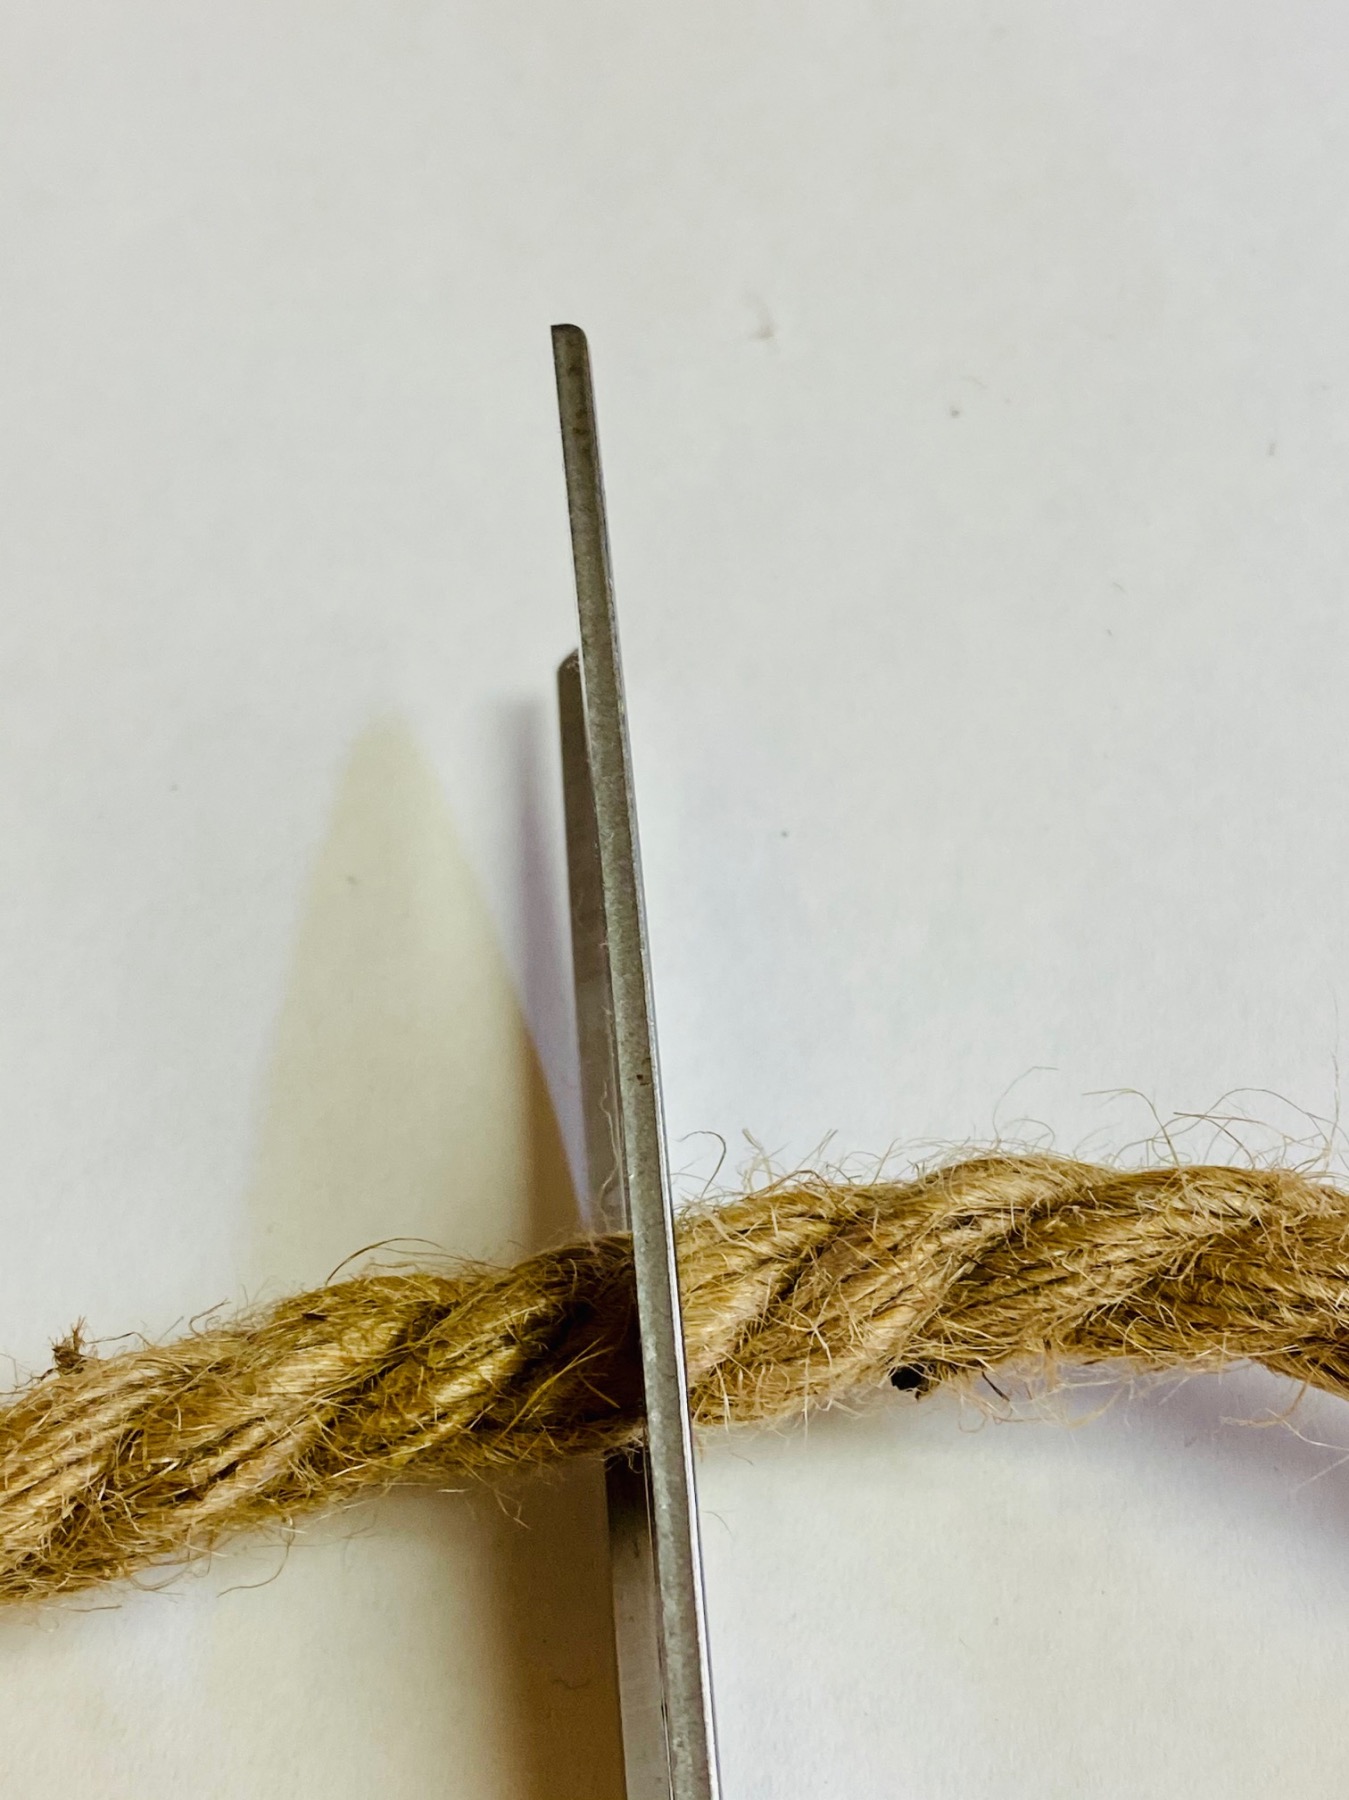
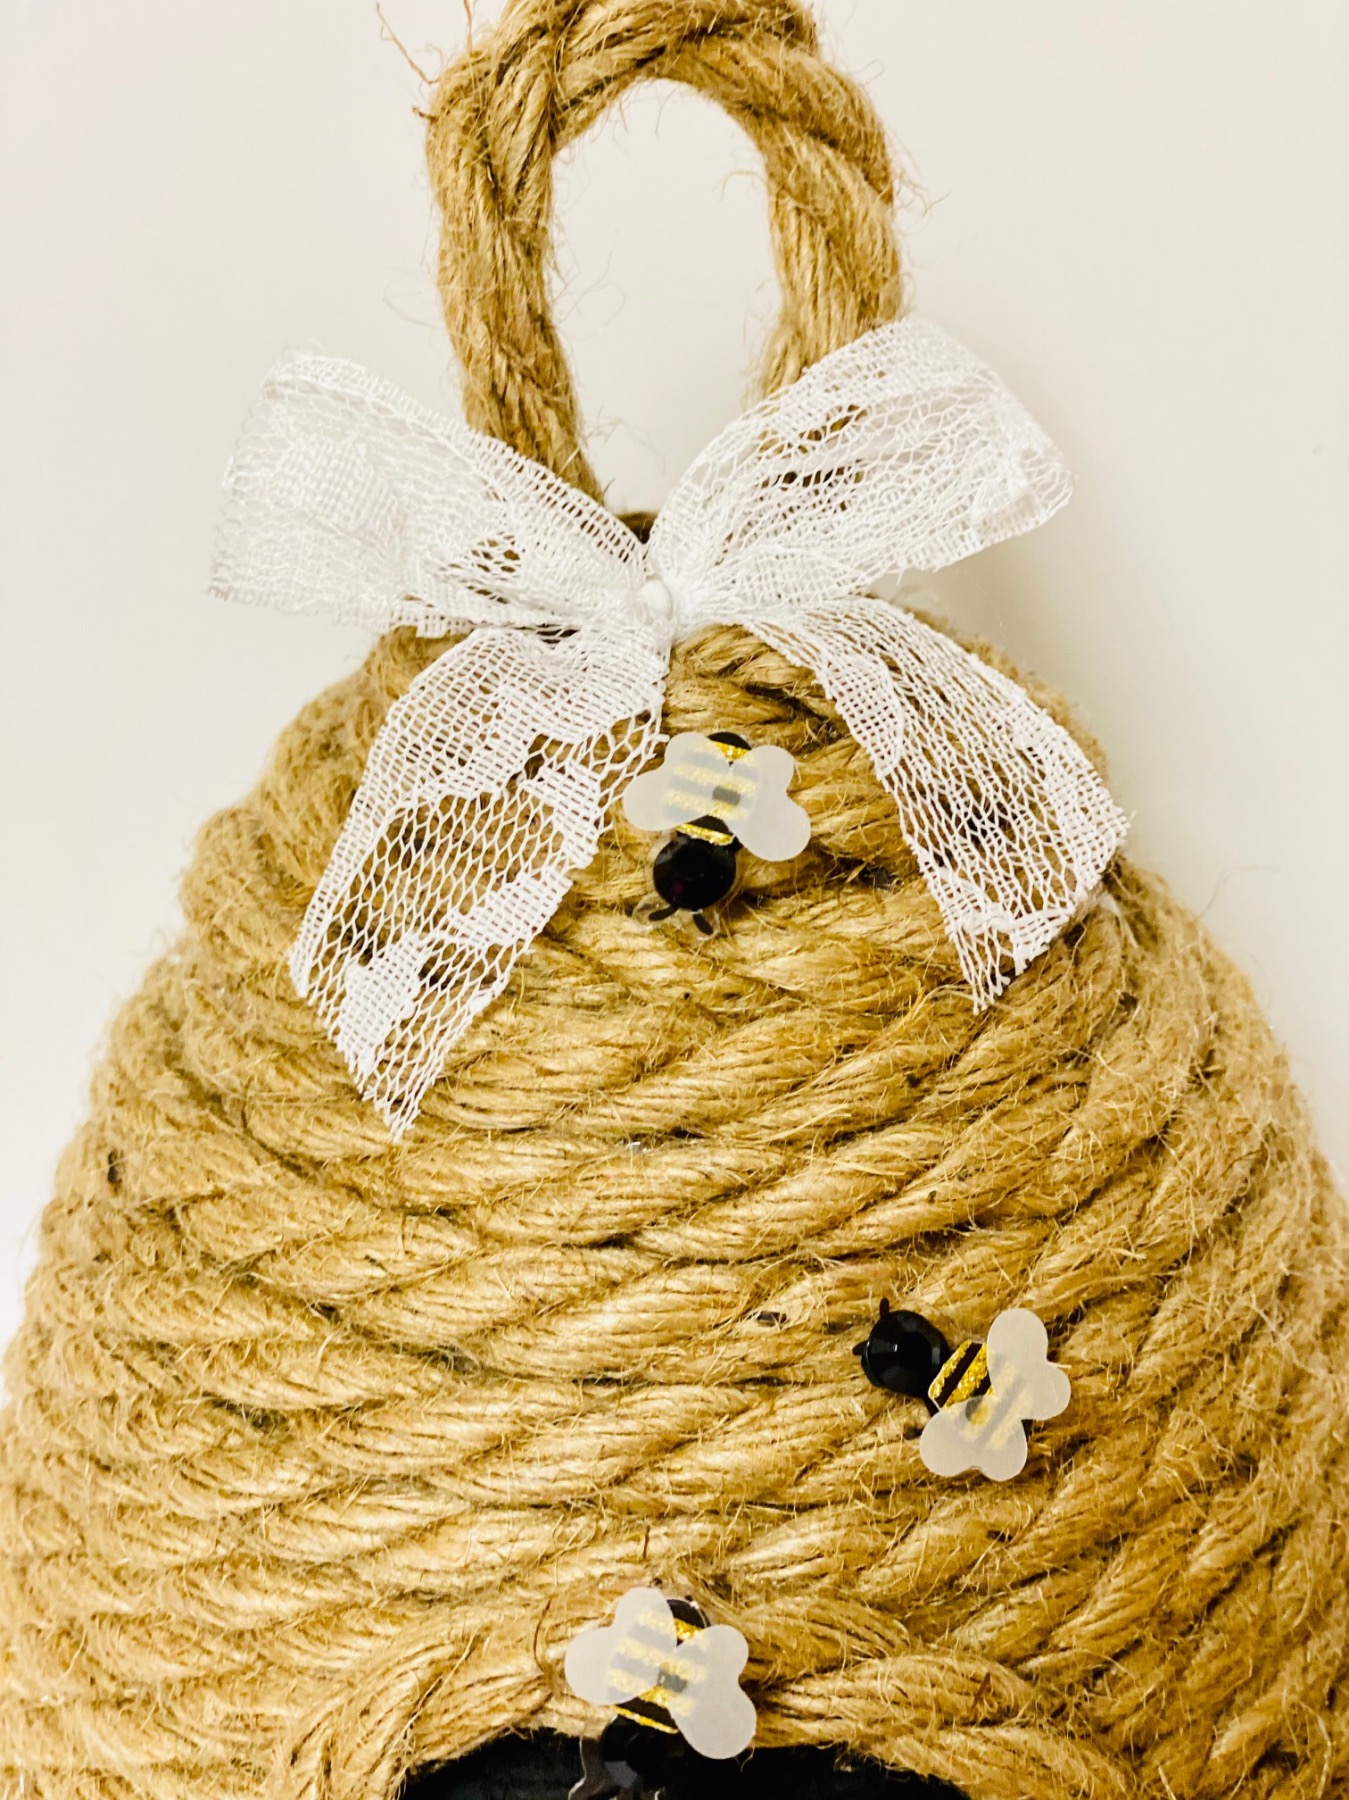
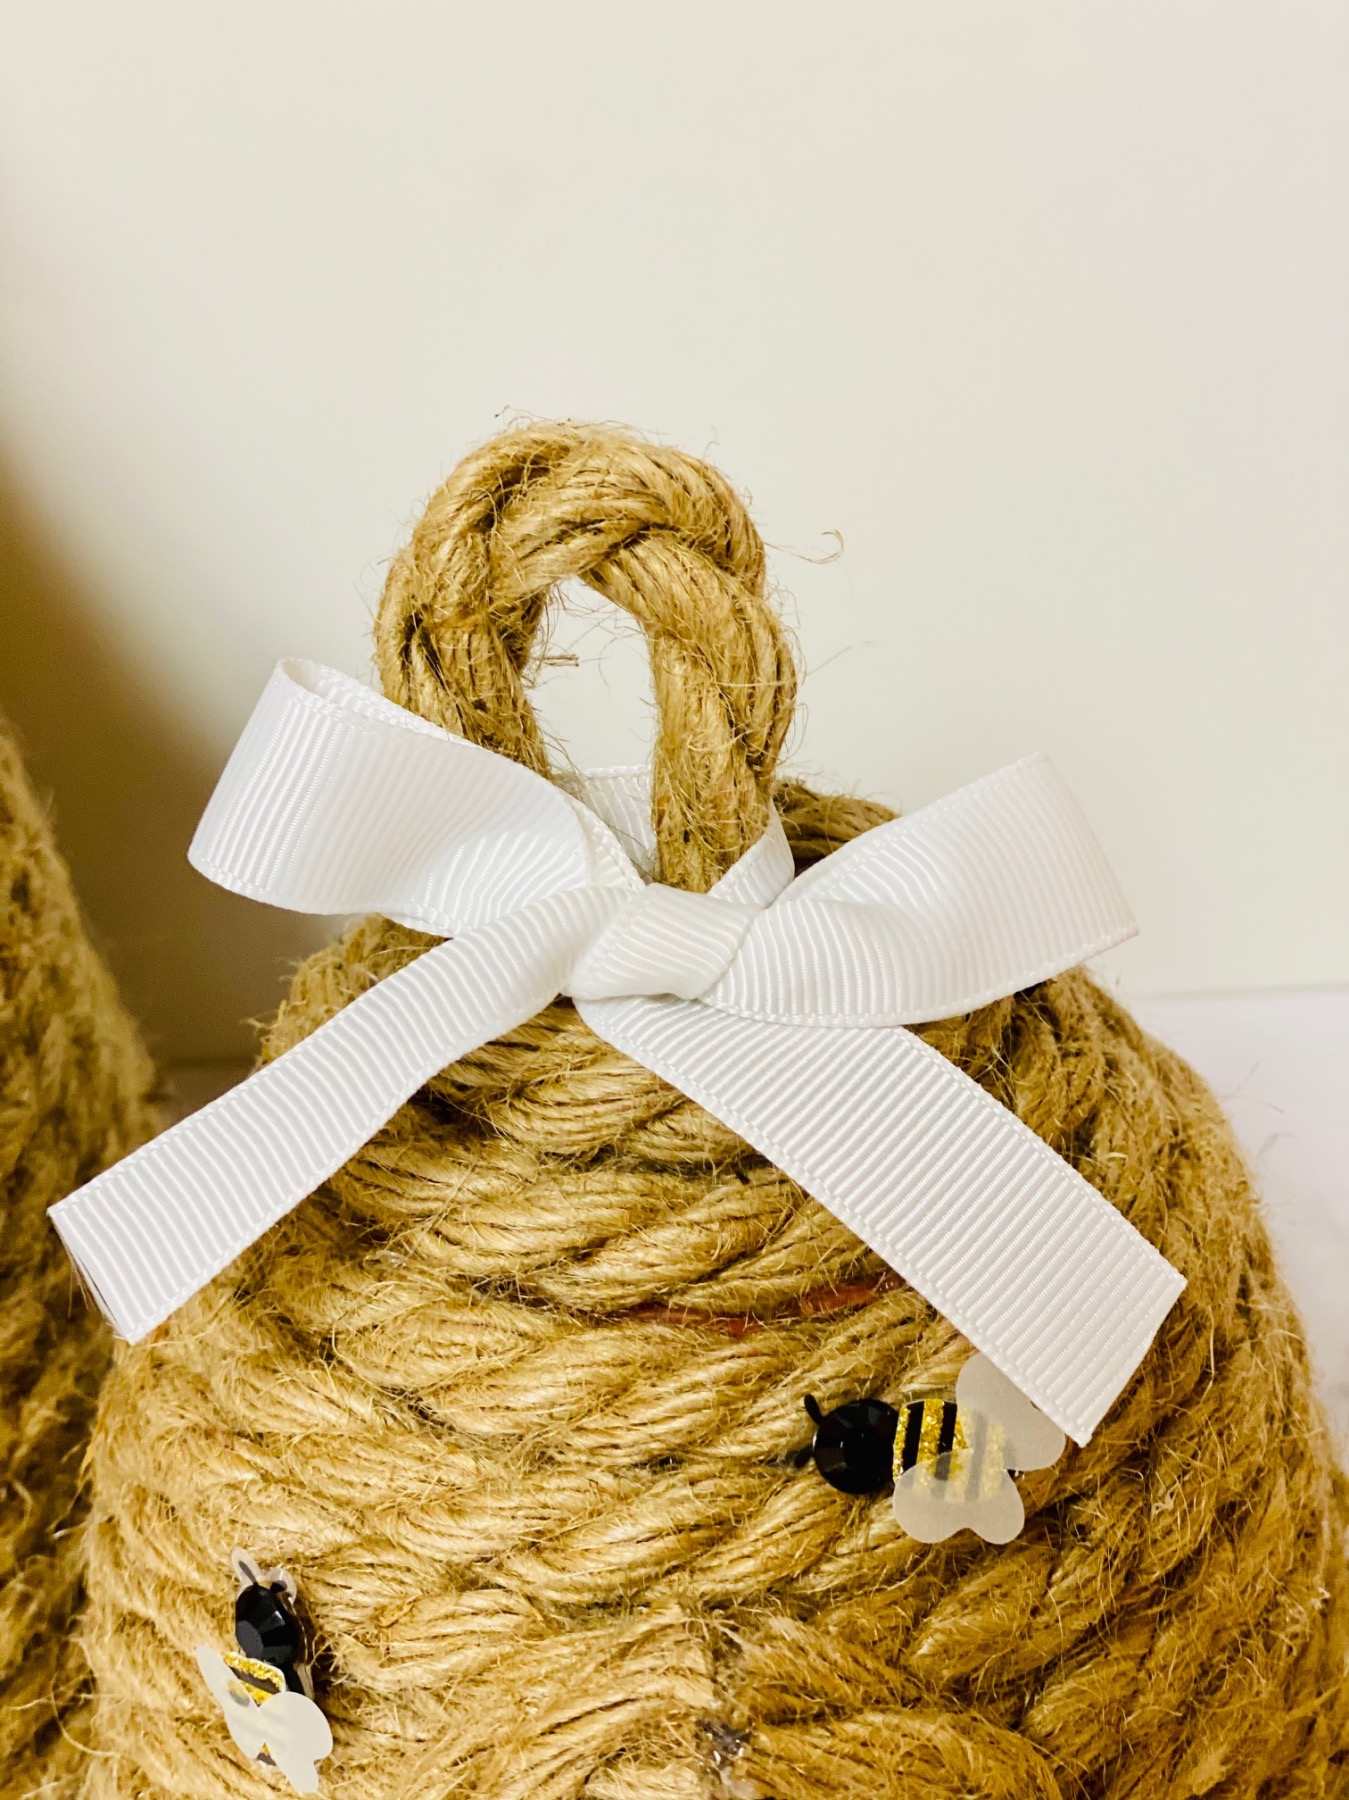
Make a Loop of Rope
Now cut a short length of rope to make a loop at the top. The length of the rope can vary based on the size of the pot. For the small pot I cut about a 4 inch section of the rope and for the large pot I cut a 6-7 inch section of the rope.
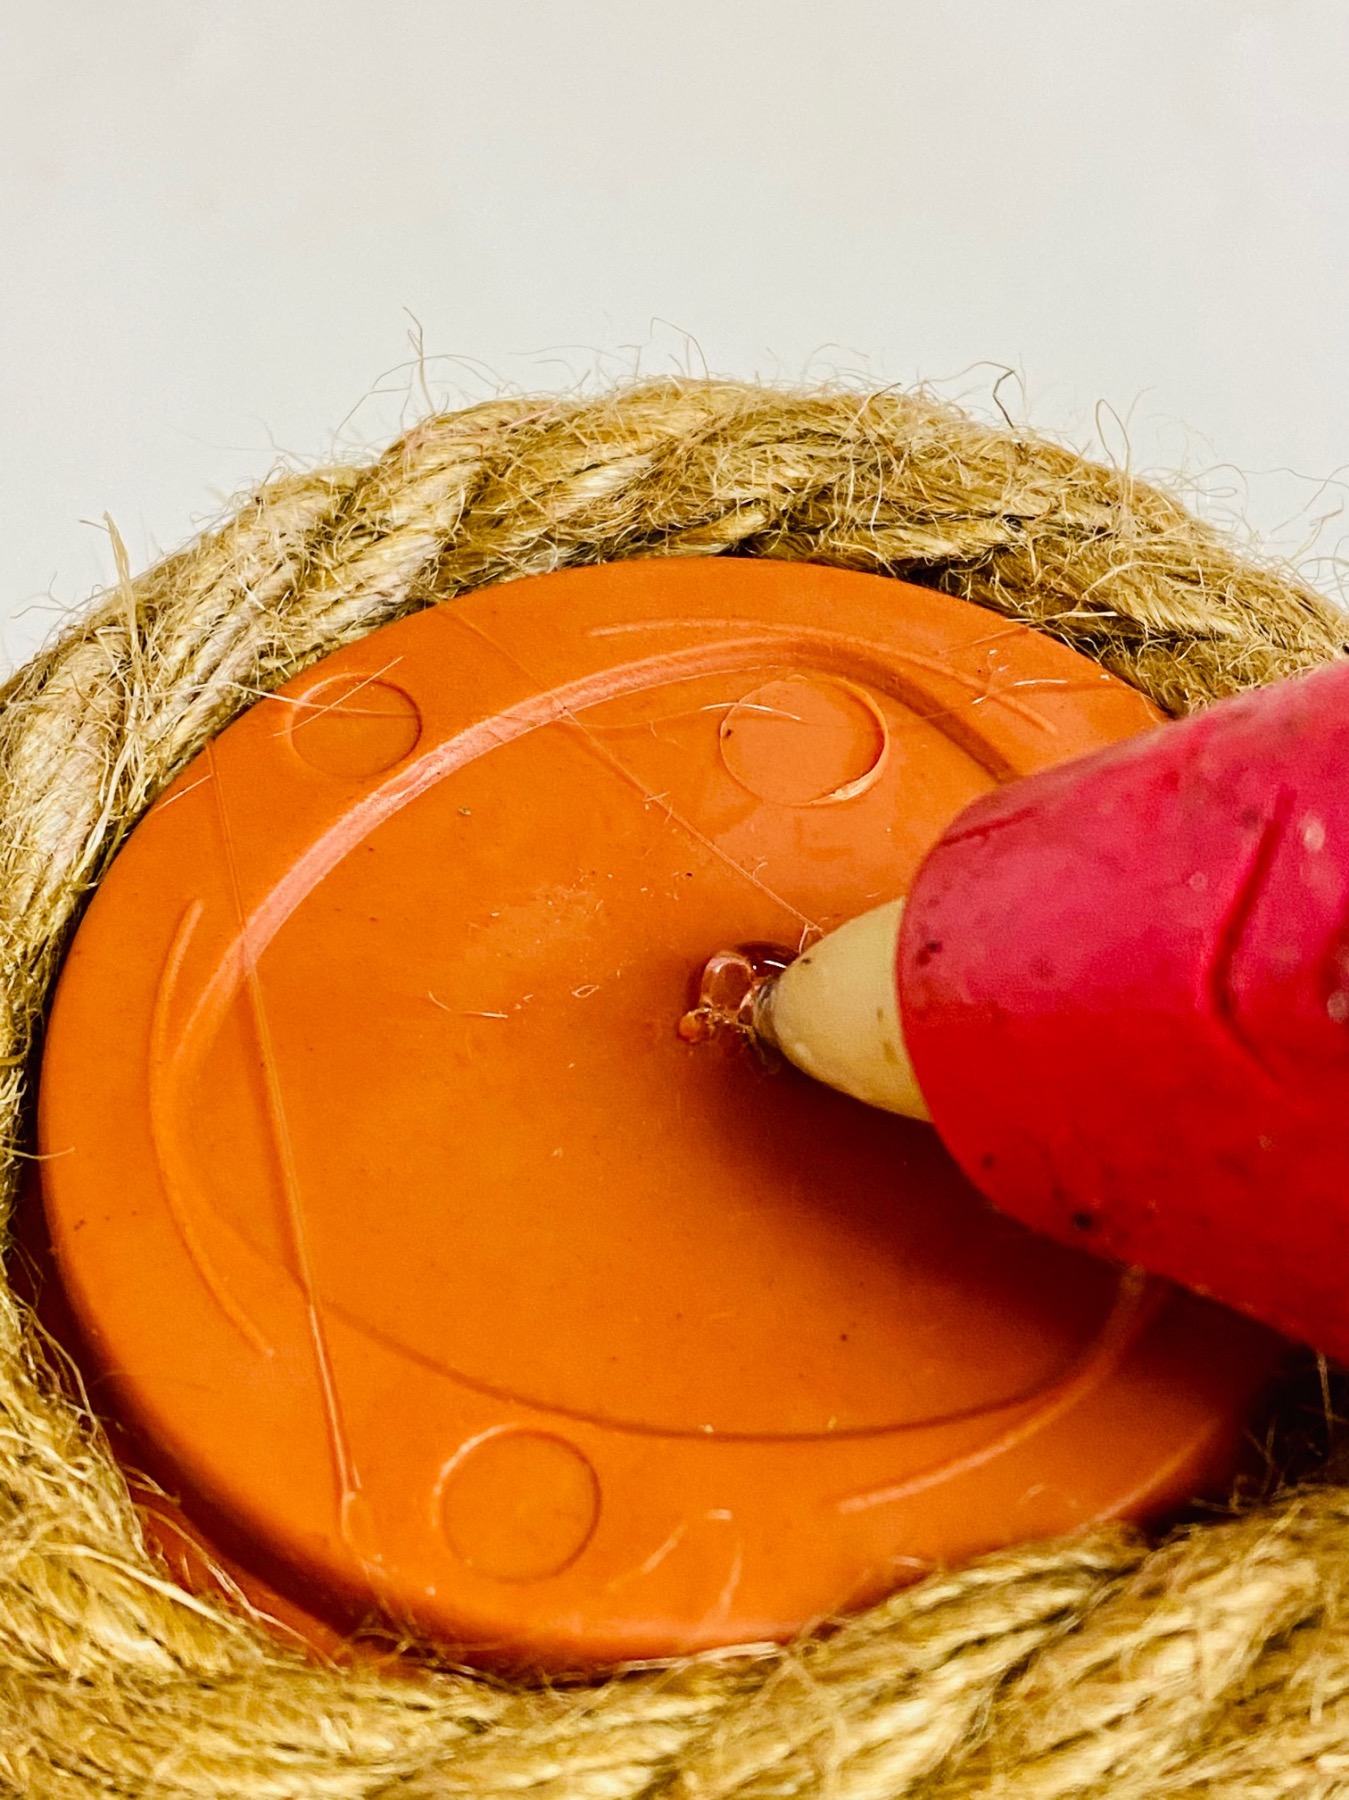
Use the hot glue to attach one end of the rope. Use a good amount of glue (about the size of a quarter) for each end. Hold it in place to let it set and then attach the other end with hot glue.
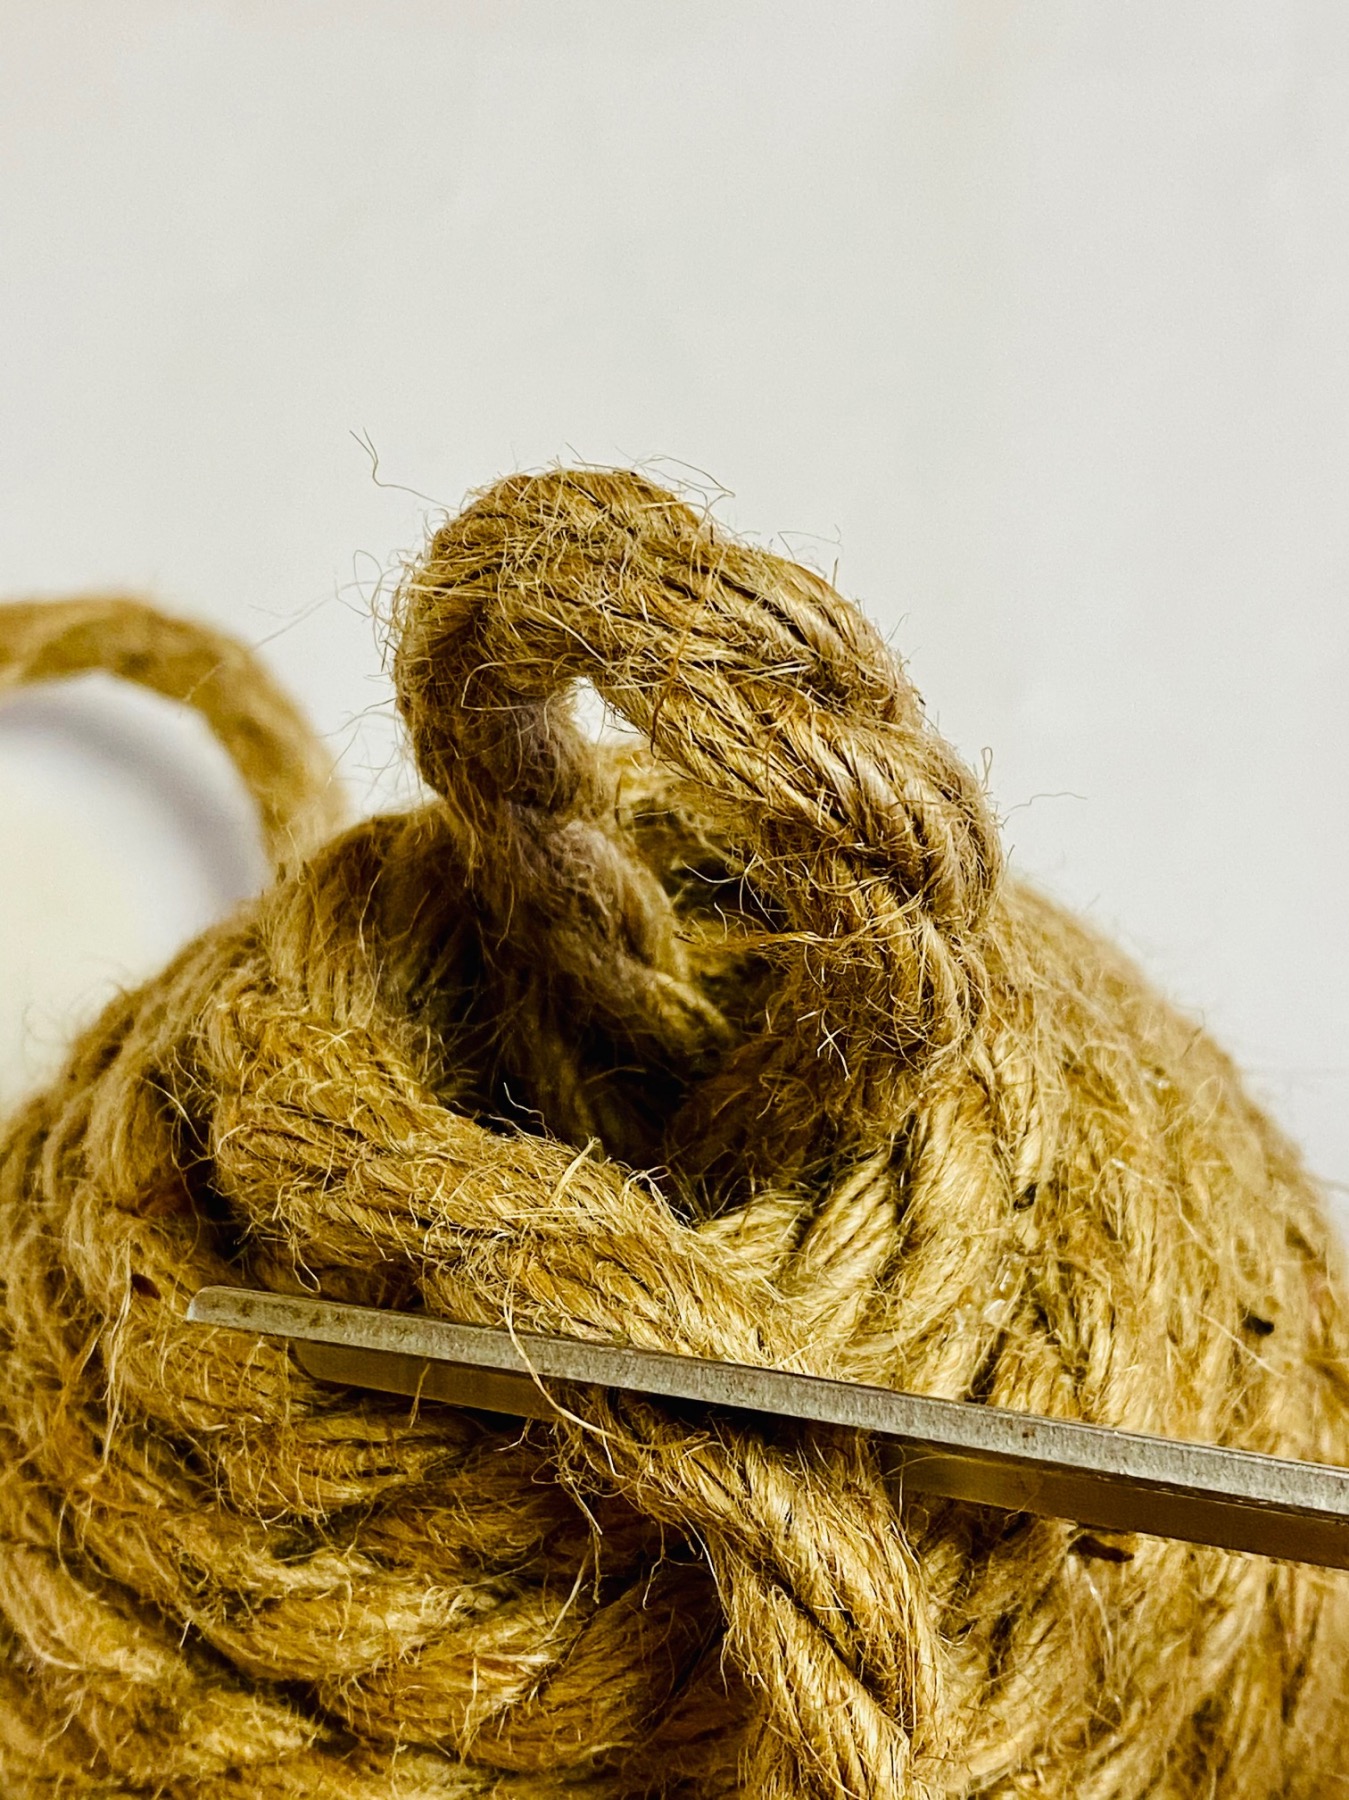
How to Finish the Attaching the Rope
Now that you made your loop, continue attaching rope around the top body of the beehive. Begin again along the top edge where you had previously paused using the same winding motion inward and up to completely cover the planter.
The goal is to cover the ends of the loop, which is why we finish the body last. When you have your top filled in with rope, cut the rope, add a lot of glue to the end, and tuck it into the beehive body to hide it.
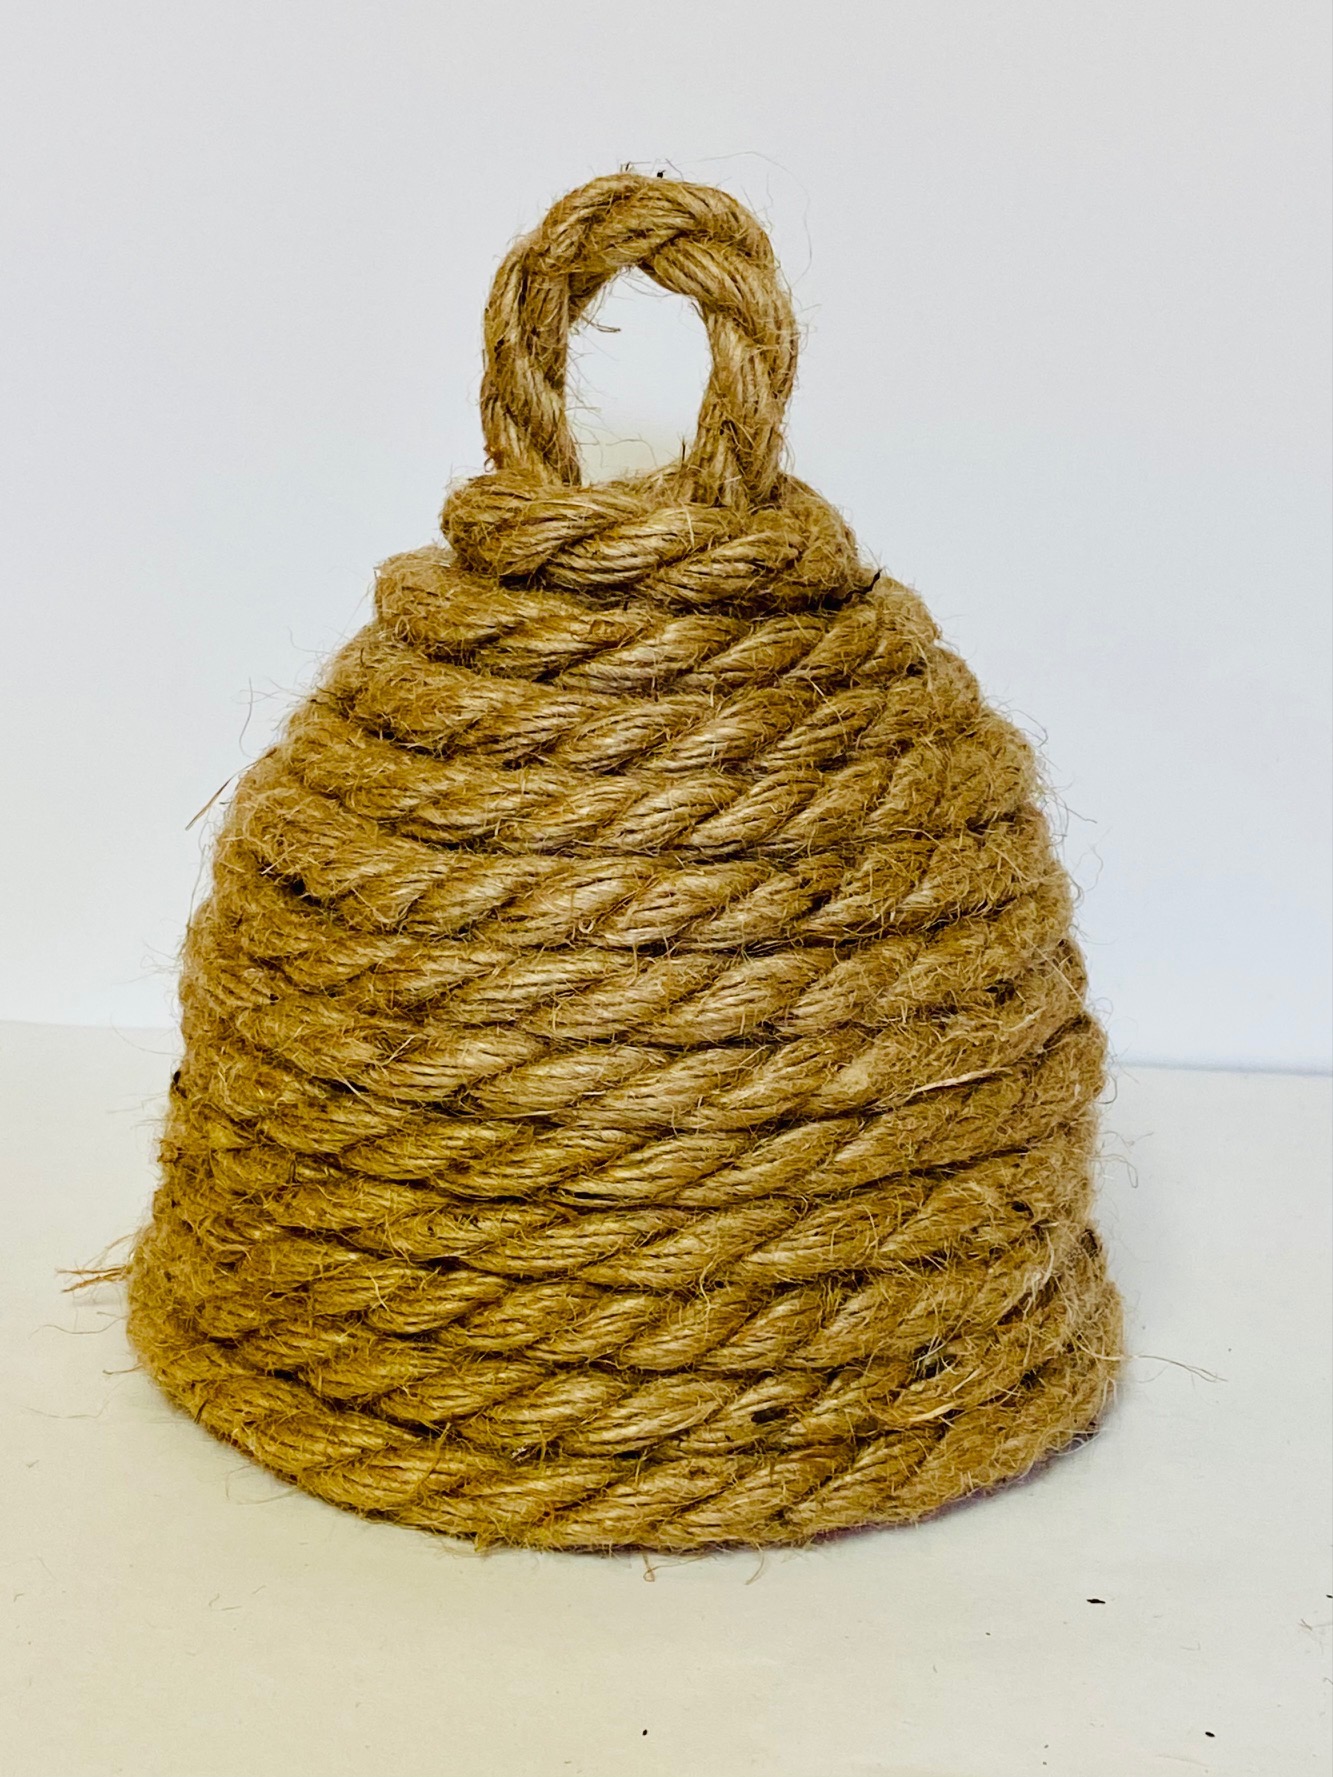
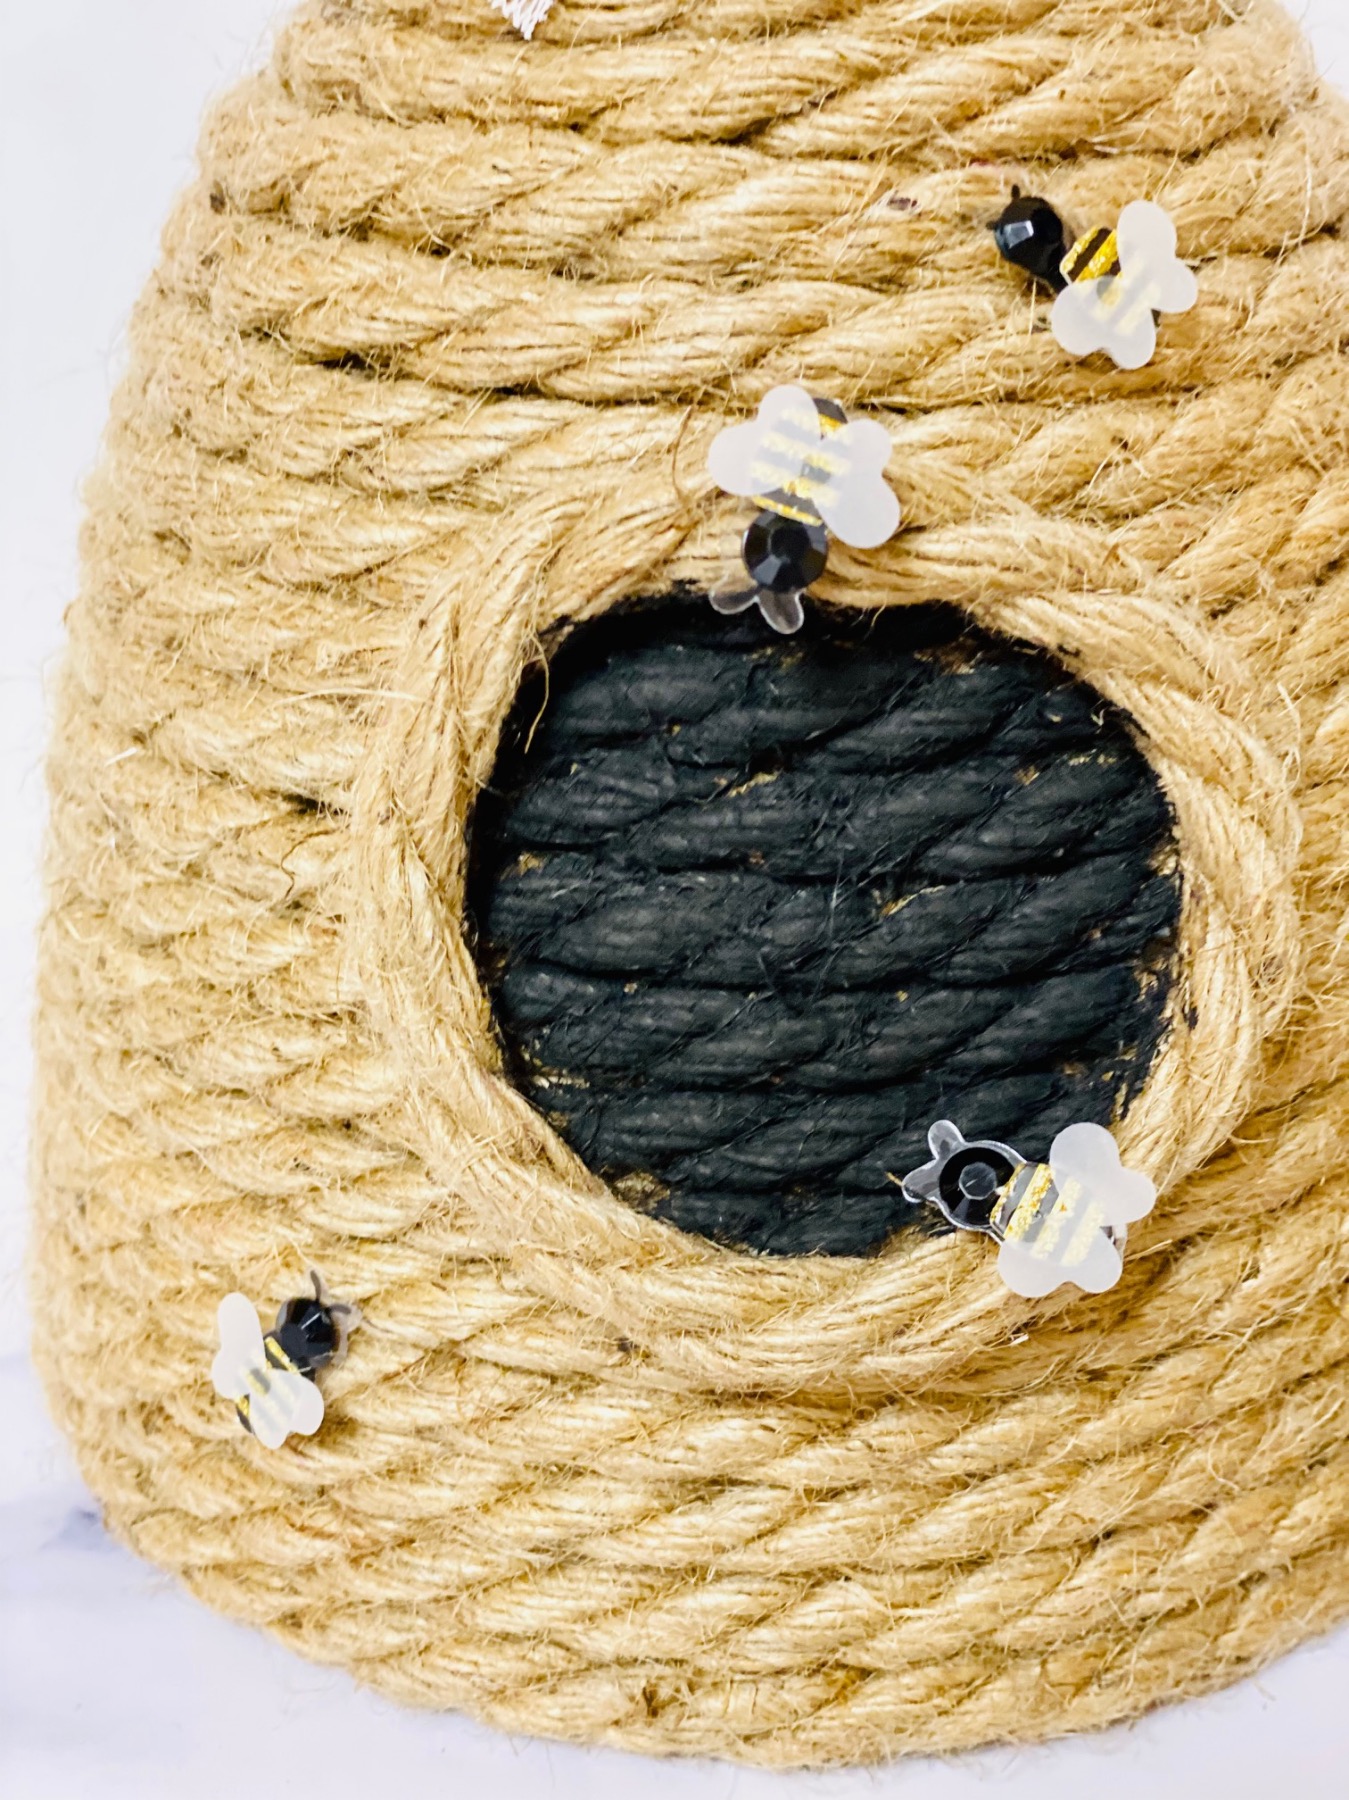
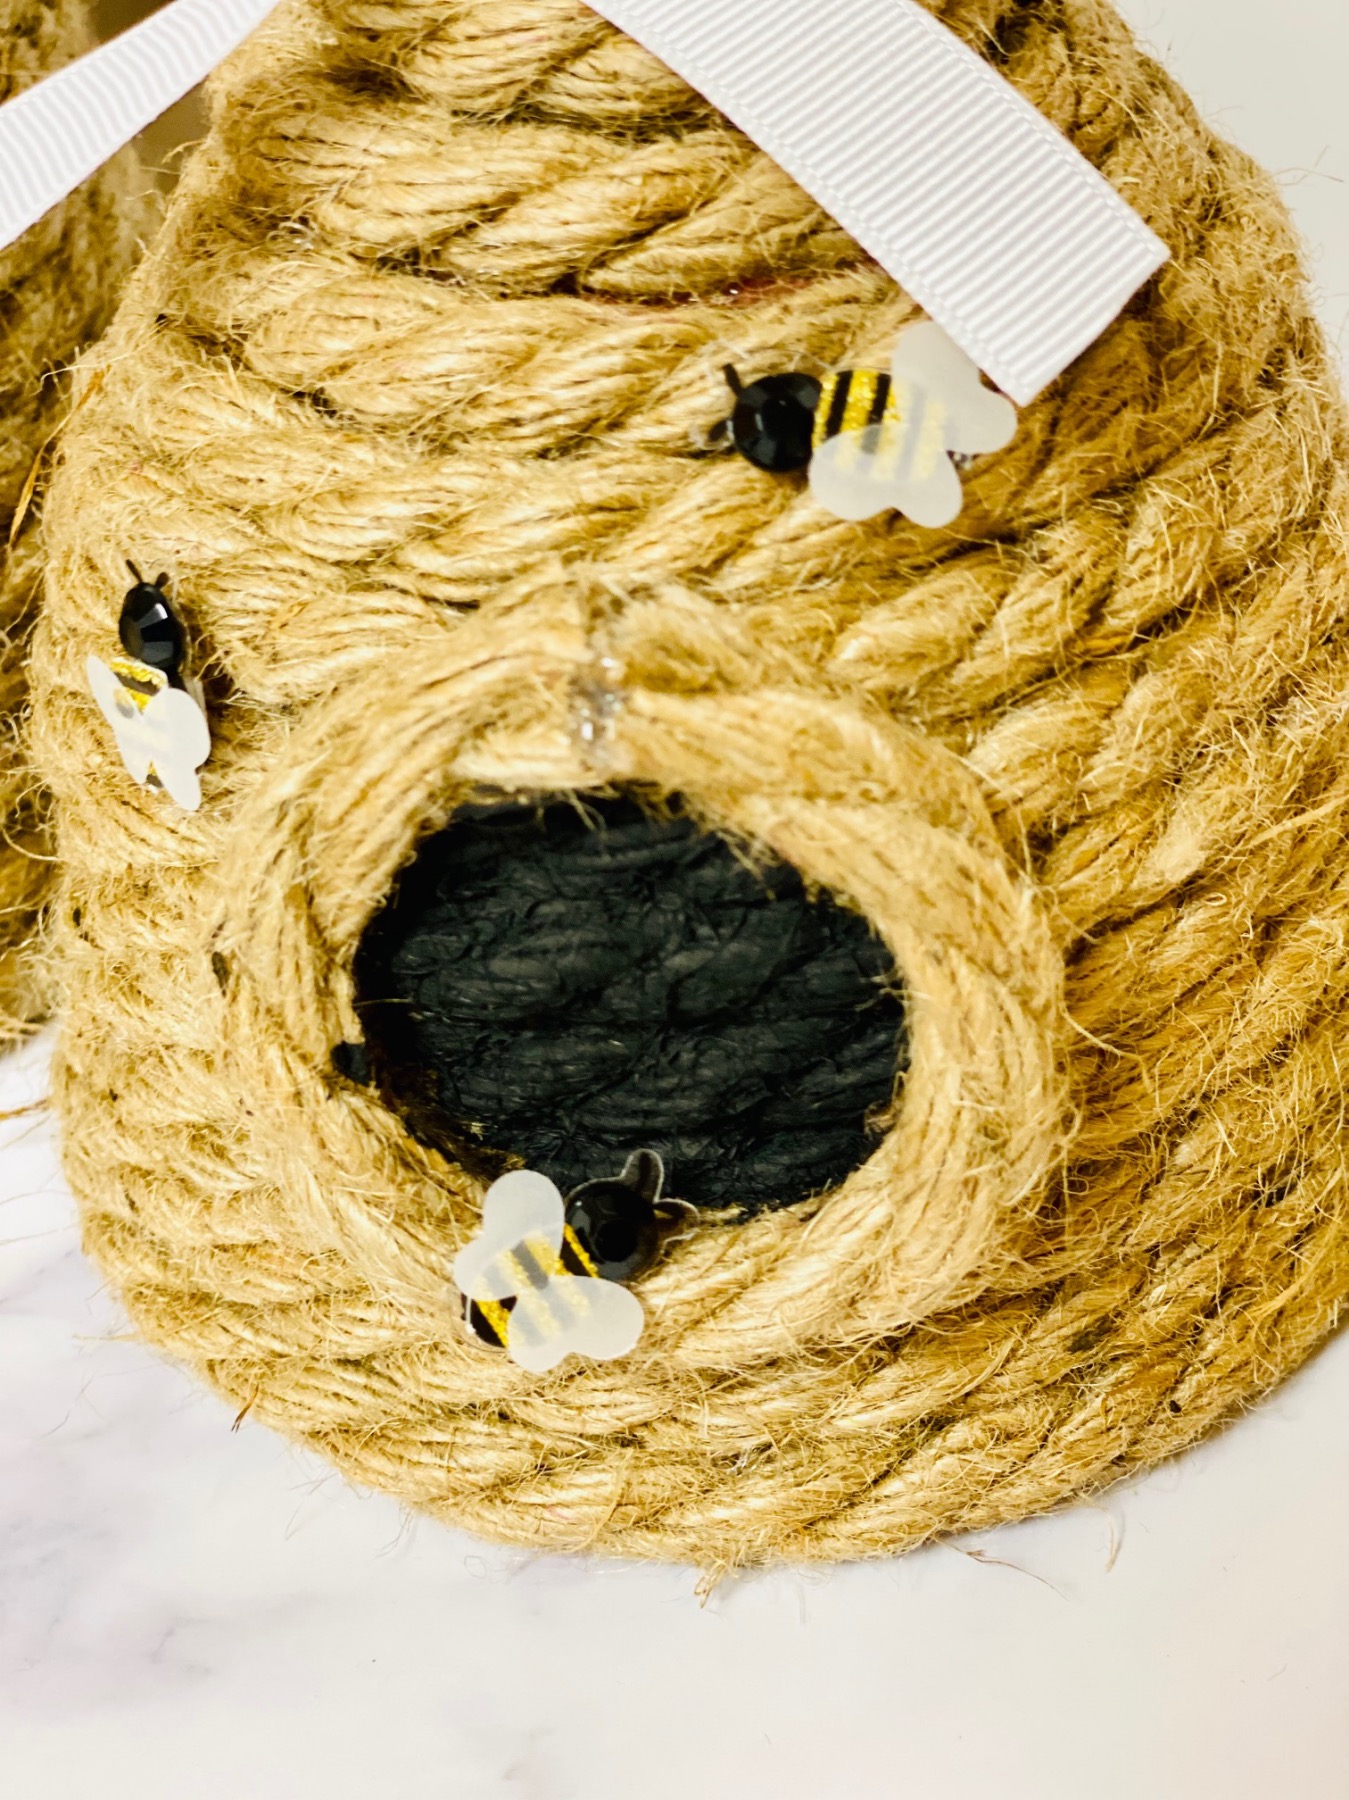
Make the Beehive Hole
To make the beehive opening cut another short length of rope, just like you did for the loop. For the small pot cut a 4-5 inch section and for the large pot a 6-7 inch section.
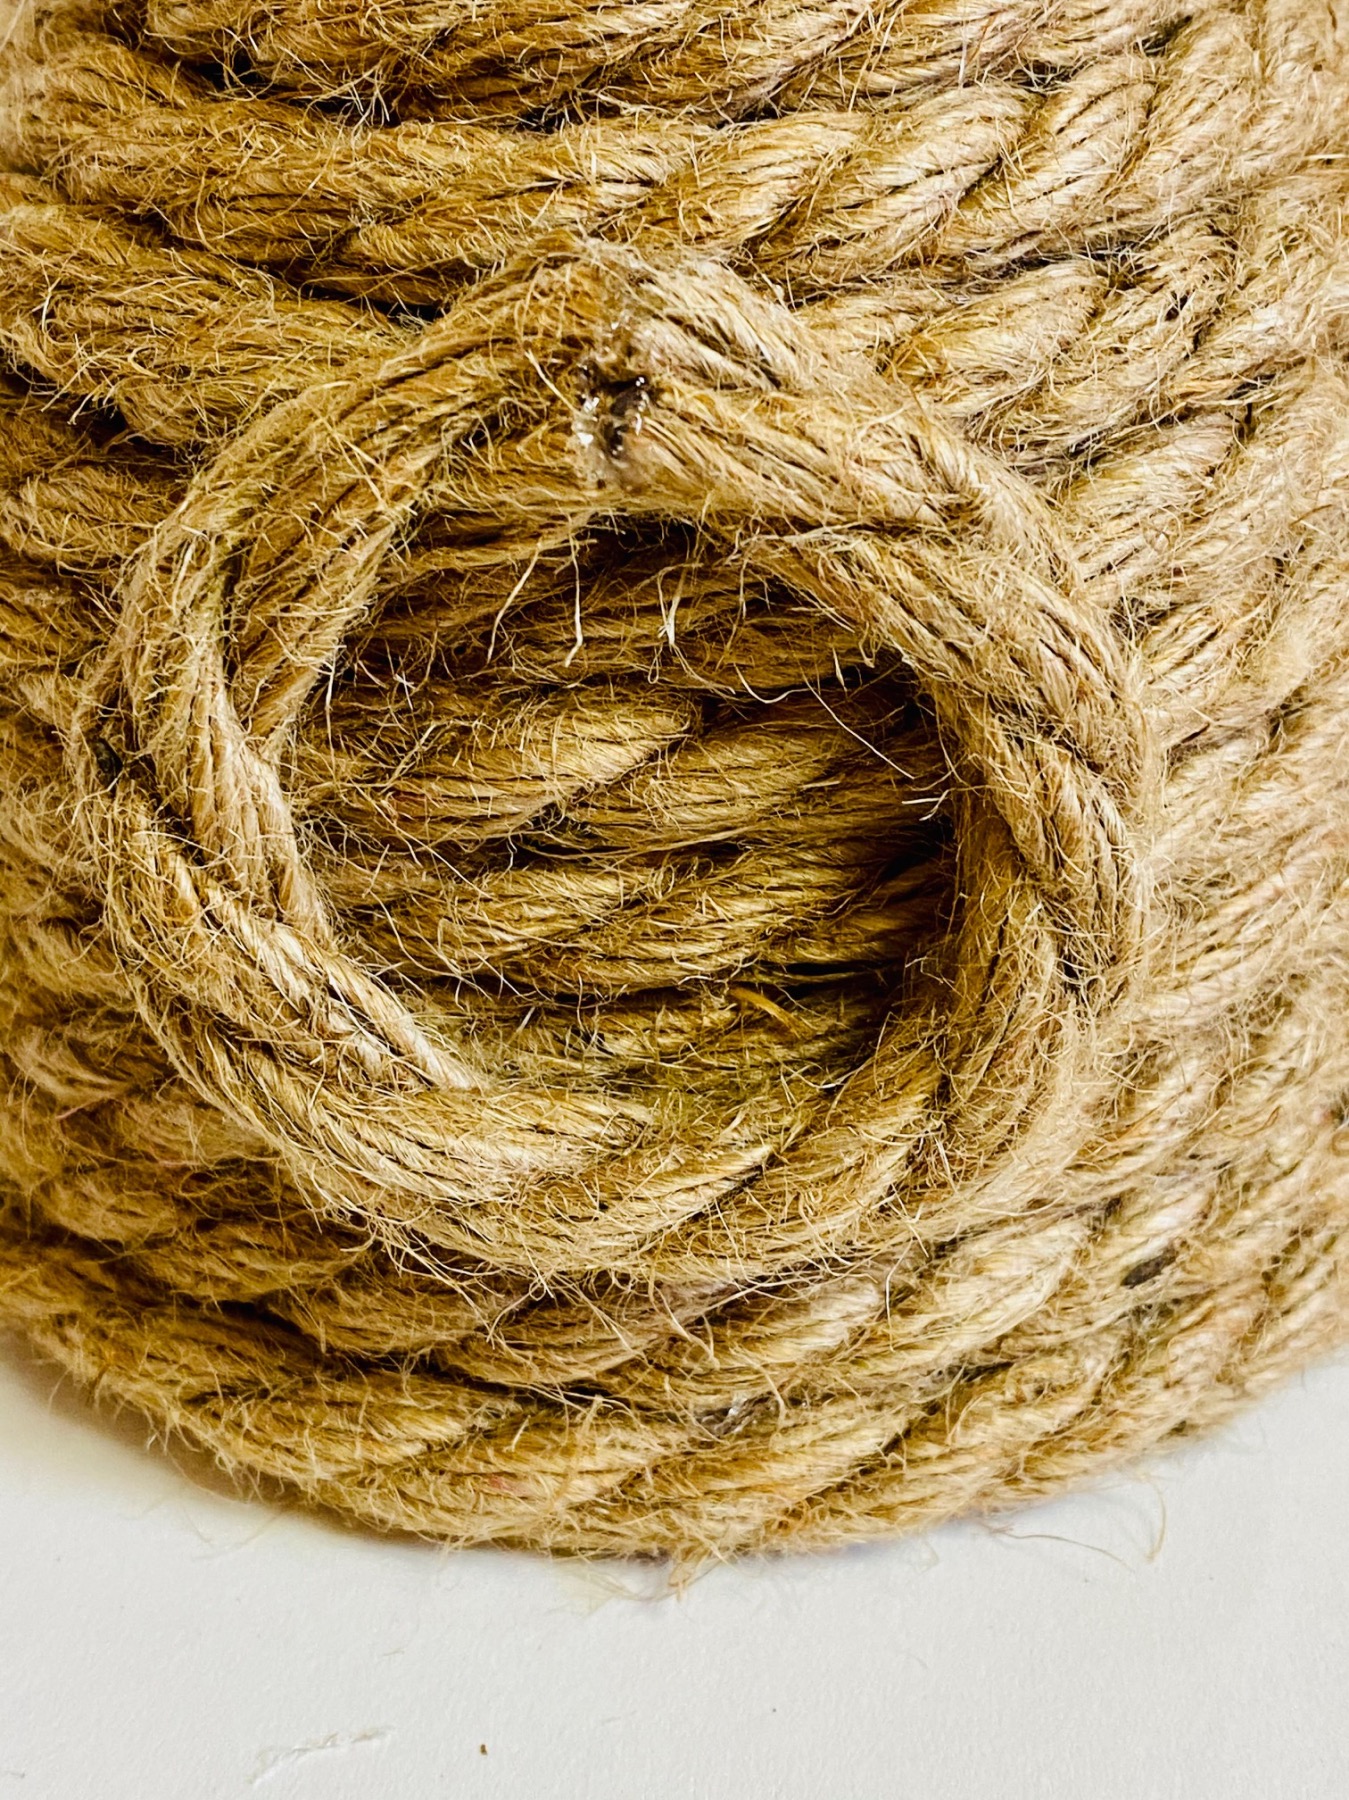
Add glue to the ends of the rope and hold them together until they hold on their own. This will form a small circle. Then attach the circle around the halfway point or slightly lower on the body of the beehive. Apply glue to the backside of the rope and hold it in place for a few seconds.

If you haven’t already, repeat everything you have done so far to make your 2nd pot! It really makes a cute pair when one is a little bigger than the other.
Before you begin to painting, give your rope a gentle tug to make sure all the pieces are held firmly in place. Add any additional glue as necessary, but be careful to keep the glue from showing as best you can.
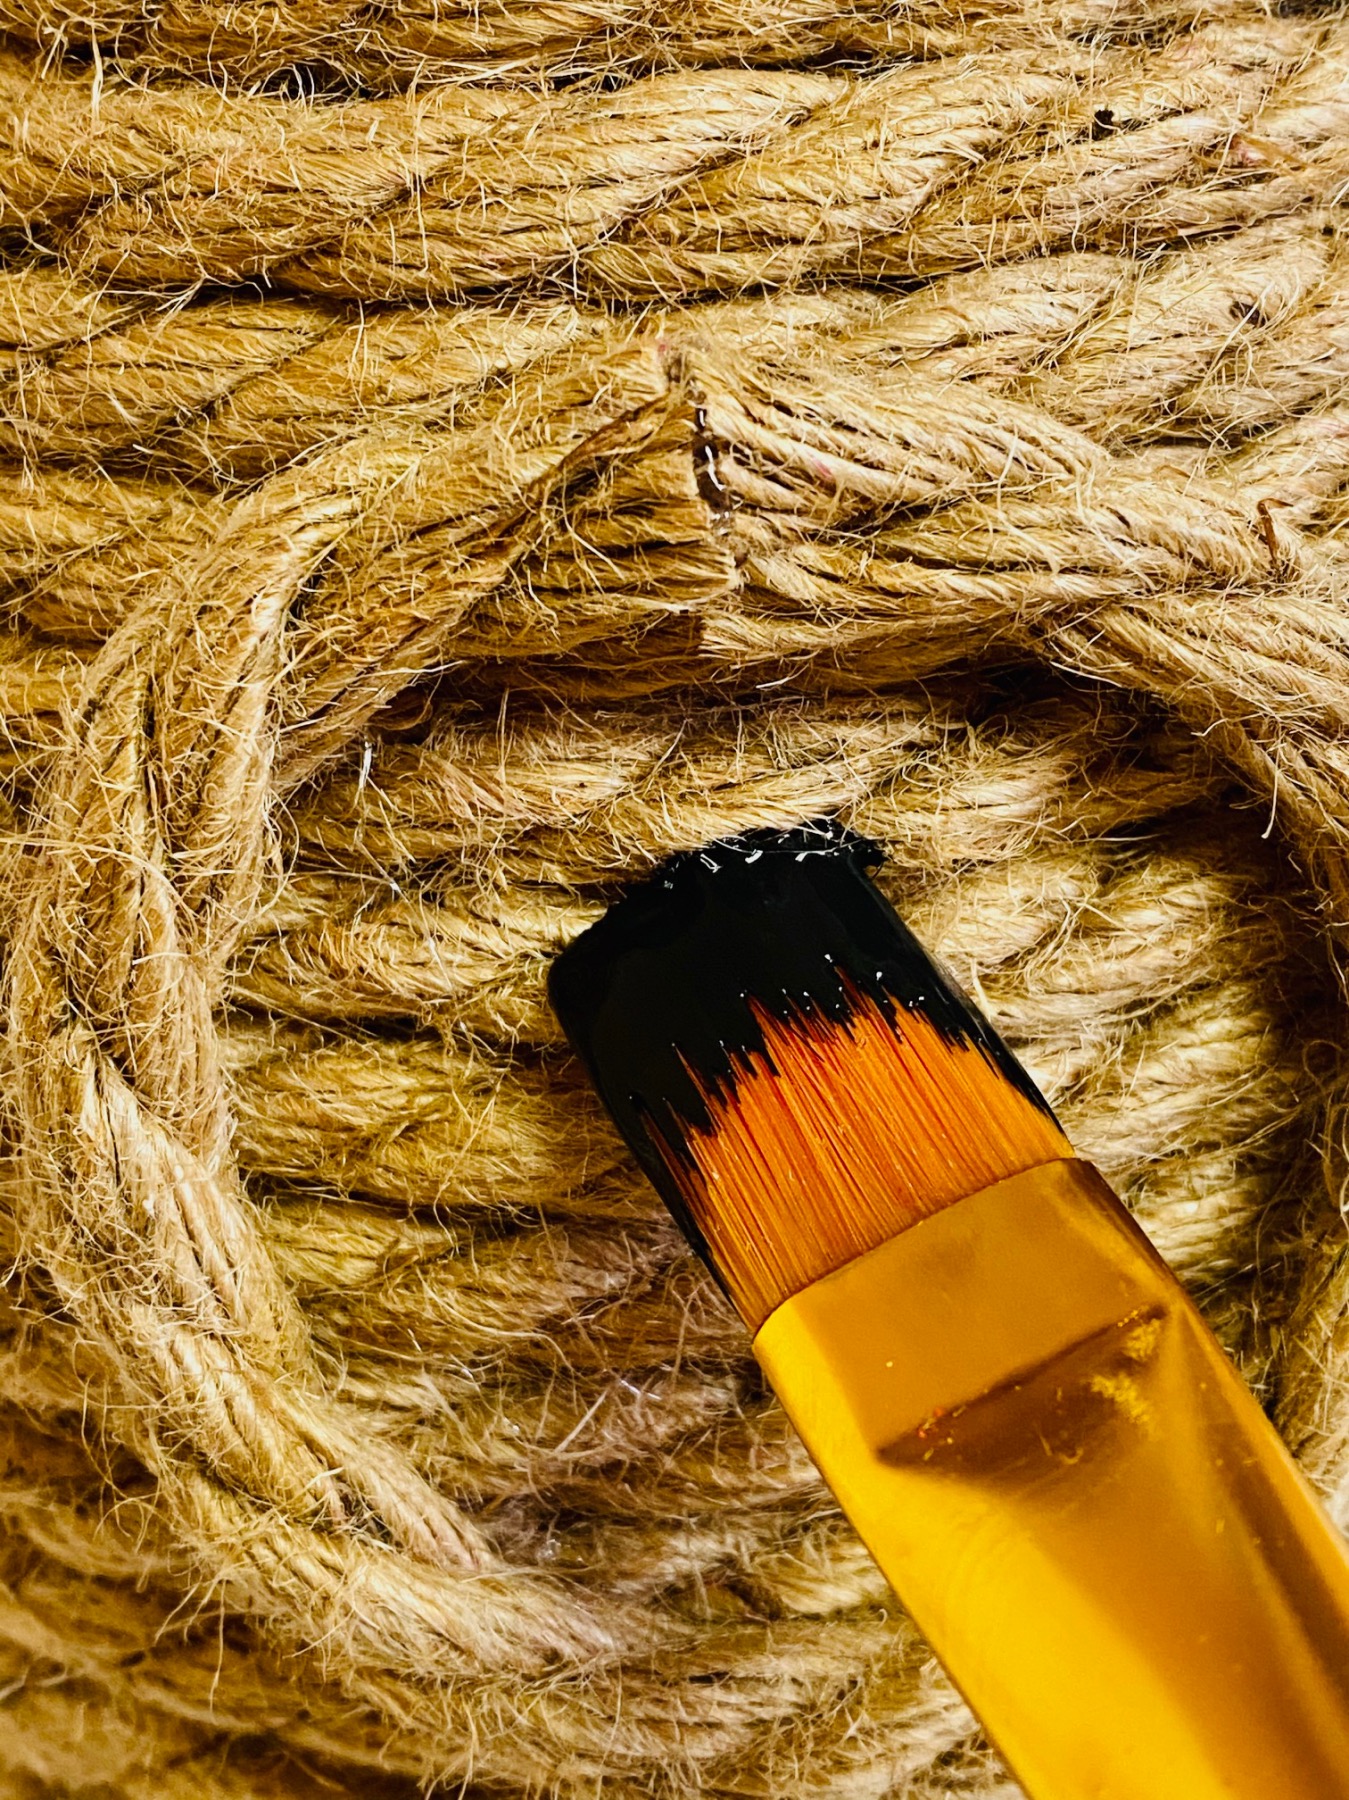

Paint the Beehive Opening
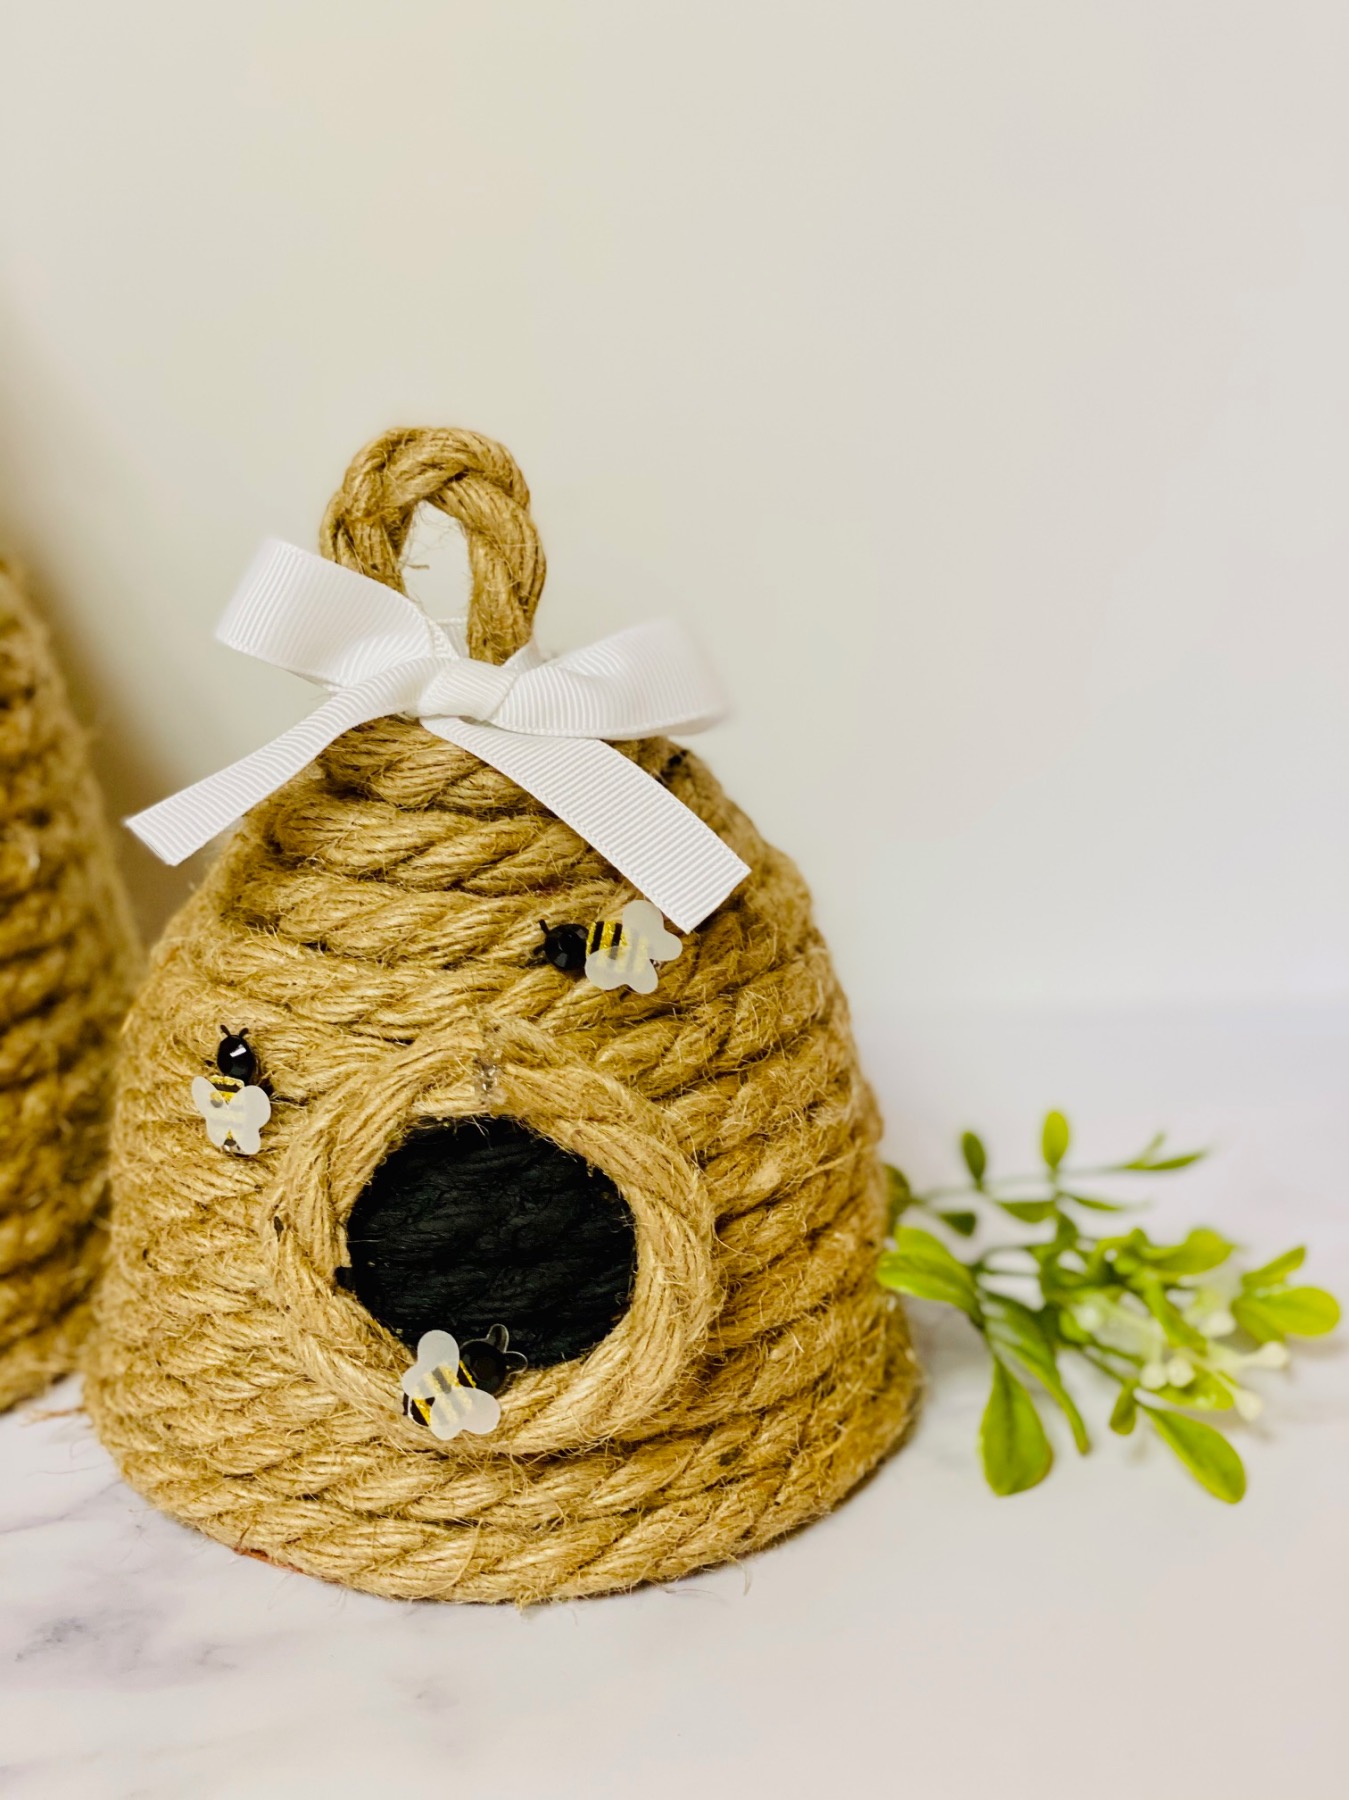
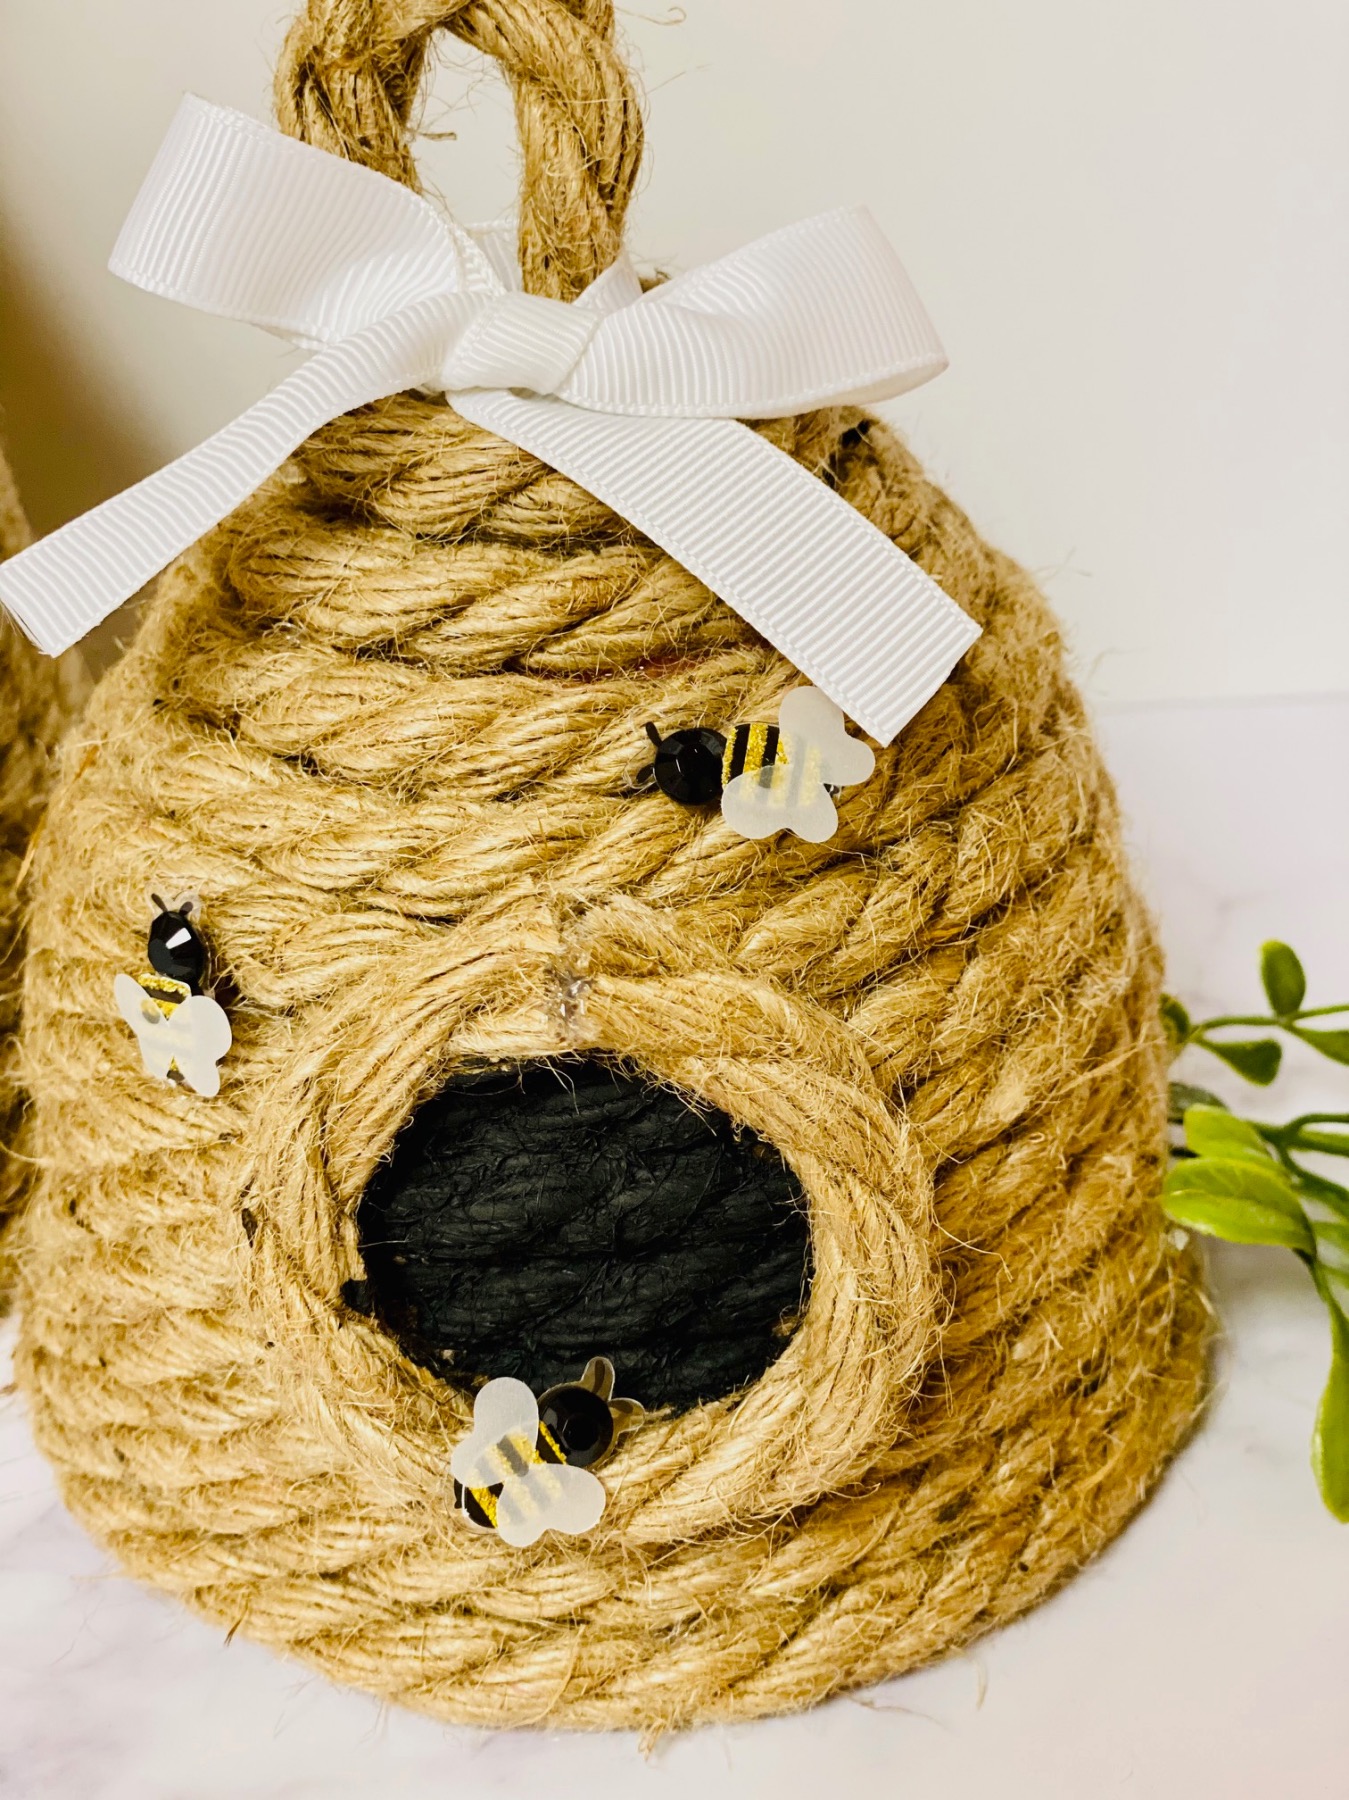
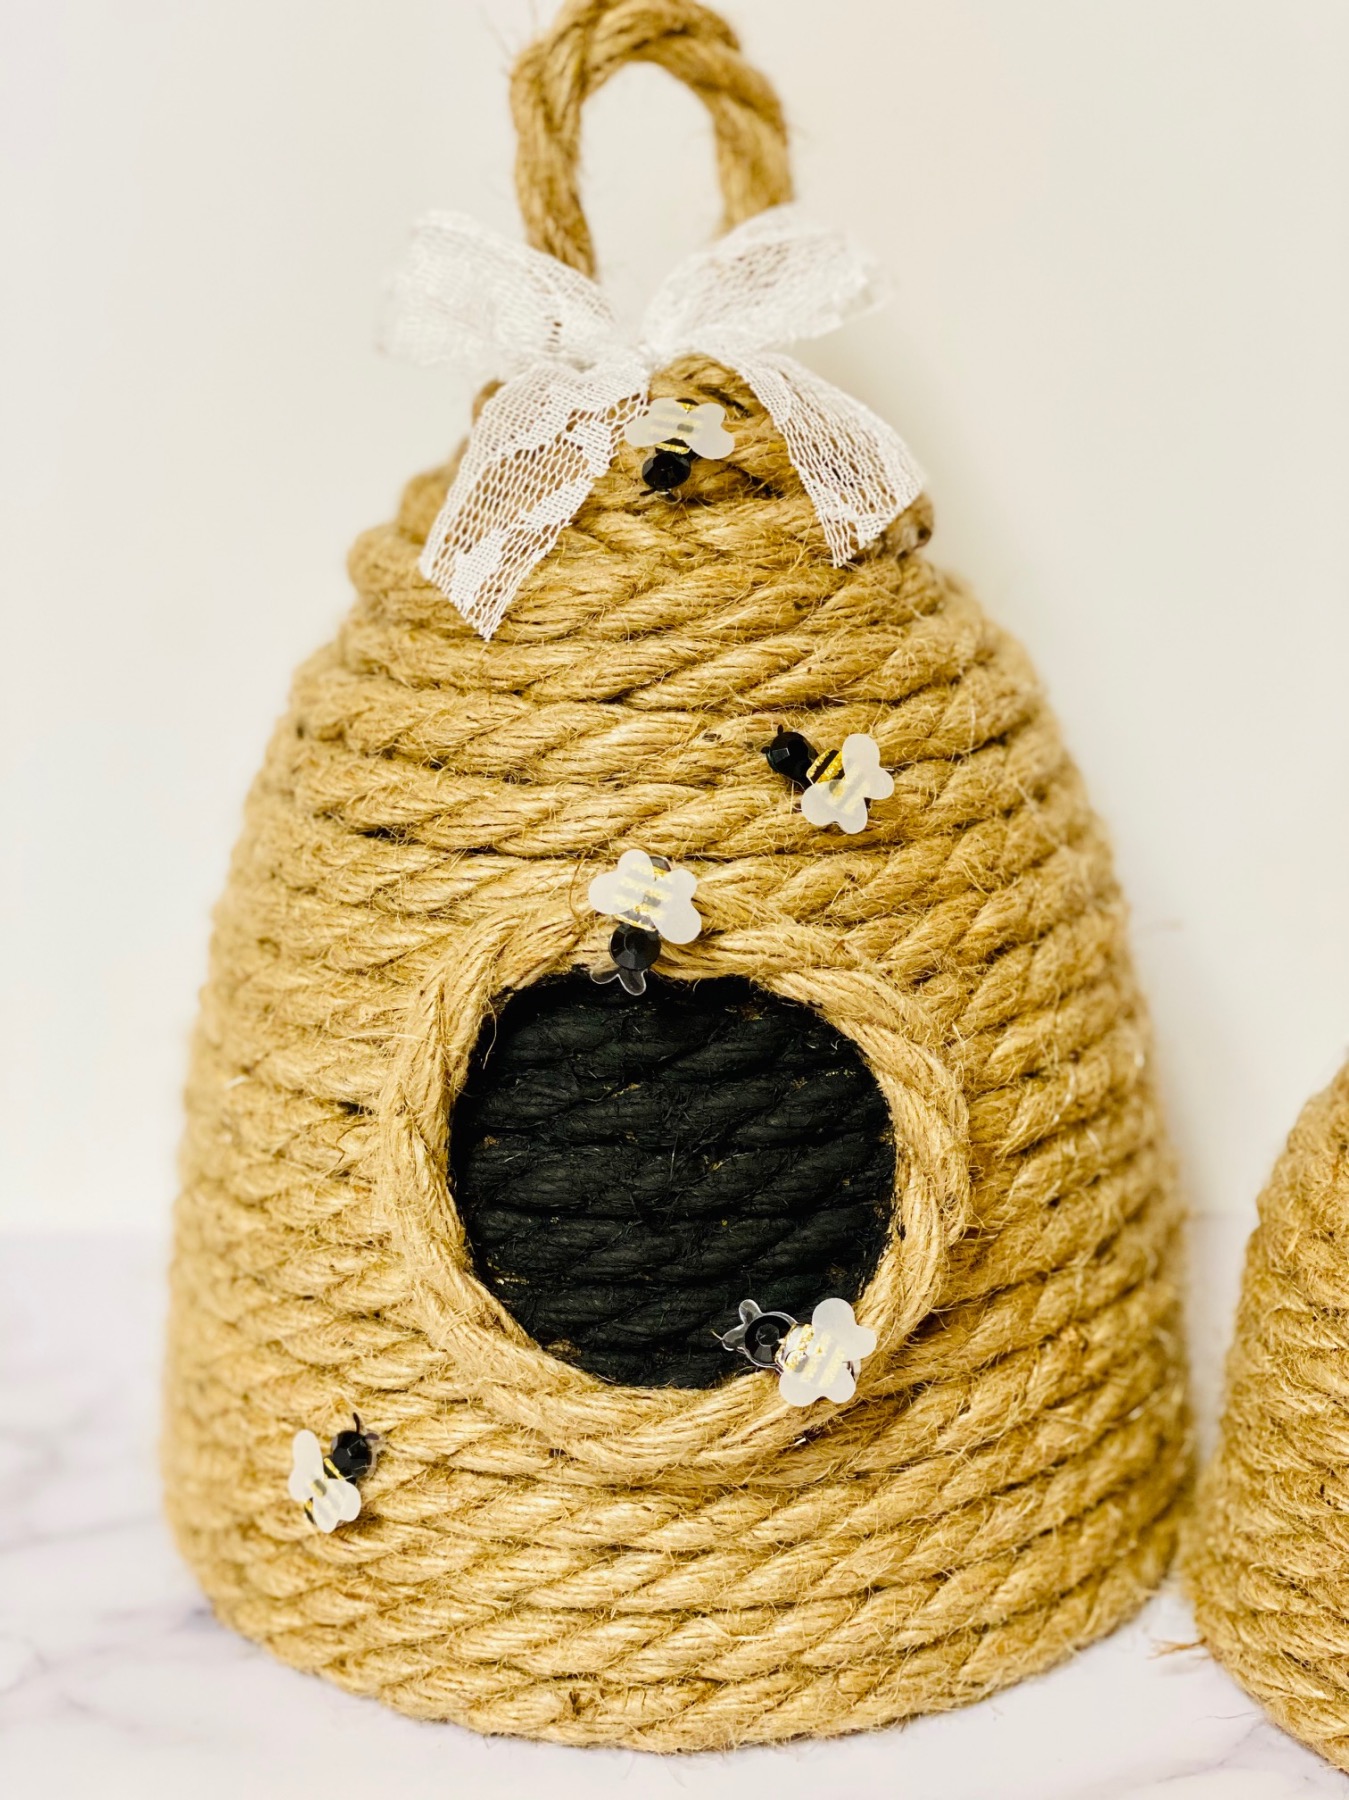
Once your rope is completely attached, paint inside your circle of rope for the opening to make it look like an entrance.
Chalkboard paint is best but any kind of paint will work. Chalkboard paint has a lovely matte finish which is why it’s perfect for this project.
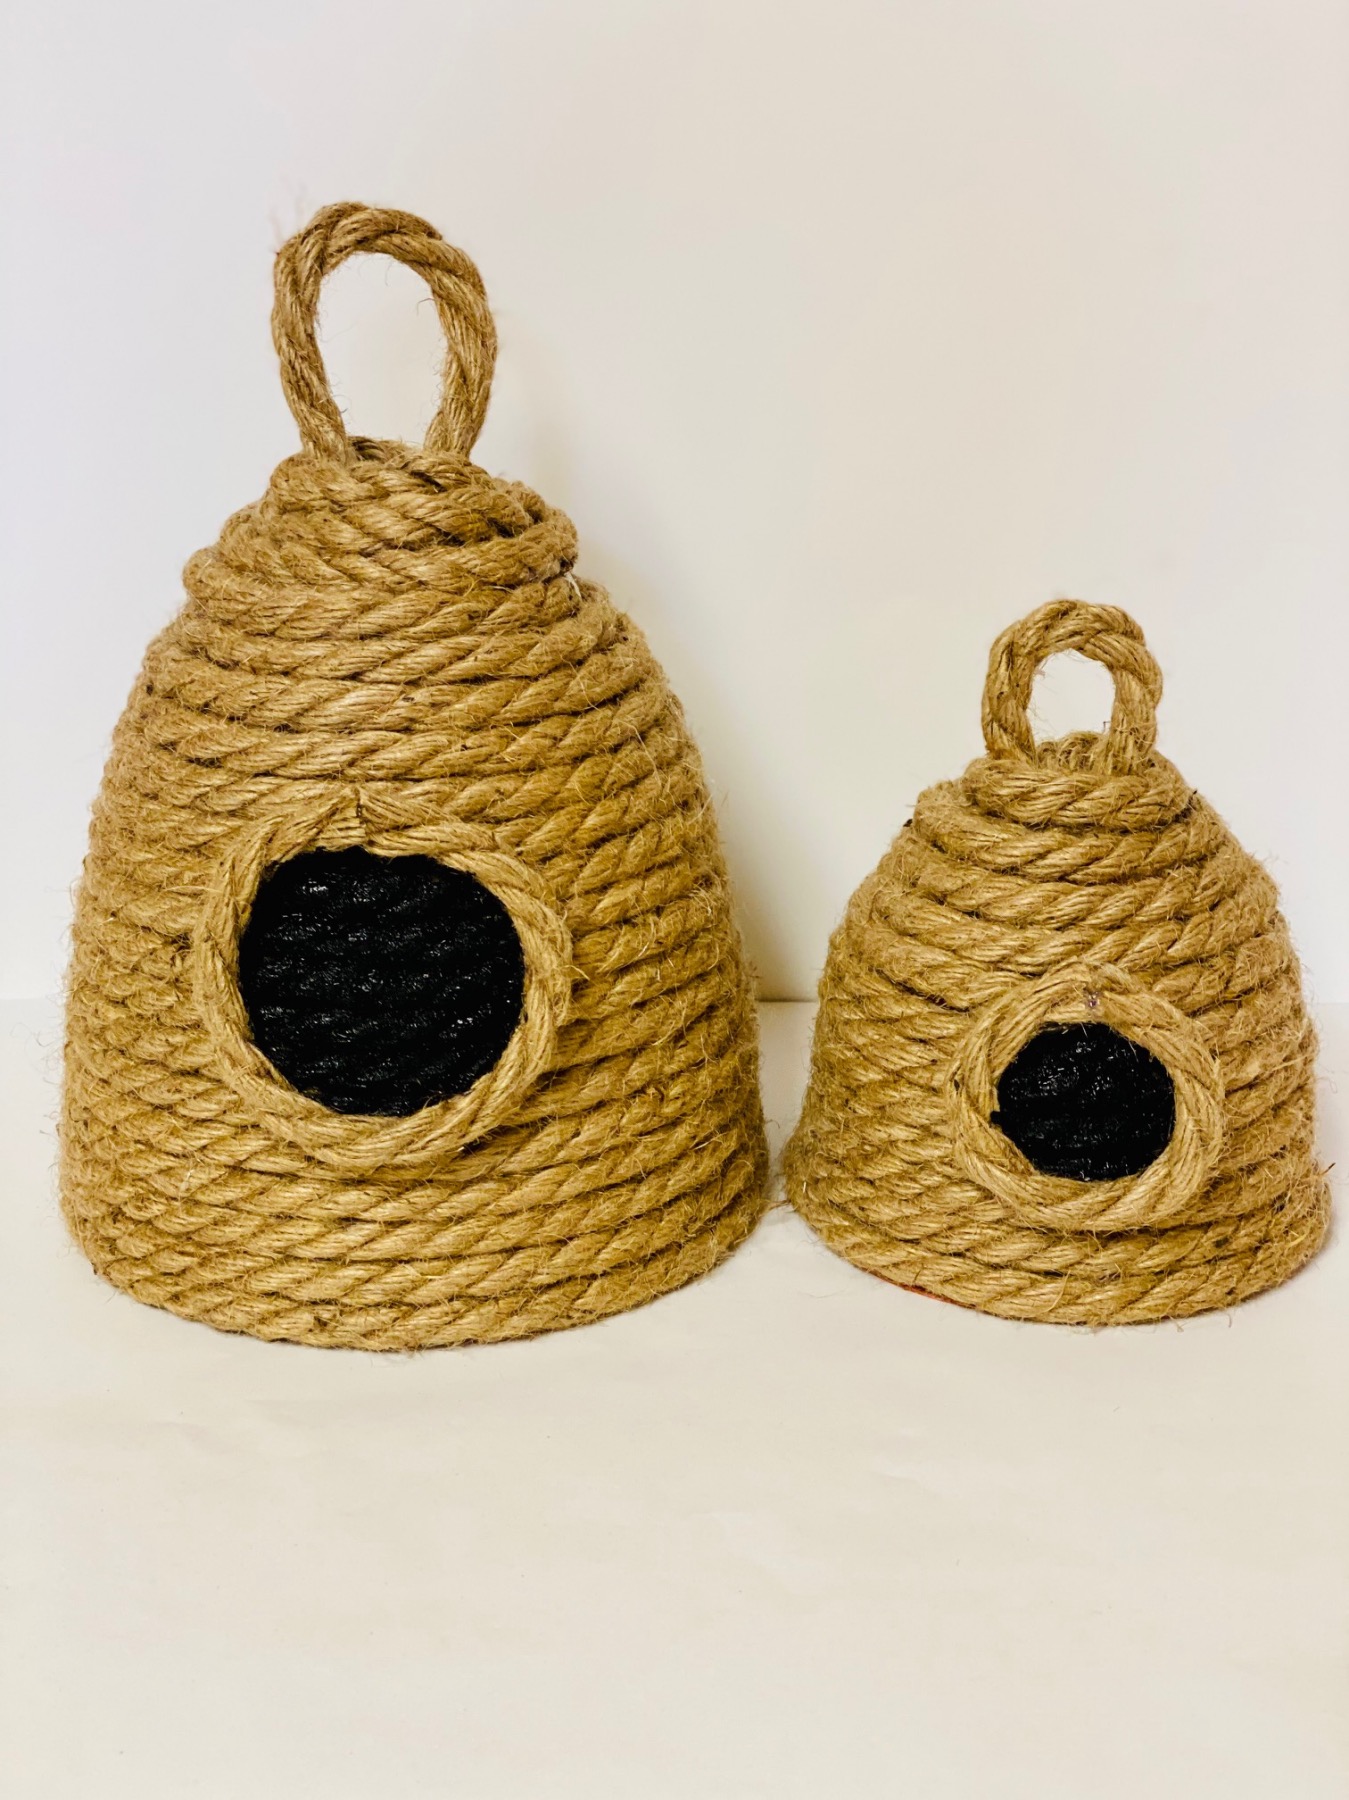
I used 2 coats of paint. Chalkboard paint dries quickly, but let the 1st coat rest and dry before adding the 2nd coat.
How to Finish the Beehive
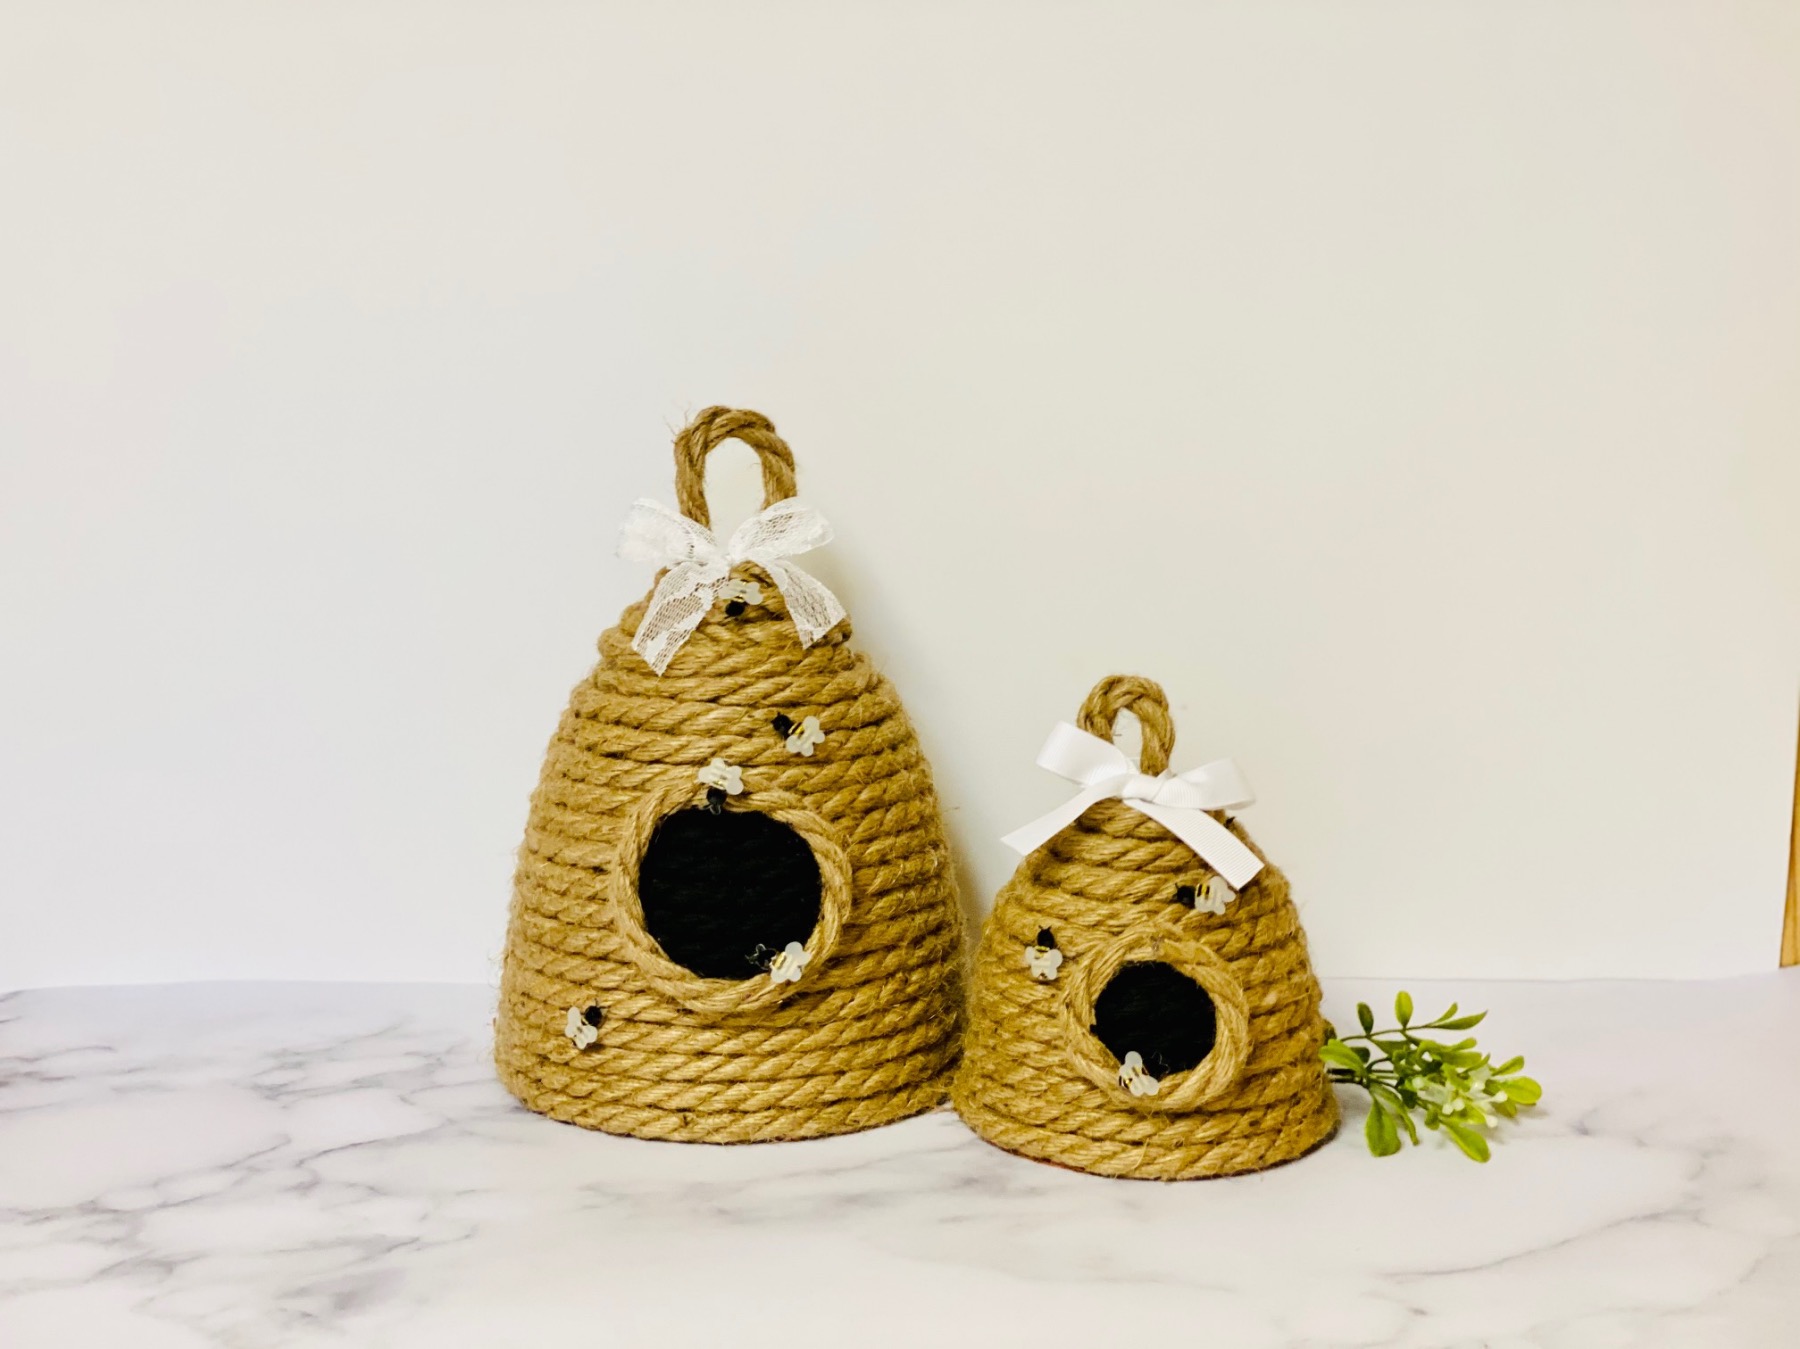
Viola! Your DIY Rope Beehive Decoration is finished. Now it’s time to decorate.
Bee decals make this craft so special! You can check your local craft store’s sewing section for bee buttons, the scrapbooking section for bee die cuts. Bee stickers are perfect too!
Attach the sporadically to the beehive.
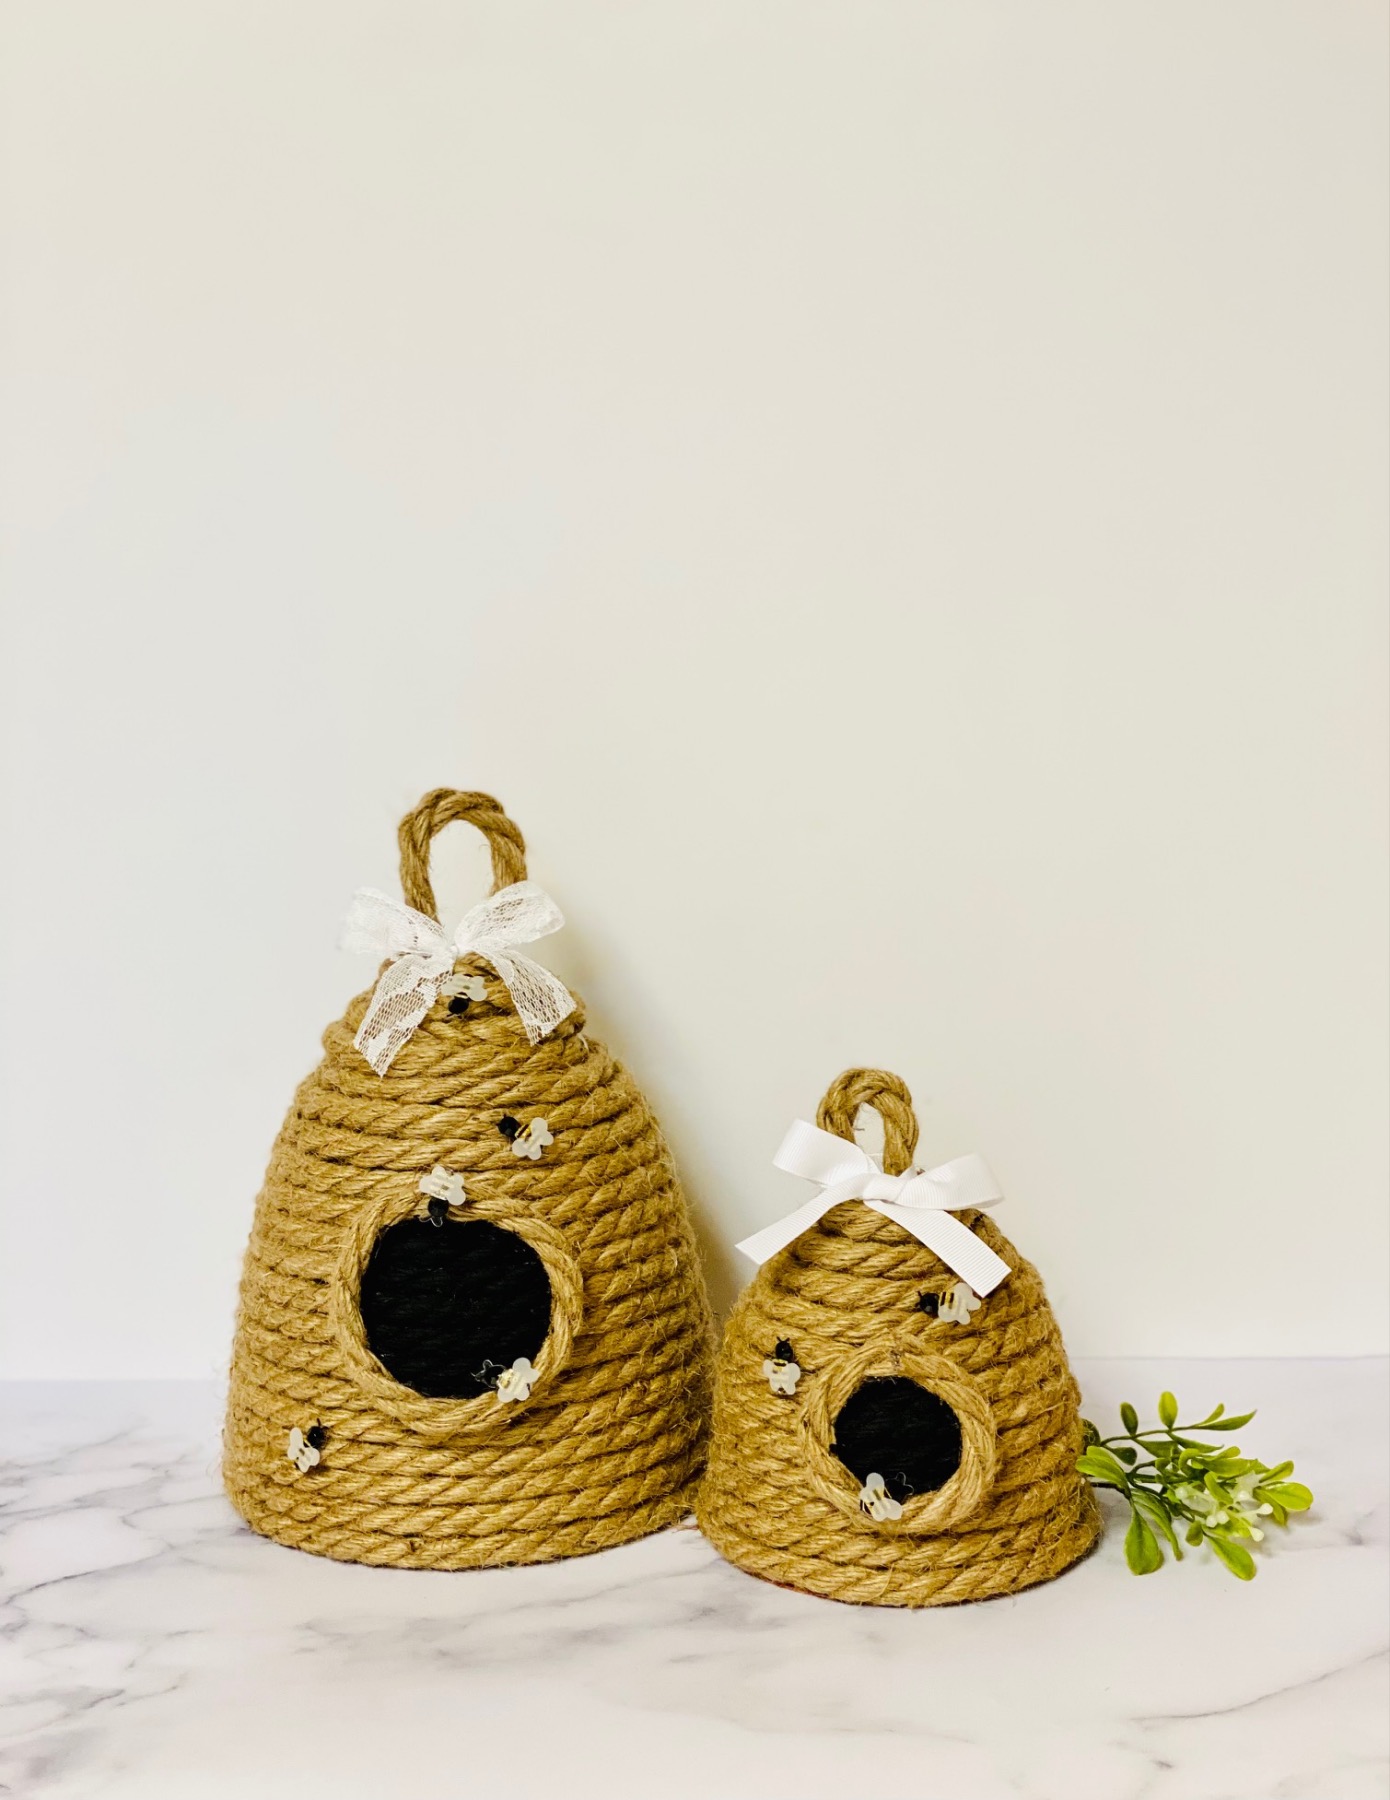
Last use cream colored or lace ribbon to add a bow to the top of each beehive. I made one of each.
Now place your beehives anywhere that you want to add a touch of spring inspiration! These DIY Rope Beehive Decorations are perfect for a party. Imagine them next to the drink station at a kid’s birthday party or next to the welcome sign at an outdoor wedding.
But they also make great decorations for a large dining table or in an entry way. There are no wrong way to display them!
Your Rope Beehives will last forever, but the rope may need to be dusted overtime and your ribbon may need to be replaced. Store them carefully by wrapping them or placing them inside a lidded bin when they aren’t in use.
Did you make this Rope Beehive? Show us what you made! Tag us online or leave a comment so we can see how yours turned out.
Need even more spring decoration inspiration? How about this Lemon & Hydrangea Door Wreath. Or these lemon, lime, and orange printables would be a perfect to decorate in all kinds of different ways!
And it’s not exactly a decoration, but nothing is more spring than these DIY Seed Bombs!
Happy spring and happy crafting!
Let’s Stay Friends!
Insta | Pinterest | Enews | TikTok


I was inspired and made a couple of these skeps! Love them💕