DIY
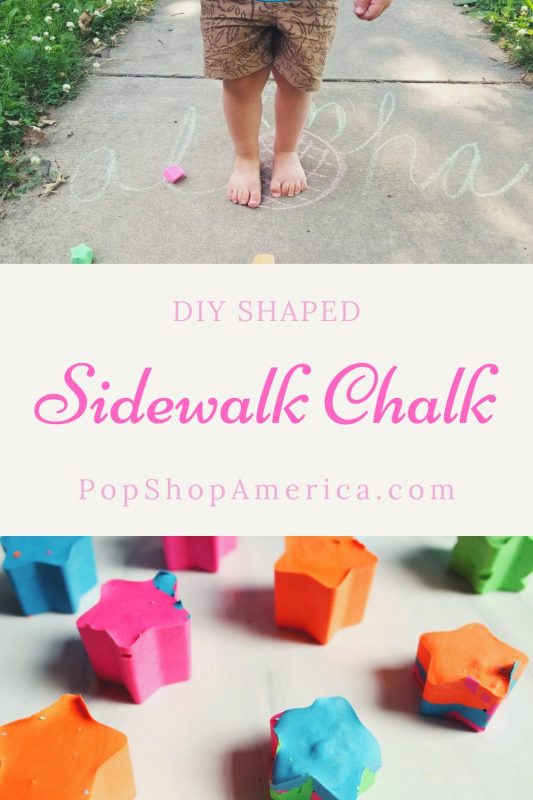
DIY Shaped Sidewalk Chalk
Aug
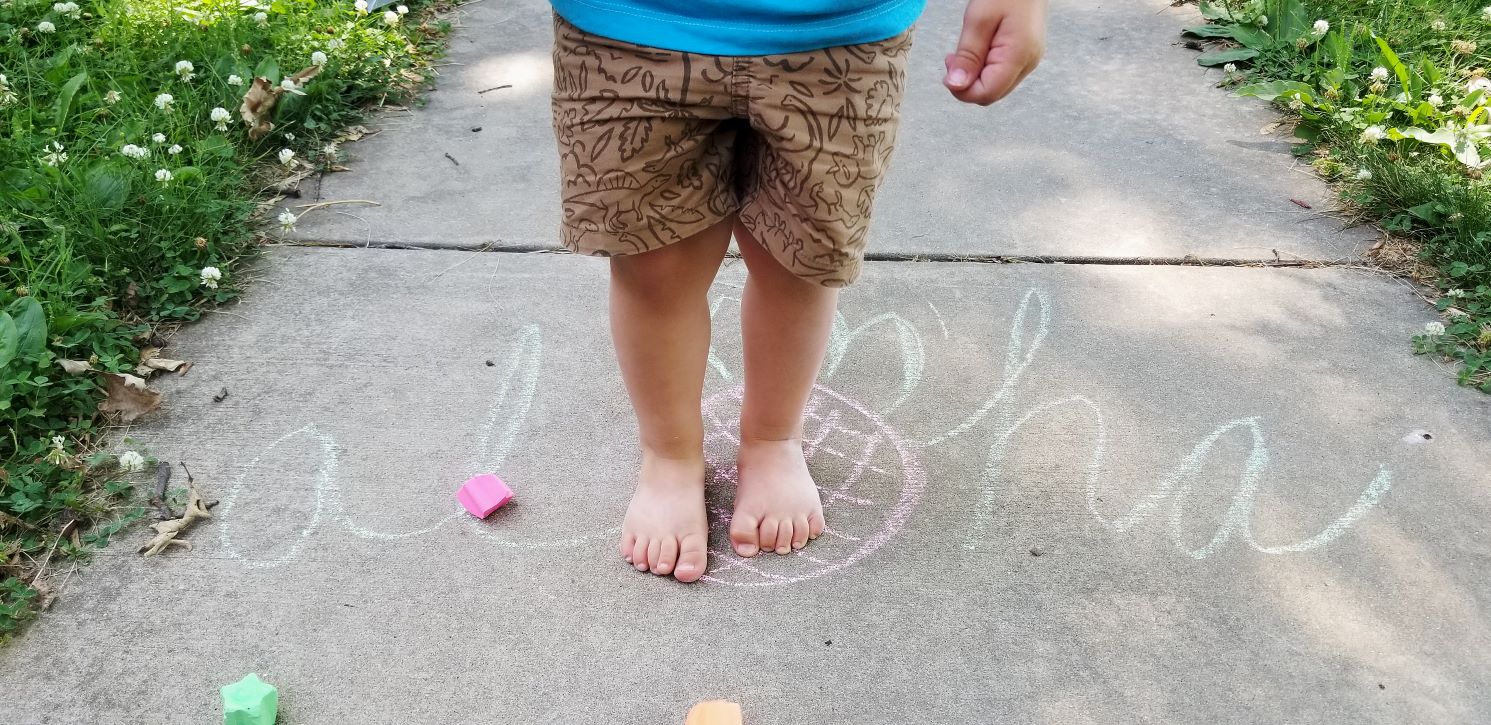
Sidewalk chalk is a piece of all my summer memories as a child. It’s a memory from working as a camp counselor during my college years, and now it’s one of my toddler’s favorite activities. But until recently, I had never made my own. How have I missed out on this for so long? It is so simple and quick, and being able to make any shapes I want is so fun! I’m excited to show you all the different shapes I was able to make and, spoiler, I learned that you can layer the colors too!
And while sidewalk chalk is a super-affordable dollar store buy, this project turned out to be just as cheap – maybe cheaper if you find a sale! – and so much more fun! After all, we know you’re not here on Pop Shop America to just buy what you can craft and DIY yourself!
P.S. While this is a great activity to get your kids involved in, it’s also so fun to make for yourself or to gift to the kids and young-at-heart in your life. Make the gift even more special with some DIY gift wrapping ideas! Everyone could use a little extra joy in the form of brightly colored chalk pieces.
Are you excited yet?
Supplies for Making DIY Shaped Sidewalk Chalk
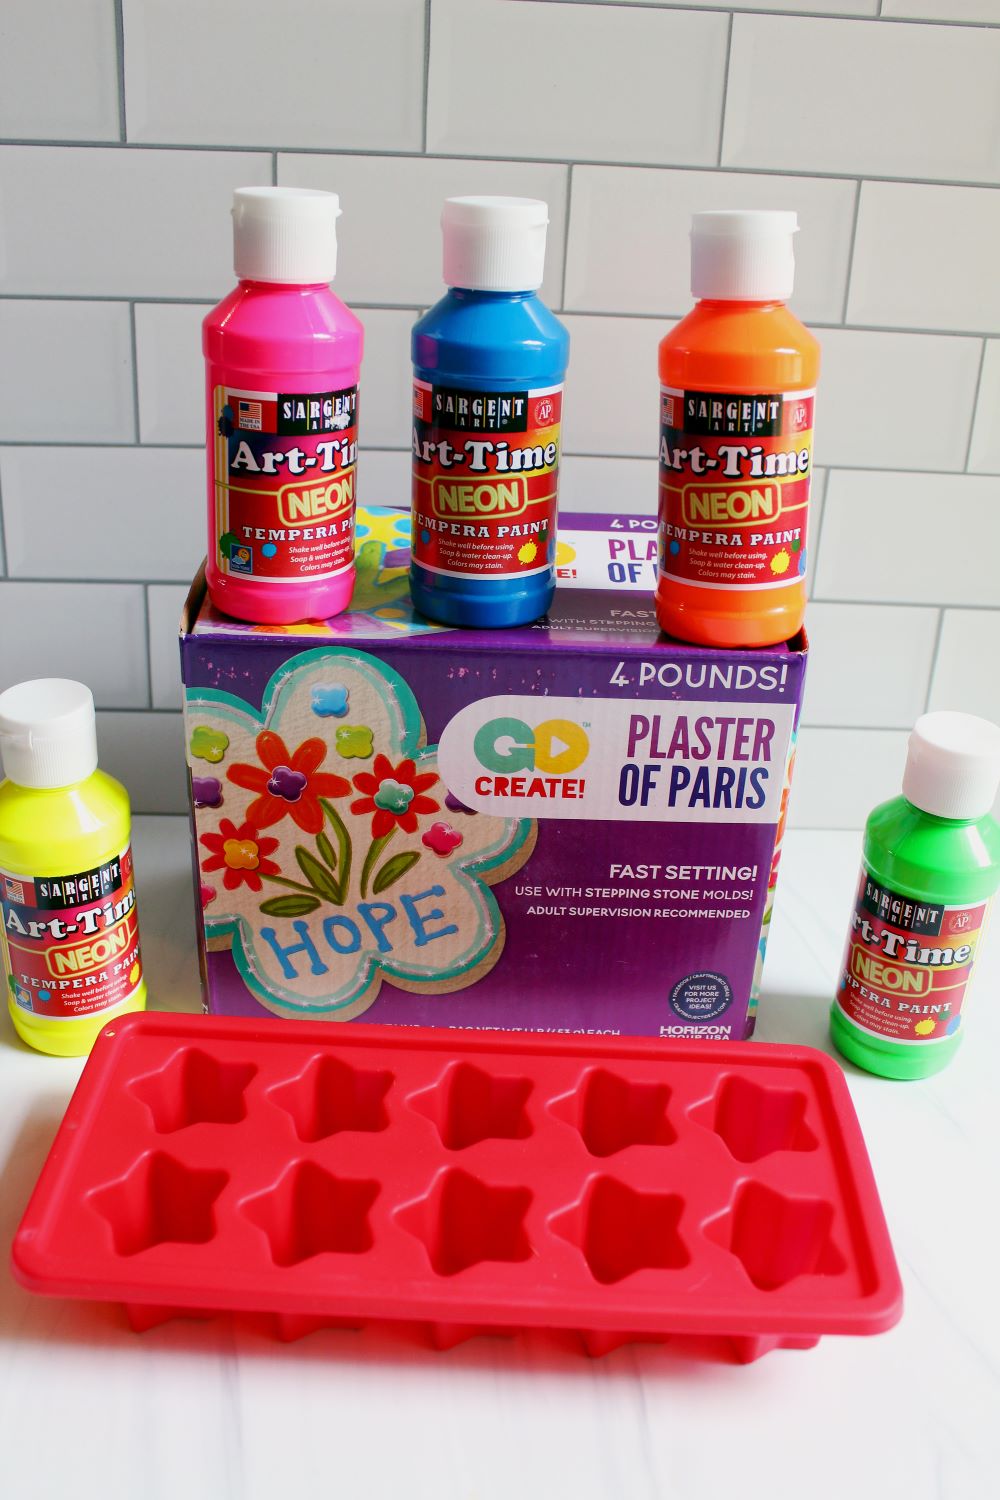
For the sidewalk chalk, you’ll need just a few supplies:
- as many colors of tempera paint as you want
- plaster of paris
- water
- disposable plastic cups
- disposable plastic spoons
- silicone molds
Quick Note: I recommend the fast-drying plaster of paris, especially if you’re making this with kids. The quick-drying one will let you use your sidewalk chalk the same day, while the other will require overnight drying.
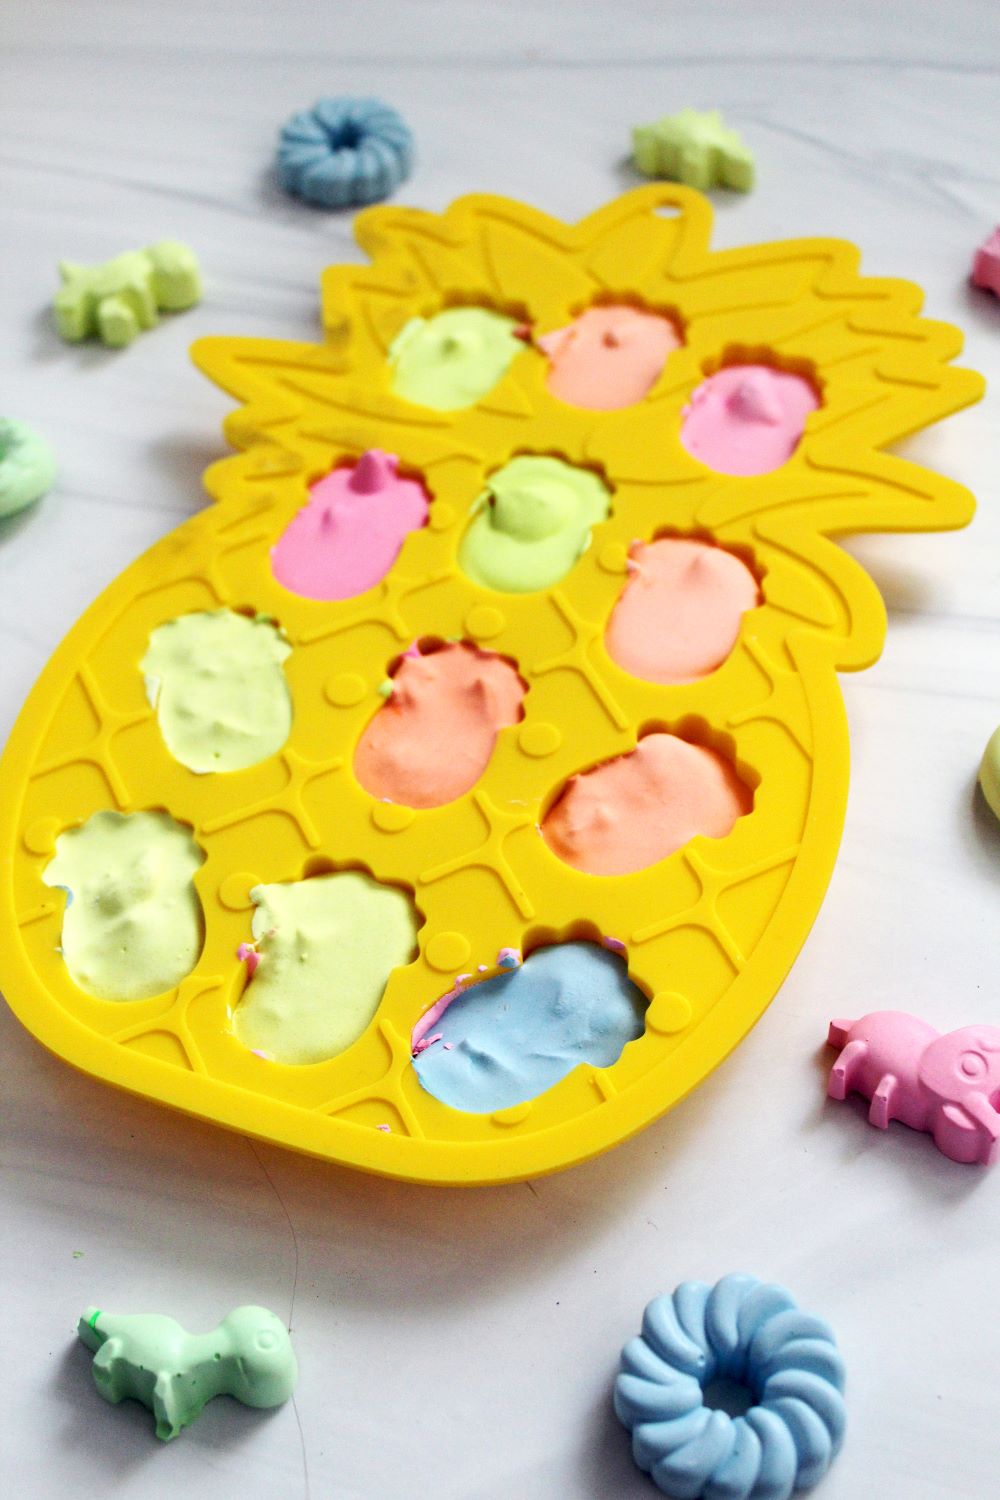
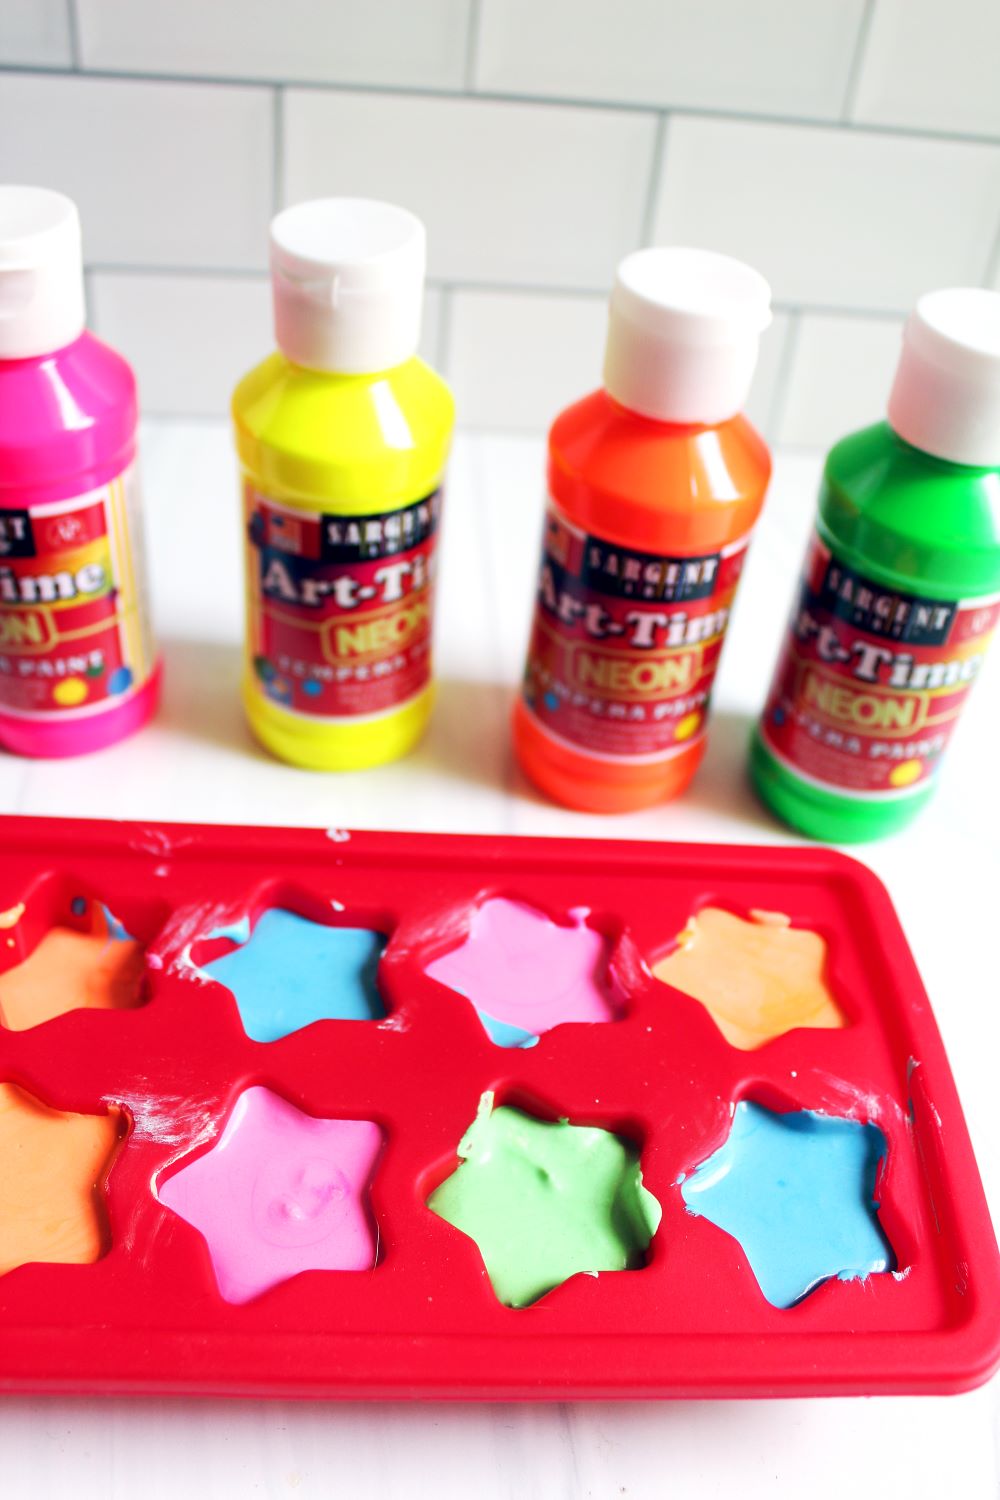
To make fun shaped sidewalk chalk, you just need shaped silicone molds. I grabbed some from the craft store, my big-box grocery store and Amazon. My choices were pineapples, stars, dinosaurs and donuts, but there are soooo many cute molds out there!
Quick Note: my preference is for molds with larger cavities. I found that the smaller molds, while they produced cute little chalks, were harder to grasp and color with. The larger, deeper molds made much better handholds.
Let’s Craft!
To make the sidewalk chalk, decide how many colors you want to make and set out that many disposable cups and spoons.

Measure 1/4 cup plaster of paris into each cup. Add 1/4 cup of water and 1-2 tablespoons of tempera paint to a cup and stir to mix well.

Immediately pour the plaster of paris mixture into your silicone molds. I use the spoon to help pour the paint mixture into the molds.
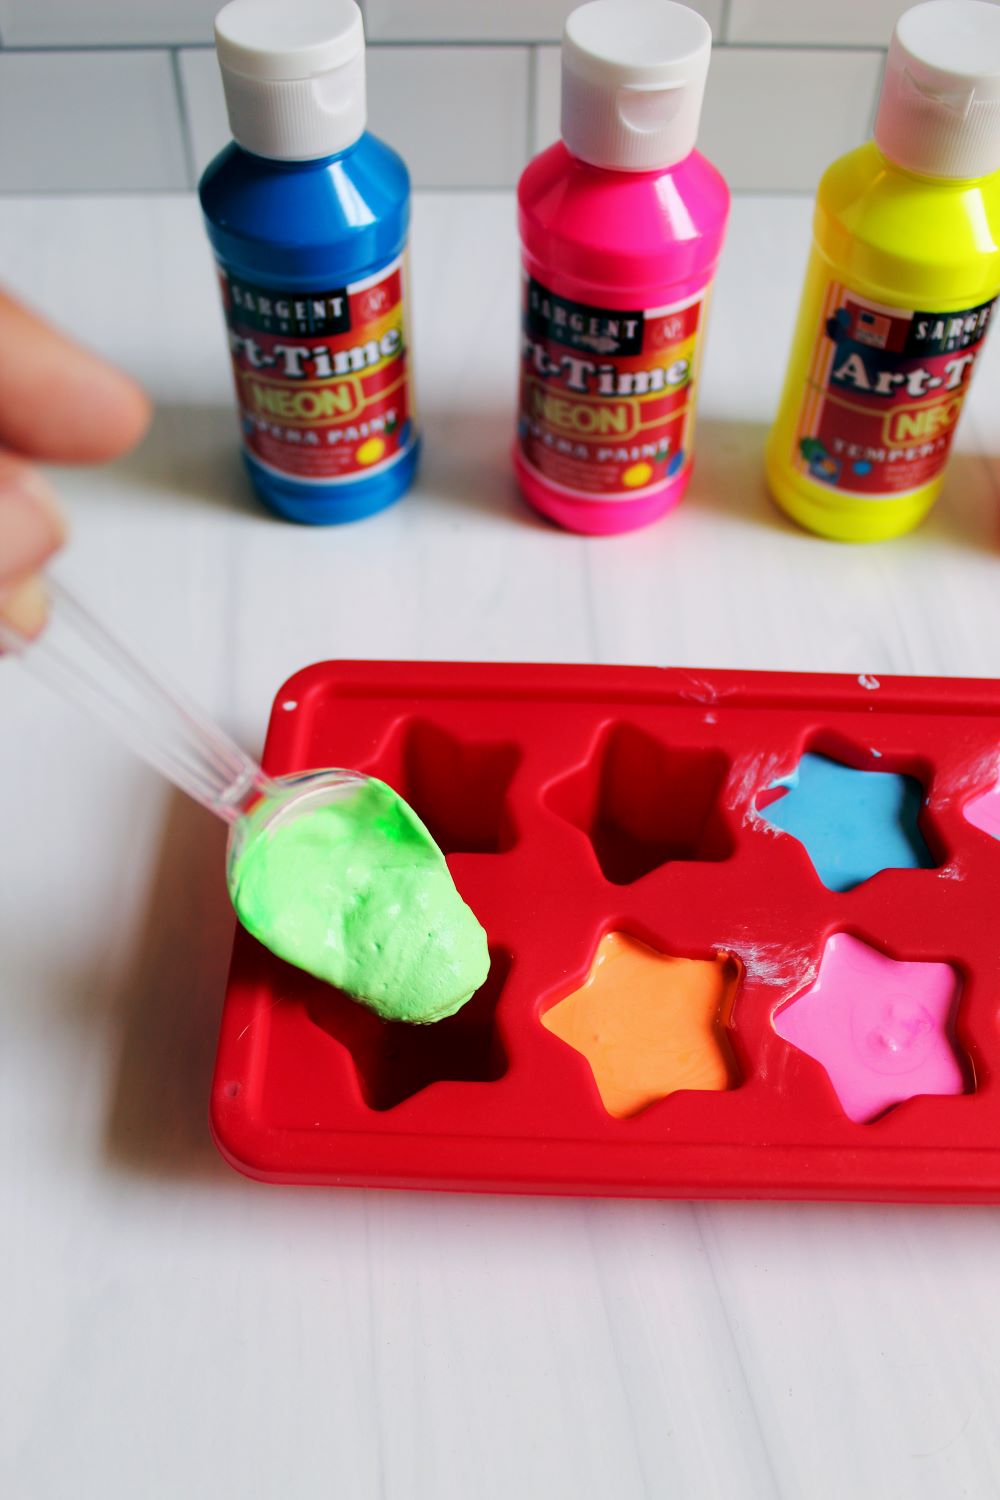
Repeat with the remaining cups to create different colors. Once you’ve filled your molds, use a paper towel to wipe off any excess spillage.
Note: If the air is dry or it’s hot out or it seems like your plaster of paris mixture is drying really quickly, make one color at a time. Make the green and pour it into the molds. Then make the blue, then the pink, etc. The first time I made it, I had no problems. The second day, it was hotter and drier, and the mixtures were starting to dry before I could get them all poured.
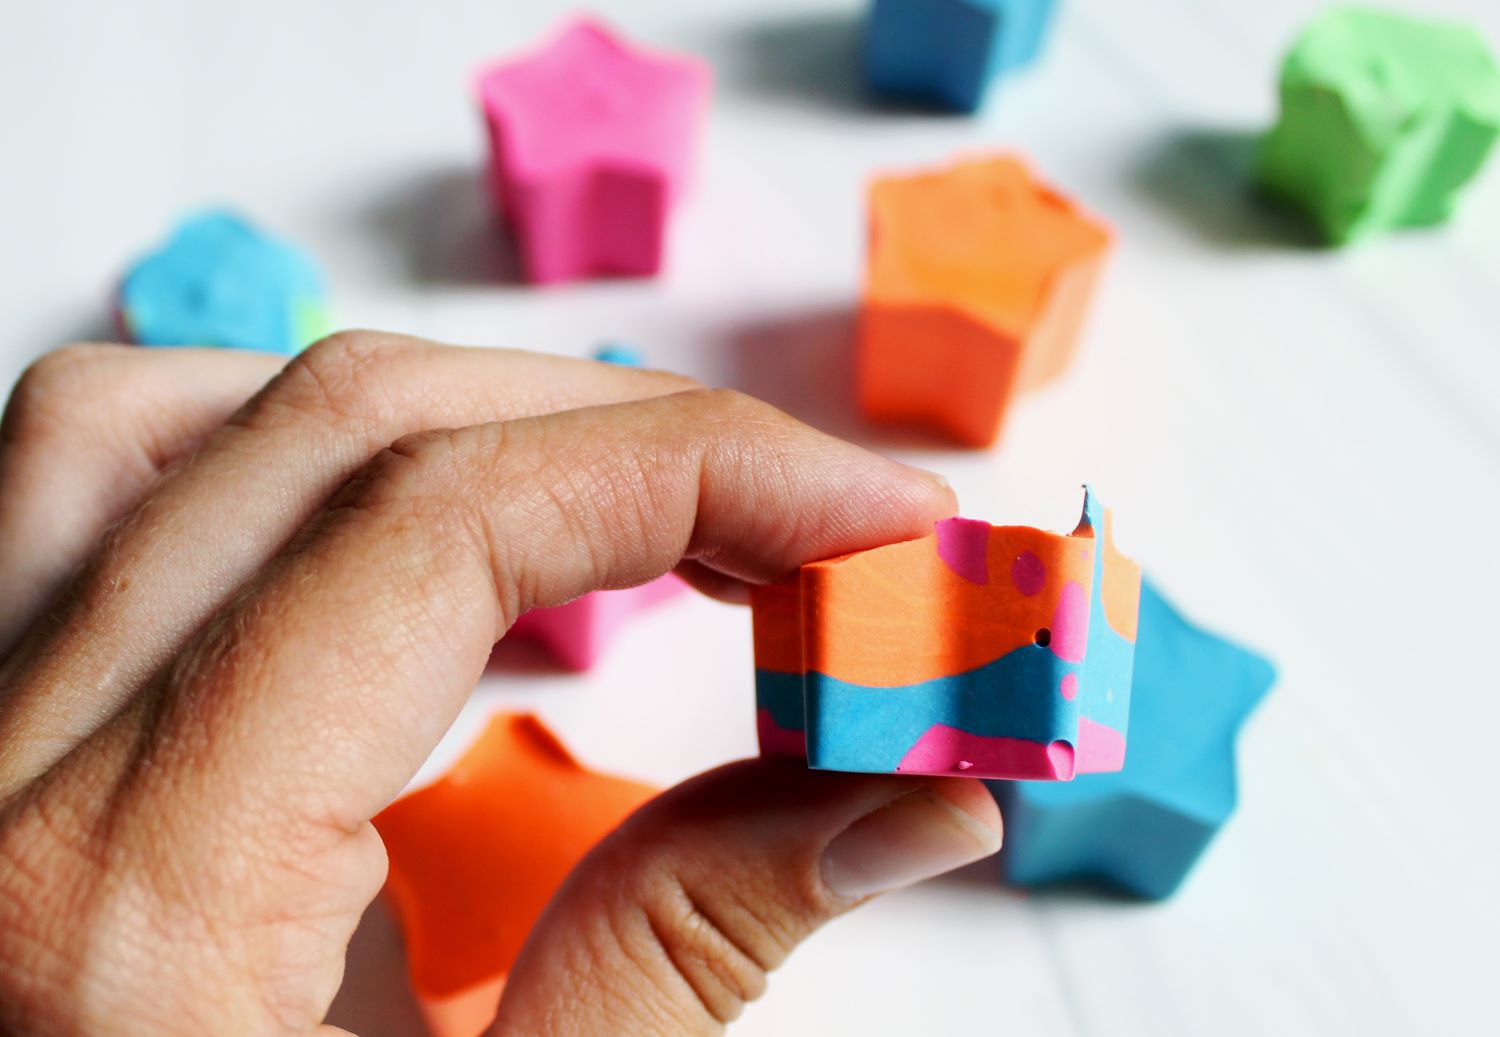
To make layered sidewalk chalks: Use the same silicone molds, and fill 1/3 of the way each with 3 different colors. The chalk mixture will sit easily on top of the other colors; it won’t mix together. So when you pop out the shape sidewalk chalk, you’ll have beautiful, fun layered chalks!
Set your chalk-filled molds aside to dry for a few hours. If you used fast-setting plaster of paris, it will only take a few hours. If you can’t find fast-drying, you can use regular plaster of paris; it just may take 24 hours to set and dry completely.
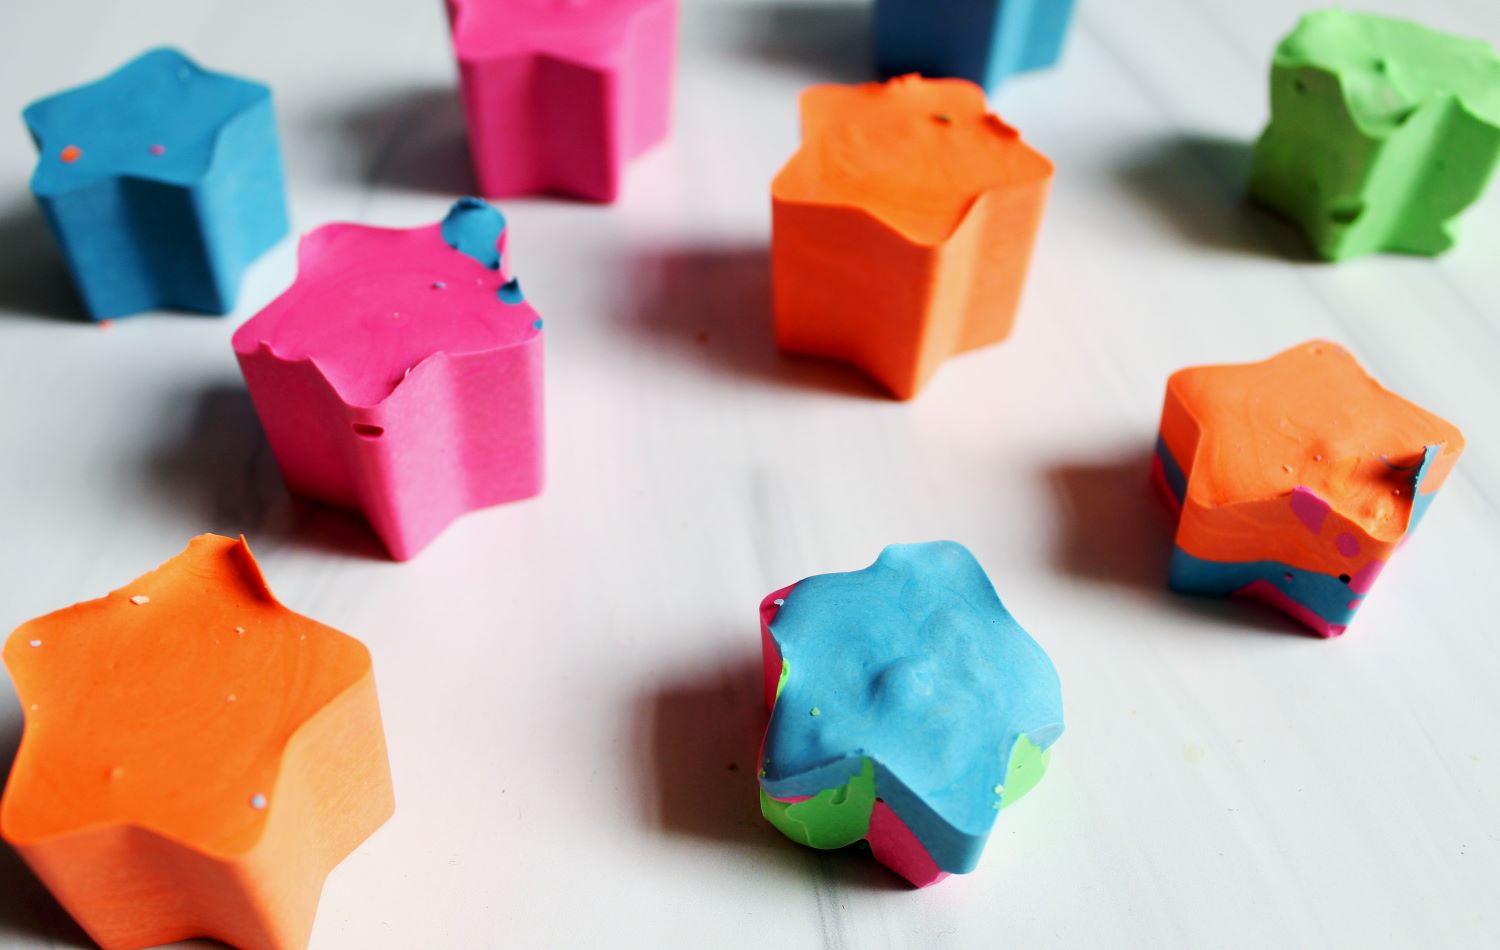
Once the chalk feels dry and hard to the touch, pop the diy shaped sidewalk chalk out of the silicone molds. I recommend letting them dry for another hour outside of the molds, to make sure all sides get ventilation. After that, try them out! Go outside and relive your childhood!
Hand them to your kids and let them play!

Or package them up and gift them to some wonderful kids in your life. No matter who you give them to or use them with, they’re going to be so excited to have sidewalk chalk that’s not shaped like a boring ol’ chalk stick.
Show us all the fun shapes you decide to make!
Let’s Be Friends!
Insta | Pinterest | Enews | TikTok