Craft in Style Subscription Instructions, DIY
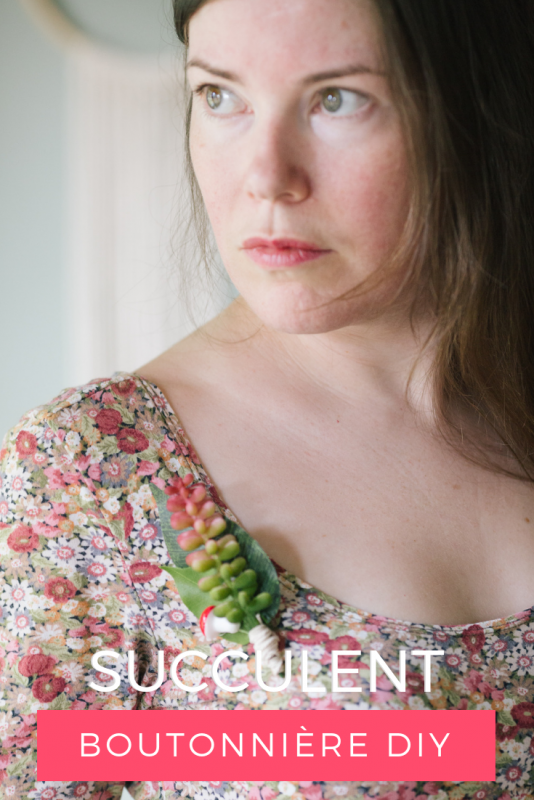
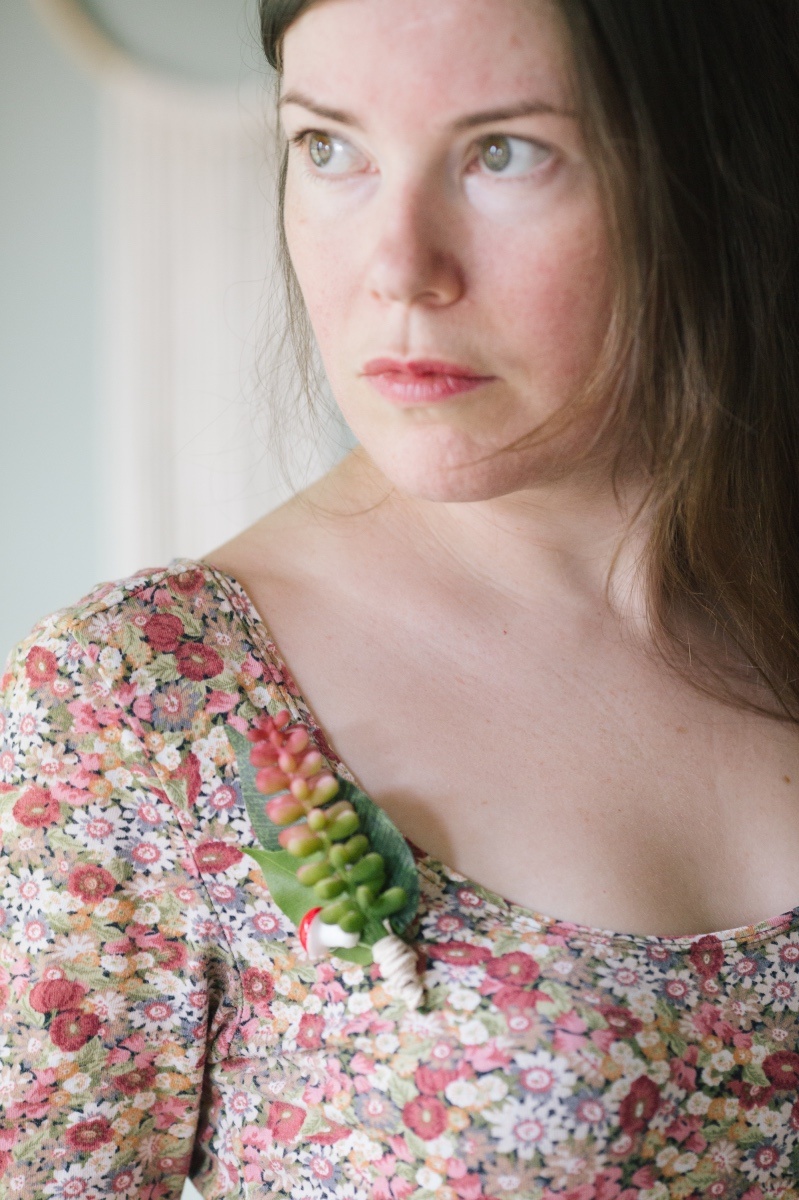
How to Make a DIY Succulent Boutonnière
Oct
Let’s play dress up! This Easy Fall Inspired Boutonnière is perfect for a wedding or just for fun! You know I love DIY Boutonnières because they are easy to make and you can do something that is so different, unique, and more exciting!
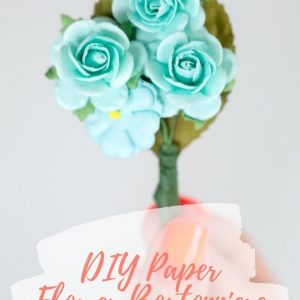
You can see my previous DIY Boutonnière with Paper Flowers here. This one is made with faux succulents and woodland findings which has a fun fairy garden feel.
This was originally a bonus that came with the October 2018 Craft in Style Subscription Box. If you’re interested, check out our fun monthly craft box!
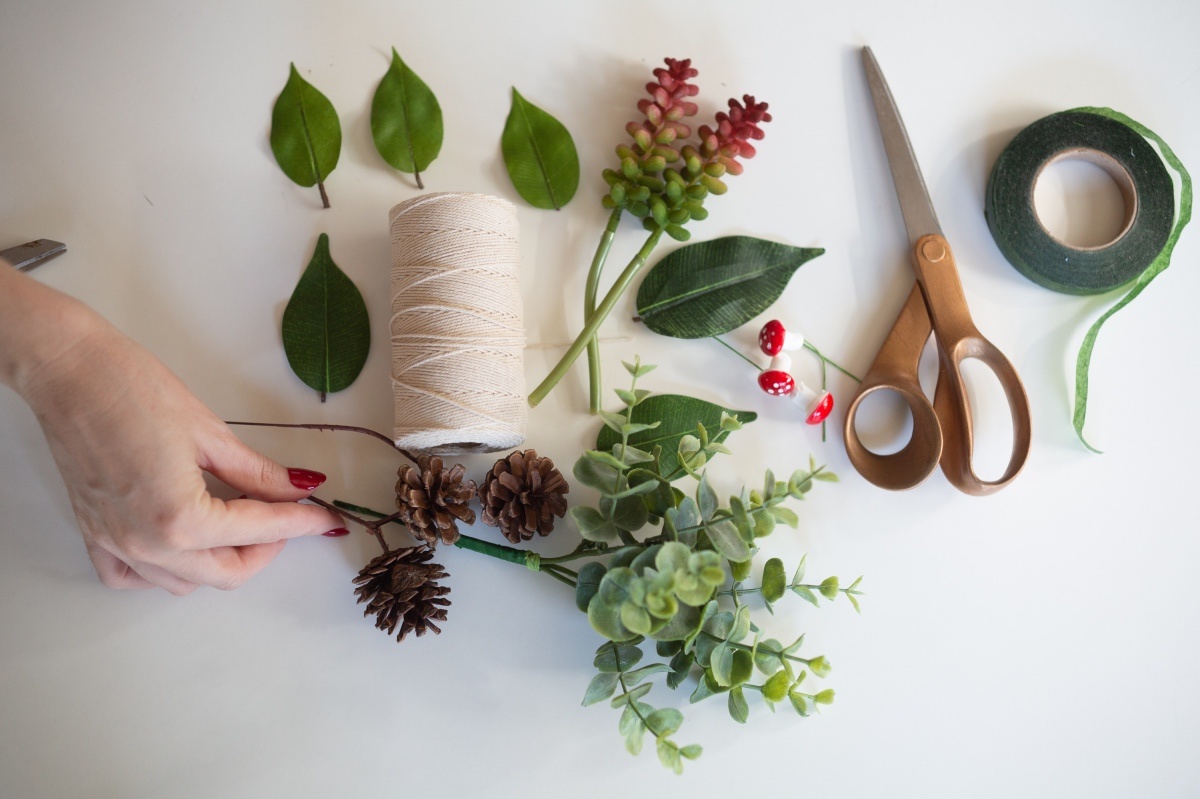
Supplies to Make this DIY
A Pinback
E6000 or Hot Glue Gun
2-3 Faux Leaves
1-2 Faux Succulents
Cute Woodland Findings (like Mini Pine Cones, Faux Mushrooms, Acorns)
A Small Piece of Floral Tape
A Bit of Twine
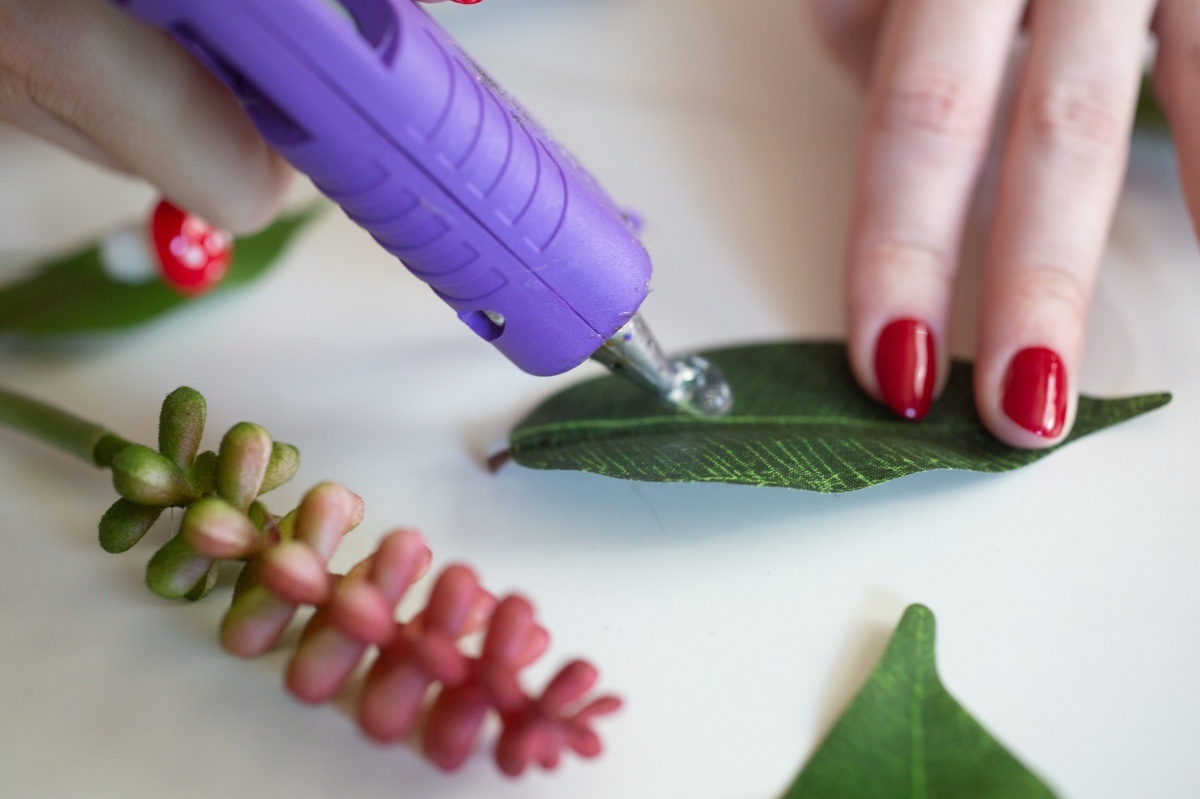
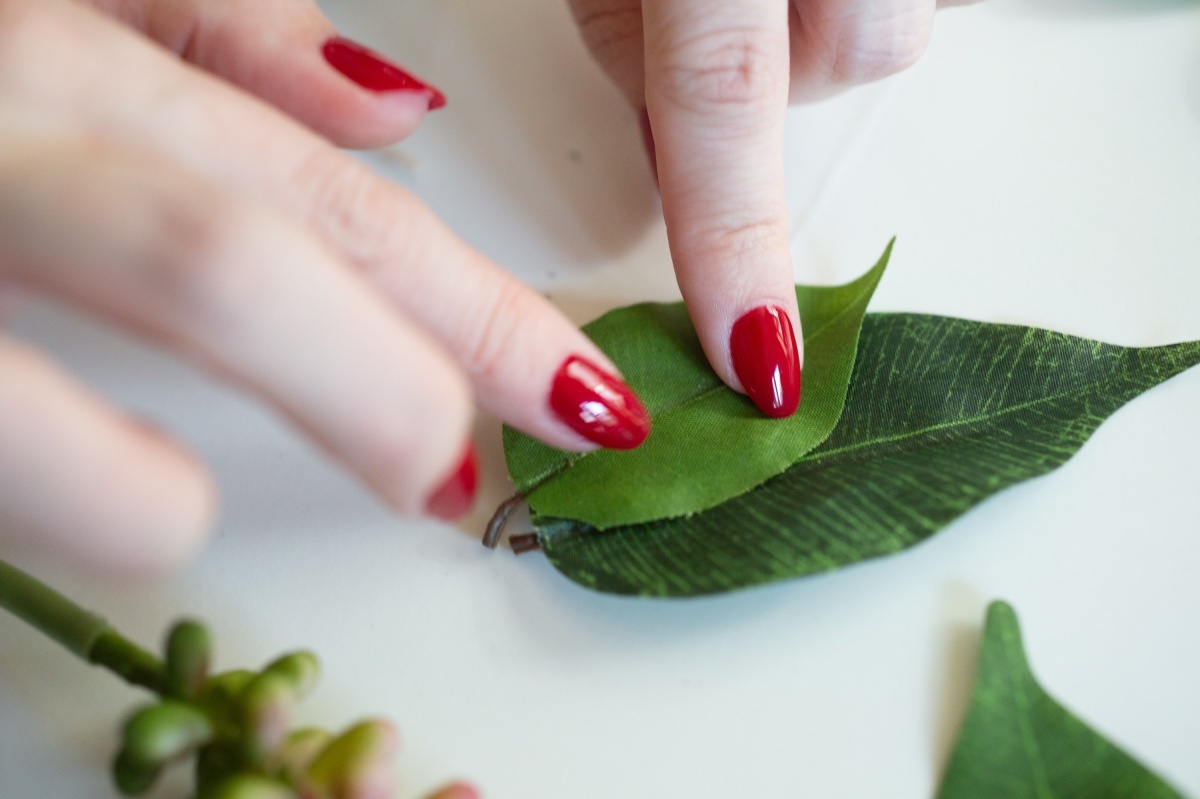
Start with a leaf as your base. Your pinback will attach the back of the leaf – so you need a nice big surface even though you will add the pinback last. I actually used two leaves but what’s great about this project is that you can customize it to make it your style.

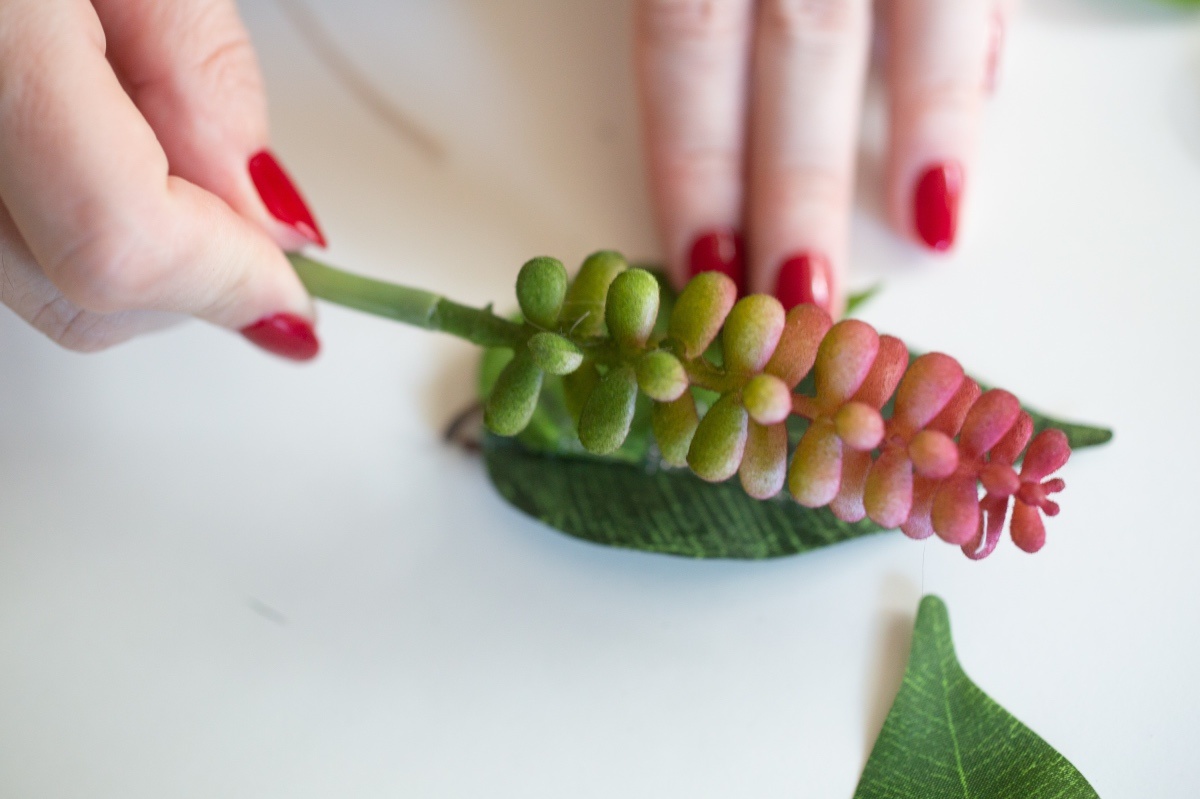
Next I added the succulent on top of the leaves. It’s best to add the biggest plant first that way you can add your smaller plants around it in an aesthetic way. If you are using hot glue, you will need to work quickly because it sets so fast. If you are using E6000 be sure to hold your pieces in place for a minute or so. E6000 sets slower but is THE BEST GLUE EVER!

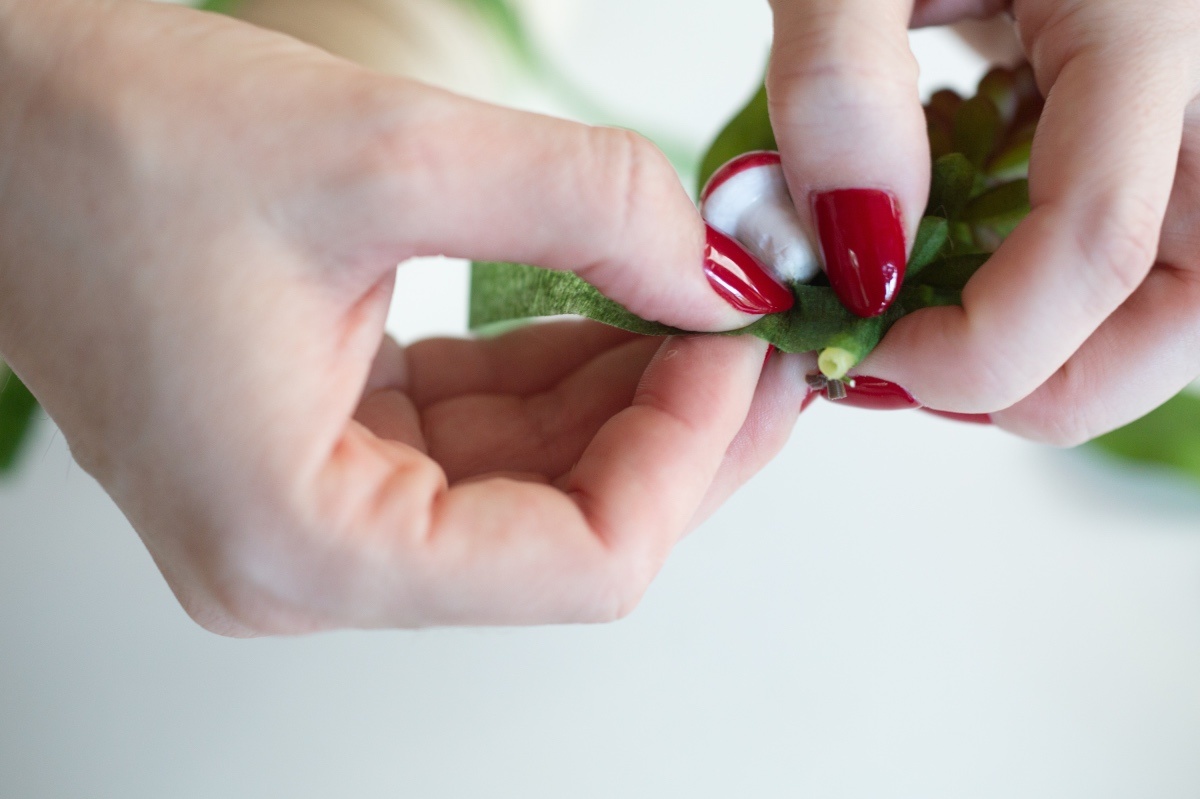
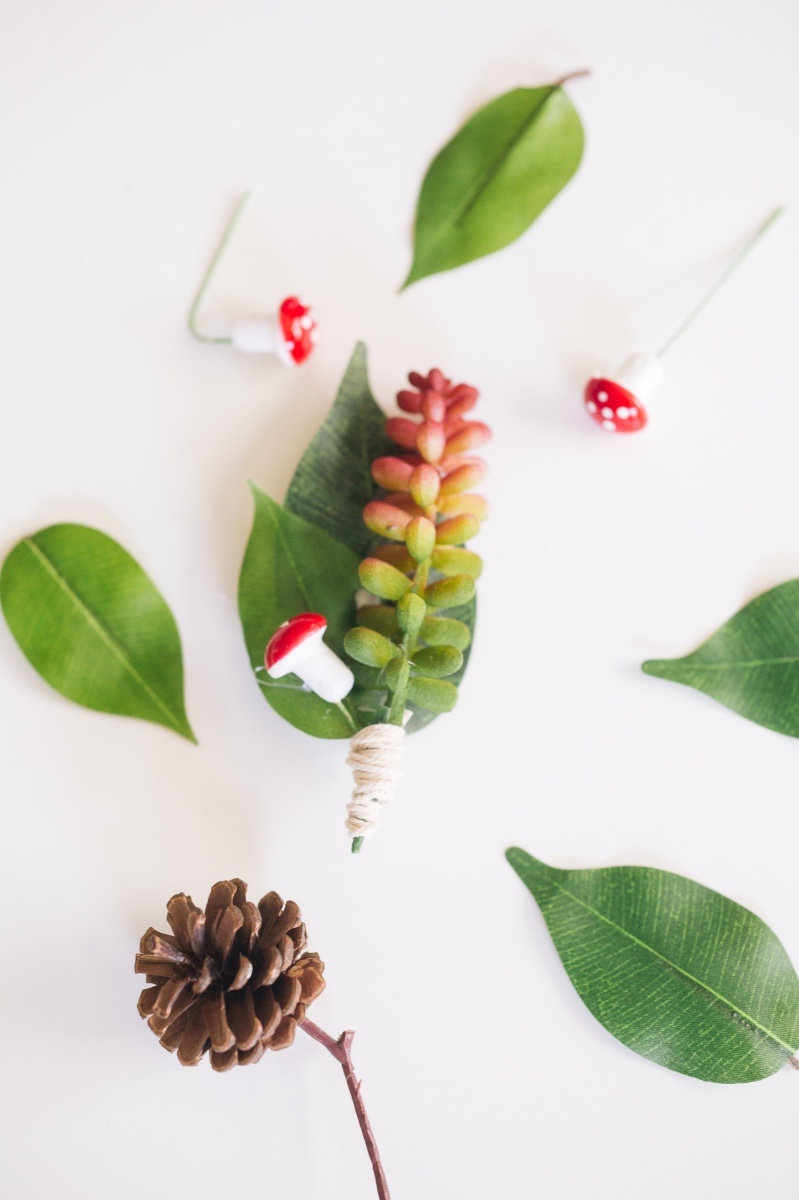
I added a cute little mushroom to mine but any woodland findings would be great here! Think pine cones, acorns, moss or any small cute items.
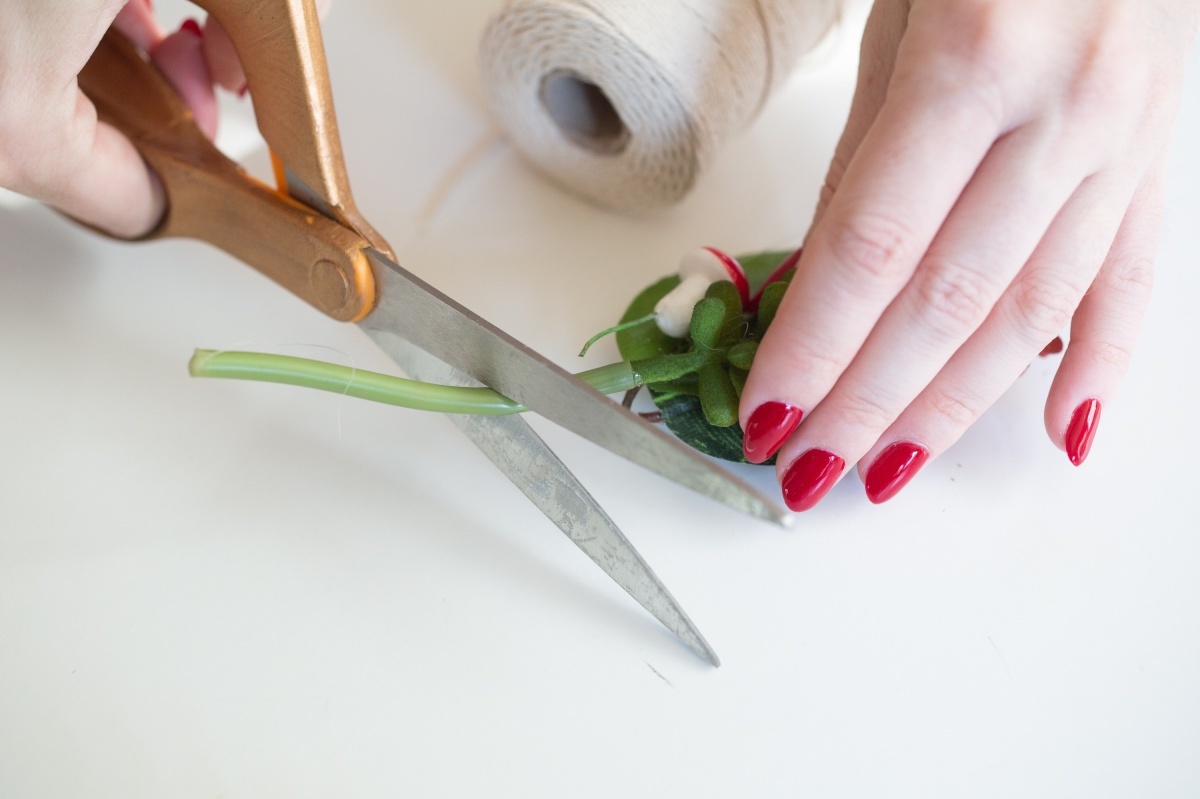
Next, trim the succulent – leaving just an inch or so below the leaf. We are going to use these one inch stems to wrap together and help your DIY Succulent Boutonnière look like a professional product!
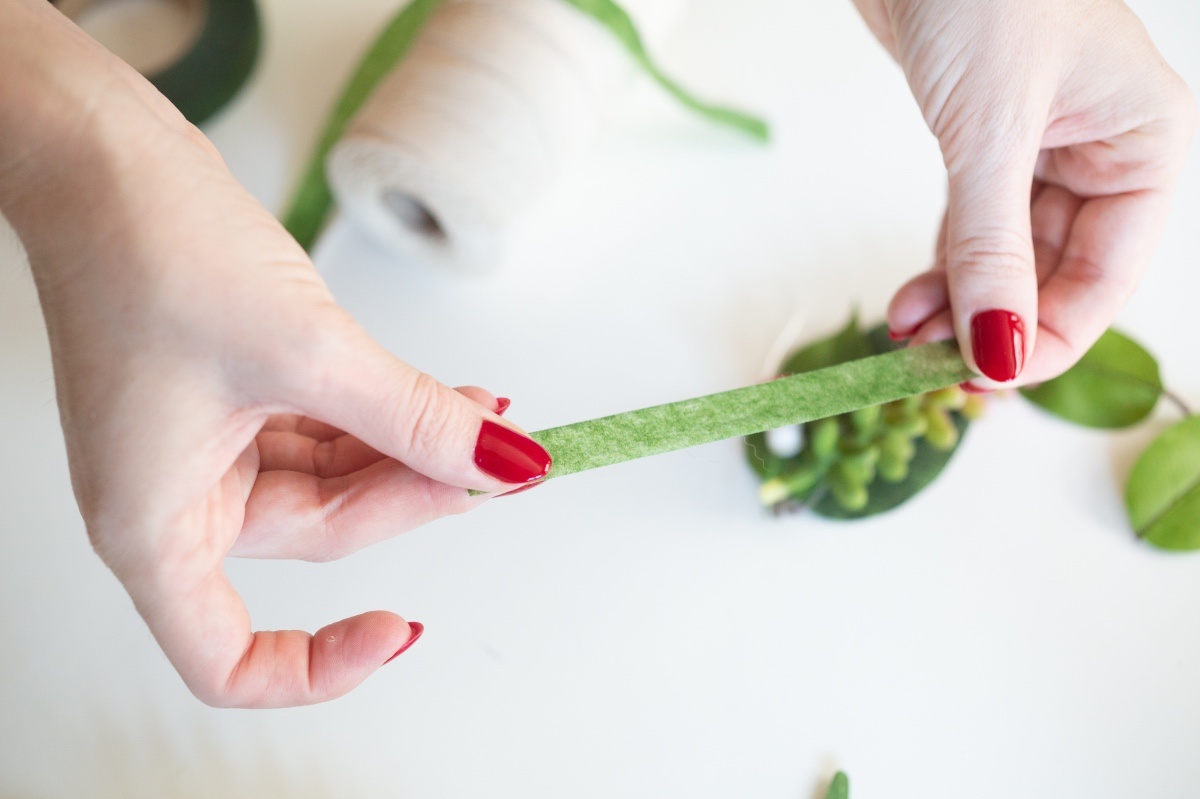
Floral tape gets sticker as you stretch it out, so give it a tug before you wrap it around the stems of your leaves and succulents. Wrap the stems tightly making a shape kind of like a triangle – so that it tapers to a point on the bottom edge.

Now, add a bit of ribbon, twine or even macrame rope around the stems to enclose your succulent and leaf bundle. Tye the twine tightly!
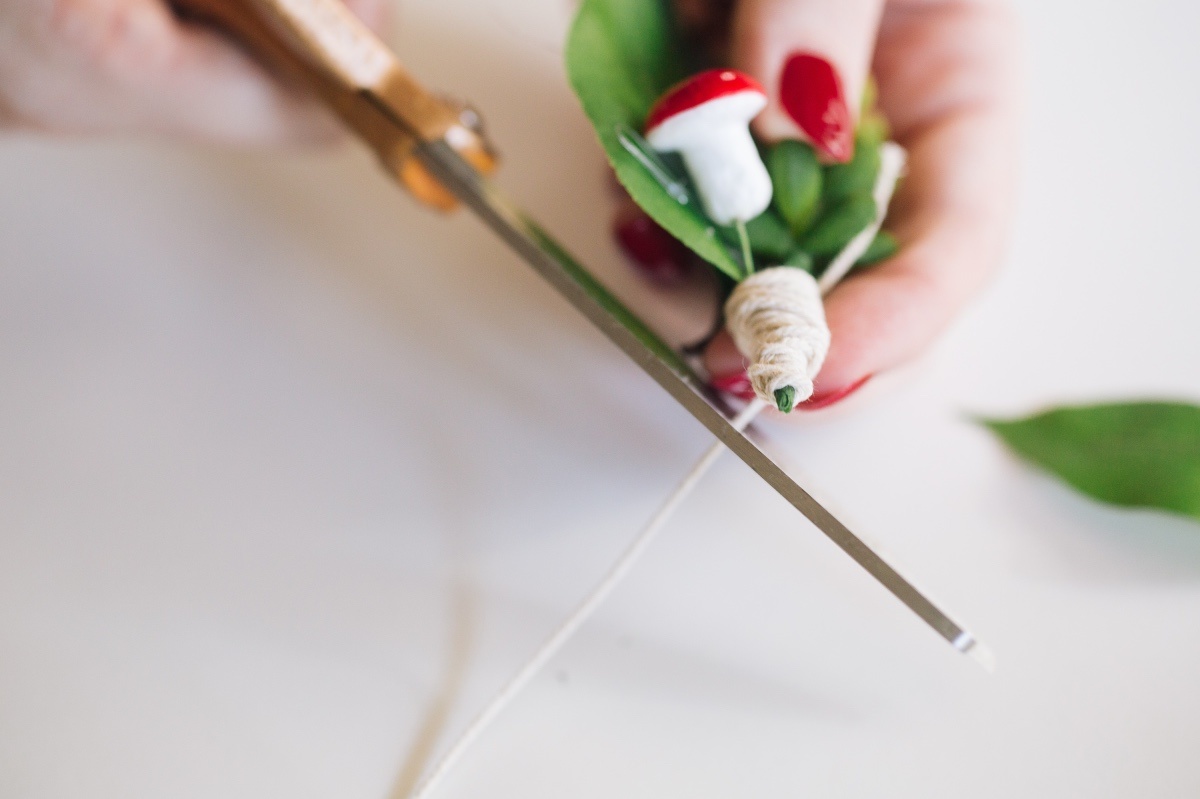
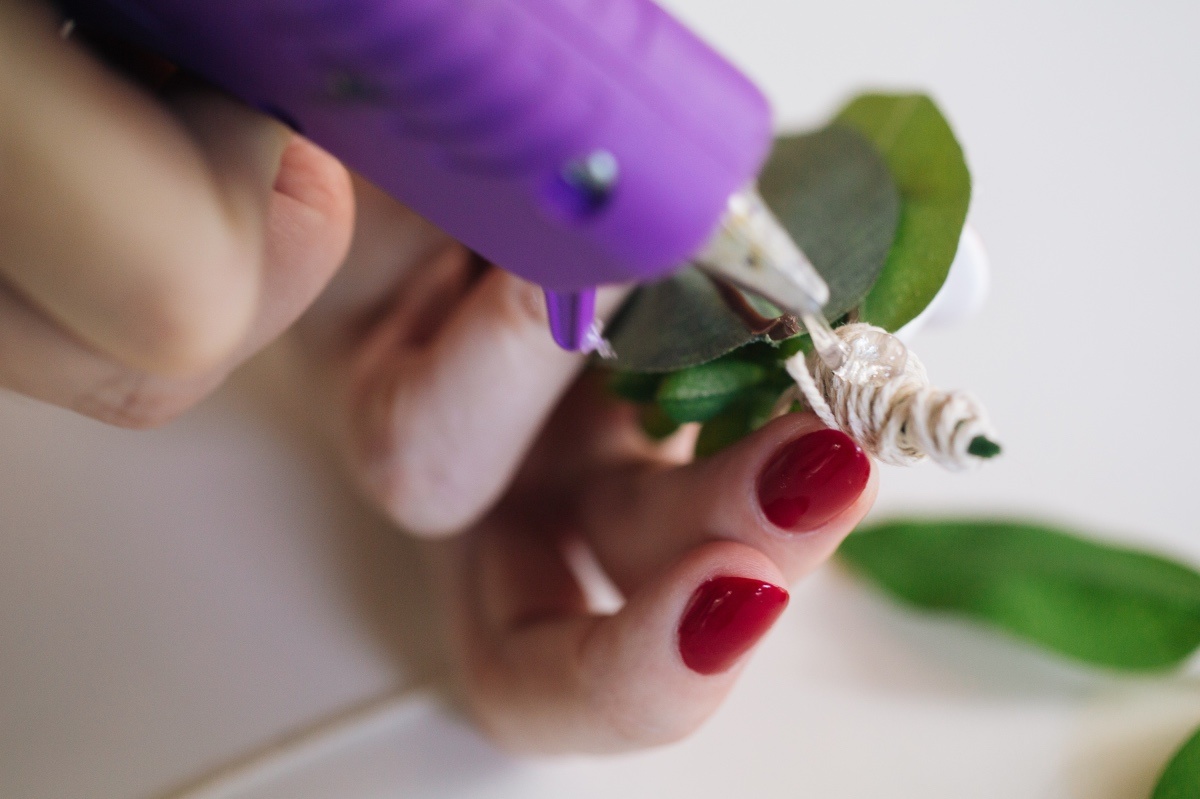
If you cut the twine on the back side of the DIY Succulent Boutonnière it will hide the edge. Then just add a tiny dollop of glue to hold the twine in place. Remember hot glue works quickly and E6000 requires you to hold it in place for a moment.
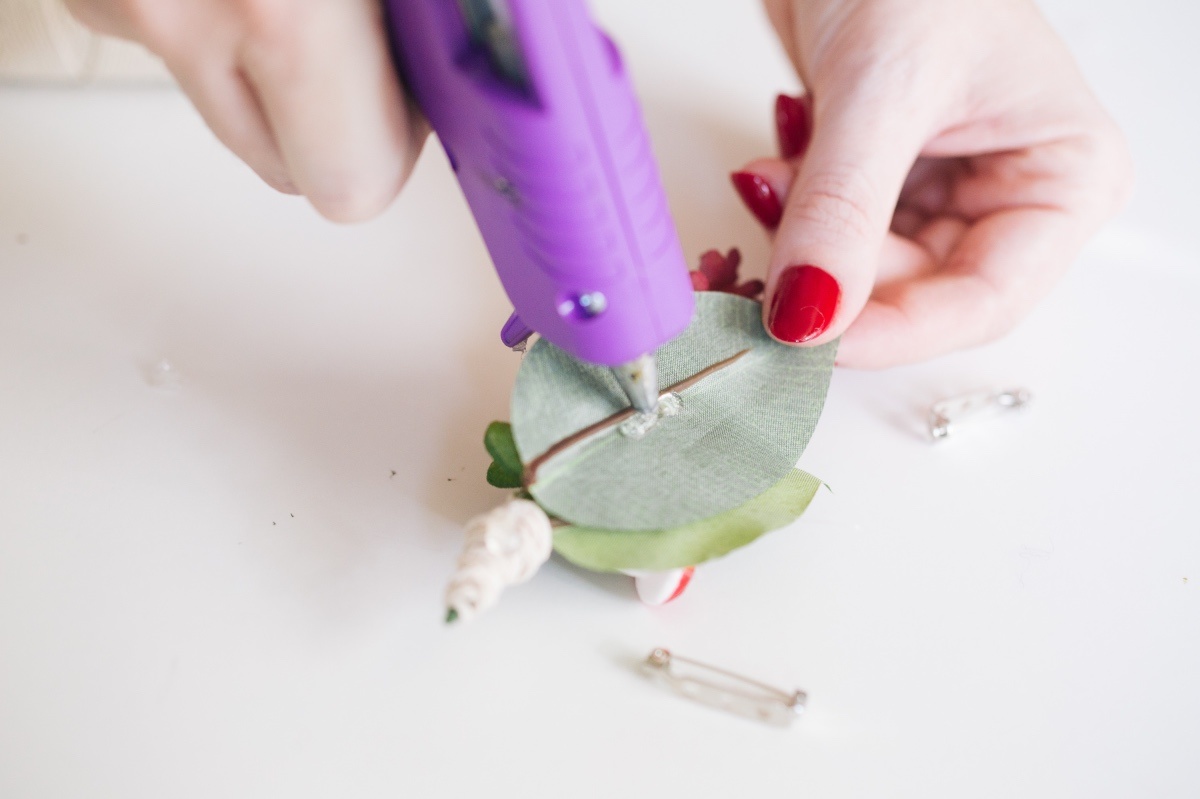
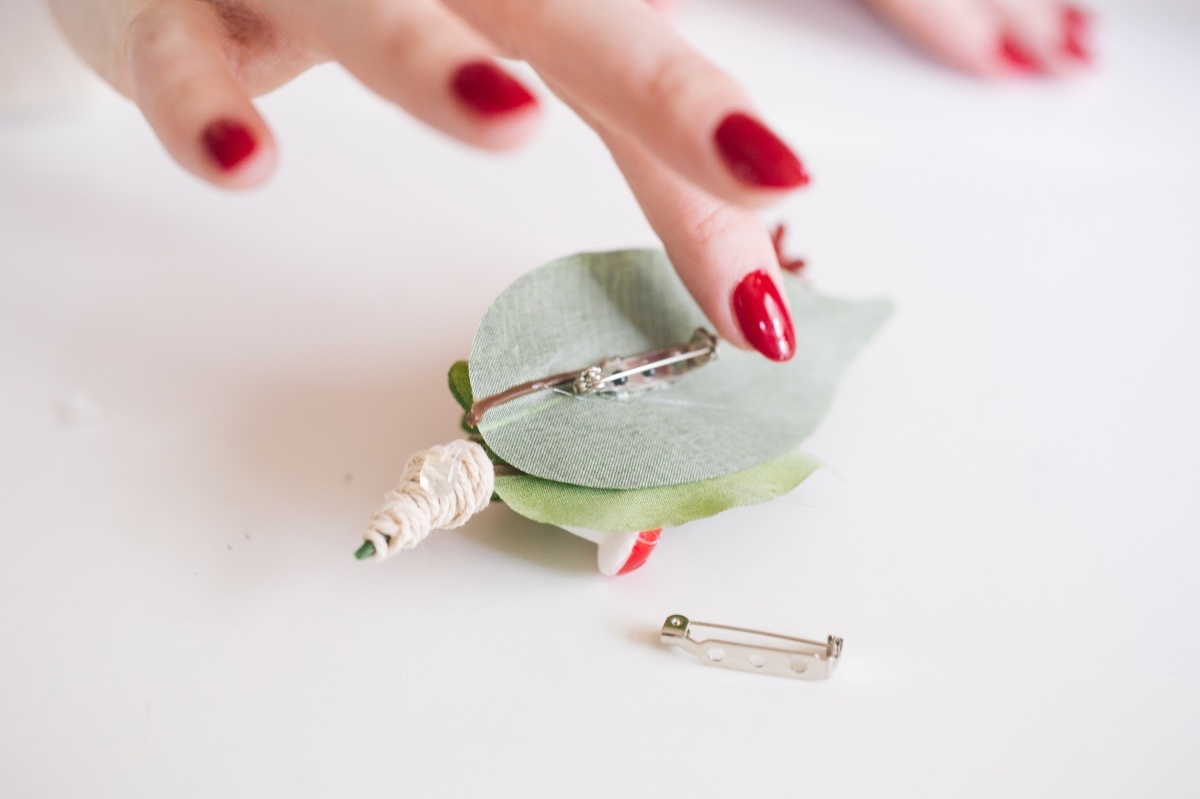
We’re almost done! Just glue a pinback to the back of the leaf so you can wear it! Be careful to avoid getting glue on any moving parts on the pin so you can put it on and take it off easily.
If you use E6000, wait a full 24 hours to wear your Boutonnière. This time will allow the glue to set completely.
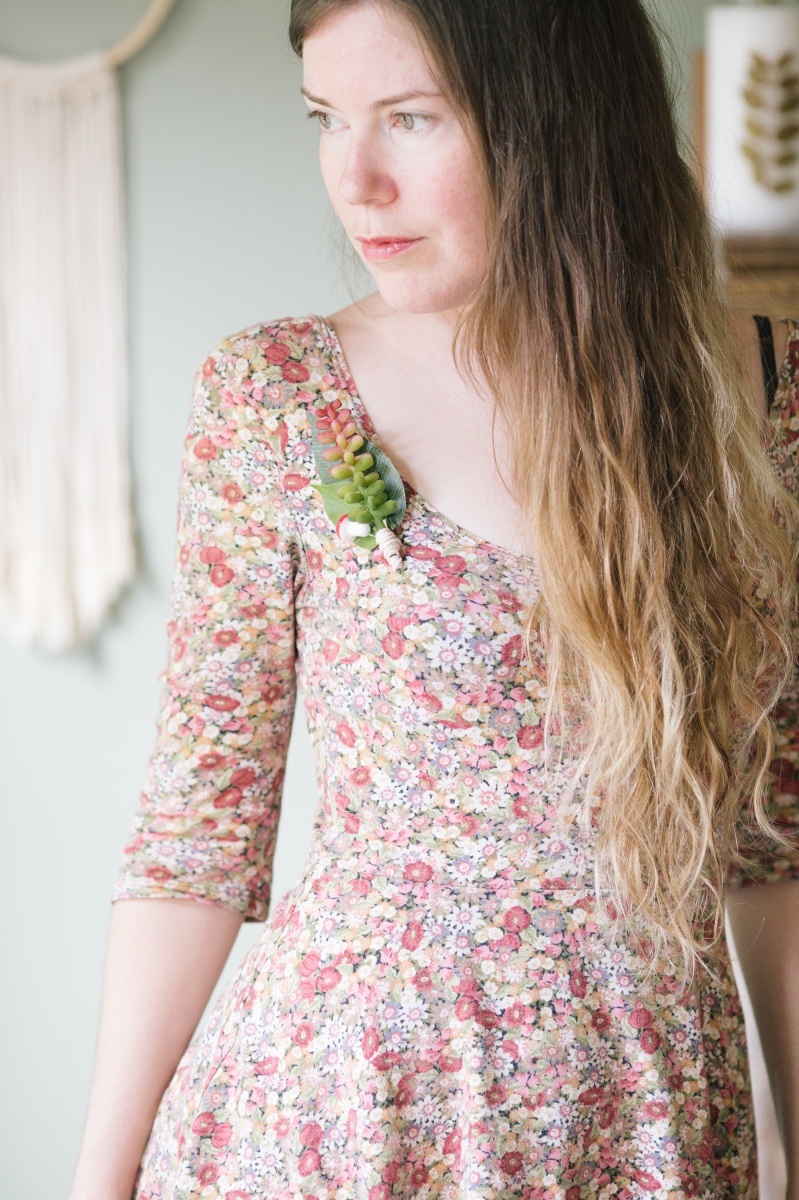
And viola! Isn’t this the cutest thing you have ever seen? If you love this, make sure you think about grabbing our Craft in Style subscription box, or send one as a gift to a friend!
Let’s Stay Friends!
Insta | Pinterest | Enews | TikTok