Craft in Style Subscription Instructions
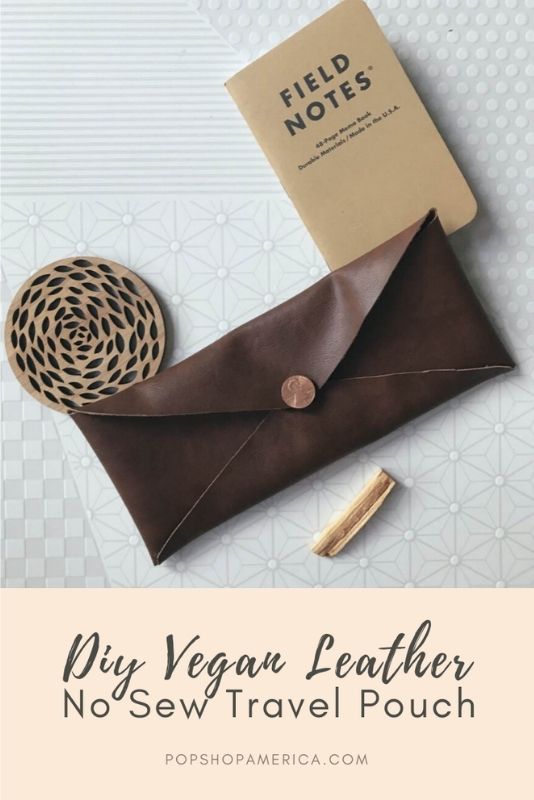
DIY Vegan Leather No Sew Travel Pouch
Sep
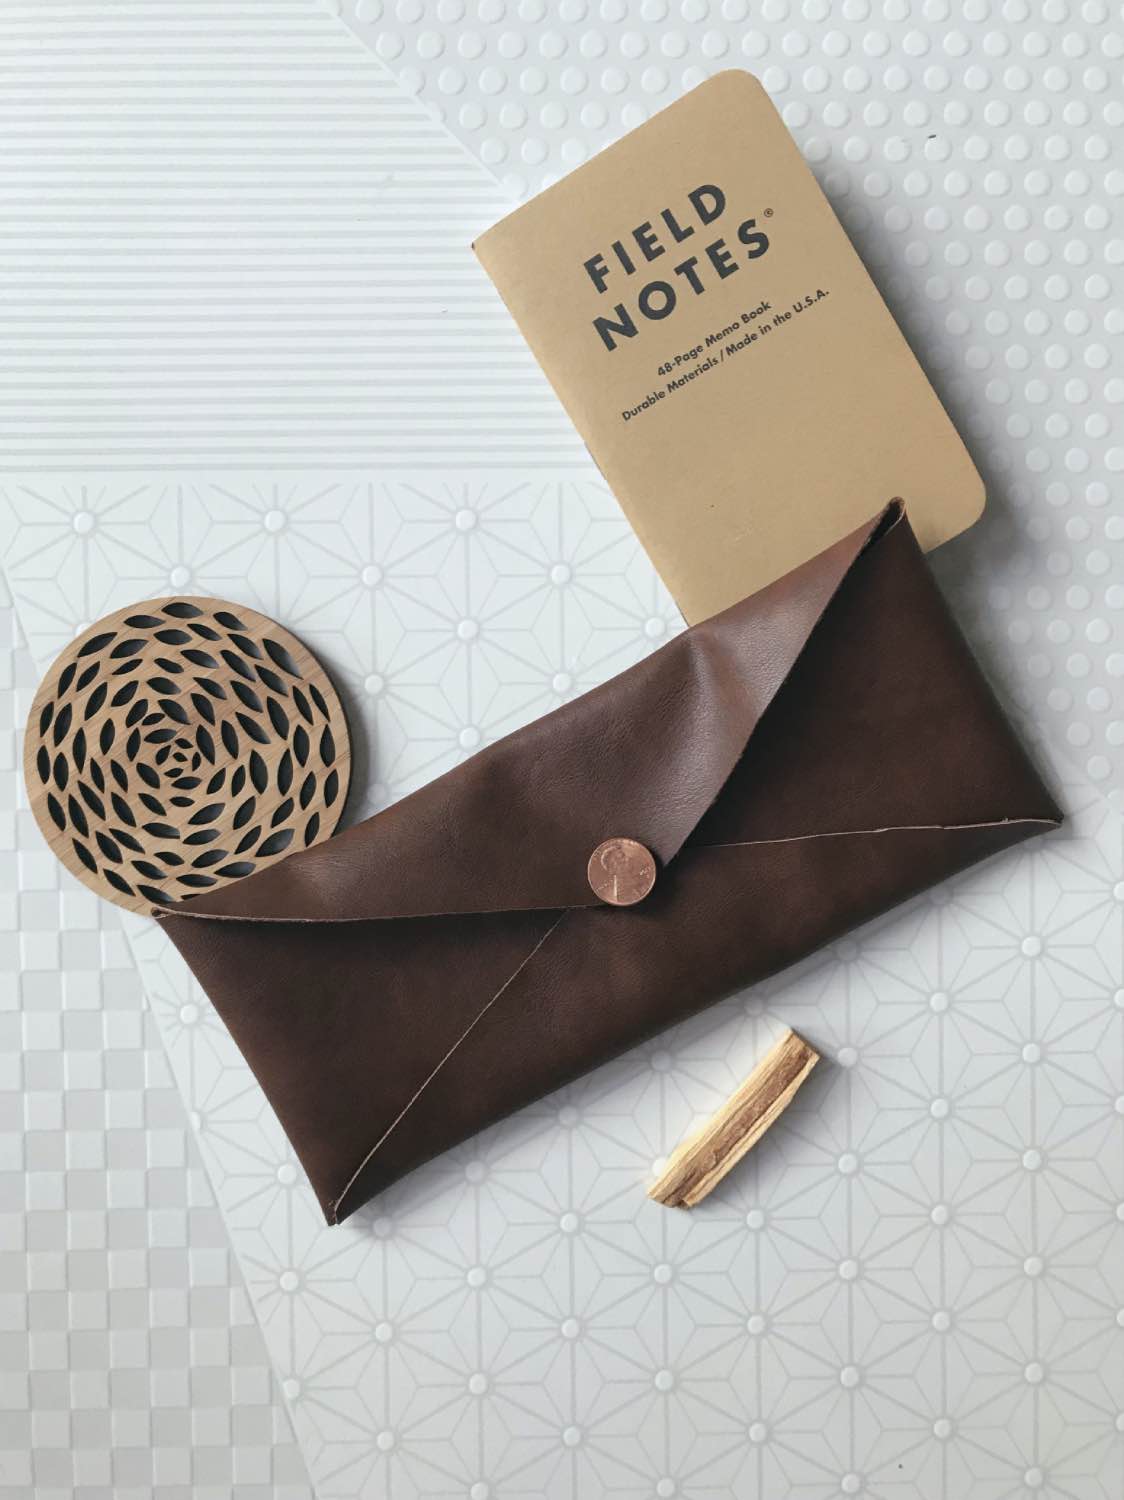
Who knew that making a diy travel clutch could be so easy?! This is a stylish way to store all your make-up, miniature shampoo bottles and other unmentionables when you travel. And this travel pouch is cute enough to take out as a clutch for a night on the town!

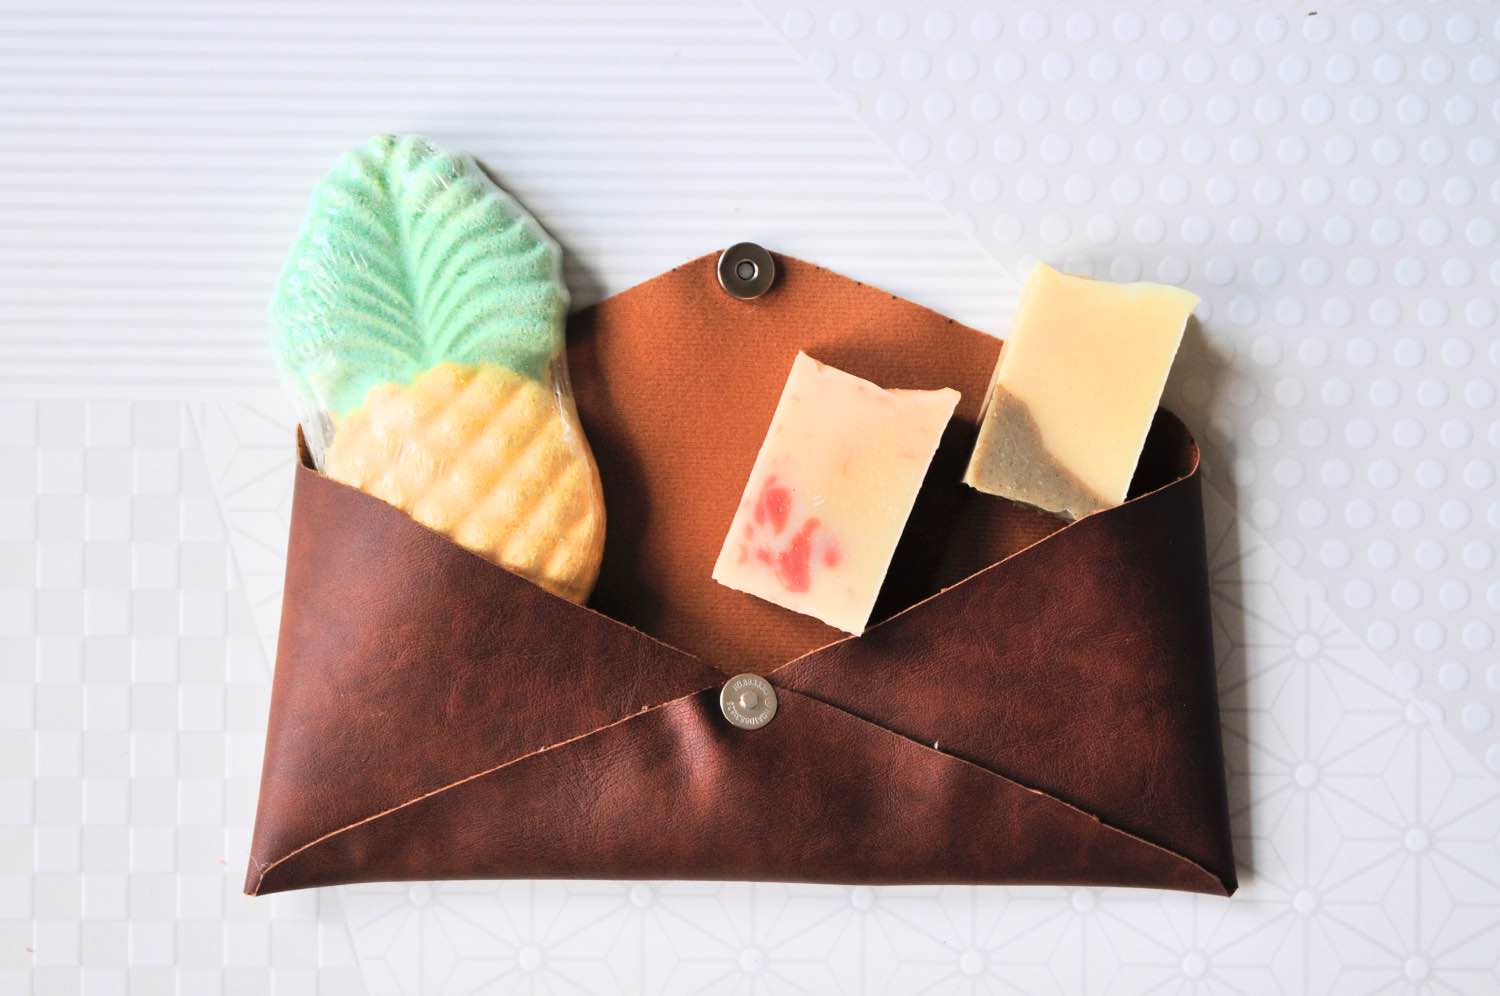
Best of all, it’s made with vegan leather! Vegan leather is easy to cut with scissors and has a gorgeous soft felt lining on the inside so you don’t even need to line this pouch.
This is the 2nd tutorial from the September 2019 Craft in Style Subscription Box. That’s our box full of unique craft supplies delivered to your door each month. In the September 2019 box, we were exploring handmade soaps and essential oils so this case is the perfect way to store your creations.
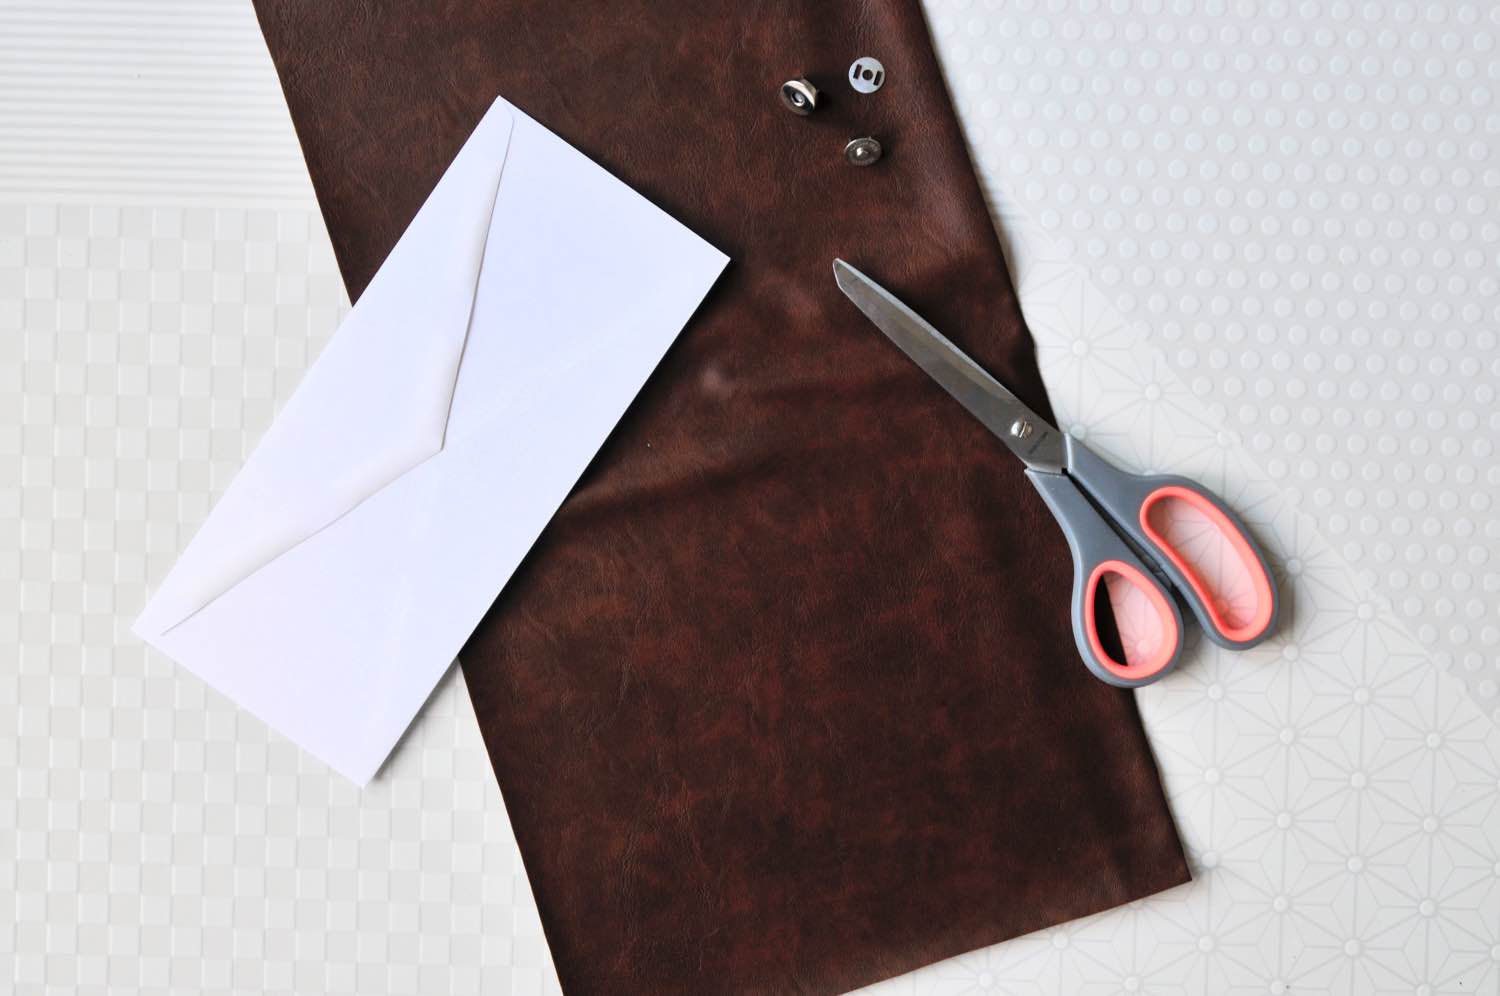
Supplies to Make a DIY Vegan Leather No Sew Travel Pouch
A Piece of Vegan Leather (19 inches across 8.5 inches tall)
This template (or you can use a traditional foldover envelope)
A Magnetic Clasp
A Drop of Any Type of Glue (Hot Glue, E6000, etc.)
In Addition to:
A Pair of Scissors
A Pen (or piece of chalk)
Optional: An X-Acto or Box Cutter
A Finishing for the Clasp like a Penny, Dime, or Stylish Button
So let’s get started making this DIY Vegan Leather No Sew Travel Pouch!
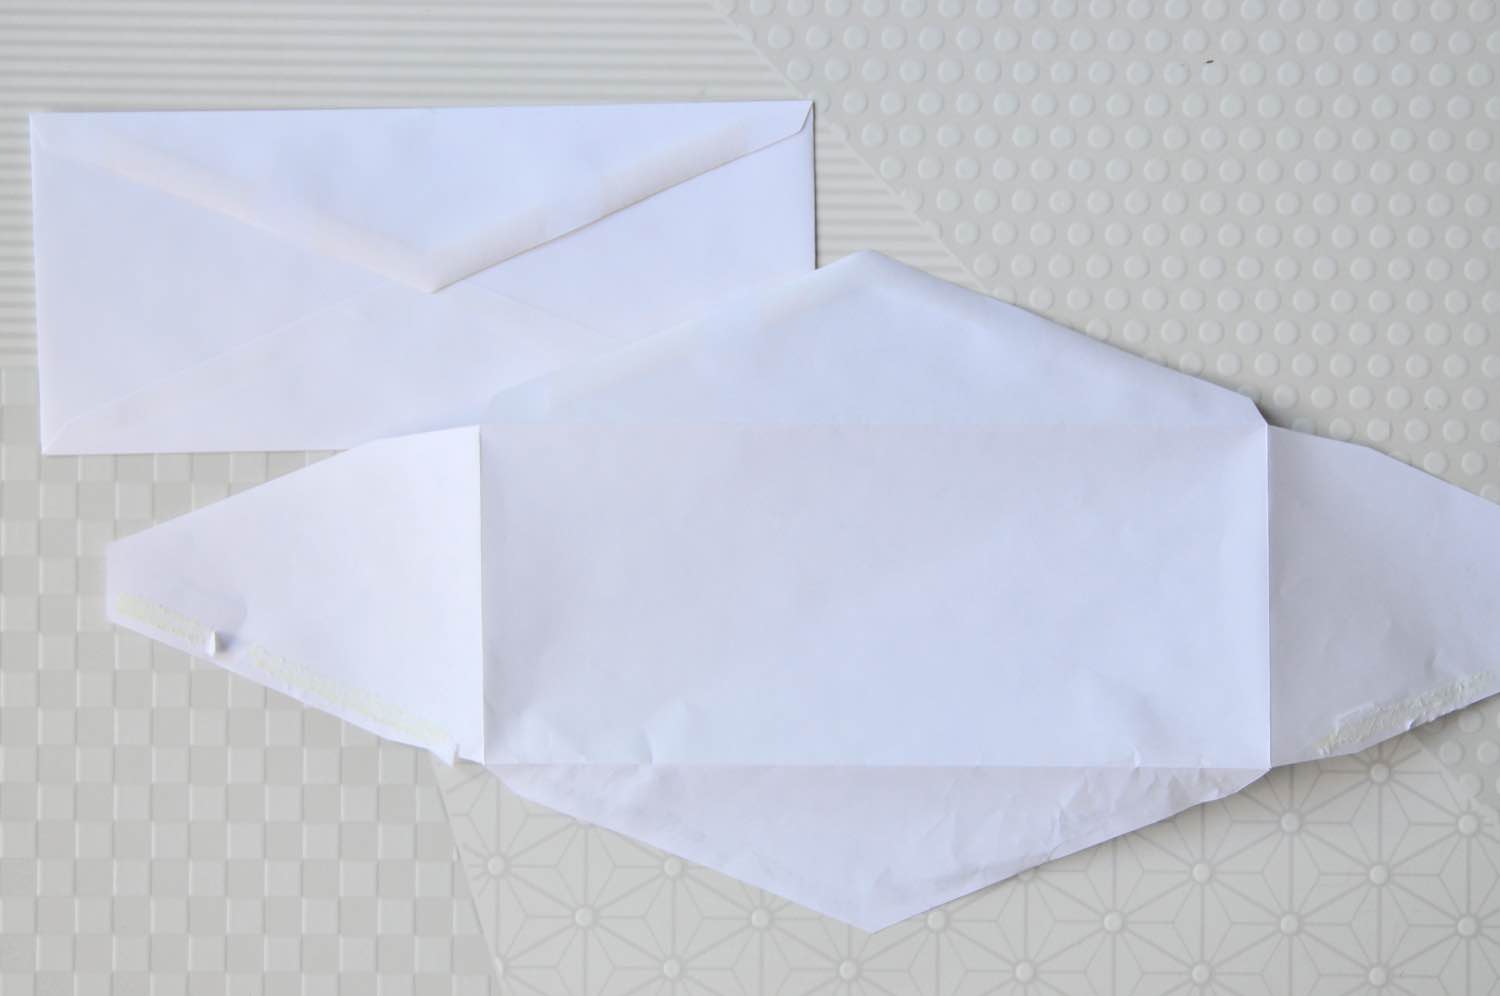
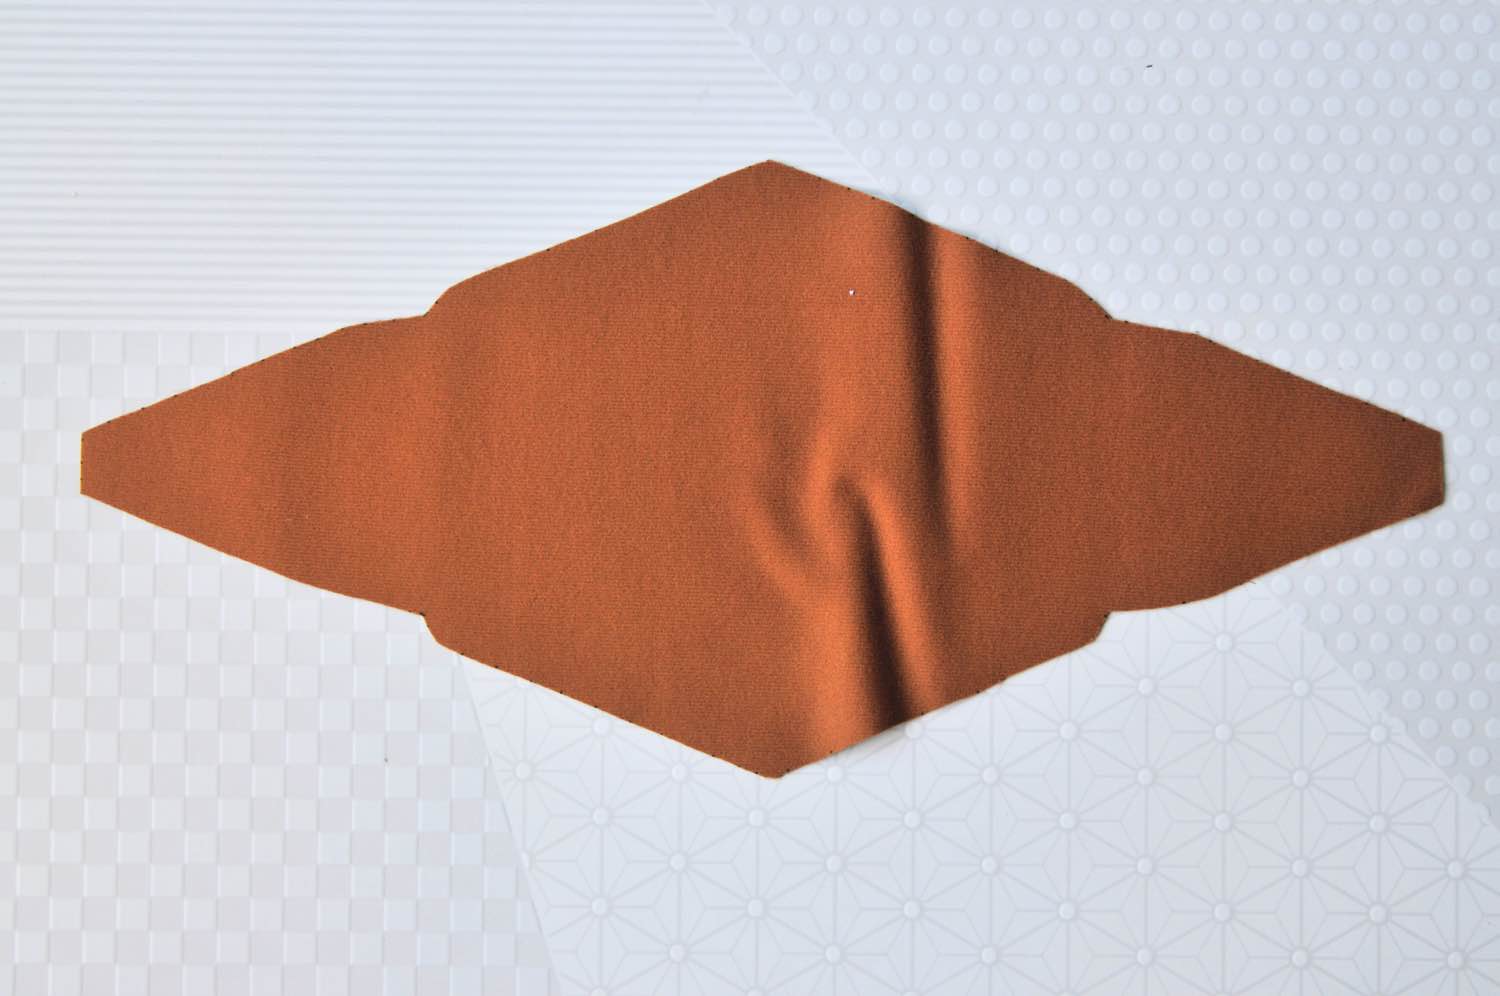
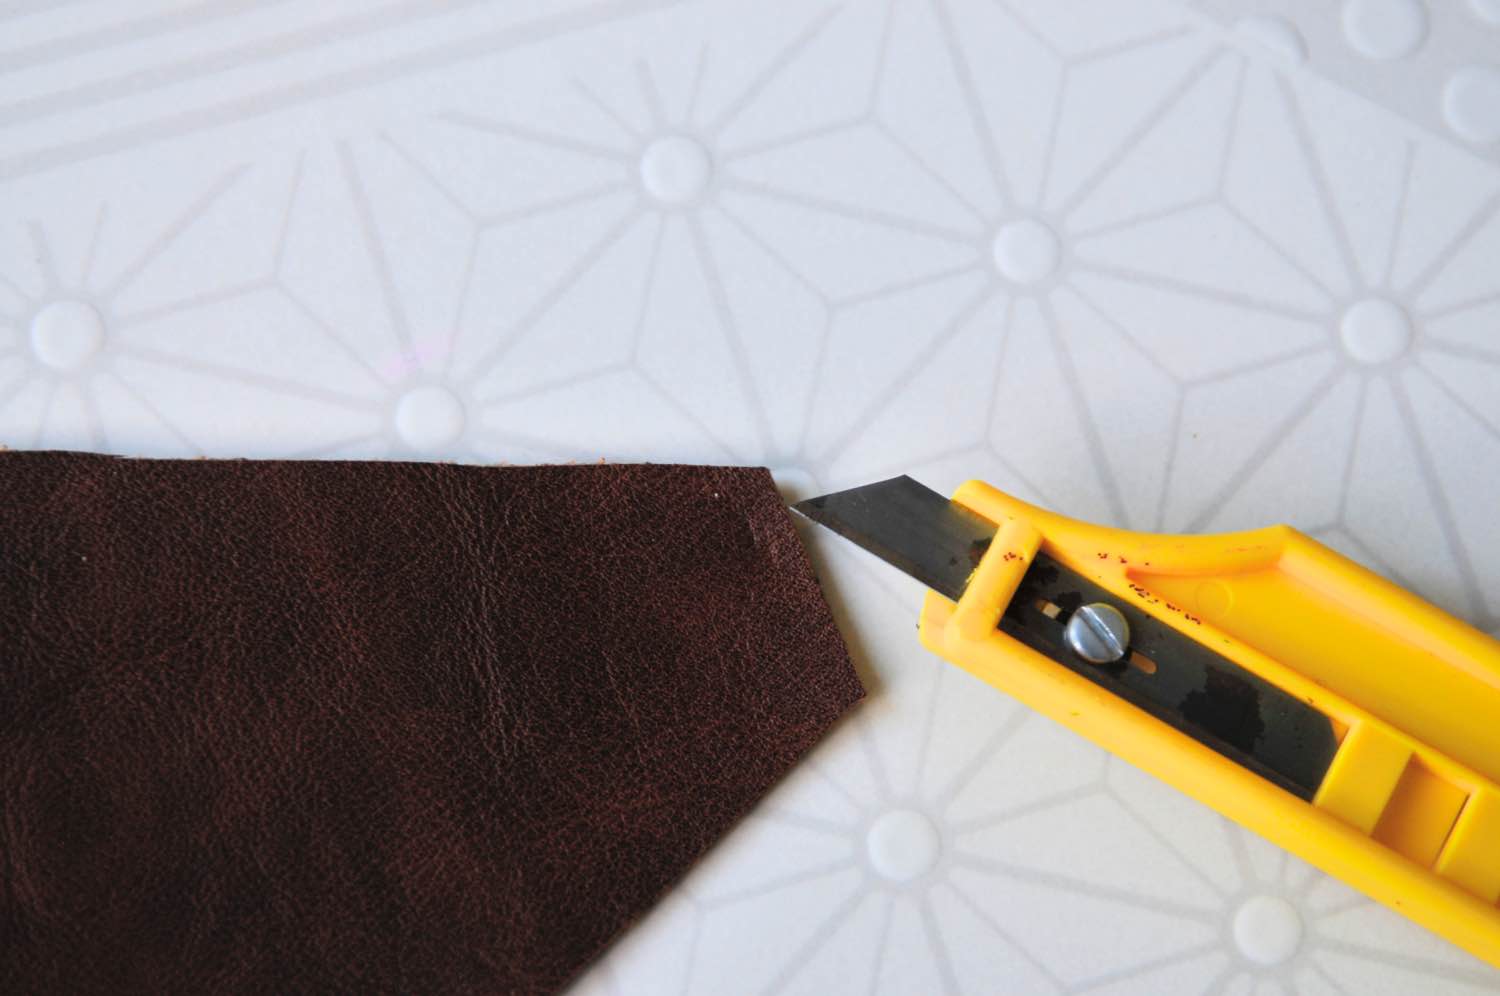
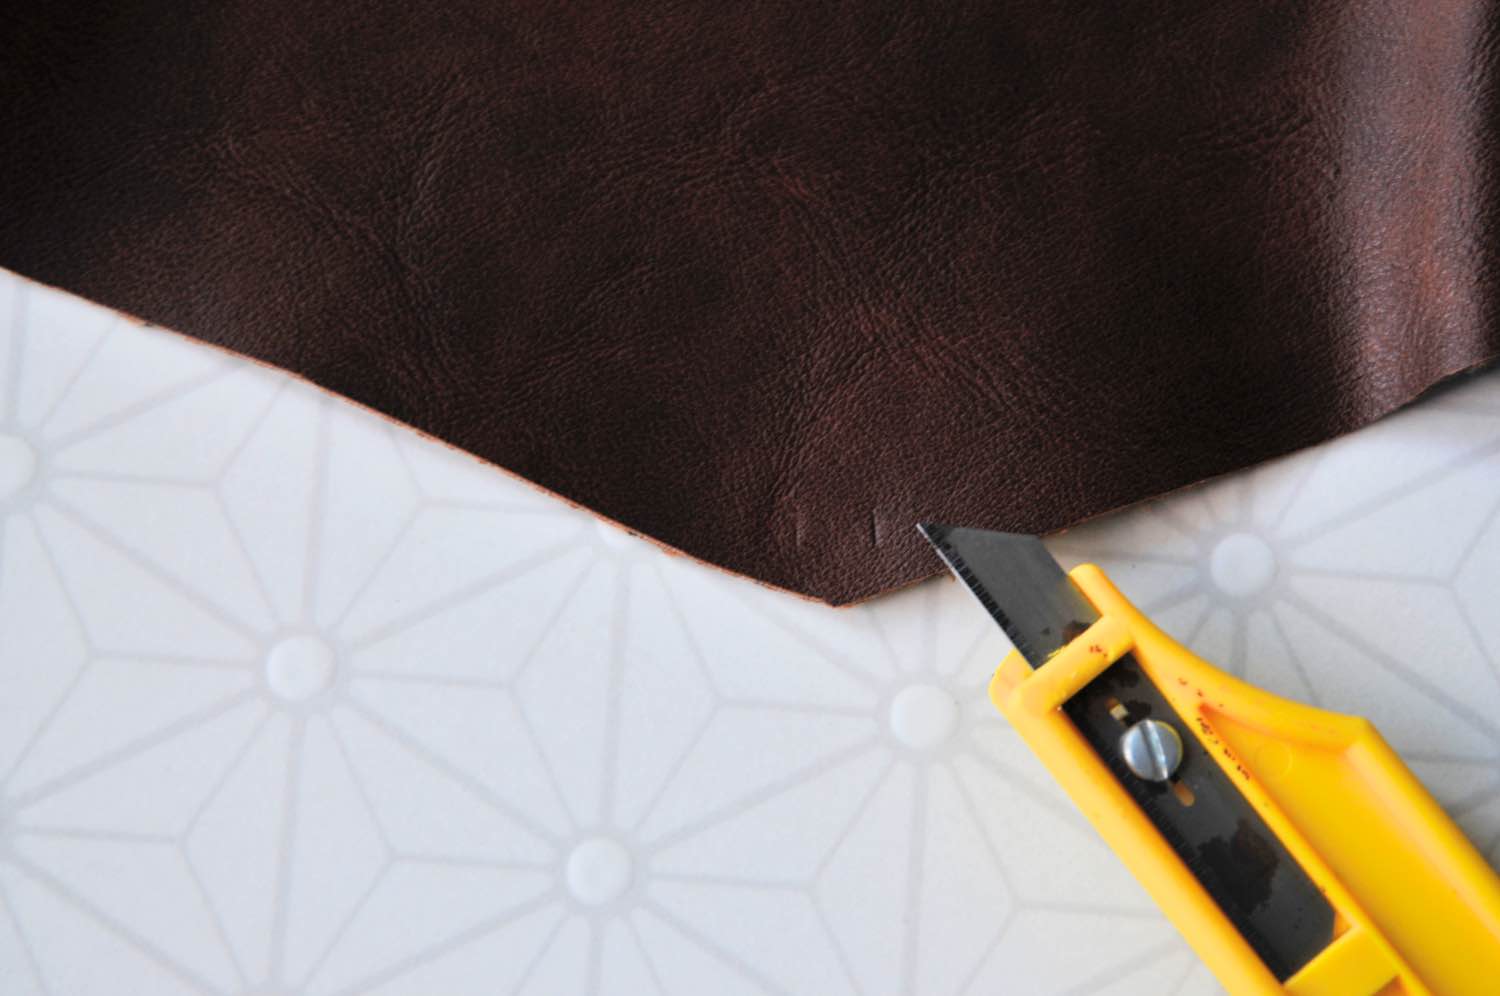
First, trace your template on the piece of vegan leather. Use the back of the leather, on the felt side to protect your markings from showing. Plus, the felt makes it easier to see your markings.
Trace the template slowly and carefully, since the tracing and cutting will make or break how professional the finished product looks.
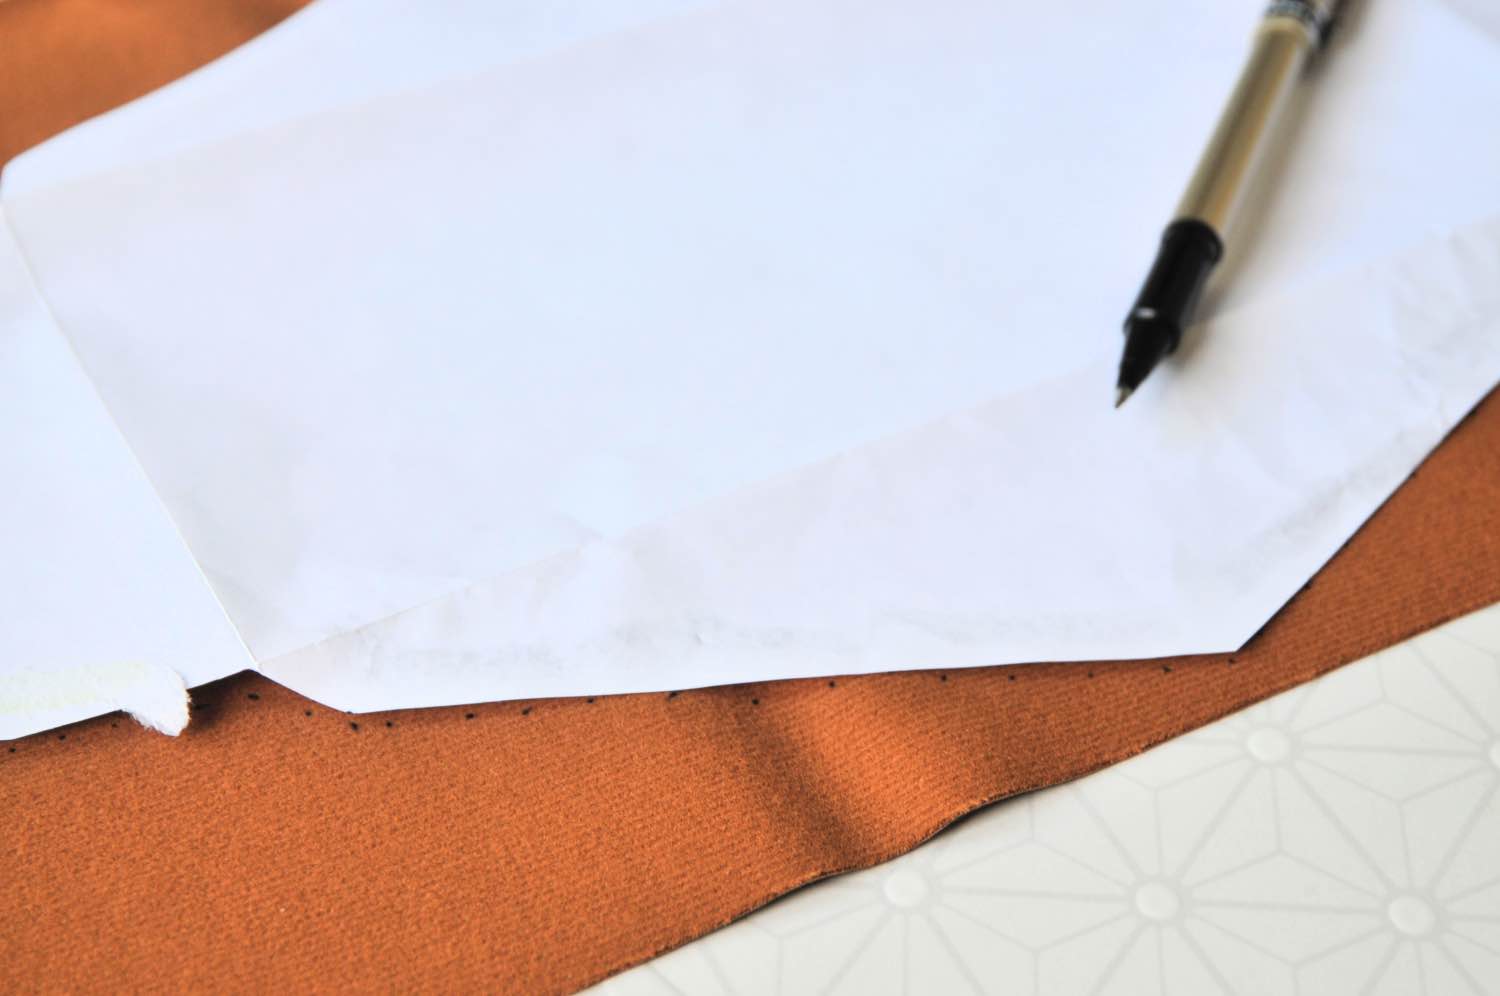
You can see my dotted line technique here. I used a dotted line because I didn’t want the line I drew to be seen in the finished product.
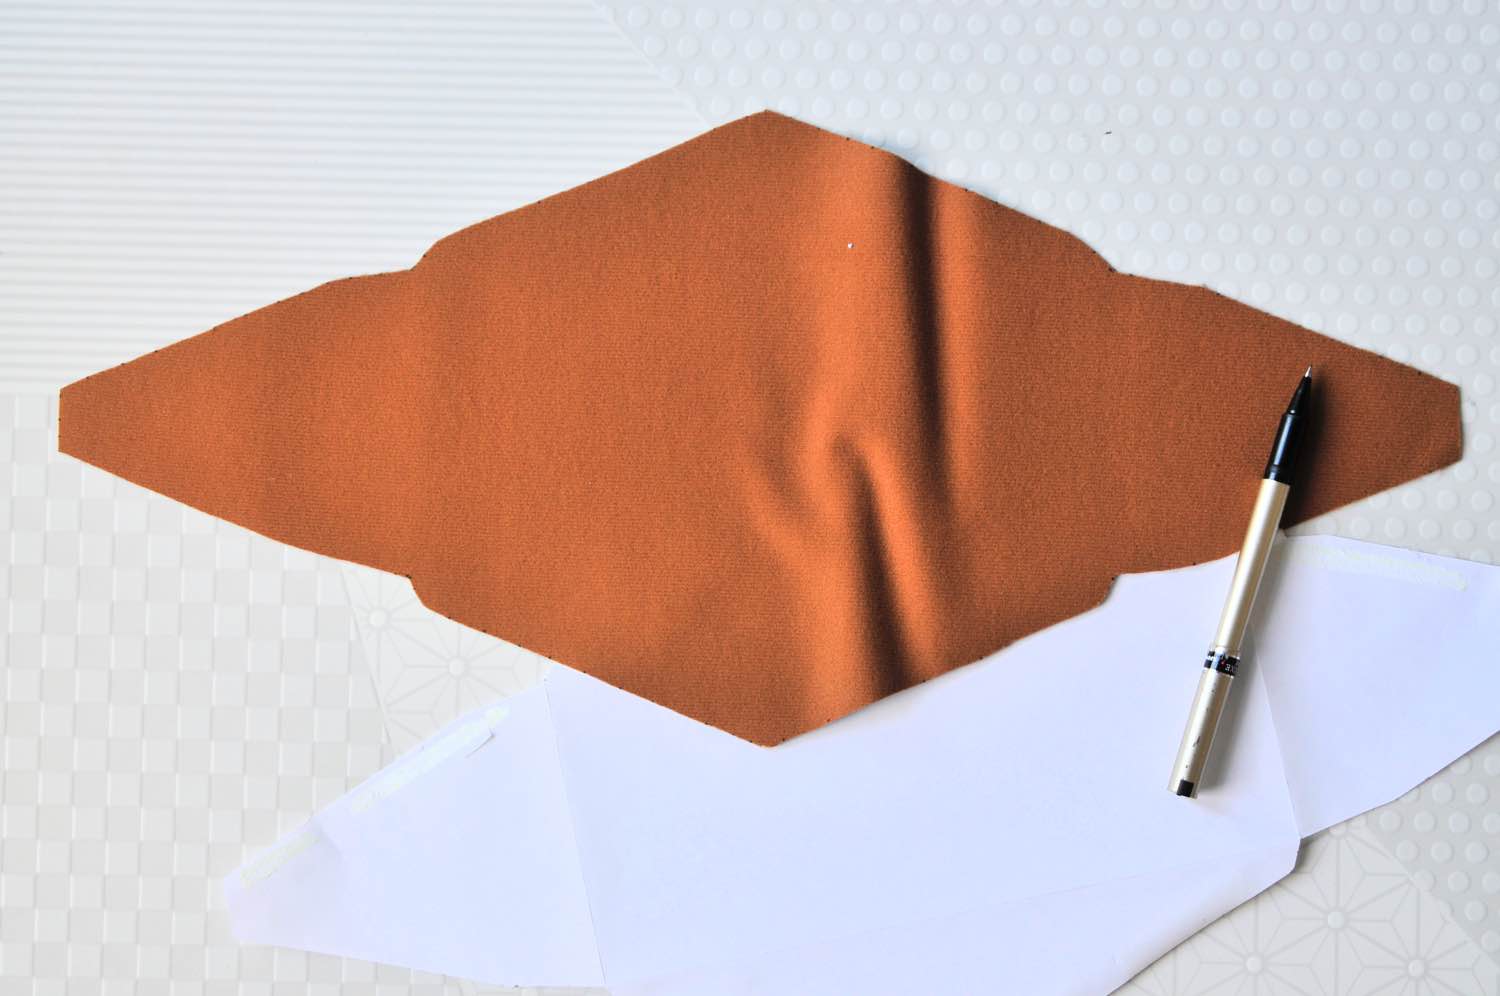
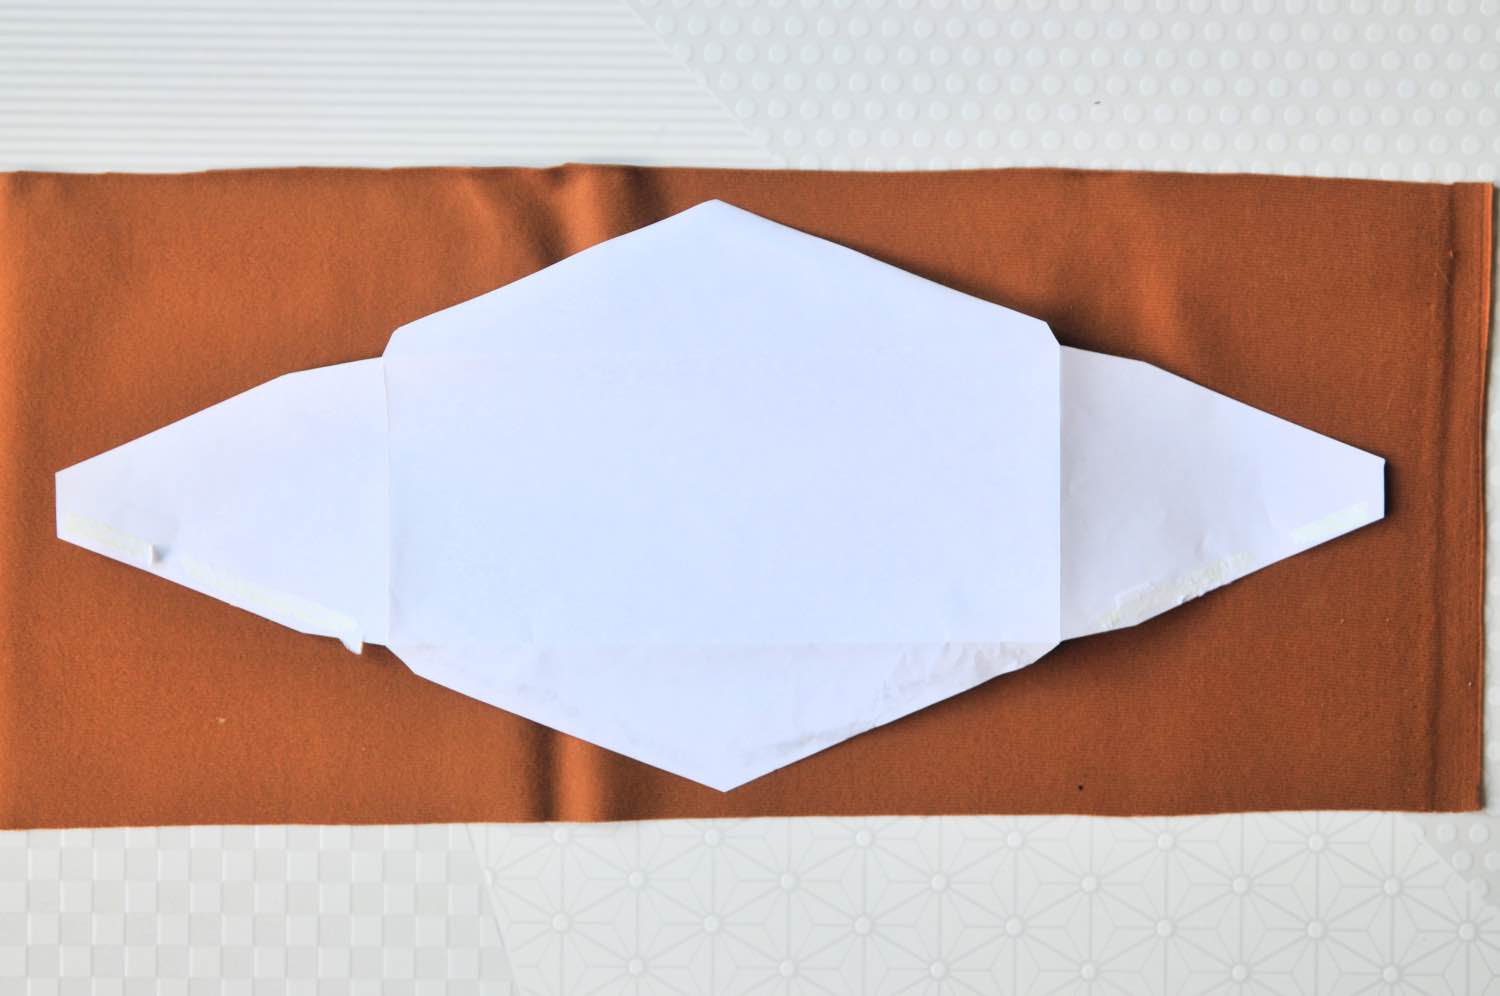
Next just cut out the leather from the template! I highly recommend saving your scraps. They are the perfect size to make cute leather jewelry like earrings for example.
Your vegan leather travel pouch should look like this now. And now we’ll just fold it up and add the clasp. Pretty easy so far, right?!
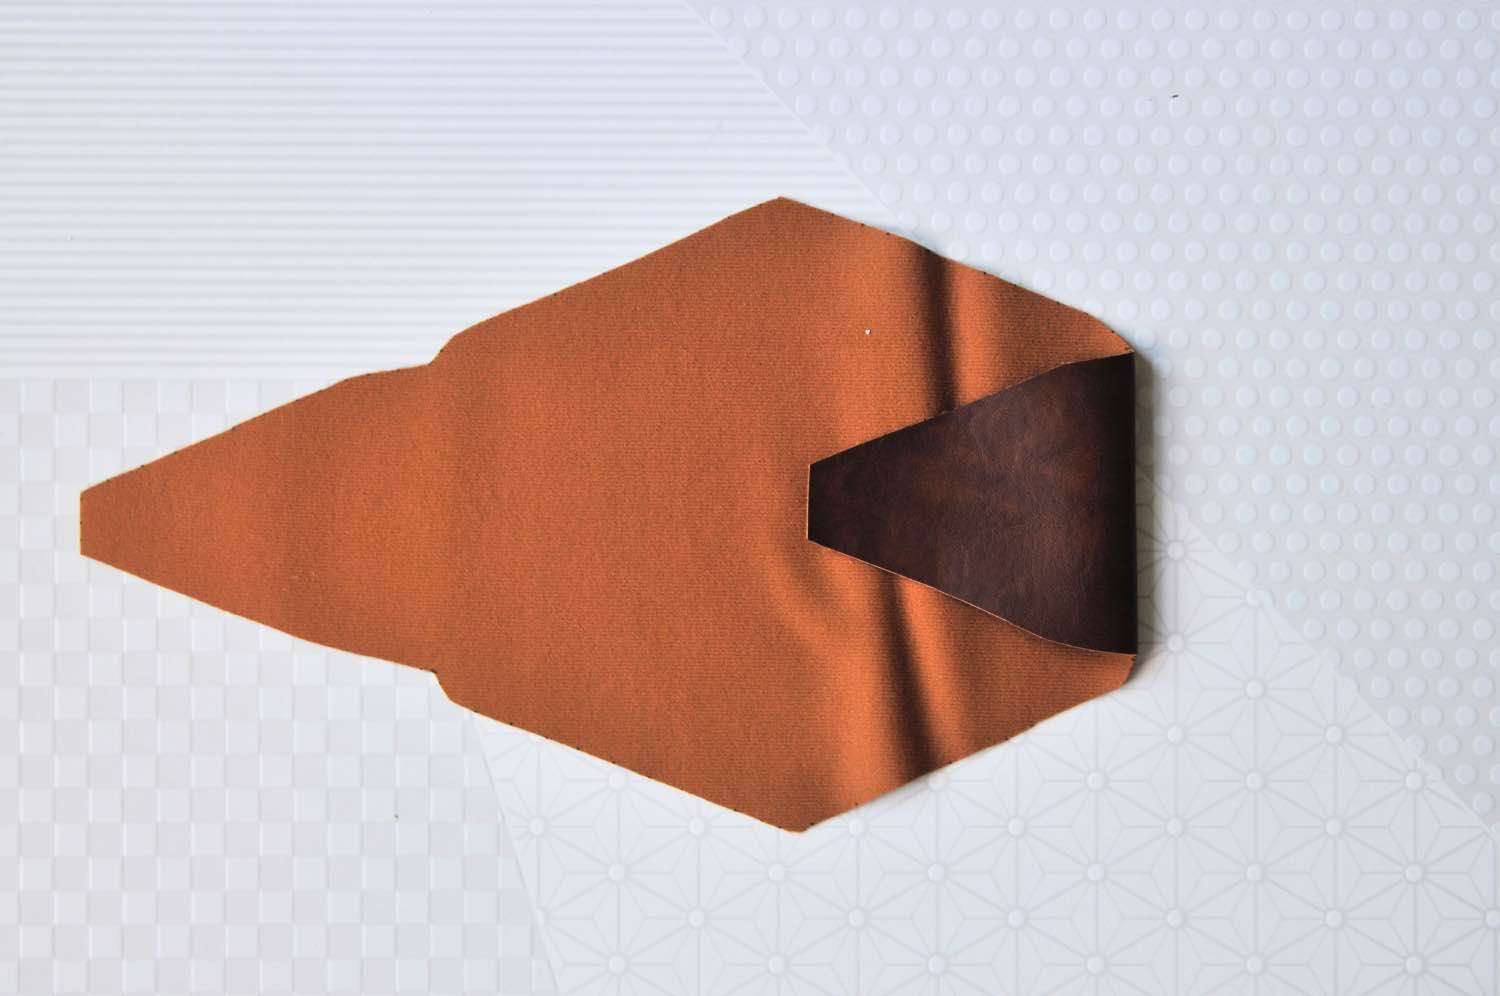

Fold the sides in first. The will have a bit of give to them, so feel free to tape them into place or add a bit of weight to the sides so that they are flat along the back of the travel case. Then fold the bottom up last.
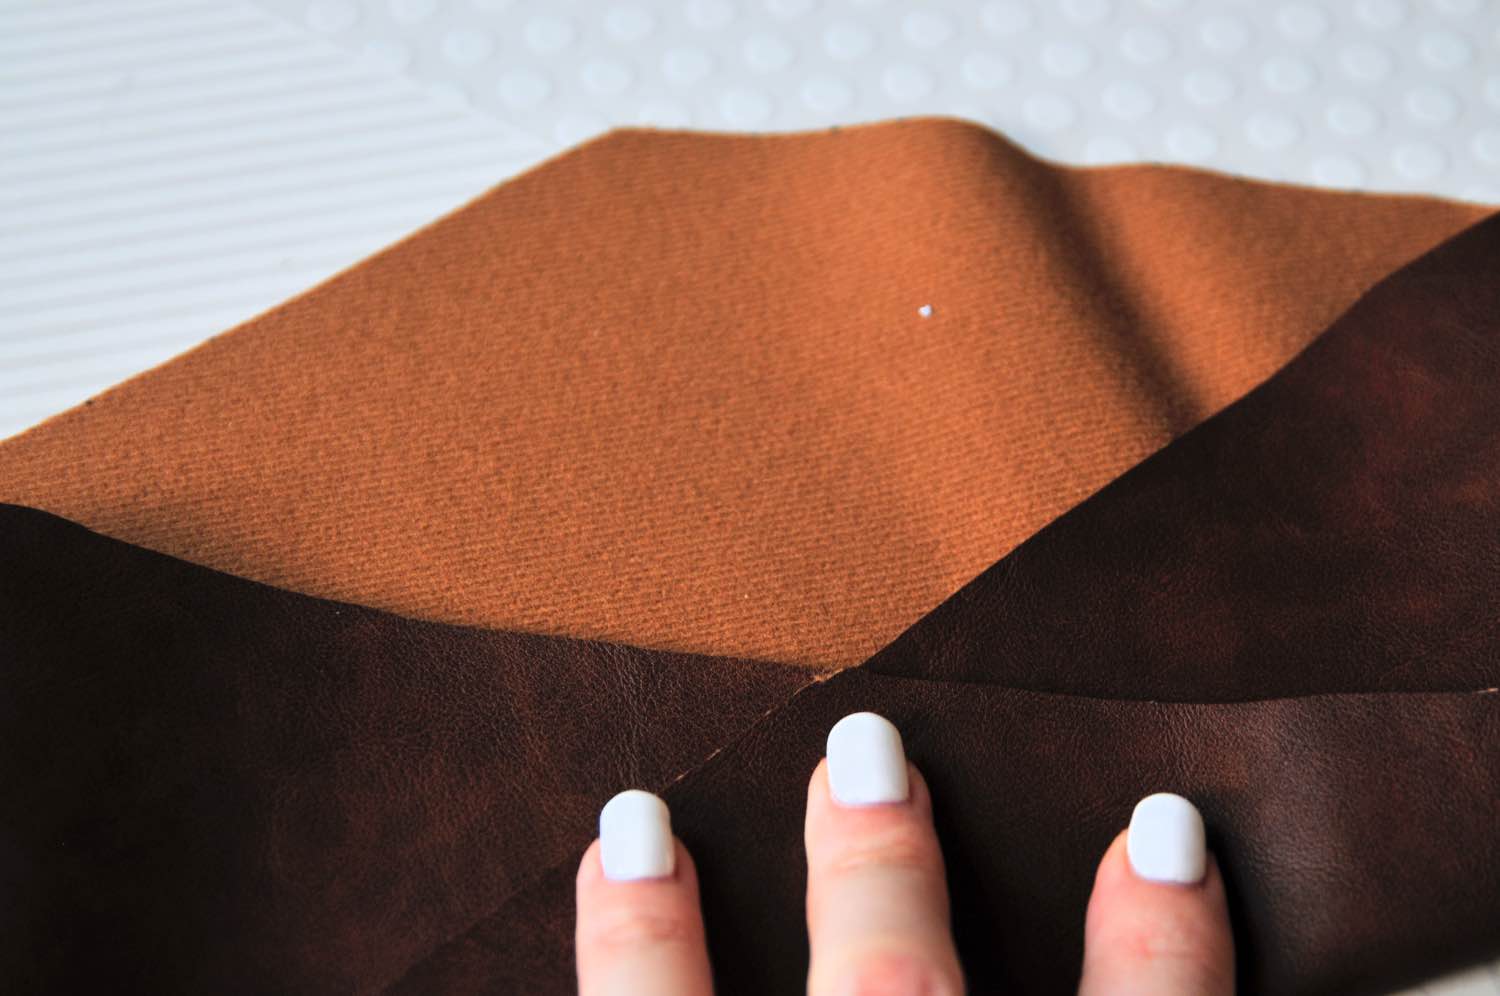
Be sure that all 3 of your sides are perfectly lined up and touching. Since we are adding the clasp, this is how your sides will hold together permanently, so we want to make sure to get it right.
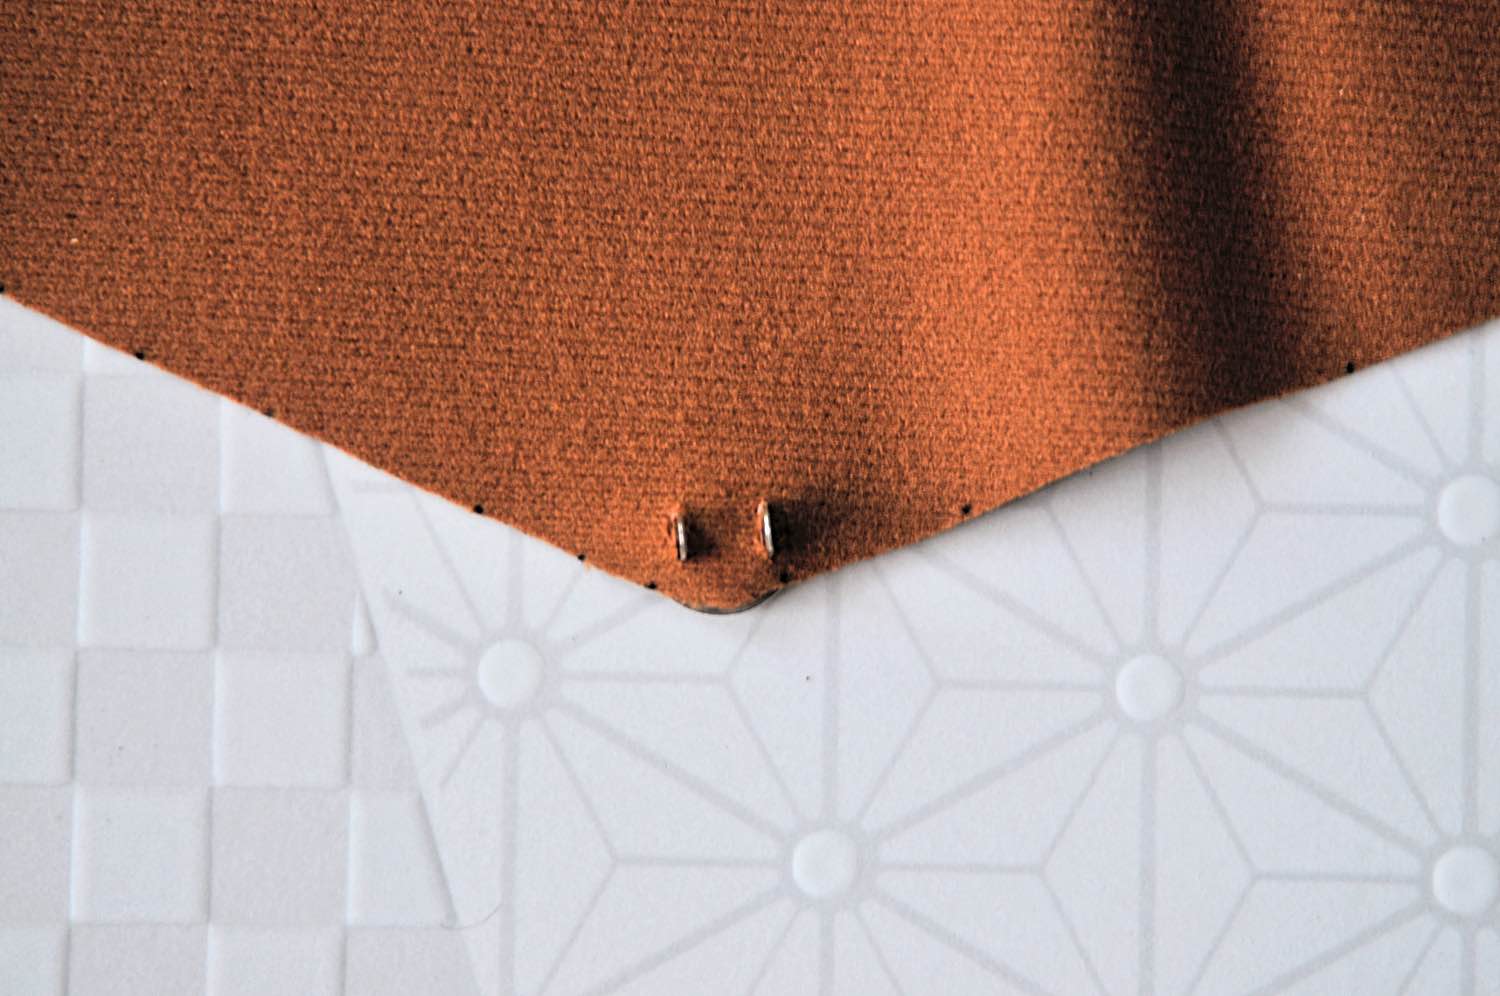
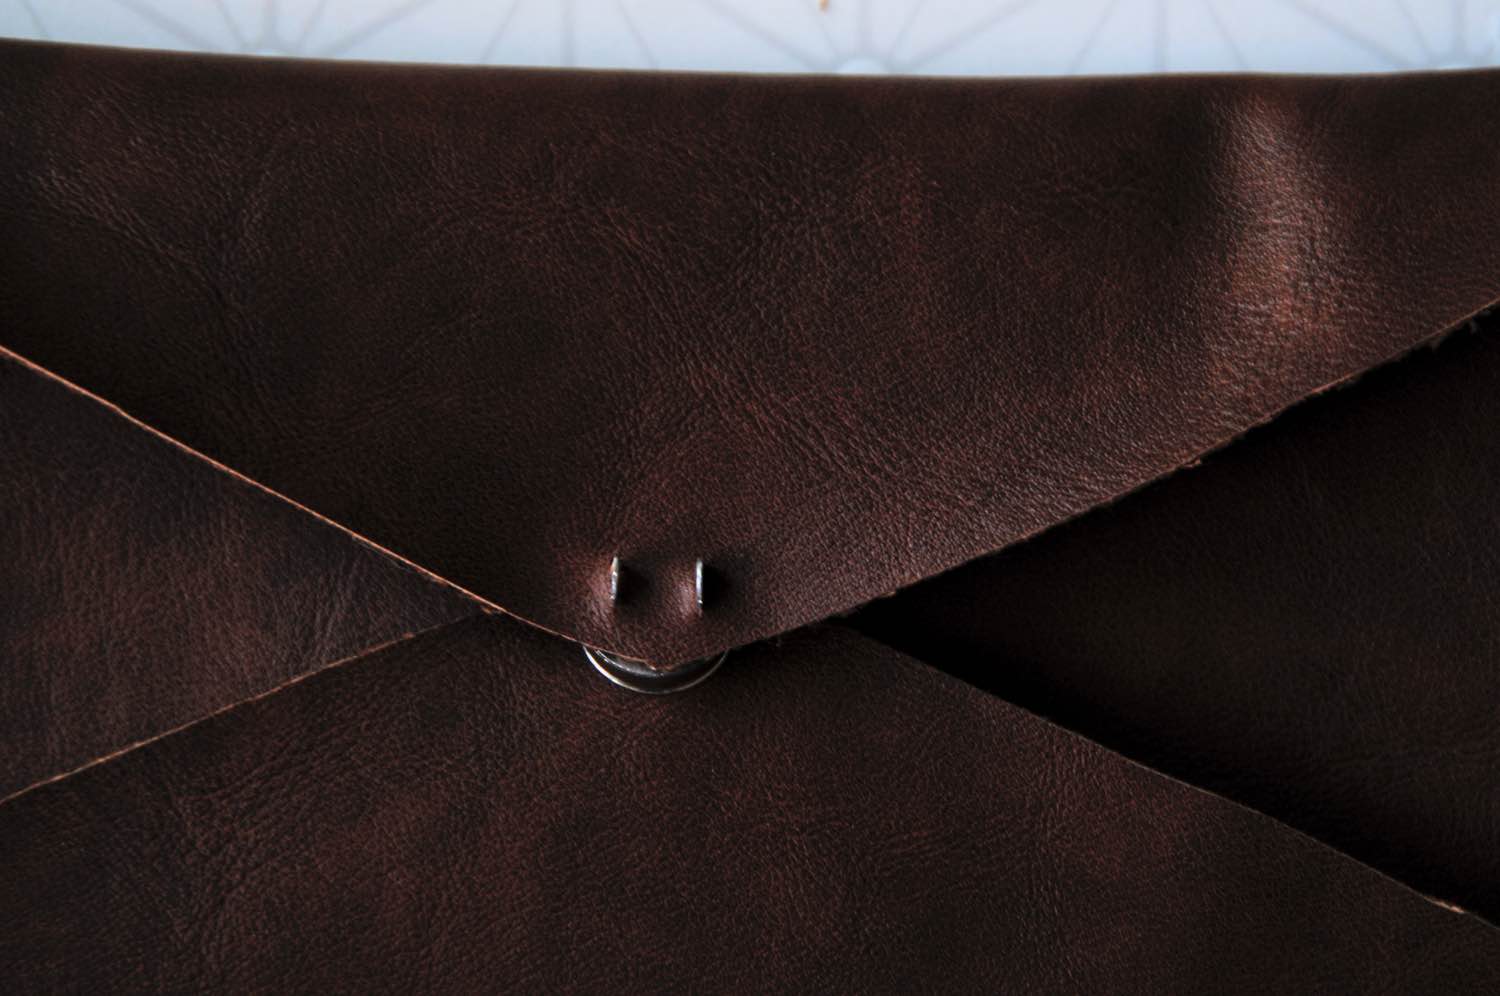
Once you know just where you want the clasp, press the clasp’s points into the vegan leather until you can see the indentions of where you pressed it, held in the leather. And pull the 3 layers apart. You will need to put the clasp through layer by layer – starting with the bottom. If you are strong, you can poke the clasp right through! But I personally used a box cutter and just made a tiny little slit for the clasp.
Next repeat the steps: press the clasp’s points into the next layer either the left or right side of the travel case. Once you can see the indention, use a blade to cut a tiny slit and push the clasp tip through.
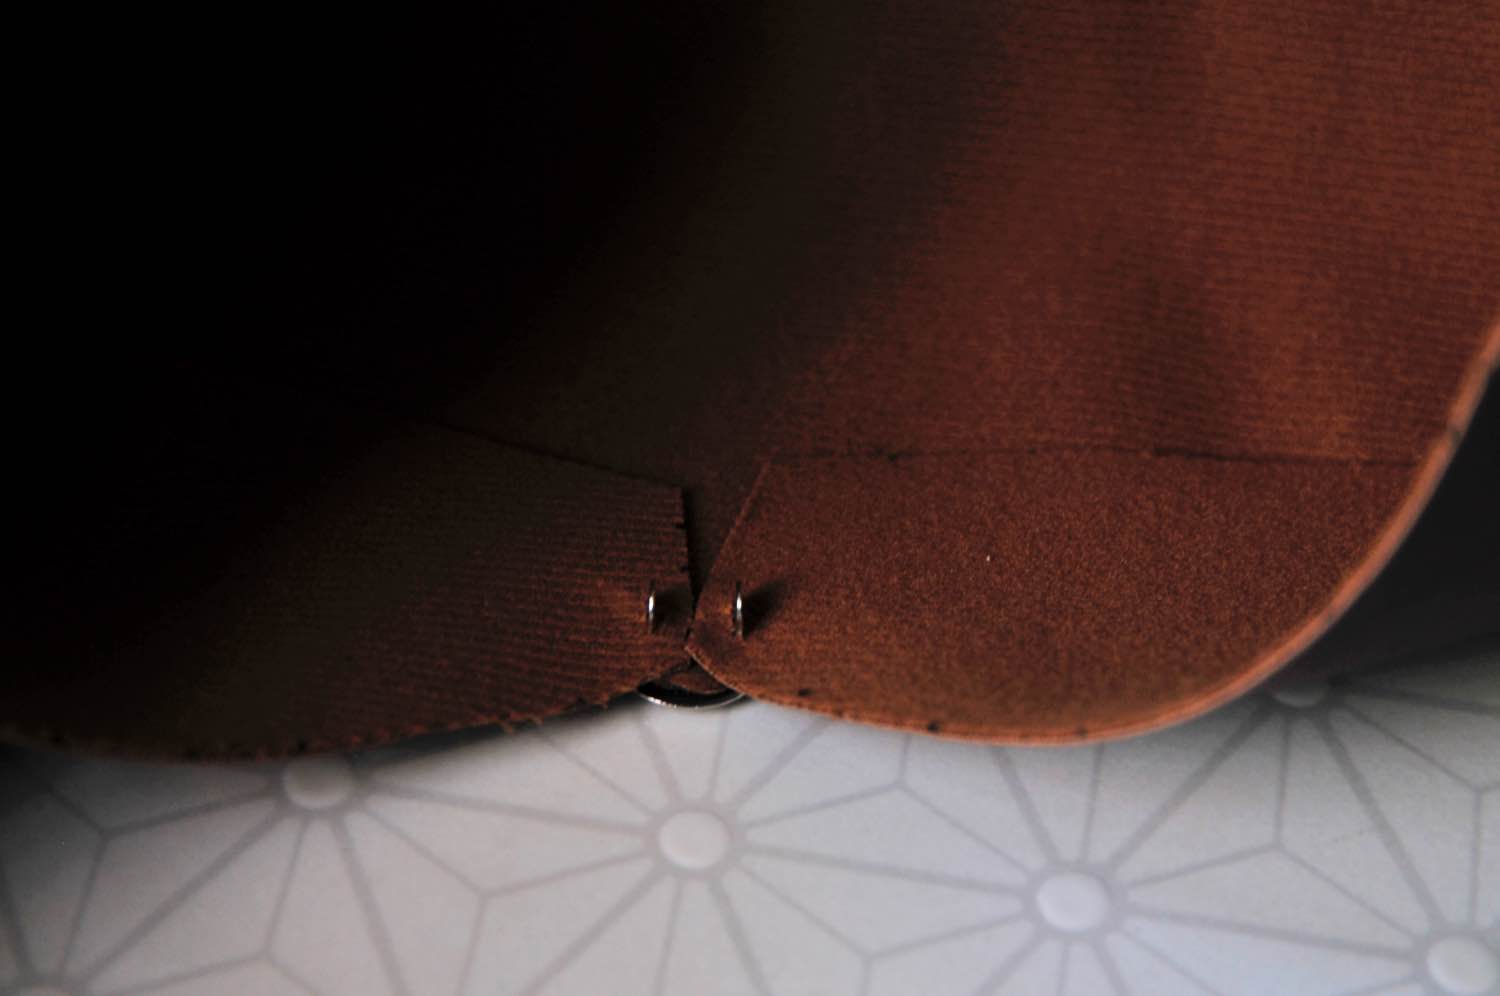
Your clasp comes with 2 round discs – one for each side of the claps. Slip it on over the ends that are pointing out, and use the end of your scissors to fold the clasp ends down into place.
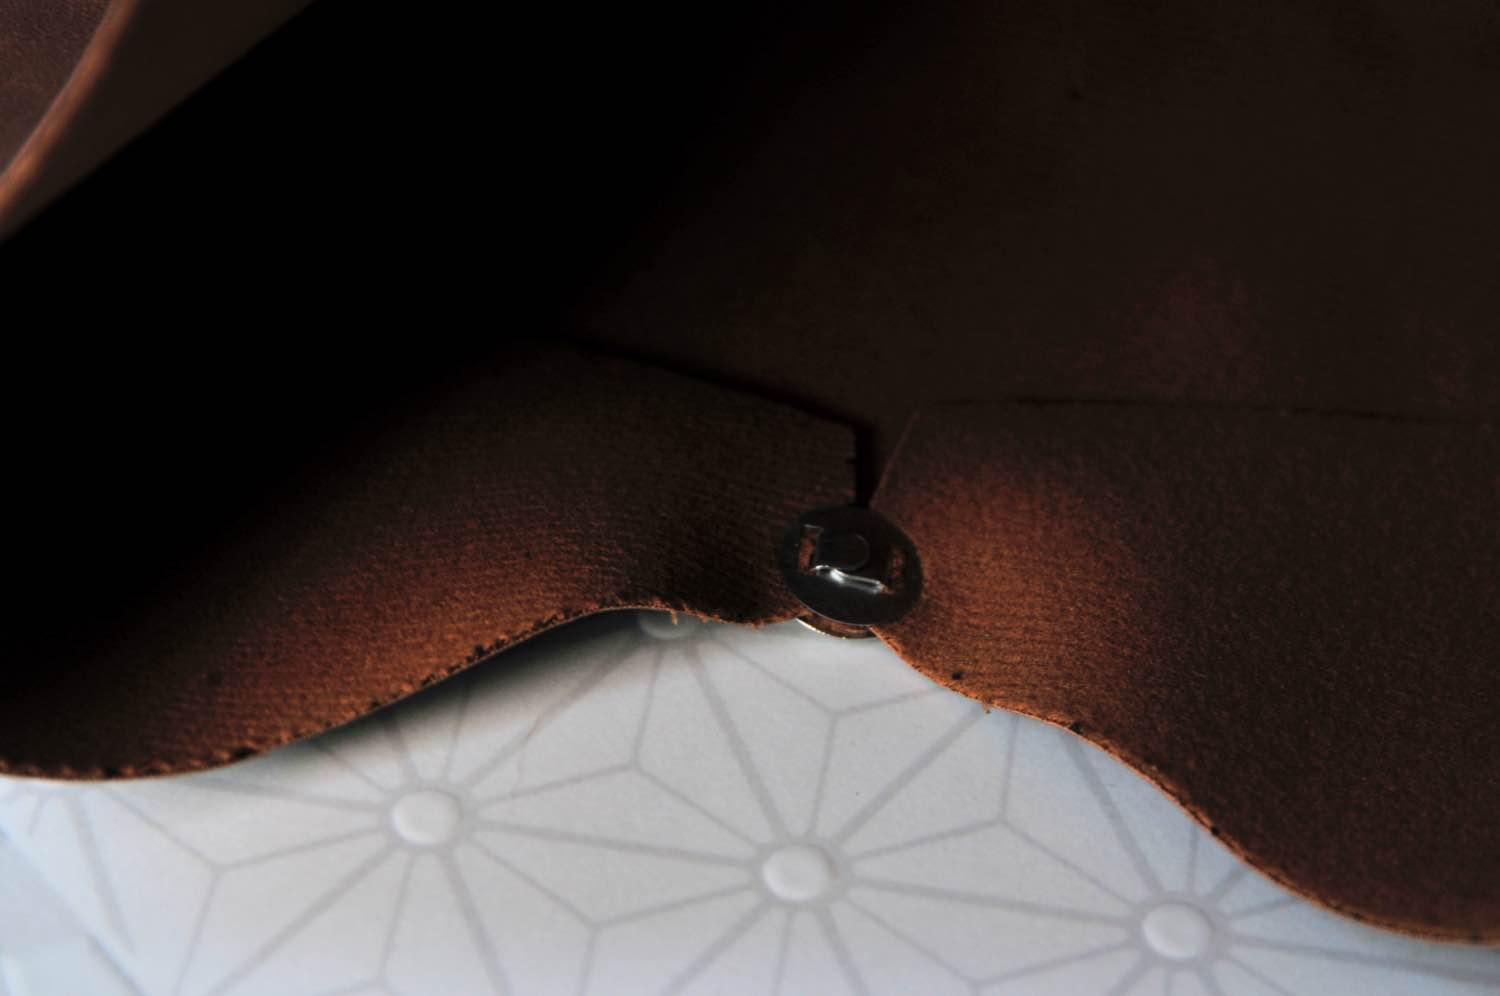
Your clasp has 2 pieces – 1 for the body of the clutch and the other for the top of the clutch. So now, we will attach the 2nd clasp to the top of the clutch. It’s all the same steps – just on a different part of the clutch.
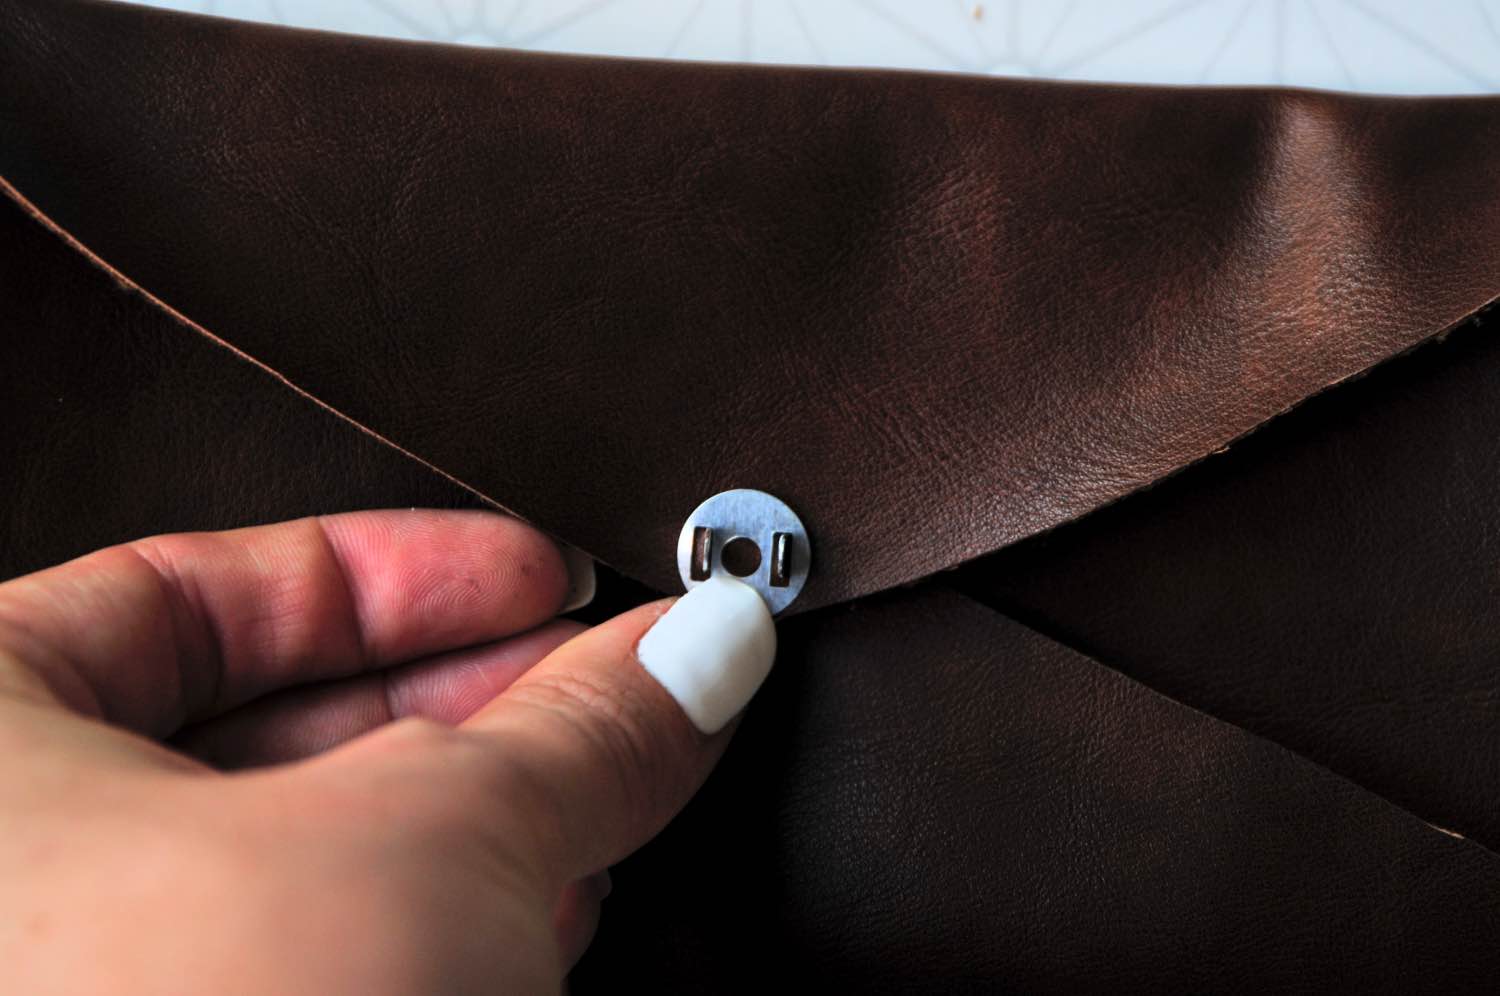
Again, figure out precisely where you want the clasp to go. This time, you will be working from the inside out. Cut your slits and poke the clasp through. And place your flat disc on top. Last fold the edges of the clasp down, to hold it into place.
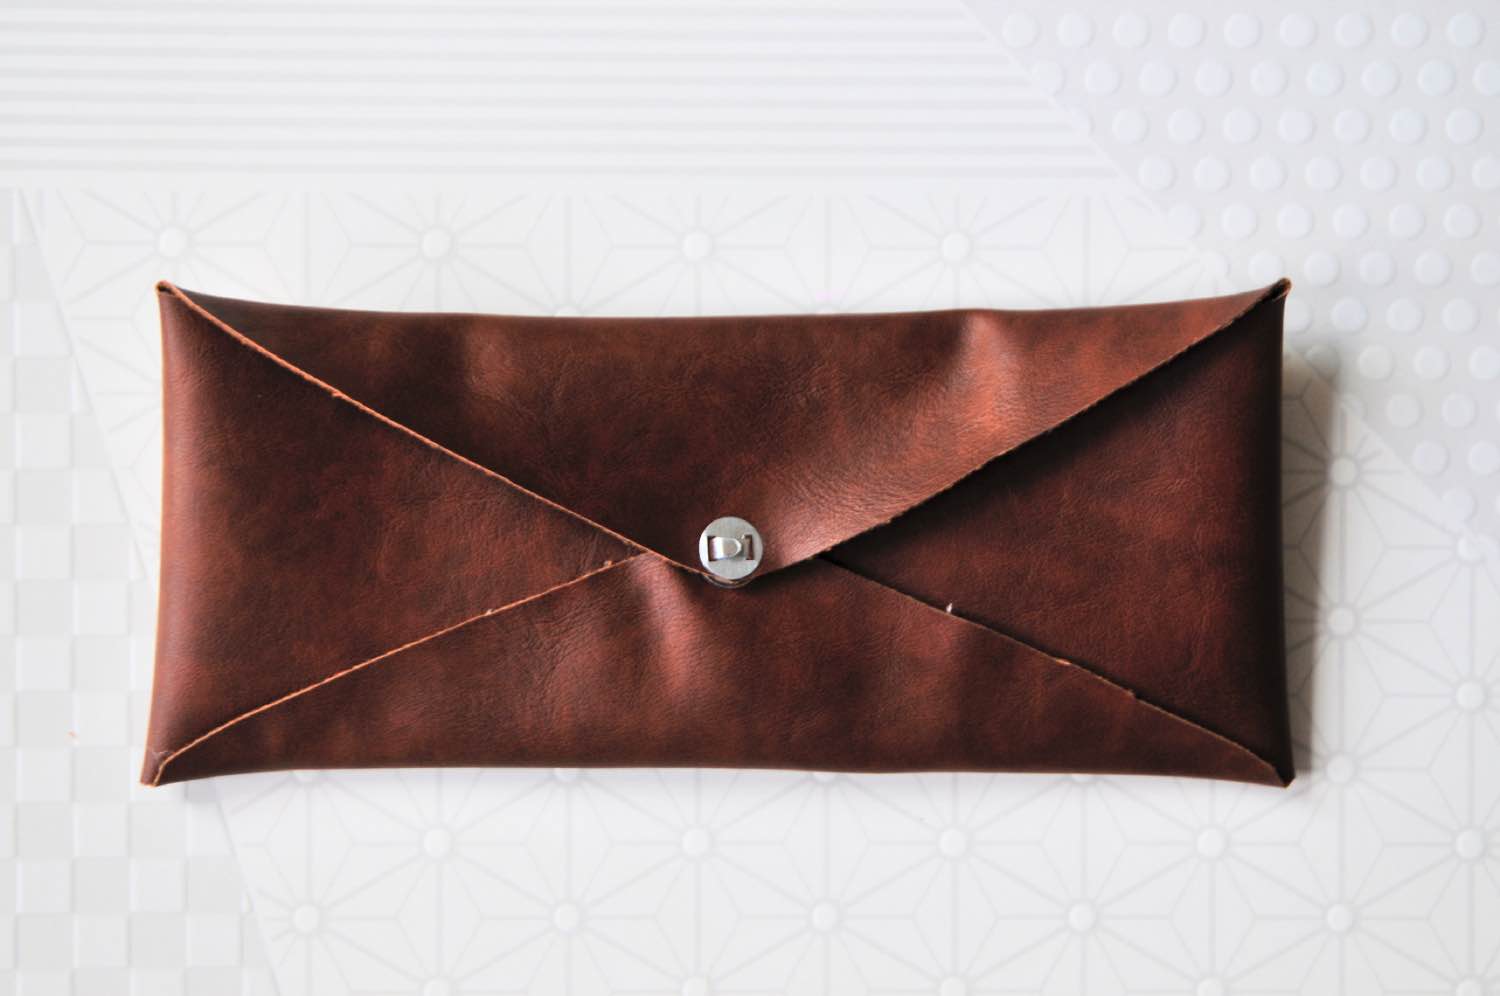
And viola! You are almost finished. You just need a couple of last minute touches. First of all, add a couple of drops of glue to hold the bottom of the travel case to the sides of the travel case. We didn’t include glue in Craft in Style, because you can use just about any kind: fabric glue, E6000, or hot glue.
Next you may have noticed that the front of your claps is not so stylish but there’s a quick fix for that!
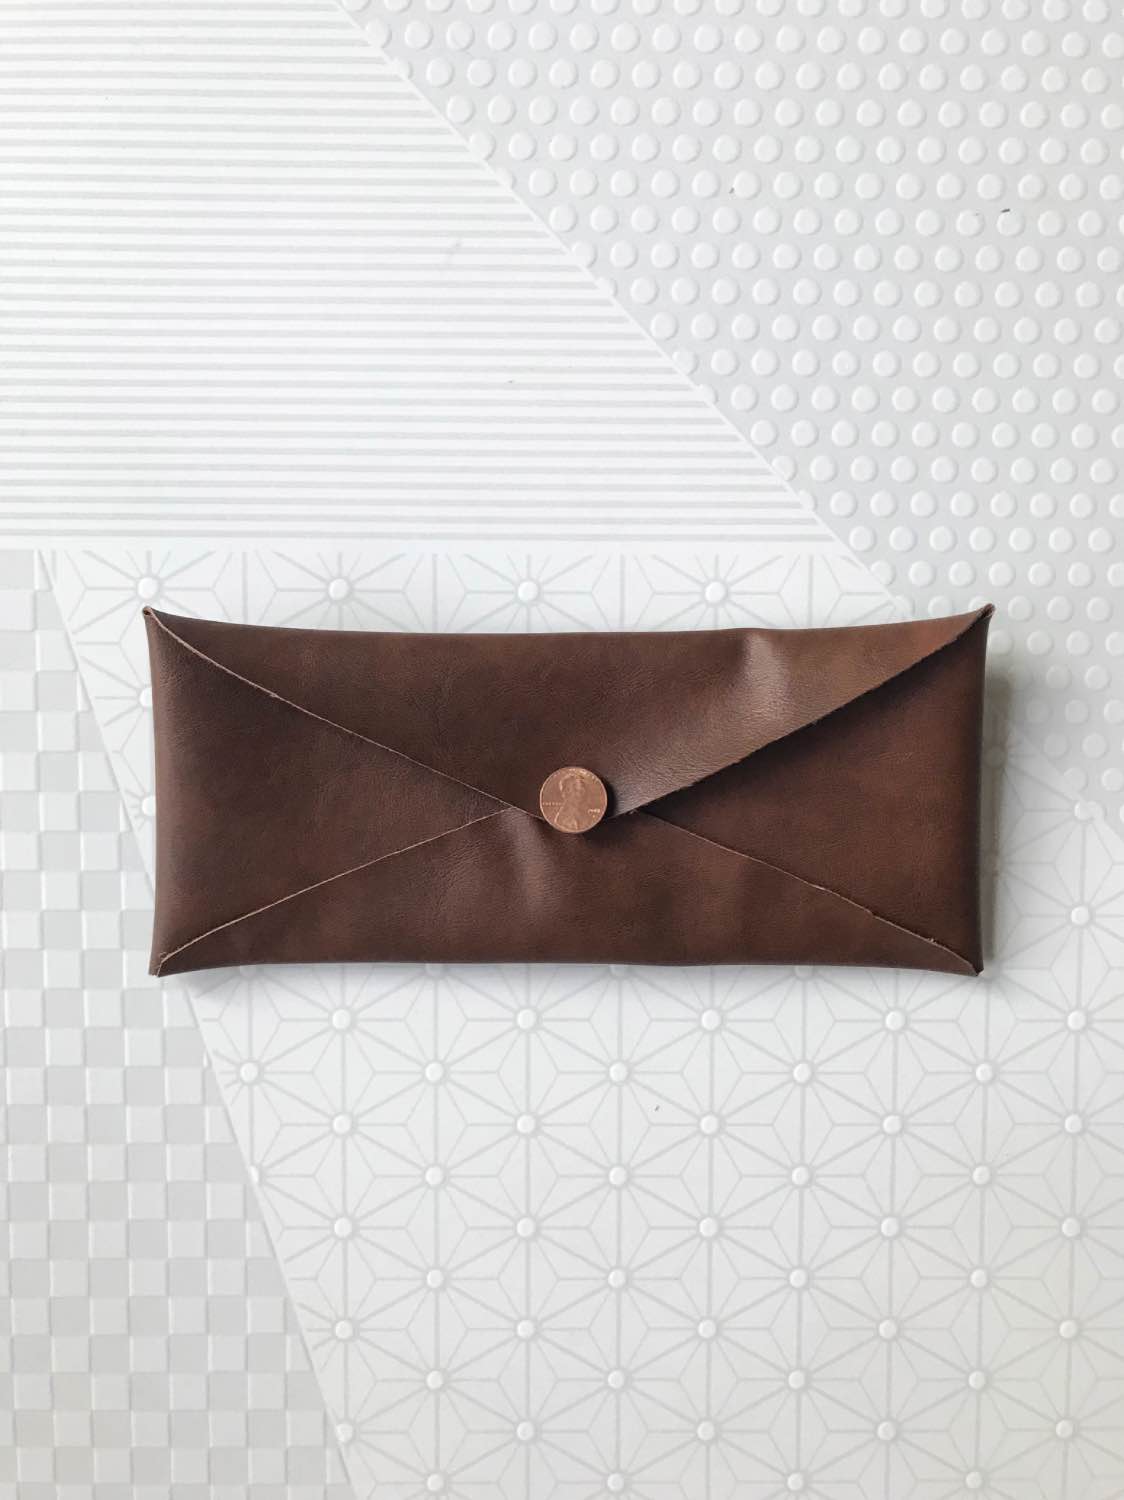
Add a penny like I did here! You could also add a dime or any stylish button. Again, all you need is a drop of any of your favorite glue. And you have your very own finished travel pouch.

Can you believe that this is a no sew tutorial?! It’s amazing all the things you can make with just some cool folds and cool shapes – no sewing machine required. So what are you going to place inside?
Are you going to strictly use this as a travel case to carry your handcrafted soaps you make with the September Craft in Style Box? Or are you going to use this as a stylish clutch and head out for a night on the town? Tell us in the comments!
And whatever you do, be sure to keep your scraps so you can make all kinds of stylish vegan leather accessories! And if you want a video tutorial with all the same steps, watch the video below. The only difference with the video tutorial is that they lined the inside of their clutch with a 2nd fabric. Fancy!
Let’s Stay Friends!
Insta | Pinterest | Enews | TikTok