
DIY
DIY Velvet Jewelry Box
Feb
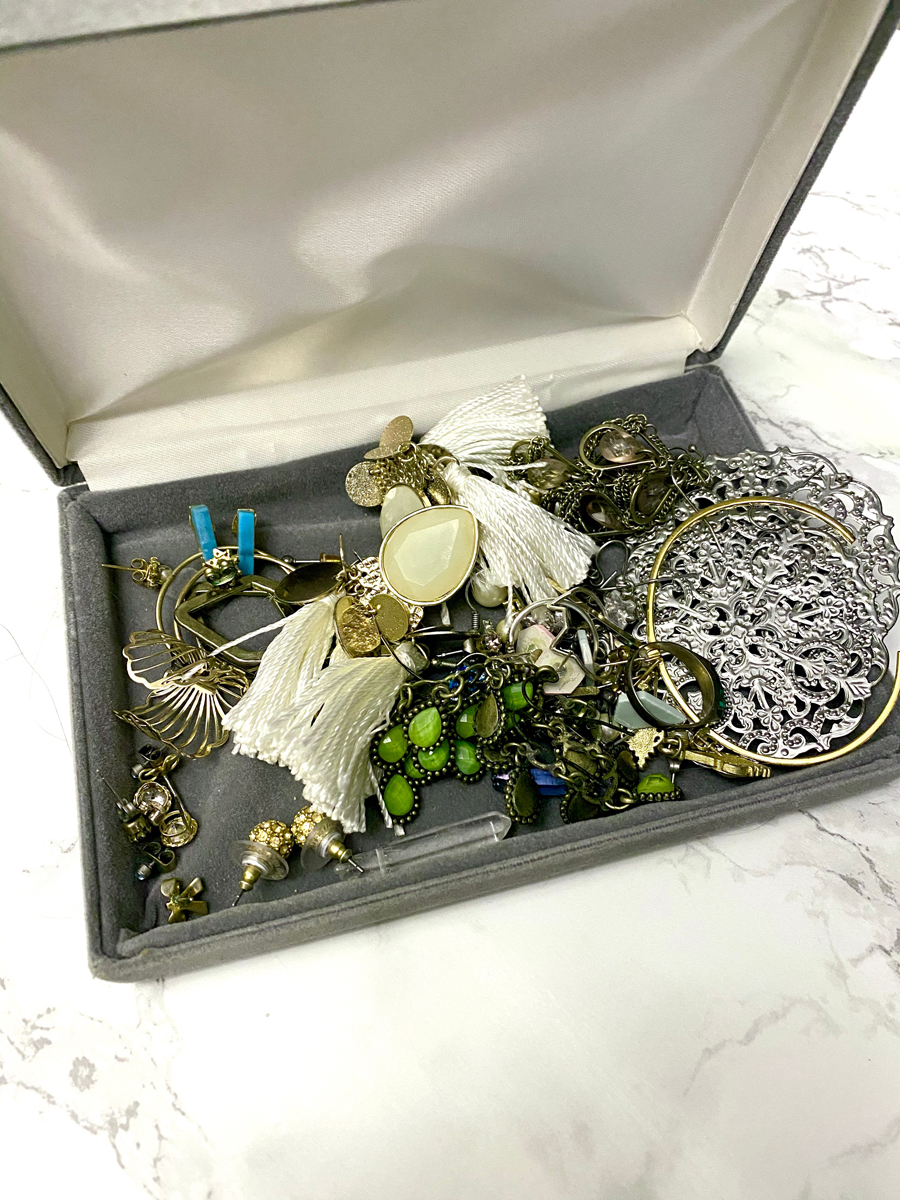
As a usually hyper-organized person, I’m incredibly embarrassed to say that all my earrings are currently sitting in a pile in a jewellery box on my vanity.
When I moved, I ditched the large, dark jewellery boxes that I made and opted for sleeker jewellery storage.
The only problem was, the boxes I bought aren’t actually for jewellery, so I needed to come up with a clever (and beautiful) way to fix that problem.
I got the idea in my head that I would be able to make jewellery storage with pieces of foam. As it turns out, my friend Tash wanted to do the same! We had a fun DIY night putting these together and it only cost us about $2!
After changing up the colour scheme of my bedroom when I moved, I had an old pillow cover in a sage green velvet that I figured would be perfect for this project as I don’t plan on using it in my home anymore. If you don’t have an old pillow cover laying around, some velvet scraps would be a great option as well. You could also use different types of fabric – just depends on your preference and what you have available. You need such a small amount that I wouldn’t recommend buying new fabric for this project.
I also just love using velvet for anything because it feels so rich and luxurious. This project is super easy and comes together in under an hour. Here’s how:
DIY Velvet Jewelry Box
Supplies:
A Box
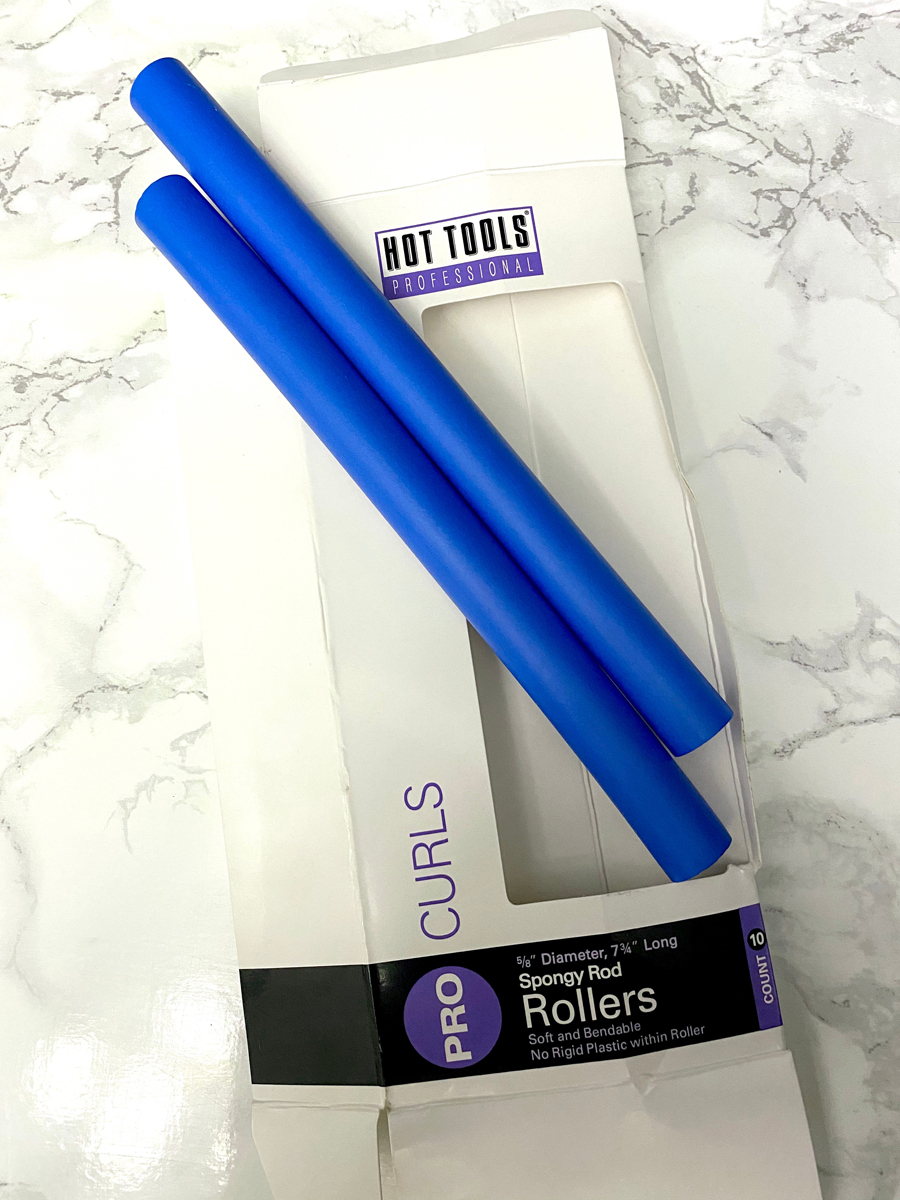
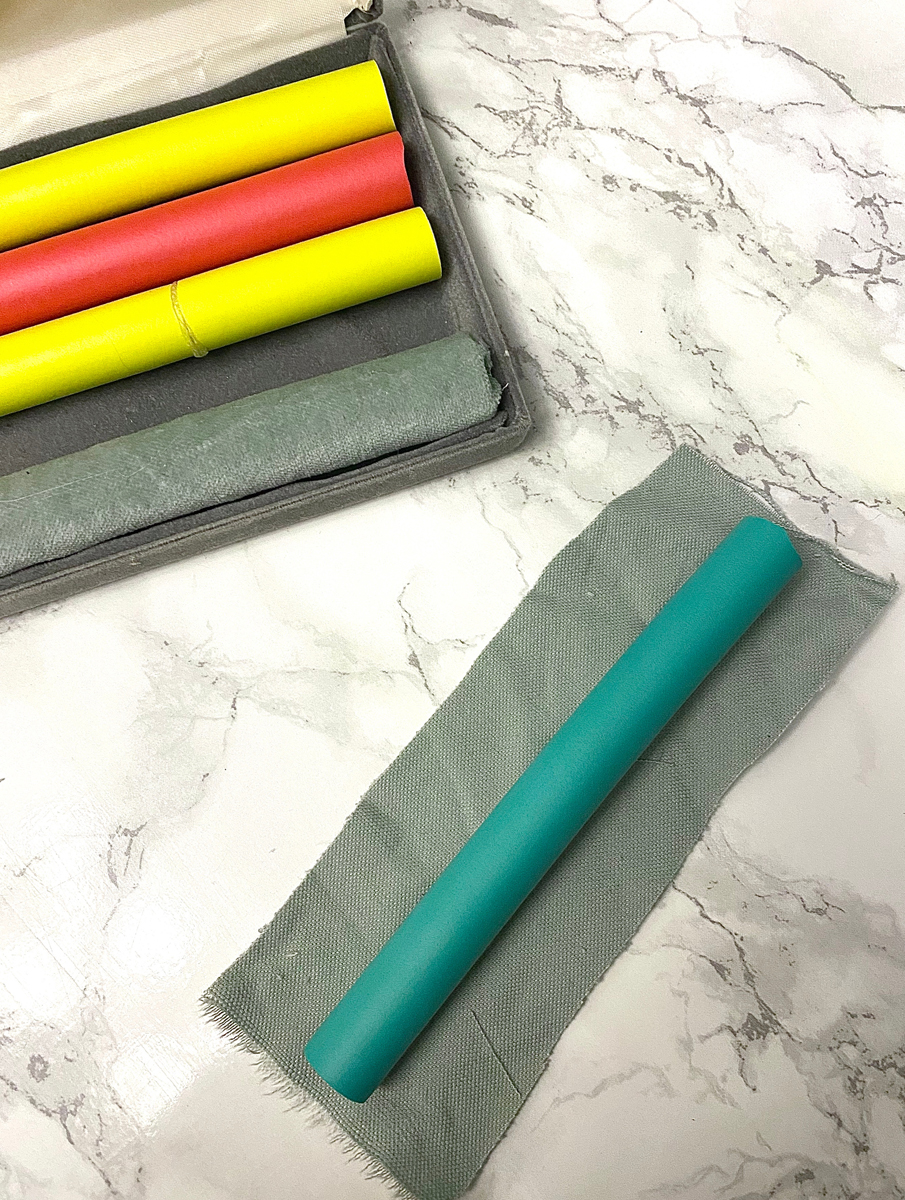
Foam Rollers with wire removed if necessary (We got ours at the dollar store and they come with a piece of wire through the middle and are typically used for curling your hair)
Velvet Scraps
Scissors
Hot Glue Gun & Hot Glue Sticks
DIY Velvet Jewelry Box Instructions:
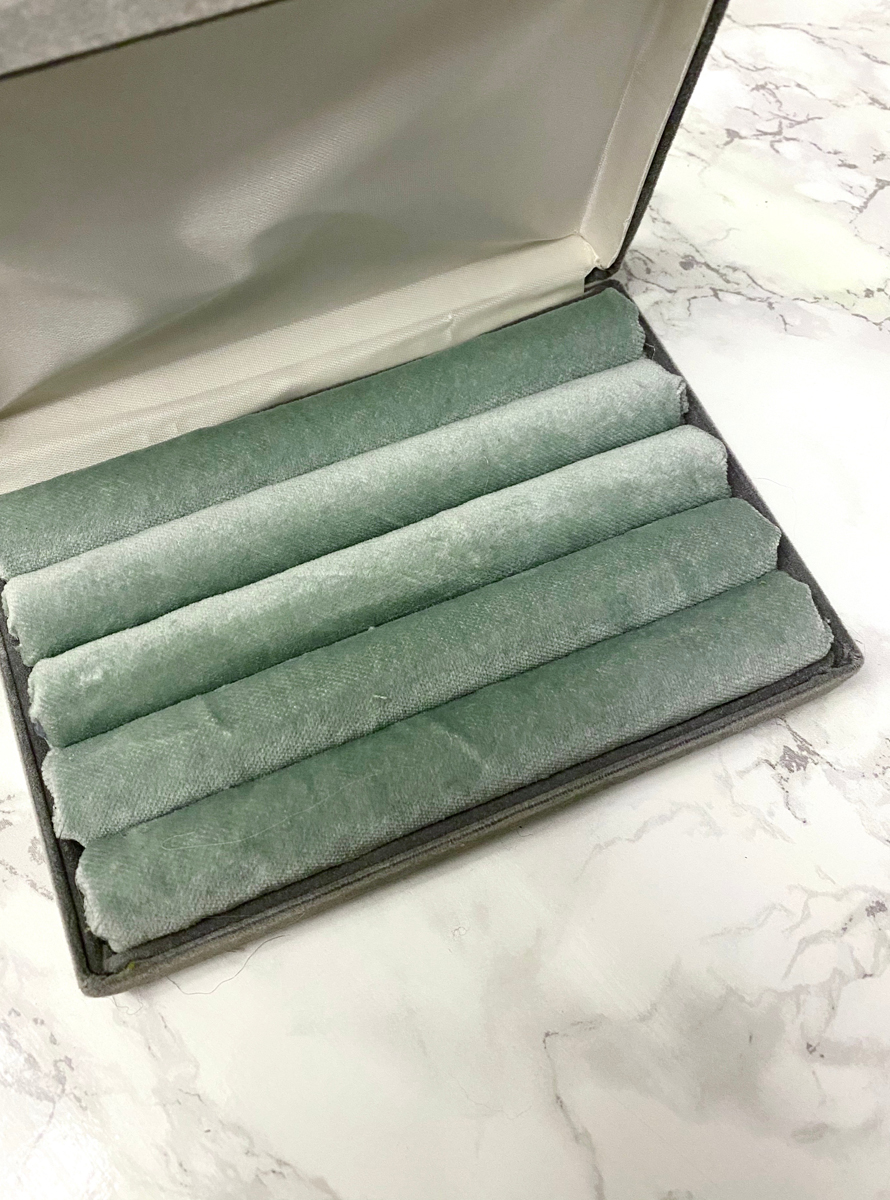
- First, determine how many rolls of foam you can fit in you box, keeping in mind that the fabric will add a bit of width to the foam. Mine fit 5 rolls perfectly. We used these foam rollers:
- Next, cut each piece of foam so that it’s about 1/8 of an inch smaller than your box. Note that there is still a bit of space on each side of the rollers. This space will fill in when we wrap each roller in velvet! If you’re using a thinner fabric, you’ll need less space for each roller.
- Once you have all your foam cut, cut a piece of fabric to wrap each piece of foam in. The fabric should be about 1/4″ wider than the circumference of your foam and just over 1/4″ longer than the piece of foam on each side so the ends can be glued down.
- Start by making a line of glue lengthwise down one of your foam rollers.
- Place the glue along the edge of the wrong side of one piece of fabric
- Next, place a second line of glue on top of the first and wrap your fabric around, pulling it taut and securing it in place along the line of glue
- Then, place a small amount of glue on each of the ends of the piece of foam and glue down the excess to cover and tuck in the ends
- Repeat for all your remaining foam rolls
- At this point, you can use the hot glue to glue them into the box or just leave the rolls in there snuggly. I just left the rolls because if I ever decide to use the box for something else in the future, it won’t be ruined with hot glue.
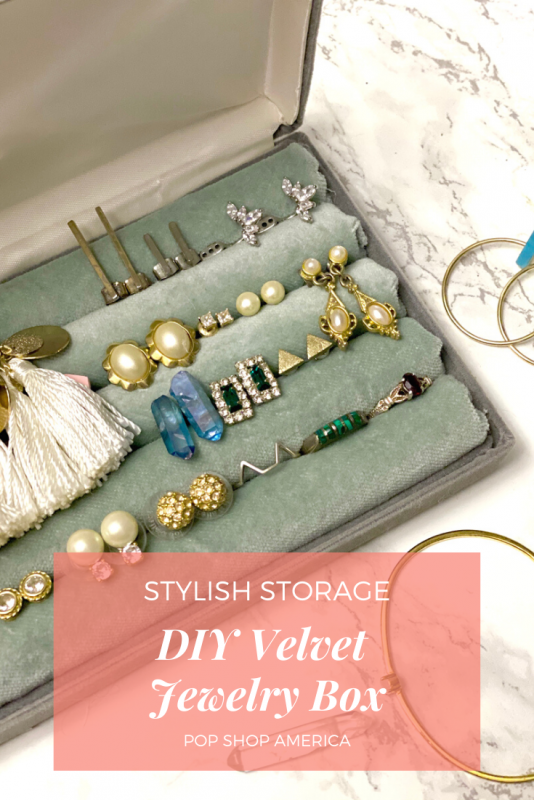
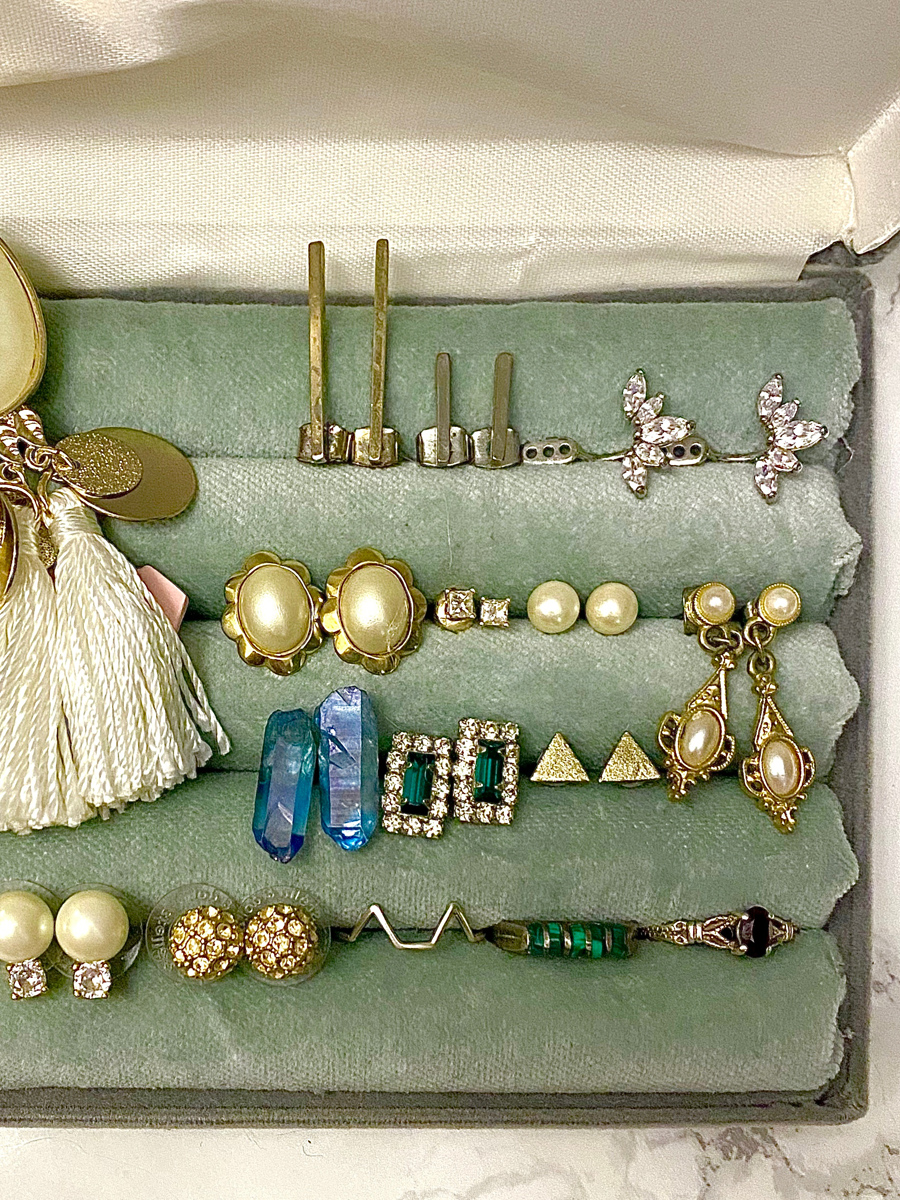
- The last step is the most fun – organize all your earrings and admire how quickly & easily this project came together, plus how beautiful it looks!

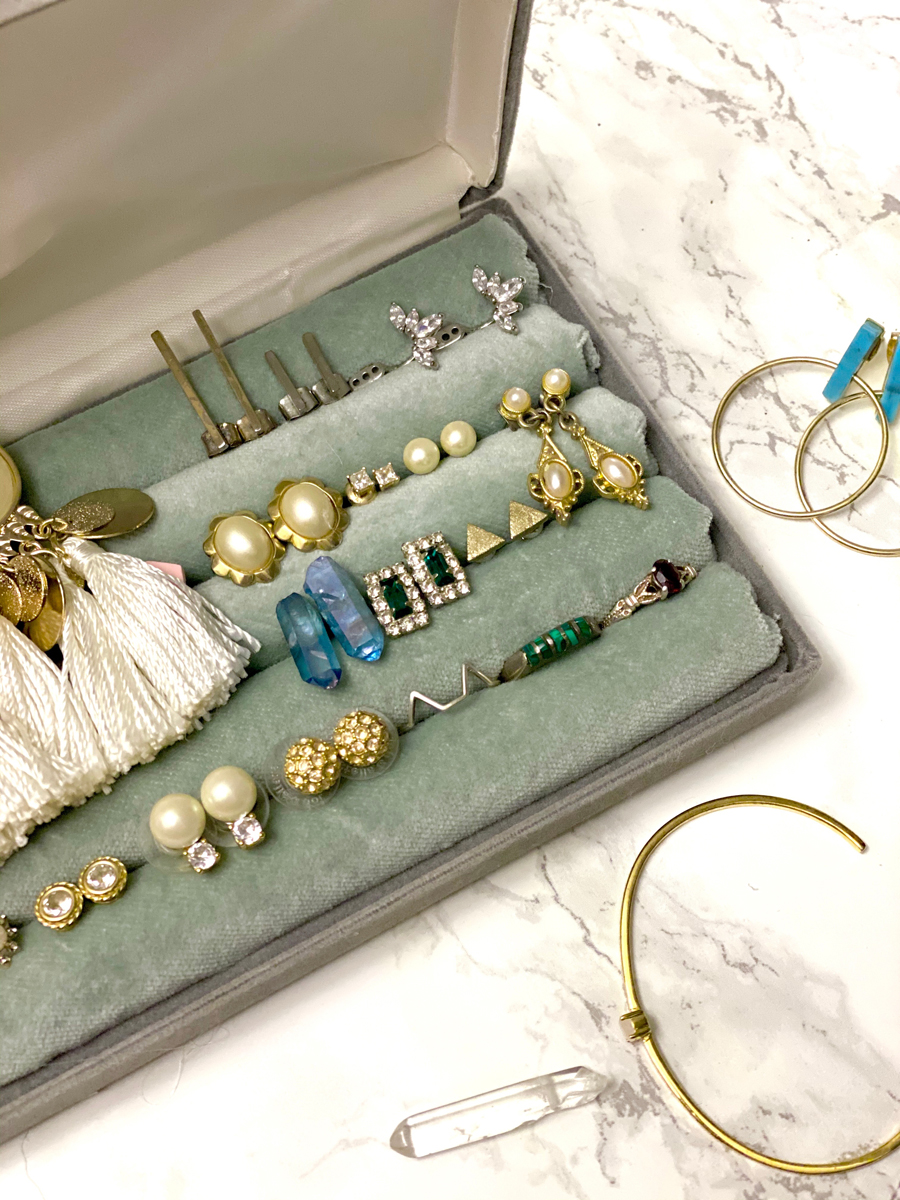
My OCD is super happy that my earrings are now all organized, plus it’s nice having them all laid out so I can actually see which ones I have and want to wear.
The small gold triangle studs are actually a DIY that I did! They were also super easy to make using clay, nail polish and superglue. Follow the tutorial here to make your own pair!
This is also a great time to purge and donate any earrings that you don’t wear anymore – I definitely gave away a few pairs!
I’d love to know what you think of this fun DIY Velvet Earring Box and if you’d make one for yourself!
- Tess

Let’s Be Friends!
Insta | Pinterest | Enews | TikTok


Beautiful! I understand you are going for a casual kind of elegance but your box would look a bit more polished if you covered 4 pieces of cardboard with your velvet and glued them into the sides of the box. If you used one piece of cardboard you could score it one one side but not the other so the piece fold but don’t come apart. Then cover each of the four sections in velvet (not one long piece or it would bulk up in the corners) and then you would only have one corner to glue and it would be very sturdy. Still your boxes are beautiful the way they are of course. :))