DIY
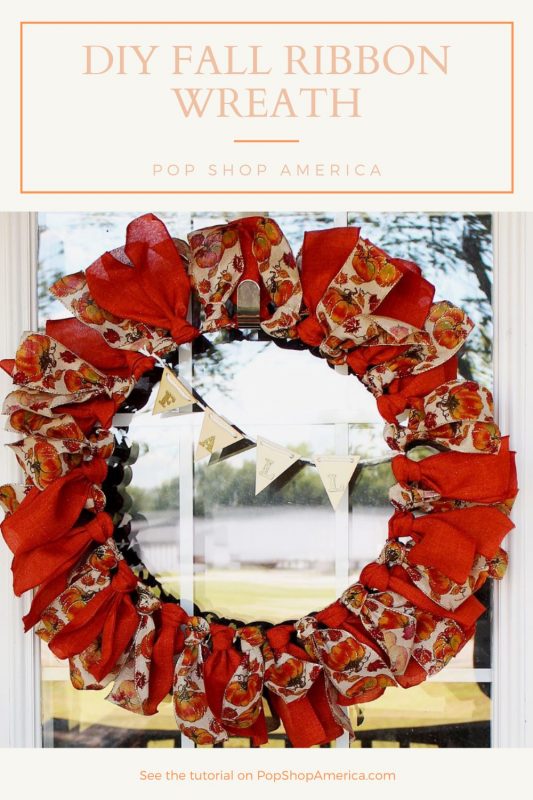
Easy Ribbon Fall Wreath DIY
Nov
Are you a seasonal decorator? I love the feeling of pulling out my fall decorations and putting them up, because it feels like it’s ushering in the cooler weather and changing leaves. Without a doubt fall is my favorite season. I have a wreath for every season – actually, I have at least 2 for a few seasons! But, friends, I have 3 doors and plenty of walls – I’m in need of so many more!
Fall is such a perfect wreath making season: the leaves and flowers are all shades of gorgeous red, yellow and orange color. I decided to start out making a simple ribbon wreath, and you guys: it is so simple! The entire wreath took me less than 30 minutes, start to finish!
It’ll take you longer to buy your materials (although probably not if you use Michael’s curbside – prevents all the extra wandering!).
Let’s get crafty!
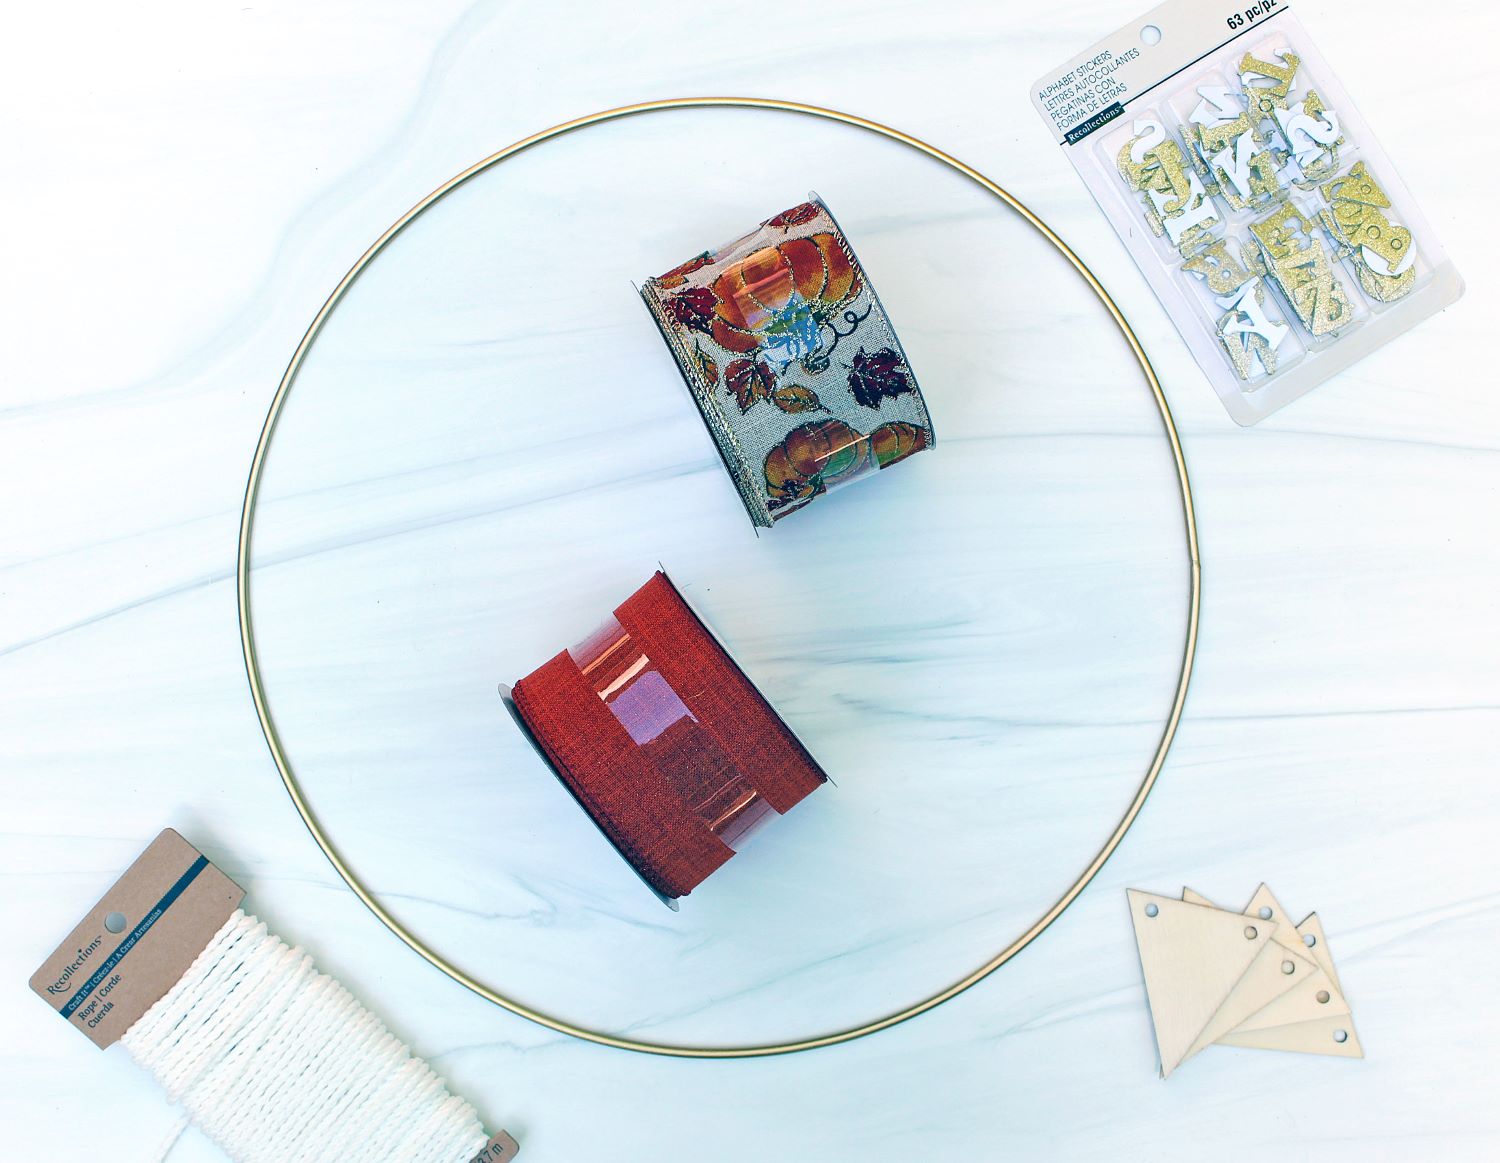
Supplies for Making this Ribbon Fall Wreath DIY
You’ll need:
- 2 designs of wide wired ribbon ( I used this one and this one)
- Metal floral hoop or wooden wreath ring
- scissors
- twine or cord
- wood pennant flags
- glitter letters or wooden letters
Optional: glue if you choose wooden letters, stain or paint for wood flags
How to Make an Easy Ribbon Fall Wreath DIY
Cut the wire ribbon into 15-18 inch strips. The longer the ribbon, the longer your ribbon knots will be. It took me about 17 strips of each of the two ribbon designs.

To tie the ribbon knots:
First, fold the ribbon in half, with the loop facing up. Hold the loop behind the wreath frame.
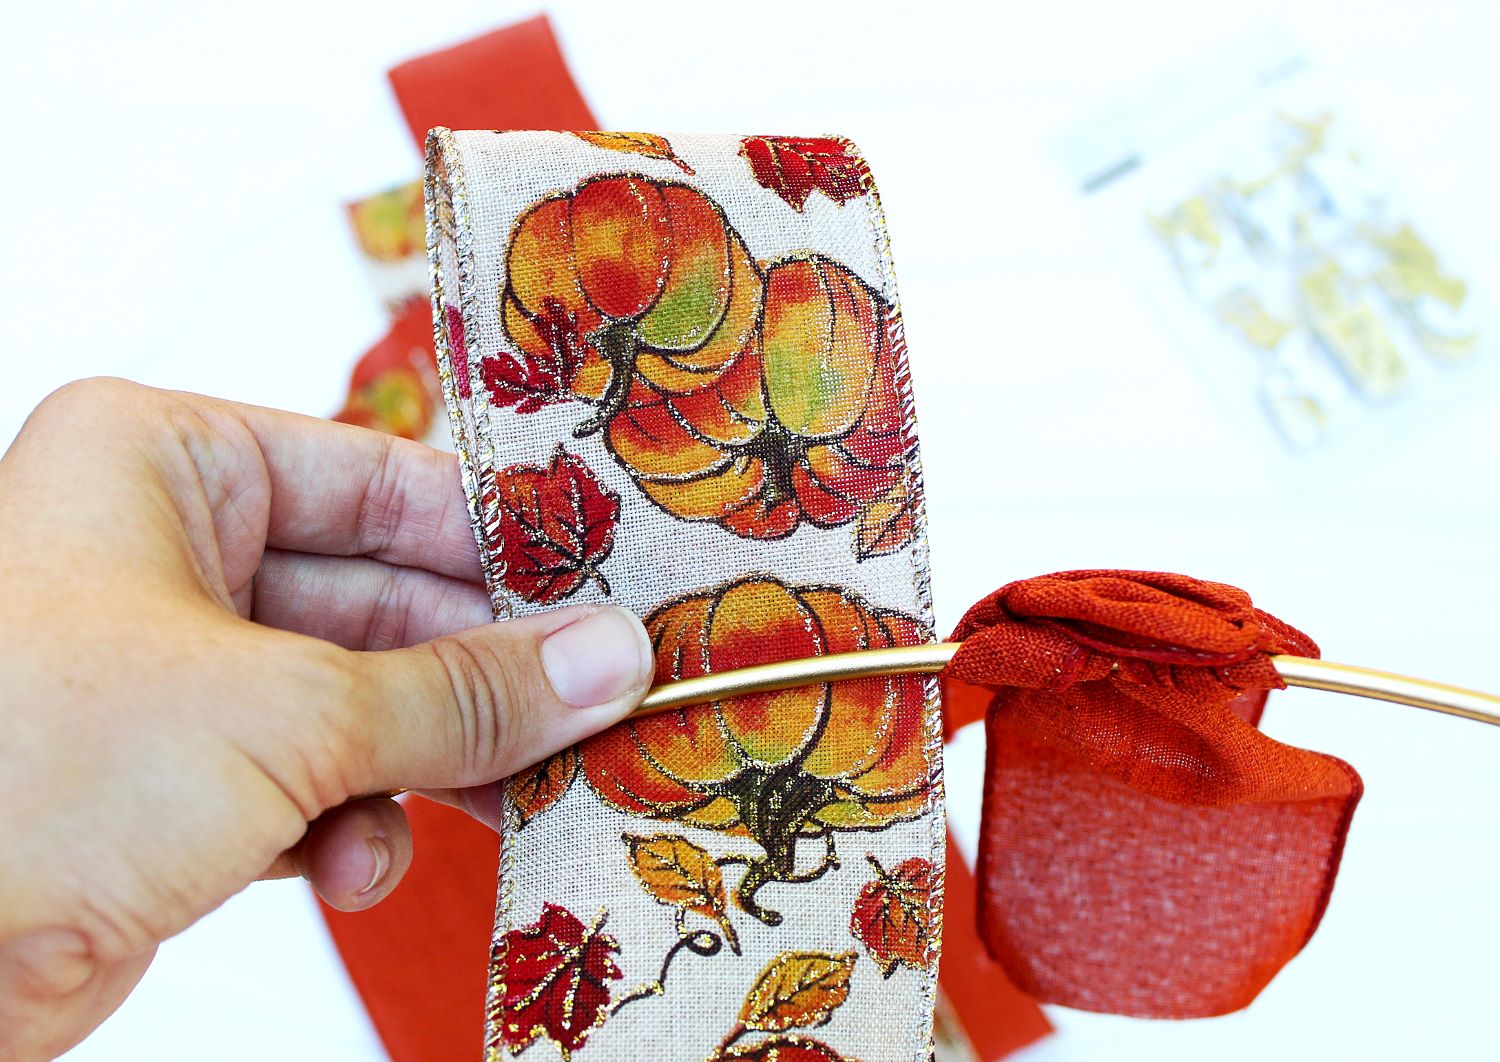
Bring the loose ends up on the front side of the hoop and pull them through the loop of ribbon. Pull tight to make a knot. Flip the ribbon so that both ends are front facing.
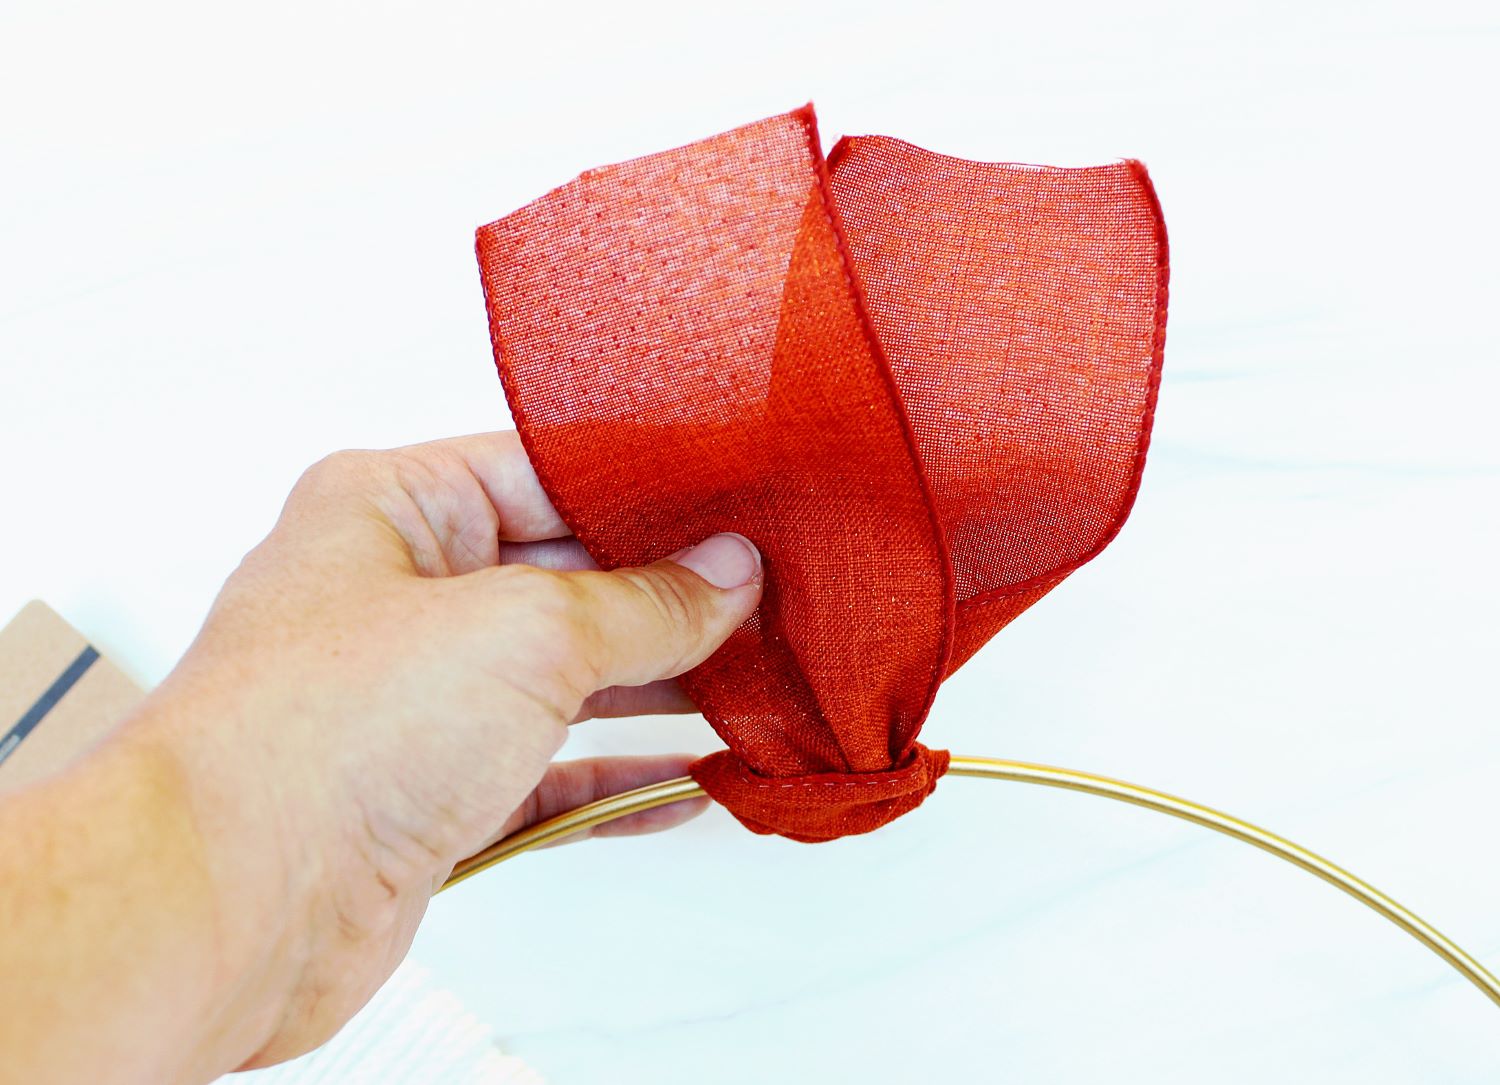
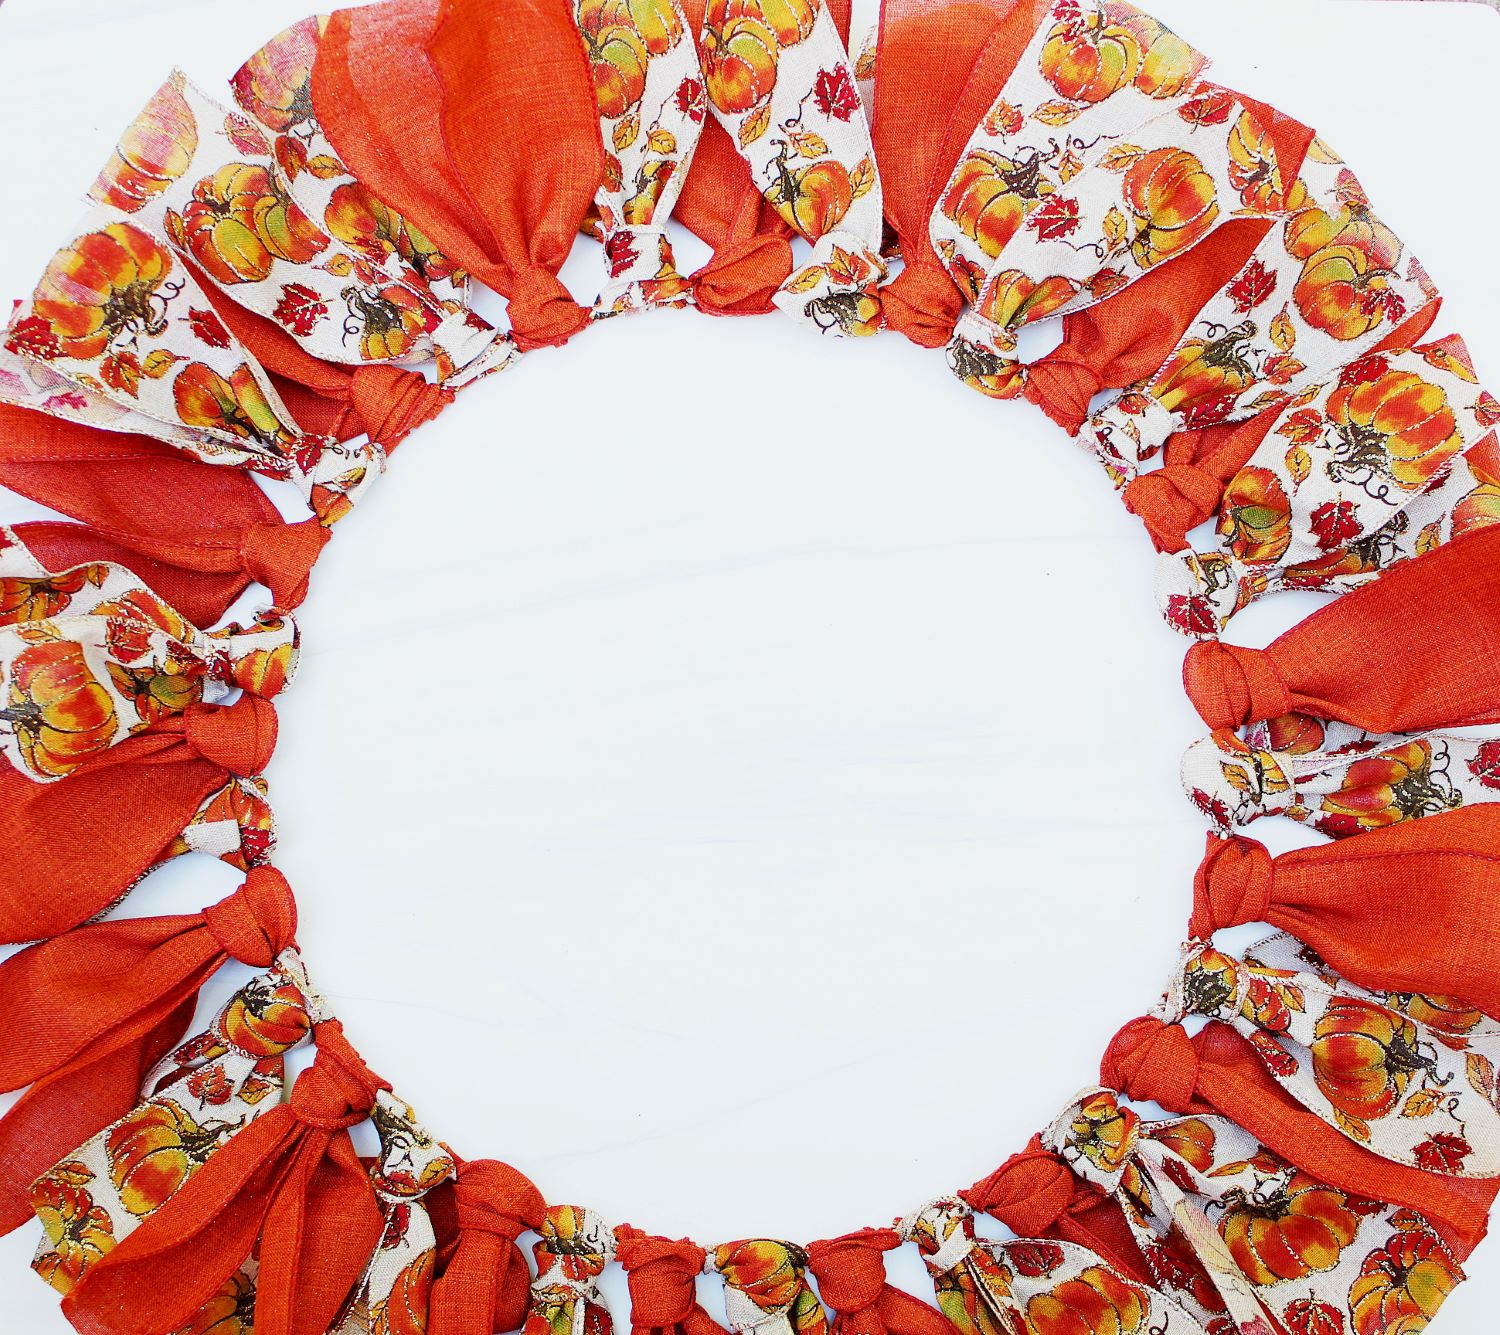
Alternate ribbon designs and tie all the way around the hoop.
Note: If you use a metal wreath frame/floral hoop, you may want to put a dot of glue under each ribbon to help keep it from sliding. My ribbons were slipping a little bit once I hung it – mostly when the wind hits it just right – so I added a drop of glue and it’s all good!
Make sure your ribbon knots are pressed tightly against each other so all the space gets filled.
If you just want to have a simple knot ribbon wreath, you can be finished here! But if you want to add a little more spice to it, keep reading.
Decorating the Ribbon Fall Wreath DIY
There are endless possibilities for adding accents to your fall ribbon wreath. You could add a bow, or some flowers, or some velvet pumpkins. I thought about all of those but decided to go the simple route of adding wood pennants and sparkly letters to spell out fall.
If you want to stain or paint your wood pennant pieces, do that before you start making the ribbon wreath so that they’ll have time to dry. Make sure to paint around the holes carefully.
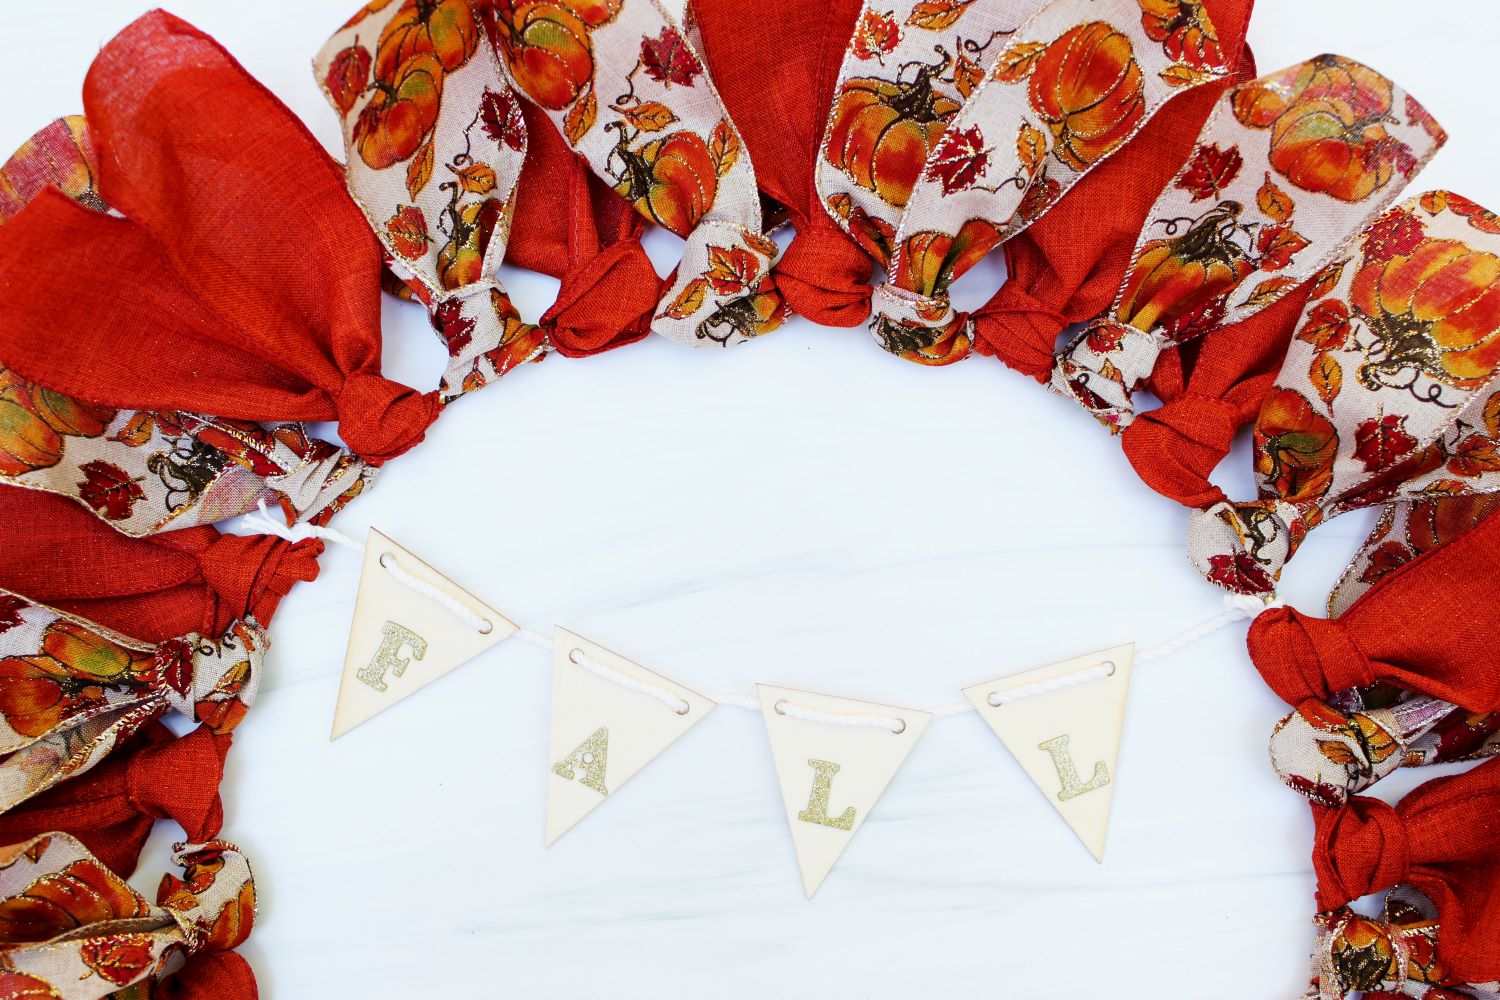
I used sticky glitter letters to spell out ‘FALL.’ Stick or glue your letter to the wood. Then string the wood onto cord or twine; I used white cord because it was what I had on hand, but I plan to replace it out with a more rustic-looking twine. String the pennant pieces by coming up through the back on one hole and going across the front of the wood and down through the second hole. Space the 4 pieces evenly apart and then cut the cord with some extra for tying.
Tie each end of the cord or twine to the wreath hoop; I did it so they would hang at an angle. Cut off any excess ends and tuck the ends under a ribbon knot to hide them.
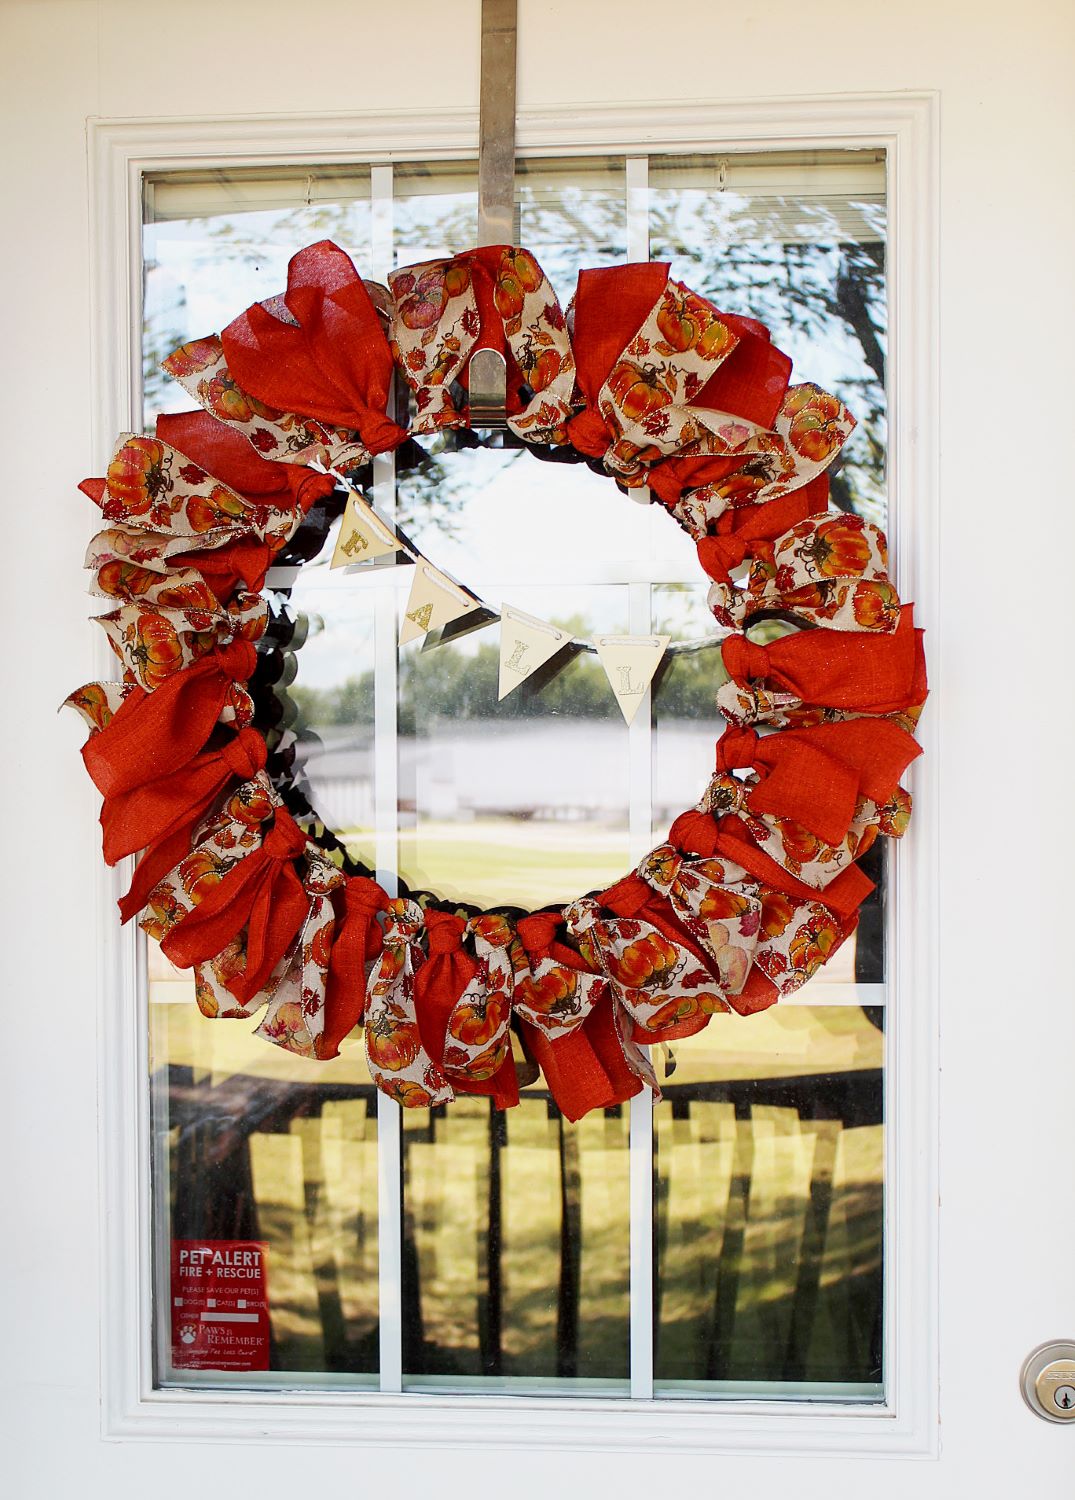
Like I said, this wreath is so simple, but it is such a beautiful presentation piece! Go ahead, hang it on your front door where everyone can see it – just pop it on a wreath hanger and you’re good. Add a couple of hay bales and some pumpkins to accessorize around the door and you’ve got a dreamy front porch display that’ll last you the whole season!
Let’s Be Friends!
Insta | Pinterest | Enews | TikTok