Craft in Style Subscription Instructions, DIY
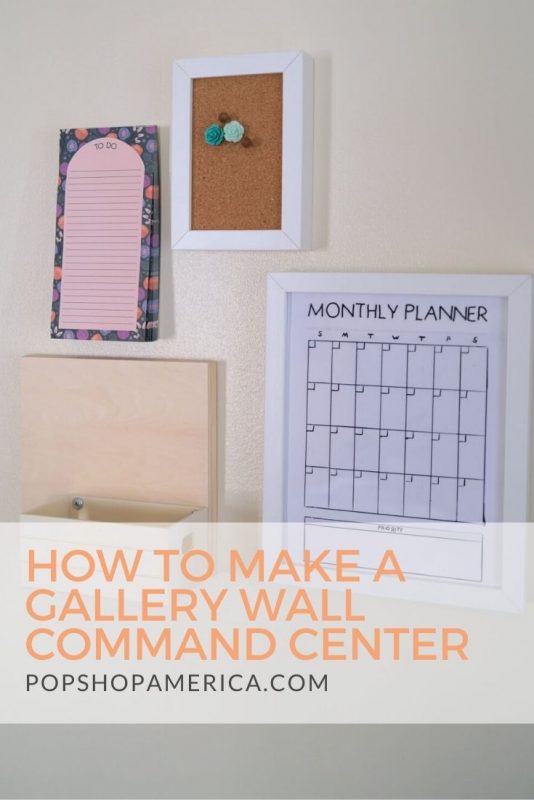
How to Make a Gallery Wall DIY Command Center
Oct
This blog is the tutorial for the September Craft in Style Subscription Box. You can find more about this box and other Craft in Style Boxes here.
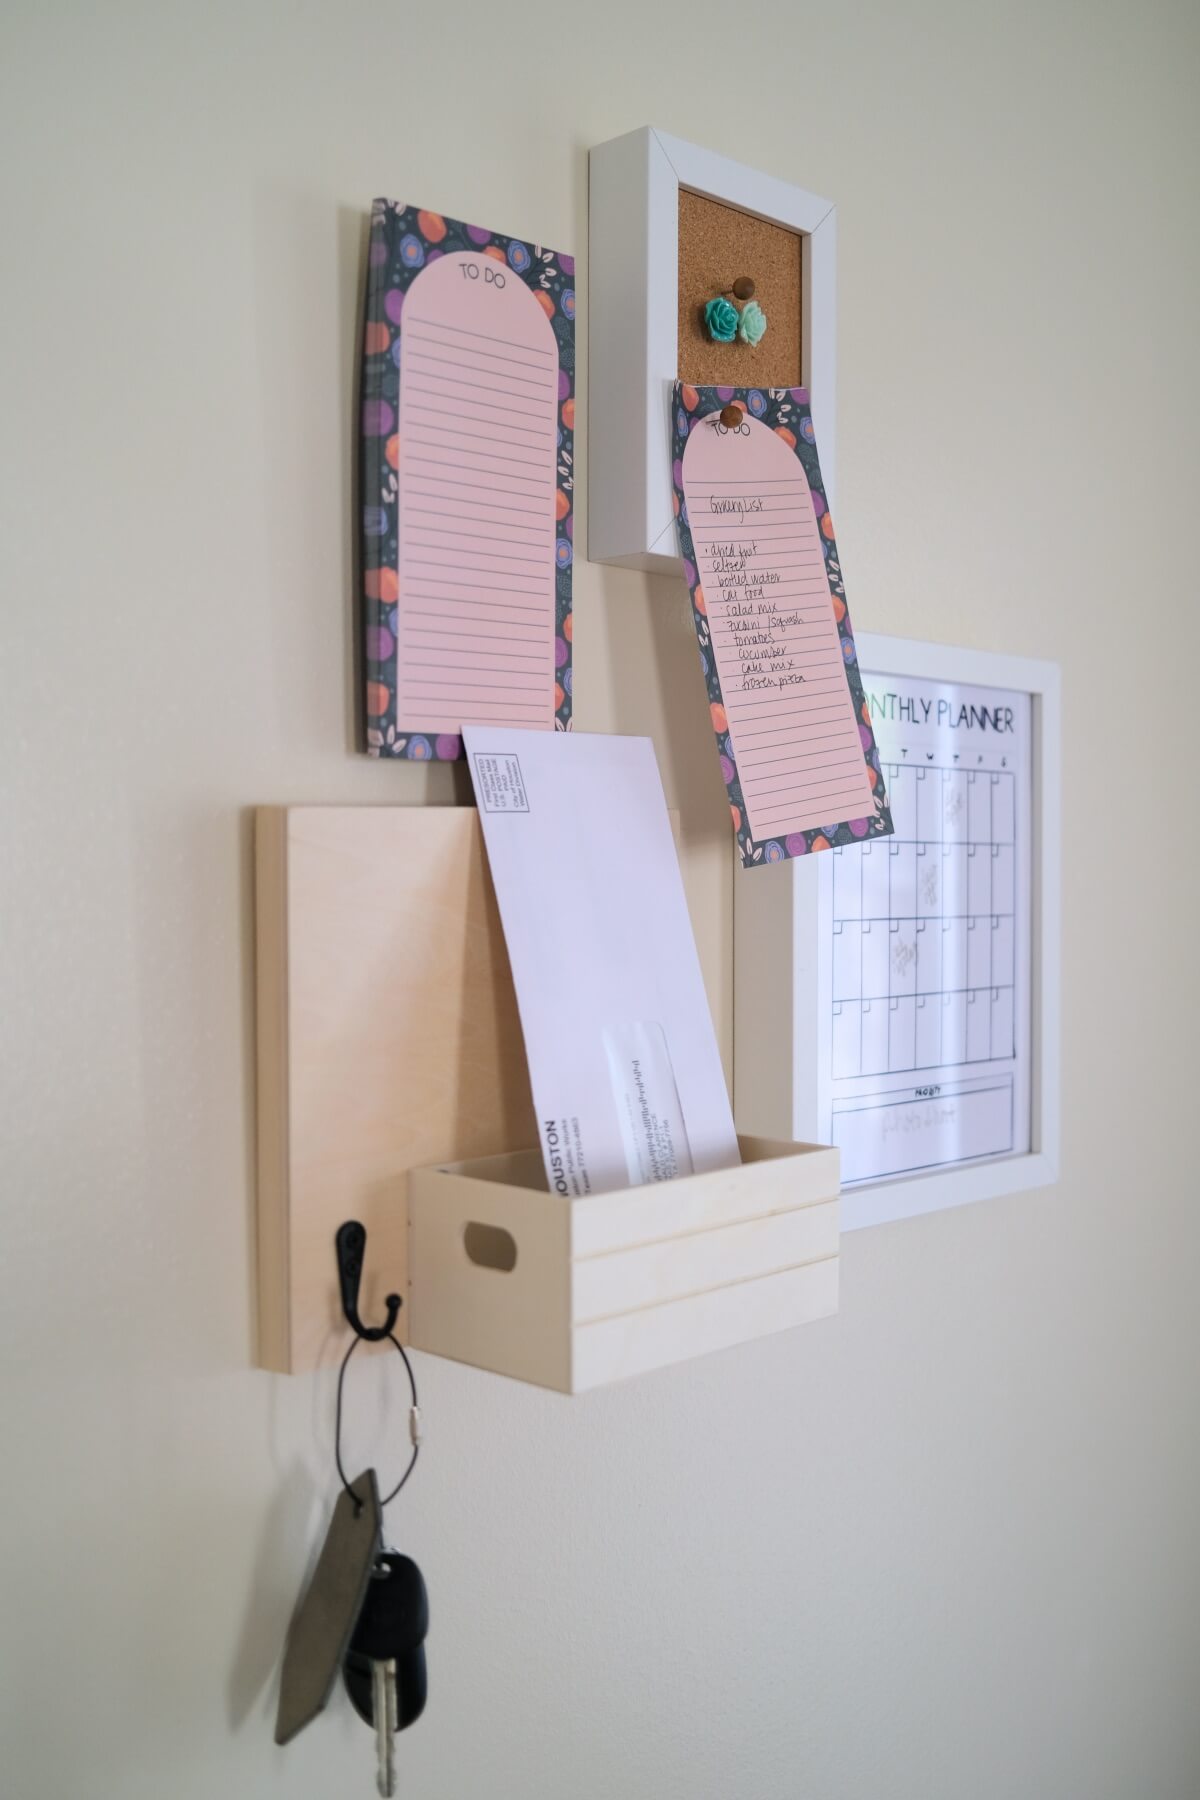
This diy is all about getting organized! There’s nothing more soothing than having a place for your keys, notes, and a wall calendar all in the same place. And that’s what creating a DIY Command Center is all about.
Having a space where you can organize small items is perfect for right by your front door, in a mud room, or near a kitchen. To find the right spot for a DIY Command Center – think about where you spend lots of time. Or consider the first and last place you go before you leave your home. These are the ideal.
What’s great about making this gallery wall style command center is that you can choose your own shape and style to make sure your command center fits any space.
For someone in a tiny space, you could hang your command center vertically. For someone that already has a lot of hangable art in their home, this command center can fit right in! So let’s make it!
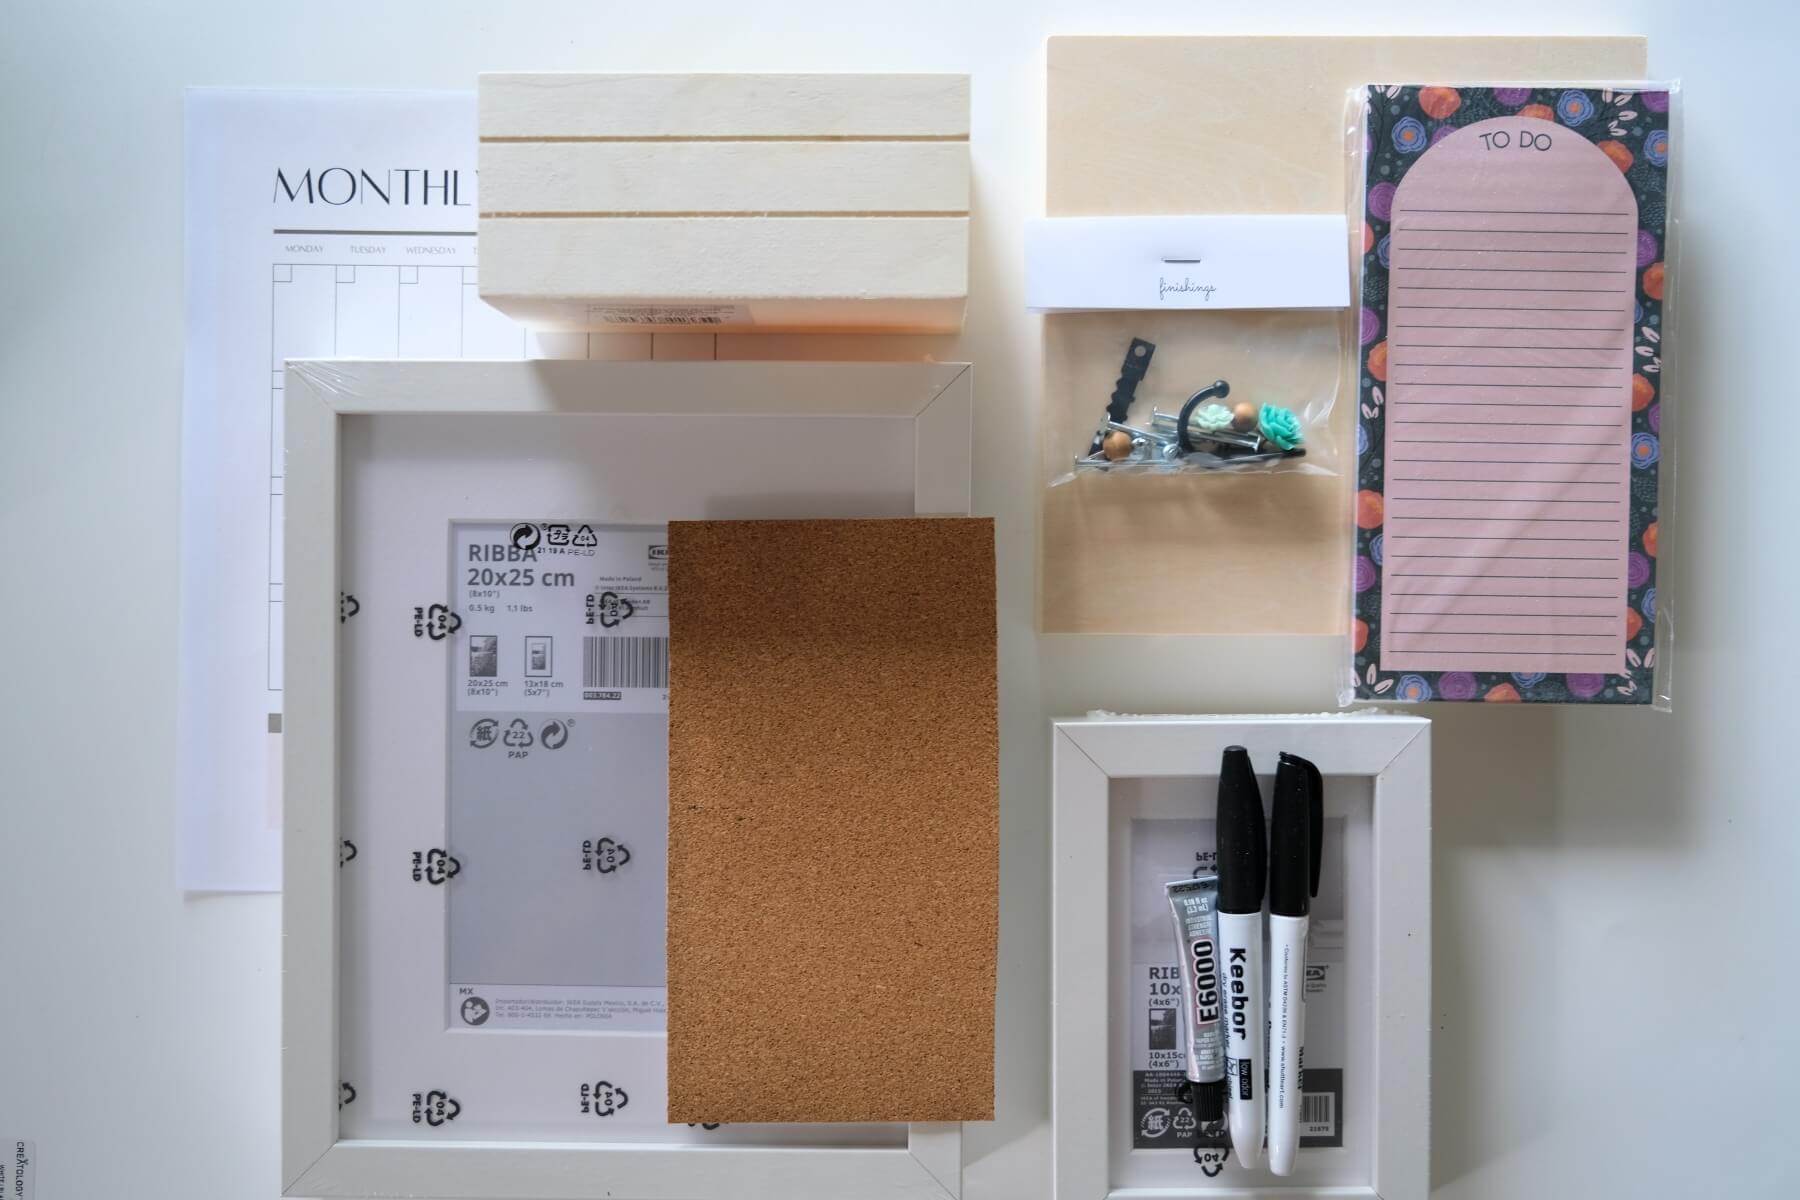
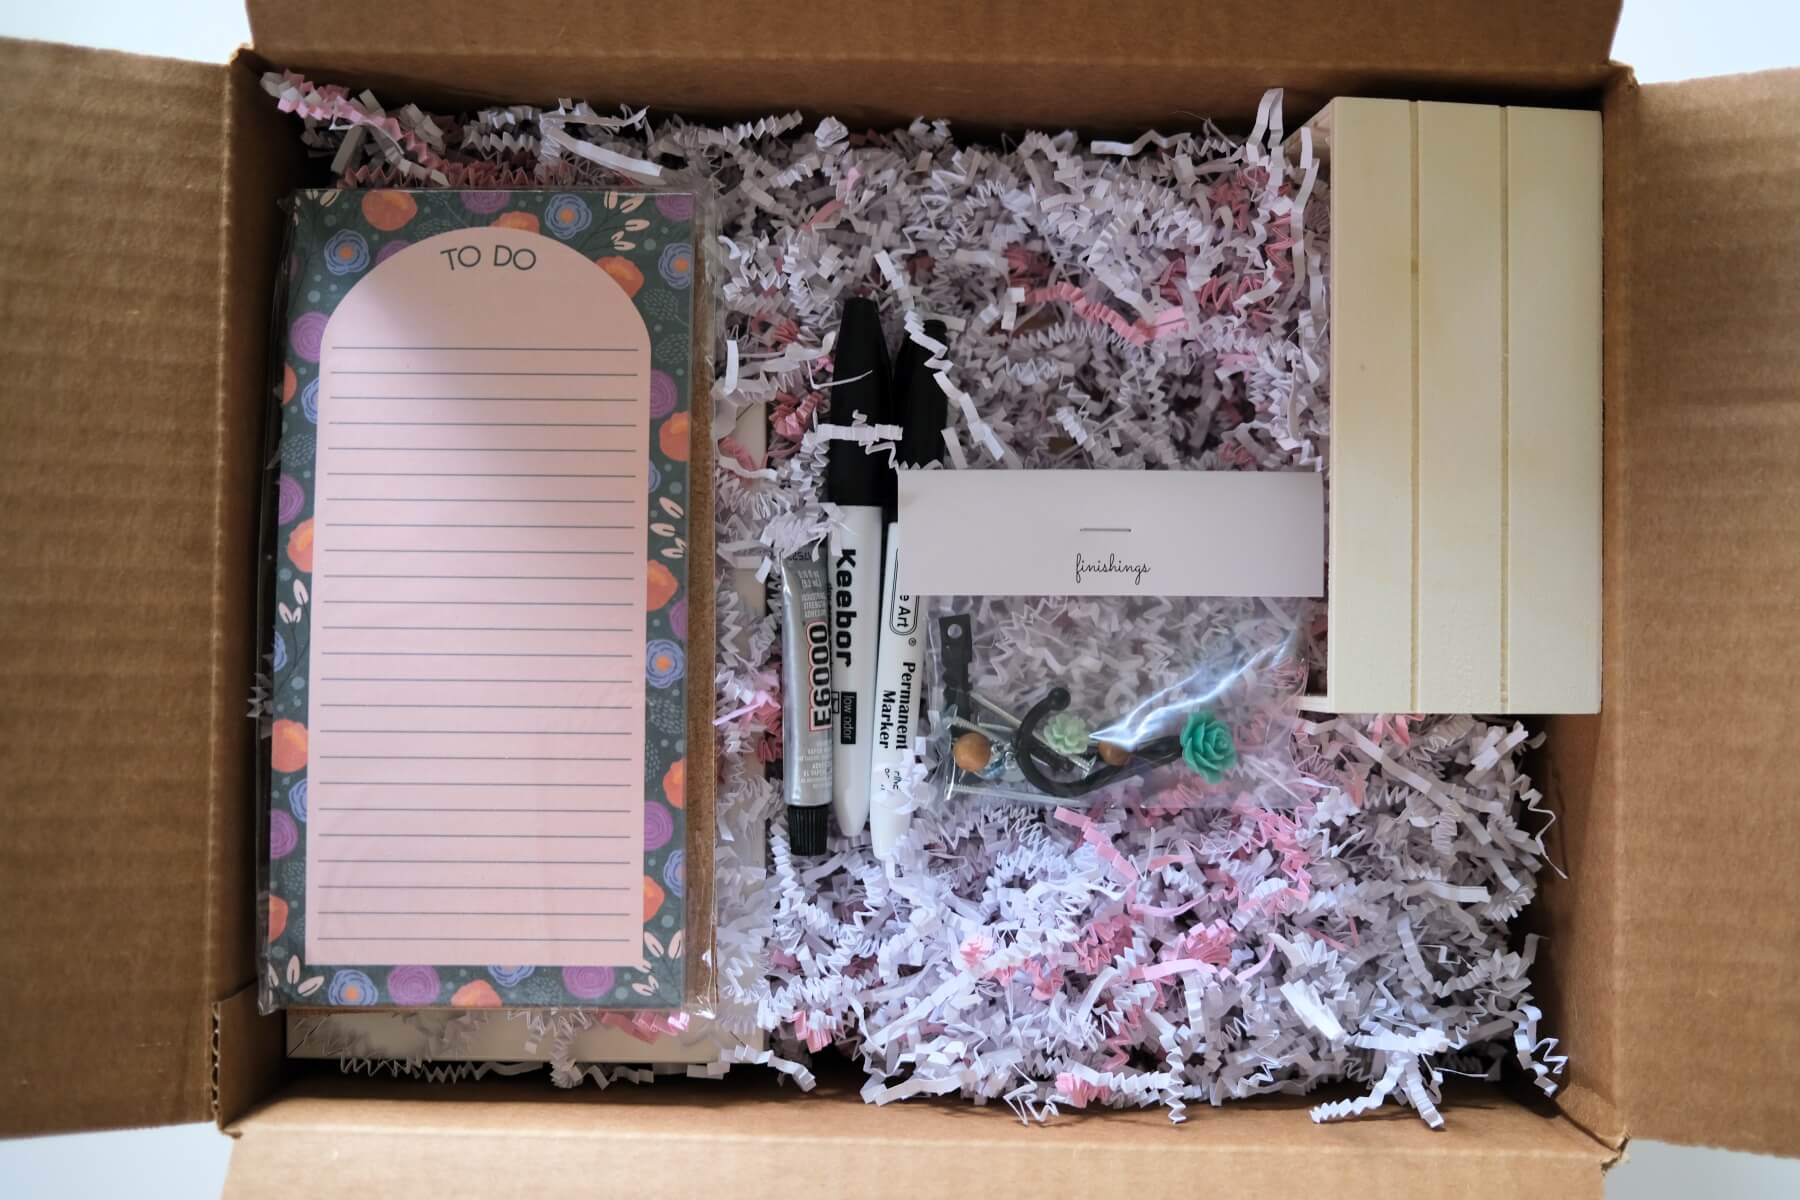
Supplies to Make a DIY Command Center:
September 2021 Craft in Style Subscription Box
or
8×10 Glass Frame
This Monthly Calendar Template
Sharpie or Permanent Marker
Dry Erase Marker
4×6 Glass Frame
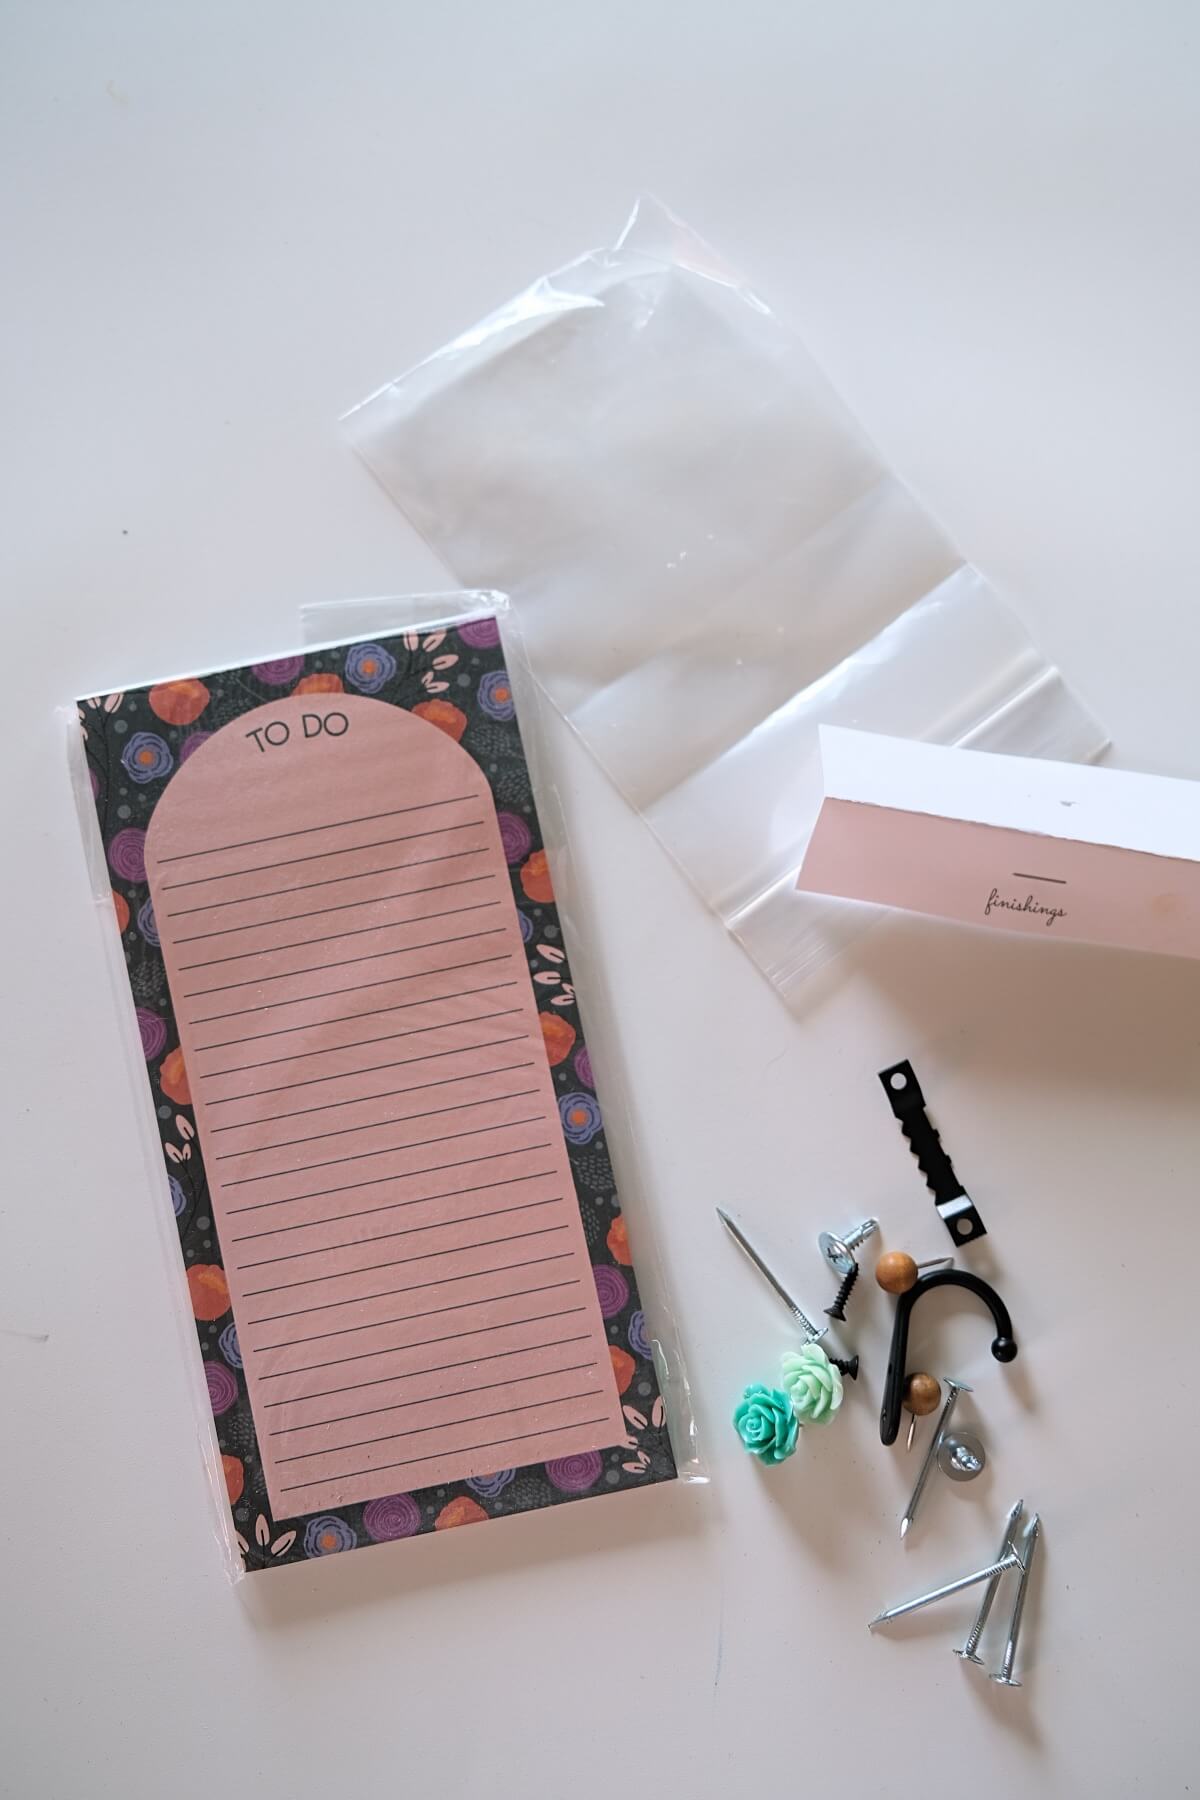
Small Piece of Cork Board
Thumbtacks
6×6 Wood Board
4 inch wide Wooden Crate
2 Screws (or E6000)
A Hook
A Notepad and a Sawtooth
Plus you will need a pencil, scissors, and screwdriver to build your command center, in addition to nails and a hammer to hang your command center. You may want a hot glue gun, but it’s not necessary. It’s a lot of supplies, but you can make any piece individually and put them together with other pieces. This is a diy that’s really creative, so it’s okay to just try a part of it.
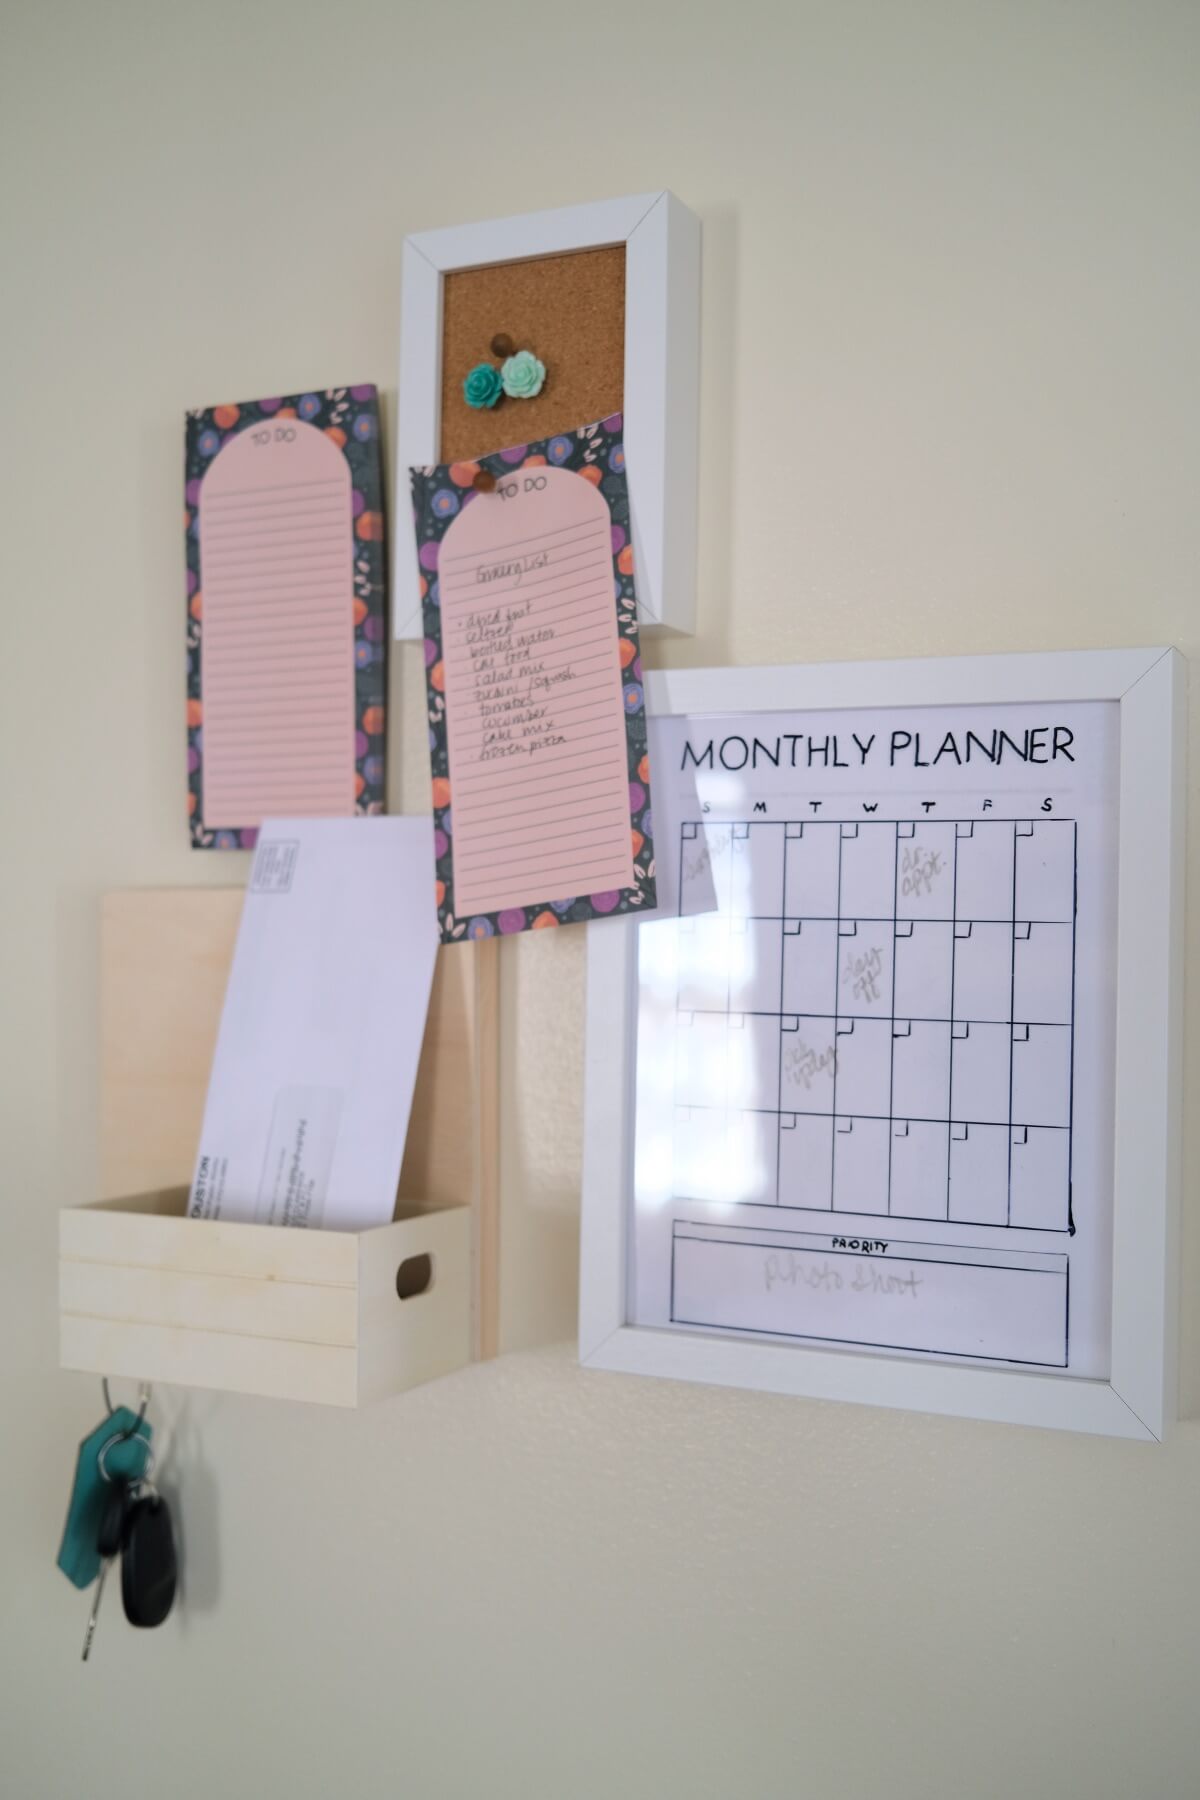
I also love this DIY Command Center because it’s 4 diy’s in one. We’ll go through them in order from easiest to most challenging to make:
1. A Hangable Notepad
2. A 4×6 Inch Framed Cork Board
3. An 8×10 Inch Framed Monthly Dry Erase Calendar
4. A Wooden Mail Holder
How to Make a Hangable Notepad
Making this hanging notepad is easy! All you need is a sawtooth like this. Flip the notepad over to place the sawtooth on the back.
You will want to place your sawtooth up high. If you have a magnet on the back like mine, your fixture will not adhere to the magnet as well as the paper. To make it, add a dab of glue to each edge of the sawtooth and press it into place.
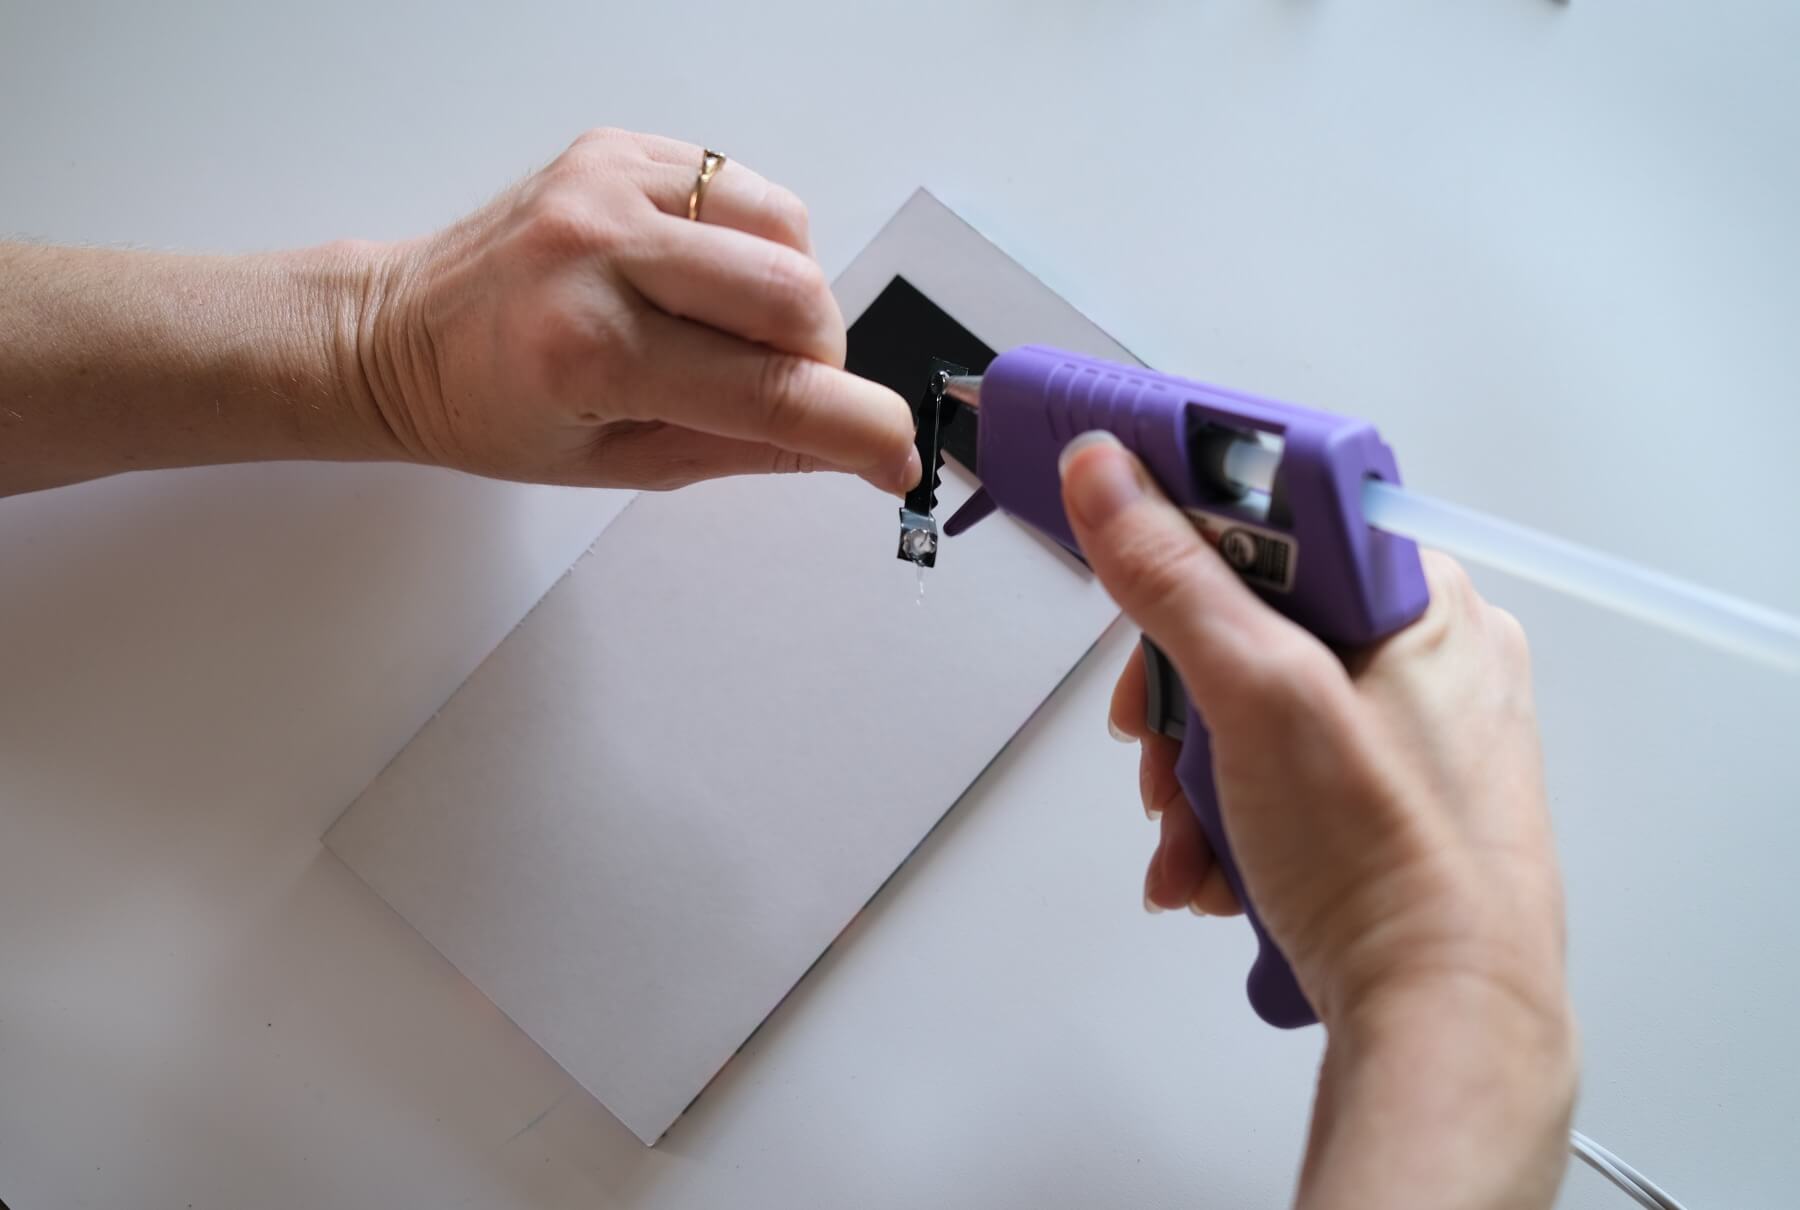
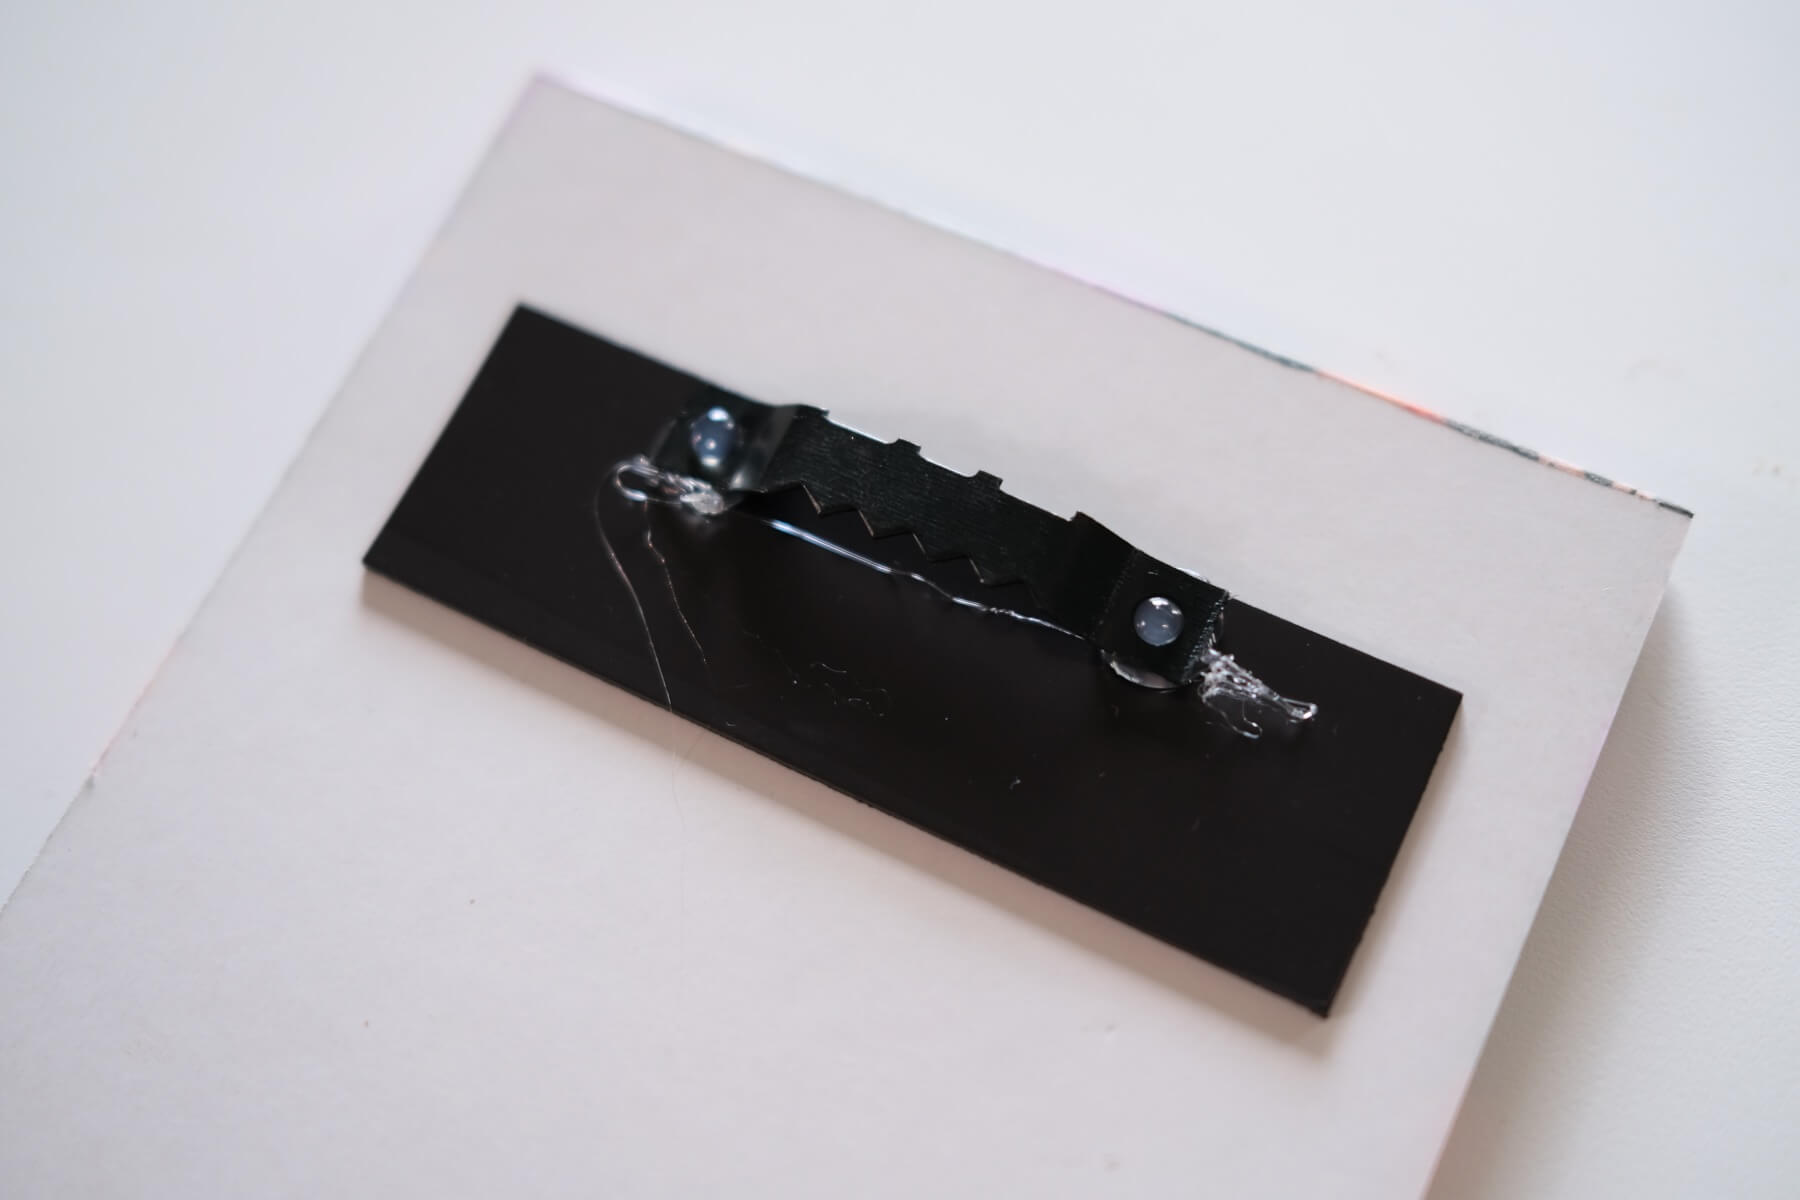
If you are using a glue gun like I did, then just hold the sawtooth in place for around 15 seconds. Within 10-15 minutes your notepad will be ready to hang.
If you use E6000 instead, which is a superior glue, hold the sawtooth in place for a little bit longer. And wait 1 full day to hang your notepad. E6000 dries slowly, but it’s a wonderfully permanent hold.
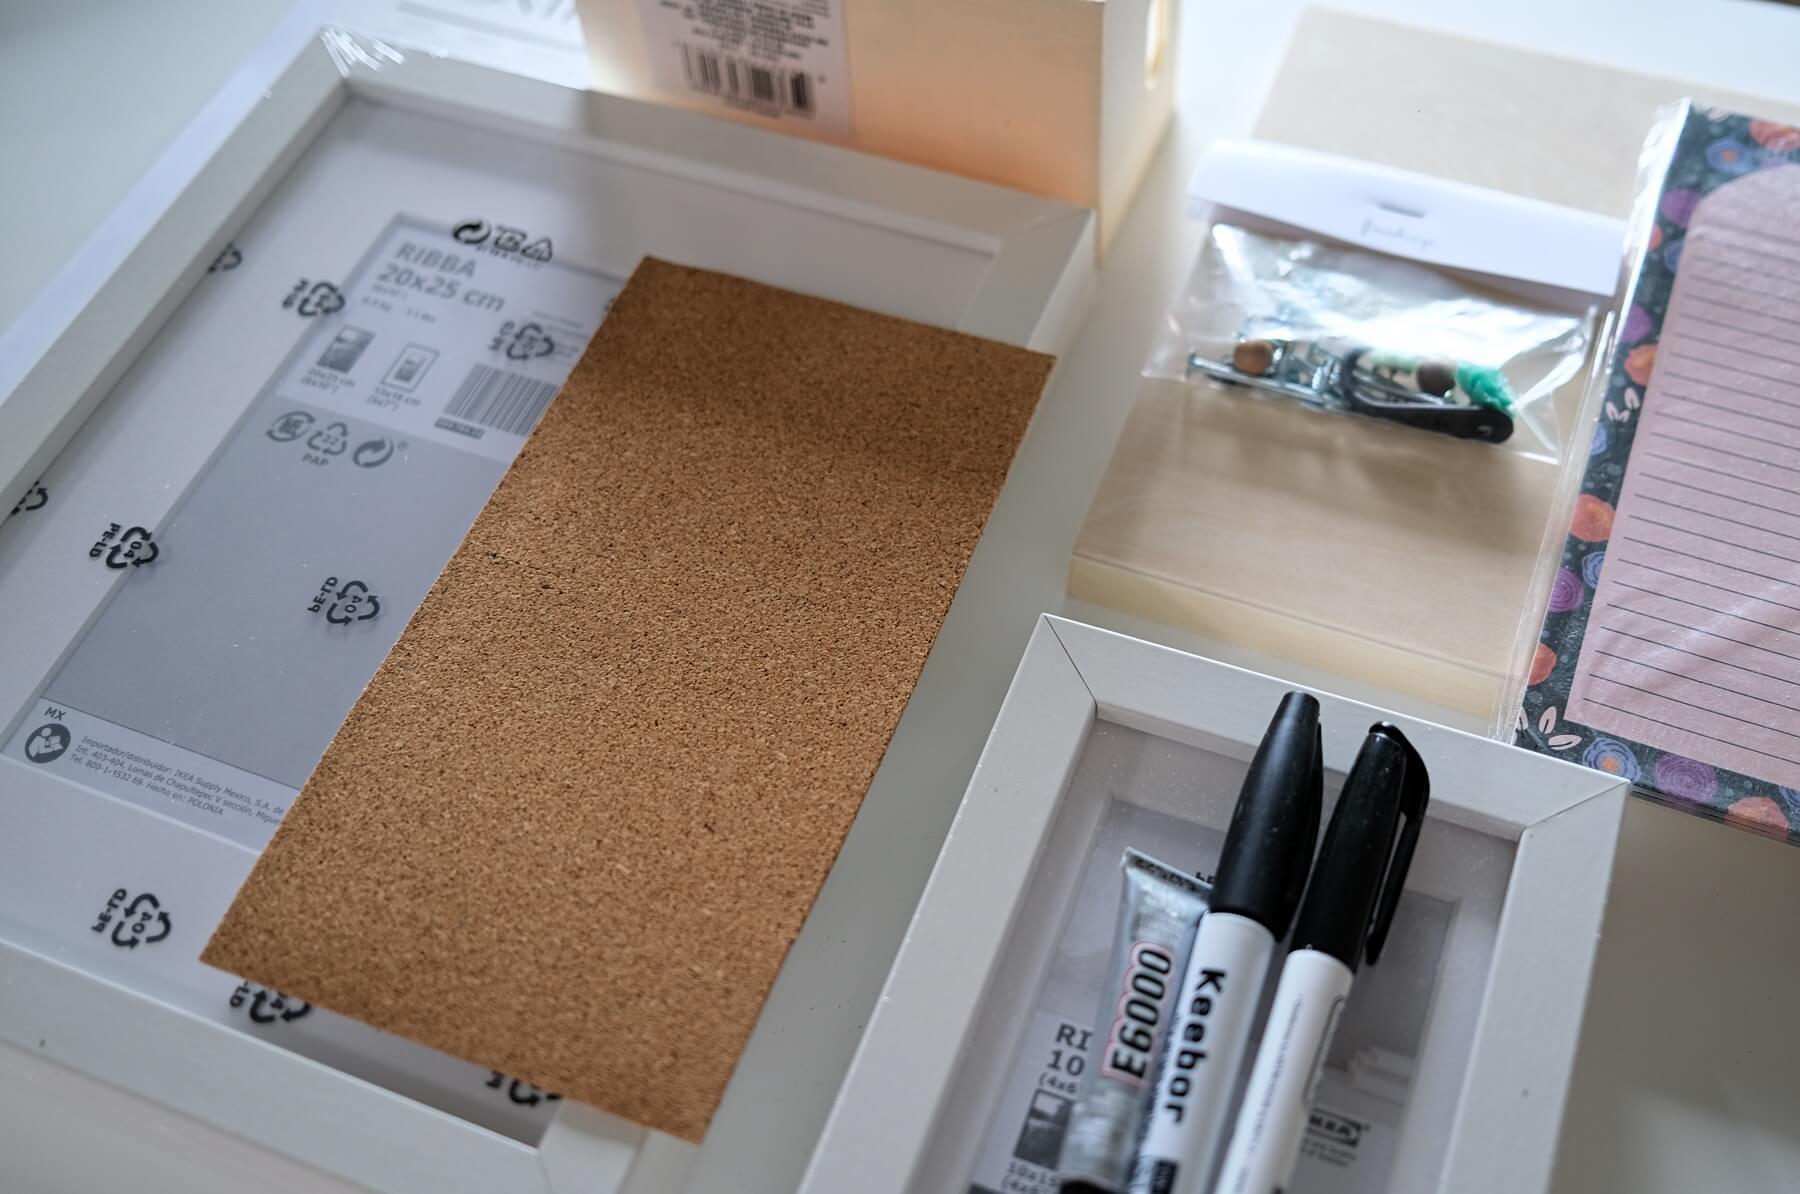
How to Make a Framed Cork Board
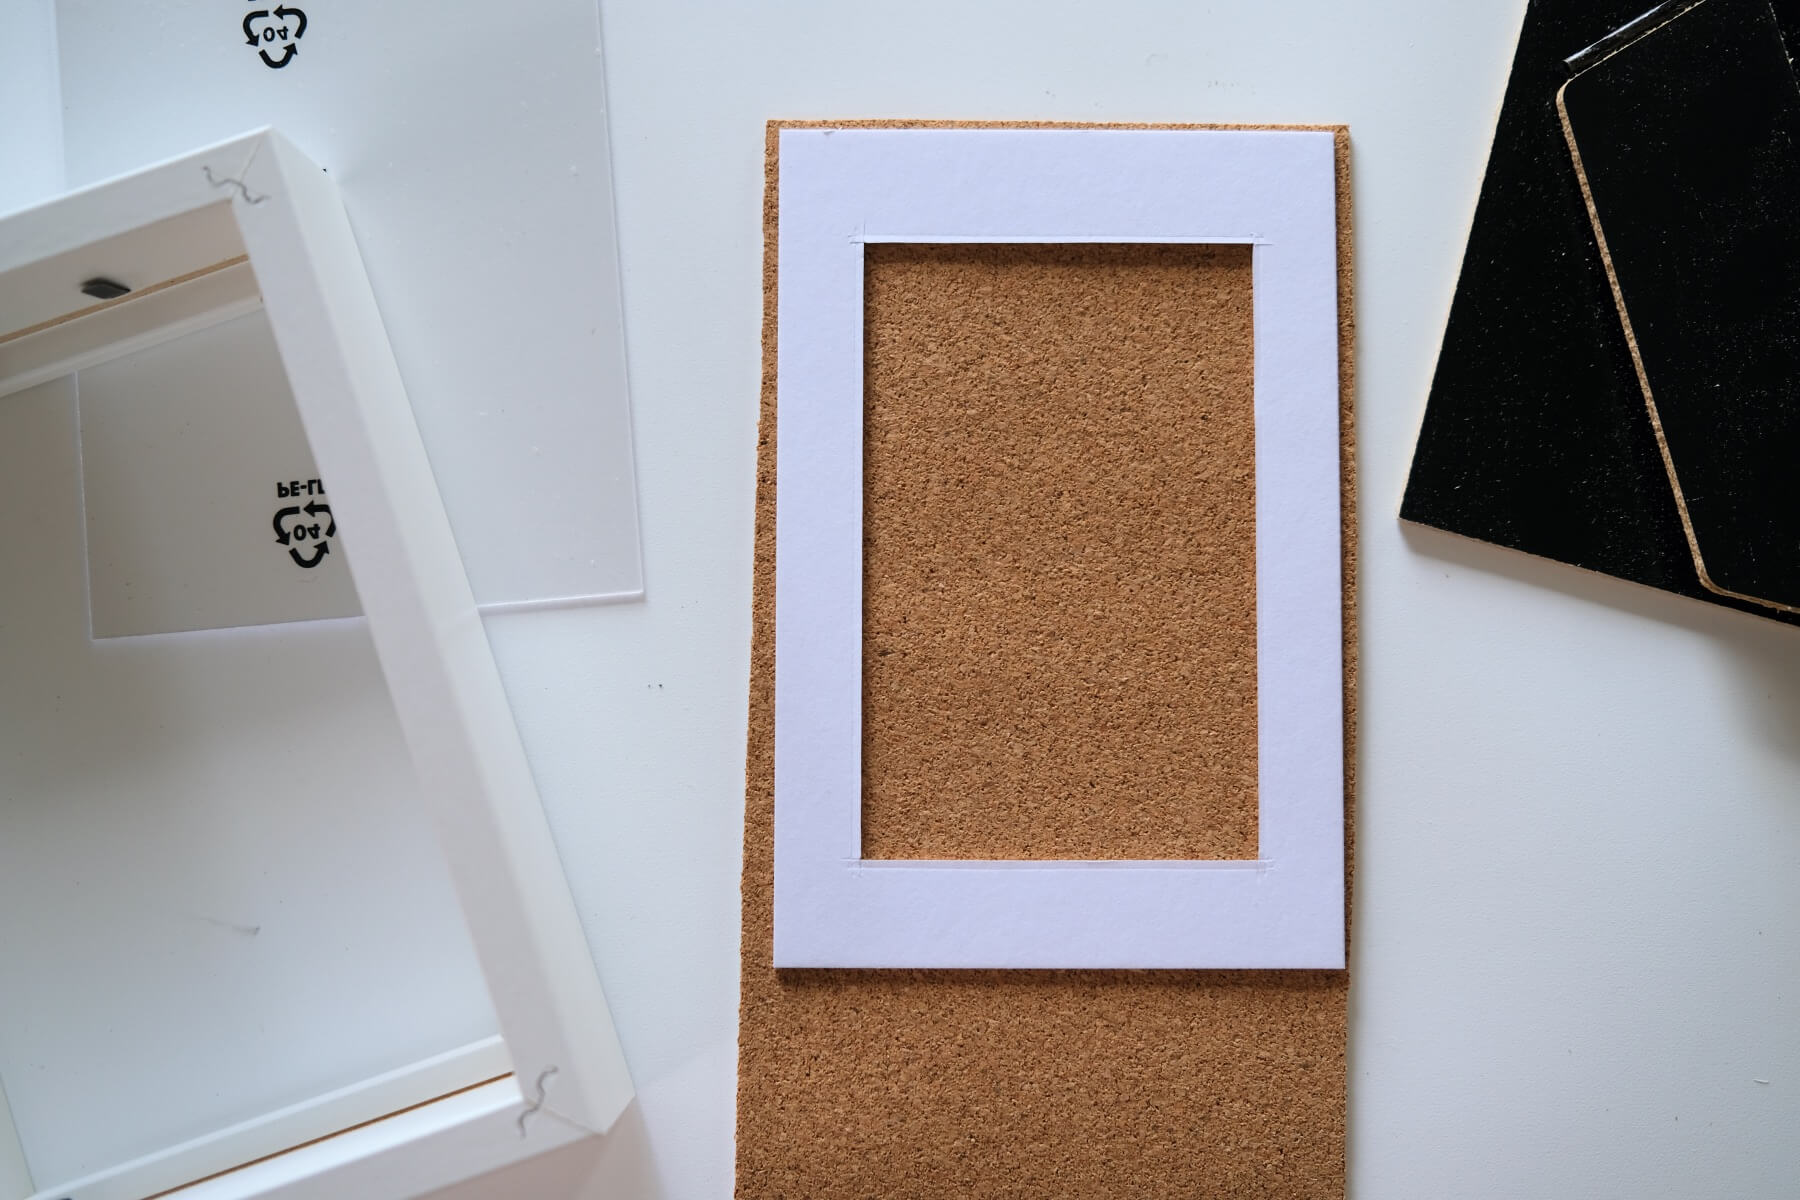
Next, let’s make the cork board! I would recommend using the 4×6 frame for this project. Instead, you could make a 4×6 monthly calendar and an 8×10 cork board. Basically the reverse of what I’ve done. But a smaller monthly calendar will be hard to use and hard to see. And the cork board will be massive!
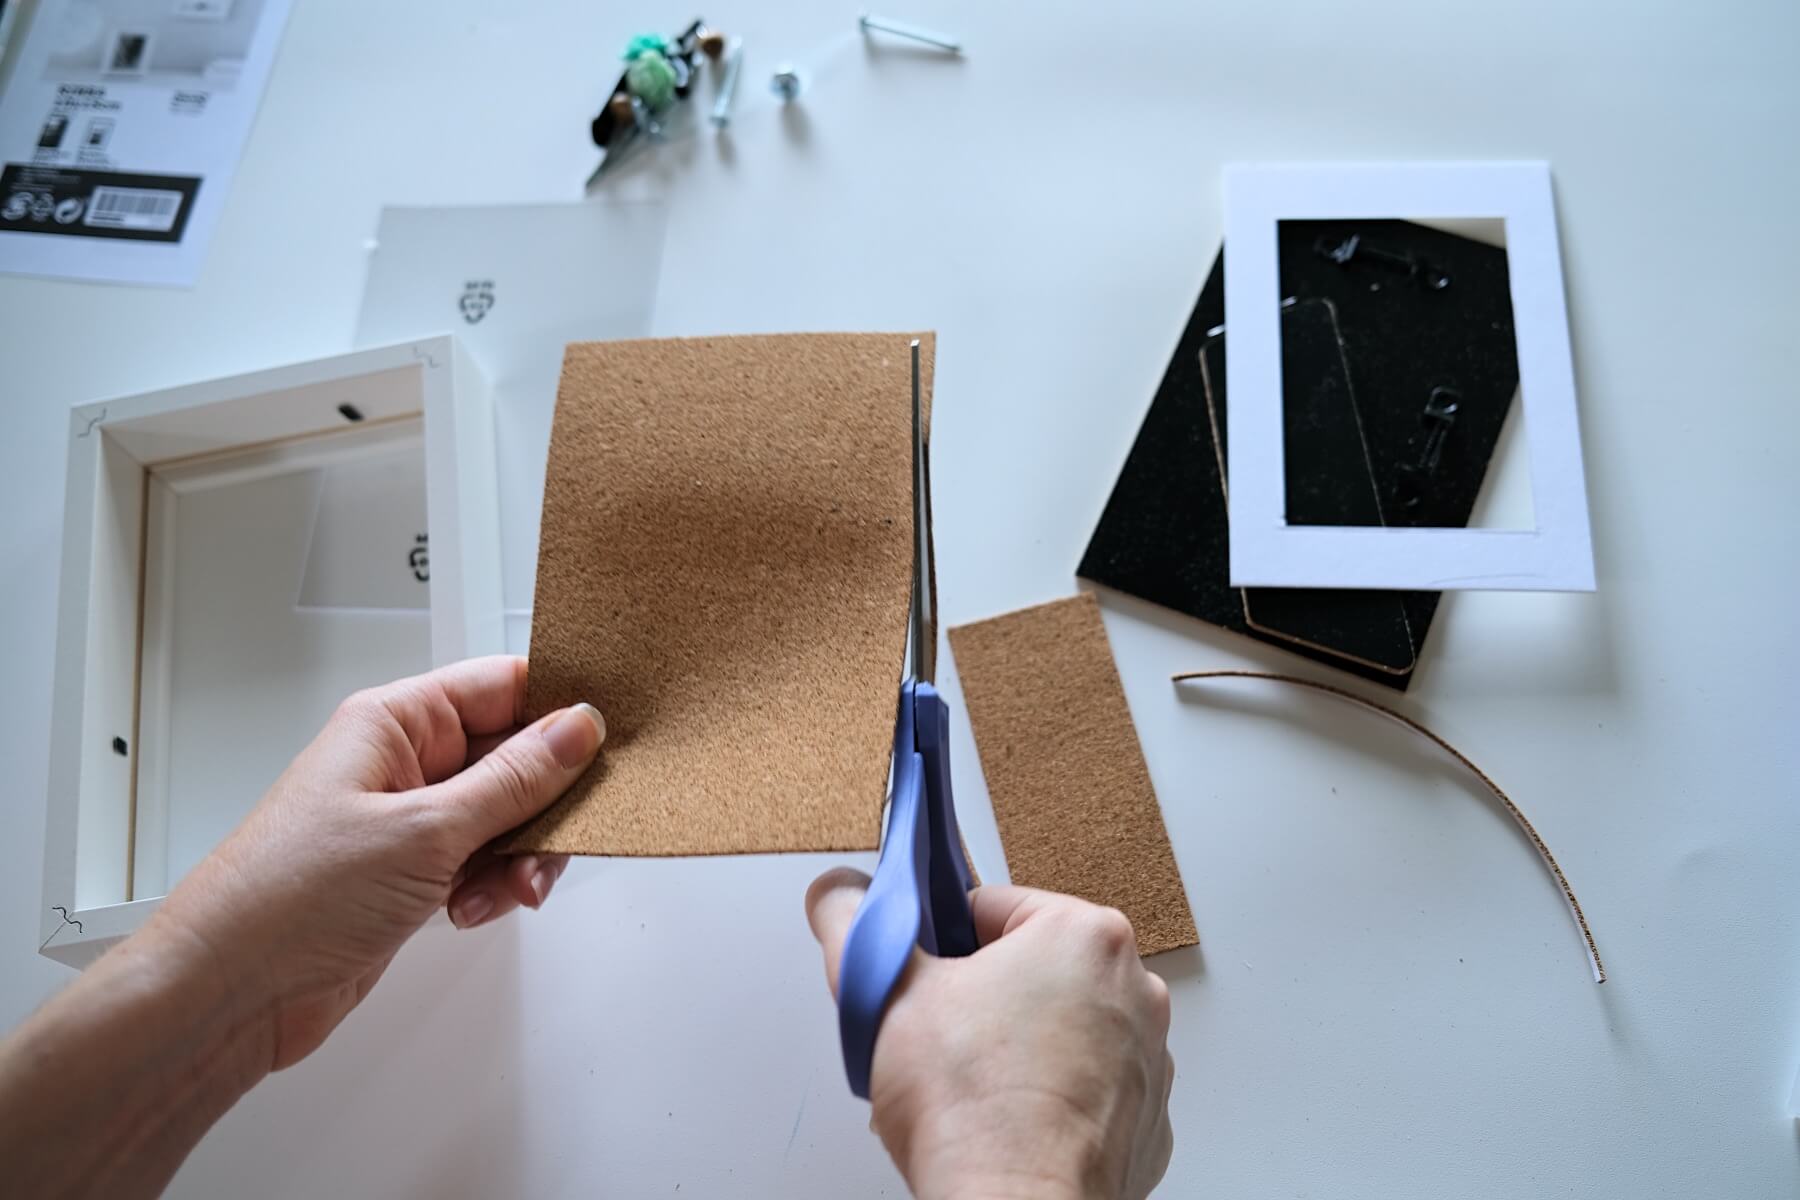
Start by taking the frame apart and pulling out the inserts. Remove the glass – we won’t use that at all in this diy. But we will use it later, so be sure to hold onto it.
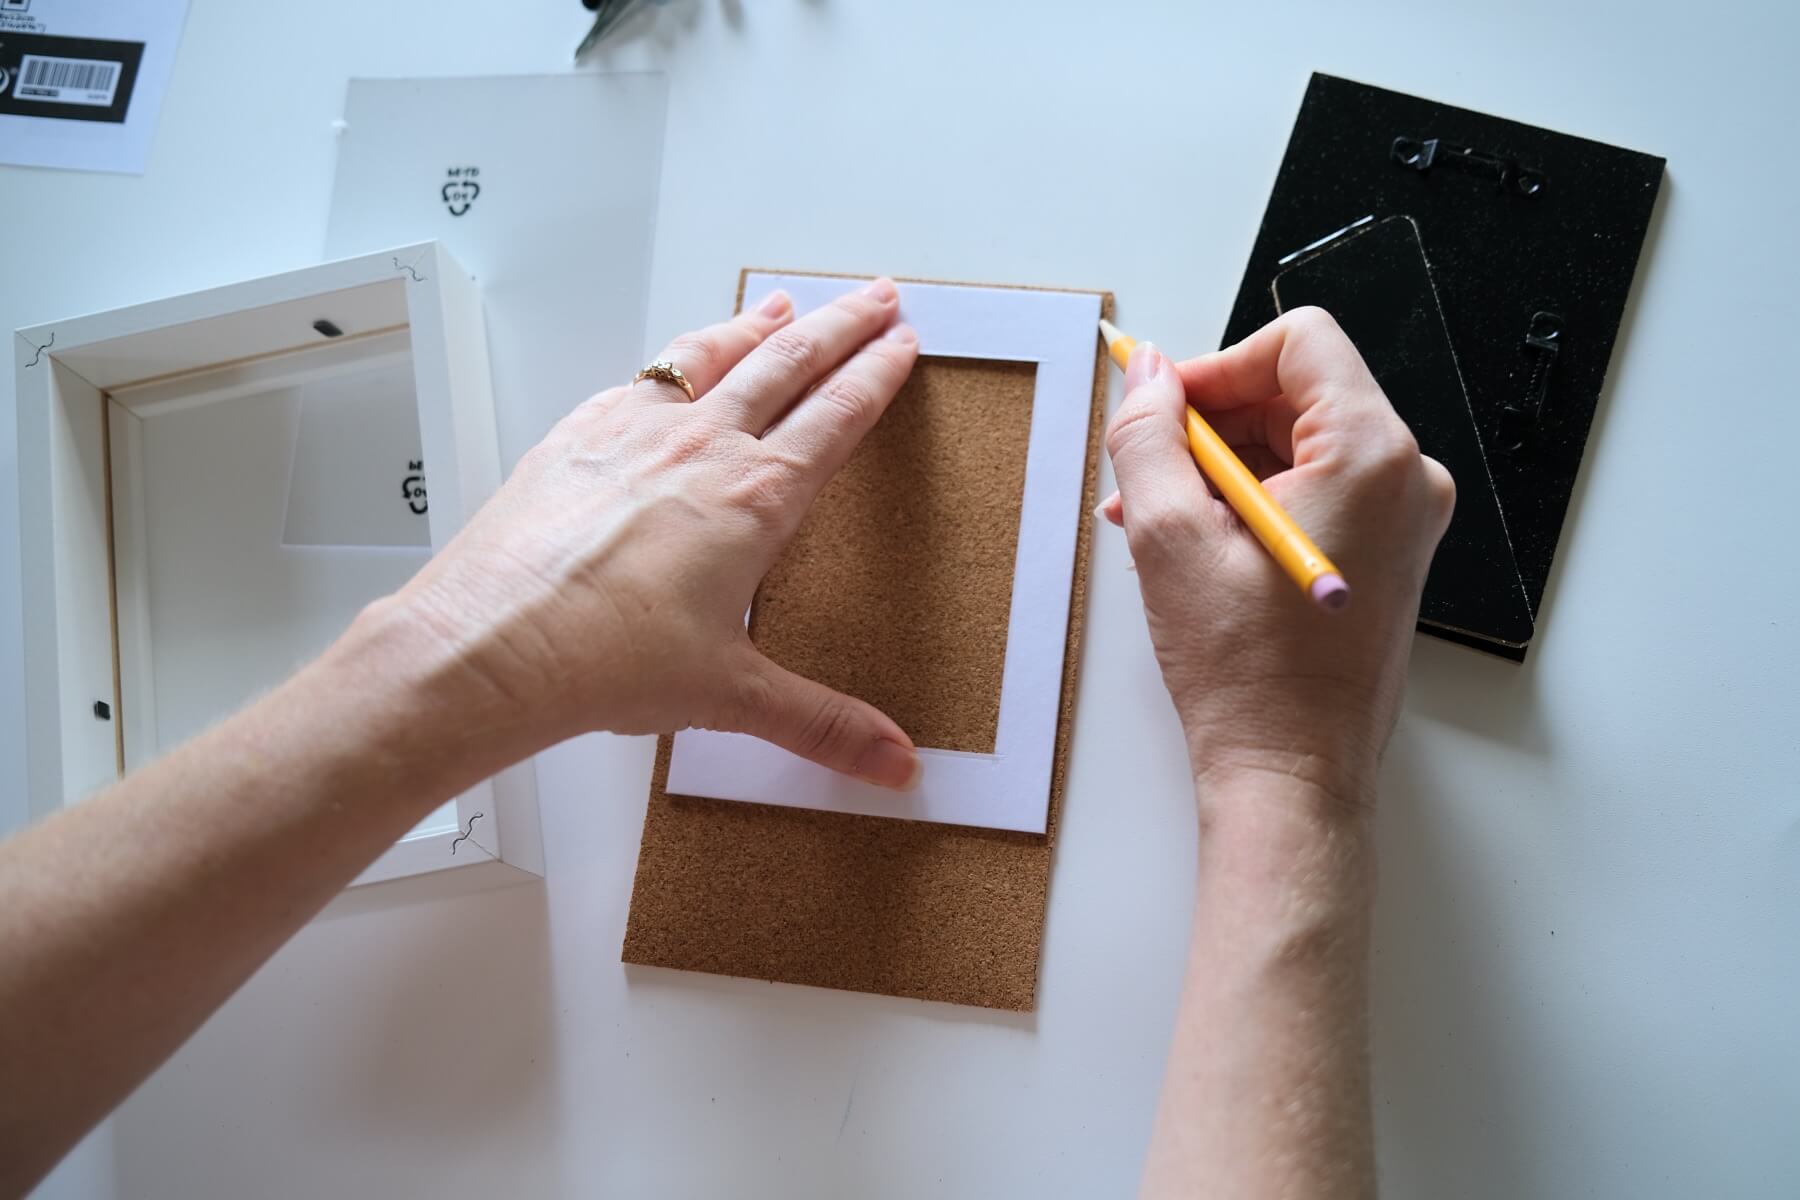
Take any piece from inside the frame, like the paper or a matte board, and set it above the sheet of cork. Use a pencil to trace the outer perimeter of your paper on your cork. Be sure that you are firmly holding the cork and paper in place so that neither move.
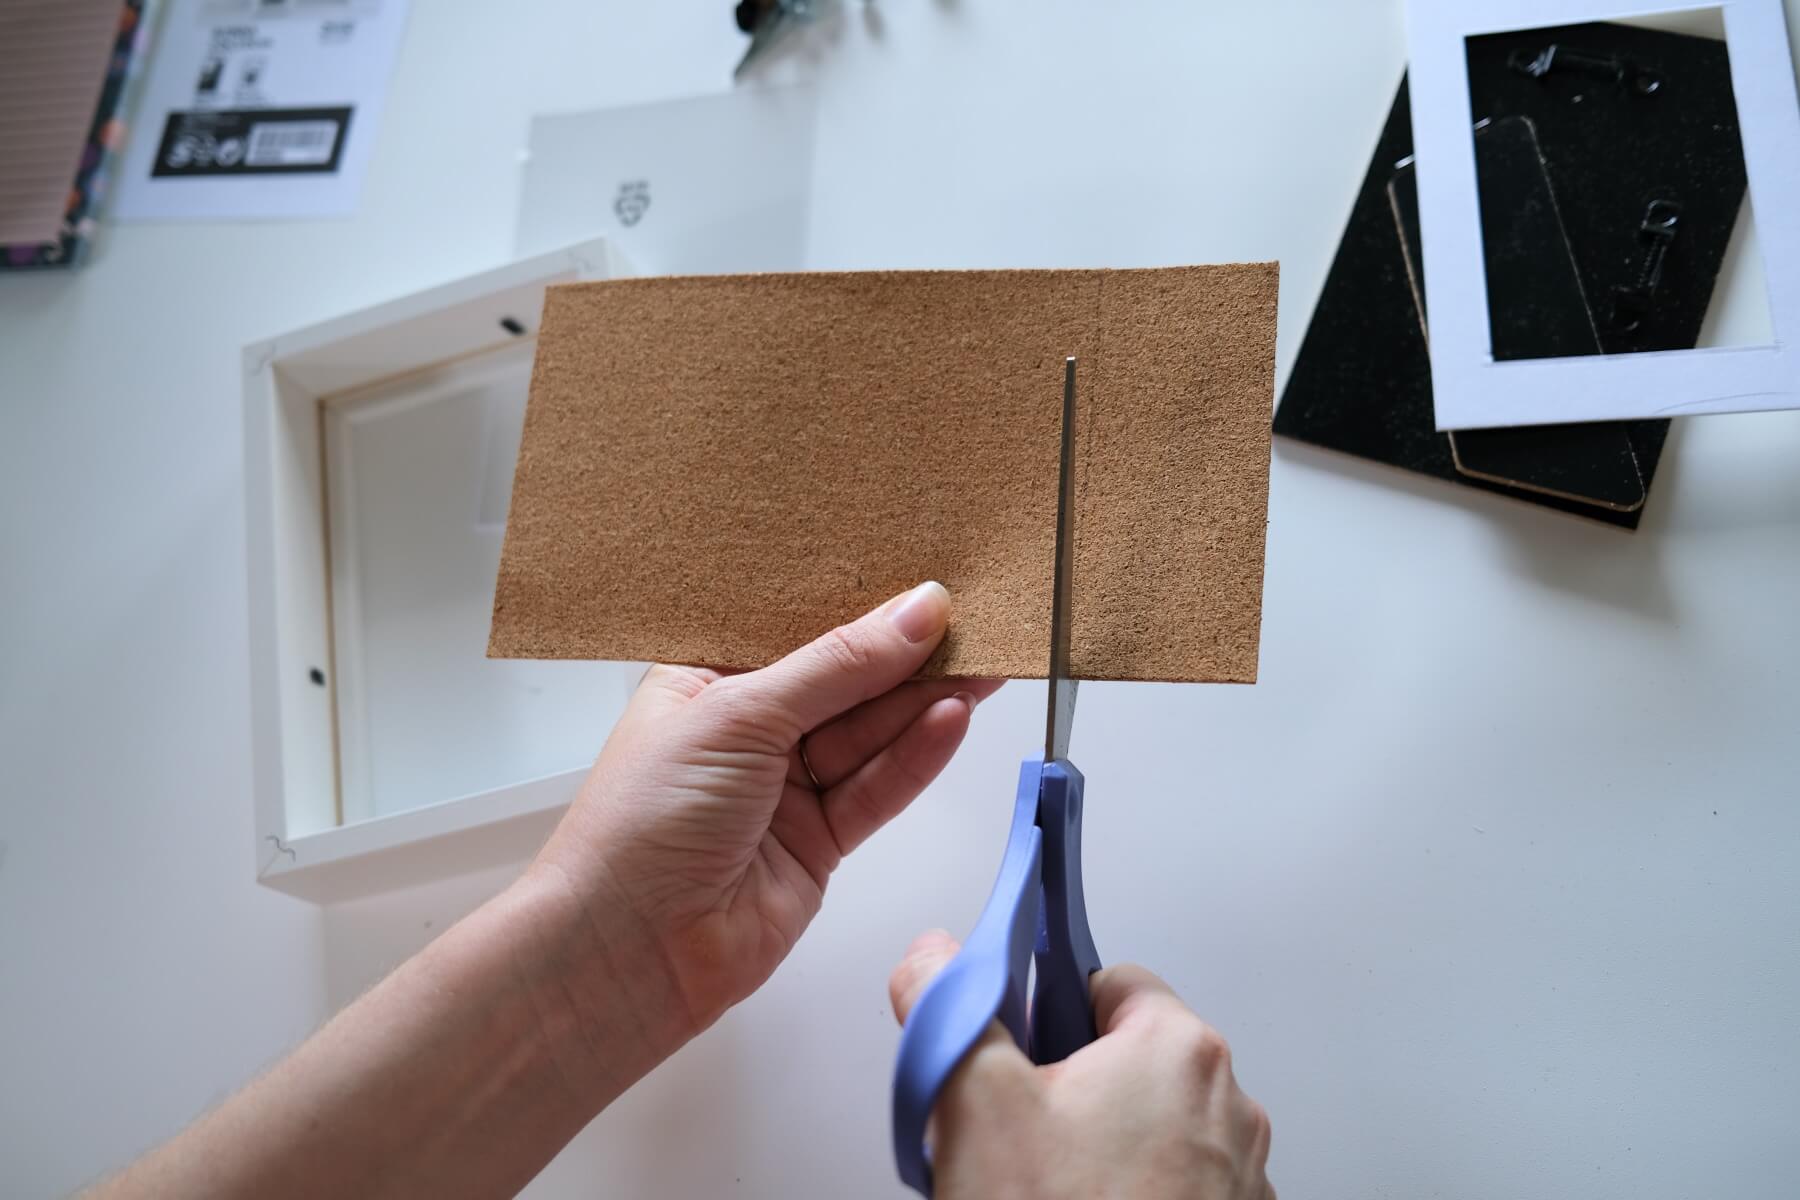
Once you have your pencil lines finished, use scissors or a box cutter to cut the cork board along the pencil lines.
Place the cork board inside the frame and make sure that it fits and lays flat. It shouldn’t squish into the corners or have edges that need to fold over. To make it fit, you may need to pull the cork board back out and trim it more, until it fits perfectly.
Once you have your cork board inside the frame and it fits well, add the rest of the cork board scraps behind it. Add the paper that you originally removed too.
Anything that you can add behind the cork sheet to fill the frame will help give your cork board the thickness that it needs.
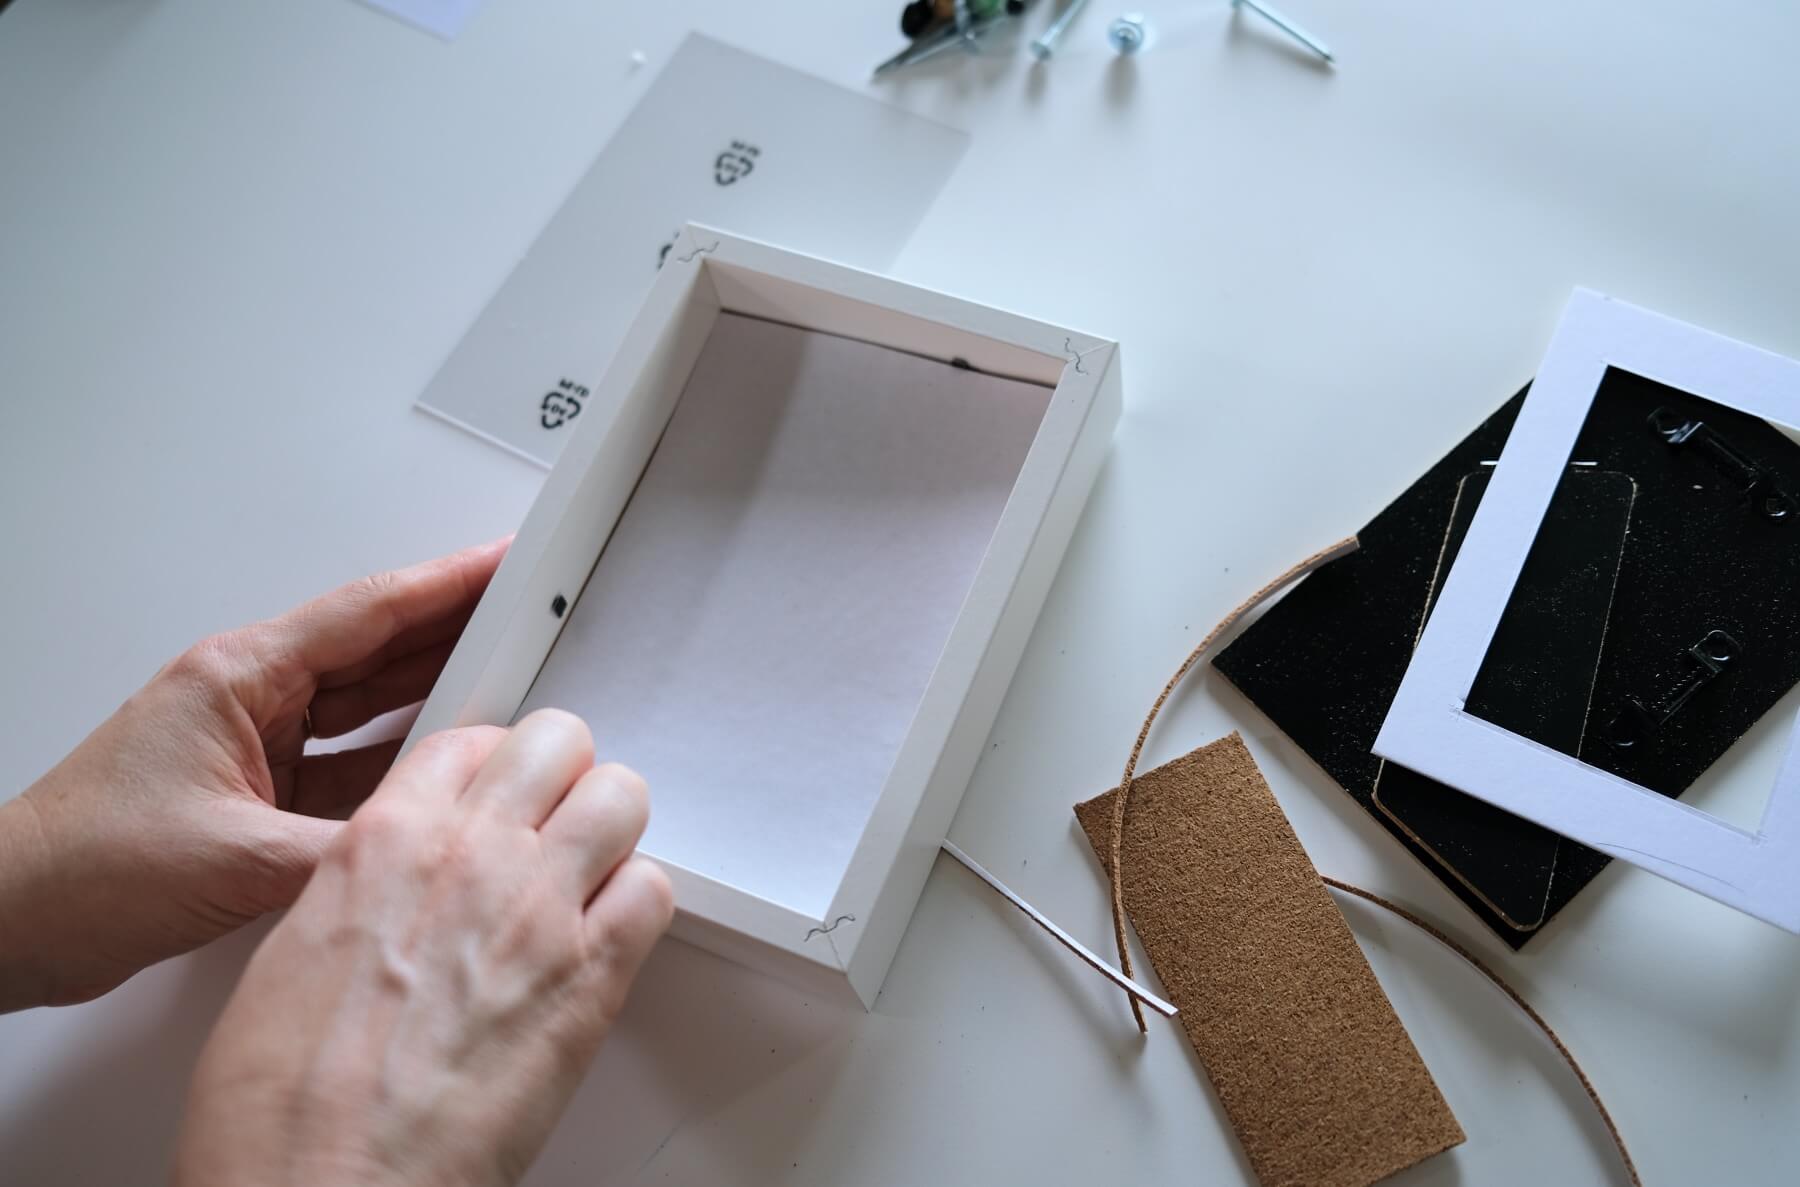
Since the cork is fairly thin, you will want to add these extra layers. Then when you use your push pins there’s more depth for them to hold your notes, drawings, and so much more.
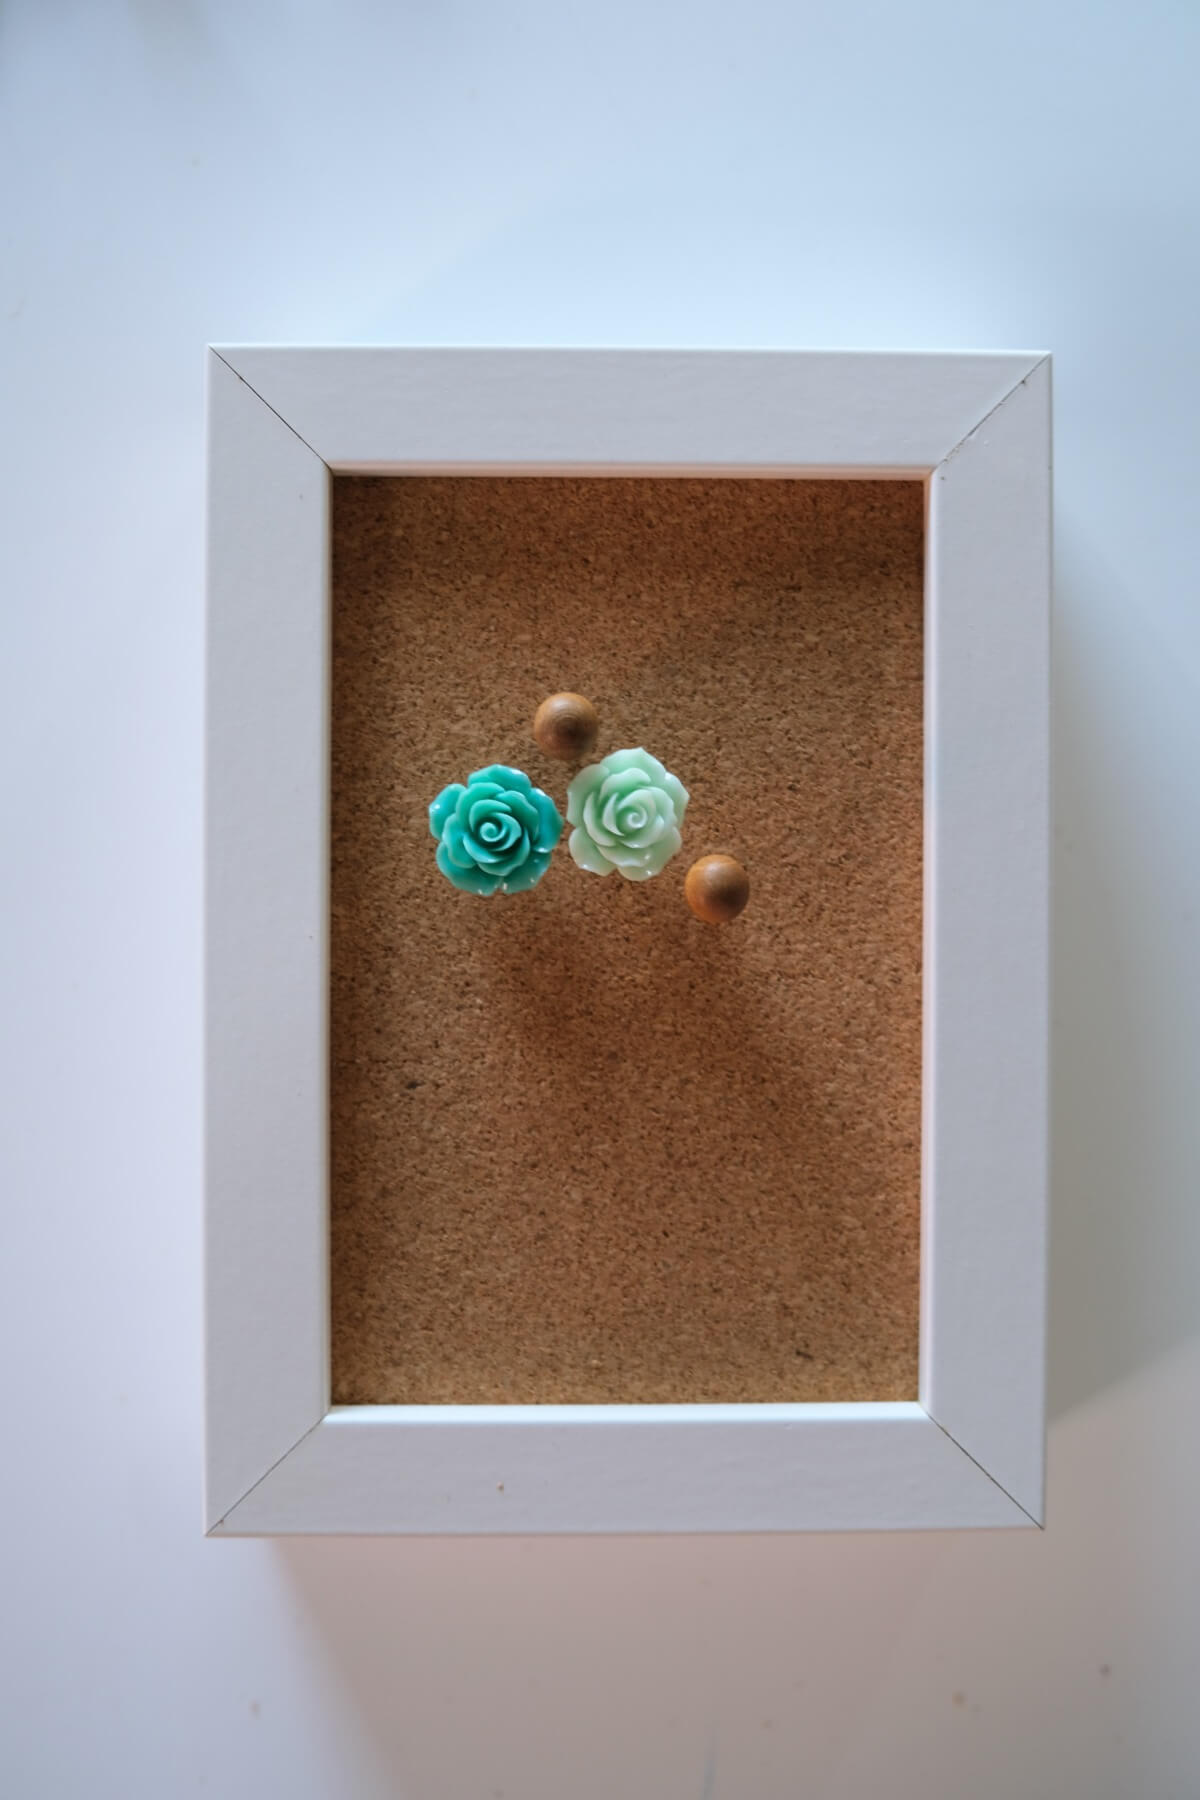
Use adorable thumbtacks like these succulent thumbtacks to help your framed cork board feel special! Your cork board is the best place to store your unused push pins so they will be ready to use anytime.
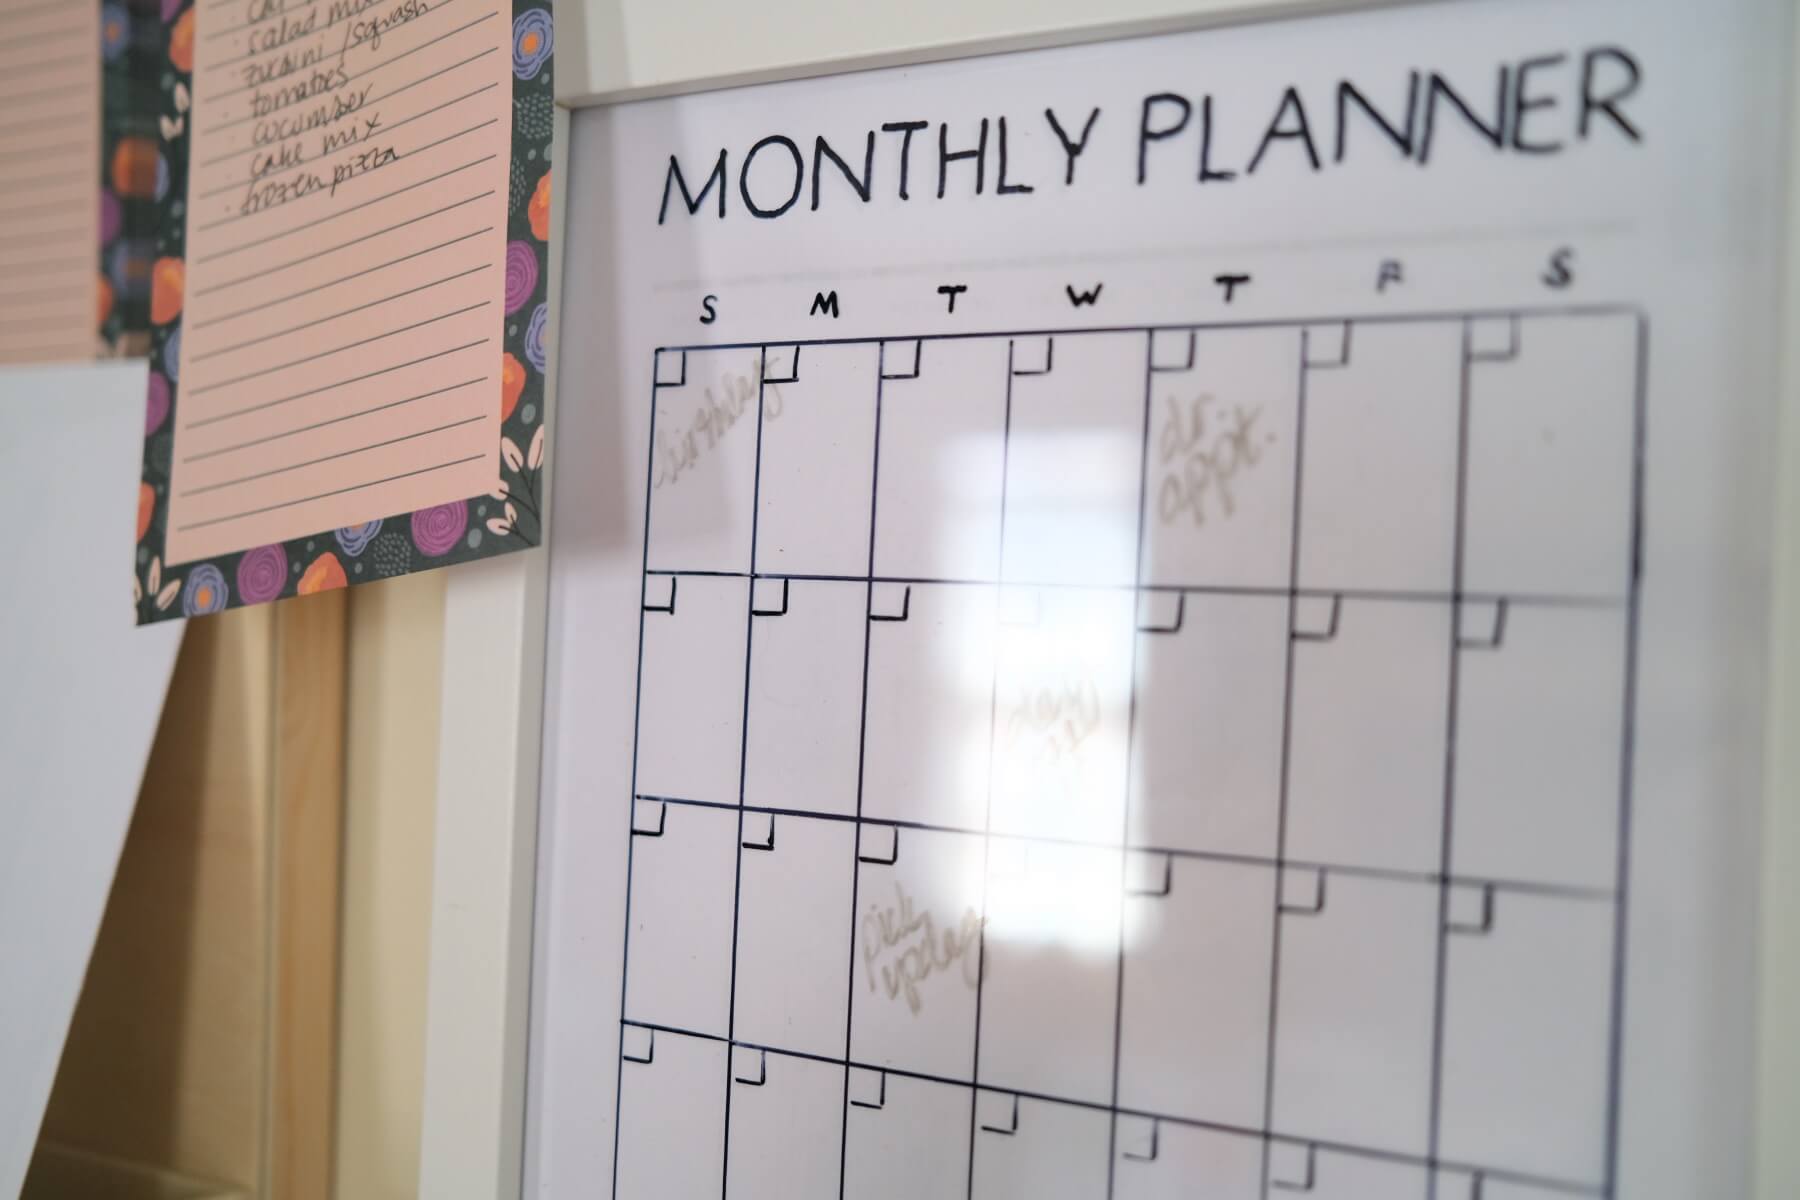
How to Make a Framed Monthly Calendar
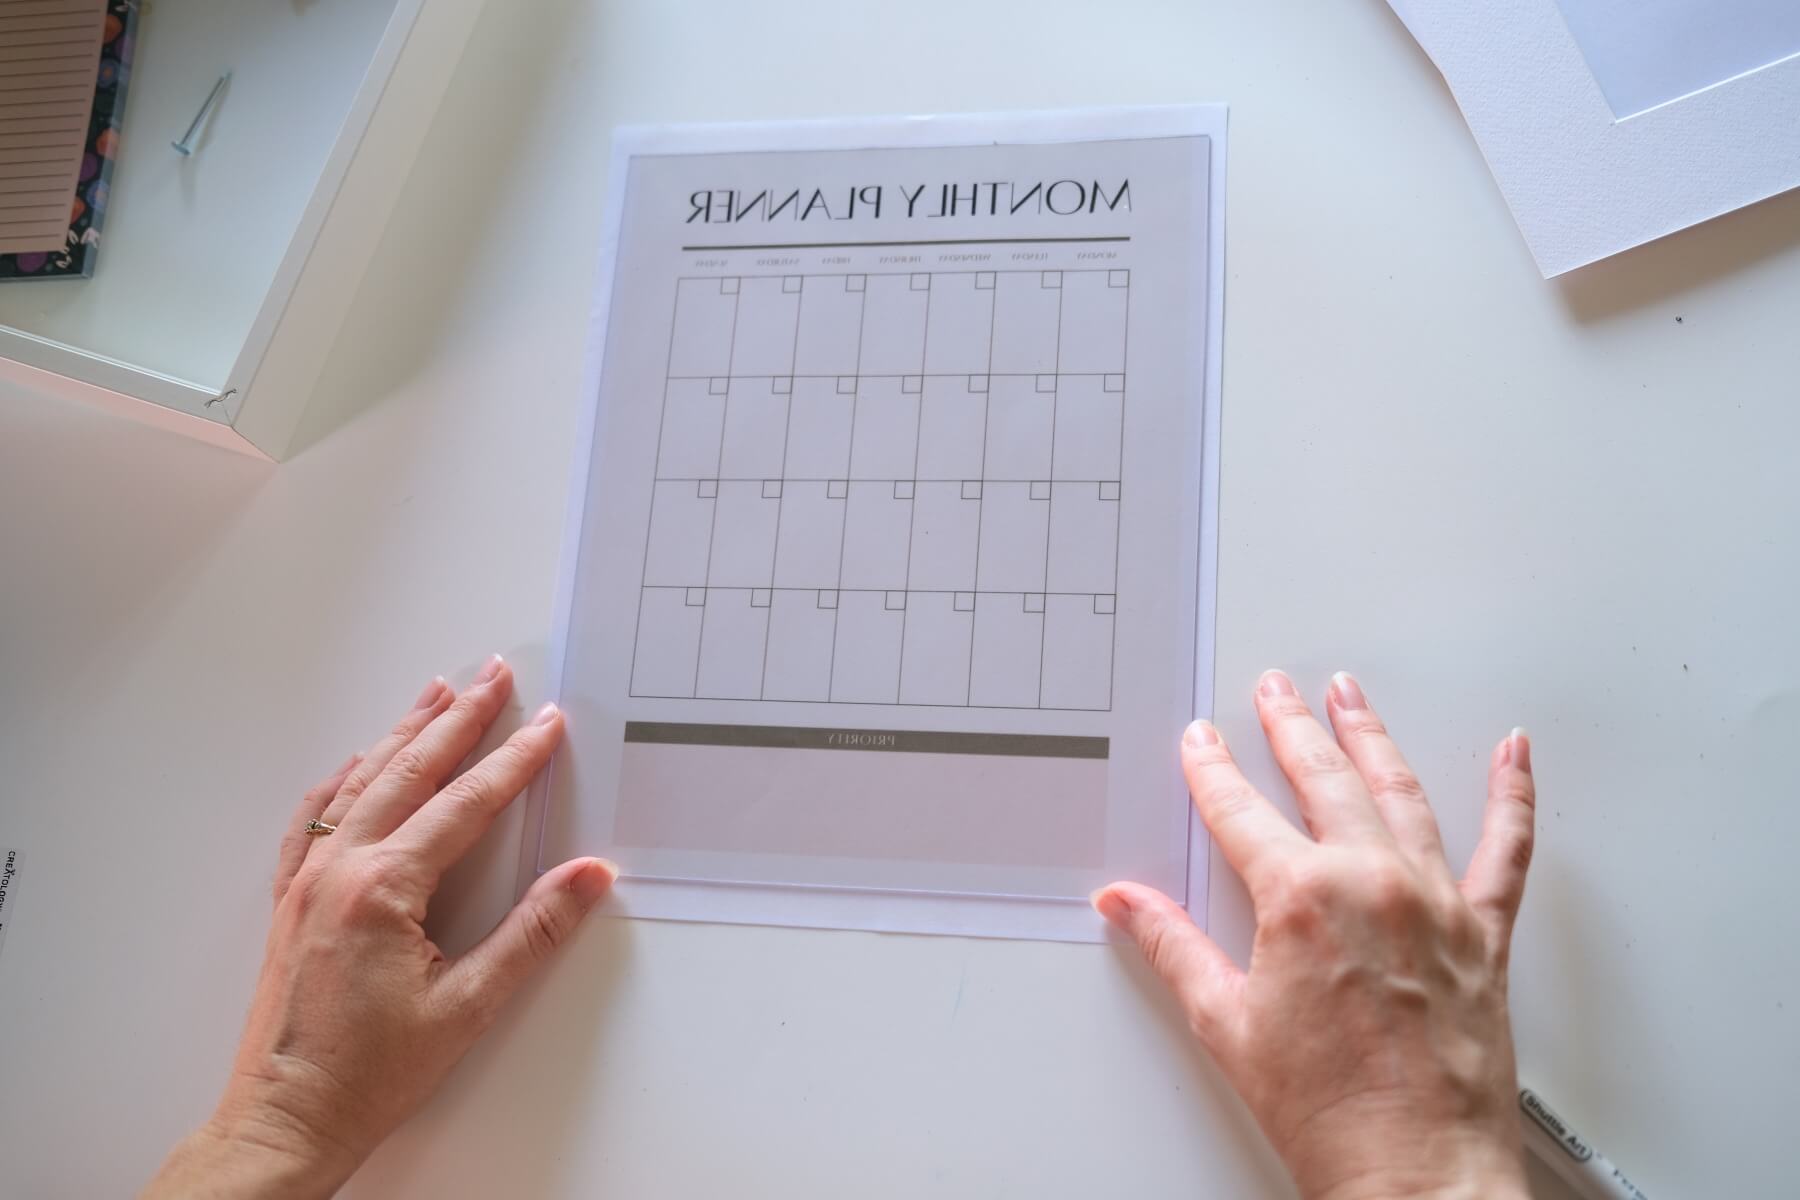
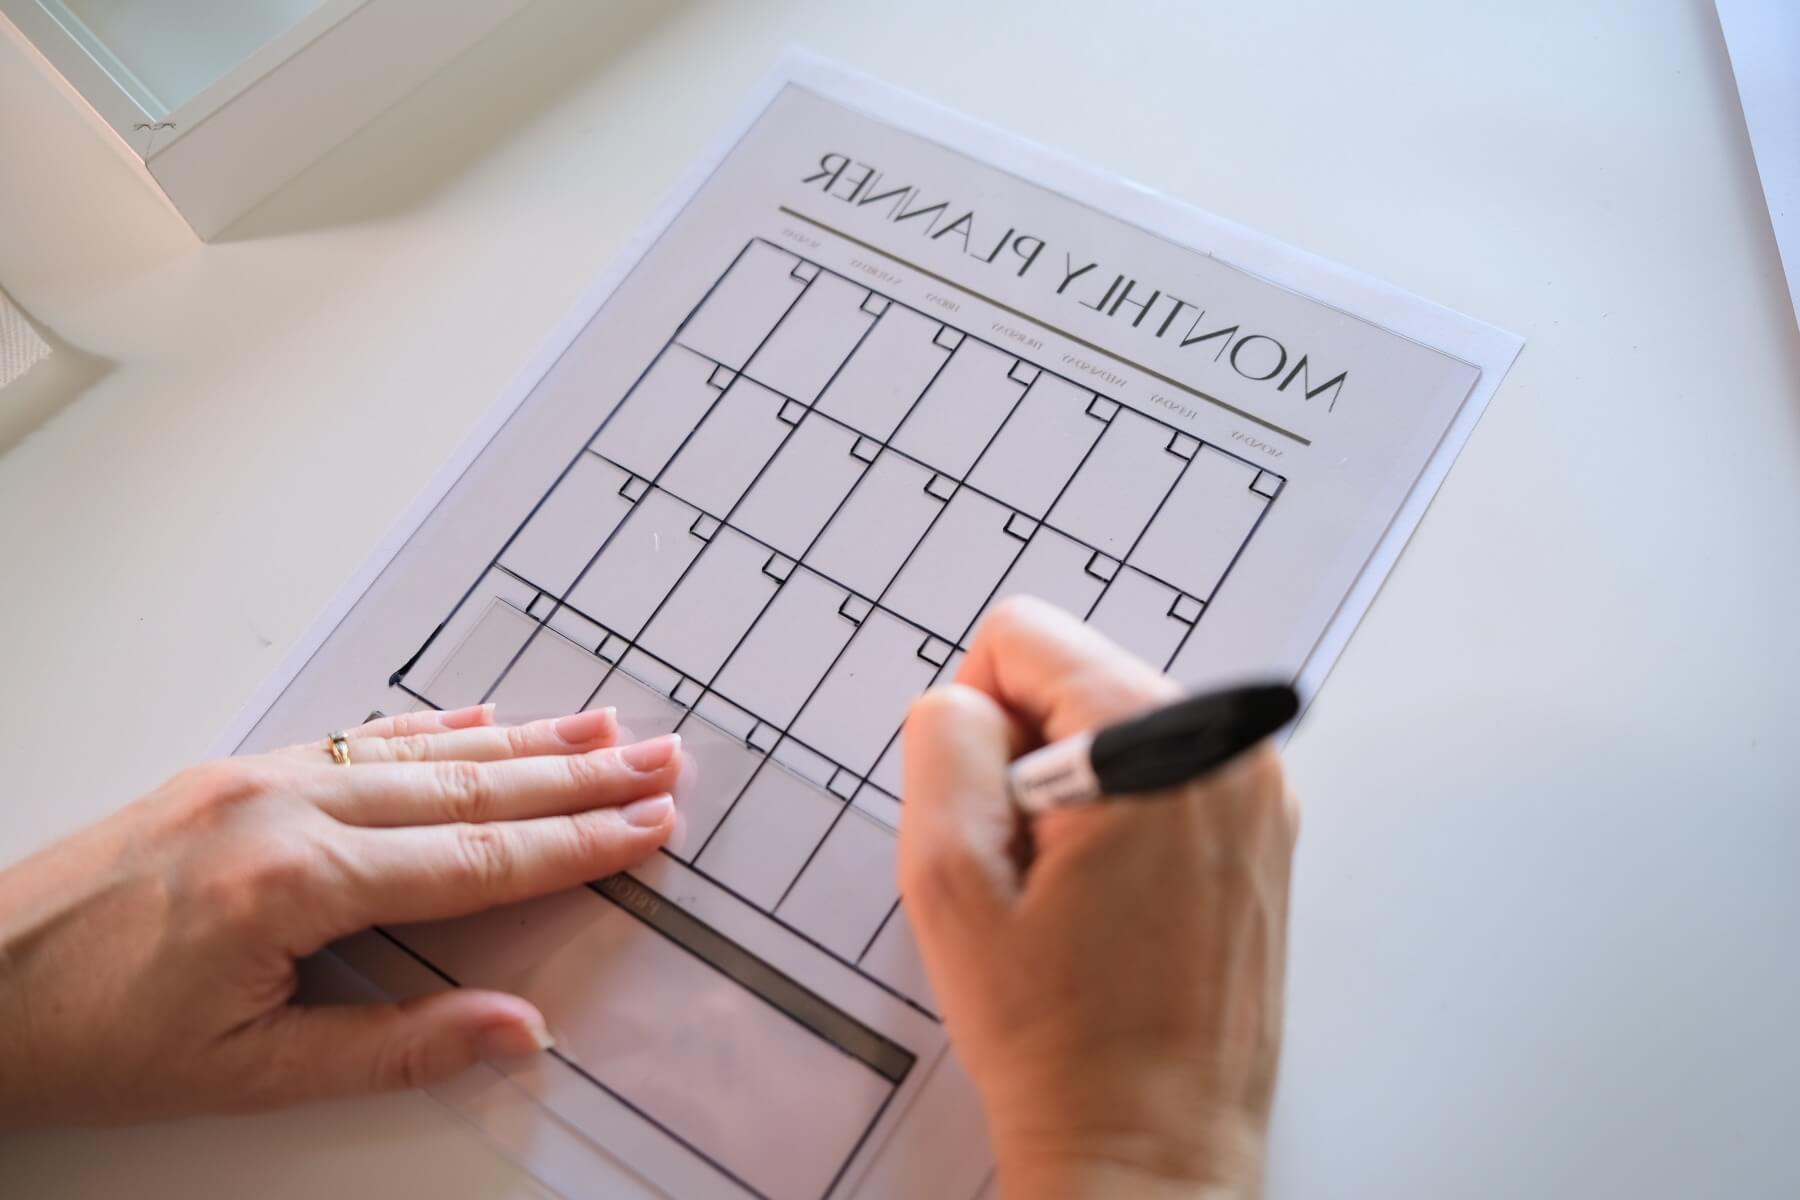
Now this may be the most time consuming of any of these diy’s but it’s so stylish when it’s finished! To make this framed monthly calendar, you will need your 8×10 frame, this Monthly Calendar Template, a Sharpie or Permanent Marker, and a ruler. Or even better than a ruler, you can use the piece of glass from the 4×6 frame.

Start by pulling all of the pieces out of the frame and set your 8×10 piece of glass on top of your monthly calendar template.
This template is in reverse because we’ll create the calendar in reverse! Then we’ll flip it again to place the glass back inside the frame. That will help your calendar last longer and look more professional because you won’t be wearing away the permanent marker.
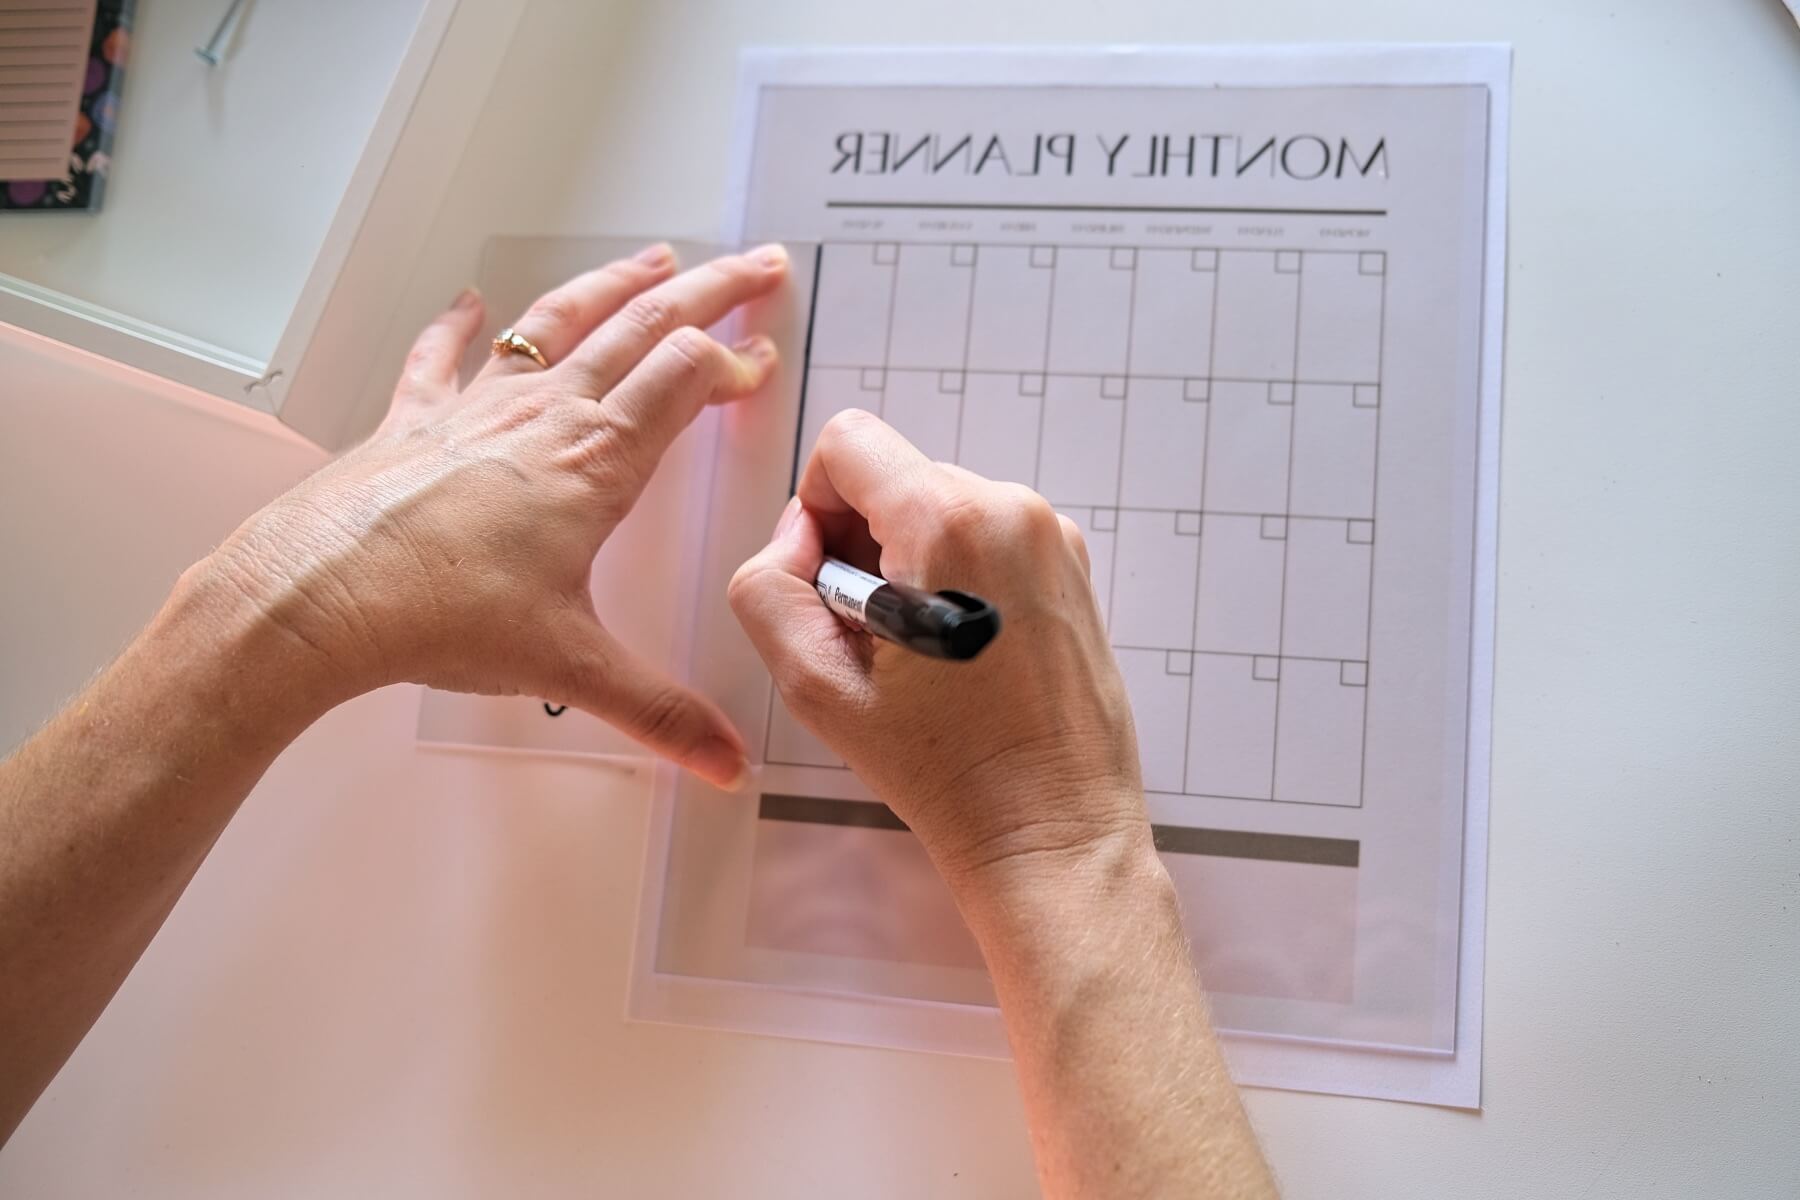
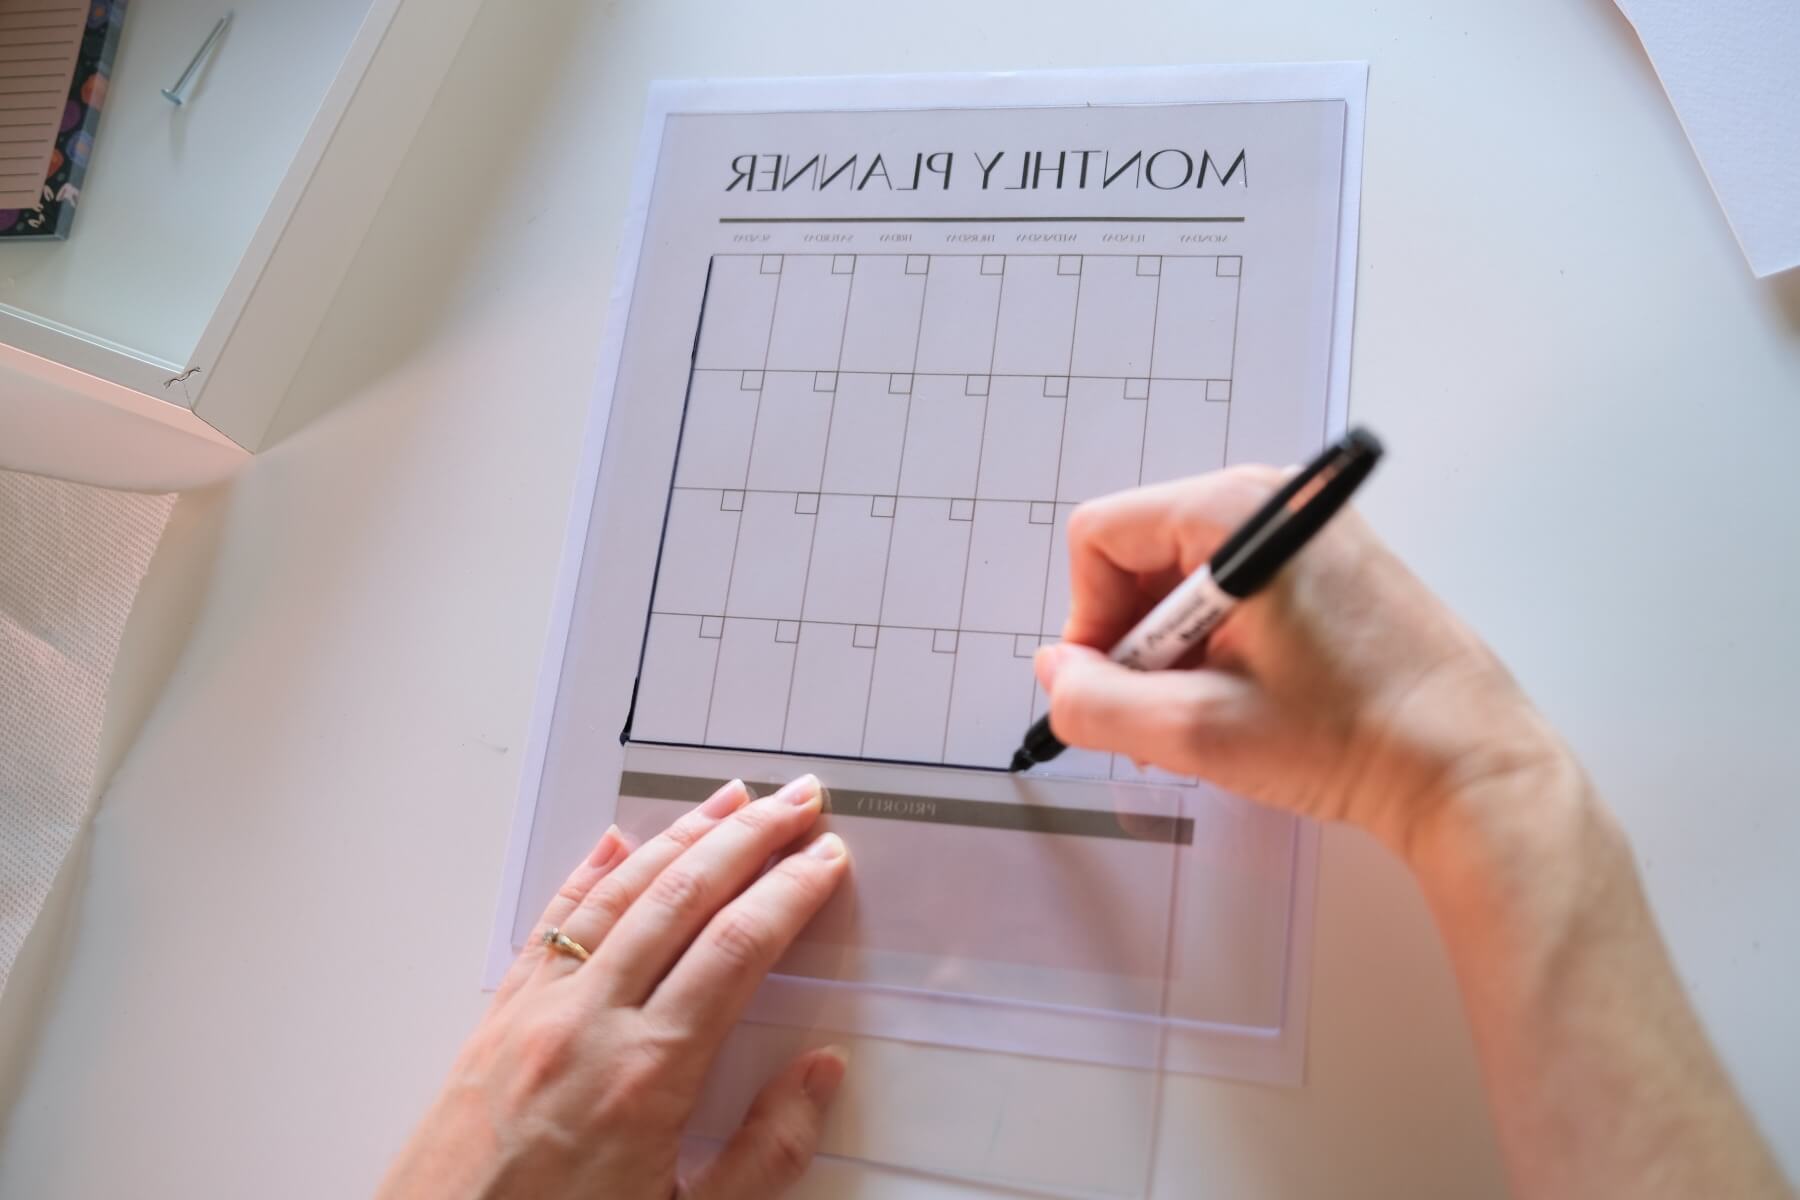
Use a ruler or the edge of your 4×6 glass to trace all the lines with your permanent marker.
I started on the left edge making the longer lines first. I continued to make the vertical lines from left to right across the glass. While drawing the lines, be careful to not drag your hand through the ink and smear the ink.
If you are concerned about smearing the ink, the easiest way to prevent it is to take a break and let the ink dry.
Another trick is to wipe the ruler or edge of the glass with paper towels after every few lines.
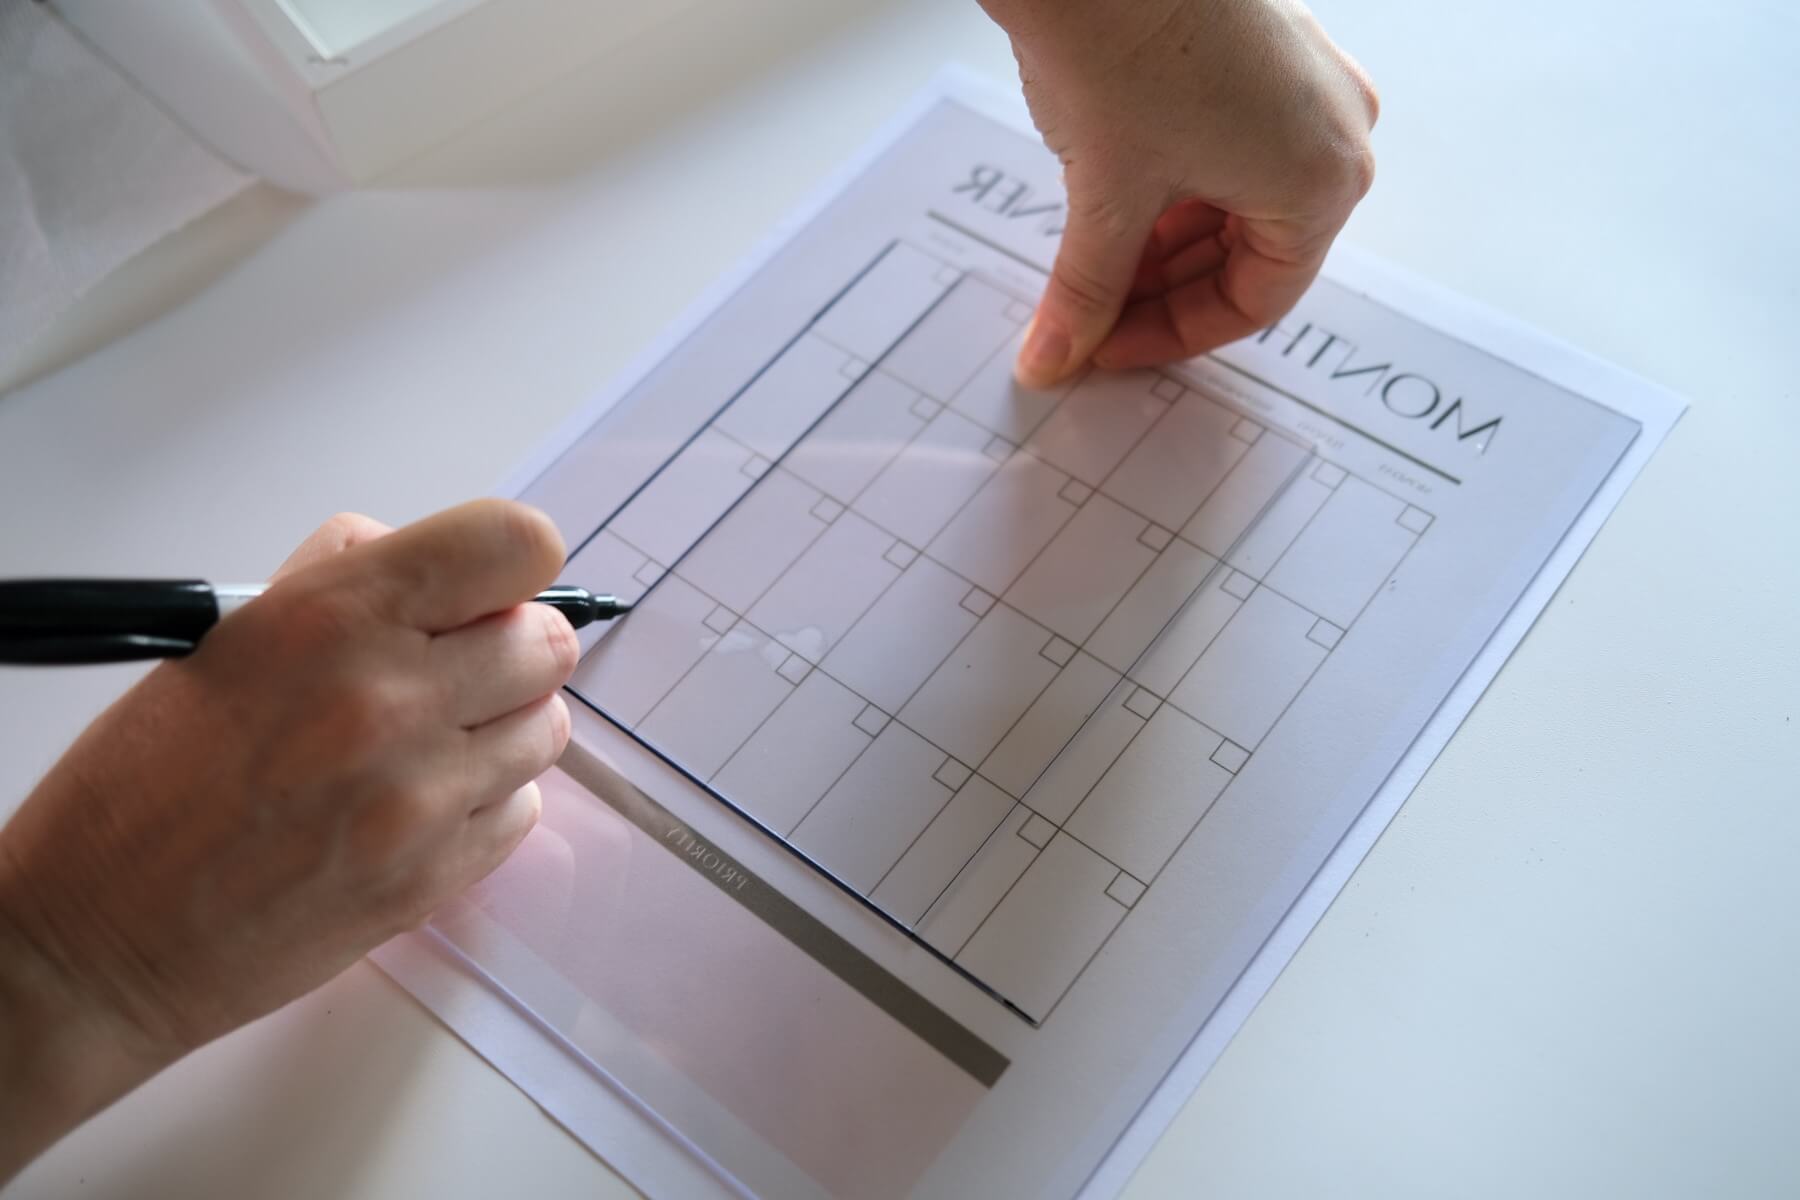
Fill in all the lines on the calendar square – both vertically and horizontally. And include all the exterior perimeter lines too.
The small squares inside the main calendar are perfect for writing the calendar dates. You can use your ruler to make these small squares or you may be able to freehand them.
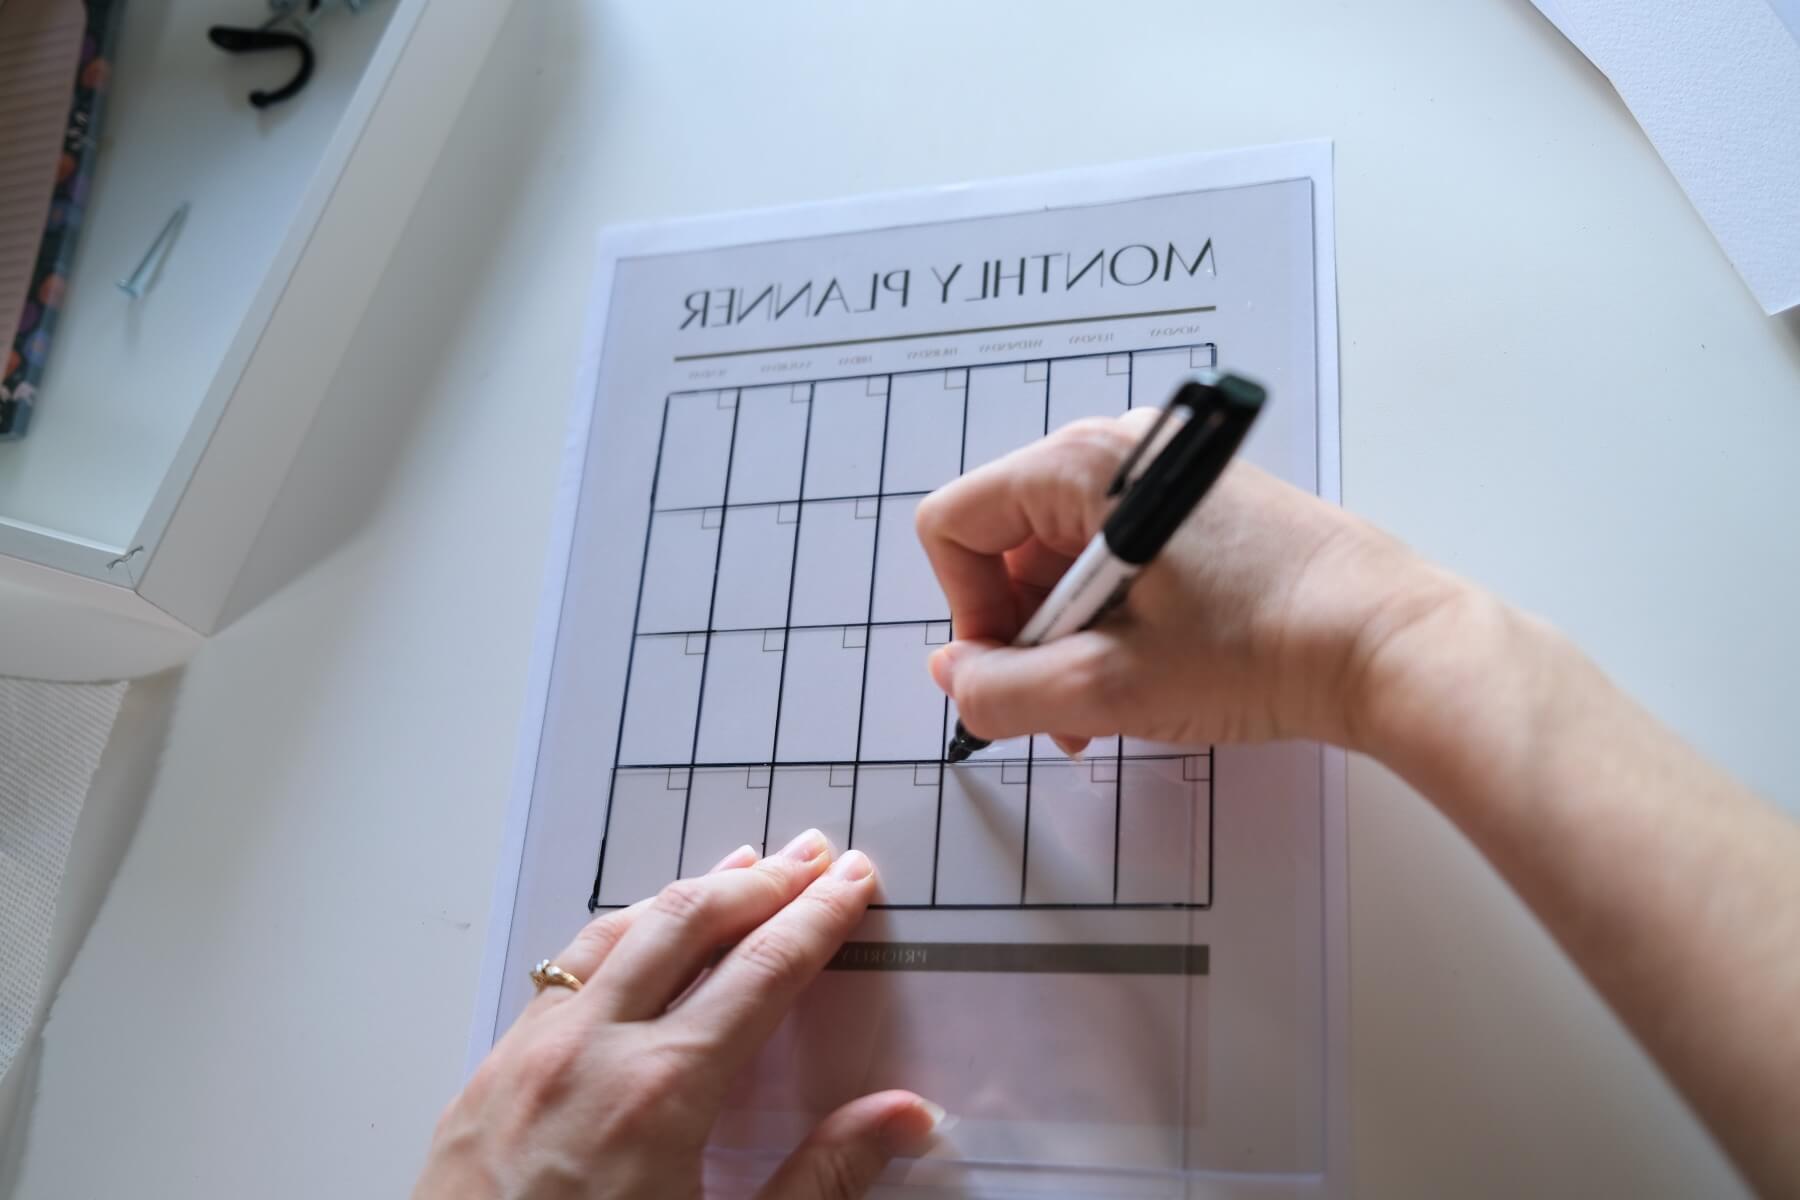
Once your interior calendar is finished, you will want to make a large rectangle at the bottom. This space is perfect for additional notes like making doctor’s appointments, hair appointments or writing out birthdays that don’t fit inside the smaller squares.
After that rectangle is finished, the only remaining items are the words. Those can be a little confusing in reverse!
To make the words, just trace the lines of each letter without thinking too much about it. As for the days of the week, these were a little small for me so I used the first letter of each day, instead of the whole word.
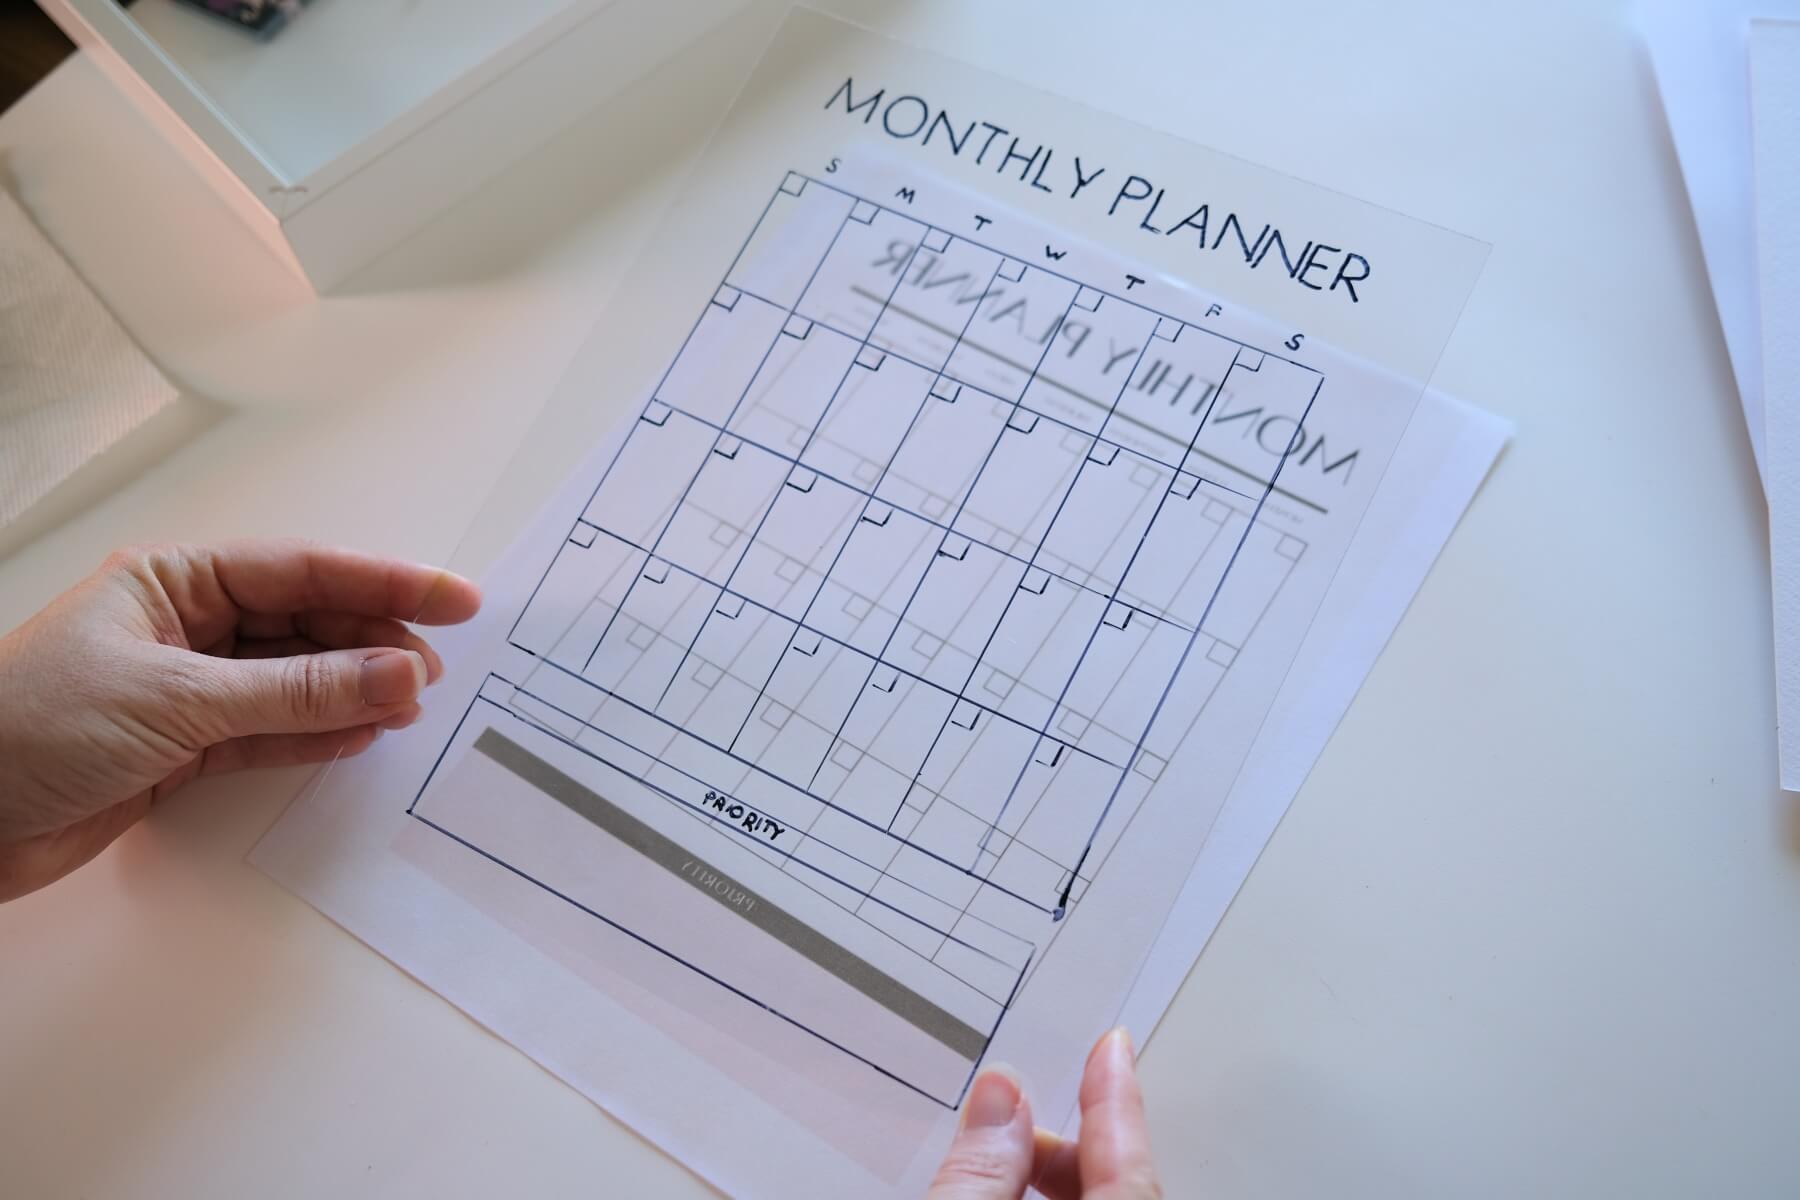
Once you have your words traced, the drawing portion of this project is done! So flip it over and see how it looks! The glass piece will be placed back inside the frame. So before you place it in the frame, review it carefully for anything that you need to touch up.
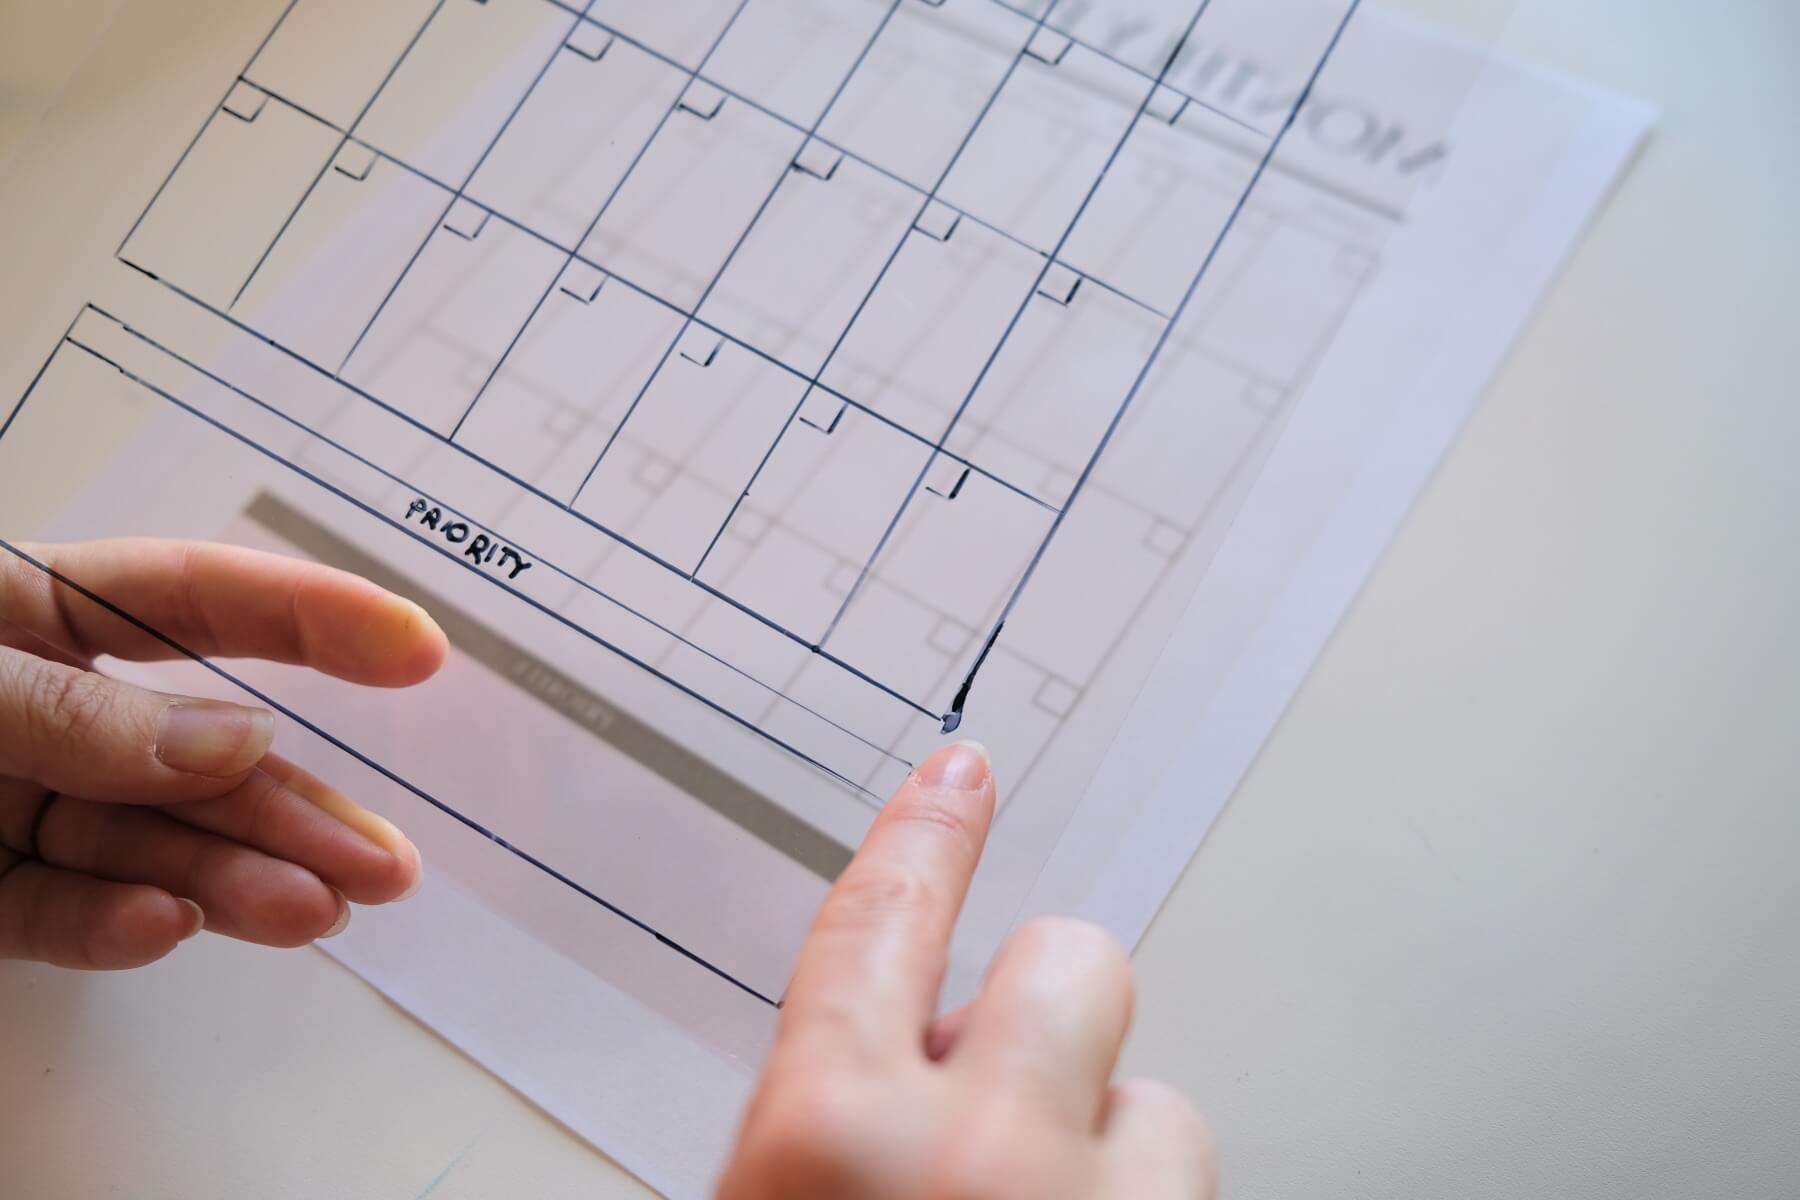
Use Rubbing Alcohol to Remove Any Mistakes
If you have a little imperfection like mine, you can use rubbing alcohol to clean up the lines. Just add a tiny dab of alcohol to a Q-Tip or edge of a paper towel and carefully remove the excess marker.

Place the glass inside the 8×10 frame so that the calendar faces out. Since the glass is clear, you will need clean white or colored paper behind the glass. You can likely use the backside of your calendar template and the paper that came inside the frame.
Or you can use regular white copy paper or colored paper of your choice!
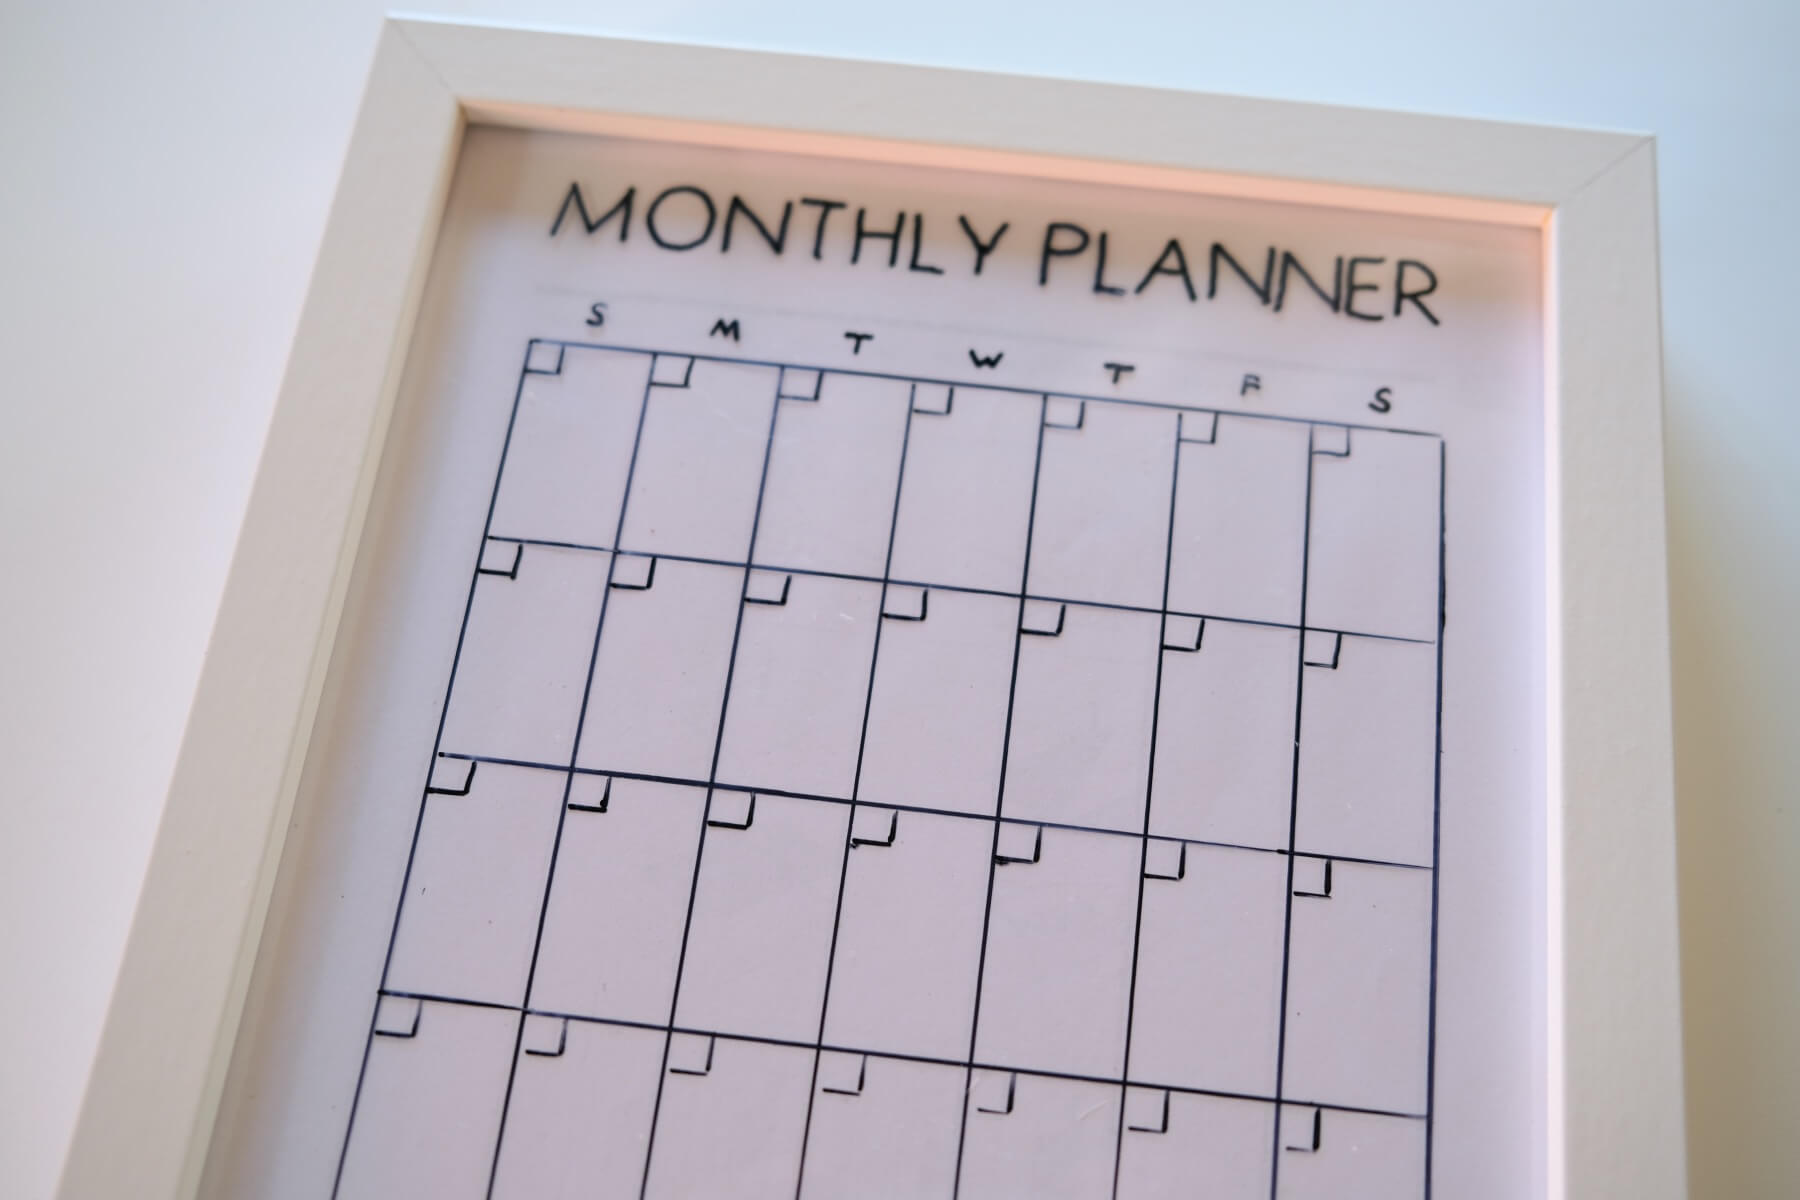
You may notice that mine is not perfect, but it’s the handmade qualities that make it feel so special! Now there’s only 1 piece left in our Gallery Wall DIY Command Center!
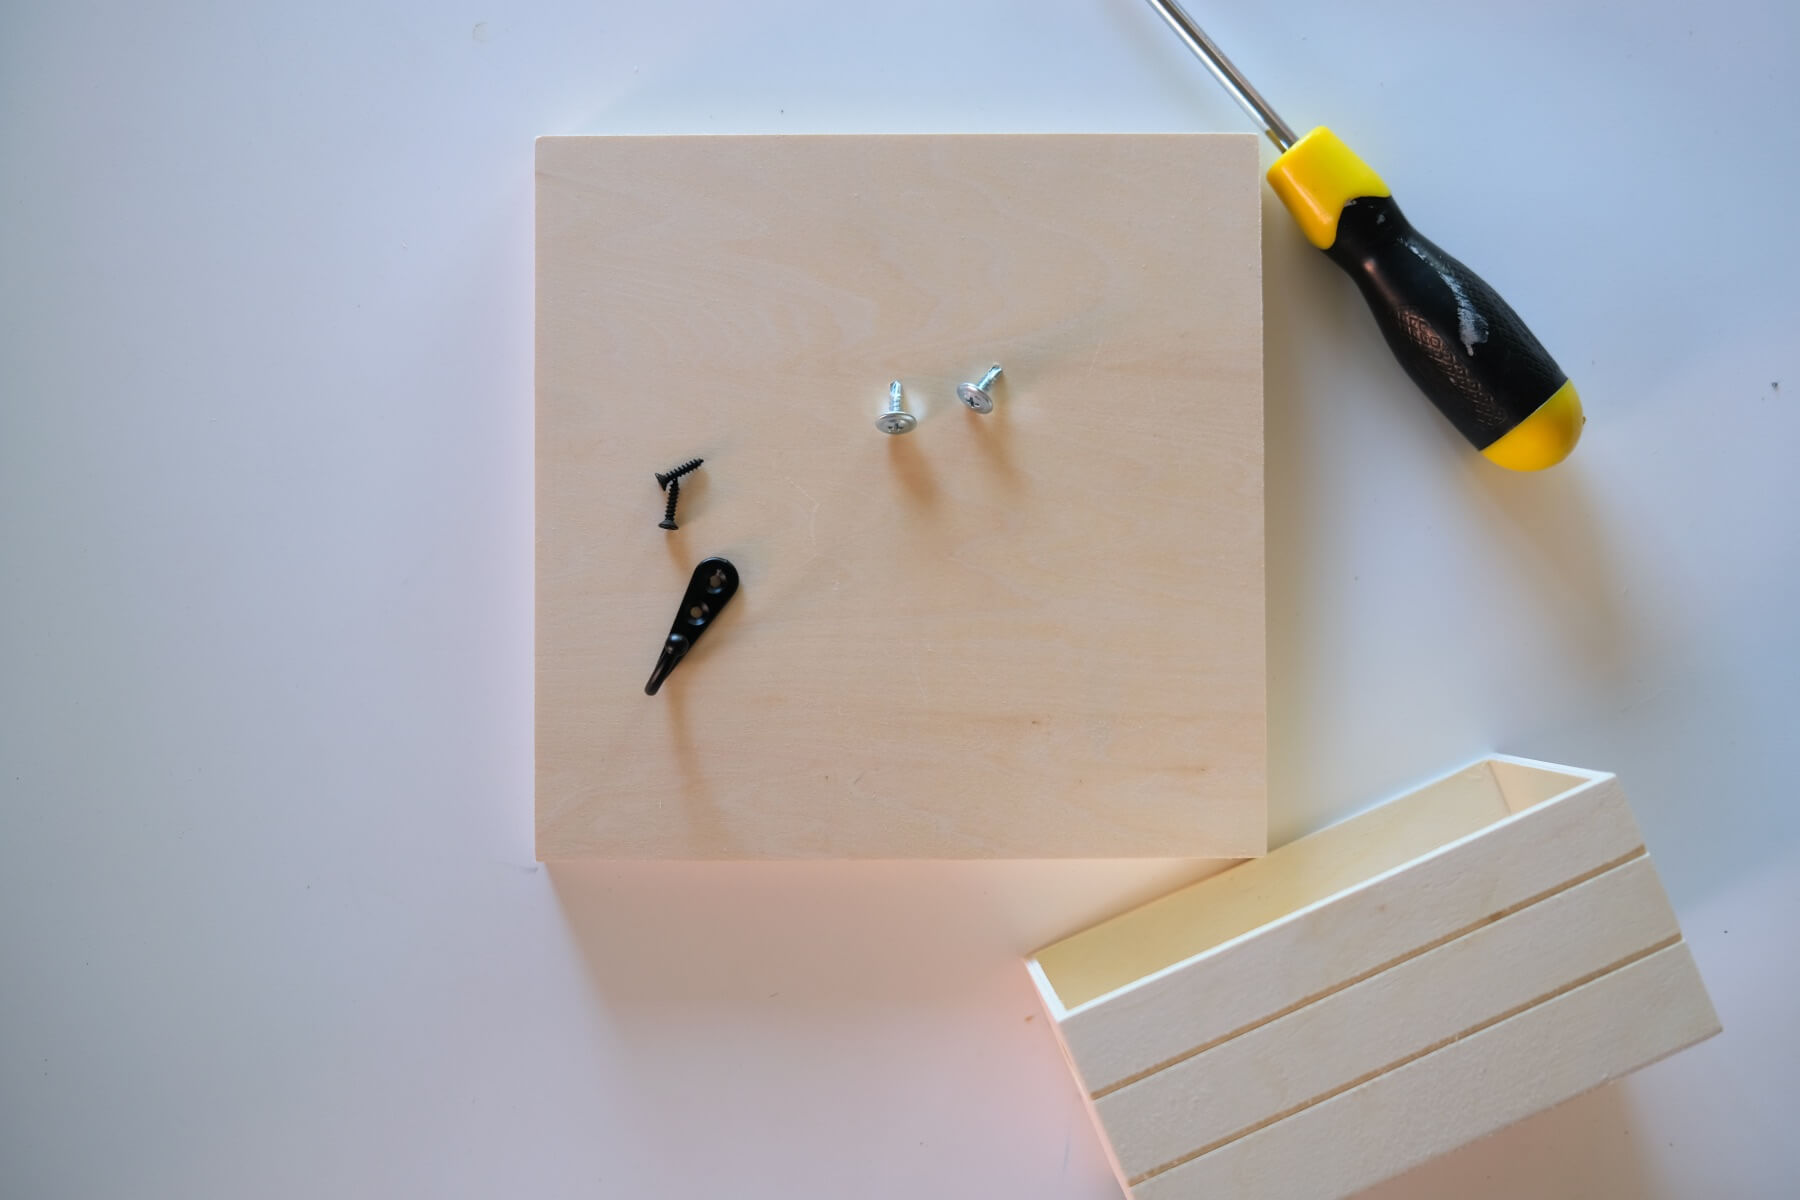
How to Make a Wood Mail Holder
To make this wood mail holder, you will need your wood square, wood crate, a hook and 4 screws.
To attach the wood crate, you could use E6000 instead of screws. But to attach the hook, you will need to use the screws. If you purchased the September Craft in Style Box, the screws for your hook are quite tiny and match the hook. The screws for the crate are silver and have a large surface.
If you are working on your own, you can use any screws that will pierce through the wood frame.
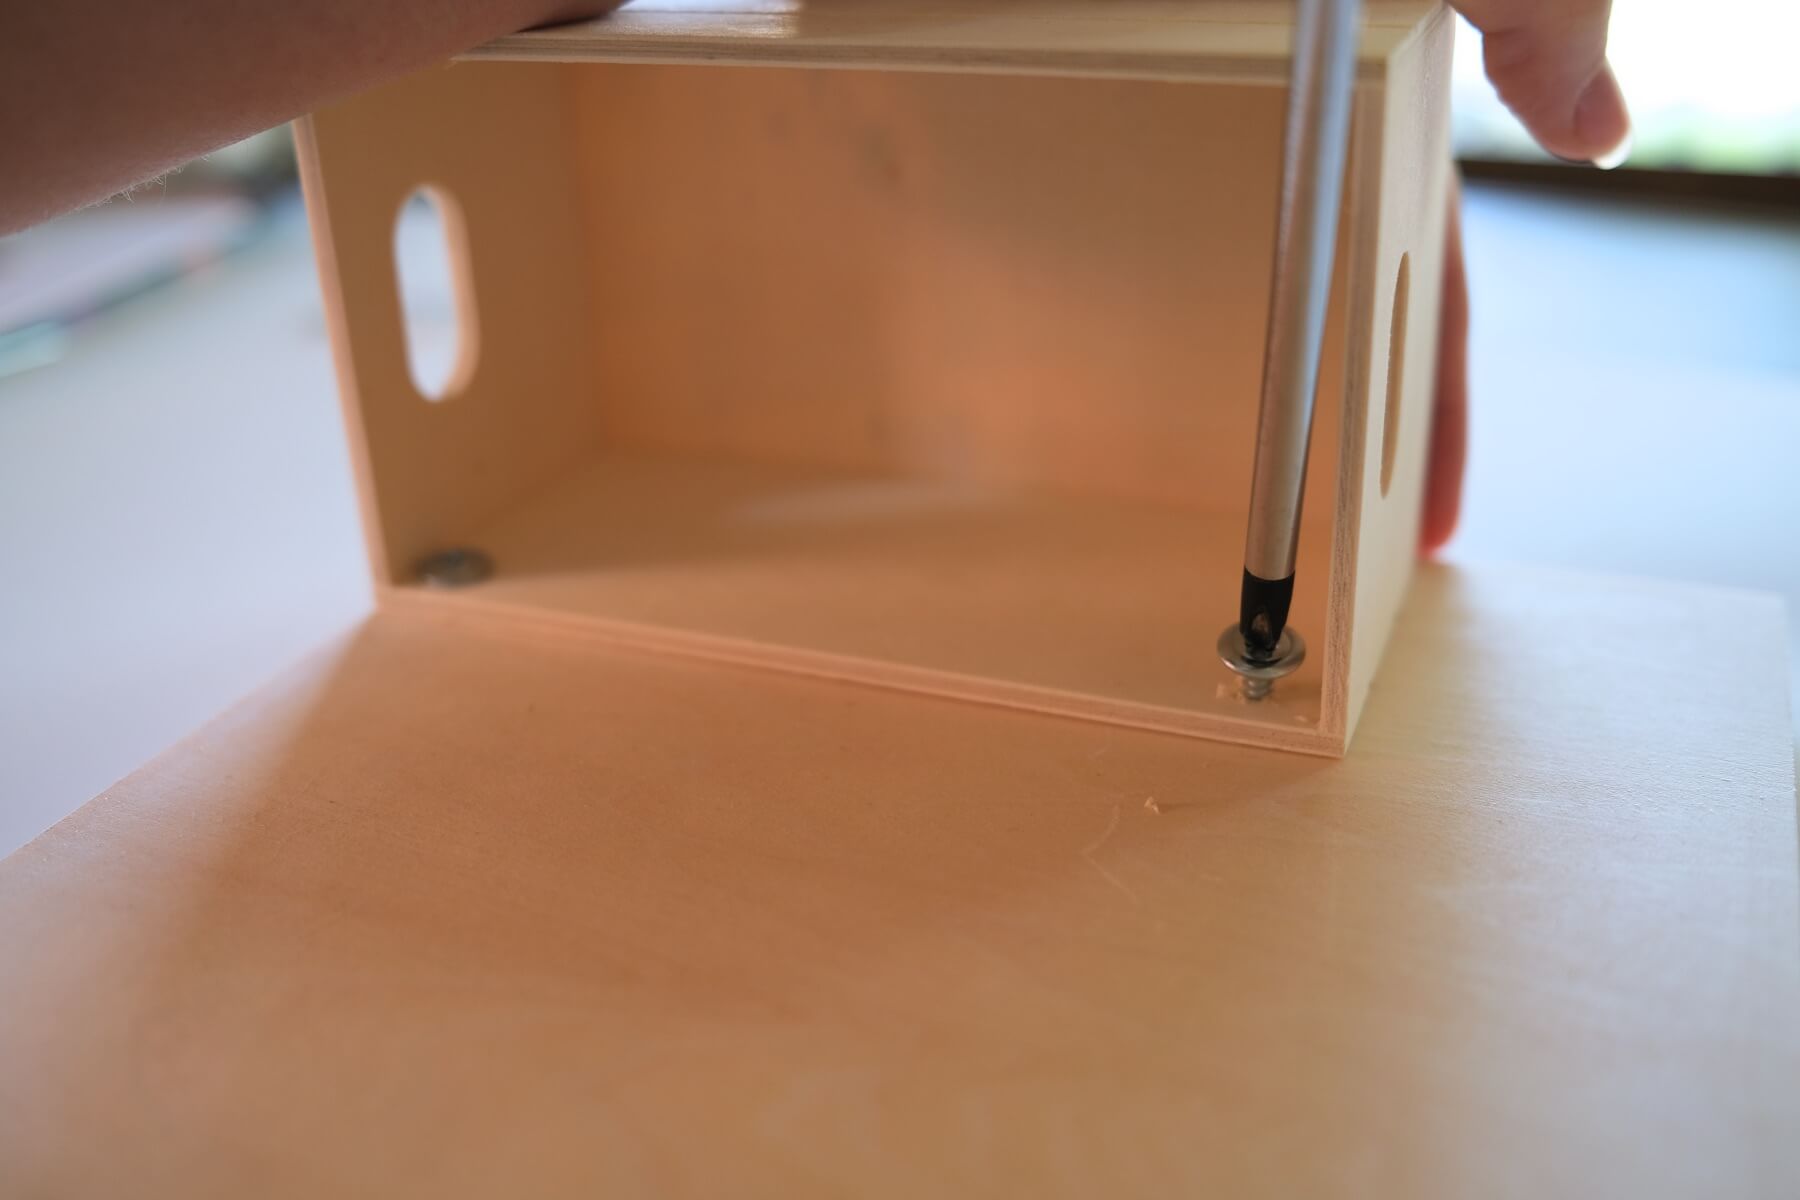
Start by attaching the wooden crate. I chose to place my crate in the lower right side but you could place your crate anywhere you like!
Once you know where you want to place the crate, use your 2 silver screws to attach it. The screws should go inside the crate in the upper corners. If you use E6000 instead, cover the entire side of the crate that will attach to the wood frame in glue. Place the wooden crate on the frame in the perfect spot and then place some heavy and well balanced items on top. Books will be perfect for this!
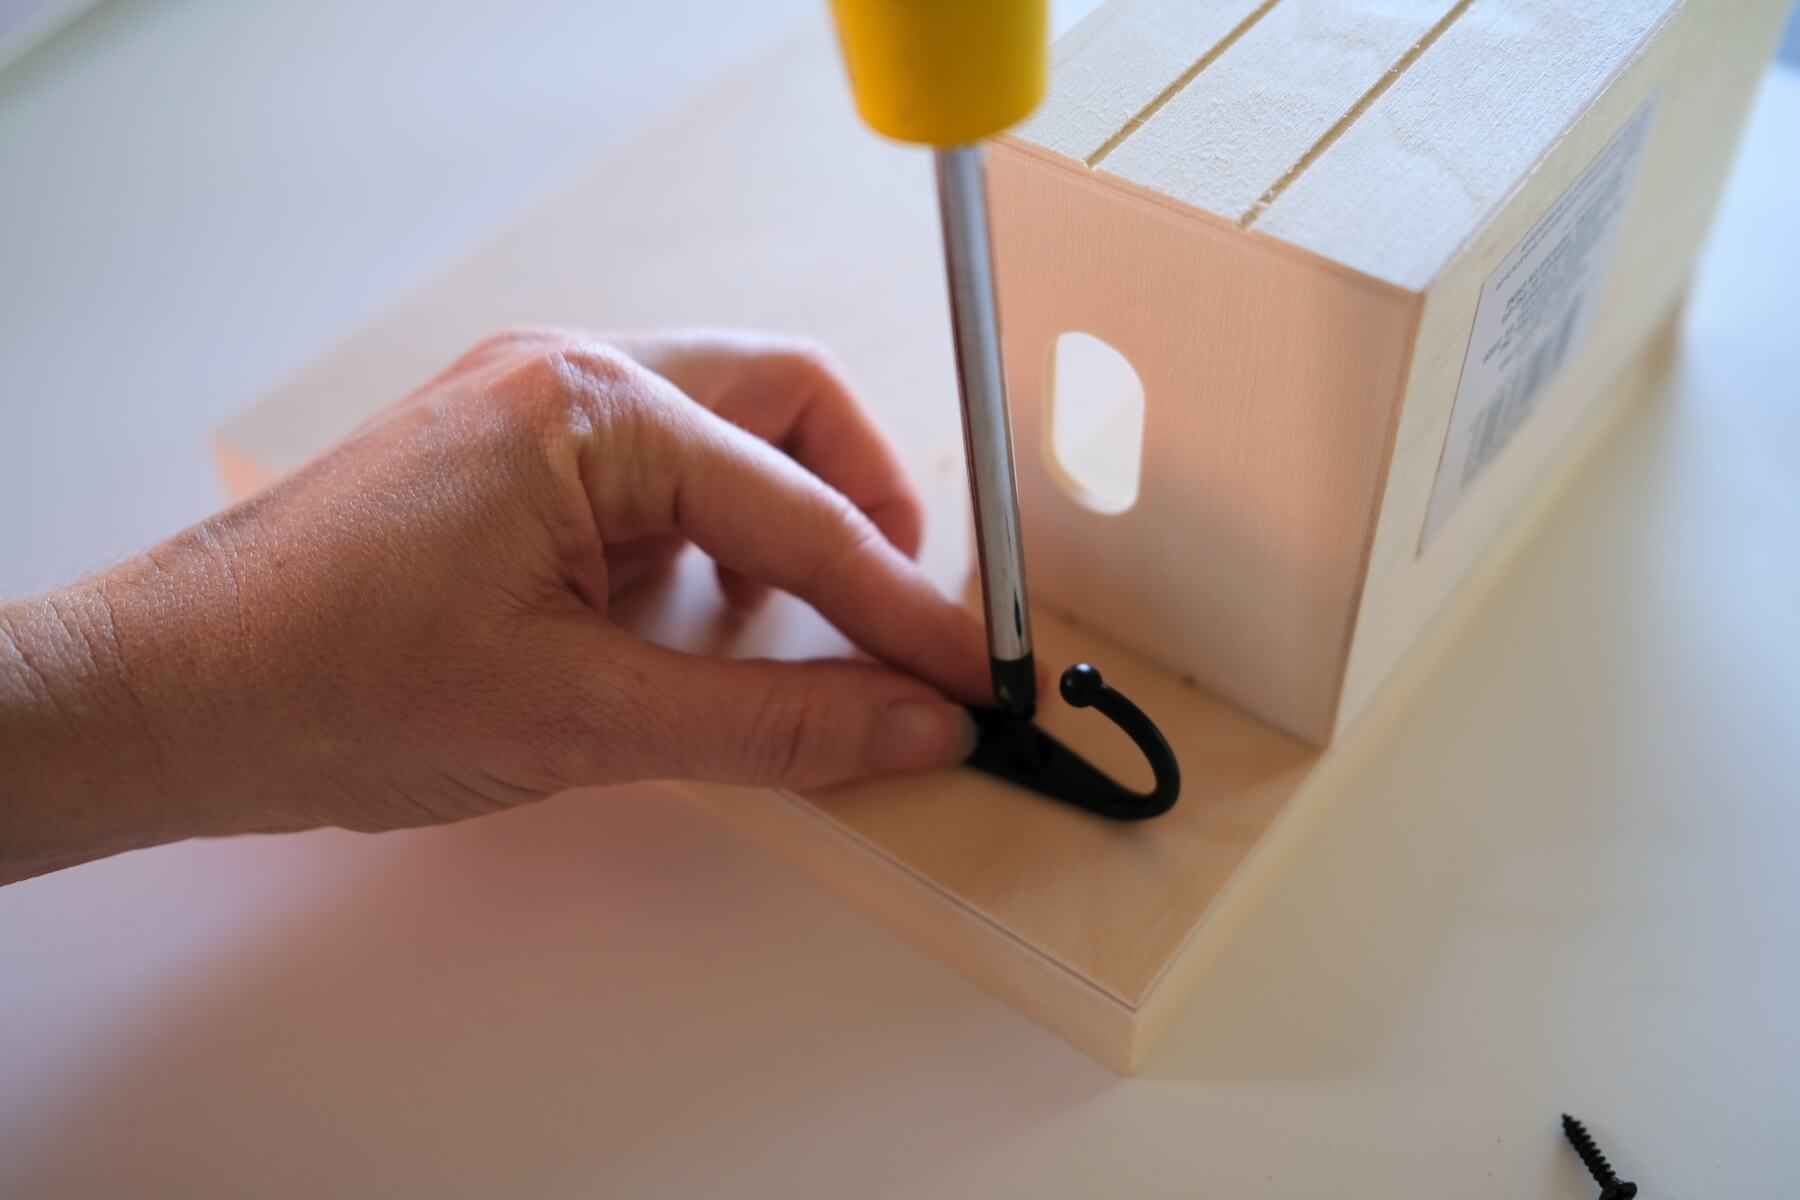
Next attach the hook. Just like the crate, the hook can go anywhere you choose. I placed mine in the lower left next to the crate. Use both screws to attach the hook to the wood.
You can paint your mail holder to match the color of your frames. Or you could even make it into an acrylic paint pour like this. I plan to paint mine with chalkboard paint to turn this into a chalkboard mail holder!
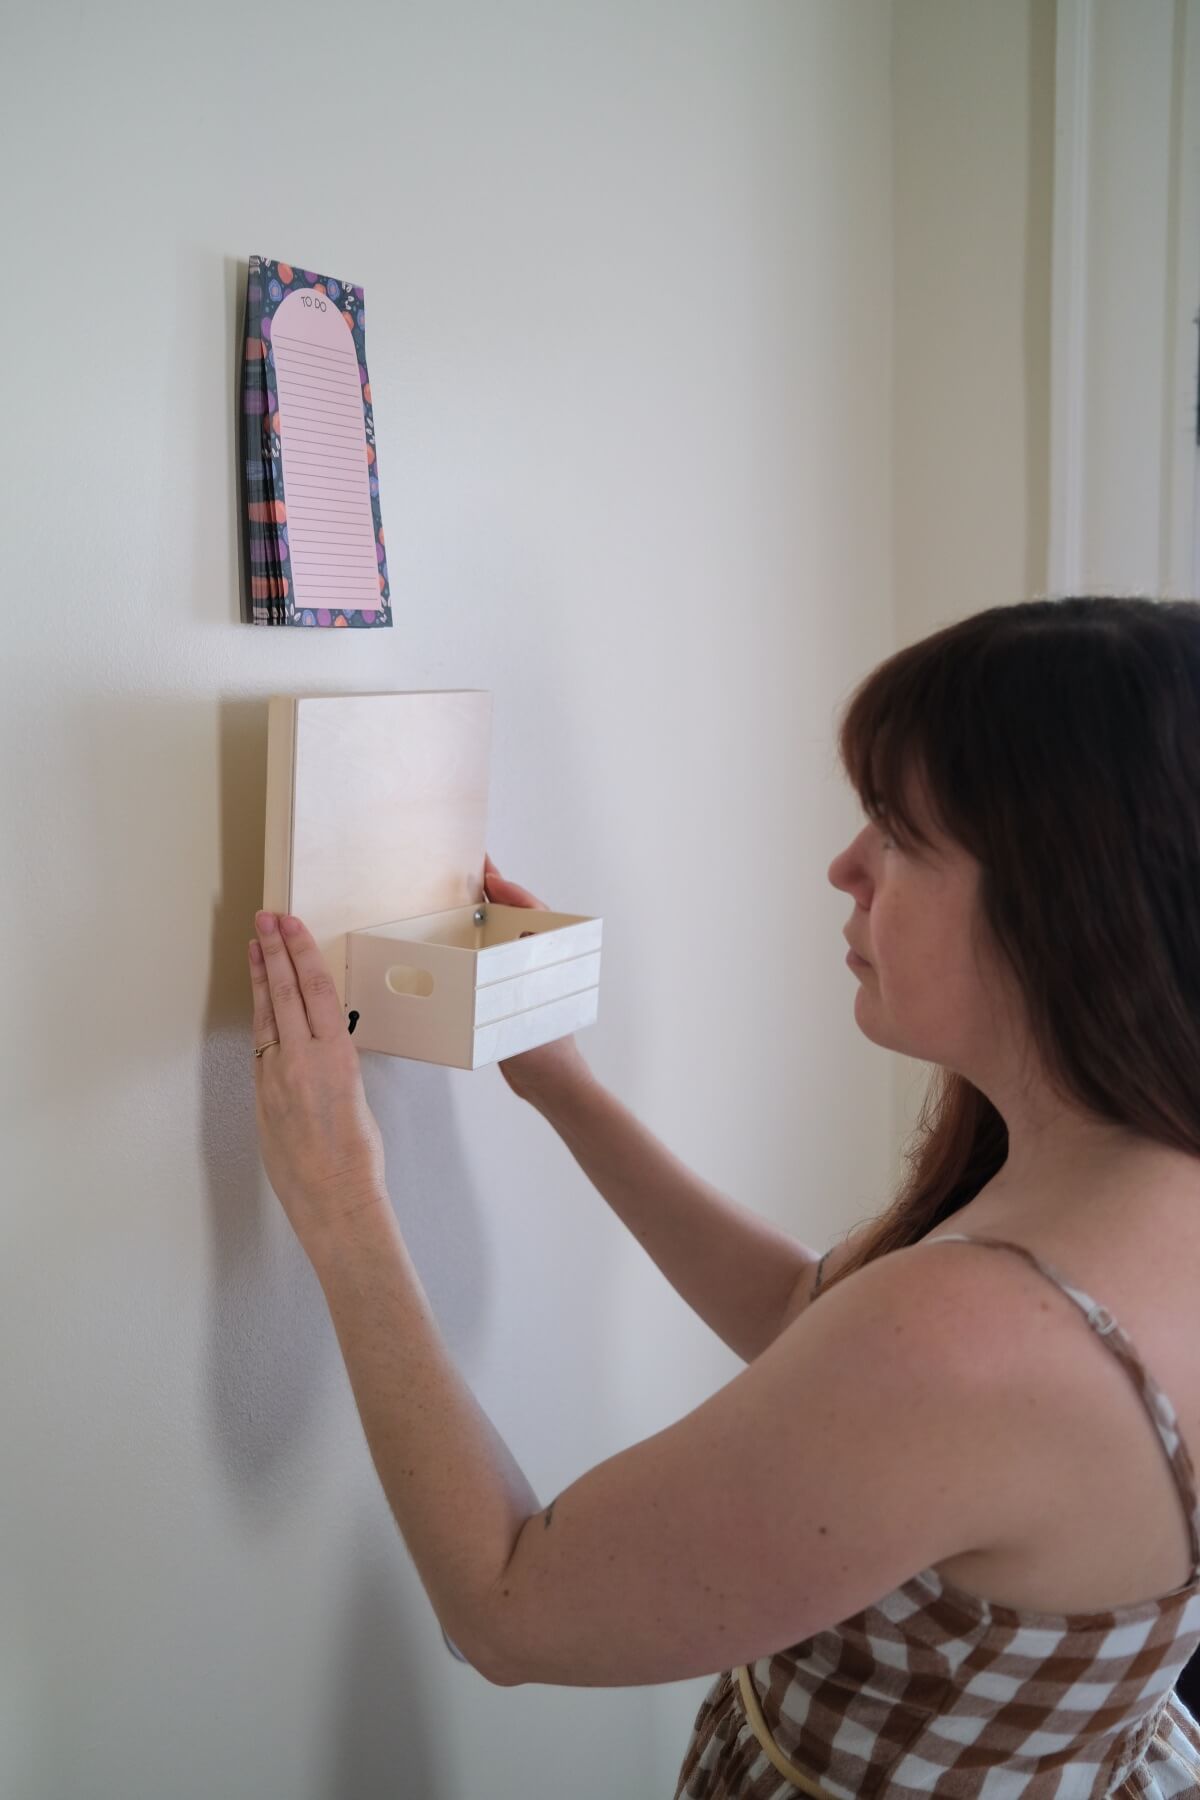
How to Hang Your Gallery Wall DIY Command Center
Now all the command center pieces are finished! But is it really complete until you decide your layout and hang it?!?
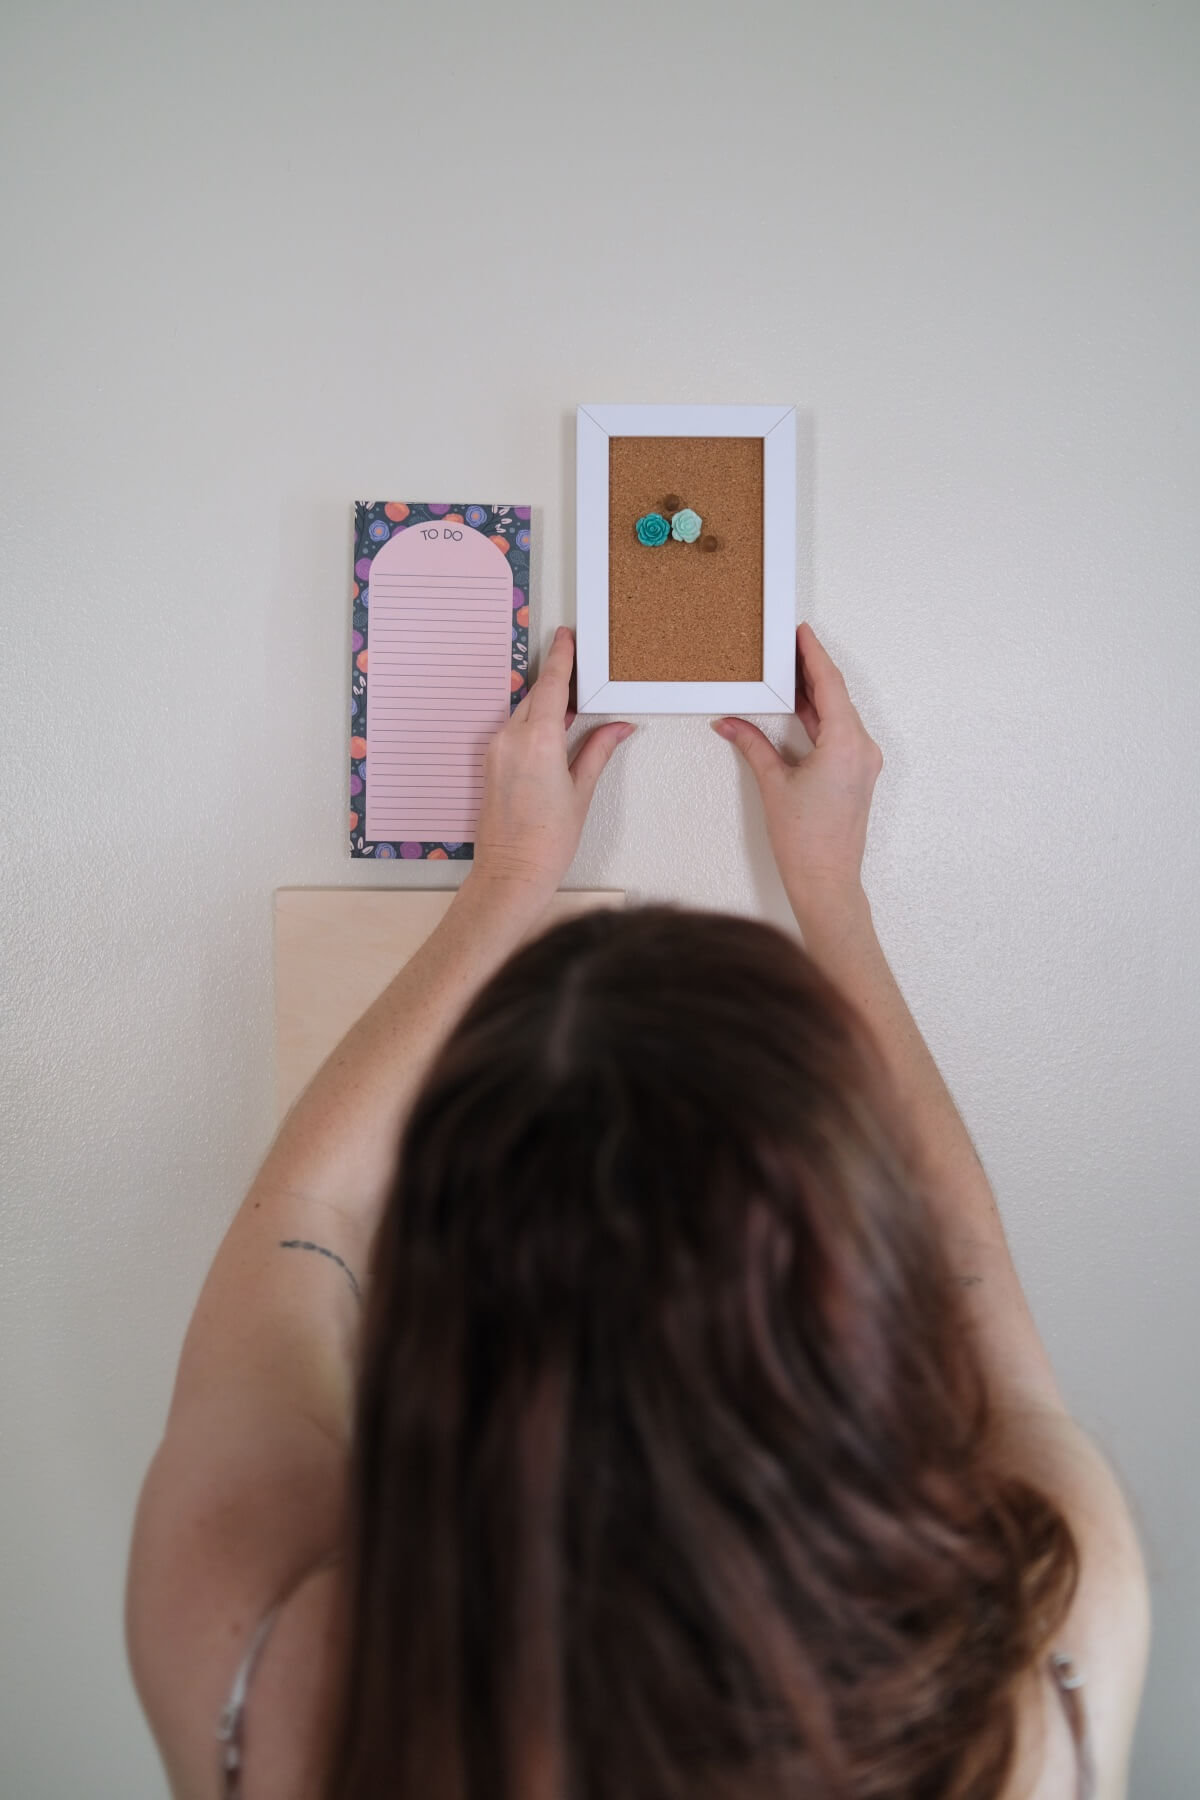
Before you hang anything, determine your layout by placing all the pieces on the floor.
Shift things around and see what looks good. Once you determine your layout, take a photo of the layout while it’s still on the ground.
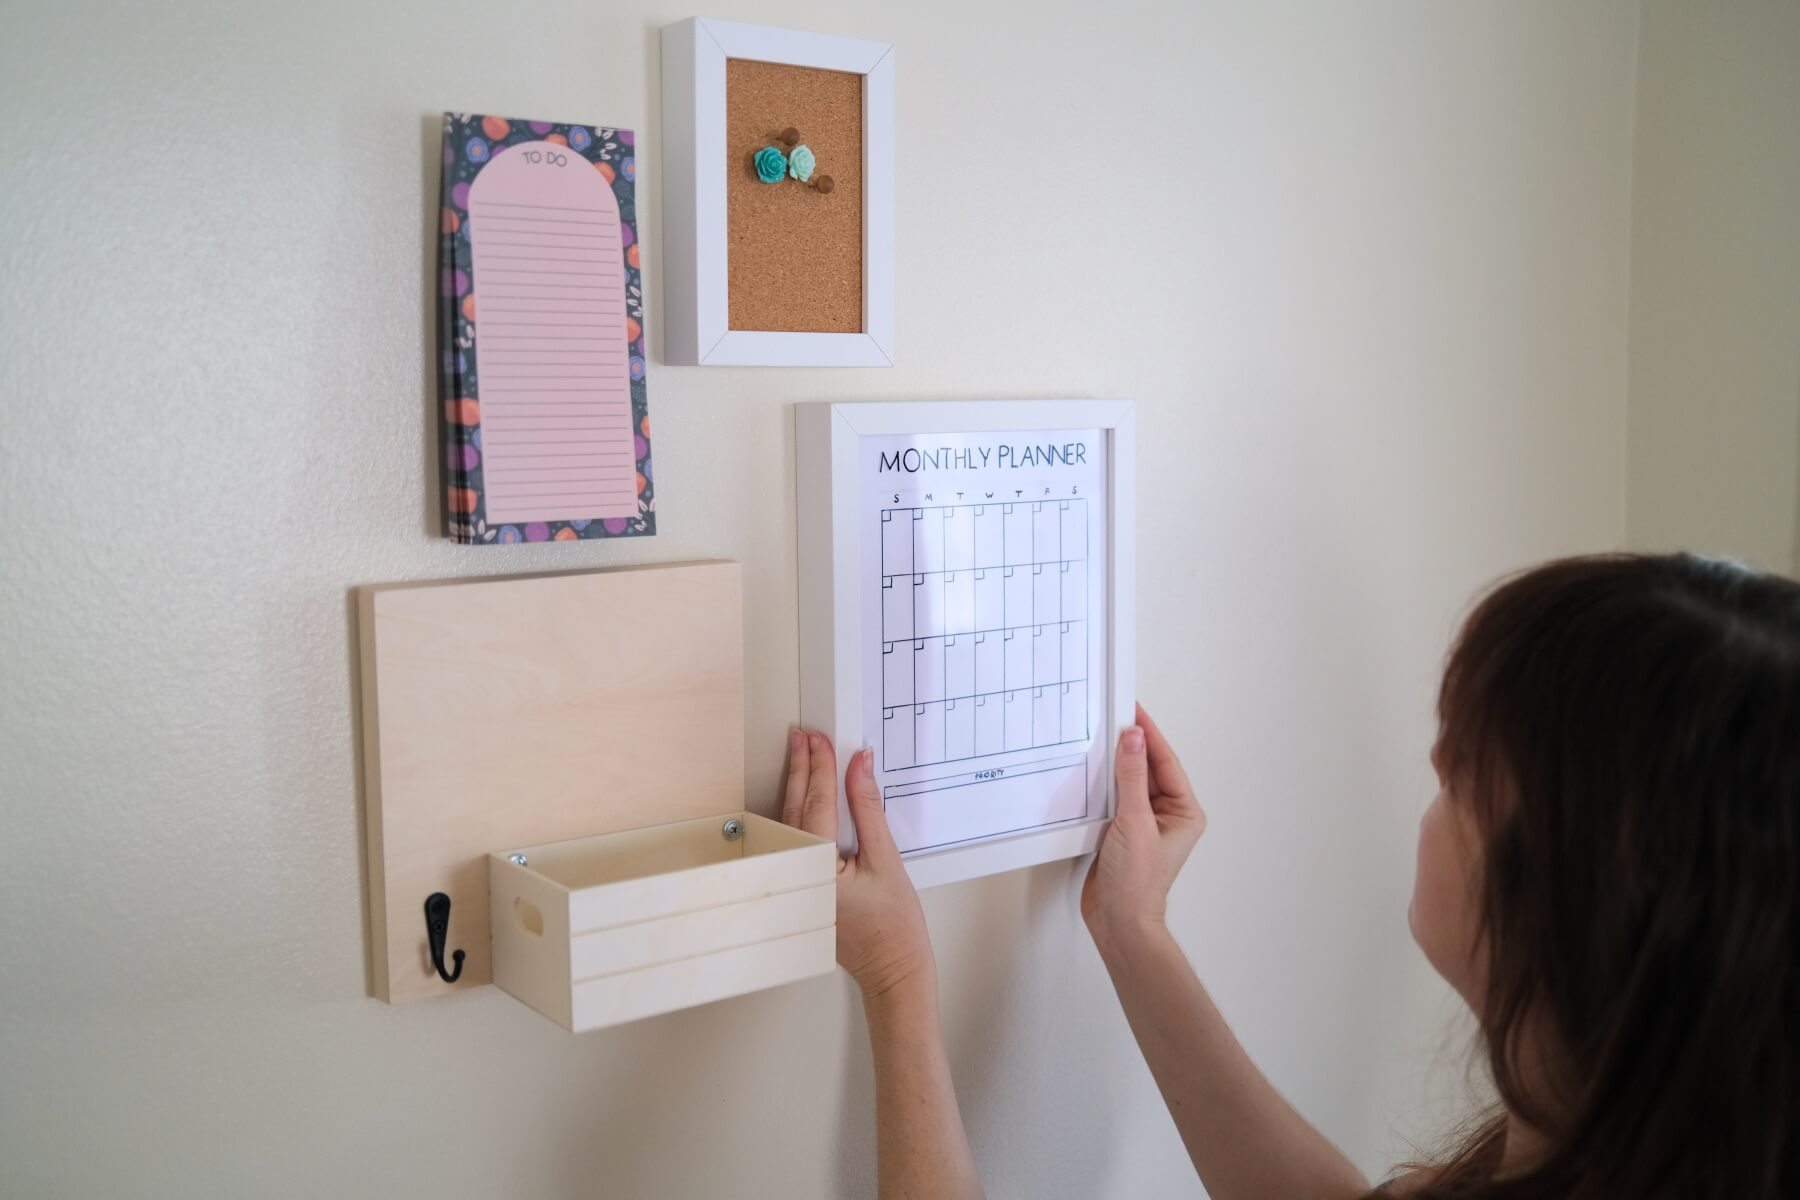
You may think you will remember the layout without the photos, but I sure didn’t! Once your layout is determined and you have a photo, we can start to hang the gallery wall piece by piece.
You can start from top to bottom or start in the center and work your way out. Whatever makes the most sense for your space.
Starting in the center is ideal, because creating a strong centerpiece will help your gallery wall DIY Command Center have a great looking flow.
Remember if you don’t like the way it looks, you can always take it down and redo the layout!
Each piece will just need one nail. Every piece is lightweight. But I used 2 nails for the wood mail holder.
Because the mail holder has a hook, which is perfect for your keys or a lightweight sweater, I wanted to be careful. Just the weight of placing something there and pulling it back off everyday can add up.
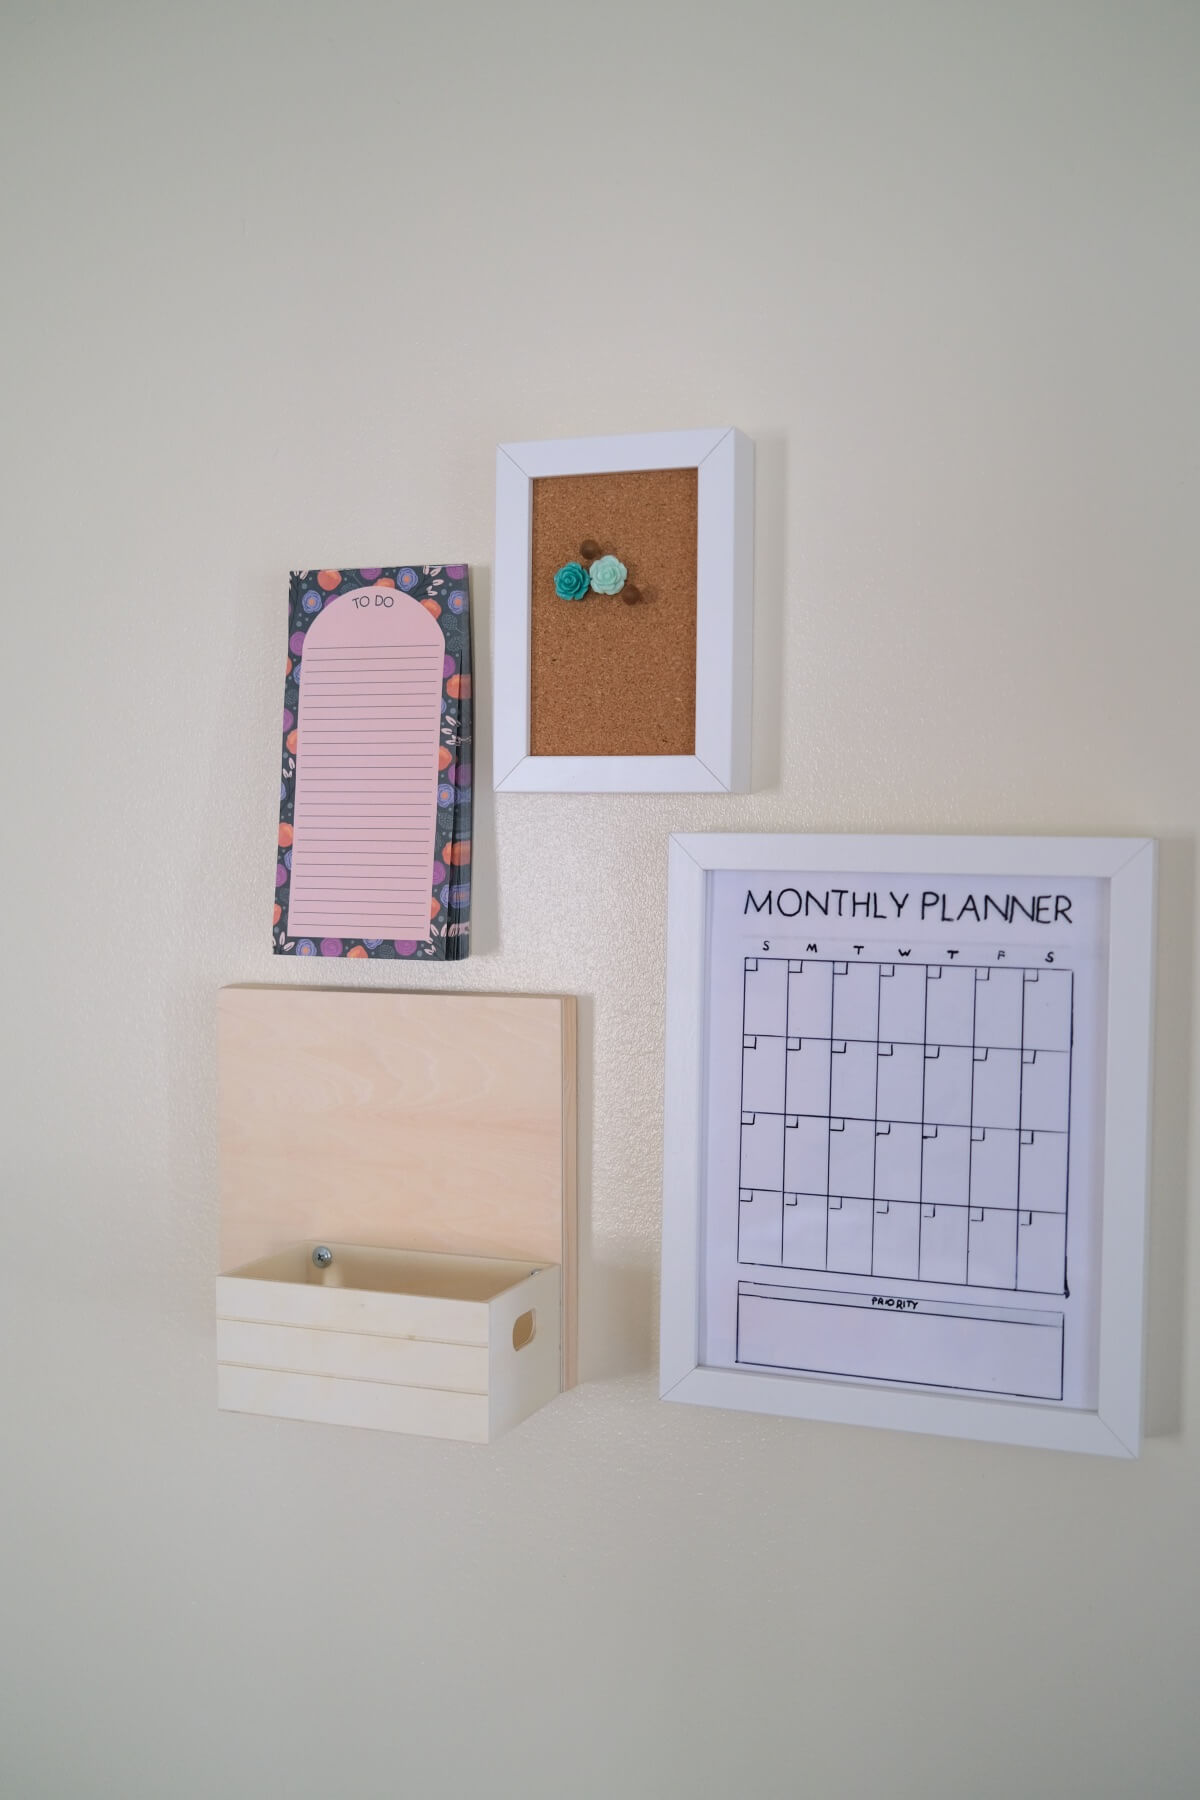
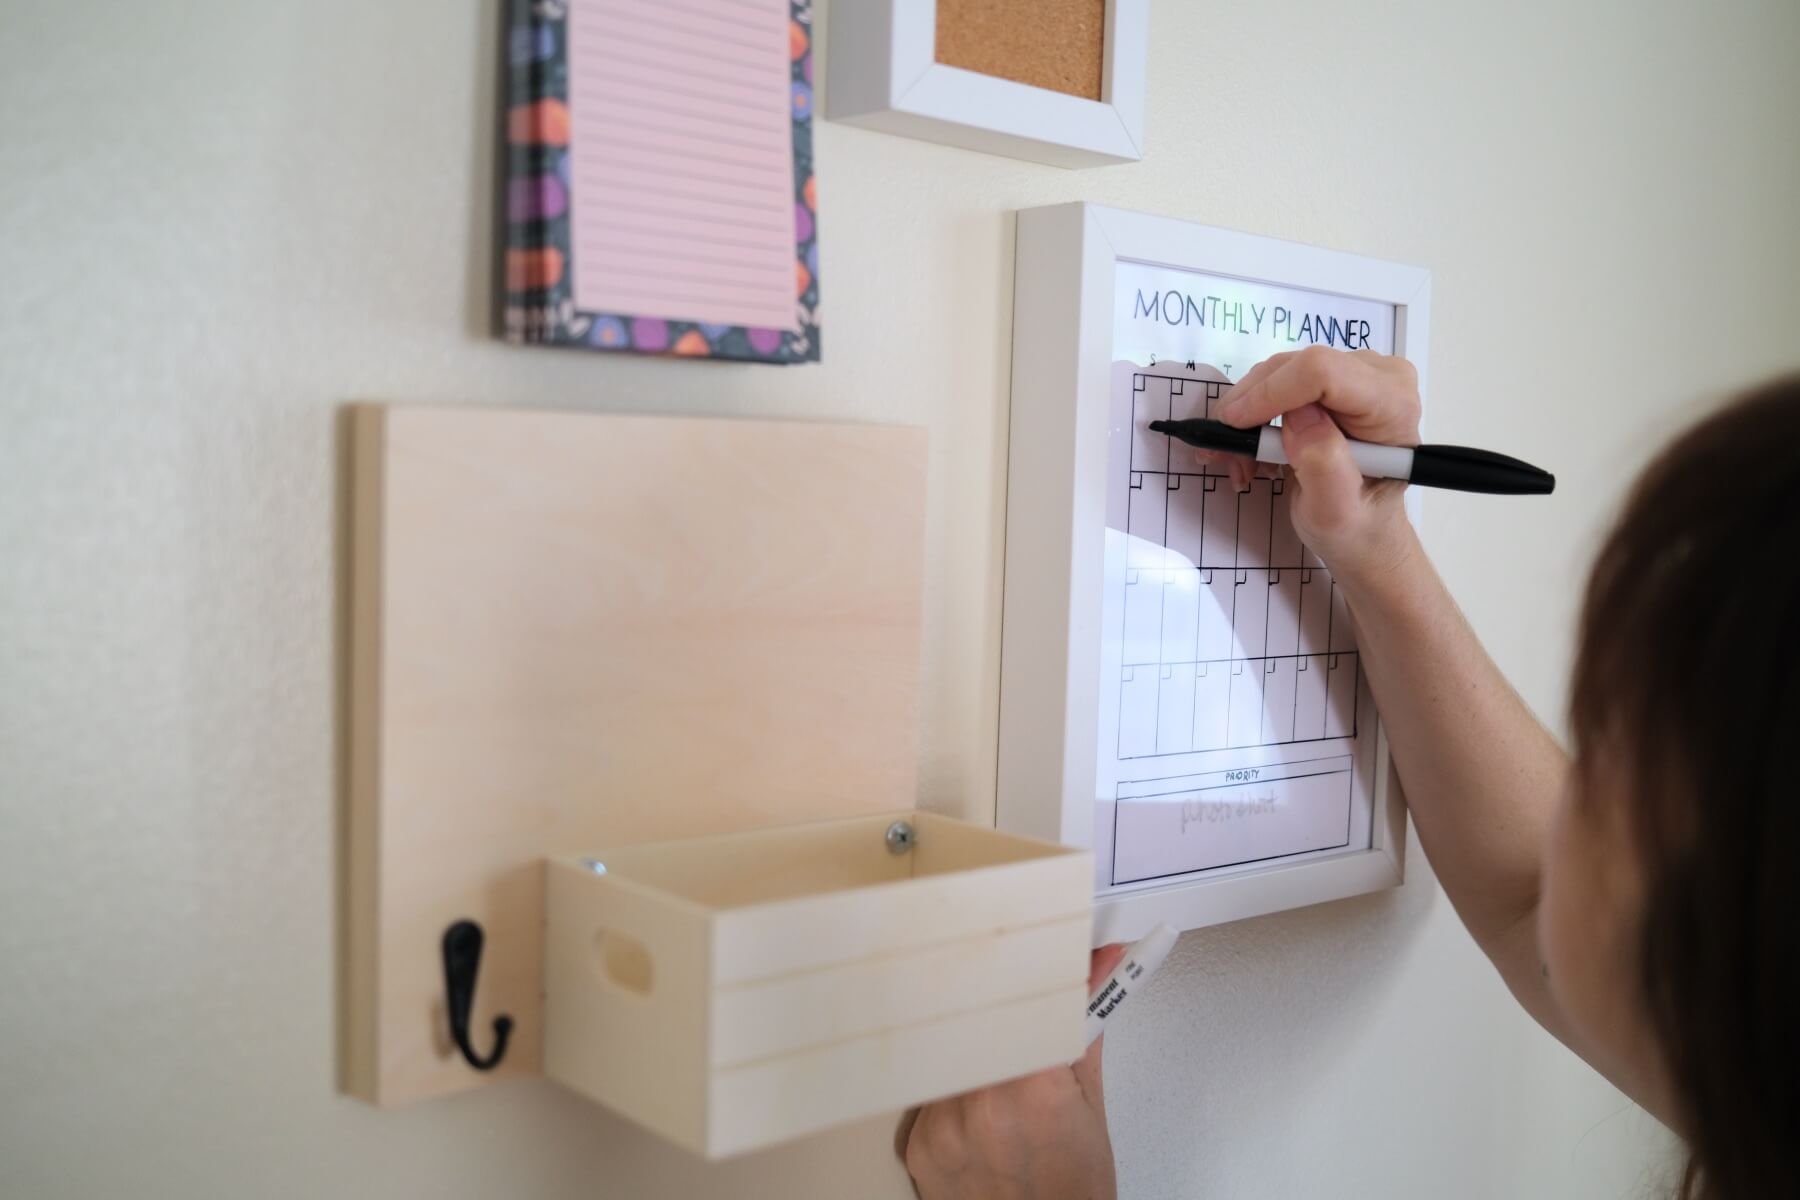
How to Use Your Gallery Wall Command Center
Once you have your command center hanging, start by using a dry erase marker to fill in the dates on the monthly calendar. You can add tasks in your boxes for each day. Or you can add the important dates at the bottom under Priority. You could even color code your calendar by using an array of dry erase markers.
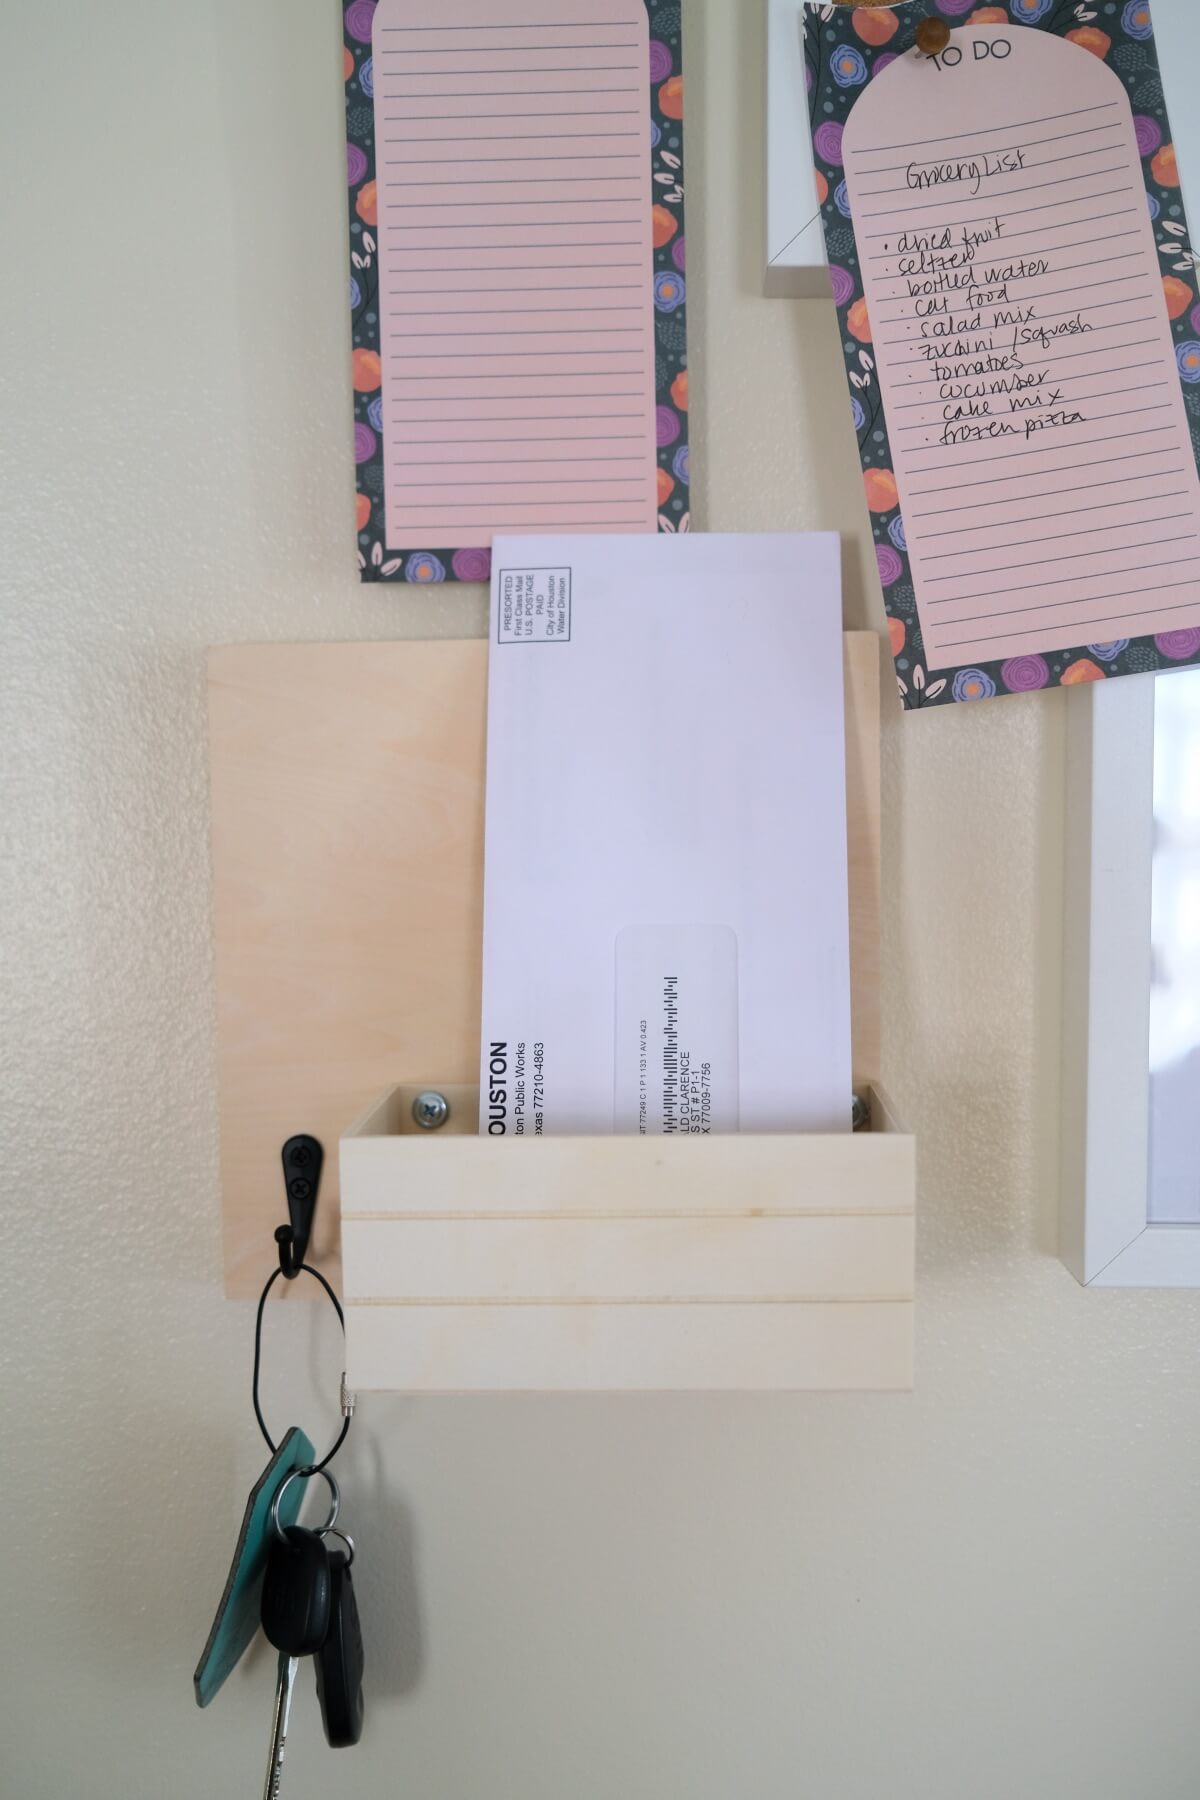
Of course, the mail holder is the perfect place to bring in mail or even place outgoing mail before you hit the post office. But you could use it for other small objects too – especially the kinds of things you usually keep in your purse like business cards, lip gloss, or spare cash.
Remember, you can paint your mail holder too! For example, you can paint it with chalkboard paint like I did here.
Your notepad is the perfect place to jot down a to do list for the day, especially for those busy and unmanageable days! You can even tear off sheets to take with you as a checklist.
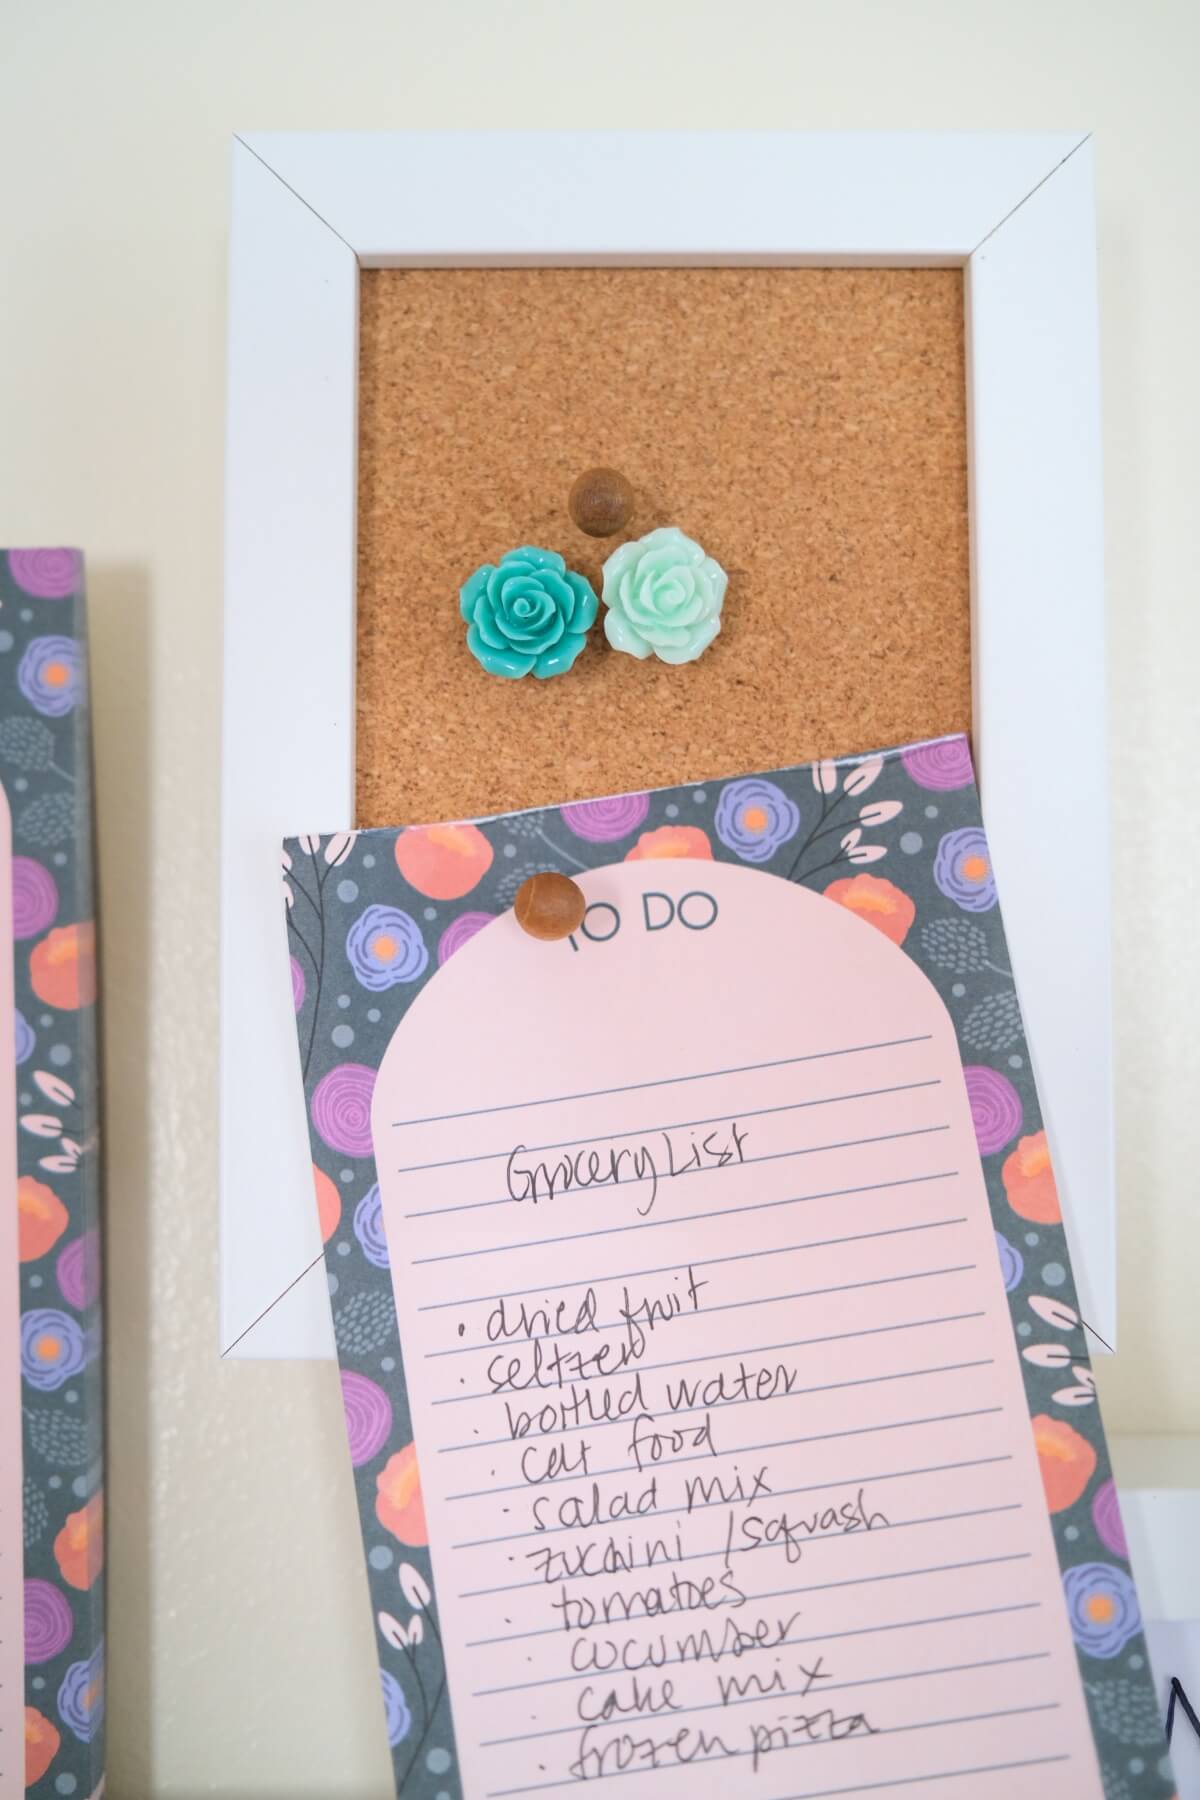
Your notepad is also the perfect place to create notes for family members or even a grocery list like my list here. Just tear the sheet off and pin it to the cork board like this! Your command center is creative, so try something new and see what works.
Getting inspired to get organized? Because I sure am! So how are you going to use your Gallery Wall DIY Command Center? Tell us in the comments! And better yet show us your command center by tagging us in your photos!
Let’s Stay Friends!
Insta | Pinterest | Enews | TikTok