DIY
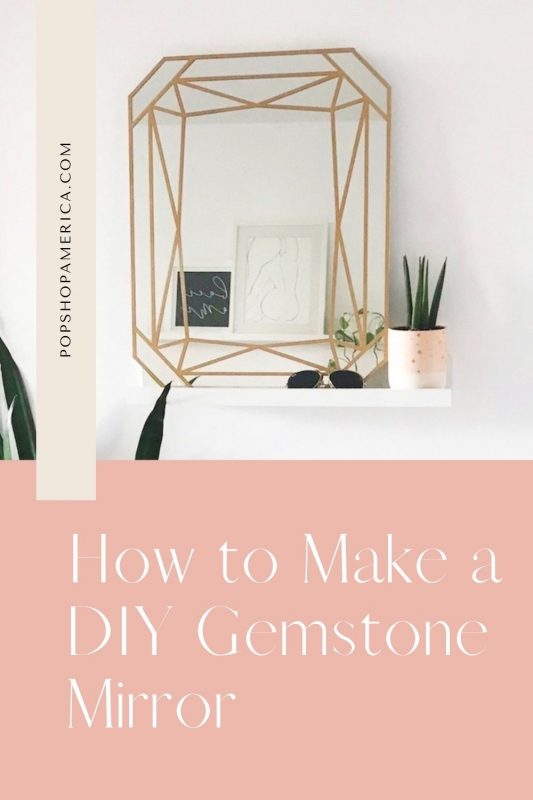
How to Make a Gorgeous DIY Gemstone Mirror
Jan
I’m super excited to share this DIY gemstone mirror tutorial with you today because this is one of my favourite DIY projects ever!
I actually did this project a long time ago, so it’s been with me through four different apartments. Four different apartments means that I’m excited to share four slightly different styling options with you! I’ve mainly used this mirror in my front entrance, but it’s looked slightly different each time.
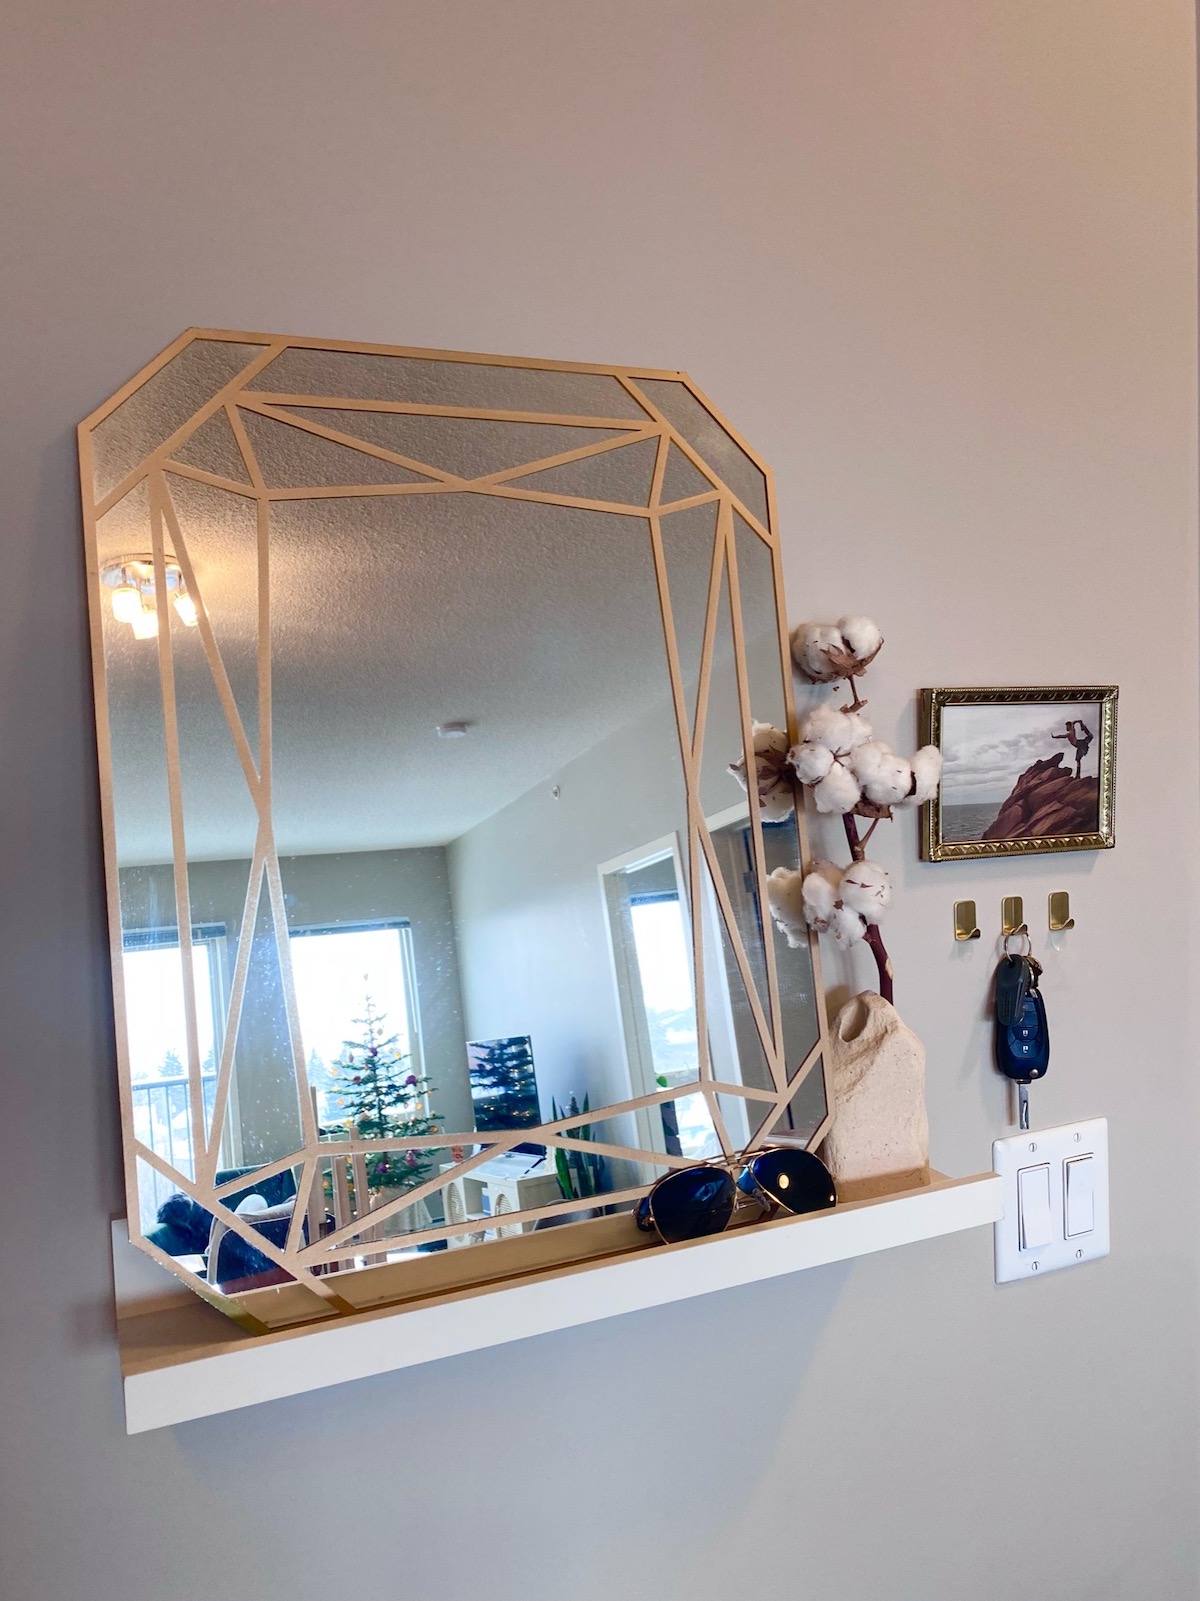
The mirror has now travelled with me to Calgary and I think the mirror’s current placement is my favourite yet!
The Inspiration
If you’re like me and you read the blog A Beautiful Mess, then you’ll probably be familiar with the Gem mirror tutorial that Laura posted in early 2015.
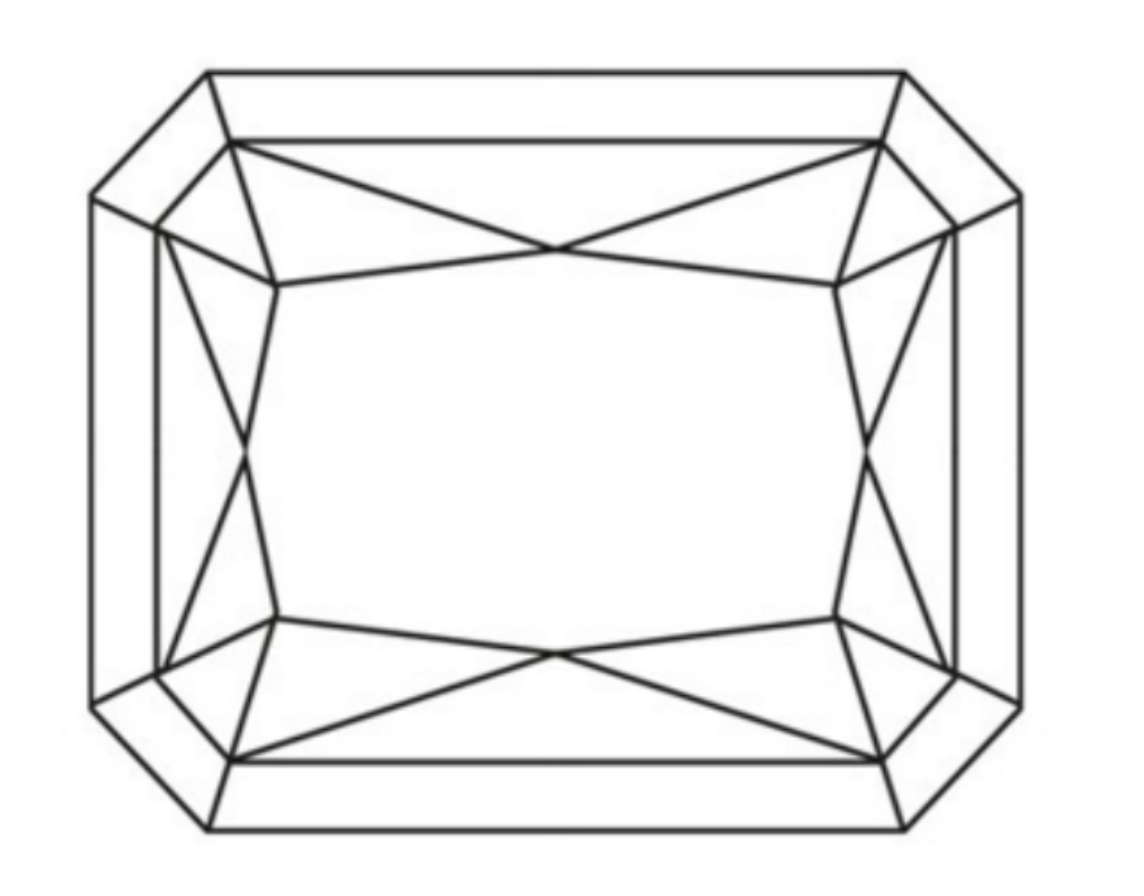
I was inspired by the octagonal gem shape of the ABM post, but I wanted to create an original design that would be easier to do using my rectangular shaped mirror. I also chose an emerald because I wanted to use the mirror in my front entrance. In order to still be able to see my face in the mirror it needed to be taller. An octagon would have been too short given the size of the mirror I had.
The Supplies
You’ll need a couple of unique supplies for this project, one of which is a glass cutter. They’re super easy to find at your local hardware store and can be used for a variety of projects! After completing this project you may become addicted to customizing and cutting glass. I know I was!
You’ll also need contact paper which is the secret to making super crisp lines on your mirror. I was actually very impressed with how crisp my lines were!
So, without further ado, let’s make this DIY gemstone mirror!
Supplies
- glass cutter tool
- mirror (mine measured 17.5″ x 30″)
- metal ruler
- C-Thru ruler (I love this one)
- thin Sharpie marker
- gloves and safety glasses
- fine grade sandpaper
- contact paper
- X-Acto knife
- gold spray paint
- clear spray paint (I used a matte finish)
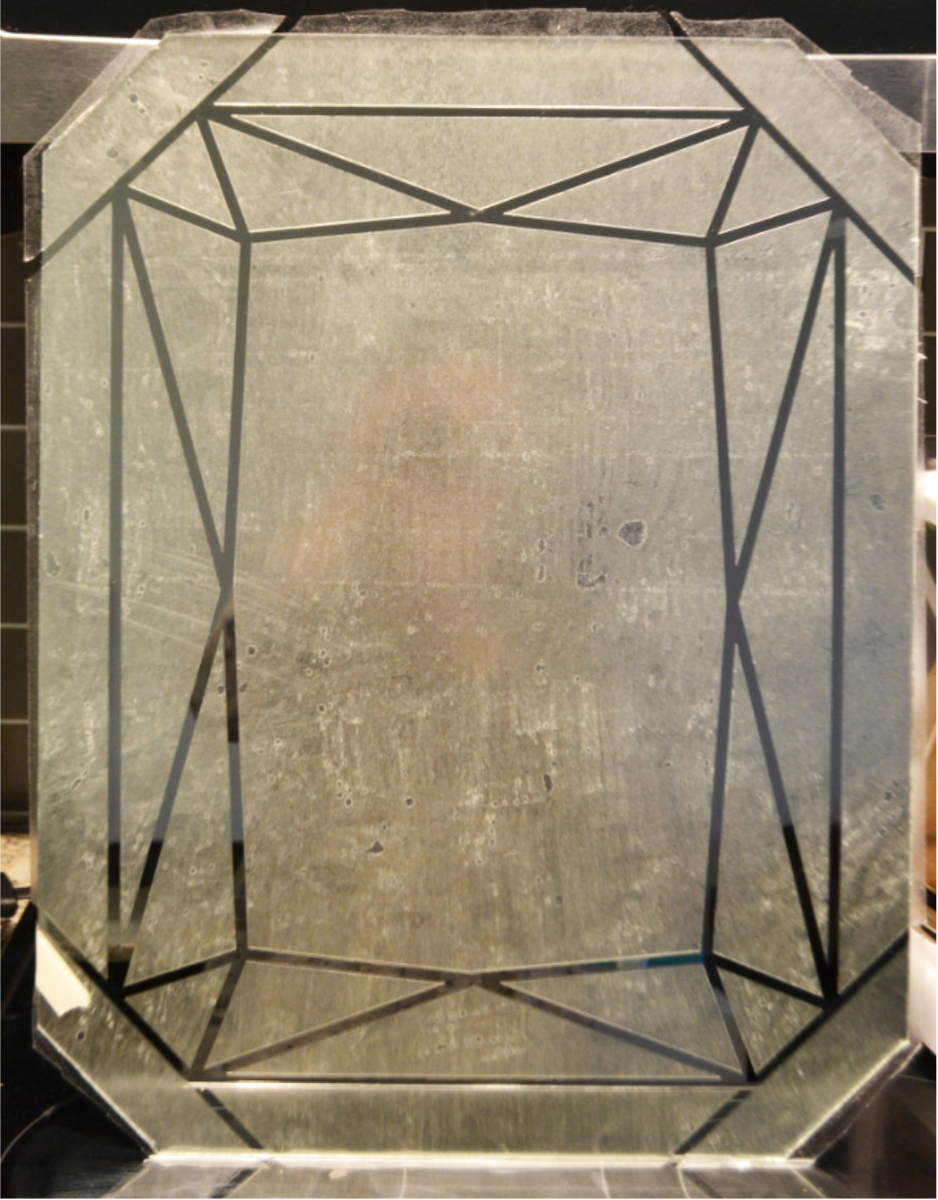
Note: When I did this project I forgot the outside border the first time I did it and took all the photos. I ended up having to do the entire project a second time, so you’ll see the border in the finished photos, just not in the progress shots.
Instructions – Cutting
- To make your emerald shape the only cuts you need to make are 4 small ones to cut off the corners. To make sure that you’re cutting the same size piece off each side, measure 2.5″ from each corner and make a mark. Then draw a line connecting both of your marks. Repeat for the remaining three corners.
- Now it’s time to score your mirror. Don’t be afraid! Take your metal ruler and your glass cutter and place the glass cutter right up against the ruler and score the line. Make sure to press down hard and only go over the mirror once so that you have a clean cut. Repeat on the remaining three sides.
- Once you’ve made your cuts align the cut with the edge of a counter. Put on your gloves and safety glasses and then grab the corner of the mirror and snap off each of the corners.
- When you’ve snapped off all the corners your can use the sandpaper to lightly sand the cut edge.
Instructions – Gem Lines
- Now it’s time to make the gem lines! Clean the surface of your mirror with glass cleaner and allow it to fully dry.
- Cover the entire surface of your mirror with contact paper making sure to smooth out any bubbles so that it lays perfectly flat and your paint won’t leak at all.
- I used this emerald pattern for my mirror. I just found it on google, but was thrilled with this shape because I didn’t anticipate that I would be able to have a shape with all those cool angles.
- Take your sharpie and make a 1/4″ border around the outside of your mirror (this entire space will end up being gold).
- Next, draw a line 1.5″ wide measured from the edge of your mirror
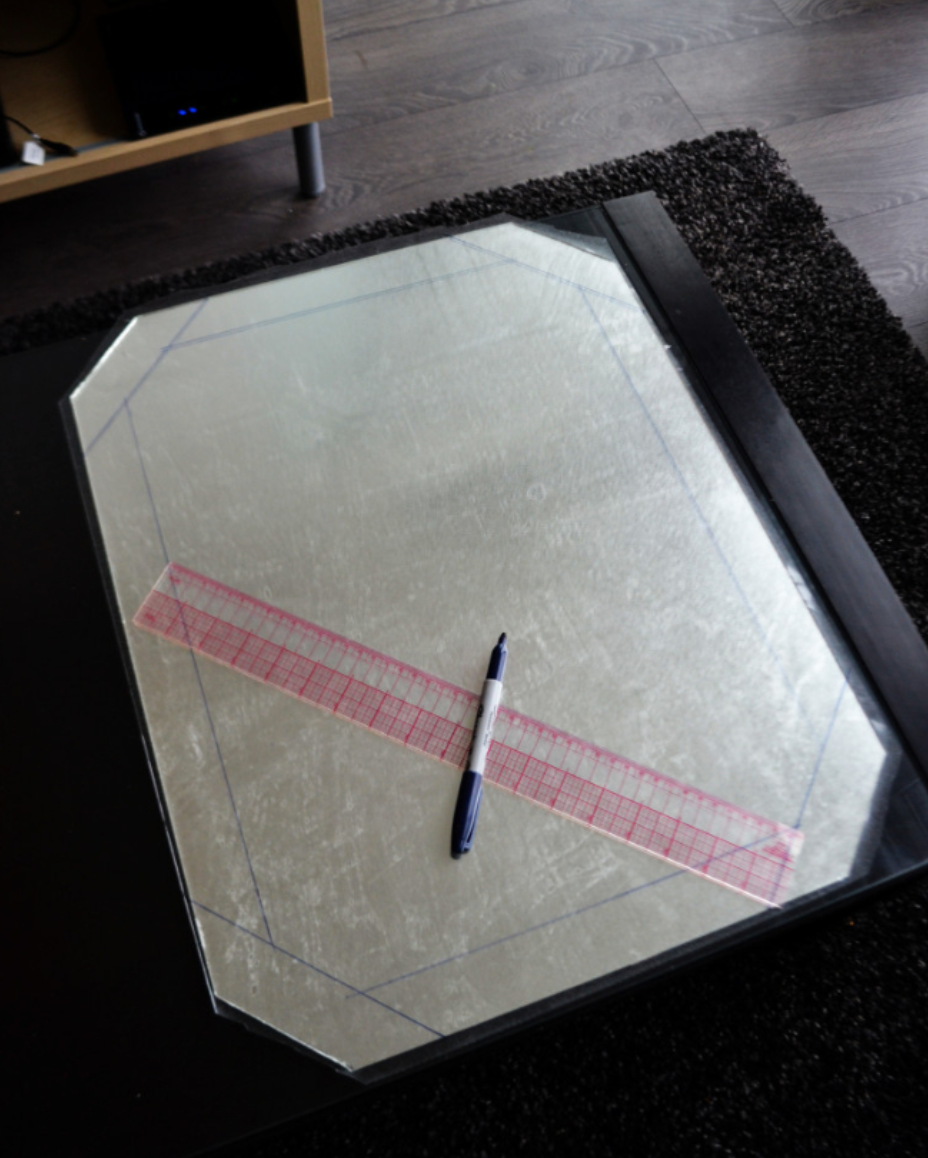
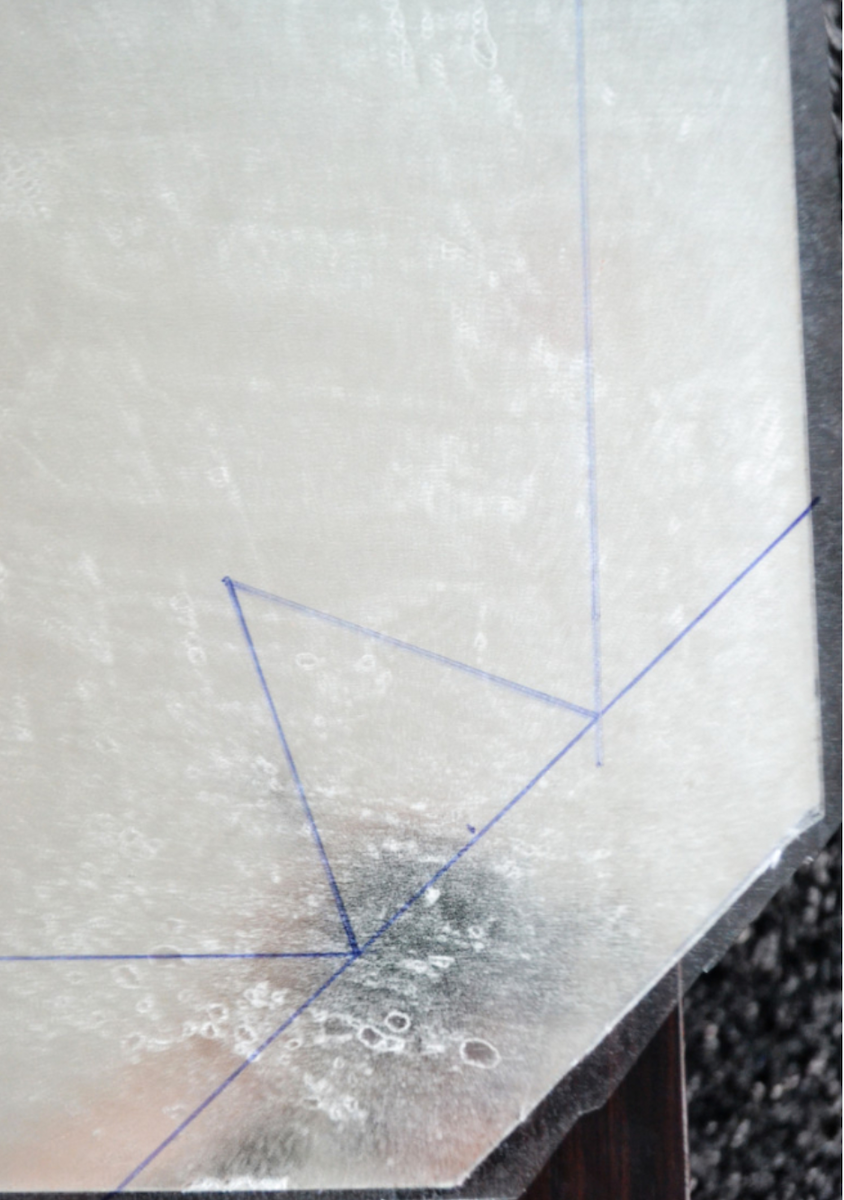
- On each of the corners, find the middle and make a dot 2″ away from the border line.
- Now make a line from the dot to each of the corners where the two border lines meet. Repeat for the remaining three sides.
- Next, it’s time to make the gem lines on the sides. Pick a side and measure it to find the middle.
- Once you have found the middle, measure 1 7/8″ out from the border and make a dot.
- Starting from the dot, make two lines. We’re going to be connecting these lines to the top and bottom of the triangles on either side that we made in the corner. Connect one line to the top of each triangle and another to the bottom of each triangle. Repeat for the remaining three sides.
- Now that all your gem lines are drawn on, you’re going to measure 1/8″ on either side of each line using your C-Thru ruler and cut the contact paper using your X-Acto knife. I find this type of ruler is much easier to use for measuring these lines.
Instructions – Painting
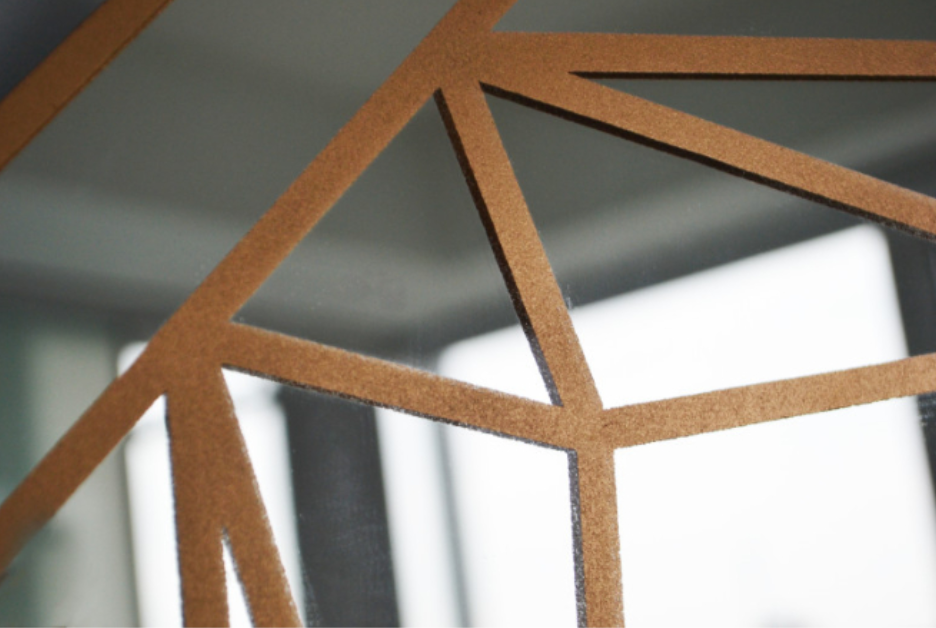
- After all of the lines are cut, you’re going to peel away the contact paper to reveal 1/4″ thick line of mirror underneath.
- Now, it’s time to paint! In a well ventilated area, spray your mirror with 2 coats of the gold spray paint and then 1 coat of the clear spray paint, allowing the paint to dry for at least 30 minutes in between each coat.
- Once the paint is dry, take your X-Acto knife and C-Thru ruler and lightly score along each line again to make sure that you cut the paint and it doesn’t peel off with the contact paper. This will also ensure that you get super crisp lines.
- Working slowly, peel off all the contact paper. This part is quite exciting, especially when those crisp perfect lines are revealed.
- Once you’ve taken off all the contact paper, stand back and admire your work!
The Finished Mirror
The mirror took almost a full day to complete, but I think the end result is totally worth it! The emerald shape works well for my apartment where it’s used near the entryway, but there are a ton of other shapes that would be really cool too. Even making a few smaller ones in different gem shapes would be really fun!
I’ve mainly used this DIY gemstone mirror in my entryway, but have styled it a couple different ways in the last few apartments I’ve had.
In the first apartment it was displayed in the corner with some art and my shoes underneath. 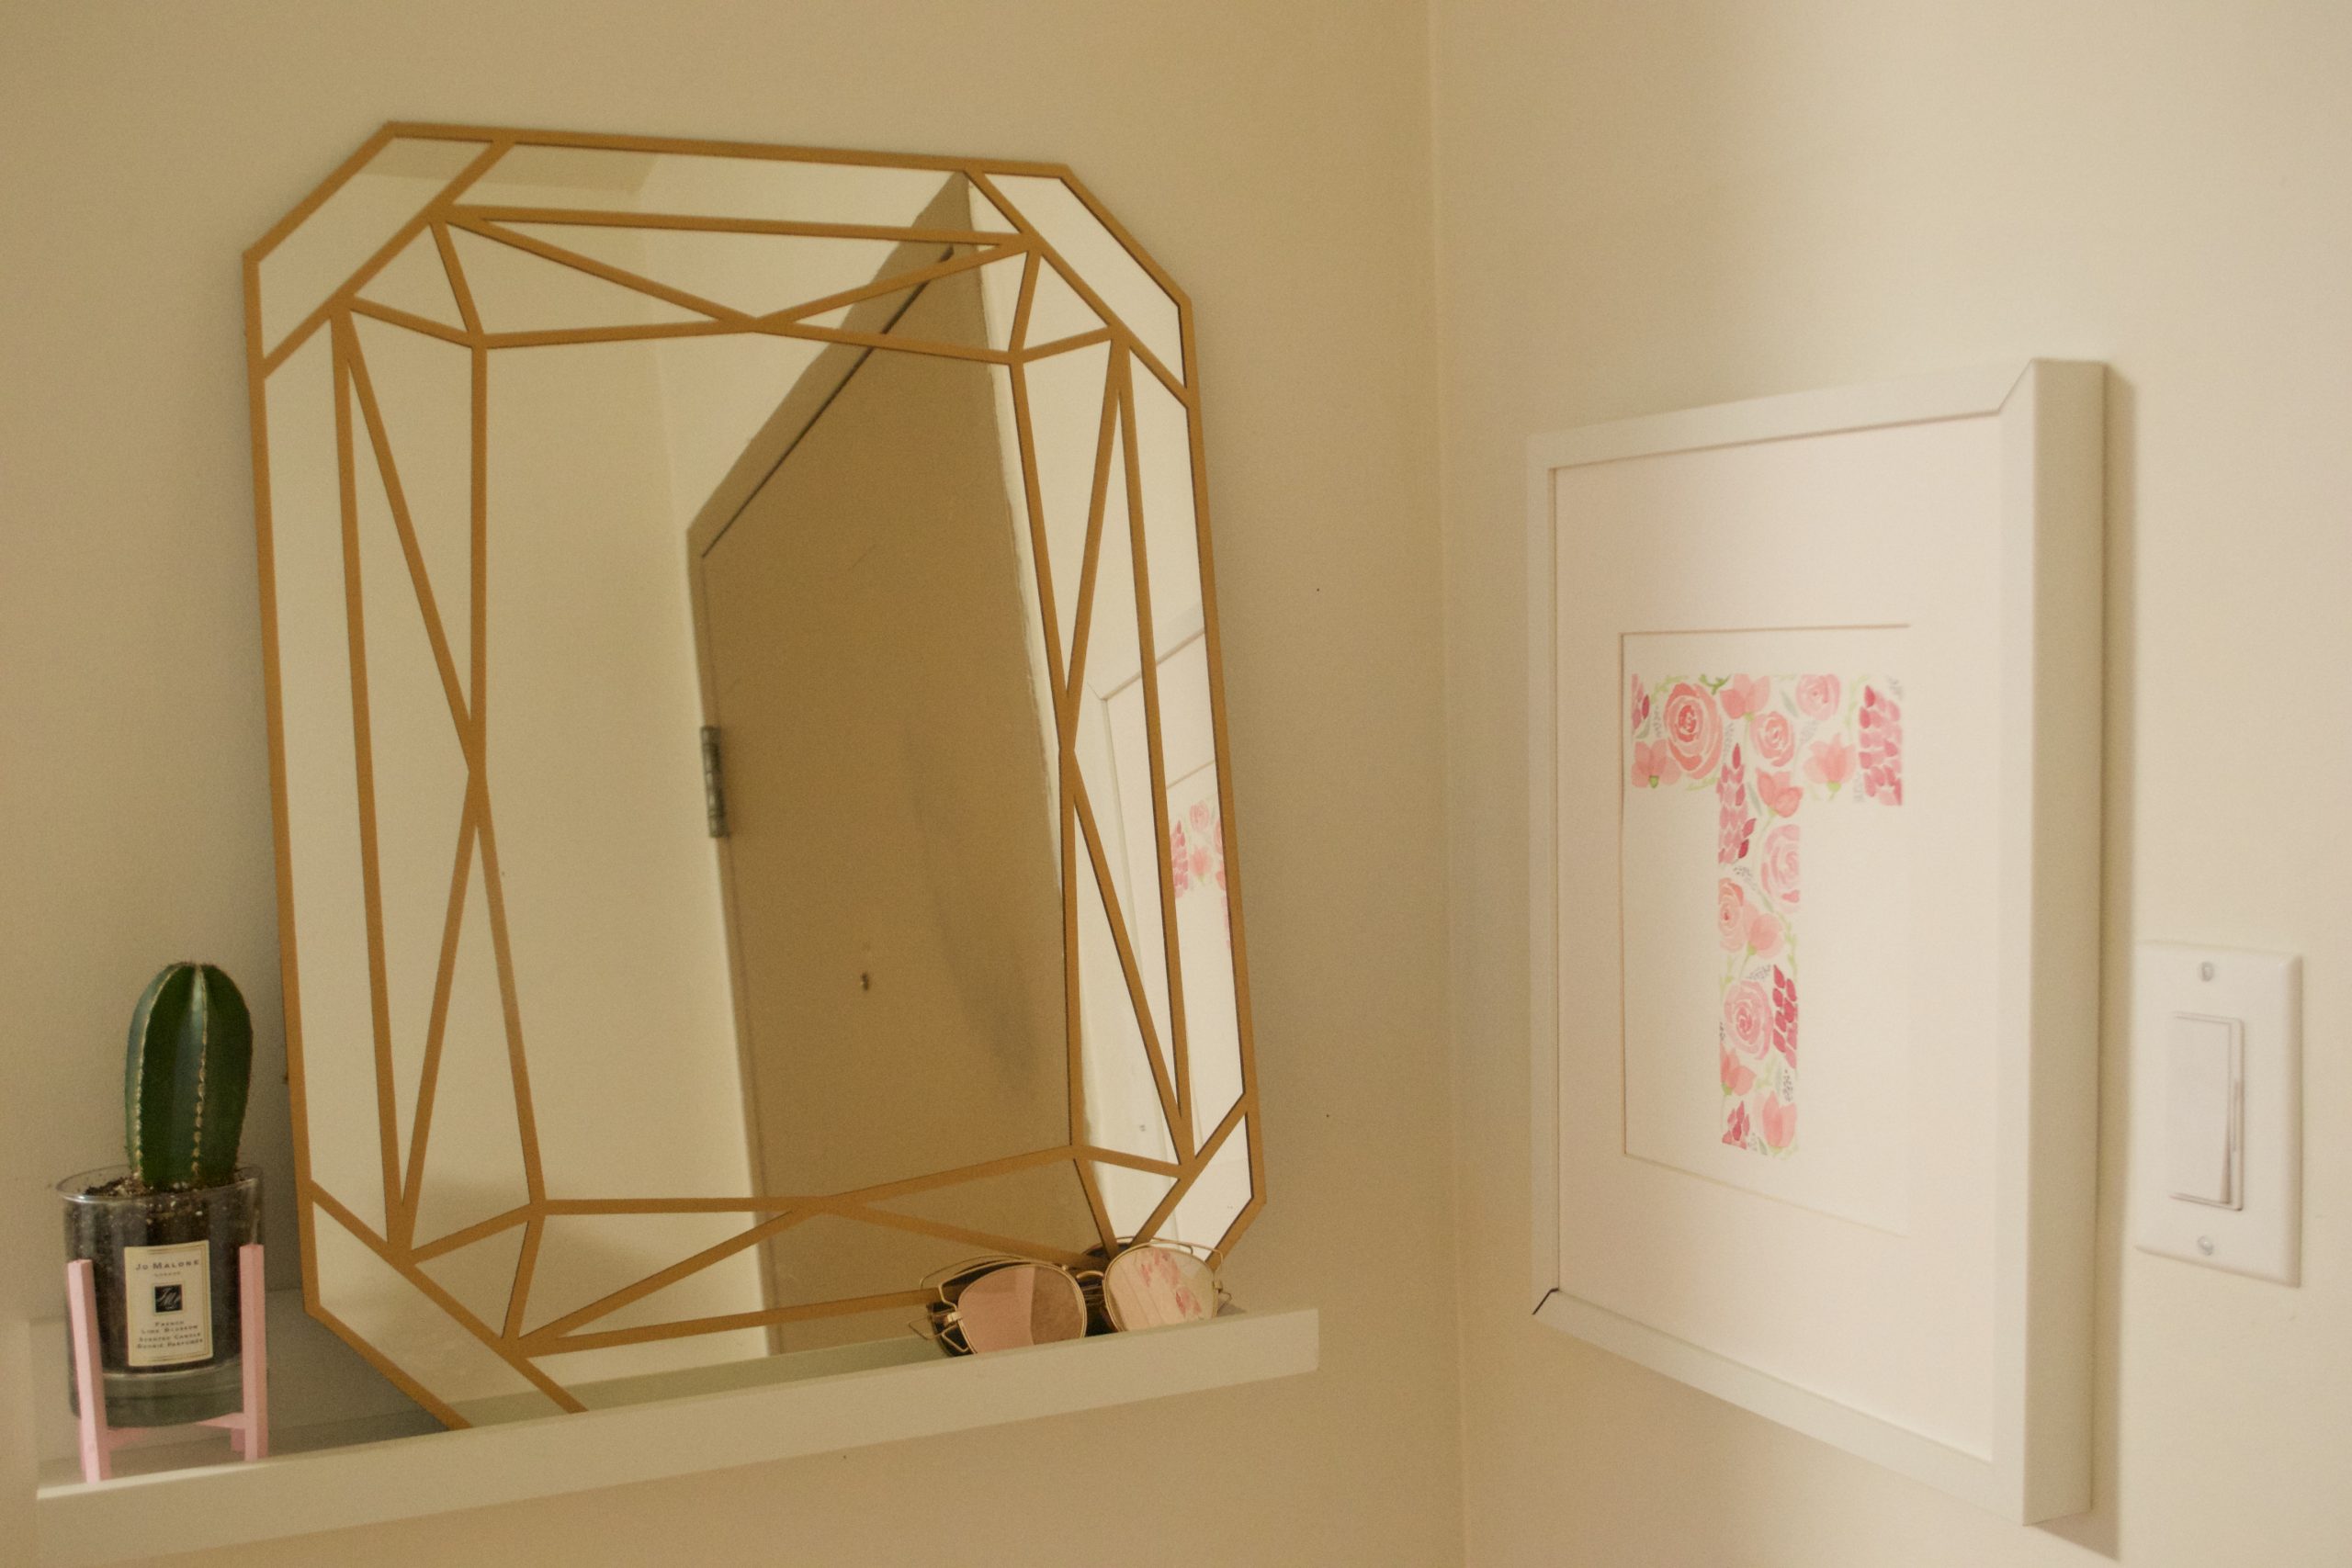
In my apartment that I renovated I styled the mirror with a few snake plants and my matte pink door. 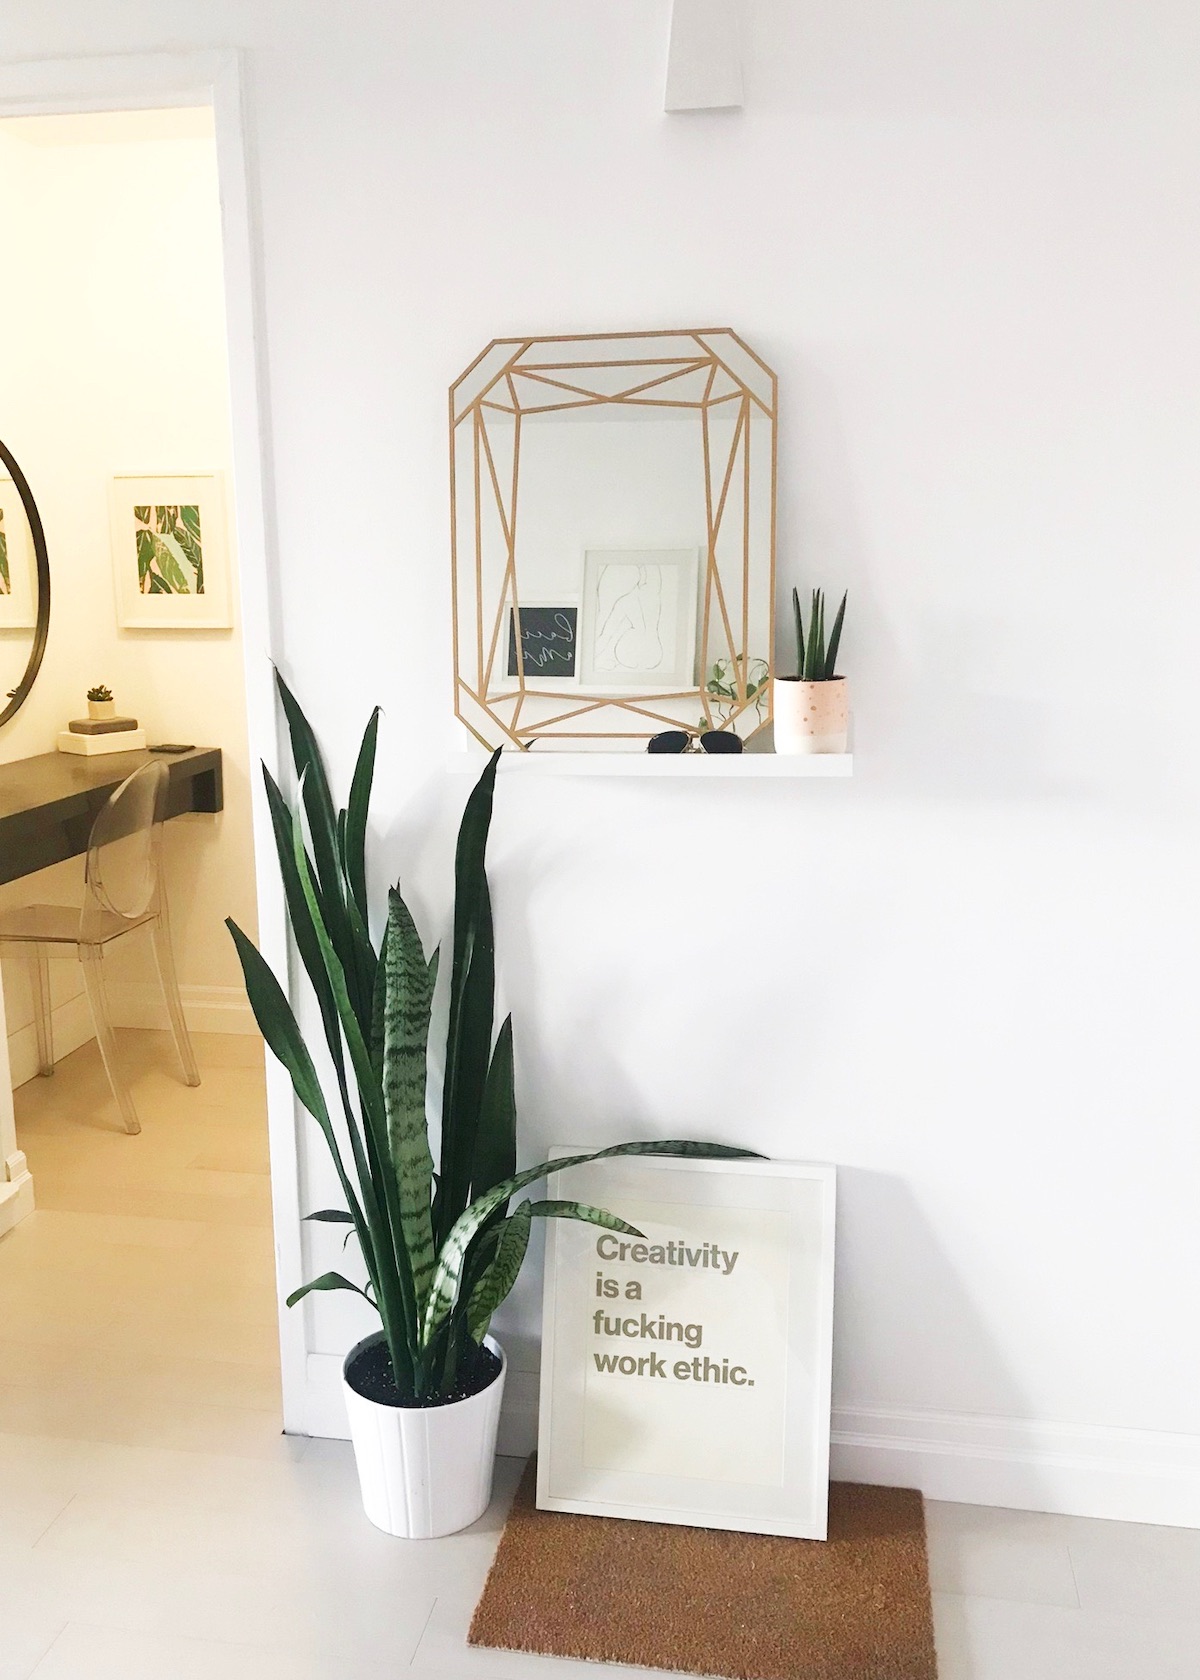
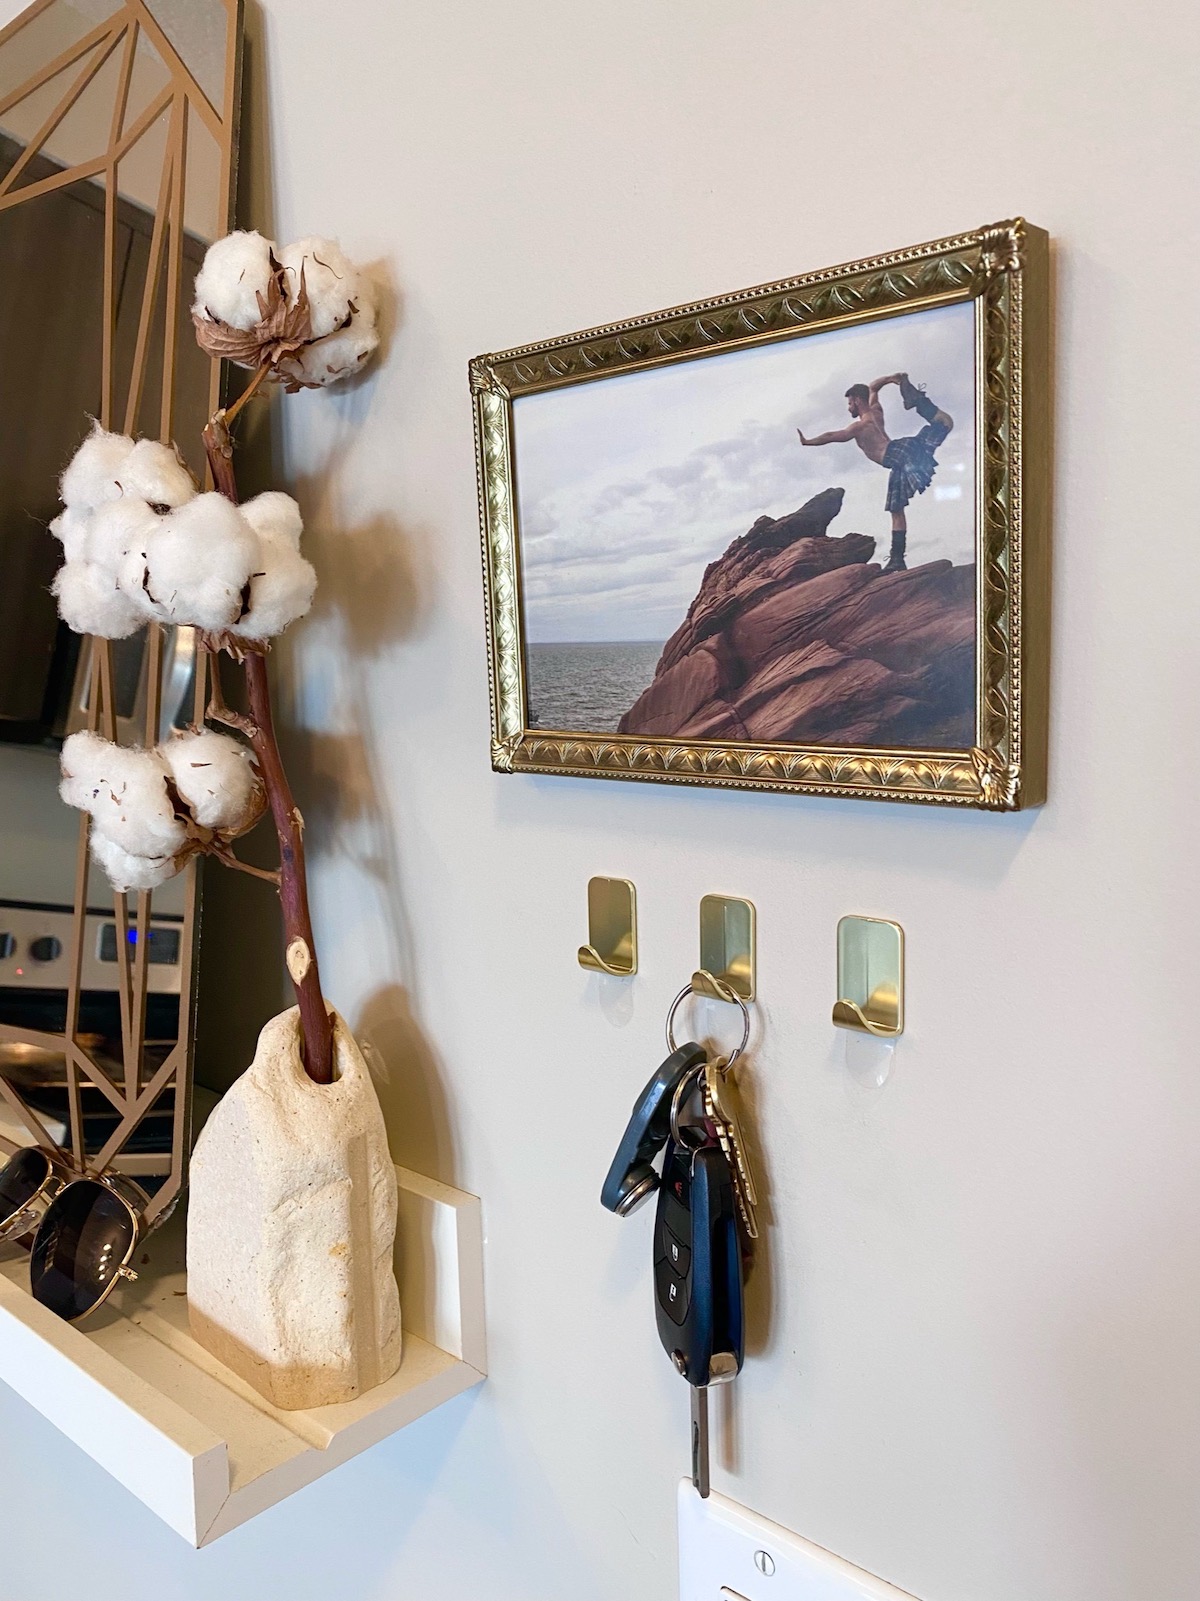
Now, in my current Calgary apartment, the mirror is styled with some dried cotton flowers, key hooks and a cheeky photo of a man in a kilt doing yoga.
If you make this gemstone mirror, I’d love to see what shape you choose and how you’d style a mirror like this!
- Tess
Let’s Stay Friends!
Insta | Pinterest | Enews | TikTok